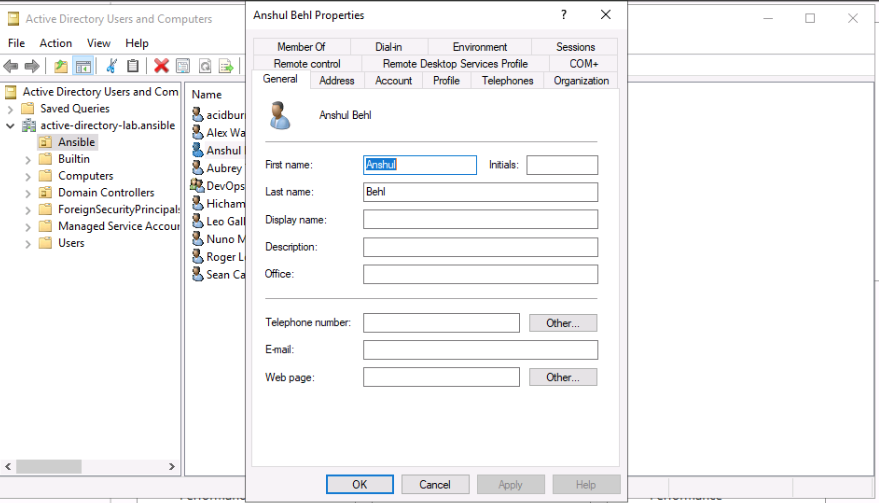
Organization Management
We have created our controller, and we can now start to create objects, users, and groups on our domain.
☑️ Organizational Units and Groups
Active Directory allows us to create organizational units which mirror our functional business groups. In this exercise we are going to create a group for our Ansible users. However, we are also going to create this group under its own OU in Active Directory.
Navigate to your vscode to start.
Select the create_ou_grp.yml playbook. Edit the playbook for the following tasks.
  tasks:
    - name: Create Organizational Unit
      microsoft.ad.ou:
        name: "{{ org_unit }}"
        state: present
        protect_from_deletion: true

    - name: Create a group in an OU
      microsoft.ad.group:
        name: "{{ group_name }}"
        scope: global
        path: OU="{{ org_unit }}",DC=active-directory-lab,DC=ansible
        state: present
The first task creates an organizational unit in the domain, while the second creates a group within that OU. We can save this playbook and push it back to our repo.
Before we update our remote repo, we need to configure our git details:
git config --global user.email "student@redhat.com"
git config --global user.name "Student"
Next let’s update the repo:
git add *
git commit -m "Updating the OU Playbook"
git push
You will be asked to authenticate at the top of the vscode editor -

Use the following credentials:
Username: student
Password: learn_ansible
Once the repo has been updated, we can navigate to AAP to update the project and create a template.
In your controller, navigate to Automation Execution > Projects. You can click on the sync project button on the Active-Directory AAP project.
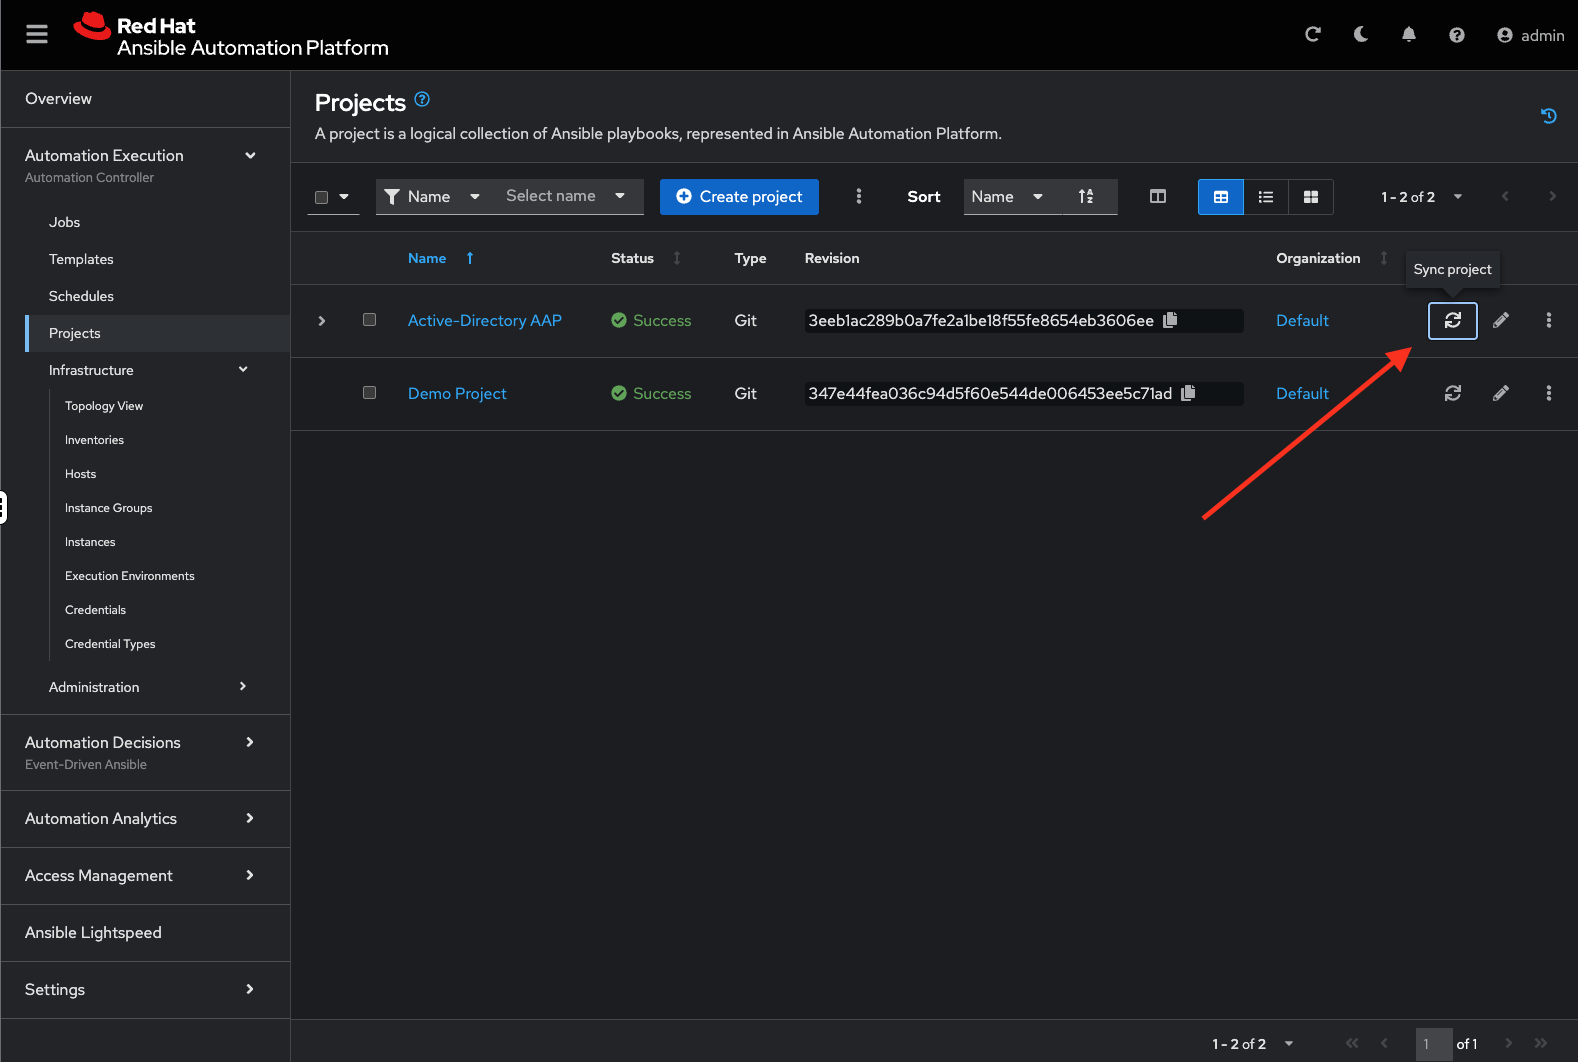
This will grab the latest version of our playbooks.
Next, navigate to Automation Execution > Templates and select Create template followed by Create job template.
Create a template with the following details:
Name: Create OU and Groups
Description: Creating OU and user group based on business units
Inventory: Servers
Project: Active-Directory AAP
Playbook: create_ou_grp.yml
Execution Environment: Windows_ee
Credentials: Windows Host
Save the template. Next we need to add a survey.
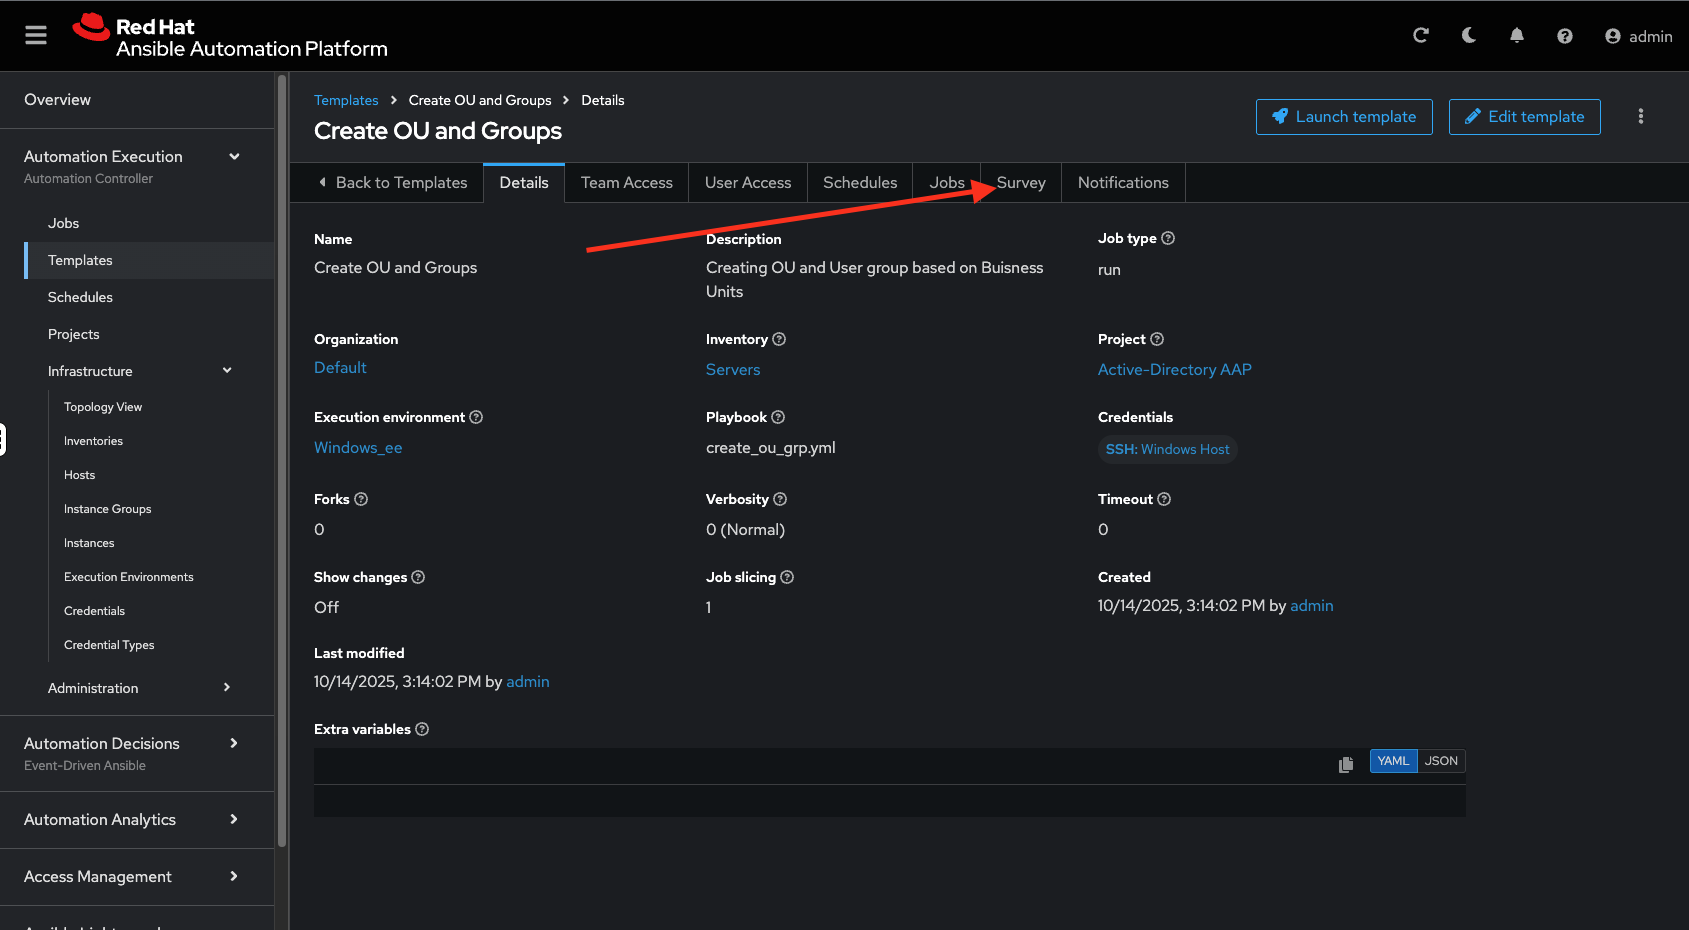
Select Survey on the right of the job template details page. Select Create survey question and create the following survey question:
Question: Please define your Organization Unit (OU)
Description: OU to be created on the domain
Answer variable name: org_unit
Answer Type: Text
Save this question and add the next:
Question: Please define your Group for the OU
Description: Group for the OU to be created on the domain
Answer variable name: group_name
Answer Type: Text
Save, and enable the survey with the toggle.
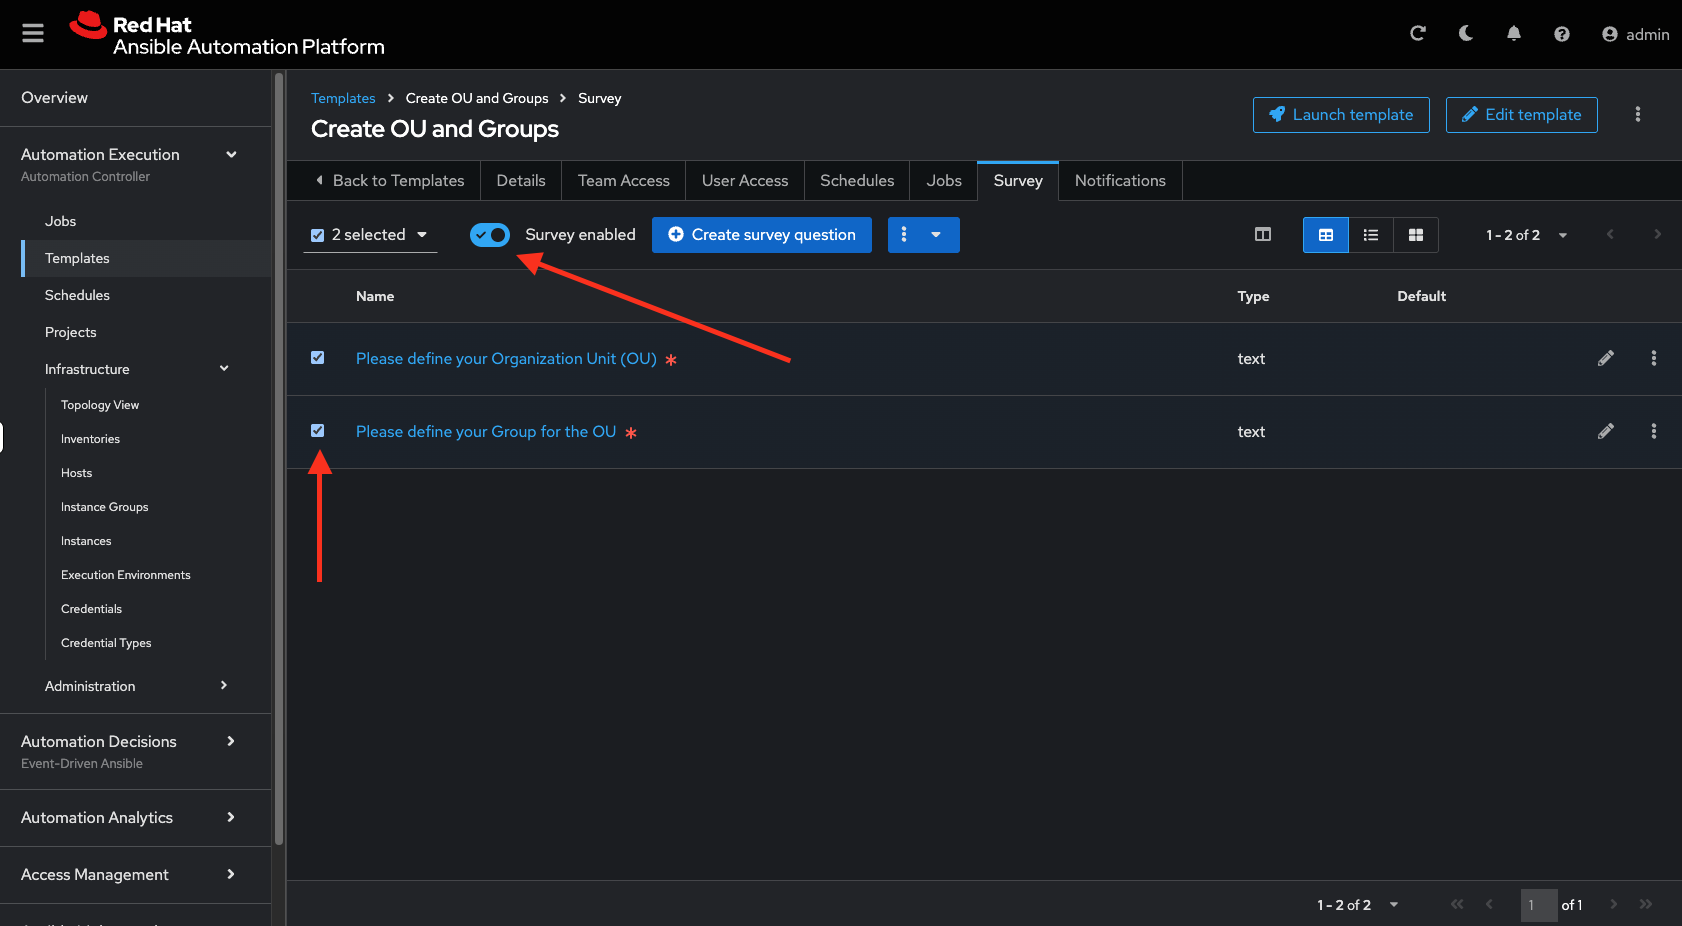
Navigate back to templates and click on the rocket on our Create OU and Group template. The survey will ask you for input. Please provide the following:
Organizational Unit = Ansible
Group Name = DevOps
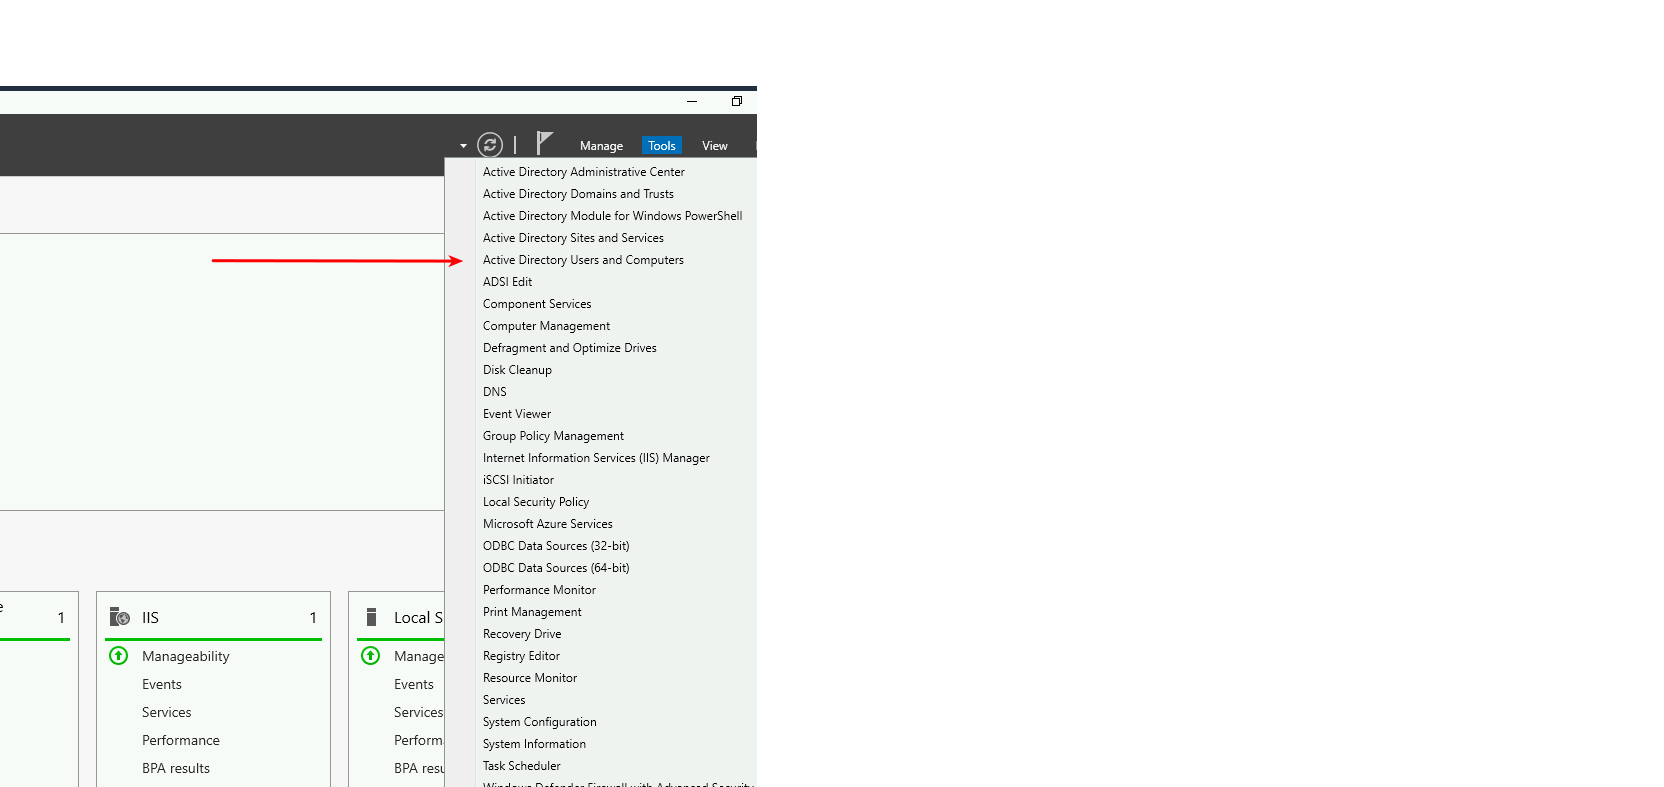
Once the template is done, we can verify the changes on our domain controller. Navigate to the windows tab. Start > Server Manager, next select Tools and Active Directory Users and Computers.
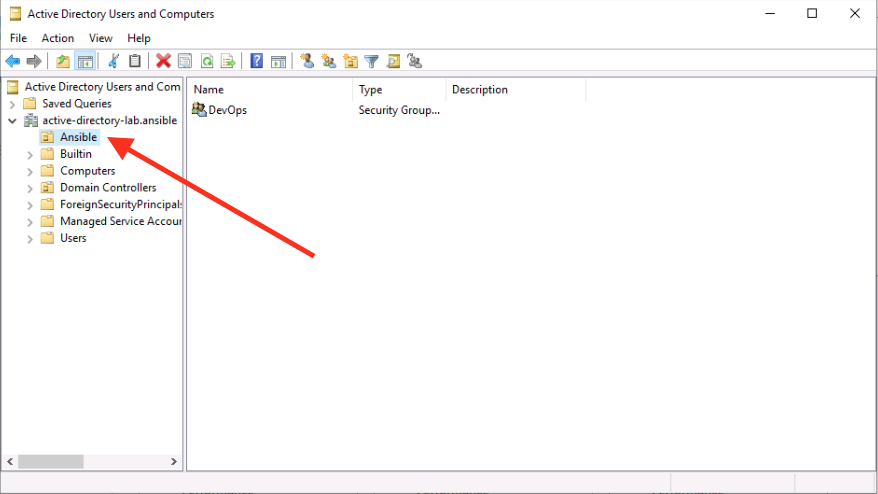
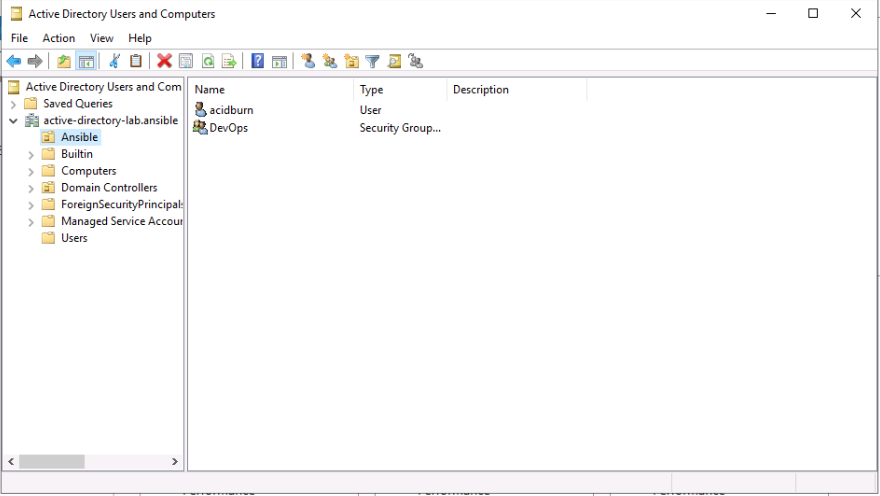
If you drop down your active-directory-lab.ansible domain, you should see your Ansible OU and the group inside it.
☑️ Creating domain users
We have our groups and OU created, and now we can create some users. Navigate back to vscode and select the playbook create_user.yml. This playbook allows you to create users on the domain. However, these tasks add users into different groups, to control this we use tags.
Navigate to AAP and let us create a template to create admin users. Create the following template with the following details:
Name: Create Admin users
Inventory: Servers
Project: Active-Directory AAP
Playbook: create_user.yml
Execution Environment: Windows_ee
Credentials: Windows Host
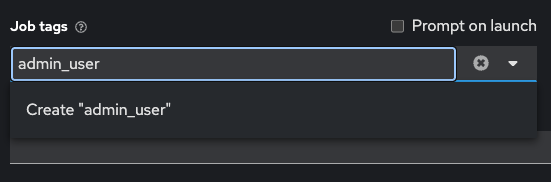
Job Tags: admin_user
| When adding a Job Tag, you need to create the tag before you can allocate it. |
We need to add a survey again, so once this template is saved, navigate to Surveys and let’s add the following three questions:
Question: Please define your user Identity (username)
Description: Identity (user login name)
Answer variable name: user_identity
Answer Type: Text

Question: Please define your password
Description: User Password
Answer variable name: user_password
Answer Type: Password

Question: Please define your OU path
Description: Account to be associated to the OU
Answer variable name: ou_path
Answer Type: Text
Default Answer: CN=Users,DC=active-directory-lab,DC=ansible
Save, and don’t forget to enable all of the surveys!
Next, let’s create a job template specifically for the Ansible group we created. Navigate back to Automation Execution > Templates. Select copy template to copy our Create Admin users template. Let’s edit the copy with the following:
Name: Create Ansible users
Inventory: Servers
Project: Active-Directory AAP
Playbook: create_user.yml
Execution Environment: Windows_ee
Credentials: Windows Host
Job Tags: ansible_user
Save the template.
Great work so far!
Navigate back to Automation Execution > Templates and launch the Create Admin users template. Provide the following details:
Username: zerocool
Password: P@ssw0rd.123
Desired OU: CN=Users,DC=active-directory-lab,DC=ansible
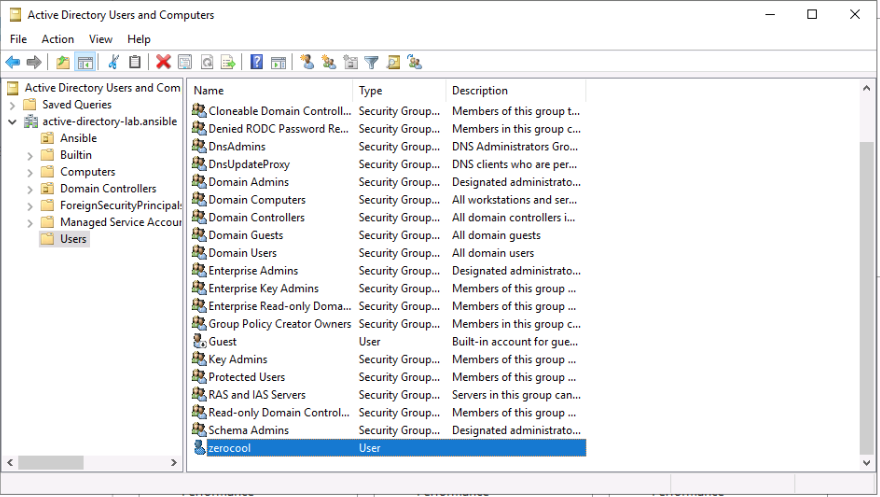
Once successful, let us navigate to our Windows tab and verify the user has been created and is a member of the right groups.
Navigate back to AAP, Automation Execution > Templates and launch the Create Ansible user template. Provide the following details:
Username: acidburn
Password: P@ssw0rd.123
Desired OU: OU=Ansible,DC=active-directory-lab,DC=ansible
Again, once complete, verify on our Windows system.
☑️ Creating multiple users
Before moving to the last exercise, let’s create a few extra users.
Navigate to vscode and select the playbook lab_users.yml. This playbook defines two variables: one for the OU we want to use (OU=Ansible,DC=active-directory-lab,DC=ansible) and the other for the user password, which we will generate at random.
If you have previously completed the 'Getting started with Windows automation' lab, you would have done a similar exercise to create local accounts. This time we are using the Active Directory modules to create these users.
We have defined users as a dictionary, and we can then loop through those details to provide Active Directory with more account information. We can finish the playbook by adding a task to create users in a loop.
    - name: Create users for lab
      microsoft.ad.user:
        identity: "{{ item.key }}"
        password: "{{ user_password }}"
        firstname: "{{ item.value.firstname }}"
        surname: "{{ item.value.surname }}"
        name: "{{ item.value.firstname }} {{ item.value.surname }}"
        state: present
        path: "{{ ou_path }}"
        groups:
          set:
            - Domain Users
      loop: "{{ users_list | dict2items }}"
Save the playbook and let’s push it to our repo again.
git add *
git commit -m "Updating the Lab Users"
git push
Remember the git username and password:
Username: student
Password: learn_ansible
Once we have saved this, we can navigate to AAP. We need to synchronize our project.
Navigate to Automation Execution > Projects and resync. Then let’s create a new template with the following details:
Name: Create Ansible Lab users
Inventory: Servers
Project: Active-Directory AAP
Playbook: lab_users.yml
Execution Environment: Windows_ee
Credentials: Windows Host
Once created, save the template and launch it!
We can verify our changes in Active Directory.
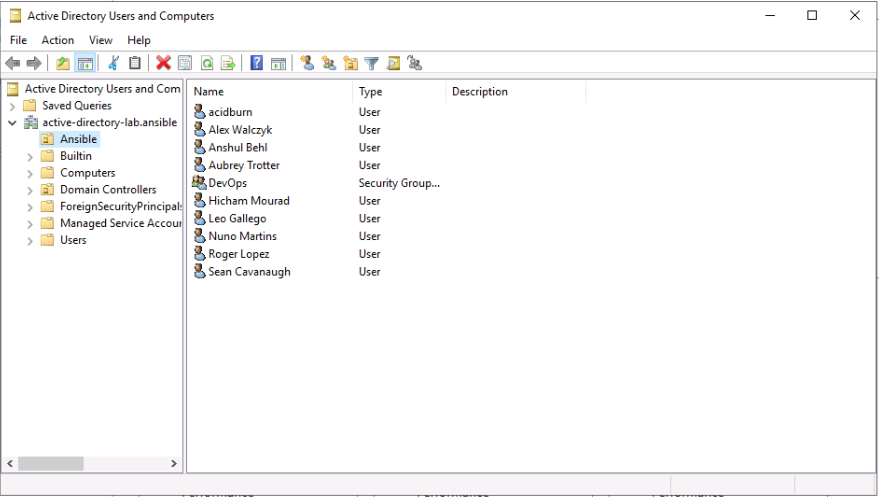
Confirm the details are correct.