Interacting with Active Directory
Apart from creating objects, accounts, and groups or resetting passwords, etc., we can also use Ansible to interact with Active Directory.
☑️ PowerShell in Ansible
Ansible has a number of modules for Windows and for Active Directory; however, we can still utilize PowerShell inside of an Ansible playbook to execute custom tasks or to enrich the automated tasks we are trying to complete.
In this exercise we are going to gather information from Active Directory and use it to create an HTML page. It’s important to note that we have a module to do this, but we want to use PowerShell as an example in this instance. Navigate to vscode and open the user_info.yml playbook. In this playbook we are using the win_shell module to execute some PowerShell. We can then use the output with our traditional Ansible modules.
---
- name: Get AD Users and create HTML report
  hosts: windows
  gather_facts: false
  tasks:

    - name: Get AD user accounts with groups and lock status
      ansible.windows.win_shell: |
        Import-Module ActiveDirectory
        Get-ADUser -Filter * -Property GivenName, Surname, SamAccountName, MemberOf, LockedOut |
        Select-Object \
          GivenName, \
          Surname, \
          SamAccountName, \
          @{ \
            Name = "Groups"; \
            Expression = { \
              ( \
                Get-ADUser -Identity $_.SamAccountName -Property MemberOf | \
                Select-Object -ExpandProperty MemberOf | \
                Get-ADGroup | \
                Select-Object -ExpandProperty Name \
              ) -join ", " \
            } \
          }, \
          LockedOut |
        ConvertTo-Json
      register: ad_users

    - name: Create HTML file from template
      ansible.windows.win_template:
        src: templates/users_template.html.j2
        dest: /user_report.html
      vars:
        users: "{{ ad_users.stdout | from_json }}"
The second part of the playbook is to create an HTML page using a Jinja template, which can be found in the template folder of your repo.
Let’s create a template for this so long. Create a template back on controller with the following details:
Name: User Data Report
Inventory: Servers
Project: Active-Directory AAP
Playbook: user_info.yml
Execution Environment: Windows_ee
Credentials: Windows Host
Save it and next we do the Workflow!
☑️ Create the workflow
Now, we want to grab some data from our Active Directory and create an HTML report. Let us create a workflow template for this and add an approval for the workflow!
Navigate to Automation Execution > Templates and select Create template, but this time select Create workflow job template. Workflows give us the ability to string automation together and orchestrate different templates. Use the following when creating the workflow:
Name: AD User Data Report
Inventory: Servers
Save the template!
When adding a workflow, we need to choose the action. We are going to start with an approval step; click on Add step and select Approval as a Node Type.
Use the following for the approval:
Name: Are you sure you want to access Active Directory account data?
Save the approval step.
We can click the three dots on the approval step and click on Add step in our workflow. We need to decide on the condition when this template will be used, so we can use the following for the approval:
Node Type: Job Template
Job template: User Data Report
Status: Run on success
Convergence: Any
Our simple workflow should look like this:
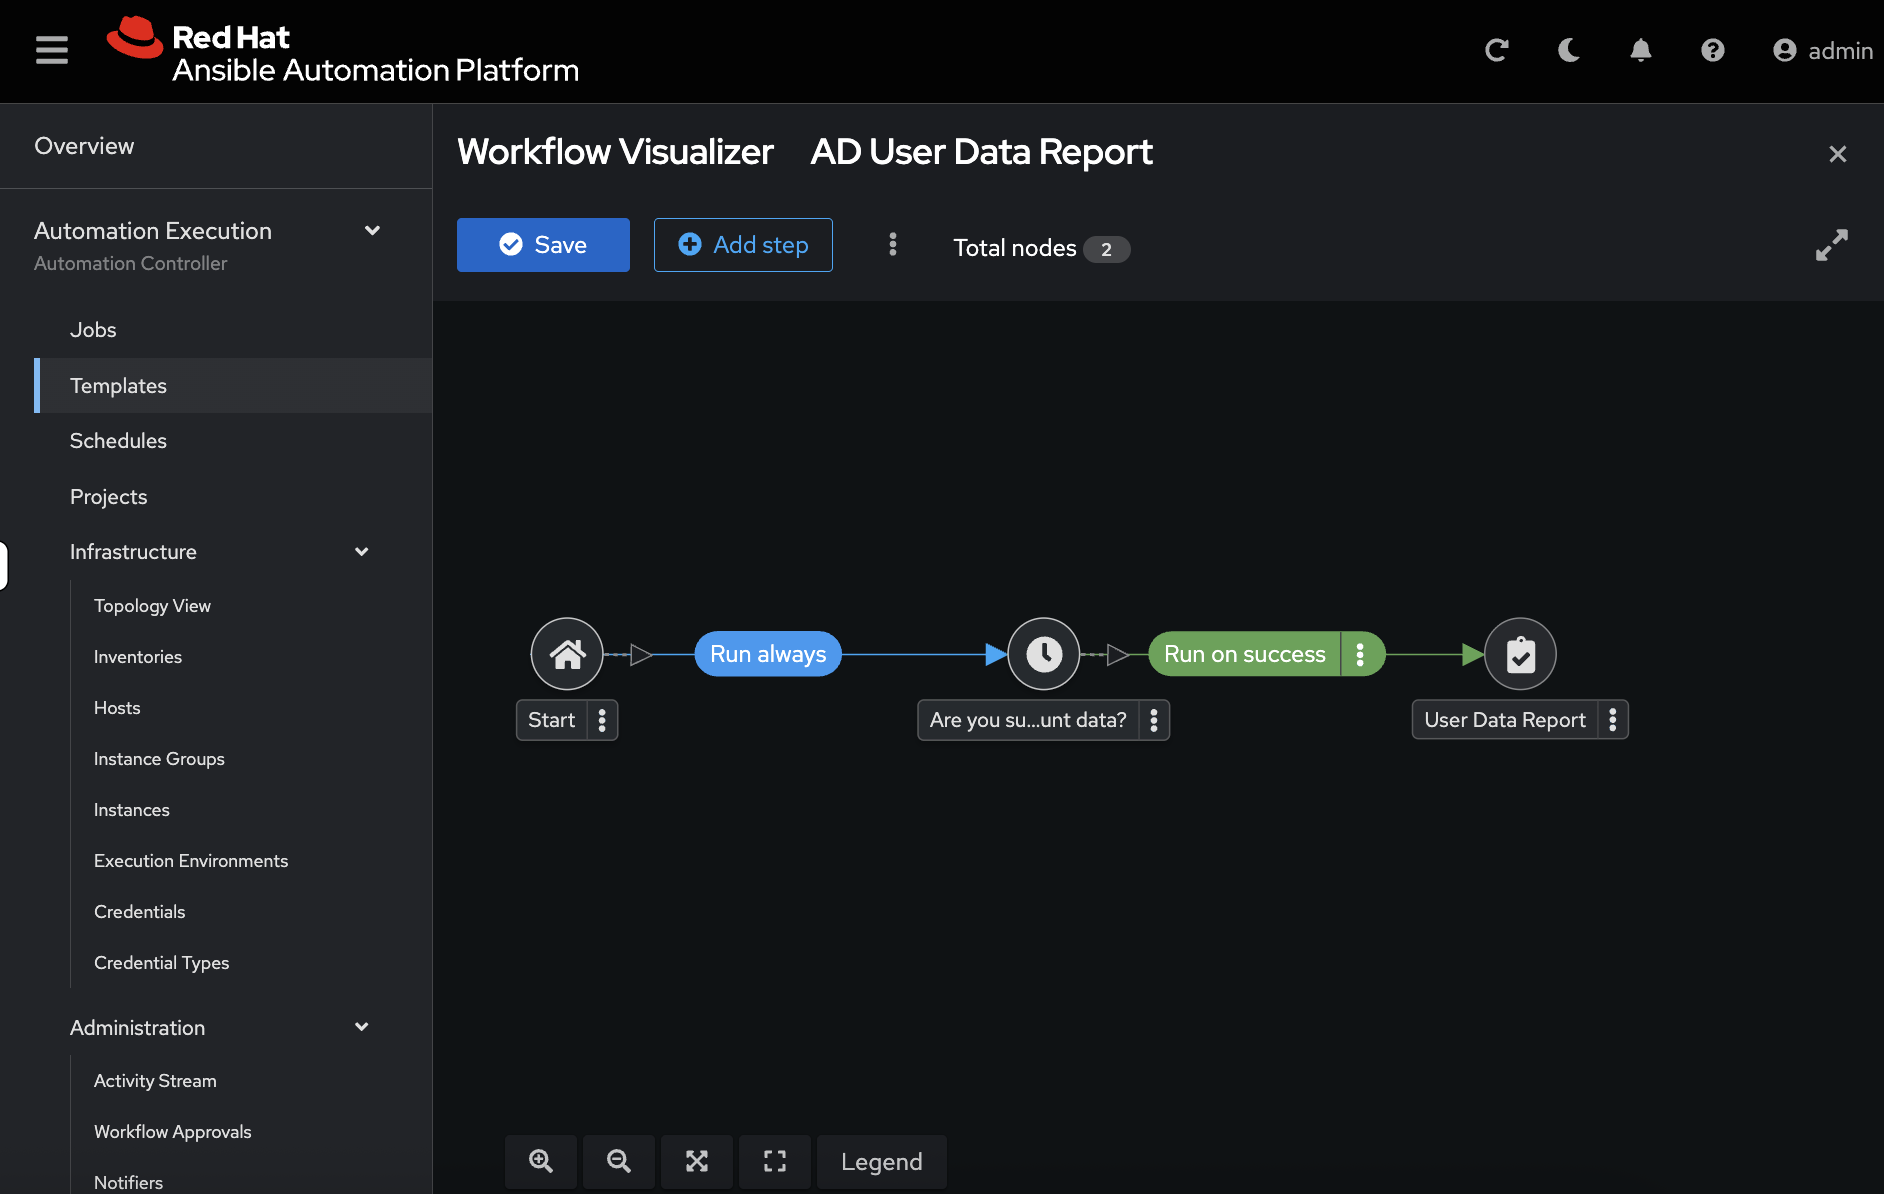
We can now save this workflow template.
We can now navigate to Automation Execution > Templates and launch our workflow template. You will see we have a notification for an approval:
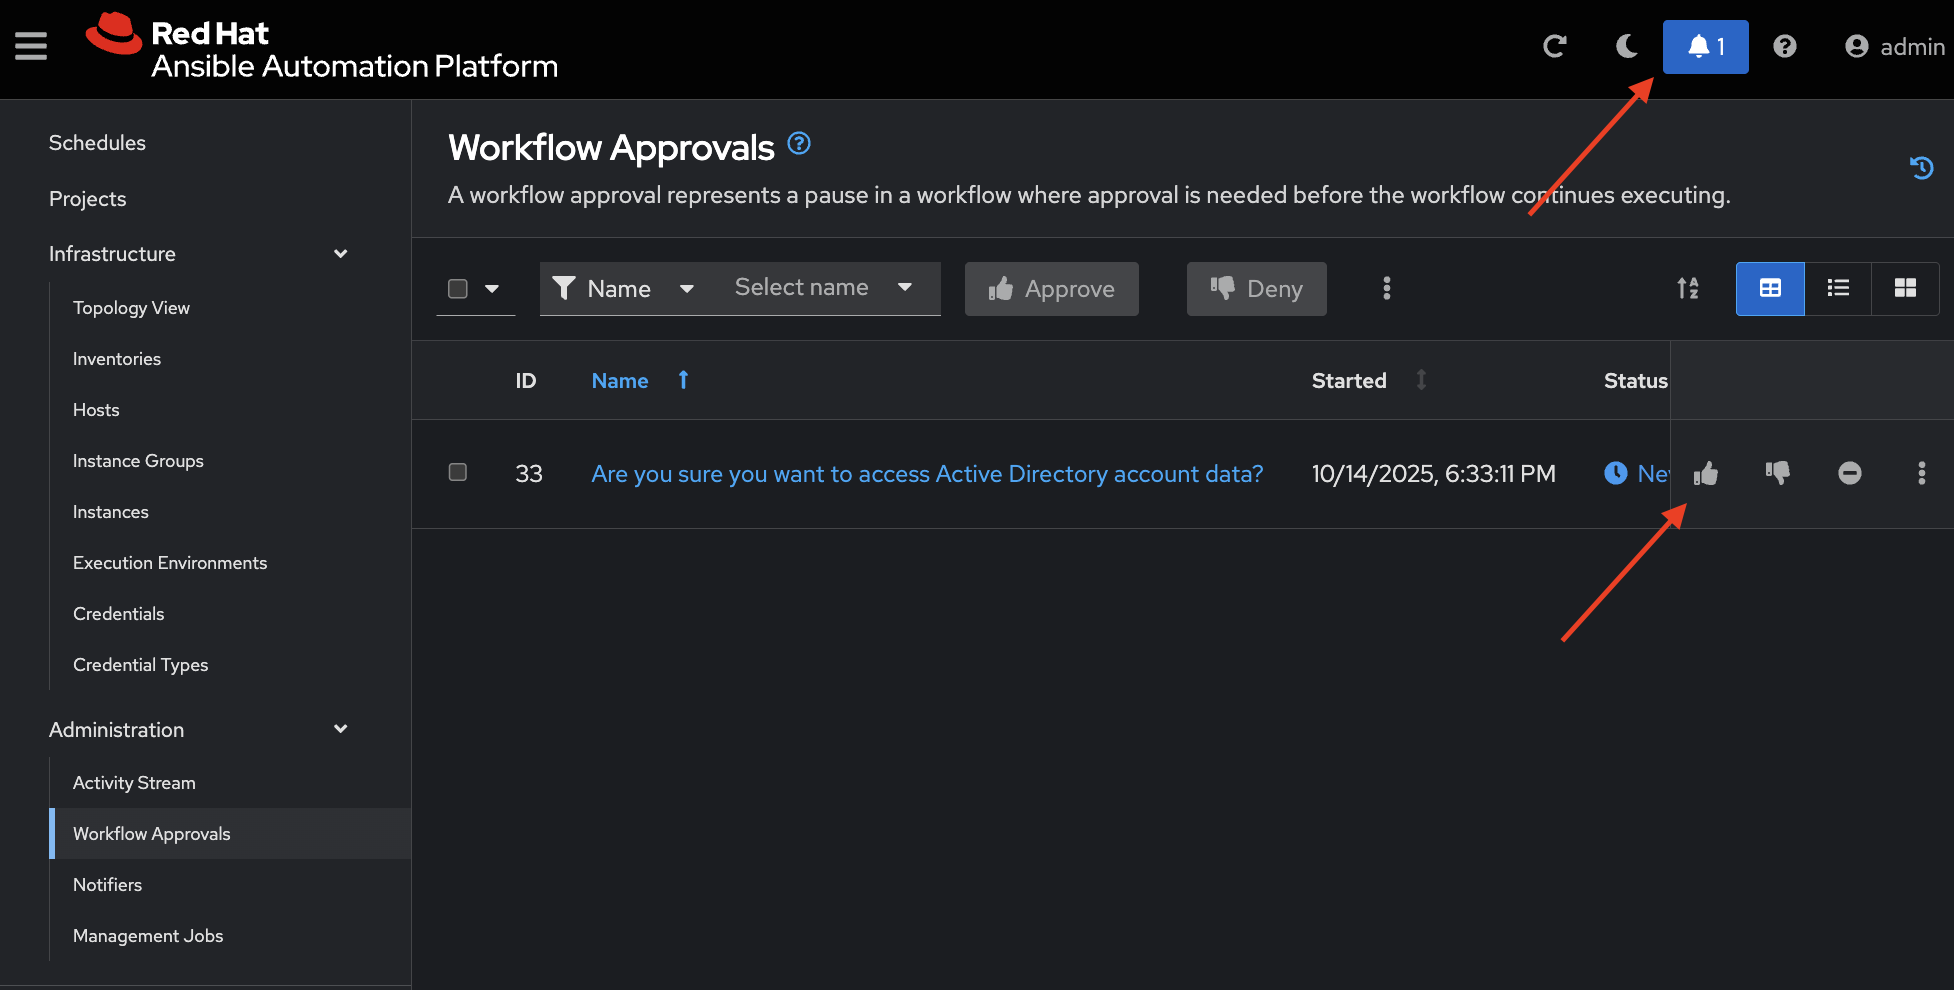
We can approve or reject the workflow; select the thumbs up to approve the workflow. We can navigate to Automation Execution > Jobs to see the User Data Report job execute. Once successful we can look at our report on our Windows host.
On the Windows system we can navigate to C: > Sites > ad_report and open the user_info.html file.
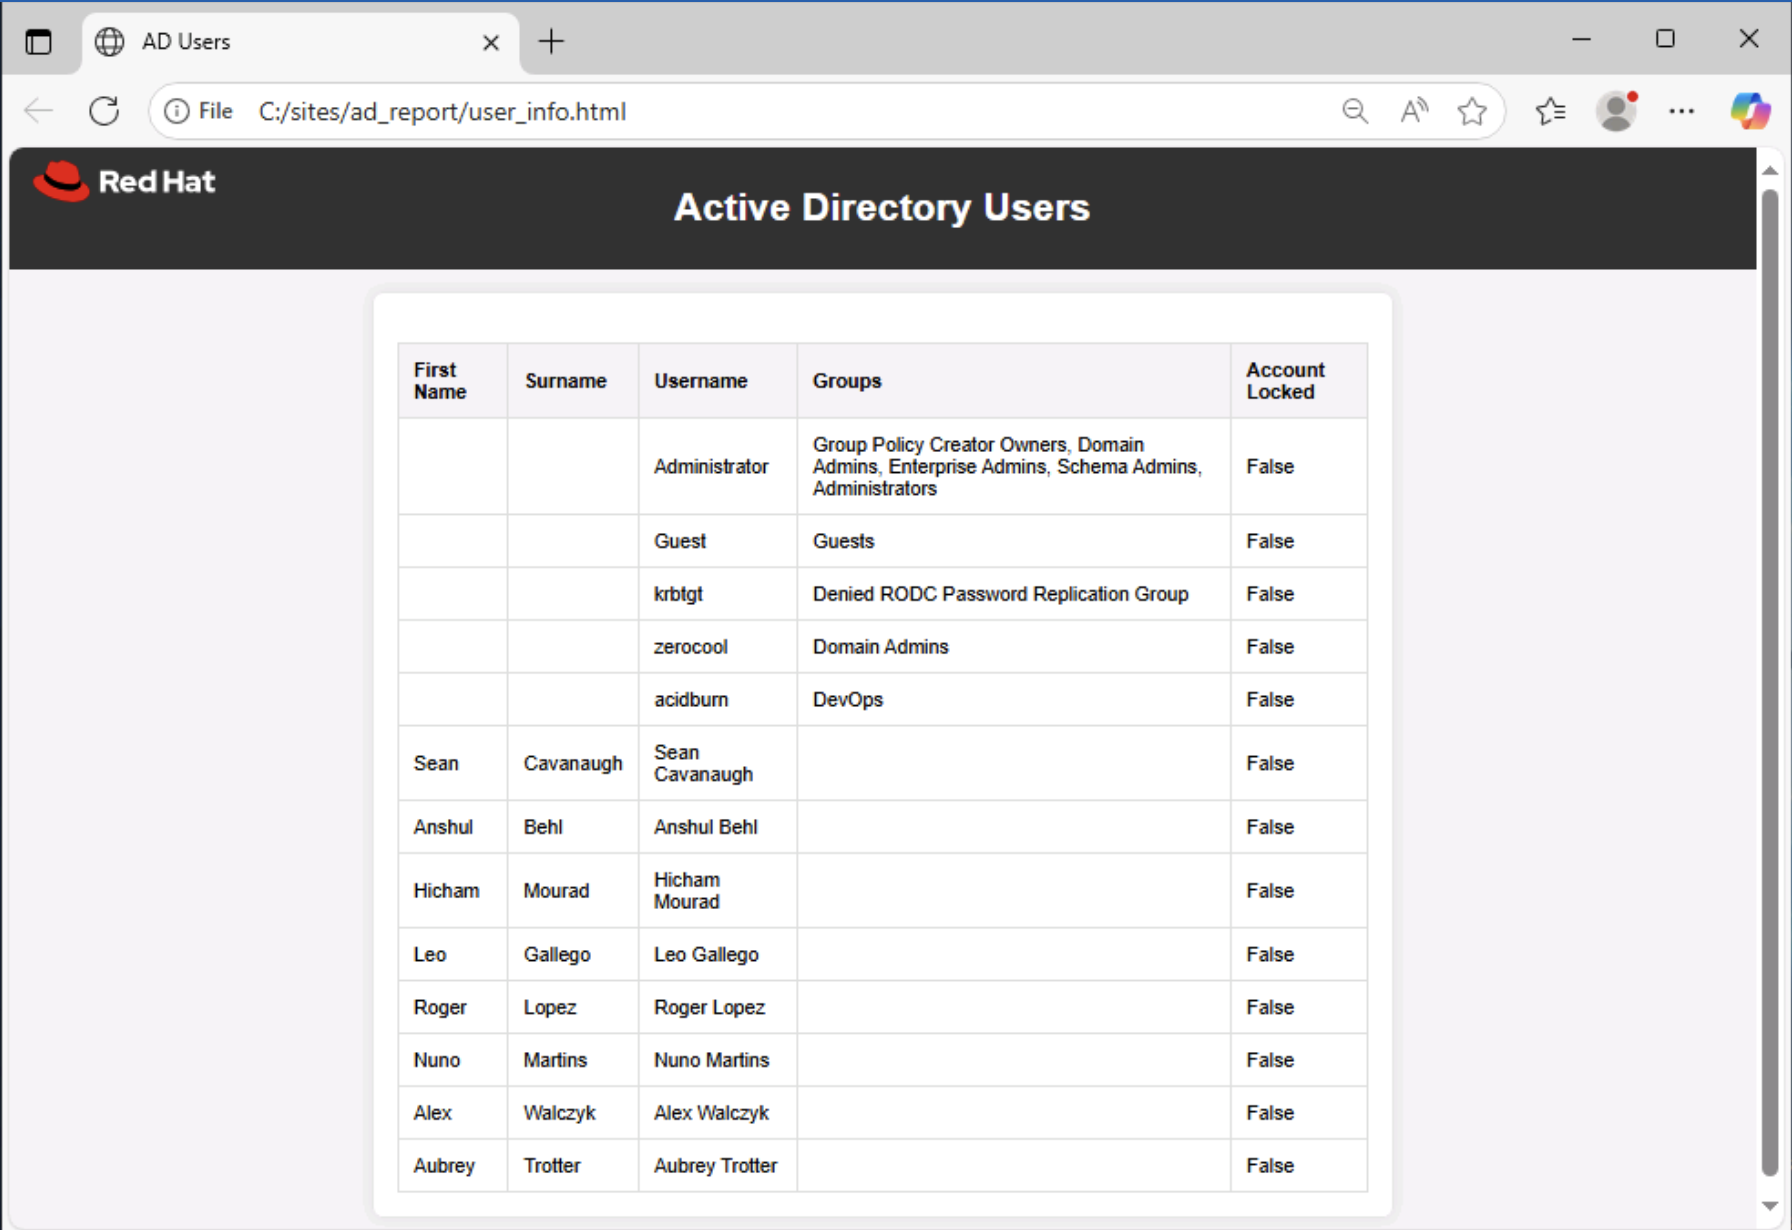
You should view the accounts from your Active Directory. Congrats!
This concludes this lab.