Module 1: DEFEND — Detect and Contain
Your SIEM has detected something. Splunk is showing critical vulnerability events against your production app server — CVE-2024-38476, a CVSS 9.8 SSRF vulnerability in Apache HTTP Server. There is no patch available yet. You need to investigate, confirm the finding, and contain the threat.
In this module you will first respond manually — investigating the alert and running the containment workflow by hand. Then you will configure Event-Driven Ansible so that when the same vulnerability appears on a second server, the response is fully automated. The contrast is the point: what took you minutes to do manually, EDA does in seconds.
Learning objectives
By the end of this module, you’ll be able to:
-
Investigate a CVE alert in Splunk and understand the detection data
-
Run a vulnerability scan from AAP to confirm the CVE on the target system
-
Manually execute a containment workflow and verify the results
-
Write an EDA rulebook that matches Splunk saved search alerts
-
Connect Splunk to EDA using the Ansible Add-on for Splunk
-
Create a Token Event Stream and Rulebook Activation in EDA Controller
-
Deploy a vulnerable application and watch EDA automatically contain it
Part 1: Manual Response (rhel01)
Exercise 1: Investigate the CVE in Splunk
|
Why we do this: Before automating any response, security teams need to understand what they’re dealing with. Splunk aggregates detection data from multiple sources — vulnerability scanners, log analysis, intrusion detection — into a single correlated view. Investigating the alert manually first establishes the baseline: what CVE, what severity, which hosts, which packages. This is the context that drives every decision downstream. |
Your security team has flagged unusual activity. Start by investigating what Splunk has detected.
-
Click the Portal - rhel01 tab in the workshop sidebar. This is the Parasol Finance customer portal — a production application running on
rhel01. Confirm it is up and publicly accessible. -
Open the Splunk tab and log in:
-
Username:
admin -
Password:
ansible123!
-
-
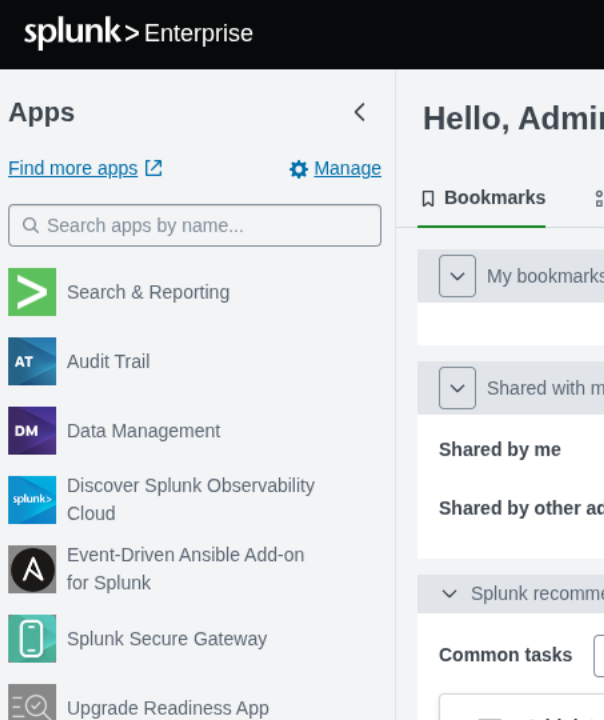
Navigate to Search & Reporting from the left sidebar.
-
Run the following search to see the vulnerability events:
index=main sourcetype=linux_secure "CVE-2024-38476" OR "httpd" OR "vulnerability"You should see multiple events reporting a critical vulnerability in
httpdon hostrhel01. -
Examine the events. Notice the key details:
-
The affected host:
rhel01 -
The CVE:
CVE-2024-38476— Apache HTTP Server SSRF via mod_rewrite -
The CVSS score: 9.8 (Critical)
-
The affected package:
httpd-2.4.57-5.el9 -
The recommended advisory:
RHSA-2024:5138
-
-
Now run the aggregated search that the saved alert uses:
index=main sourcetype=linux_secure "CVE-2024-38476" OR "httpd" OR "vulnerability" | stats count by host, source | where count > 0This groups the findings by host and log source — this is the query that powers the Splunk saved search alert.
-
Navigate to Settings → Searches, reports, and alerts. Make sure you configure your filters to Type: ALL, App: All and Owner: Administrator. You will then see the pre-configured DCC CVE Alert saved search. This search runs every minute and is configured to fire the EDA add-on action when it detects matches.
Exercise 2: Confirm the Vulnerability from AAP
|
Why we do this: SIEM alerts can be noisy — false positives, stale data, correlation errors. Before taking action, you need ground truth from the target system itself. The Scan System playbook uses |
Splunk shows the detection, but you need to confirm the CVE actually exists on the target system.
-
Open the AAP Controller tab and log in:
-
Username:
admin -
Password:
ansible123!
-
-
Navigate to Automation Execution → Templates and find the DEFEND - Scan System job template.
-
Click the rocket icon to Launch the job template. When prompted for a Limit, enter
rhel01to target only rhel01. -
Watch the job output. You should see:
-
CRITICAL: CVE-2024-38476 detected on rhel01
-

-
Advisory details for
RHSA-2024:5138showing the affectedhttpdpackage
The CVE is confirmed. The vulnerable httpd-2.4.57-5.el9 package is installed on rhel01.
Exercise 3: Manually Run the Containment Workflow
|
Why we do this: The workflow chains three distinct security responses. Scan confirms the vulnerability is real before acting. Contain isolates the external-facing network interface ( |
|
Real-world context: This containment follows a graduated approach. Rather than killing httpd outright (which disrupts internal users and monitoring), the playbook isolates only the external-facing interface:
In production, your containment level depends on how actively the CVE is being exploited: you might start with a WAF rule, escalate to interface isolation, or go all the way to a full service stop. This workshop demonstrates interface-level isolation — enough to block the attack vector while keeping the system manageable. |
Establish the baseline (before containment)
Before running the containment workflow, capture the current state so you can see exactly what changes.
-
Open the Terminal tab and connect to
rhel01:ssh rhel01 -
When asked for a password, enter
ansible123! -
Check which firewall zone each network interface is in:
sudo firewall-cmd --get-active-zonesBoth
eth0andeth1should be in thepubliczone. -
See what services are currently allowed through the public zone:
sudo firewall-cmd --zone=public --list-allYou should see
http,https,ssh, and other services listed — the system is wide open. -
Confirm httpd is running and serving the portal:
sudo systemctl status httpd --no-pager | head -5 -
Verify the portal responds:
curl -so /dev/null -w "HTTP %{http_code}\n" http://localhostExpected:
HTTP 200. -
Click the Portal - rhel01 tab and confirm the Parasol Finance portal loads normally.
| Keep this baseline in mind — after the workflow runs, every one of these will change. |
Run the containment workflow
-
In AAP, you need to login with the following details:
-
Username:
admin -
Password:
ansible123!
-
-
Navigate to Automation Execution → Templates and find the Vulnerability Containment workflow template.
-
Click the rocket icon to Launch. When prompted for a Limit, enter
rhel01. -
Watch the workflow execute three steps in sequence:
-
DEFEND - Scan System — confirms CVE-2024-38476 is present
-
DEFEND - Contain Service — isolates the external interface (
eth0) to aninternal-onlyfirewall zone and hardens httpd -
DEFEND - Harden Posture — applies SELinux booleans and deploys file integrity monitoring
-
-
Wait for the workflow to complete successfully. image::sec5.png[Vulnerability Containment Workflow]
Verify the containment
-
Click the Portal - rhel01 tab and refresh the page. The portal should no longer be accessible — the external interface (
eth0) has been moved to a restricted firewall zone. -
Now open the terminal and verify what changed. Check the firewall zones —
eth0should be isolated:sudo firewall-cmd --get-active-zoneseth0should now be in theinternal-onlyzone (SSH only).eth1remains in thepubliczone. -
Verify
httpandhttpsare no longer in the public zone:sudo firewall-cmd --zone=public --list-servicesNeither
httpnorhttpsshould appear — onlyssh,cockpit, anddhcpv6-client. -
Inspect the internal-only zone:
sudo firewall-cmd --zone=internal-only --list-allYou should see
eth0assigned with onlysshallowed — external traffic is blocked. -
Confirm httpd is still running — the service was hardened, not killed:
sudo systemctl status httpd --no-pager | head -5Expected:
active (running). -
Verify the portal is still accessible internally via
eth1(192.168.1.13):curl -so /dev/null -w "HTTP %{http_code}\n" http://192.168.1.13Expected:
HTTP 200— the service is contained from external access but still available on the internal network. -
Verify the httpd hardening that was applied:
grep -E "^ServerTokens|^ServerSignature" /etc/httpd/conf/httpd.confExpected:
ServerTokens ProdandServerSignature Off. -
Verify the security headers are being served:
curl -sI http://localhost | grep -iE "X-Content-Type|X-Frame|Content-Security|Referrer-Policy|Server:"You should see the containment headers and the
Server:header showing onlyApache(no version). -
Verify SELinux booleans are enforced (from the Harden Posture step):
getsebool httpd_can_network_connect httpd_enable_cgi httpd_can_sendmail httpd_use_nfsAll four should show
off. -
Confirm AIDE file integrity monitoring is active:
sudo crontab -l | grep aideYou should see a cron entry running AIDE checks every 4 hours.
-
Check the containment log for the audit trail:
sudo cat /var/log/containment-actions.log
Verify
-
The Vulnerability Containment workflow completed successfully
-
The Portal - rhel01 tab no longer loads — external access is blocked
-
eth0(external) moved to theinternal-onlyzone with SSH only -
eth1(internal) remains inpublic— internal access preserved -
httpd is still running and responding on the internal network (192.168.1.13)
-
httpandhttpsremoved from thepubliczone -
httpd configuration hardened (
ServerTokens Prod,ServerSignature Off, security headers) -
SELinux booleans prevent outbound connections, CGI, mail, and NFS
-
AIDE file integrity monitoring is scheduled
That manual process took several minutes. In Part 2, you will automate it.
Part 2: Automated Response (rhel02)
Exercise 4: Write the EDA Rulebook
|
Why we do this: Event-Driven Ansible needs rules that map incoming alert data to the right automated response. The rulebook is the decision logic: which alerts warrant full containment, which need investigation only, and which trigger patching. Writing these rules forces you to think about your organization’s response policy in code — what severity triggers what action, and what data from the alert flows through to the automation. |
When the Splunk saved search detects CVE events, the Event-Driven Ansible Add-on for Splunk sends a webhook to EDA. You need a rulebook that matches these events and triggers the right workflow.
-
Navigate to Gitea and login with the following details:
-
Username:
gitea -
Password:
ansible123!
-
-
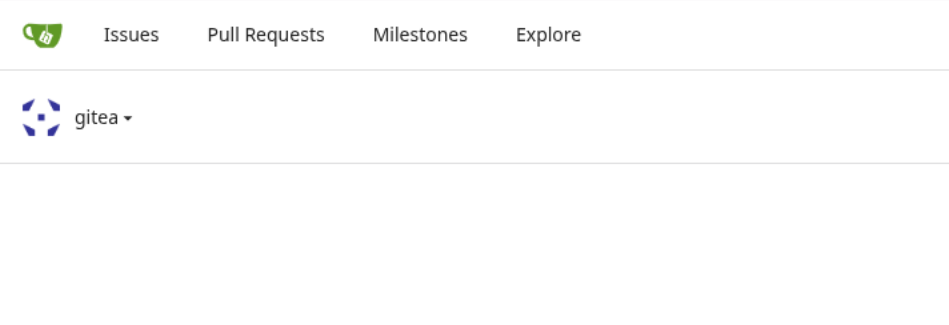
In Gitea , click on Explore and navigate to the repository
defend-contain-comply. -
Create a new file:
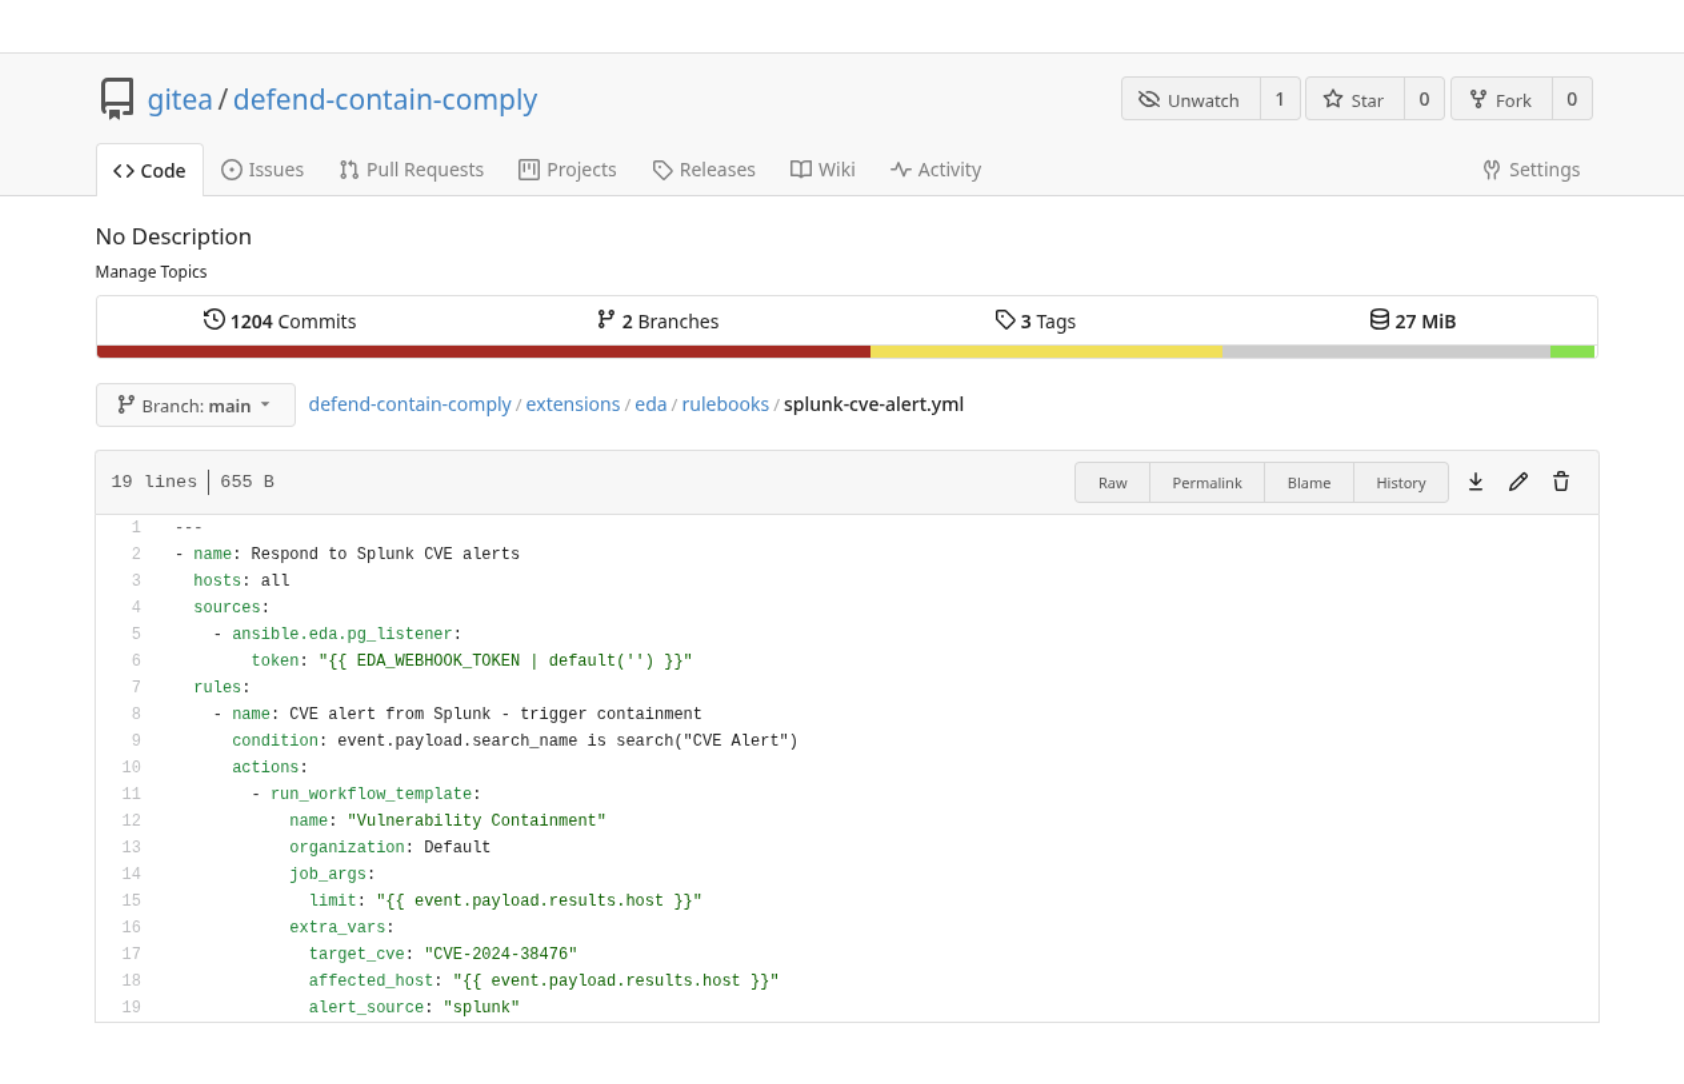
splunk-cve-alert.ymlin the following path to the repositoryextensions/eda/rulebooks, add the following yaml content:
+
---
- name: Respond to Splunk CVE alerts
  hosts: all
  sources:
    - ansible.eda.pg_listener:
        token: "{{ EDA_WEBHOOK_TOKEN | default('') }}"
  rules:
    - name: CVE alert from Splunk - trigger containment
      condition: event.payload.search_name is search("CVE Alert")
      actions:
        - run_workflow_template:
            name: "Vulnerability Containment"
            organization: Default
            job_args:
              limit: "{{ event.payload.results.host }}"
            extra_vars:
              target_cve: "CVE-2024-38476"
              affected_host: "{{ event.payload.results.host }}"
              alert_source: "splunk"
+
|
The Splunk add-on sends the saved search name in Rule 1 (CVE alert from Splunk): Match |
-
Commit your changes in Gitea
-
Now sync the EDA project in the AAP Controller (Automation Decisions → Projects → Defend, Contain, Comply → Sync).
Exercise 5: Connect Splunk to EDA
|
Why we do this: The EDA Token Event Stream is the secure ingestion point for external systems. By creating the event stream in AAP and configuring the Splunk add-on to point at it, you’re building a trusted channel between your SIEM and your automation platform. The API key authentication ensures only authorized sources can trigger automation. This is the wiring that turns a detection tool into a response system. |
The AAP credential, project, and decision environment are already configured. You need to create an Event Stream in Event-Driven Ansible, configure the Splunk add-on to point at it, and create the Rulebook Activation.
-
In AAP, open the Automation Decisions and navigate to Infrastructure → Credentials. We need to create a token credential to be used by the Event Stream. Click on Create credential:
-
Name:
Splunk EDA Token -
Description:
Token for Splunk EDA -
Organization:
Default -
Credential Type:
Token Event Stream -
Token:
ansibleiscool -
HTTP Header Key:
Authorization -
Click Create credential
-
-
Open the Event Streams section and click Create event stream:
-
Name:
Splunk EDA -
Organization:
Default -
Event stream type:
Token Event Stream -
Credential:
Splunk EDA Token -
Click Create Event Stream
-
-
Copy the Event Stream URL and the Token from the Event Stream you created, and save if for later.
-
Open the Splunk tab and navigate to Apps → Event Driven Ansible Add-on for Splunk → Configuration.
|
When adding the URL into the plugin, please note you need to remove aap.example.org from the URL due to the workshop environment, use 192.168.1.10 instead. |
-
Click Add:
-
Name:
Splunk2EDA -
Environment:
DCC -
Integration Type:
Webhook -
Webhook Endpoint: https://192.168.1.10:443/eda-event-streams…;. (Use your URL)
-
Auth Type:
API Key in Header -
Authentication Token: ansibleiscool
-
SSL Hostname Verification: unchecked (lab environment uses self-signed certificates)
-
Click Add
-
-
Navigate back to AAP, navigate to Automation Decisions → Rulebook Activations and click Create rulebook activation:
-
Name:
DCC CVE Alert Responder -
Project:
Defend, Contain, Comply(pre-configured) -
Rulebook: select
splunk-cve-alert.yml -
Decision Environment: select the default (pre-configured)
-
Credential:
Splunk EDA Token -
Decision Environment: Default Decision Environment
-
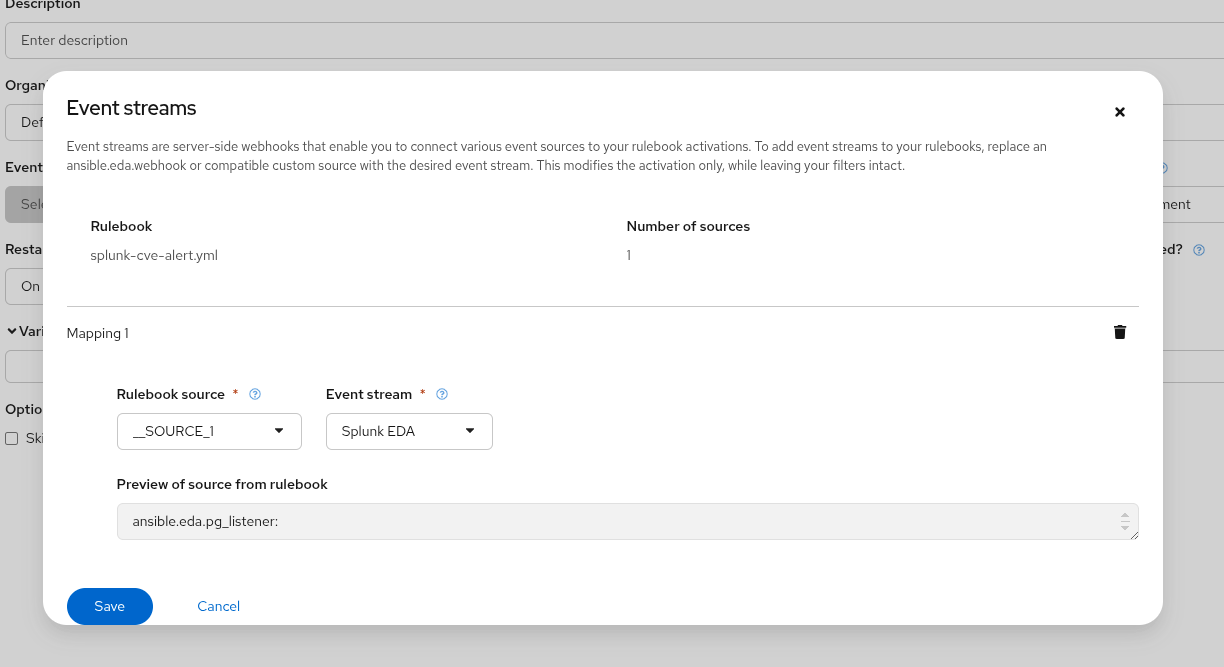
Event stream: Select the Gear Icon, Event stream: Splunk EDA
-
Click save
-
-
Wait for the activation status to show Running.
Exercise 6: Deploy the Application to rhel02
|
Why we do this: This simulates a common real-world scenario: the same vulnerable software gets deployed to a second server — a scale-out, a DR replica, or a developer spinning up a new instance from the same golden image. Automated system Scans detect the CVE and reports it to Splunk, seeding the SIEM with detection events for this new host. This is the trigger data that will flow through to EDA. |
Now deploy the same vulnerable application to a second server.
-
In AAP, navigate to Automation Execution → Templates and find the DEFEND - Deploy Application job template.
-
Click the rocket icon to Launch. When prompted for a Limit, enter
rhel02to target only rhel02. -
Wait for the job to complete. It deploys the vulnerable httpd, the Parasol Finance portal, and configures the errata repository.
-
Click the Portal - rhel02 tab and confirm the portal is now up and accessible.
-
The DEFEND - Deploy Application job completed successfully
-
The Parasol Finance Portal on rhel02 is accessible
-
Exercise 7: Trigger EDA and Watch Automated Containment
|
Why we do this: This is the payoff. The same containment that took you several minutes manually in Exercise 3 now happens in seconds, with zero human intervention. The chain is: Scan System detects the CVE and reports to Splunk → Splunk saved search fires on the next cron cycle → the EDA add-on sends the alert to the Token Event Stream → EDA matches the rulebook condition → triggers the Vulnerability Containment workflow scoped to the affected host only. |
Everything is in place: EDA is running, rhel02 has the vulnerable app, and Splunk has detection events. Now run a scan to trigger the full detection-to-containment chain.
-
In AAP, navigate to Automation Execution → Templates and launch the DEFEND - Scan System job template. When prompted for a Limit, enter
rhel02.The scan will detect CVE-2024-38476 on rhel02 and report the finding to Splunk via HEC.
-
Open the Splunk tab. Within one minute, the DCC CVE Alert saved search will fire and send the alert through the Ansible add-on to EDA.
You can verify the saved search fired by navigating to Settings → Searches, reports, and alerts and checking the "Last triggered" column.
If you don’t want to wait for the cron cycle, you can trigger the saved search manually: open Search & Reporting, find "DCC CVE Alert" in Reports, and click Run.
-
Switch to the AAP Controller tab and navigate to Automation Decisions → Event Streams — you should see the event received counter go from 0 to 1.
-
On the AAP Controller tab and navigate to Automation Execution → Jobs — the Vulnerability Containment workflow should be launching automatically, limited to
rhel02. -
Watch the workflow complete. Then click the Portal - rhel02 tab and refresh — the portal should no longer be accessible.
-
Compare the two portals:
-
Portal - rhel01: Contained manually
-
Portal - rhel02: Contained automatically via Splunk → EDA → AAP
-
The same result, but without any manual intervention on rhel02.
-
From the Terminal tab Verify containment on rhel02 from the terminal —
eth0should be isolated while httpd stays running:
|
SSH Password: ansible123! |
+
ssh rhel02 sudo firewall-cmd --get-active-zones+
eth0 should be in internal-only, eth1 should remain in public — same as rhel01.
-
Run the DEFEND - Verify Security Posture job template from AAP Controller to compare the containment state across both hosts:
In Automation Execution → Templates, find DEFEND - Verify Security Posture and click Launch.
The playbook runs against all app servers and produces a structured report for each host showing: service state, firewall zones, containment zone details, internal HTTP access, SELinux booleans, httpd hardening, AIDE monitoring, and the containment log.
Both hosts should show identical containment posture — external interface isolated, httpd still running internally, SELinux hardened. The difference is how they got there.
Lastly, navigate back to Automation Decisions → Event Streams and disable event forwarding found in the top right.

Verify
-
The DEFEND - Scan System job detected the CVE and reported it to Splunk
-
Splunk’s saved search fired and the EDA add-on delivered the event
-
EDA matched the rule and triggered the Vulnerability Containment workflow against
rhel02 -
The Parasol Finance Portal on rhel02 is no longer publicly accessible
-
Both servers show identical containment: firewall, hardening, SELinux, and security headers
-
rhel01 was contained manually in minutes; rhel02 was contained automatically in seconds
Module summary
You’ve successfully completed the DEFEND module.
What you accomplished:
-
Investigated a critical CVE in Splunk and saw real detection data
-
Confirmed the vulnerability on rhel01 using AAP’s Scan System job
-
Manually ran the containment workflow on rhel01 — and verified every change from the terminal
-
Wrote an EDA rulebook that matches Splunk saved search alerts
-
Connected Splunk to EDA using the Ansible Add-on for Splunk and a Token Event Stream
-
Deployed the vulnerable application to rhel02 from AAP
-
Ran a scan that triggered the full Splunk → EDA → AAP containment chain on rhel02
-
Verified both servers are contained: external interface isolated, httpd hardened, SELinux enforced
Key takeaways:
-
Manual response works but takes time — EDA reduces mean-time-to-contain to seconds
-
Splunk detects the threat, EDA routes the response, AAP executes the containment
-
The Splunk add-on sends the affected host from search results — the rulebook passes it as
job_args.limitto scope the workflow -
Containment isolates the external interface while keeping the service running internally — graduated response, not a kill switch
-
Workflows chain multiple templates into a coordinated response
Next steps: Module 2 will address what happens when Red Hat publishes an errata — you’ll write a policy check playbook and build a patching workflow.