1.0 - Meet Your Automation Coding Assistant
1. Understanding the Lab Environment
Before we begin, a few tips to improve your lab experience:
-
The instructions sidebar to the left can be resized to give you more space for the main panel.
-
In the left sidebar you will find the different sections. Each chapter has an introduction and related tasks below. Sections can be collapsed and expanded by clicking on them.
 Figure 1. Collapsible sidebar sections
 -
Everything in this lab happens in the VS Code tab. To run terminal commands, open VS Code’s integrated terminal by clicking Terminal → New Terminal from the menu bar, or press Ctrl+` (backtick).
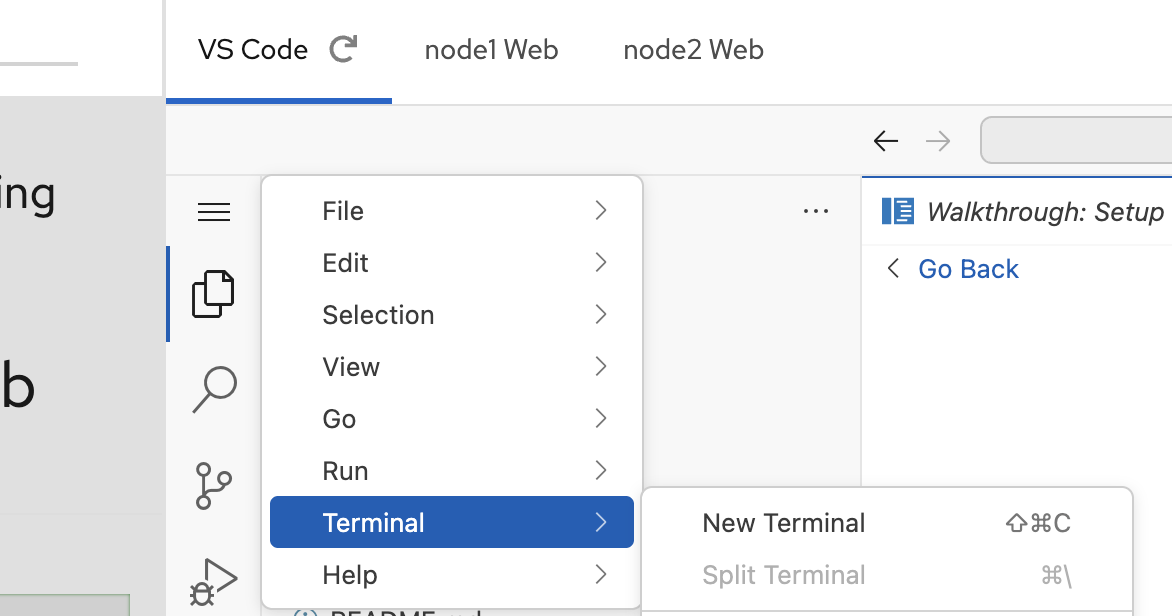 Figure 2. VS Code Terminal
 -
Each code box has a copy-to-clipboard and execute feature — click the icon on the right side of the box to run the command directly in the terminal.
-
Use the
 button to move to the next challenge after completing all tasks. It validates your work before proceeding.
 -
Use the
 button to auto-complete a challenge if you get stuck.
What is the Automation Coding Assistant?
The automation coding assistant is an AI-powered feature of the Red Hat Ansible VS Code extension. This extension transforms Visual Studio Code into a complete Ansible development environment, and the coding assistant takes it further by generating complete, ready-to-run Ansible playbooks from plain-English descriptions — no YAML knowledge required to get started.
This lab focuses on using the Ansible VS Code extension’s automation coding assistant to write playbooks faster and learn Ansible patterns as you go.
Here is what the coding assistant can do in this lab:
-
Playbook generation — describe what you want in plain English, and the assistant produces a complete playbook in a new editor tab that you can save and run immediately.
-
Role generation — convert an existing playbook into a reusable Ansible role with a single click, organizing tasks, handlers, templates, and variables into the standard role directory structure.
-
Content source tracing — the assistant cites which Ansible Galaxy content informed its suggestion, so every generated task is grounded in real-world automation patterns.
In this lab, you will use the coding assistant to generate every playbook. Your job is to write clear prompts, review what it produces, save the result, and run it.
2. Hands-On Experience
☑️ Task 1 - Verify the Ansible extension is installed
|
Switch to the VS Code tab at the top of the screen. |
-
Look at the left sidebar of VS Code for the Extensions icon (or the Activity Bar). You should see the Red Hat Ansible extension already installed.
-
Click on the Ansible extension icon in the left sidebar to open the Ansible extension panel. This panel provides quick access to playbook generation, explanation, and other automation features.
|
In a normal setup, you would configure your own LLM provider and API key through the extension’s LLM providers panel. In this lab, the coding assistant is pre-configured to use a LiteMaaS model endpoint — Red Hat AI’s Model-as-a-Service platform. The API key and model settings are injected into VS Code’s If you open the extension’s LLM providers panel and it appears empty, this is expected — the lab uses settings keys that the panel may not display. The coding assistant will still work correctly. |
☑️ Task 2 - Explore the pre-created inventory
|
Switch to the VS Code tab. |
Your lab environment already has an inventory file ready. An inventory tells Ansible which nodes to manage and organizes them into groups so you can target specific systems.
-
In the VS Code file explorer on the left, open the ansible-files directory and click the inventory file to open it.
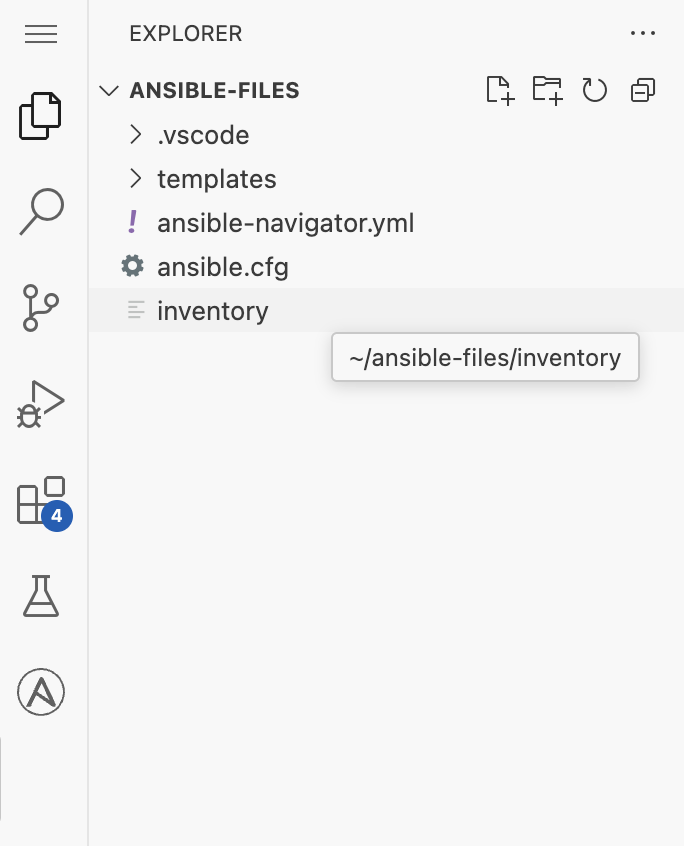 Figure 3. Ansible workspace in VS Code
 -
The file contains:
[web] node1 node2 [database] node3 [nodes:children] web database -
Notice how hosts are organized into groups:
[web]containsnode1andnode2,[database]containsnode3, and[nodes:children]groups them all together. This grouping lets you target specific sets of servers — for example, installing Apache only on thewebgroup, setting up MariaDB only on thedatabasegroup, and creating a user on all hosts.
☑️ Task 3 - Inspect the inventory with ansible-navigator
|
Open a terminal in VS Code: click Terminal → New Terminal from the menu bar, or press Ctrl+`. |
-
Change into the ansible-files directory:
cd /home/rhel/ansible-files
|
The first time you run |
-
List all hosts and groups:
ansible-navigator inventory --listExpected output{ "_meta": { "hostvars": {} }, "all": { "children": ["ungrouped", "web", "database", "nodes"] }, "database": { "hosts": ["node3"] }, "web": { "hosts": ["node1", "node2"] } } -
View a condensed graph of the inventory:
ansible-navigator inventory --graph
|
ansible-navigator runs playbooks inside a container called an Execution Environment (EE). The EE includes all the Ansible collections and dependencies needed for this lab — you do not need to install anything manually. |
3. Learning Outcomes
By completing this module, you now understand:
-
What the Automation Coding Assistant is and how it fits into the VS Code workflow
-
How an Ansible inventory organizes managed nodes into groups
-
How to use
ansible-navigator inventoryto inspect inventory structure -
How to navigate the Ansible extension panel in VS Code
4. Embracing the Next Challenge
✅ Next Challenge
Once you have completed the tasks, press the button to proceed to the next challenge.
-
The
button will validate your steps. If anything is missing, an error will appear so you can correct it before proceeding. -
You can also click
to auto-complete the challenge.
🐛 Encountered an issue?
If you have encountered an issue or noticed something not quite right, please open an issue on the Introduction to automation coding assistant repository.