Module 2: Your First Failure
In Module 1, you explored a ticket that was already waiting for you. Now you’re going to trigger a failure yourself, watch the Deep Agents pipeline process it end-to-end, and then break down exactly how it works.
Launch a failing job
Step 1: Find the job template
In the AAP2 tab (log in with user-12345 / deeper-agents if prompted), navigate to Automation Execution → Templates in the left sidebar.
Find 03 Install Web Server in the list. This playbook attempts to install a web server package on the RHEL VM — but it has a deliberate error that will cause it to fail.
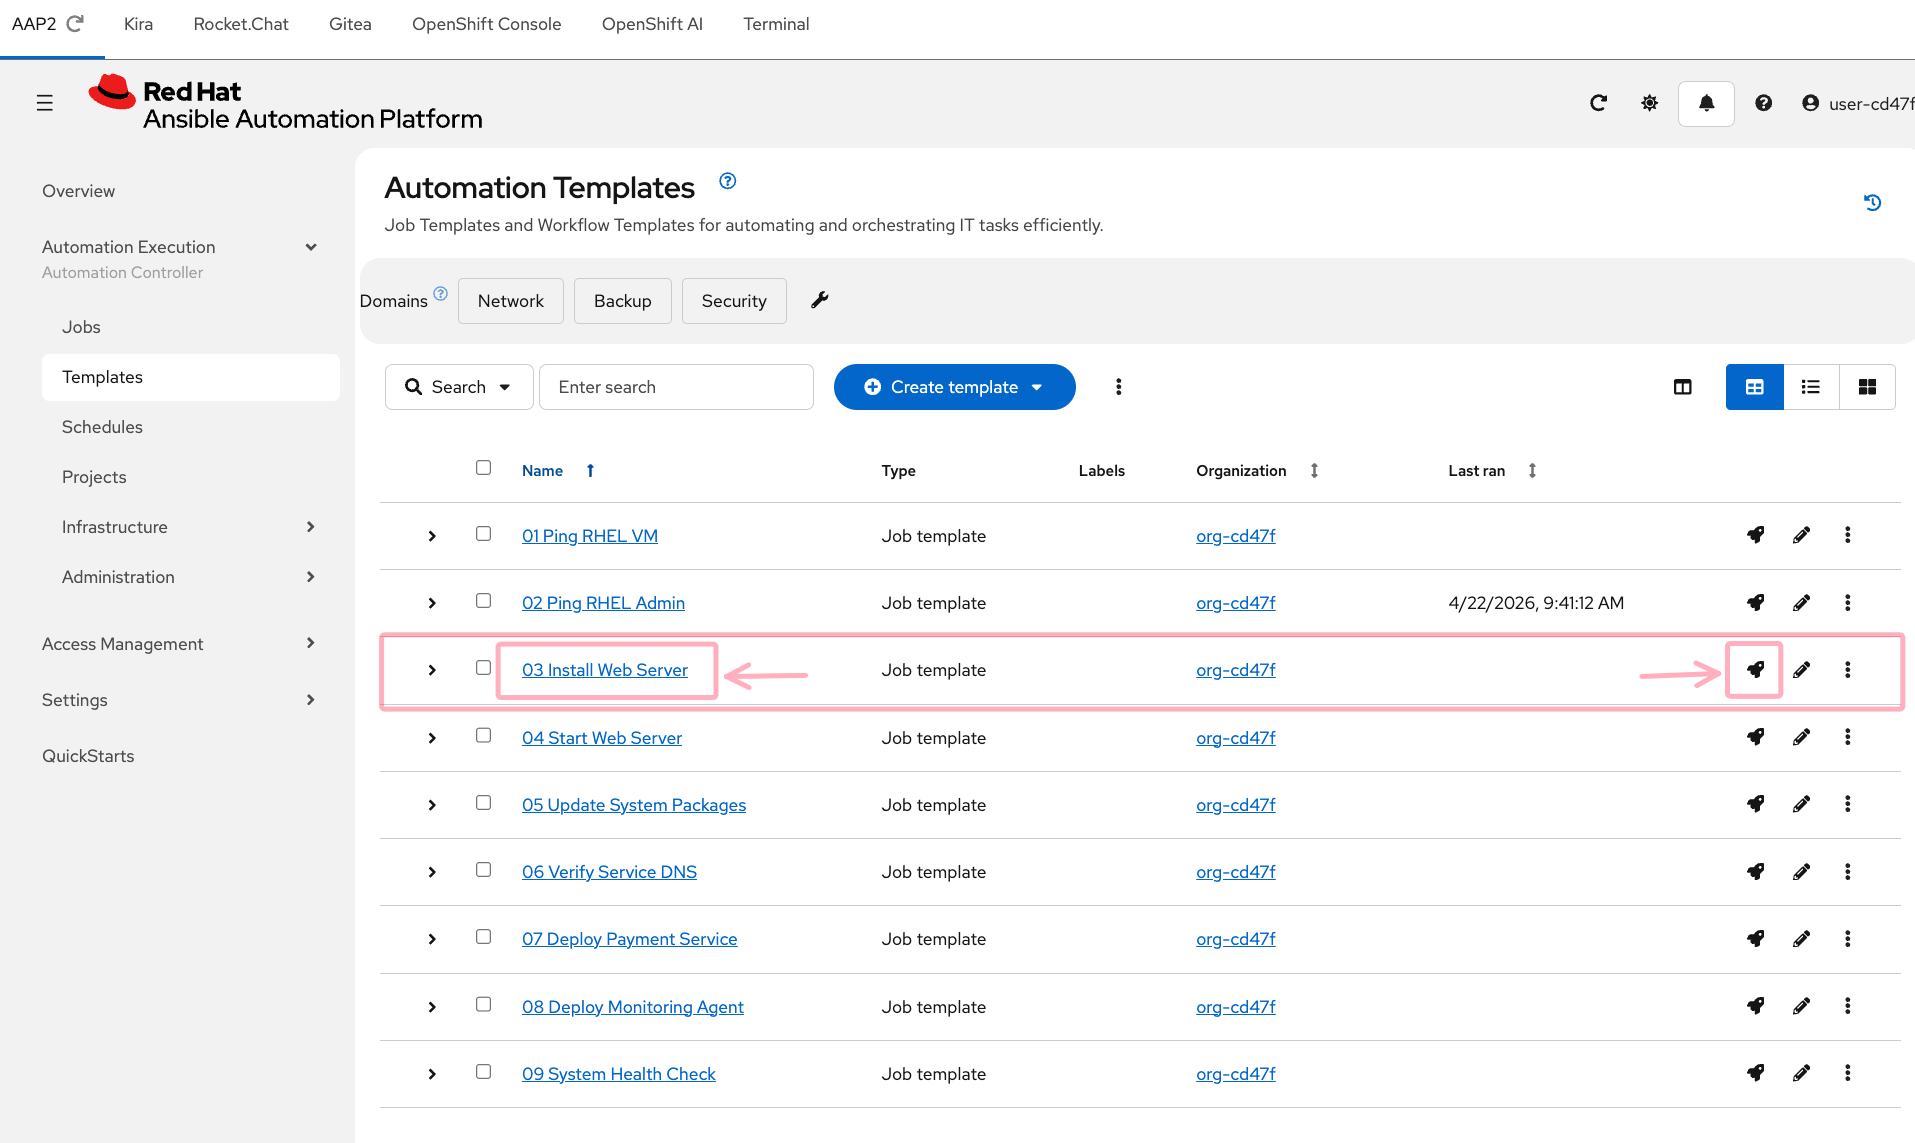
Step 2: Launch the job
Each job template row has three action icons on the right:
Click the rocket icon ![]() on the
on the 03 Install Web Server row to launch the job immediately.
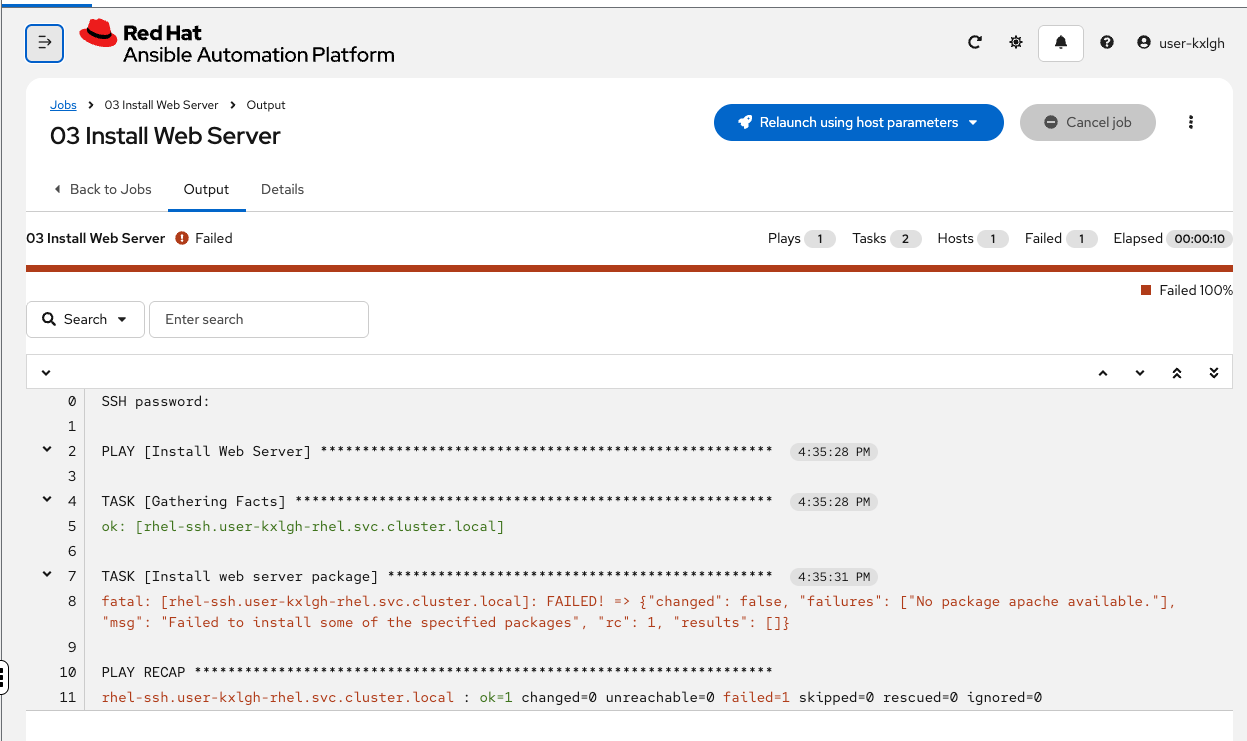
You’ll be taken to the job output screen. Watch the job run — it should fail within 15-20 seconds.
Step 3: Watch it fail
The job output will show a failure in the package installation task. The error is real — the playbook references a package name that doesn’t match what’s available on the system.
Take note of the error message — you can see "No package apache available" in the output. In a moment, you’ll see the AI agent’s analysis of this same error — and compare it to what you’d have done manually.
What happens next — inside the Deep Agents pipeline
The job has failed. AAP2 has already fired a webhook. But the AI analysis takes 1-3 minutes to complete — so while you wait, let’s walk through exactly what’s happening behind the scenes.

Here’s what each step does:
-
Webhook fires — AAP2 sends a POST to Athena’s webhook endpoint with the job ID
-
Retrieve job data — Athena’s
ops_manageragent calls the AAP2 API to fetch the full job output, error details, and metadata -
Classify the failure — the
error-classifierskill analyzes the error and determines the domain: is this an Ansible issue, a Linux issue, an OpenShift issue, or a Networking issue? -
Delegate to a specialist — based on the classification,
ops_managerinstantiates the right subagent on demand. For a package installation failure, it spins upsre_linux— a fresh agent with its own model, system prompt, and skills. The subagent doesn’t exist until it’s needed -
Root cause analysis —
sre_linuxreads the incident context, analyzes the error against its domain knowledge, and produces a structured ticket with root cause, confidence, risk, and recommended action. When it’s done, it returns its findings and is discarded — keeping theops_managercontext clean -
Quality review — a lightweight reviewer agent validates the ticket for coherence and actionability
-
Create ticket — the structured analysis is submitted to Kira as a ticket with sub-issues
-
Notify the team — a summary is posted to the Rocket.Chat
#supportchannel
Check the results
By now, the pipeline should have completed. Let’s verify.
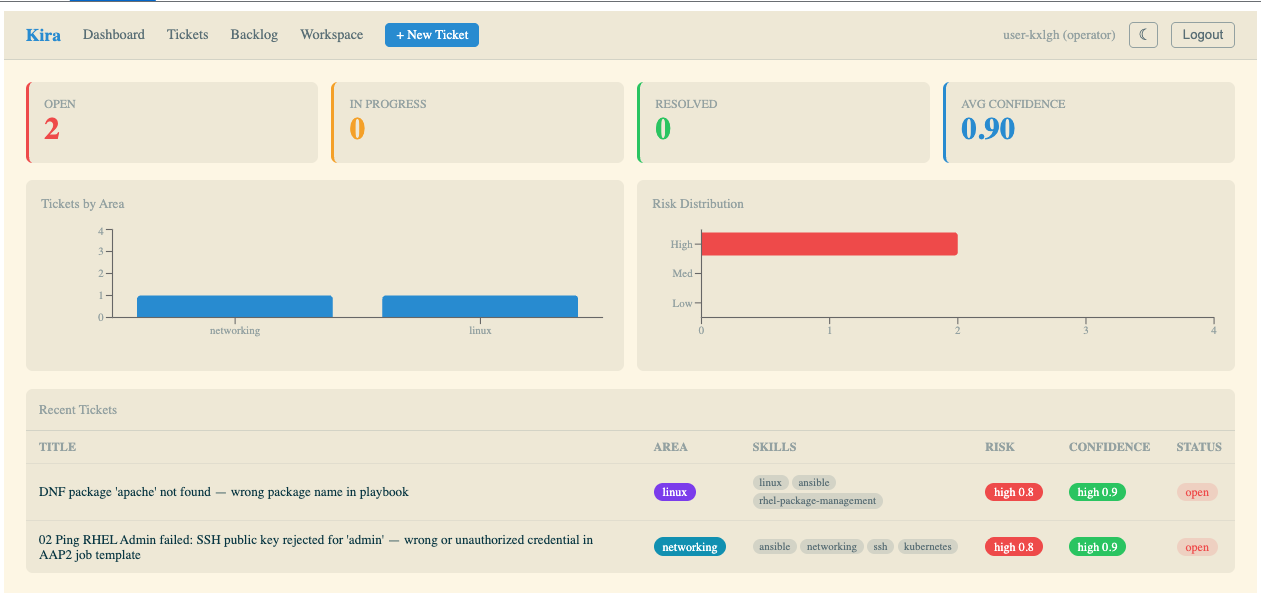
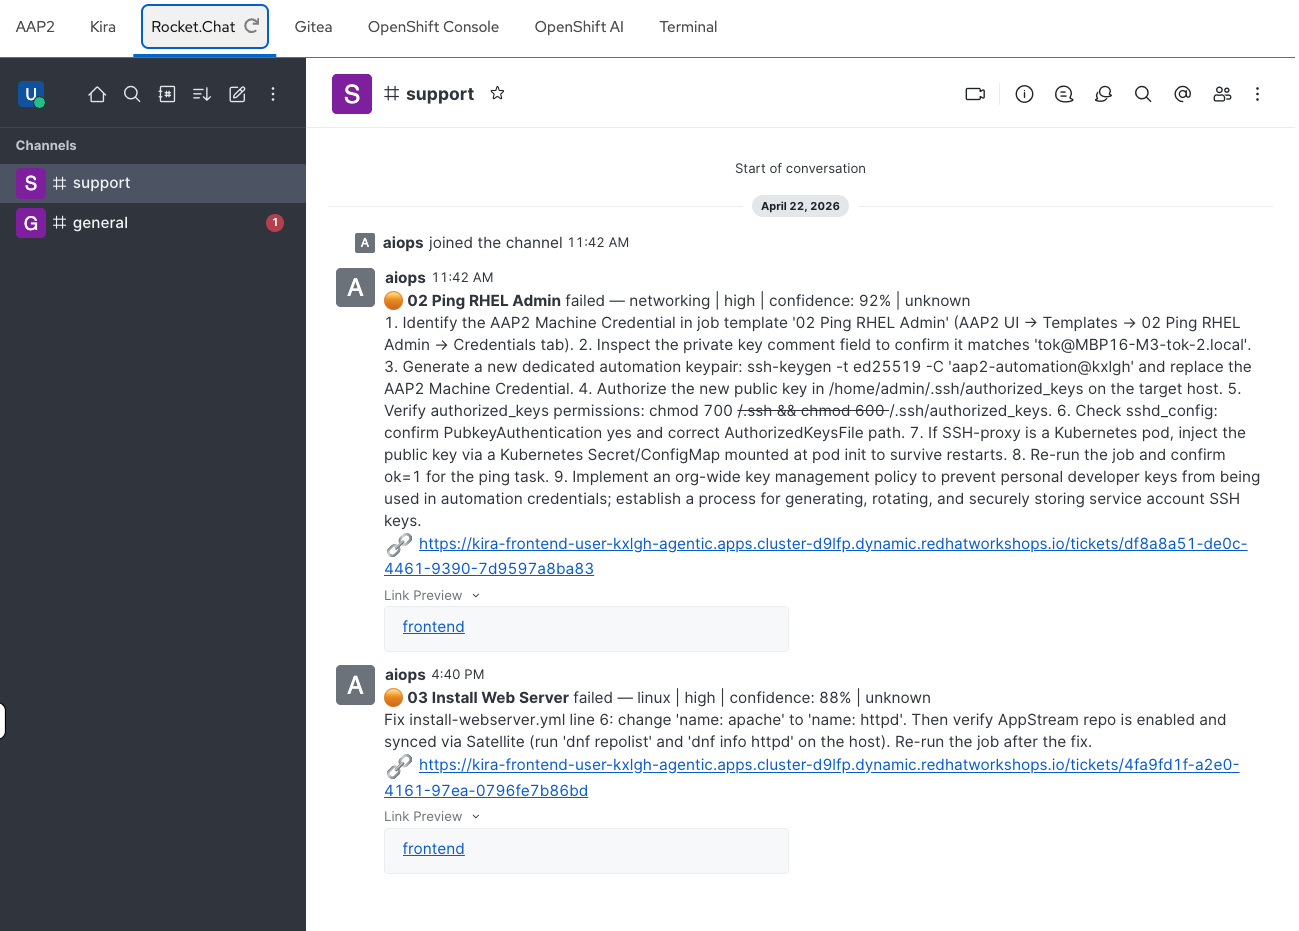
Check Kira
In the Kira tab (log in with user-12345 / deeper-agents if prompted), you should see a new ticket on the dashboard — look for the increased open ticket count and a new entry in the Recent Tickets table.
Click into the new ticket. Compare the AI agent’s analysis to the error you saw in the AAP2 job output:
-
Did it correctly identify the root cause?
-
Is the recommended action specific and actionable?
-
Does the confidence score seem reasonable?
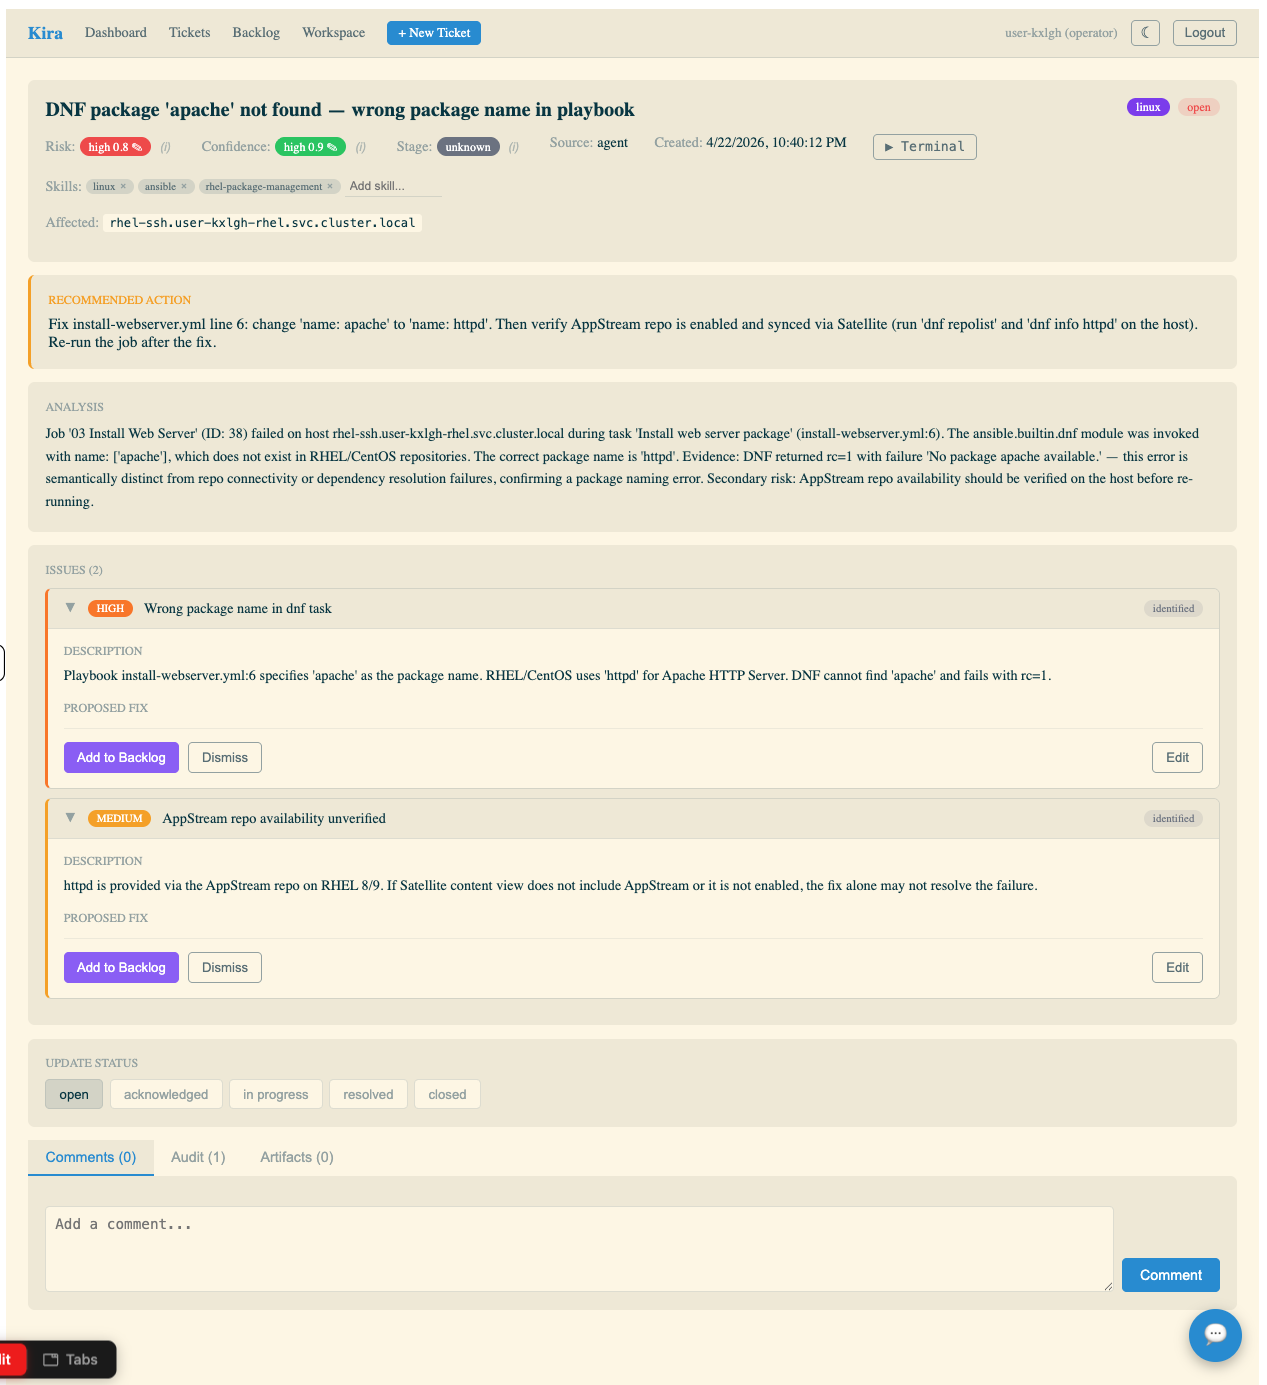
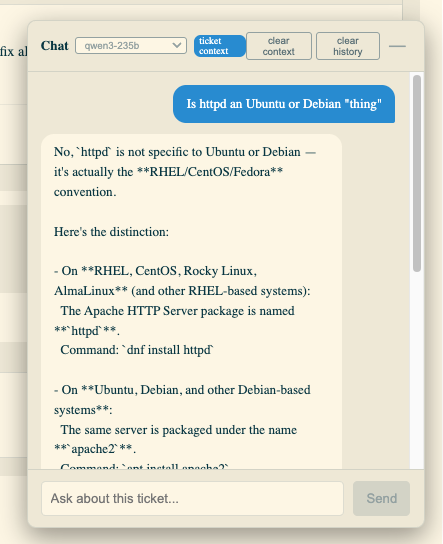
| Use the AI Chatbot (bottom right of the ticket screen) if you want to confer with the AI about the analysis — ask it to explain the root cause in more detail, suggest alternative fixes, or clarify any technical terms. Notice you can choose Open Source models of different sizes — these are provided by MaaS and run across various Nvidia and Intel GPUs utilizing Red Hat OpenShift AI and vLLM |
Breaking it down — the subagent definition
The specialist agent that analyzed your failure is defined in a YAML configuration file. Here’s the actual sre_linux definition:
sre_linux:
  description: > (1)
    Linux specialist. Delegate host-level failures: package manager (dnf/yum),
    systemd services, SELinux, filesystem/permissions, Satellite content issues.
  model: claude-sonnet-4-6 (2)
  system_prompt: | (3)
    You are a senior Linux SRE. You receive incident data from failed AAP2 jobs
    and perform root-cause analysis on host-level Linux issues.

    Always:
    - Read the incident context (incident.json) first
    - Check for package manager errors, repo access issues
    - Look for systemd unit failures, SELinux denials, permission issues
    - Consider Satellite content view configuration for package availability
    - Provide specific commands and config changes as recommendations

    Use the create-ticket skill to structure your analysis as a TicketPayload.
    Set area to "linux" for all Linux-domain issues.
  tools: (4)
    - web_search
  skills: (5)
    - ./skills/analyze-linux-failure/
    - ./skills/create-ticket/
- ./skills/common/| 1 | Description — tells the ops_manager when to use this subagent. The ops_manager reads all subagent descriptions and picks the best match based on the error classification. Be specific here — vague descriptions lead to misrouting. |
| 2 | Model — which LLM to use from MaaS. claude-sonnet-4-6 balances capability with cost. For simpler tasks, you could use a smaller model. For complex reasoning, a larger one. This is a key cost/quality tradeoff. |
| 3 | System prompt — the agent’s persona and instructions. This is where domain expertise is encoded. Notice it’s structured as a role ("You are a senior Linux SRE"), followed by a process ("Always: read context first, check for X, Y, Z"), and an output format instruction ("Use the create-ticket skill"). The quality of this prompt directly determines the quality of the analysis. |
| 4 | Tools — functions the agent can call. web_search lets the agent look up documentation or known issues. Tools are the agent’s hands — they let it take actions beyond just reasoning. |
| 5 | Skills — markdown documents loaded into the agent’s context that provide domain knowledge and output formatting guidance. analyze-linux-failure contains Linux-specific diagnostic patterns. create-ticket defines the TicketPayload schema. common has shared log-parsing techniques. Skills are the agent’s reference library — they don’t require code, just well-written instructions. |
The pattern
This is the Deep Agents pattern: a manager agent that classifies and delegates, backed by specialist subagents with domain-specific skills. The key insight is that each component is independently configurable:
-
Add a new domain — create a new subagent entry in the YAML with its own prompt and skills
-
Improve analysis quality — refine the system prompt or add more detailed skills
-
Control costs — switch individual subagents to cheaper models for simpler failure types
-
Add capabilities — give a subagent new tools (file reading, API calls, database queries)
You don’t need to modify any code to do any of this. The YAML configuration and skill markdown files are all you need to change — and in a later module, you’ll do exactly that.
Takeaways
-
You triggered a real failure and watched the AI pipeline analyze it end-to-end
-
The pipeline takes 1-3 minutes: webhook → classification → specialist analysis → ticket + notification
-
Each subagent is defined in YAML: description, model, system prompt, tools, and skills
-
The system prompt encodes domain expertise — it’s the most important part of the subagent definition
-
Skills are markdown documents that provide reference knowledge — no code required
-
The pattern is extensible: new domains, better prompts, different models, additional tools