Module 1: Provisioning and exploration
It’s your first day working on AI initiatives at Parasol Insurance. Normally, getting a new developer productive takes weeks — setting up environments, requesting access, installing tools, and navigating endless documentation. But Parasol has adopted Red Hat Developer Hub to eliminate that friction.
In this module, you’ll self-service a fully configured development workstation, explore the Red Hat build of Podman Desktop and its extensions, and get hands-on with the AI Lab to see how developers can safely experiment with AI models and recipes on the desktop.
Learning objectives
By the end of this module, you’ll be able to:
-
Use Red Hat Developer Hub to self-service a RHEL 10 virtual machine with pre-installed developer tools
-
Navigate the Red Hat build of Podman Desktop and explore its extensions
-
Install and use the AI Lab extension to experiment with AI models and recipes
-
Understand how the AI Lab recipe catalog provides inspiration for building AI-powered applications
Exercise 1: Provision your development environment with Red Hat Developer Hub
Your team lead has told you: "Just go to Developer Hub, pick the AI developer workstation template, and you’ll have everything you need." No tickets, no waiting, no manual setup.
You’ll use Red Hat Developer Hub to provision a RHEL 10 virtual machine that comes pre-configured with the Red Hat build of Podman Desktop and other essential tools.
Access Red Hat Developer Hub
-
Click the Developer Hub tab at the top of the right pane.
-
Click Sign in, and log in using your credentials:
-
Username:
{user} -
Password:
{password}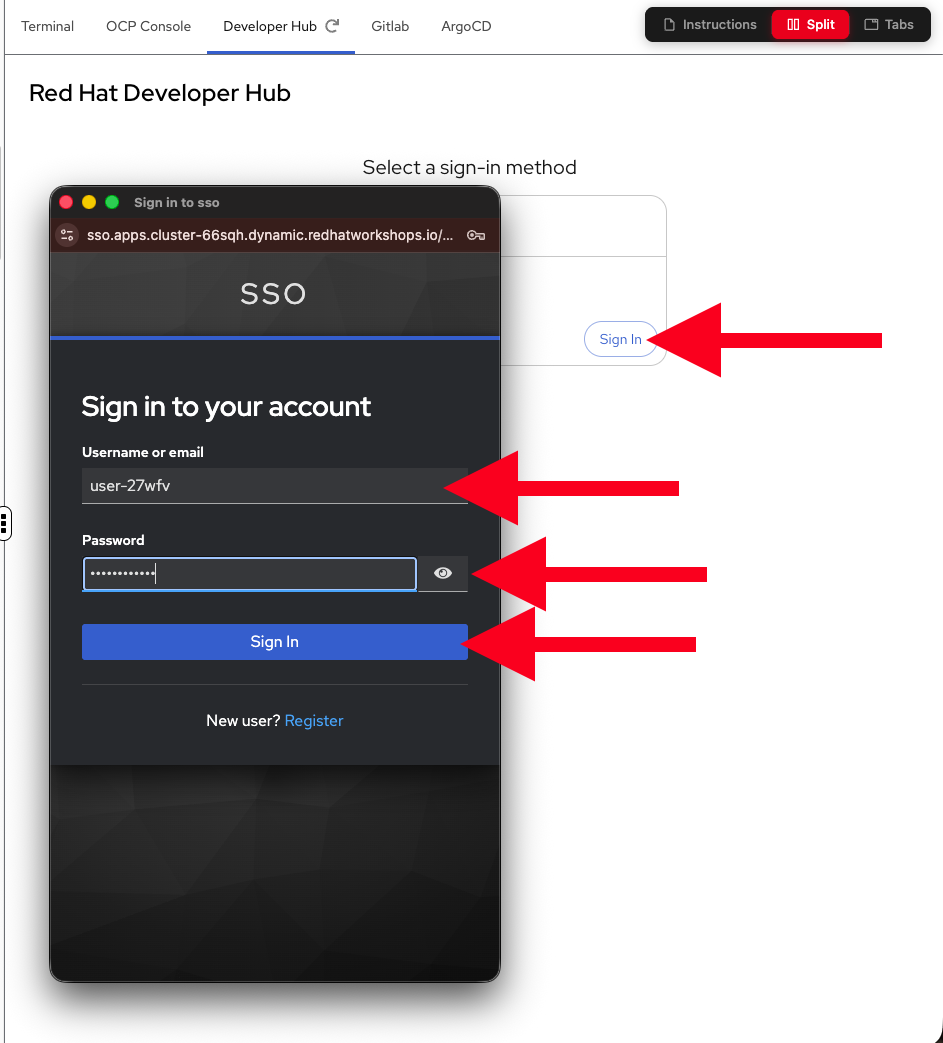
-
-
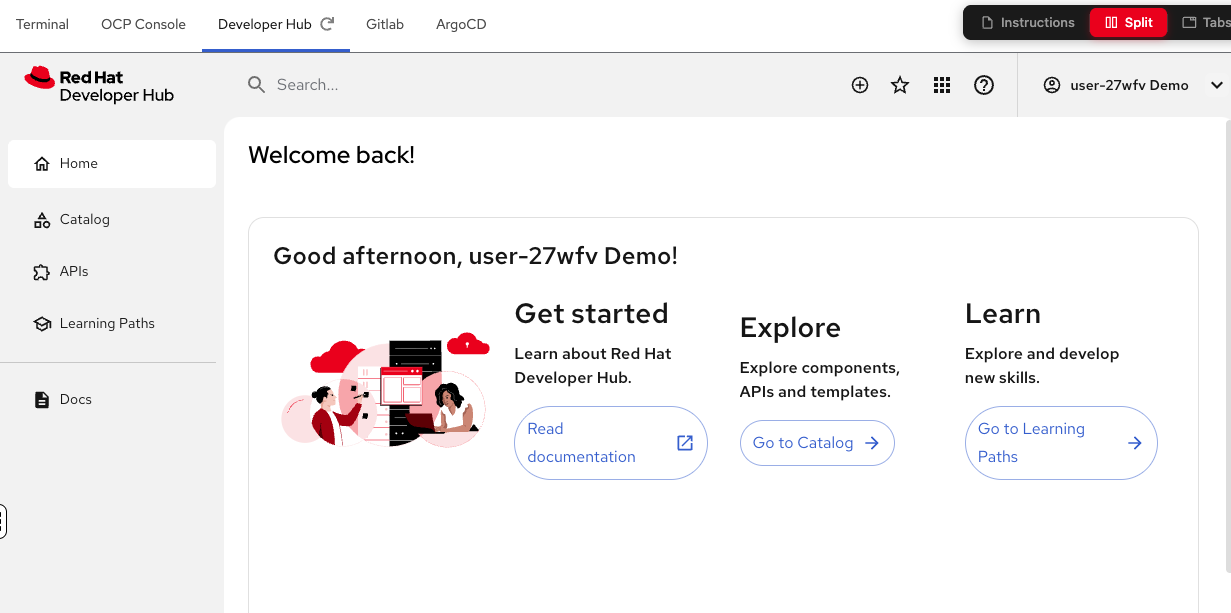
After logging in, you’ll land on the Red Hat Developer Hub home page. Take a moment to look around — this is the central hub where Parasol’s developers discover and provision everything they need.
Create your AI developer workstation
-
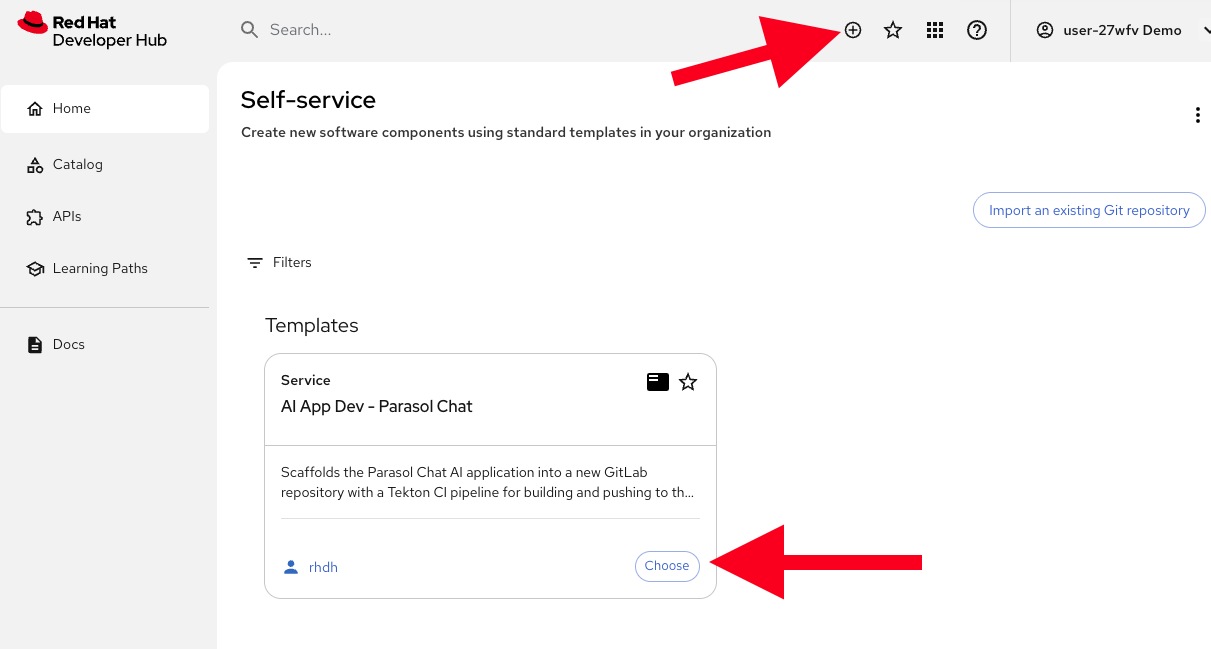
Click the (+) button at the top right of the page, then select the AI App Dev - Parasol Chat template from the catalog.
-
Fill in the template form with the following values:
-
Application Name: Leave as the default (
ai-app-dev) -
Virtual Machine Name: Leave as the default (
developer-workstation) or enter a custom nameThe virtual machine name must contain only lowercase letters, numbers, and hyphens, and must start and end with an alphanumeric character. 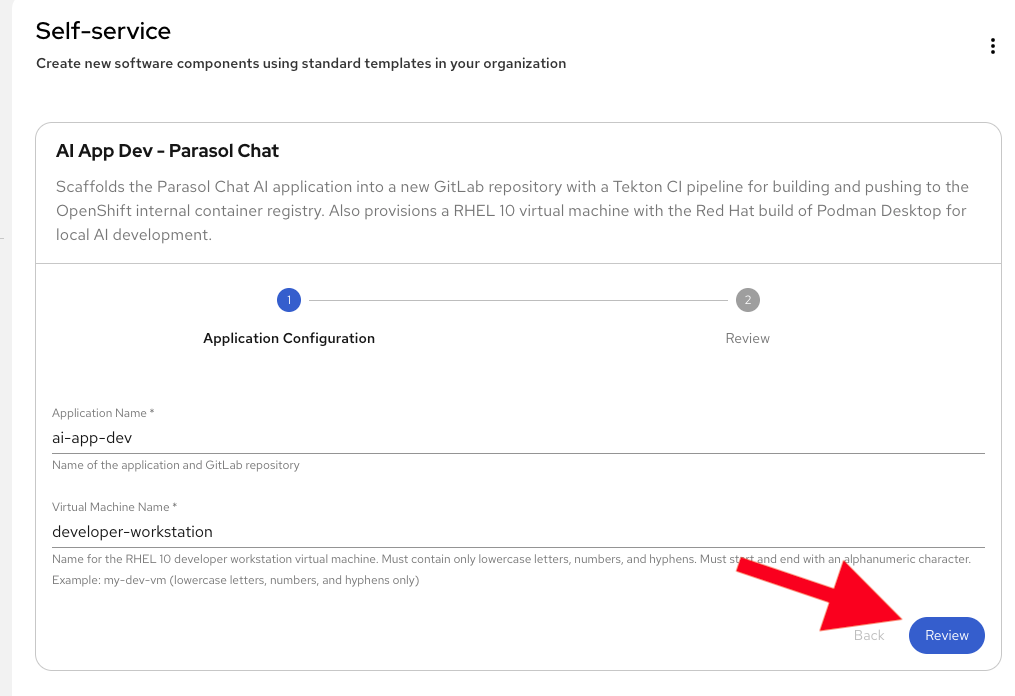
-
-
Click Review to review your selections, then click Create to begin provisioning.

-
Wait for the provisioning to complete. Red Hat Developer Hub is doing several things behind the scenes:
-
Provisioning a RHEL 10 virtual machine via OpenShift Virtualization (KubeVirt)
-
Installing the Red Hat build of Podman Desktop
-
Scaffolding a Git repository in GitLab for your application code
-
Configuring CI/CD pipelines for your project
This process takes a few minutes. In a traditional setup, this would take days or weeks of manual work across multiple teams.
-
-
Once provisioning is complete, you’ll see a success page with links to your new resources.
The virtual machine may take a minute or two to fully start up after provisioning completes. You can continue exploring the success page and Developer Hub while it boots. 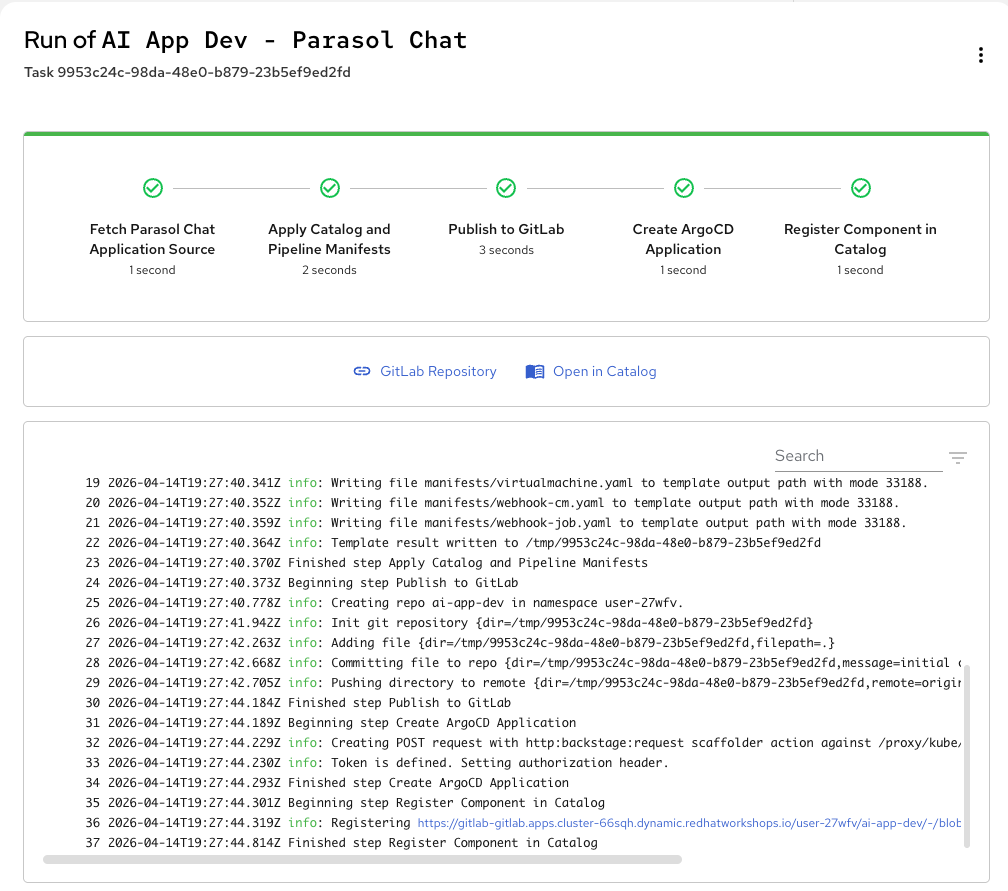
Verify your provisioned resources
-
From the success page, note the links to:
-
The GitLab Repository where your scaffolded application code lives (we’ll visit this in a bit)
-
A link to Open in Catalog. The catalog is where all your provisioned resources are registered in Developer Hub.
-
-
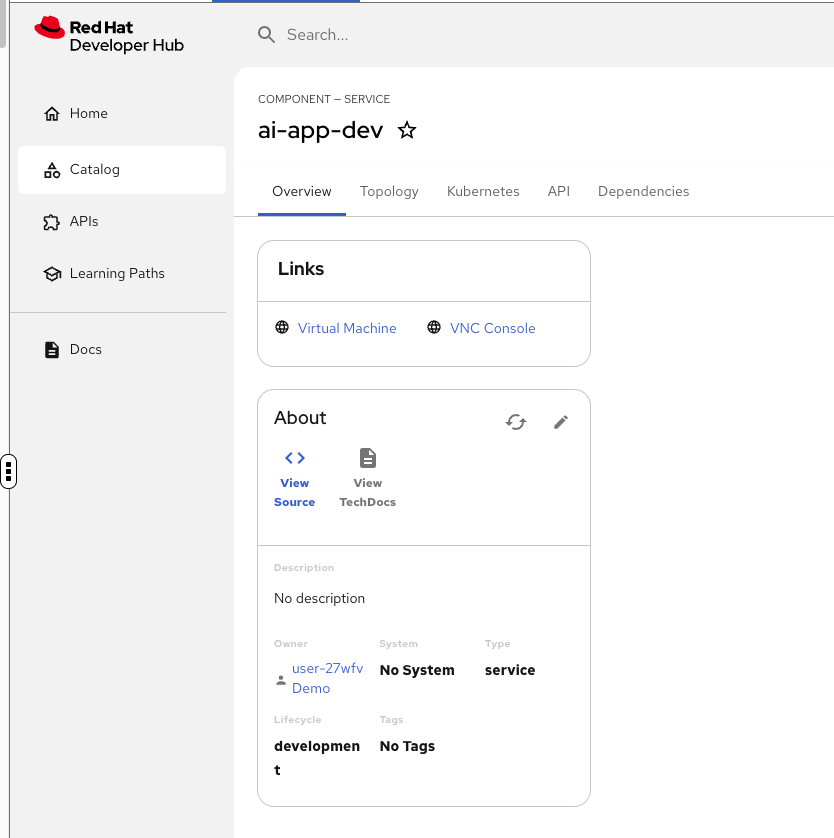
Click on Open in Catalog to view its details page.
-
Note the new links provided on the component page:
-
Virtual Machine: A link into the OCP console to view details about your provisioned VM, including its status, resources, and connection info
-
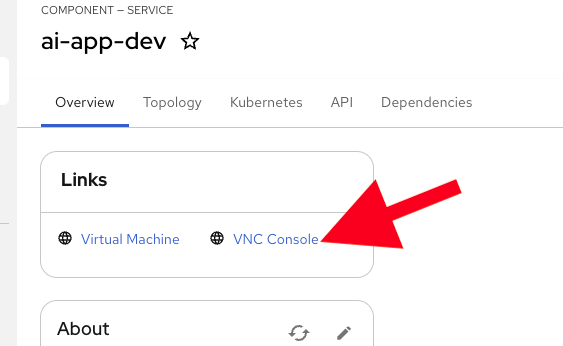
VNC Console: Connect to your new virtual machine’s desktop environment directly from Developer Hub
-
Exercise 2: Explore the Red Hat build of Podman Desktop
Now that your "workstation" is provisioned, let’s explore the Red Hat build of Podman Desktop — the primary tool Parasol developers use for container-native development on the desktop.
Connect to your virtual machine
| The virtual machine in this workshop simulates a real developer desktop. All the tools you’ll use here — including Podman Desktop, VS Code, and the AI Lab extension — can be installed directly on your own laptop. Podman Desktop is available for Linux, Windows, and Mac. We’re using a VM in this workshop so you don’t need to install anything locally. Since this is a shared system supporting many participants, performance may be slower than what you’d experience on your own machine — please don’t judge the tools by the workshop VM’s performance! |
-
In the Developer Hub component page, click the VNC Console link to open a VNC session to your virtual machine.
-
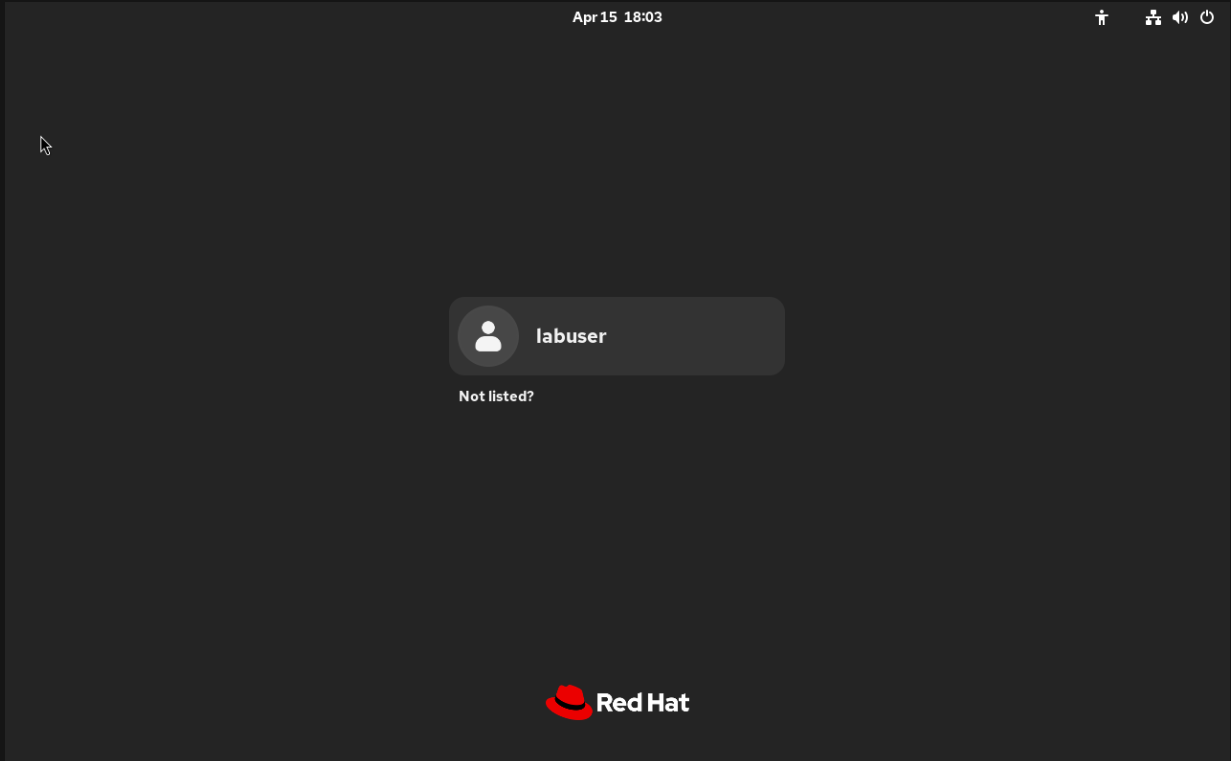
The VNC console opens, showing your RHEL 10 desktop.
-
Click on the user
labuserand enter the passwordlabpassword. After a few moments, you will land on the desktop. You can pressSkipto skip the tour.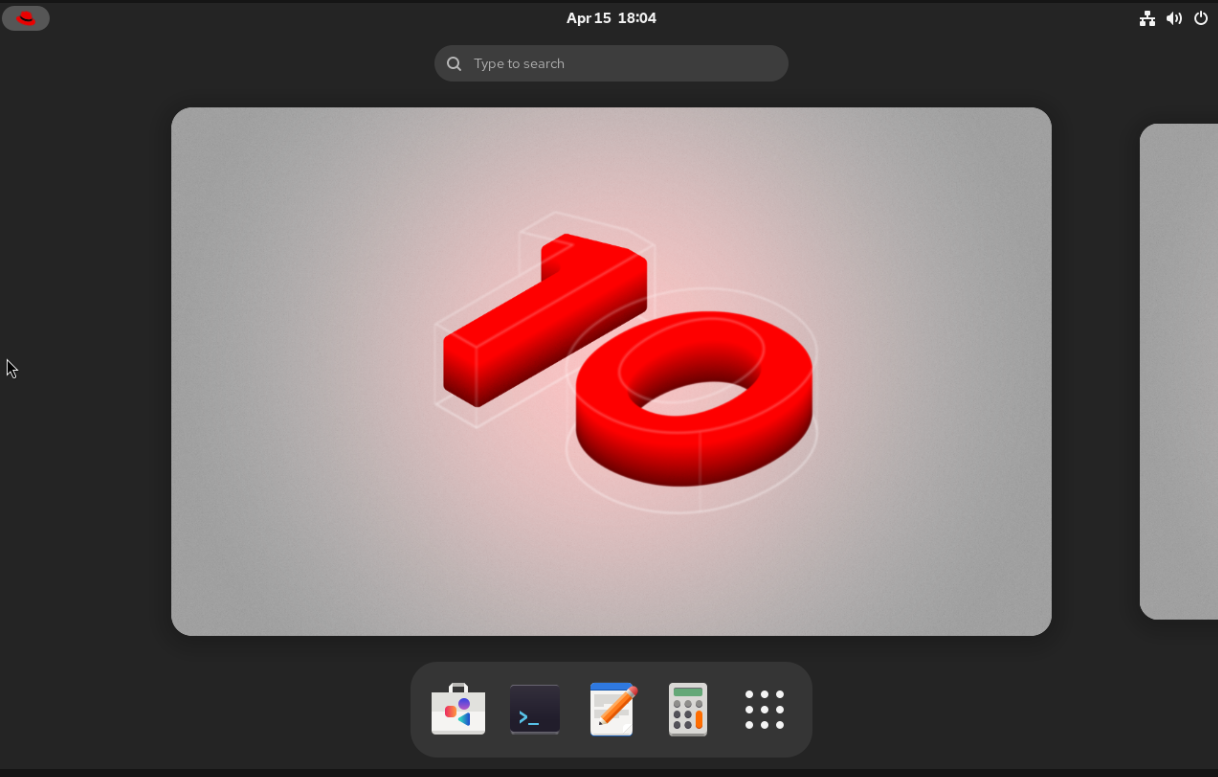
Launch Podman Desktop
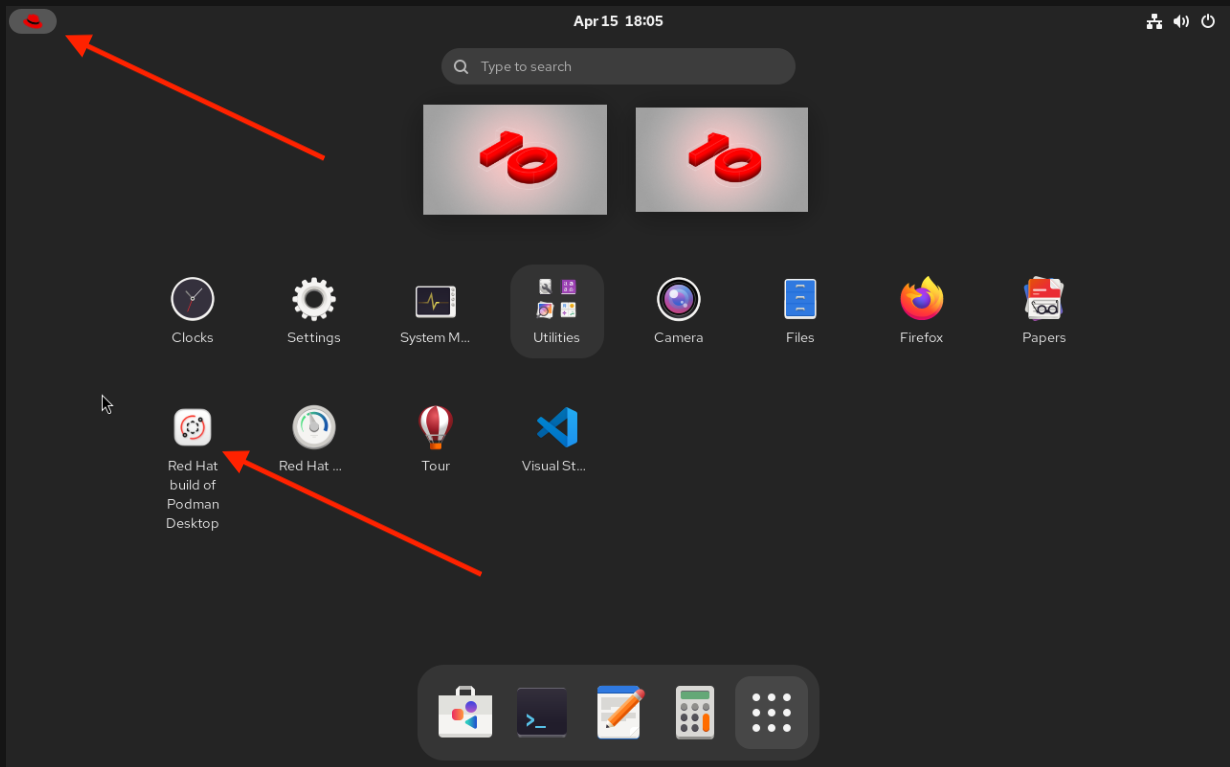
Click the "9-dot" menu at the bottom (if you do not see this, click the red fedora at the upper left).
-
Find and launch the Red Hat build of Podman Desktop from the application menu or desktop shortcut.
-
Once Podman Desktop opens, click
Skipto skip configuration (it is already configured). Take a moment to explore the interface and the sections on the left, the most important of which are:-
Dashboard: Overview of your container environment
-
Containers: Running and stopped containers
-
Images: Available container images
-
Pods: Grouped containers
-
Extensions: Add-ons that provide additional functionality and integrations
-
Kubernetes: Manage Kubernetes clusters and workloads

-
Explore extensions
-
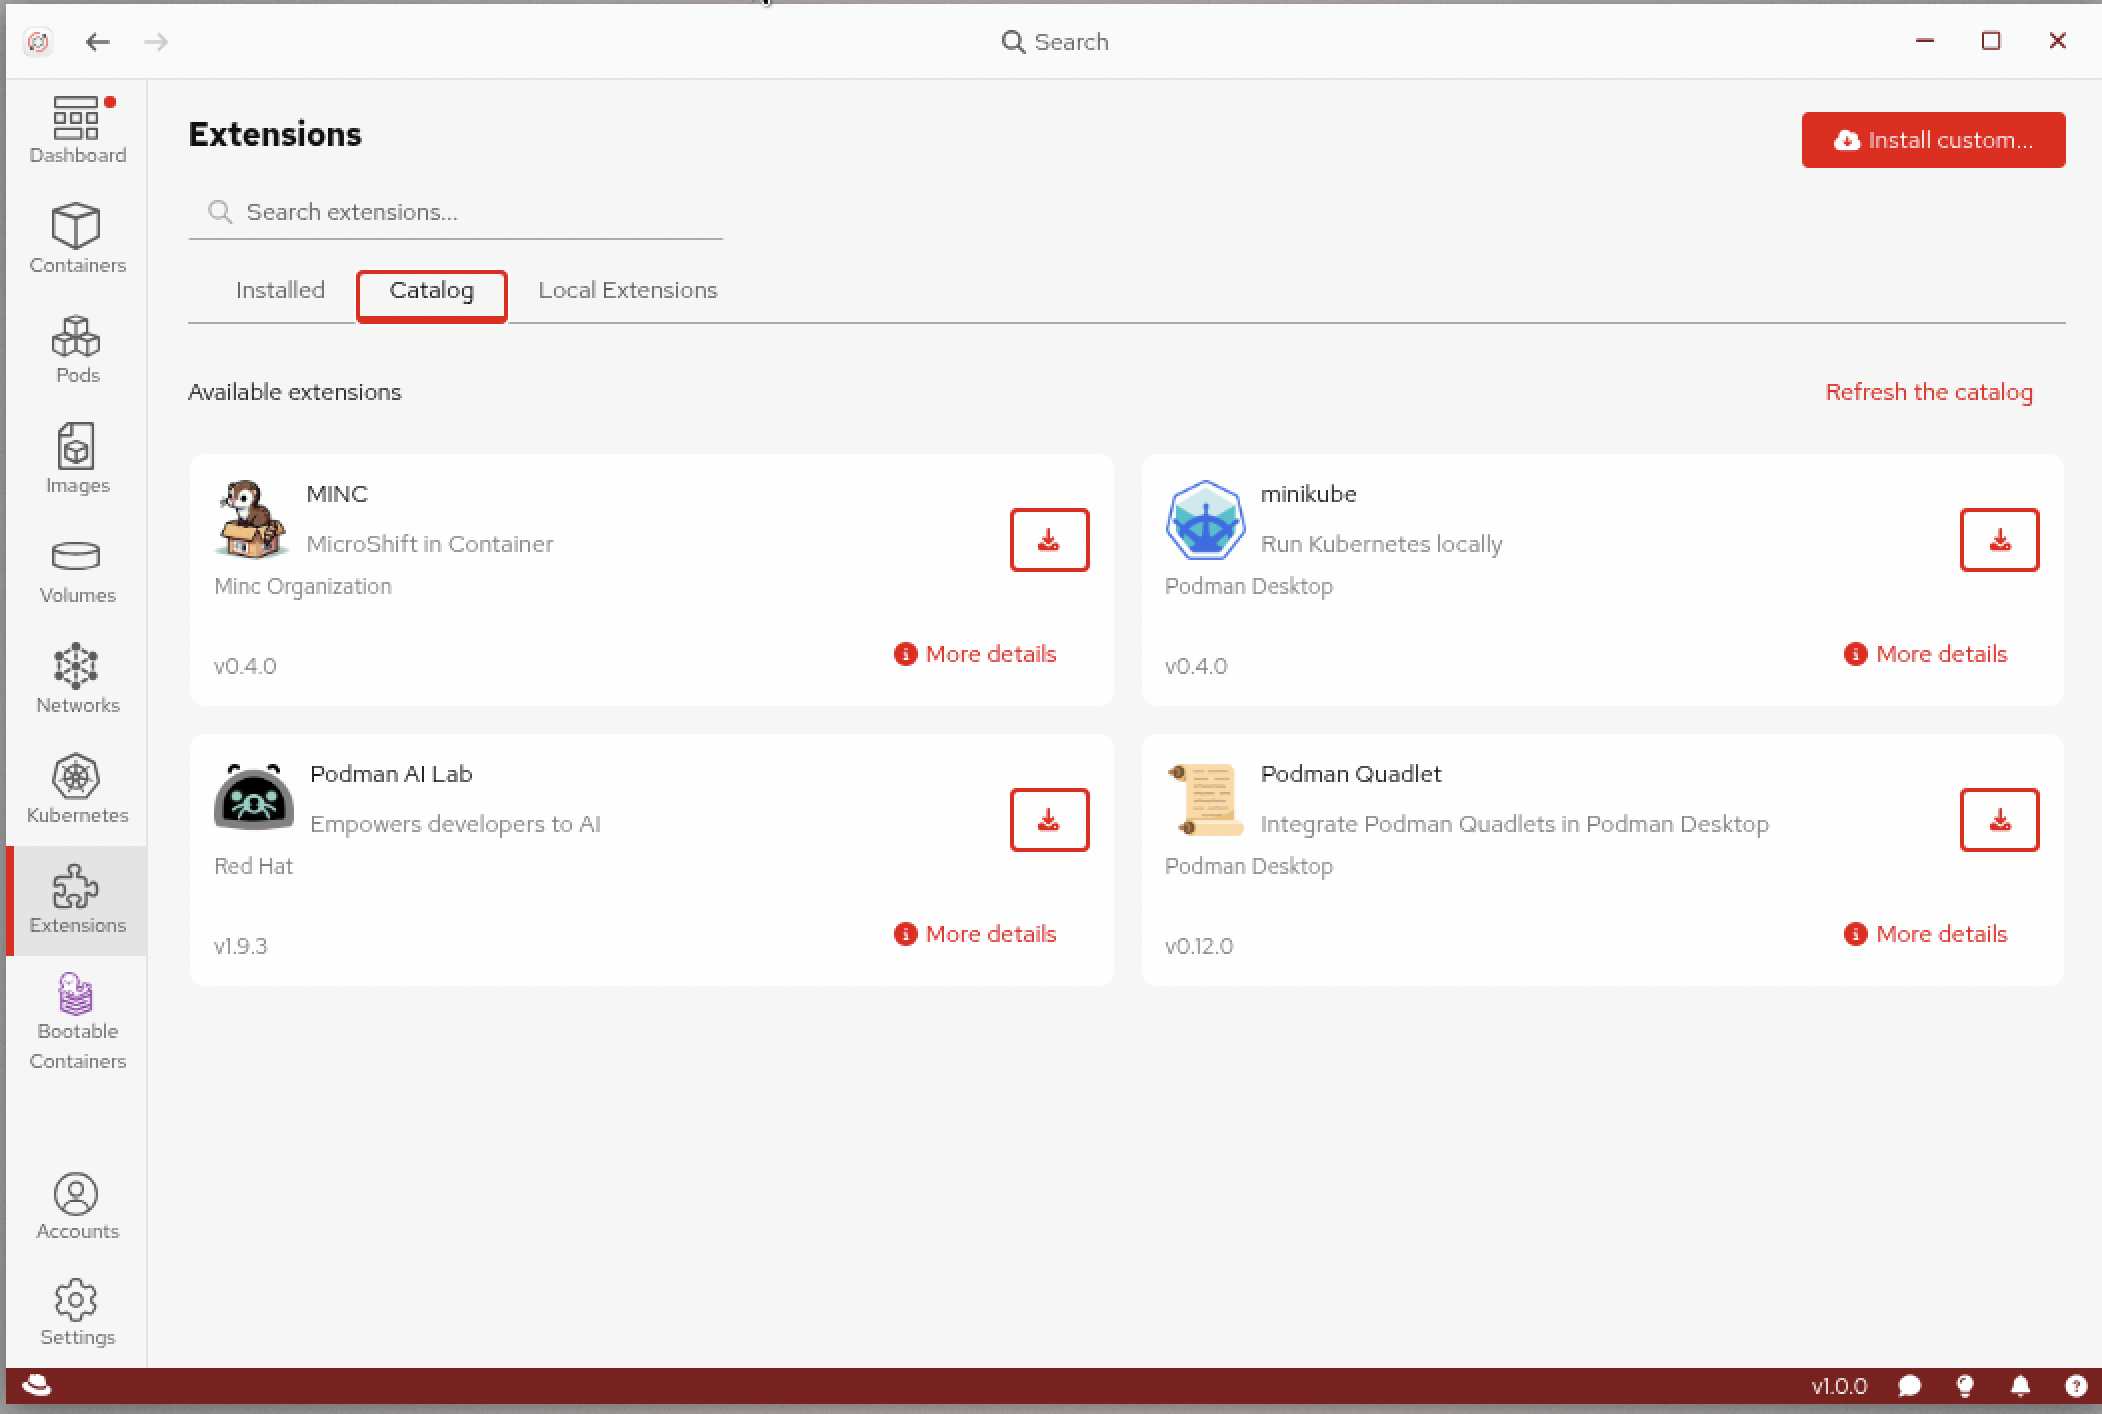
Click on Extensions in the left navigation to see what’s available. The Red Hat build of Podman Desktop supports a rich extension ecosystem.
-
Click the
Catalogtab to browse through the available extensions. You’ll notice extensions for:-
Kubernetes and OpenShift integration
-
Podman machine management
-
Podman AI extensions
-
And more
Extensions are how Podman Desktop stays lightweight while still supporting specialized workflows like AI development.
-
Exercise 3: Install the AI Lab extension and explore recipes
At Parasol, developers need a safe, local way to experiment with AI — no more shadow AI using random third-party services. The AI Lab extension for Podman Desktop provides exactly this: a governed, local-first approach to AI experimentation with a catalog of pre-built recipes to take inspiration from.
Install the AI Lab extension
-
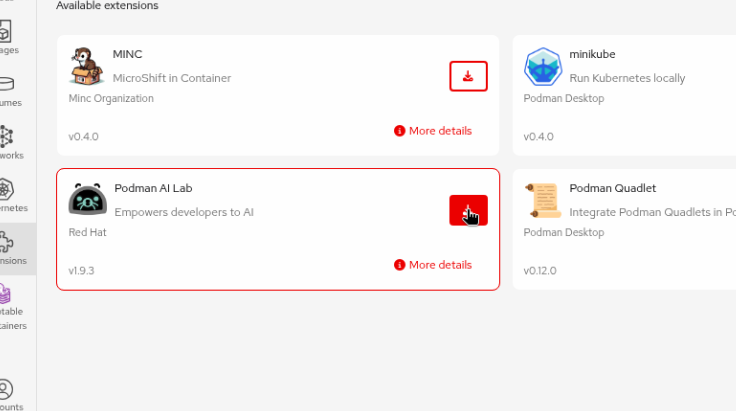
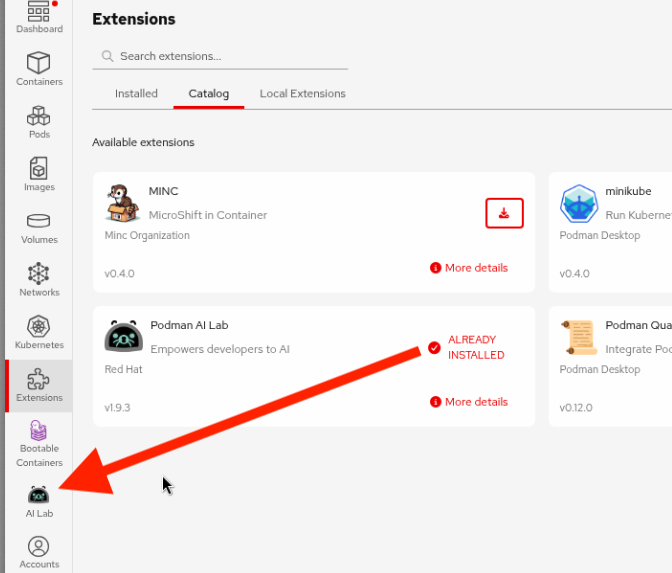
In the Catalog of extensions view, click the Install button next to the Podman AI Lab extension.
-
Click Install to add the AI Lab extension to your Podman Desktop (if if takes too long you may get a "Not responding" popup - just click Wait and it should complete successfully). The extension will be installed, which may take a few moments as it pulls the necessary container images and sets up the environment.
-
Once installed, you’ll see a new AI Lab icon in the left navigation.
Explore the AI Lab
-
Click on the AI Lab icon to open it. Take a moment to explore the different sections:
-
Catalog: Pre-built AI recipes covering chatbots, code generation, summarization, and more
-
Recipes: A collection of pre-built applications that you can run locally to see AI in action
-
Playground: An interactive space to experiment with models directly
-
-
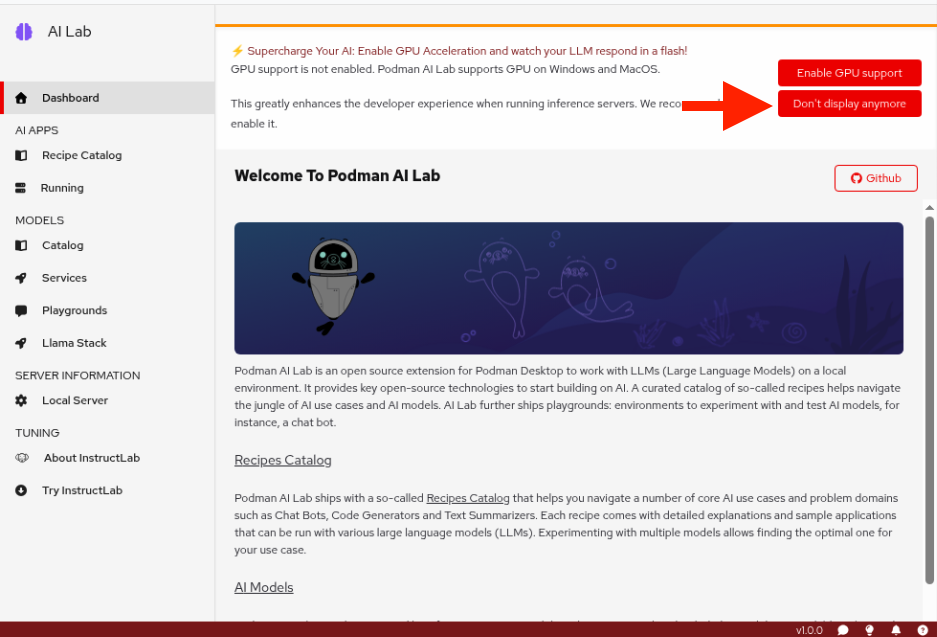
GPU Support is not yet enabled on Linux, so click the
Don’t display anymoebutton at the top to dismiss the GPU support message. -
Browse through the Catalog section. Notice the variety of recipes available — different sizes, capabilities, and use cases. Developers can experiment with many different recipes to find what works best for their needs.
All of the models and recipes you see here were pre-configured by Parasol’s platform engineering team, so developers can use approved resources right out of the gate — no need to hunt for models or worry about compliance. 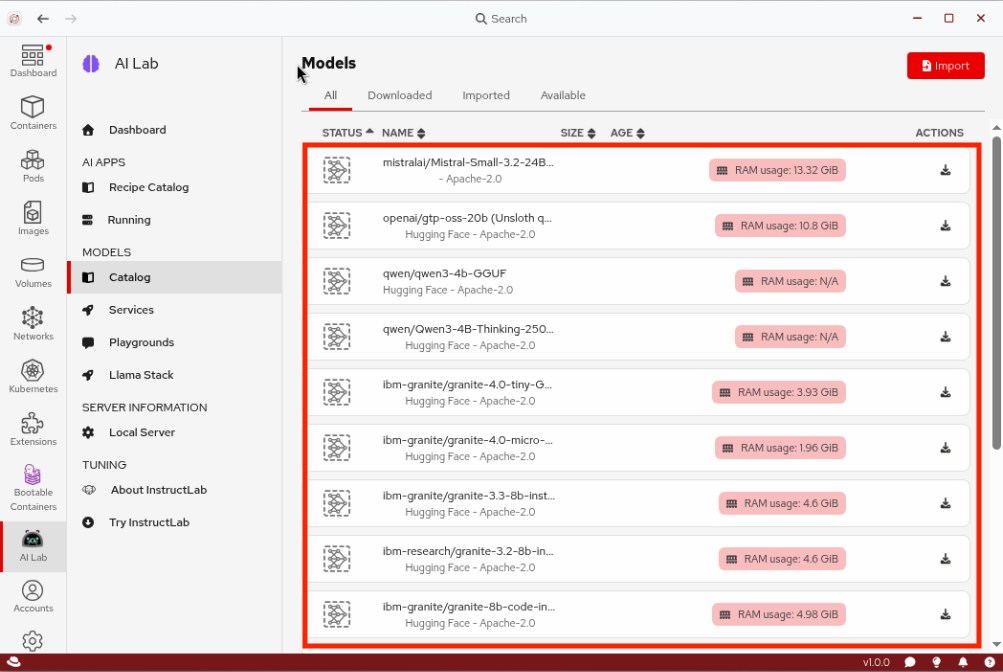
Run a recipe from the catalog
The recipe catalog is where the magic happens. Each recipe is a fully working AI application that you can run locally, inspect, and take inspiration from for your own projects.
-
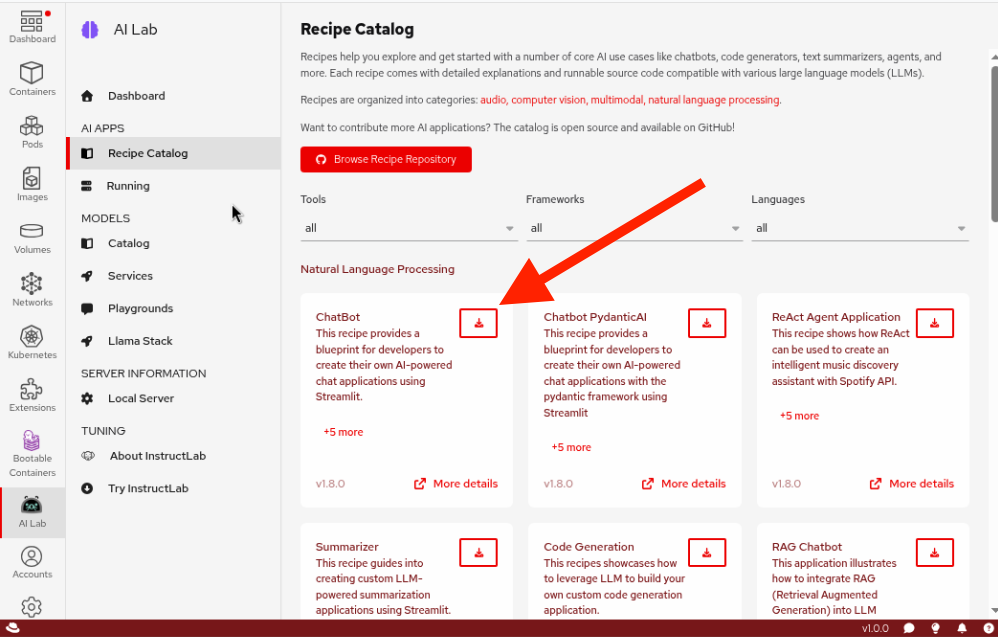
Navigate to the Recipe Catalog section in AI Lab.
-
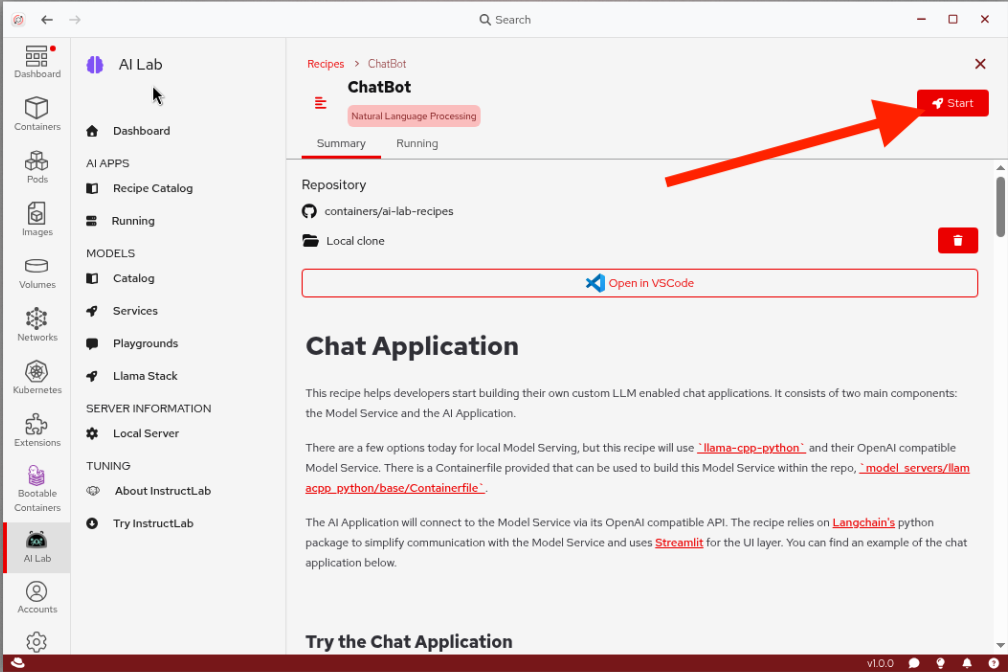
Find the Chatbot recipe in the catalog (it should be the first one). This is a pre-built application that provides a web-based chat interface backed by an AI model.
-
Click on the More Details link on the recipe card to see its details, then click Start to instantiate it.
-
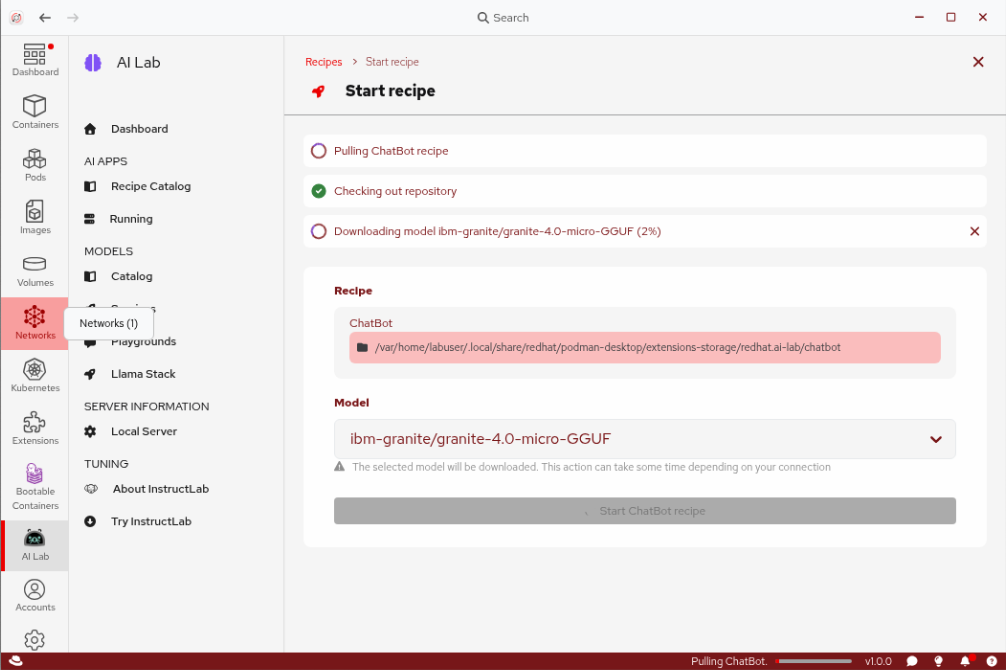
The default model
ibm-granite/granite-4.0-micro-GGUFmodel will be selected. This is a quantized model designed to fit on typical laptops, but depending on available resources, it may not be as performant as you’d expect from a full-size model. ClickStart ChatBot recipeto confirm and start the recipe. -
Wait for the recipe to pull the required model and start the application. This may take a few minutes as it downloads the model and builds the containers.
-
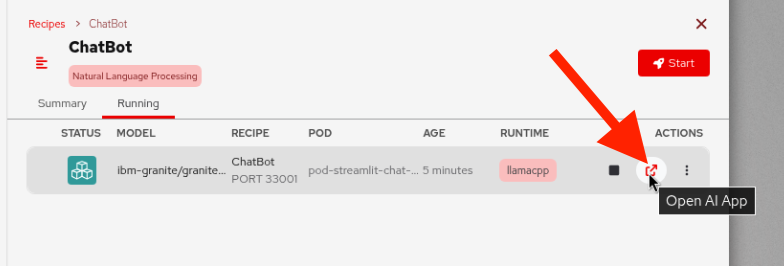
Once the recipe is running, click the Open Details link to open the chatbot application in your browser, and then click the Open ChatBot button to launch the chat interface using the Firefox browser on your VM:
| To paste text from the lab instructions into the VM, use the Paste to console button at the top of the VM console screen. This copies any text from your laptop’s clipboard into the VM. |
-
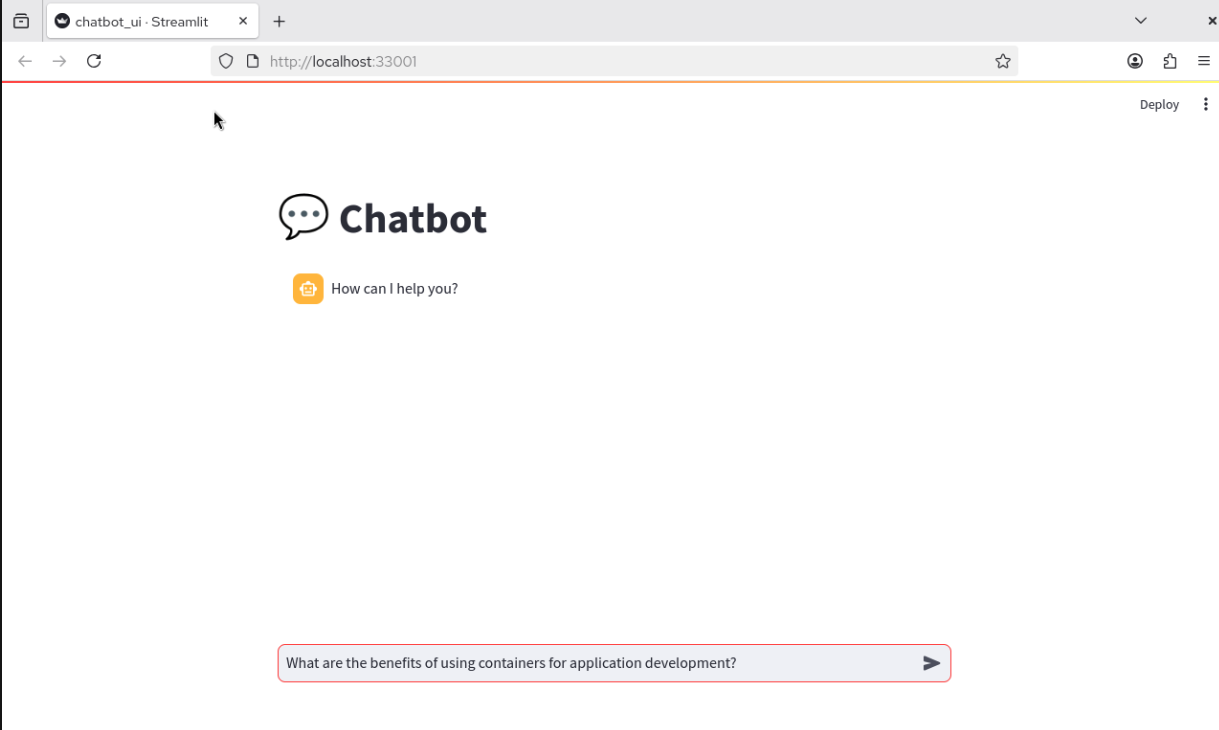
Try asking the chatbot a few questions (the response will be slow — more on this later):
What are the benefits of using containers for application development?Can you explain what a large language model is in simple terms?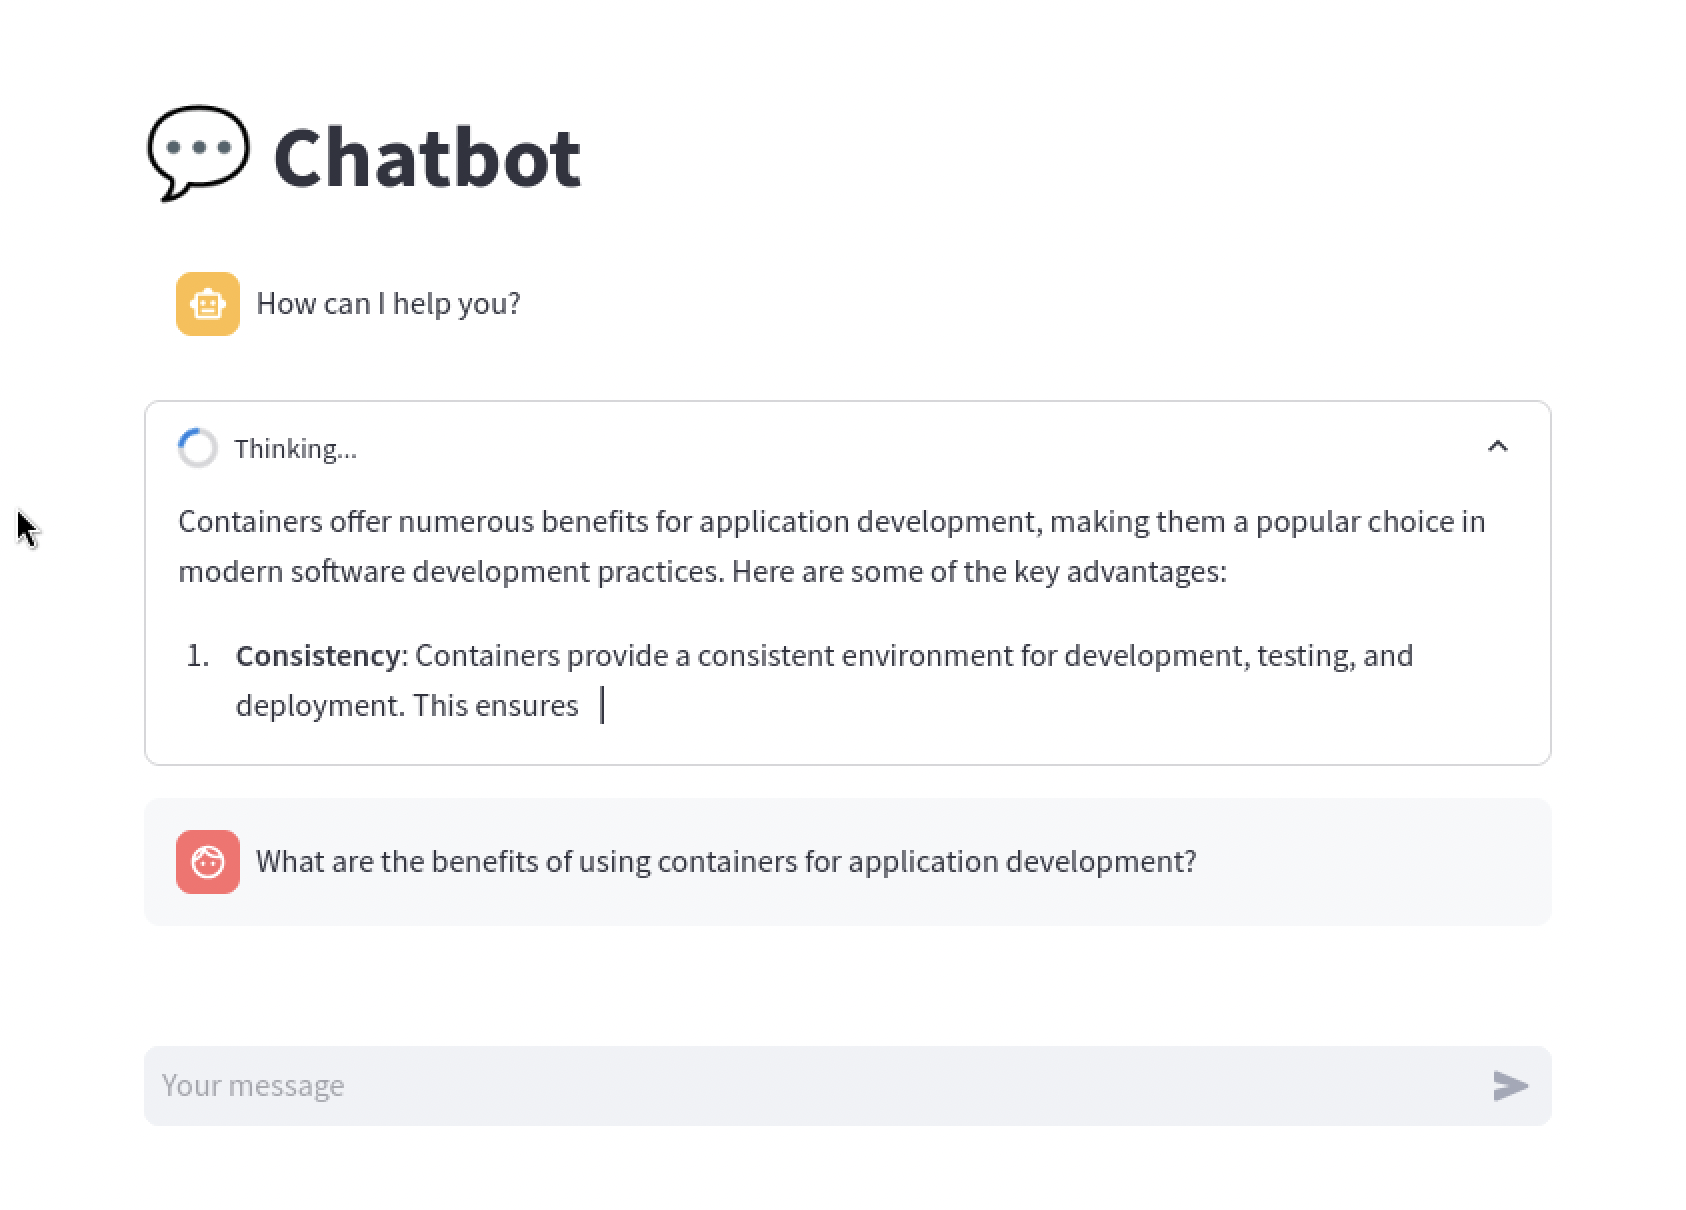
-
Take a moment to appreciate what just happened: you downloaded an AI model, spun up a fully working chatbot application, and tested it — all locally, without any cloud API keys or third-party services. This is the kind of safe experimentation that the AI Lab enables.
Developer desktops typically don’t have enough horsepower to do much beyond simple prompts with local models. In Module 2, we’ll connect to Parasol’s IT-hosted AI services for production-quality performance.
Delete the running recipe
-
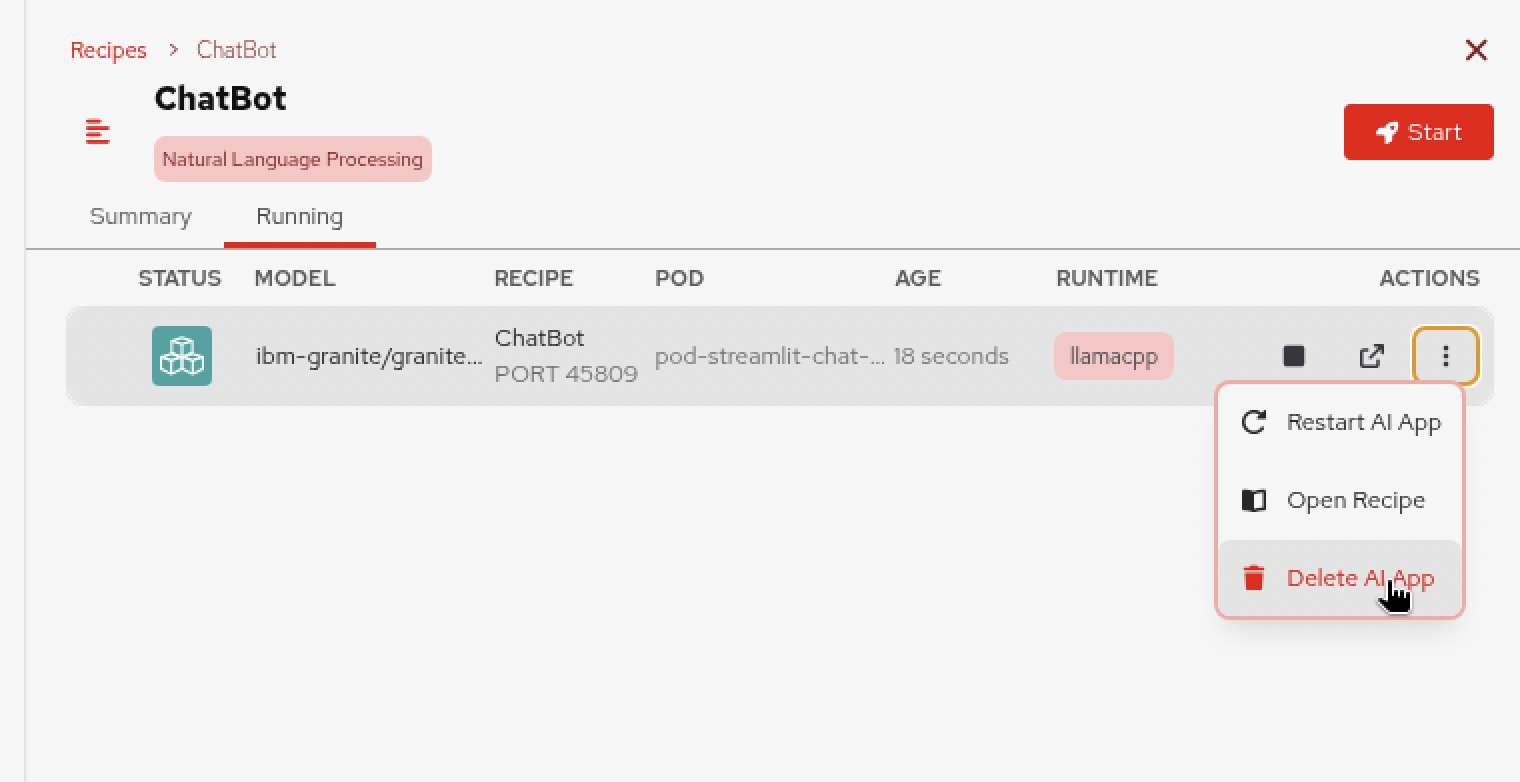
Now that you’ve seen the recipe in action, let’s clean it up. In Podman Desktop, navigate to the AI Lab and click on the Running tab for the chatbot recipe.
-
Click the three-dot menu and select Delete AI App to stop the running recipe. The source code that was cloned remains, and we’ll look at that next.
Inspect the recipe source code
The recipes in AI Lab aren’t black boxes. You can inspect their source code, understand how they work, and take inspiration for building your own AI applications.
-
Return to Podman Desktop and navigate to the chatbot recipe in AI Lab.
-
Click the Open in VS Code button on the recipe. Click Yes on the Open External Website dialog.
-
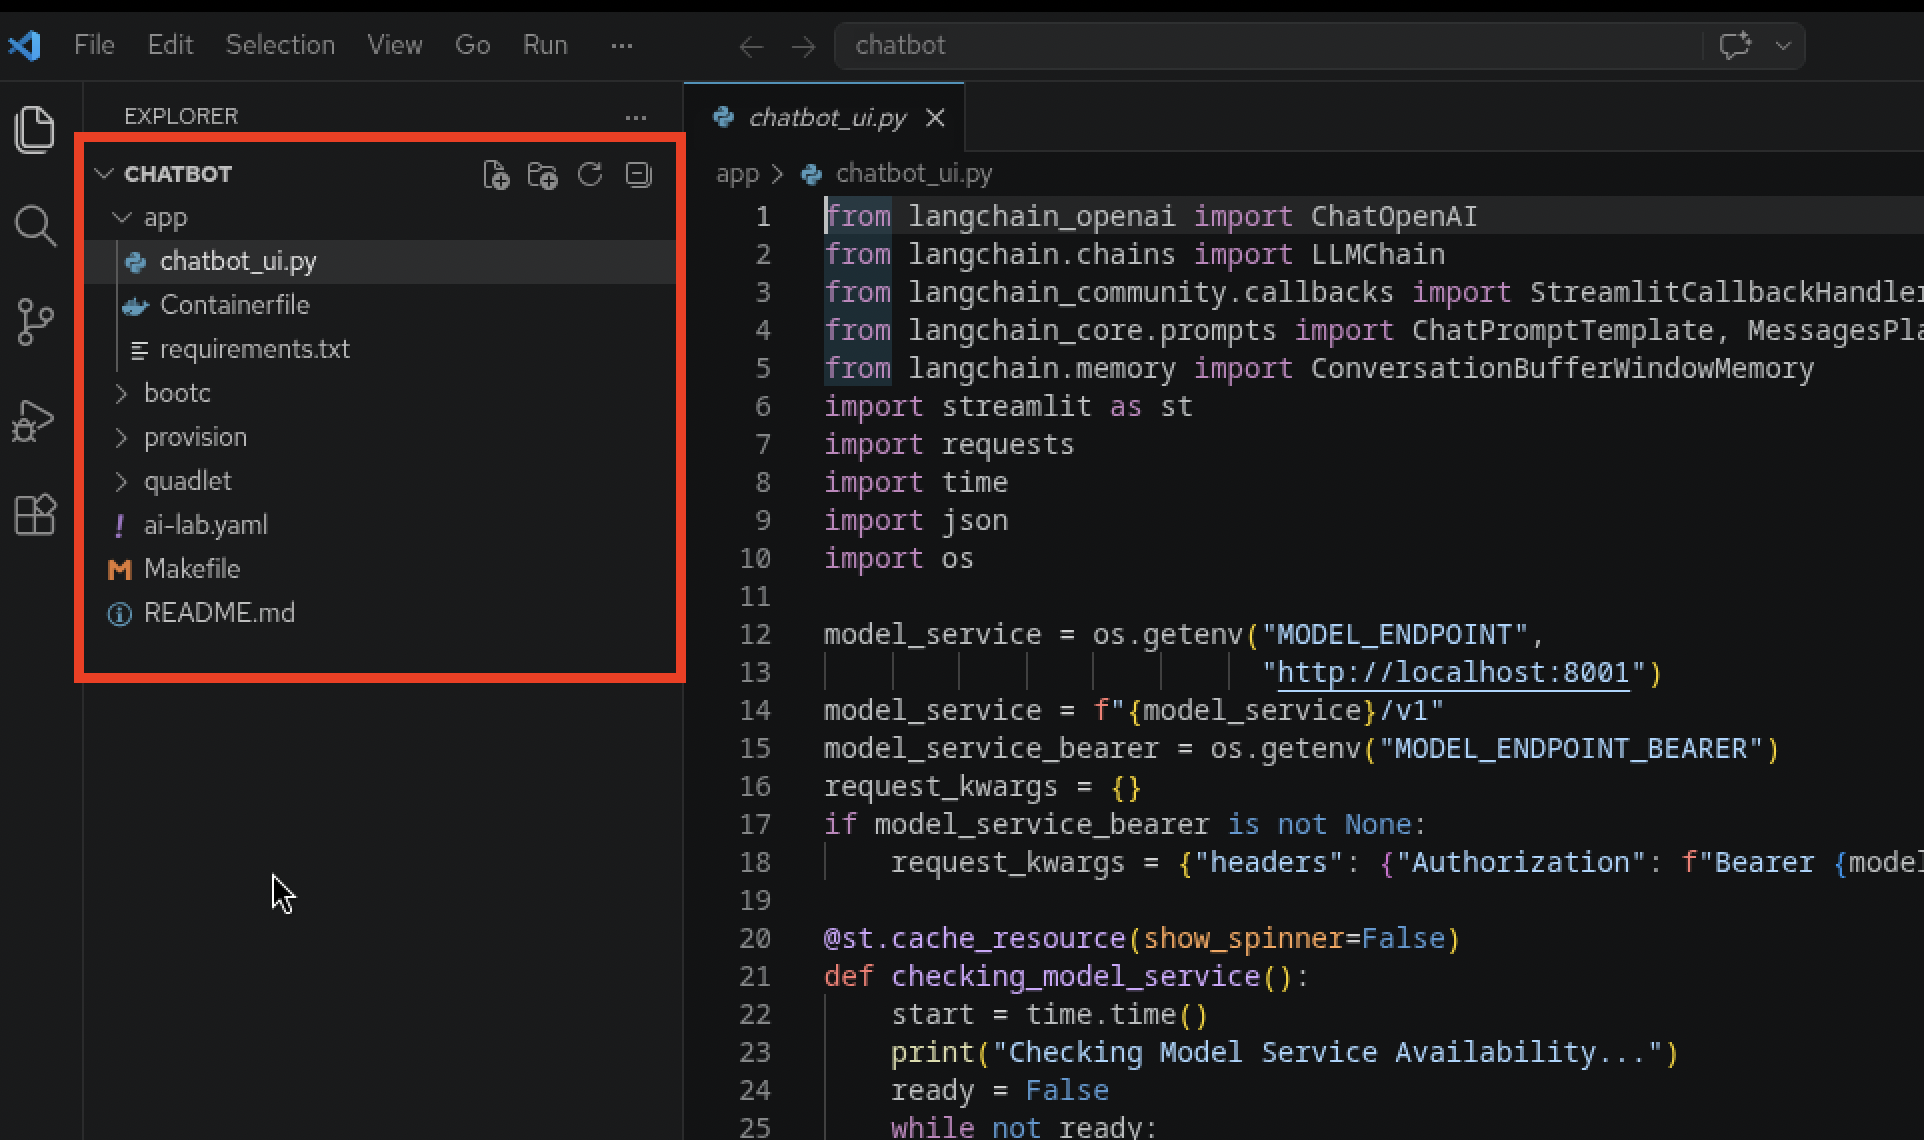
Skip the GitHub welcome screen (we’re using GitLab for this workshop). Dismiss the Git dialog about opening the parent repository. This opens the locally cloned recipe source code in VS Code.
If prompted to install the Python extension, you can optionally install it for enhanced syntax highlighting and code navigation. It’s not required for this workshop. 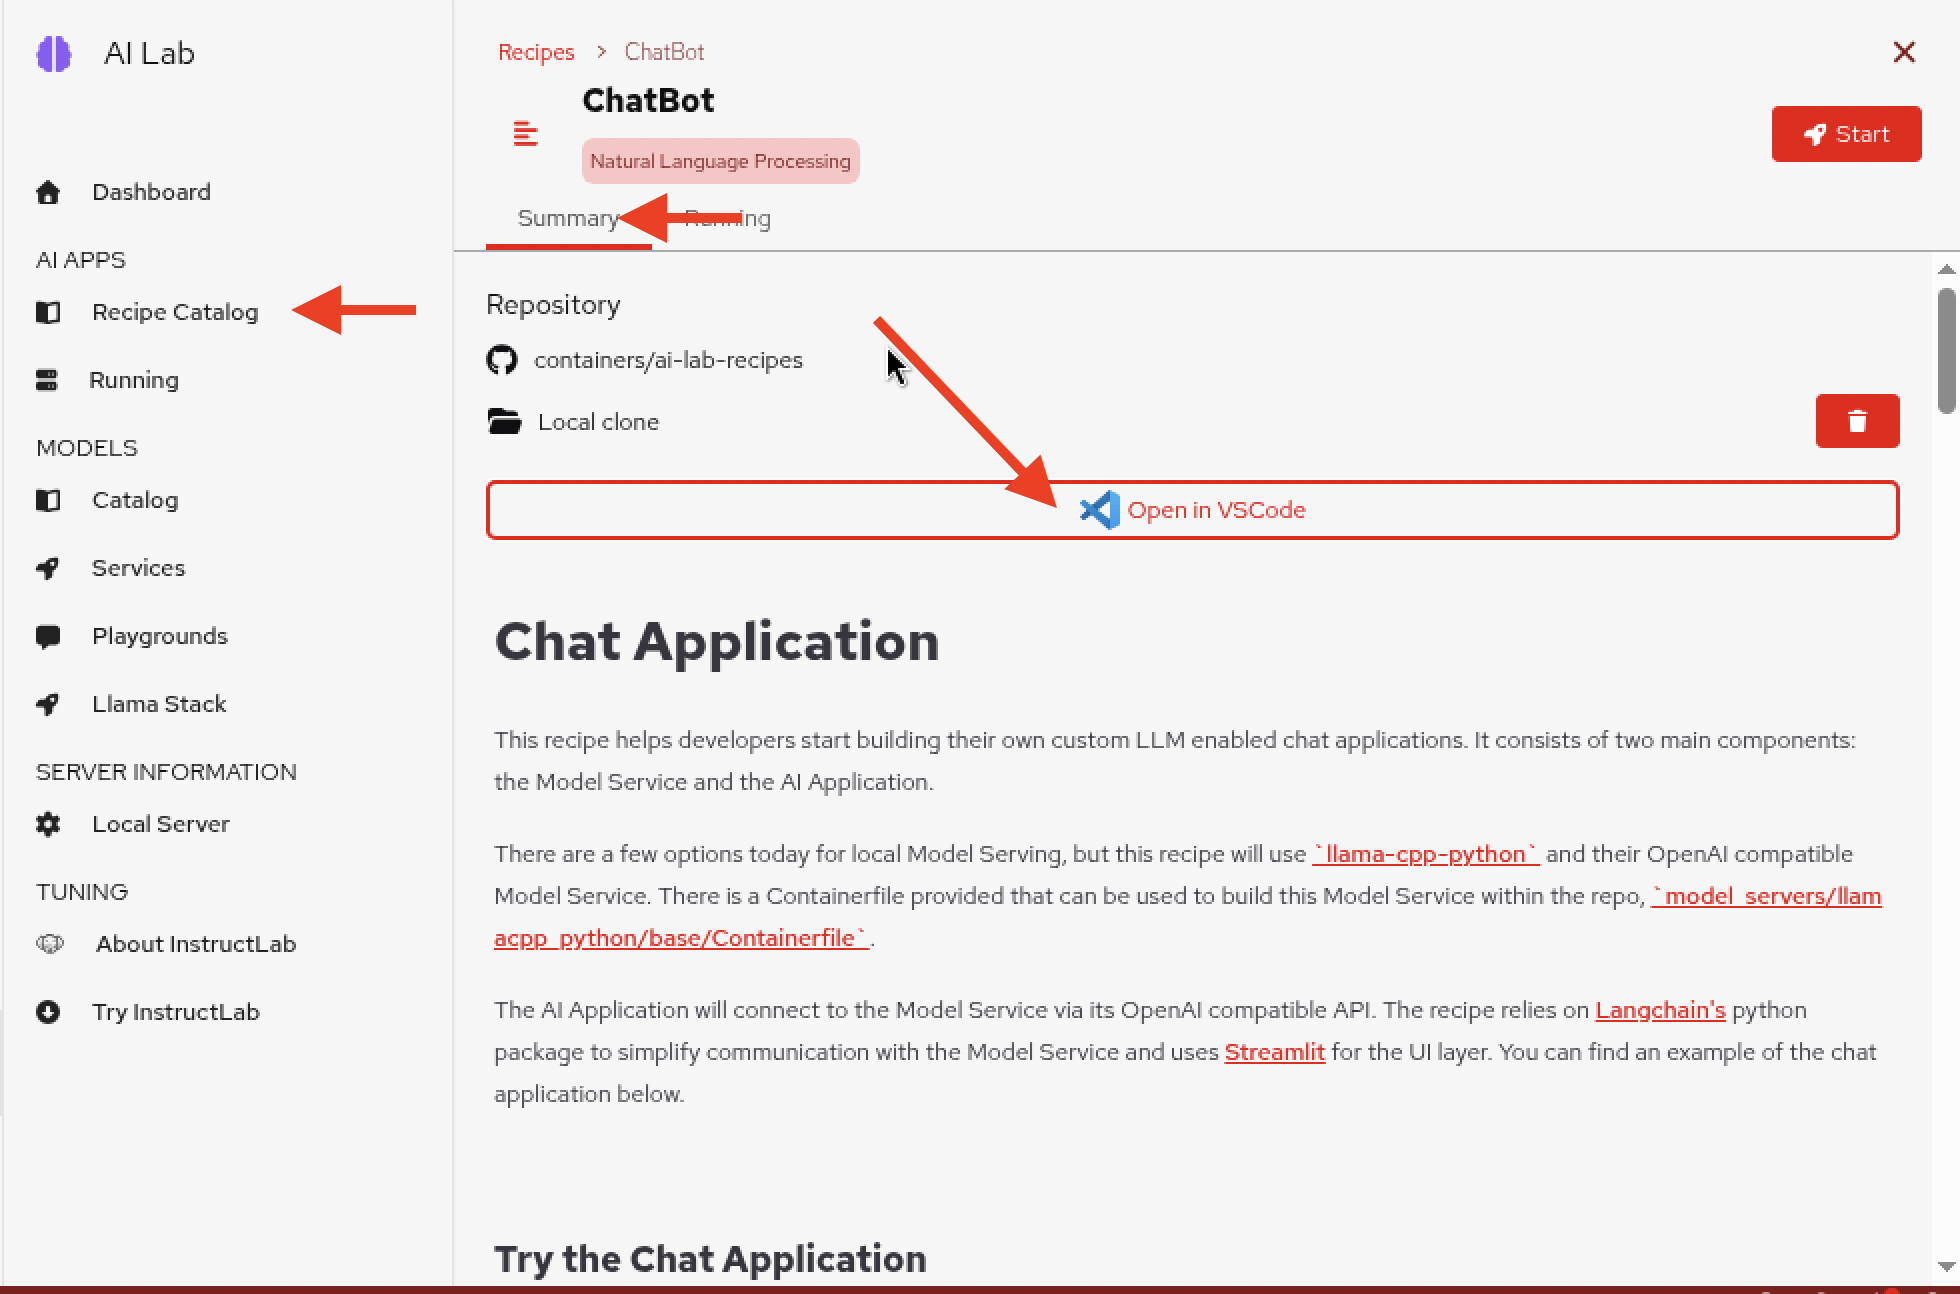
-
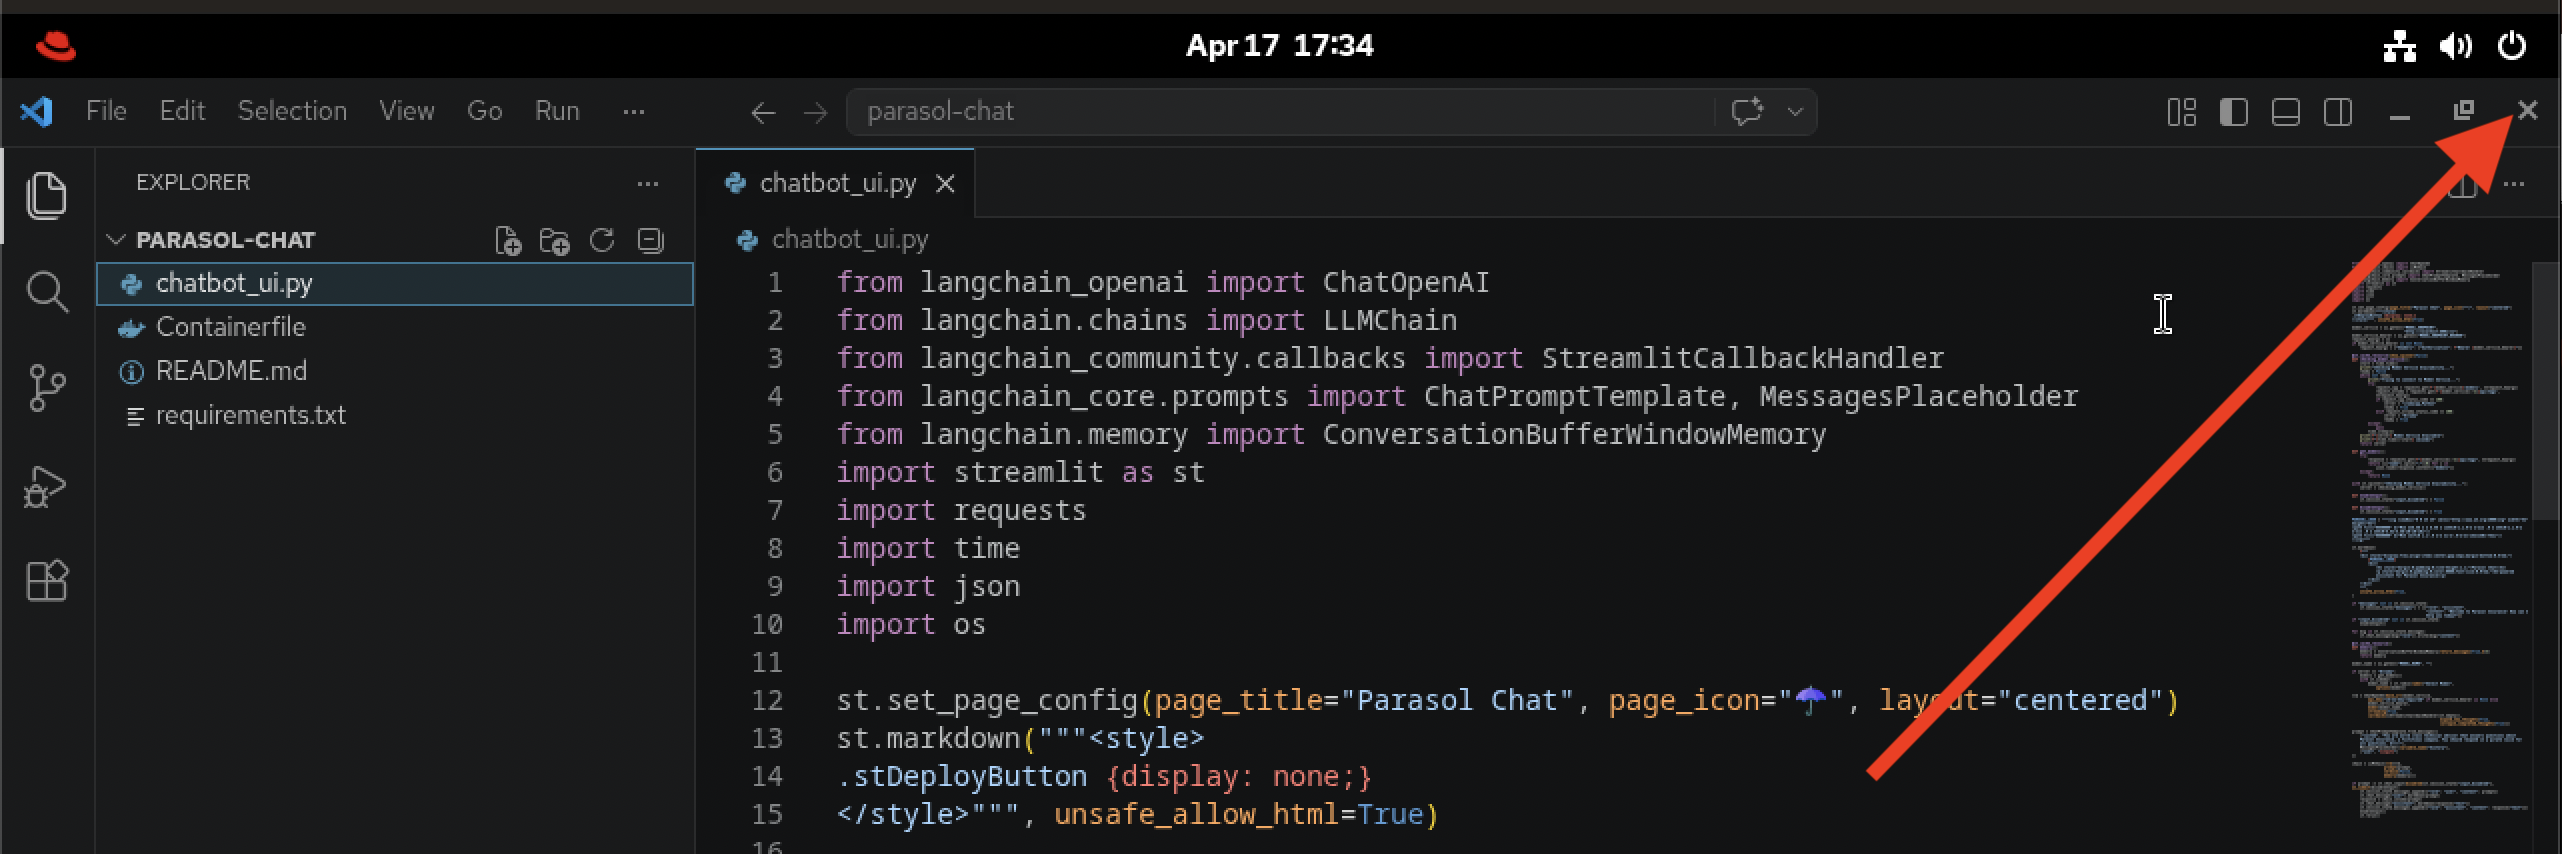
In VS Code, explore the project structure. Notice how the application is put together (most of the action is in the
chatbot_ui.pyfile):-
How it connects to the AI model endpoint
-
How the chat interface handles conversation history
-
How environment variables are used to configure the model connection
-
-
This is exactly the kind of inspiration that Parasol’s developers have been using. By exploring these recipes, the team has been learning patterns for building AI-powered applications — and they’ve used those patterns to build something of their own, which you’ll work with in the next module.
-
Close the VS Code window when you’re done exploring (you’ll open a fresh one in Module 2 with different source code, and having two open can be confusing).
Module summary
You’ve successfully completed the provisioning and exploration module — and it only took a fraction of the time Parasol’s old onboarding process would have required.
What you accomplished:
-
Self-serviced a fully configured RHEL 10 development workstation through Red Hat Developer Hub — no tickets, no waiting
-
Explored the Red Hat build of Podman Desktop and its extension ecosystem
-
Installed the AI Lab extension and explored different models and recipes
-
Ran a chatbot recipe locally and inspected its source code in VS Code
Key takeaways:
-
Red Hat Developer Hub eliminates the developer onboarding bottleneck with self-service templates
-
Podman Desktop provides a powerful, extensible desktop container environment
-
The AI Lab extension gives developers a governed, local-first approach to AI experimentation — eliminating the need for shadow AI services
-
The recipe catalog provides inspiration and working patterns that teams can use to build their own AI-powered applications
Next steps: In Module 2, you’ll work with an application that Parasol’s team built after taking inspiration from these recipes — the Parasol Chat app. You’ll customize it, build and test it locally, push it to the OpenShift registry, and deploy it to the cluster.