VM Migration with the Migration Toolkit for Virtualization
OpenShift Virtualization includes a simple way to migrate your existing virtual machines from other hypervisors with the included Migration Toolkit for Virtualization (MTV).
This demo highlights the migration of virtual machines from VMware vSphere to OpenShift.
We will use the Migration Toolkit for Virtualization to migrate virtual machines from VMware vSphere to OpenShift Virtualization.
Review the VMware Environment and Sample Application
SAY:
A three-tier application has been deployed on VMware for us to migrate to OpenShift.
The application is accessible from the following link: WebApp. The application will display a visitor counter, and the hostname of the webserver that returned your request.
This simple application consists of four virtual machines:
-
One HAproxy system that redirects traffic to the web servers.
-
One Linux system running a MariaDB database.
-
Two Microsoft Windows servers with IIS hosting a PHP application connecting to the database.
| One benefit of migrating to OpenShift is that, if you have a simple loadbalancer configuration, you do not need to migrate the HAproxy VM (which acts as a load balancer). OpenShift already handles network traffic and load balancing natively, if desired. |
Now, we will navigate to the VMware vCenter and take note of the names of the virtual machines we want to migrate.
-
database-placeholder_guid -
winweb01-placeholder_guid
| Only migrate the database and ONE of the webservers, so we’ll have one free to migrate automatically with Ansible in the next module. We cannot migrate a virtual machine twice; mac addresses are not unique. |
DO:
-
Navigate to the vCenter Console
-
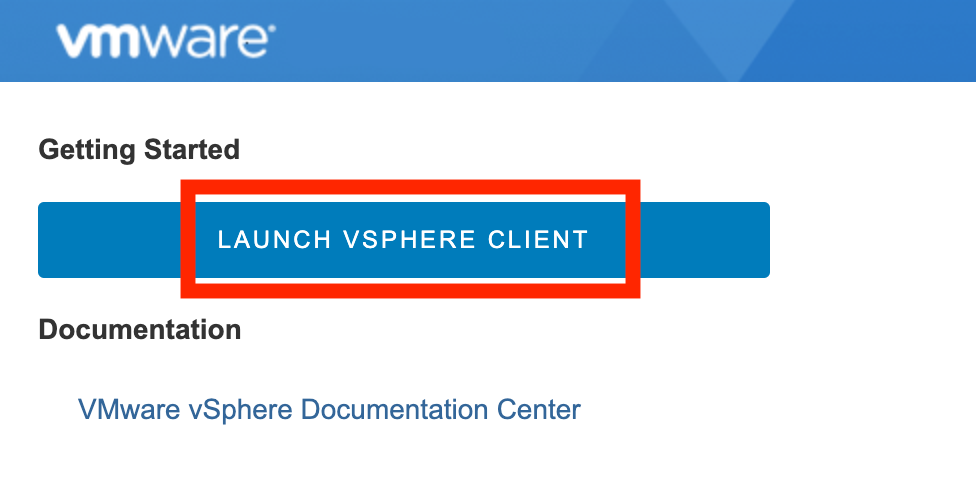
If necesary, click LAUNCH VSPHERE CLIENT
-
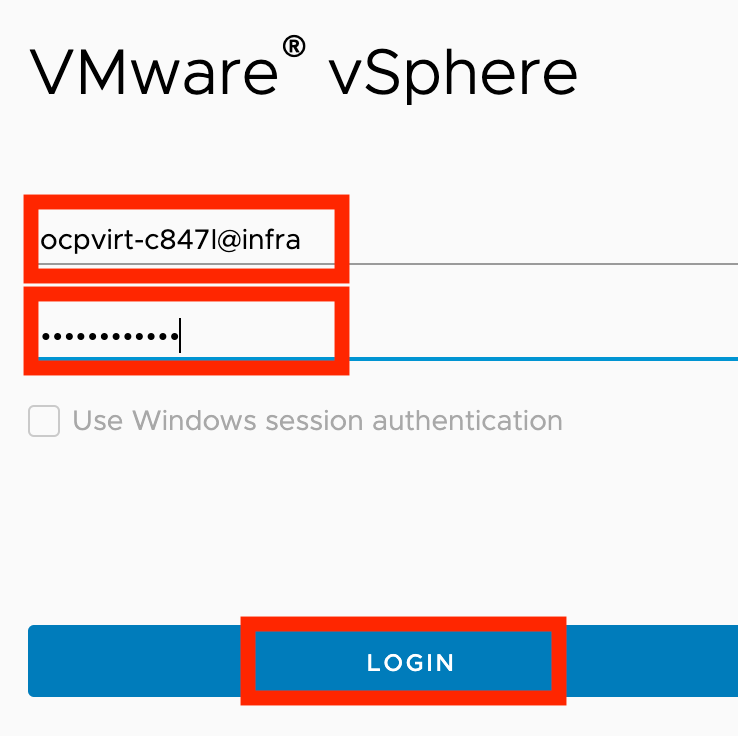
Login with the following credentials:
-
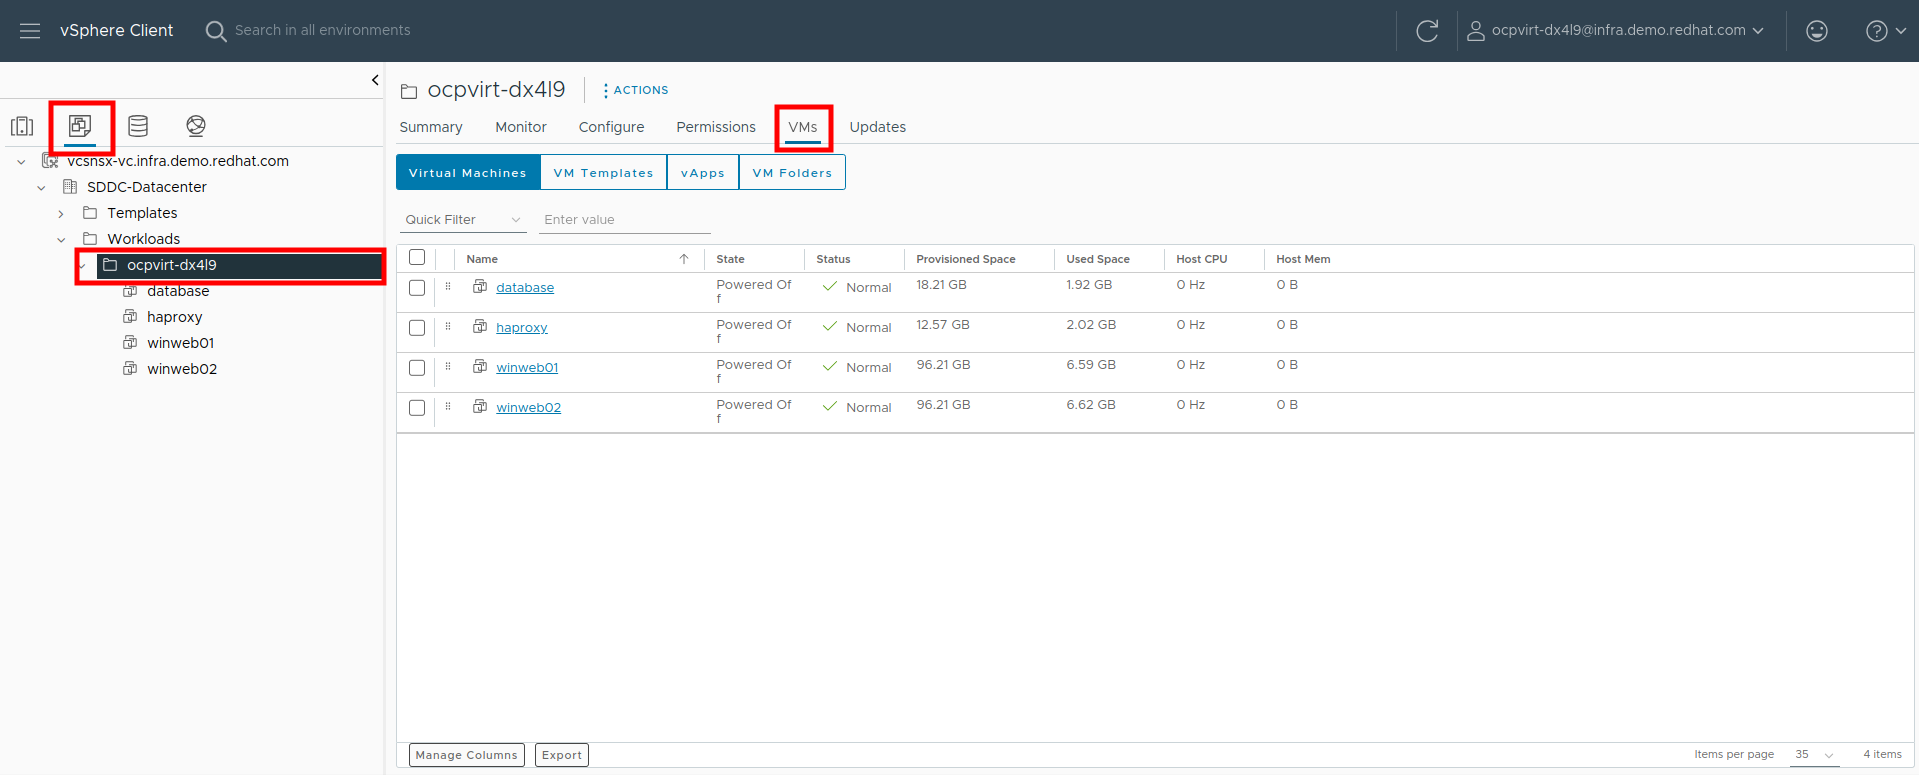
By default, you’ll land in the Inventory view at the top of the navigation tree. Click the Workloads icon and expand the navigation tree until you see the folder that matches your username and the four VMs under it. Click the VMs tab at the top of the screen to view the VM details.
SAY:
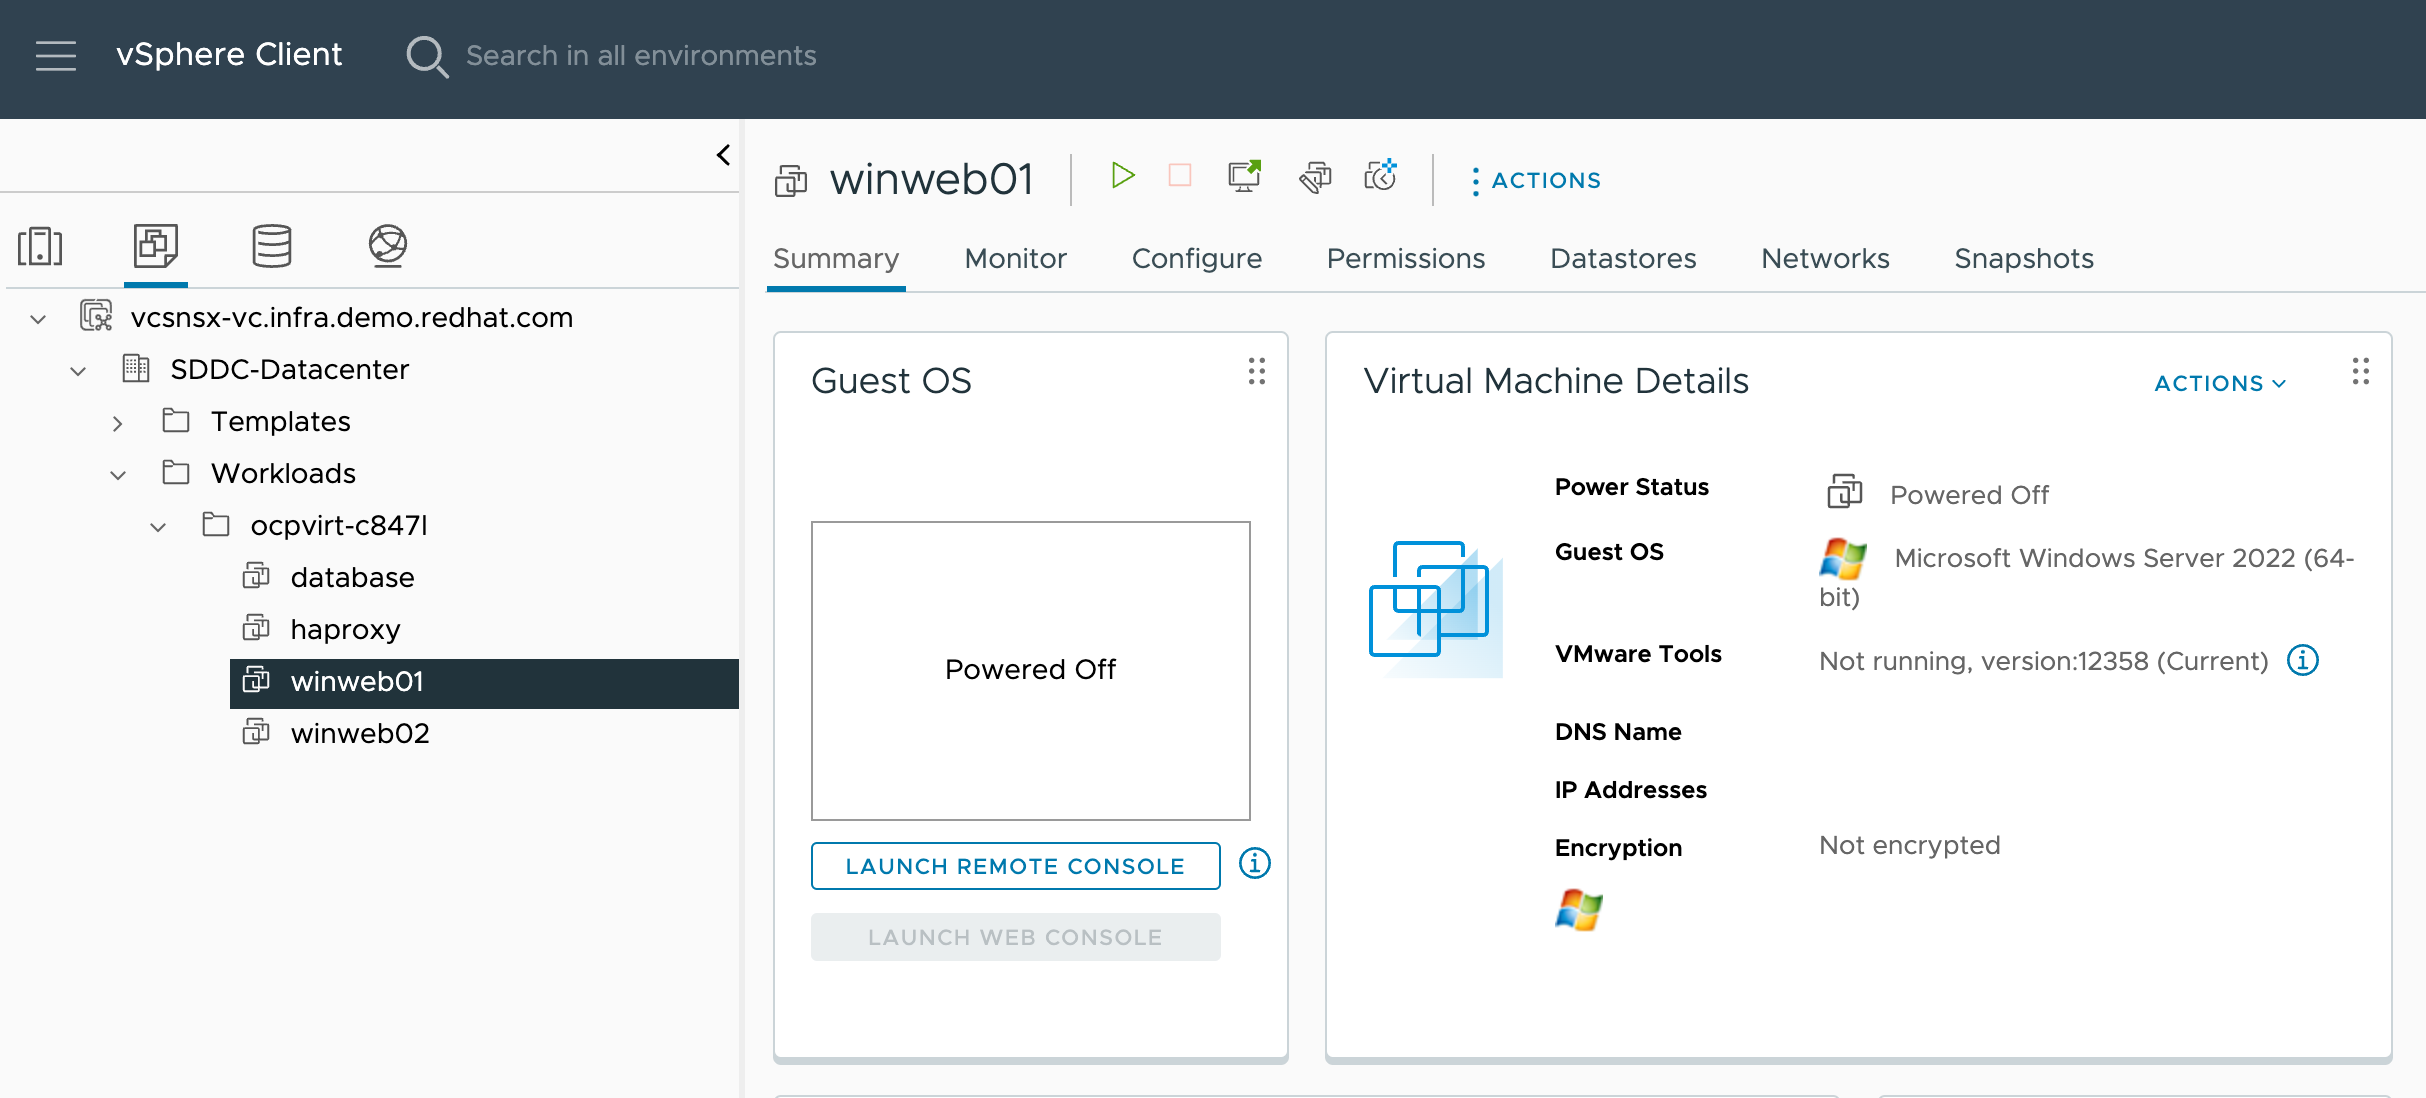
For the purposes of this demo, we have Windows and CentOS VMs to migrate. Check the operating system details by looking at the virtual machines.
DO:
| Do not start these VMware VMs. We are not supporting "warm" migrations in this demo. If your customer wants you to start and investigate these VMS, you may do so but must stop the VMs before beginning migration. |
Migration Toolkit for Virtualization
SAY:
Let’s now look at how we’re going to migrate the virtual machines.
The Migration Toolkit for Virtualization has Providers that support various virtualization platforms.
We’ll be using the VMware Provider as our migration source and the Host Provider as our migration target.
Let’s have a look at them now.
DO:
-
Navigate to the OpenShift Console.
-
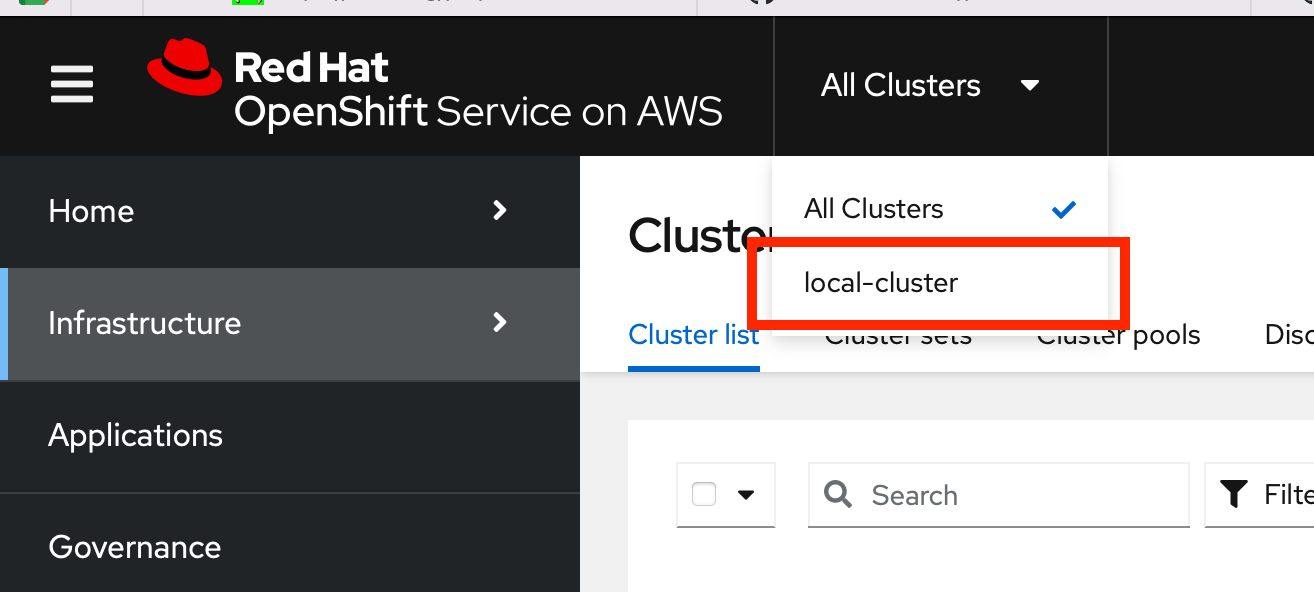
Select local-cluster from the All Clusters menu at the top.
-
Go to Migration → Providers for virtualization
SAY:
Our list of providers contains two providers: Host and VMware.
VMware will be the source provider, and Host is of type OpenShift, which will be the target provider.
Create a Migration Plan
SAY:
Now that we have reviewed our environment, it is time for us to create a Migration Plan.
The Migration Plan selects which VMs to migrate from VMware vSphere to Red Hat OpenShift Virtualization and specifies how to execute the migration.
First, we’ll create a plan that indicates the source provider, VMware and the VMs we want to migrate.
DO:
-
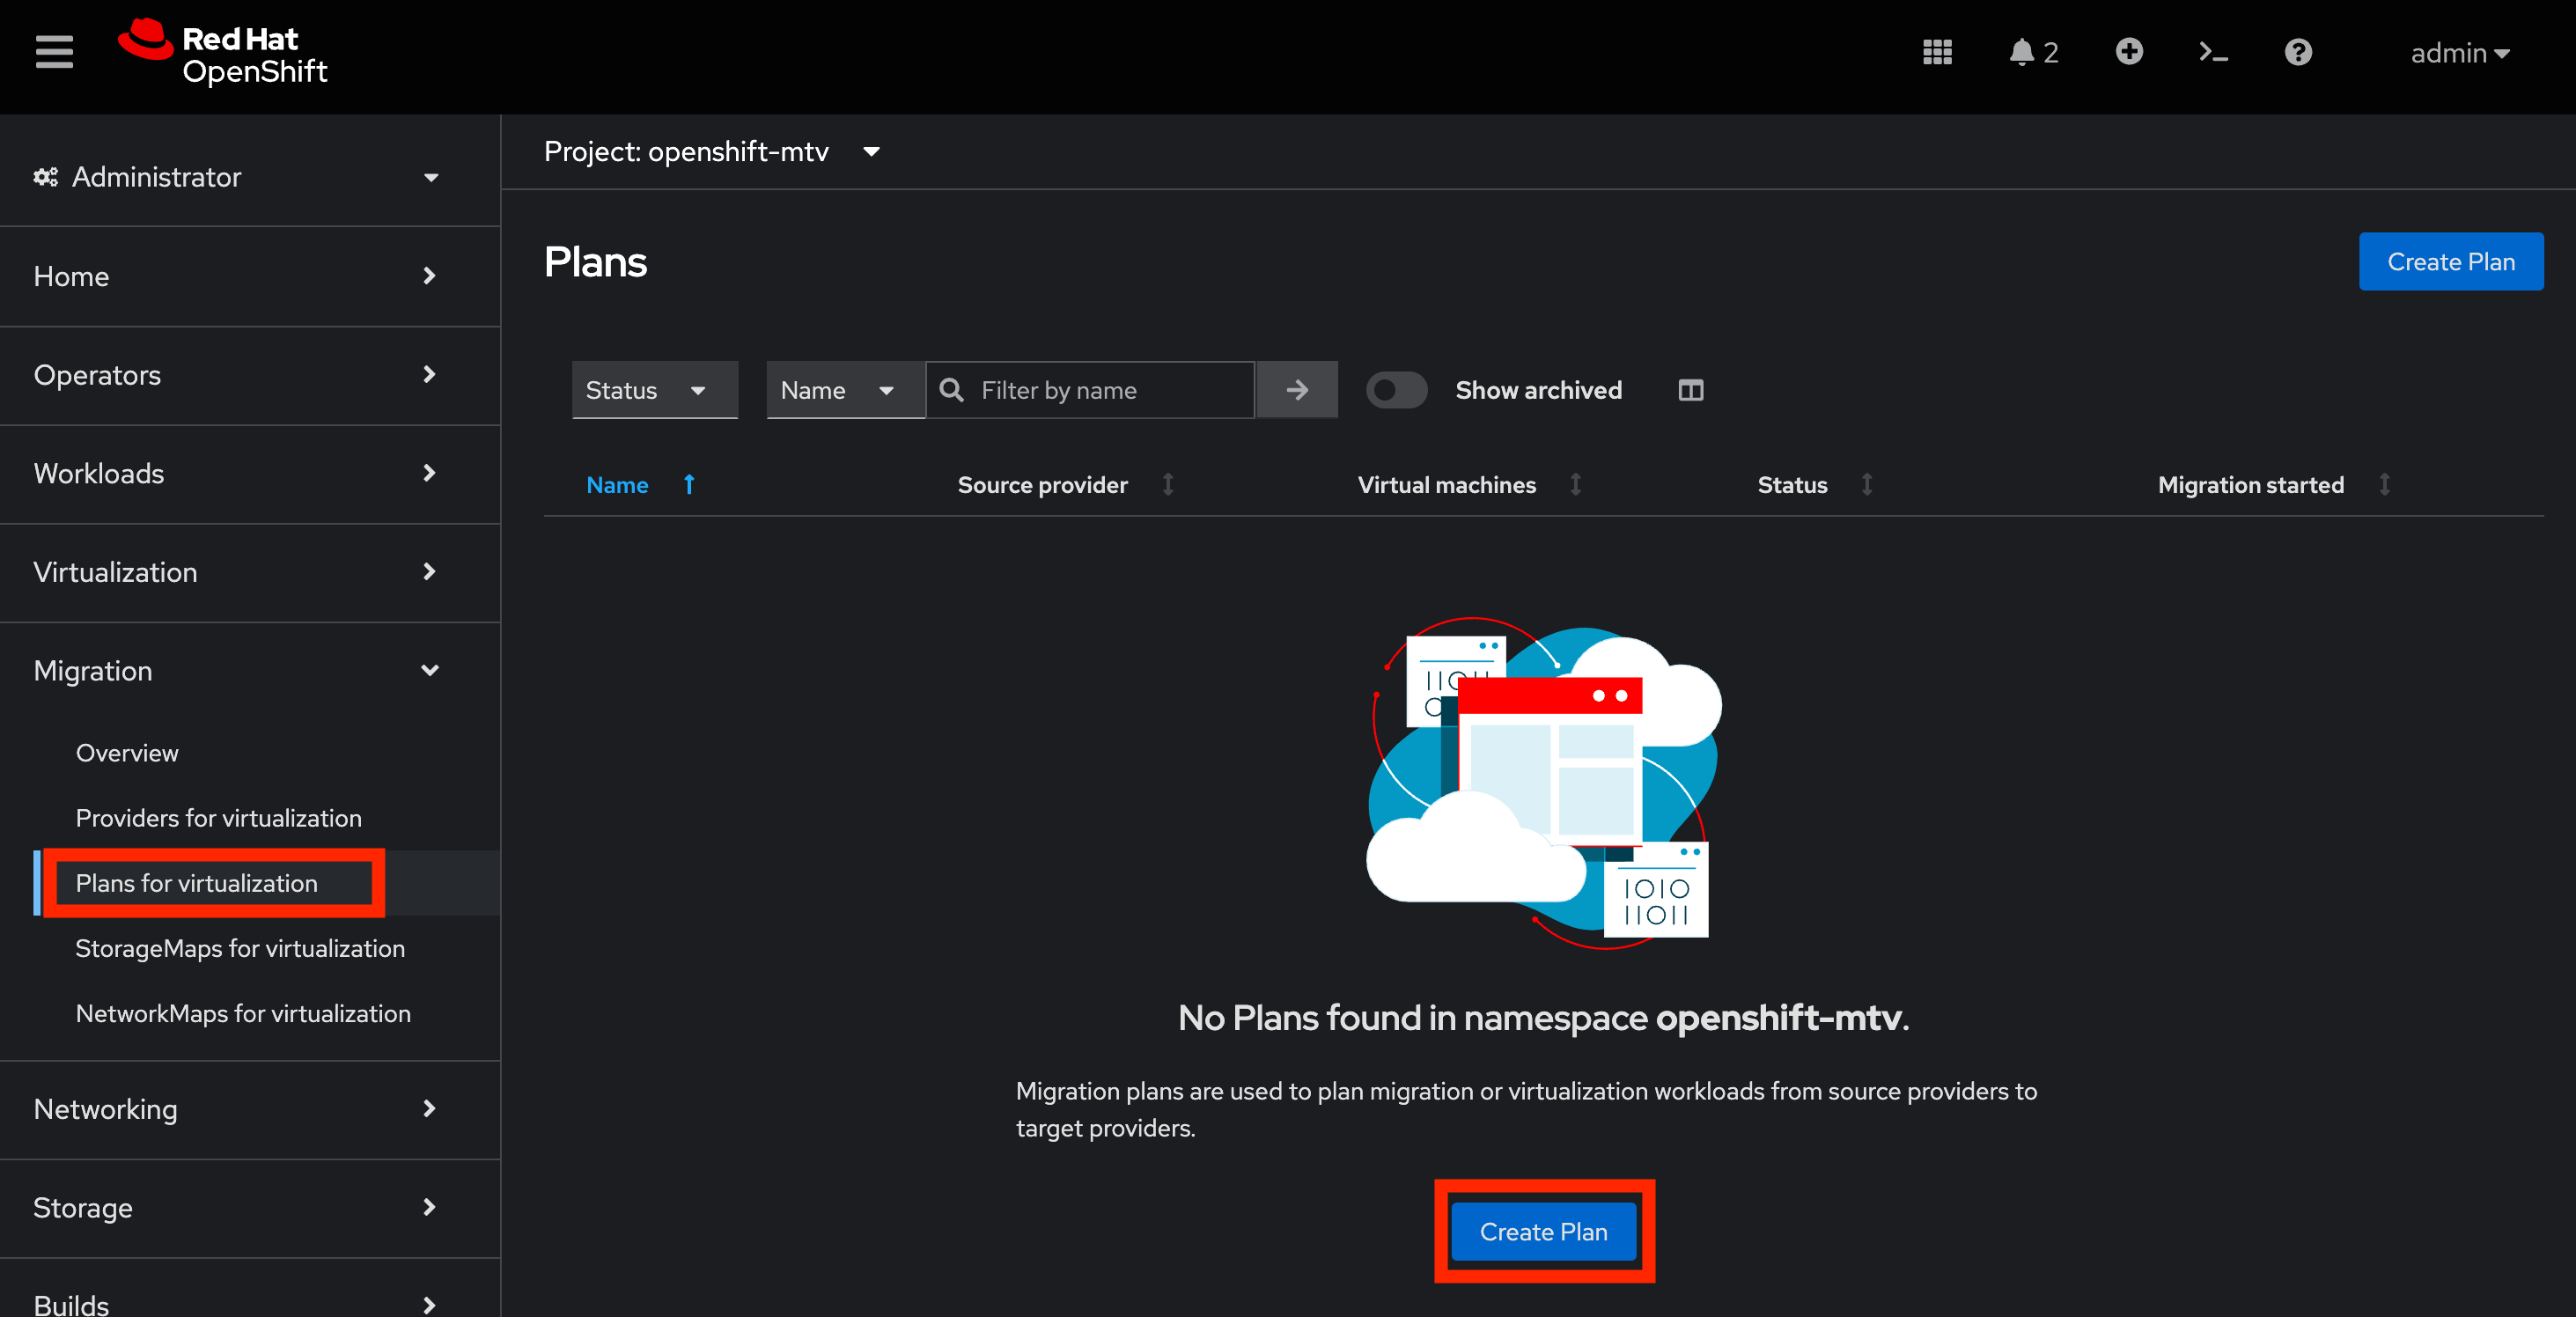
Navigate in the left menu to Migration → Plans for virtualization and press Create plan.
-
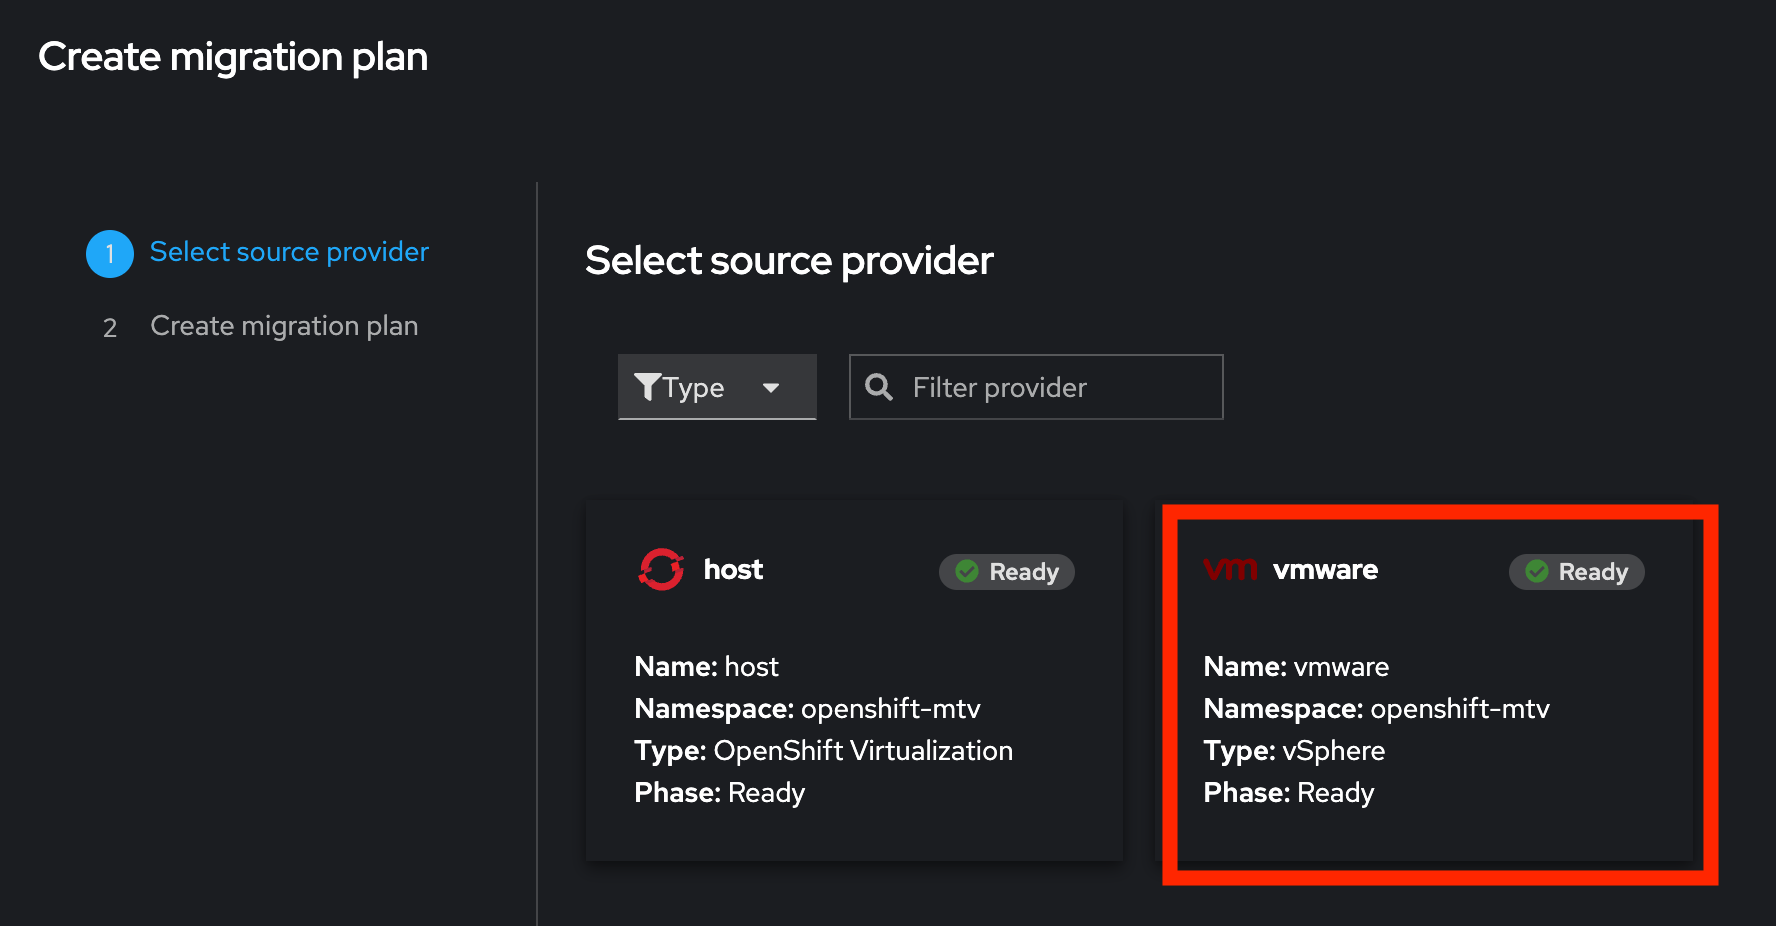
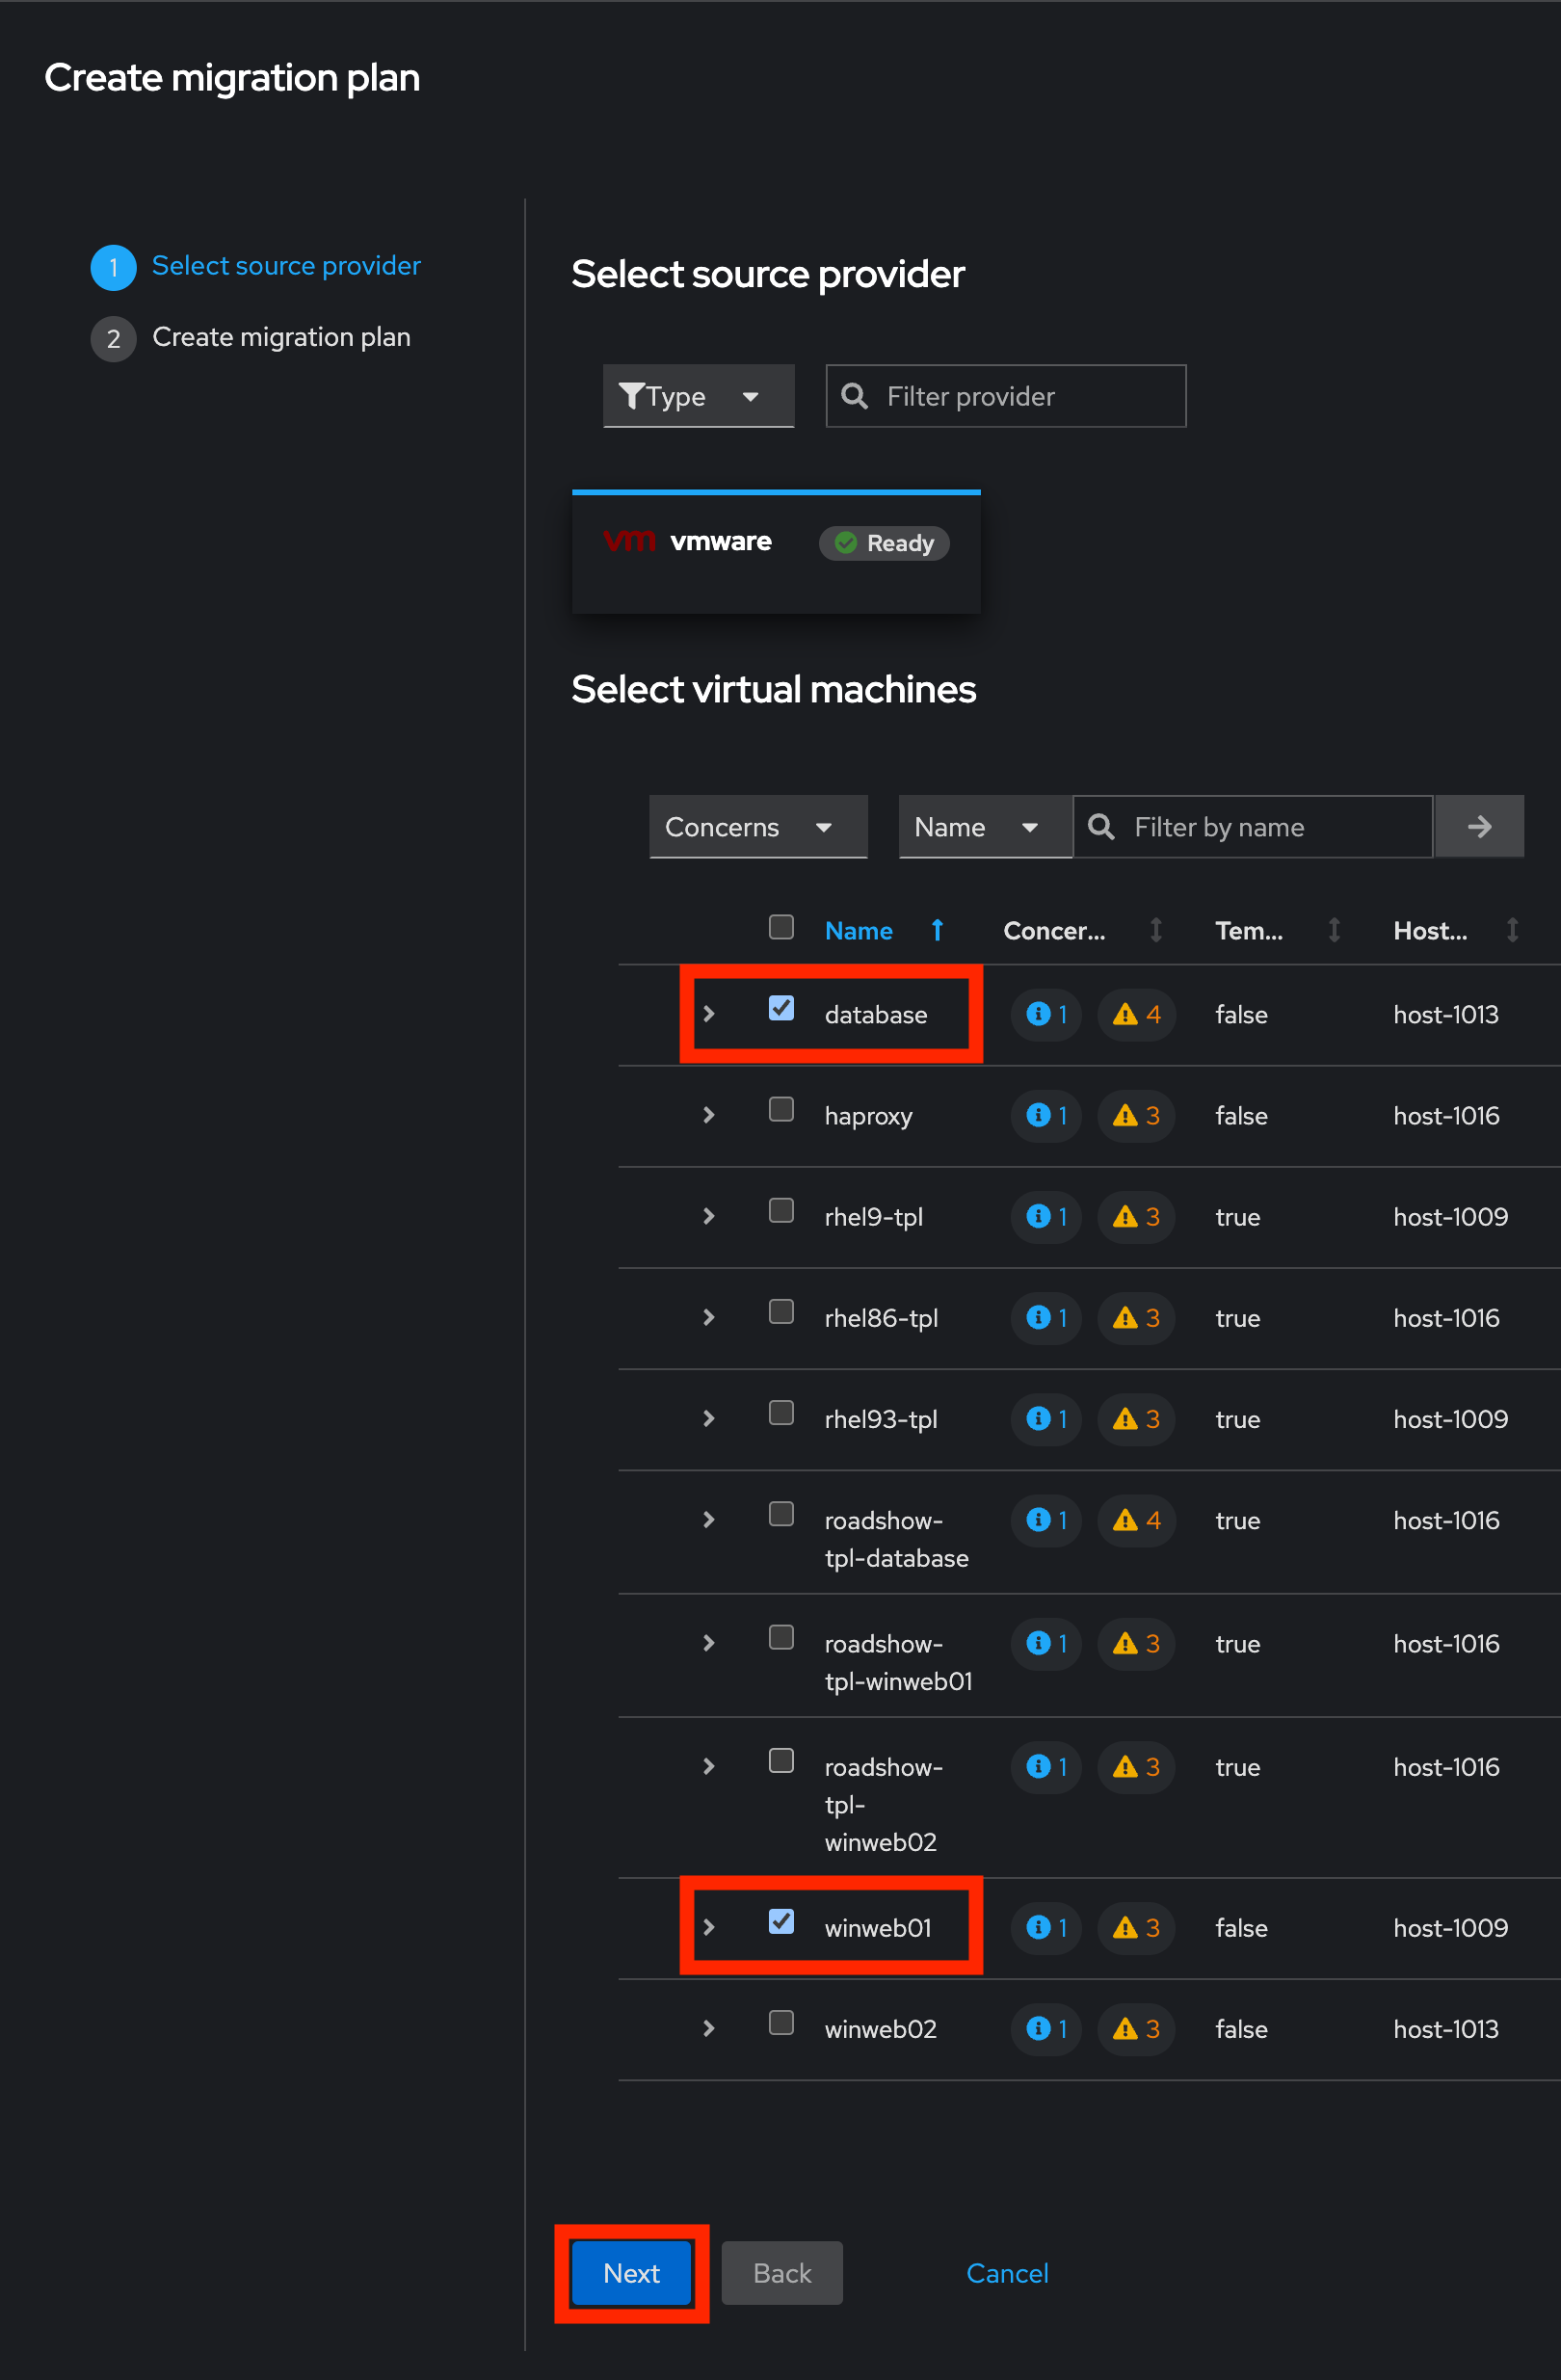
You will be asked to select the source provider that you intend to migrate from. Click on the VMware tile, and the next page will open immediately.
SAY:
Next, we’ll select the VMs that we want to migrate.
| As an aside: The VMs are auto-discovered by Migration Toolkit for Virtualization, and are organized into "Concerns." Concerns are an advanced feature, which is part of the Validation service that uses policy rules to check the suitability of each virtual machine (VM) for migration. The Validation service generates a list of concerns for each VM, which are stored in the Provider Inventory service as VM attributes. The web console displays the concerns for each VM in the provider inventory. |
DO:
-
On the next page select the two VMs you would like to move:
-
database-placeholder_guid -
winweb01-placeholder_guid
-
| The VMs are far too large to migrate in this short demo. But that’s OK, we have VMs that are already migrated to show after we’ve kicked off this migration process. |
SAY:
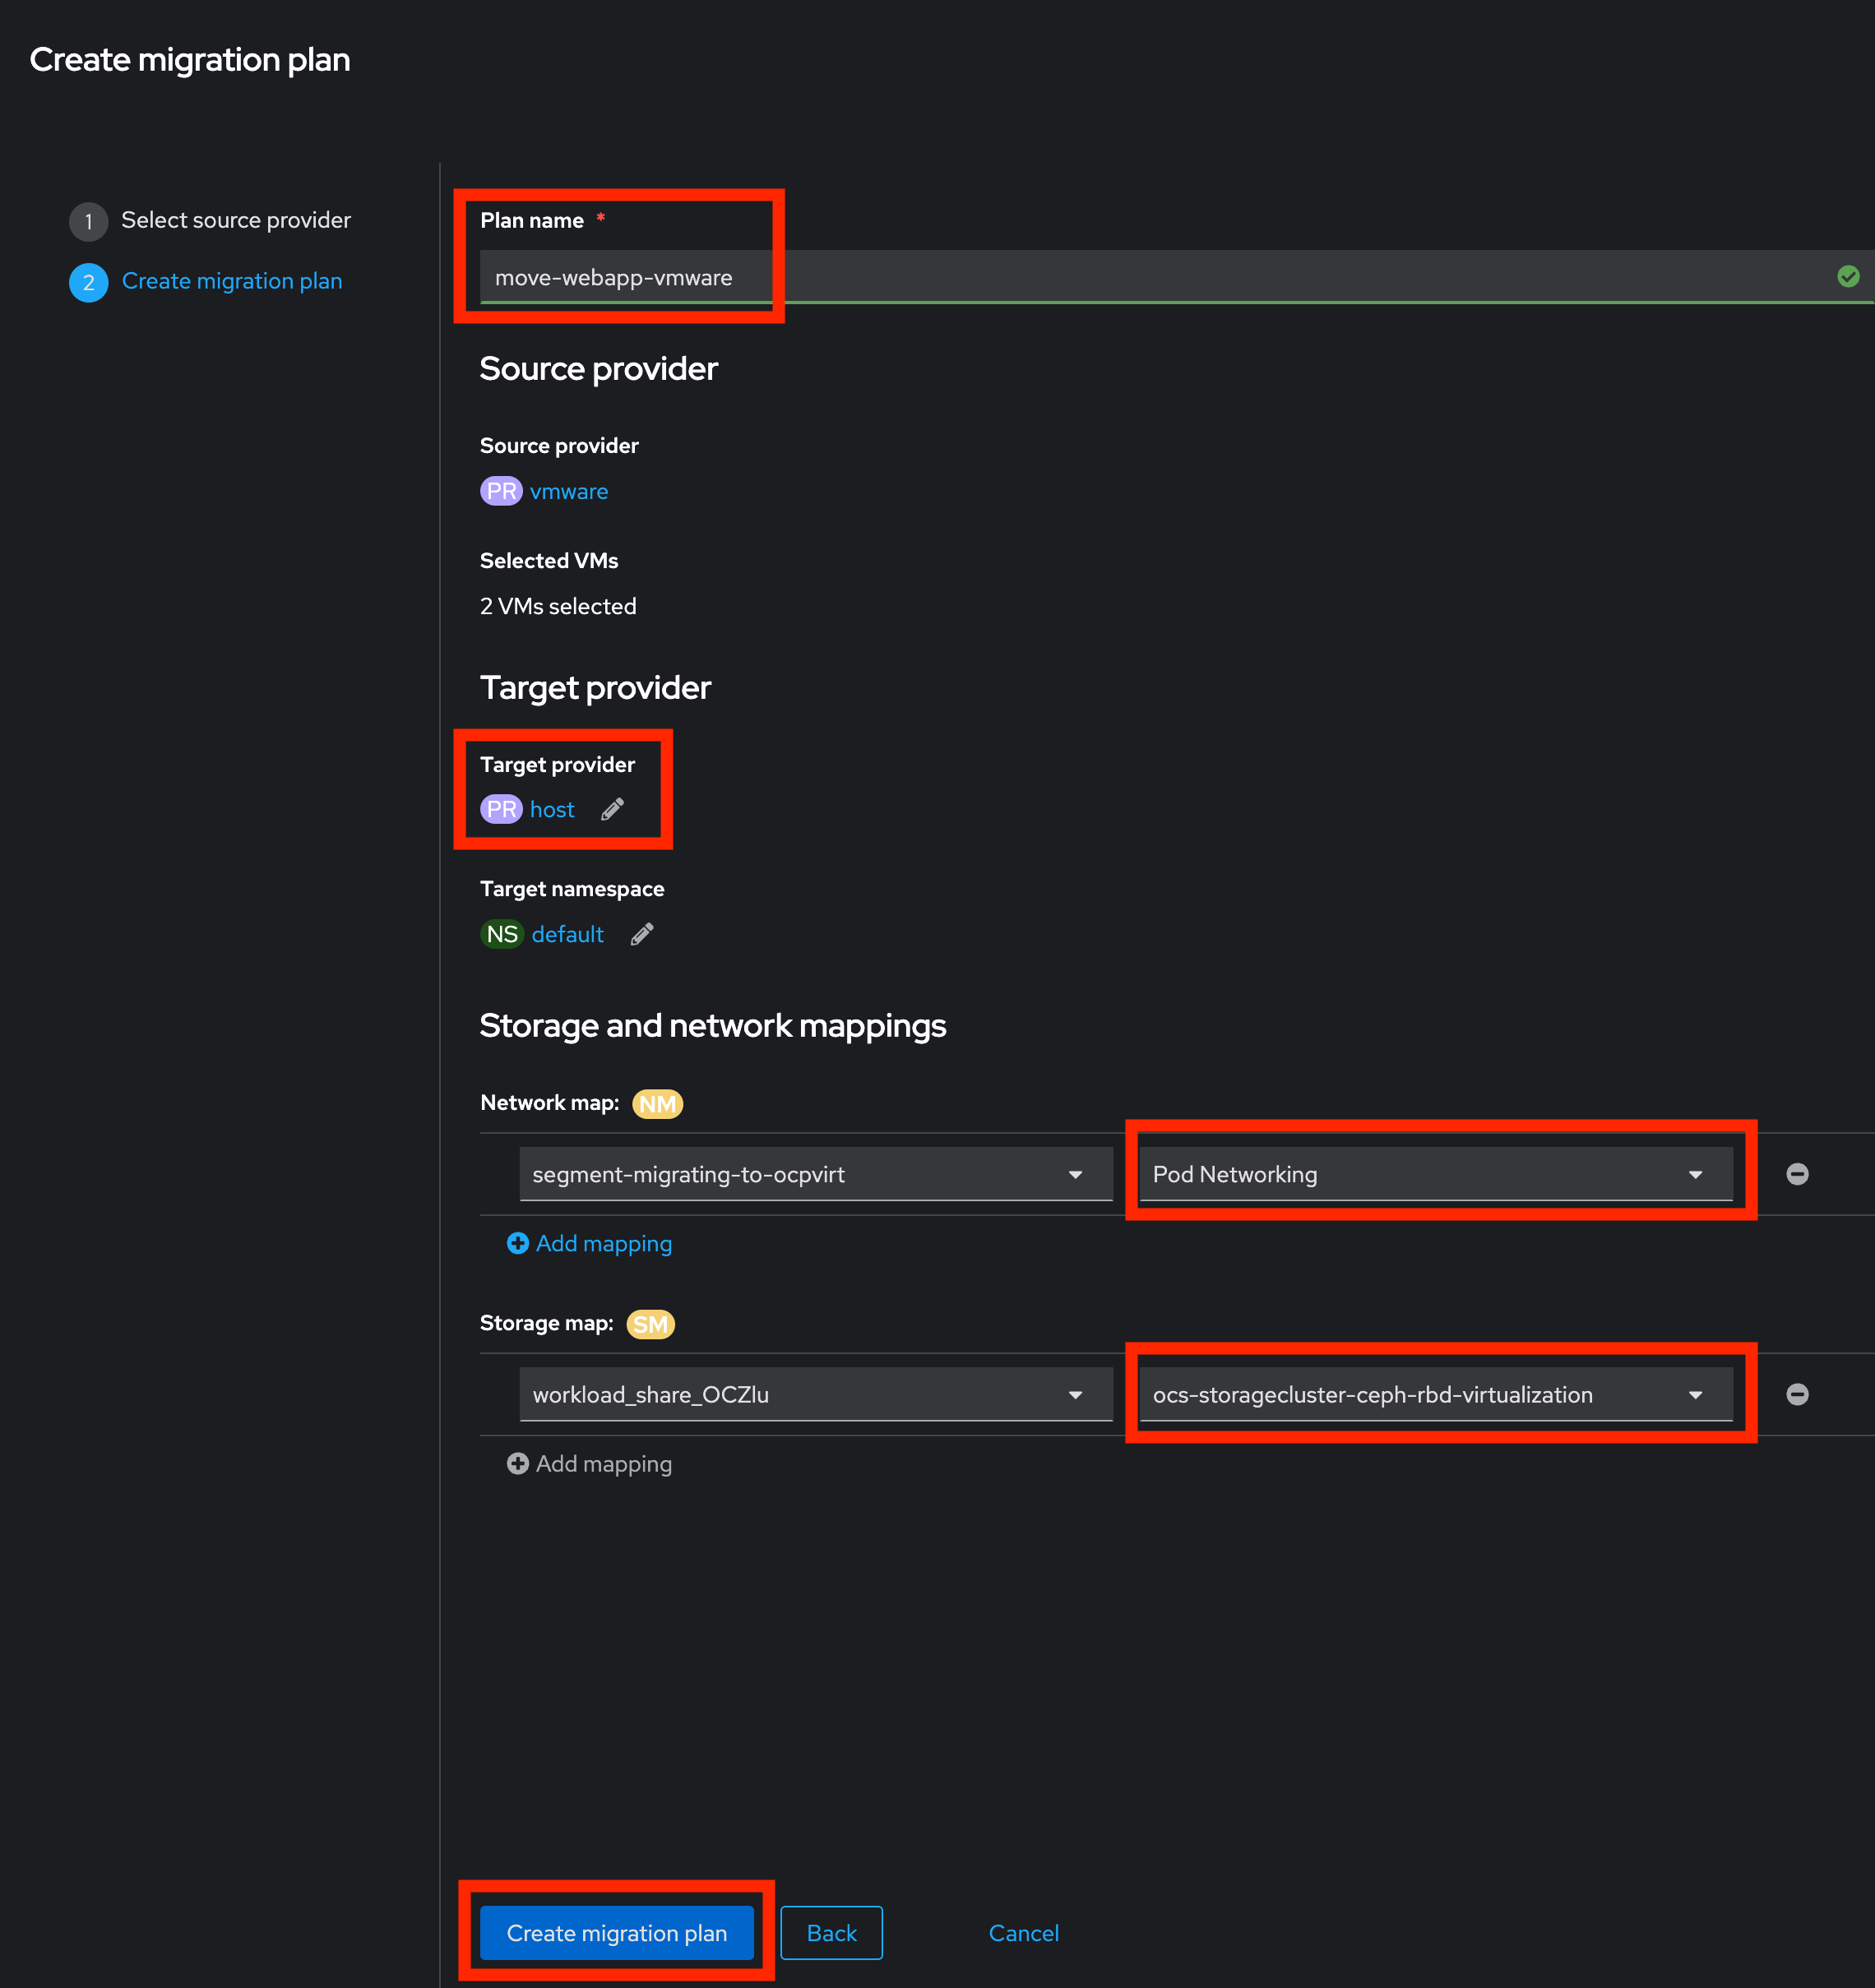
On this screen we provide details for of the migration plan.
We will give our plan a name, and make sure we’re using the proper network maps and storage maps.
DO:
-
Several details will already be filled in for you, but you will have to make a few minor modifications to ensure that the VMs land in the correct namespace, and that the networks and storage options map correctly.
Please fill in your migration plan with the following values:
-
Plan name: move-webapp-vmware
-
Target Provider: Host
-
Network map: Pod Networking
-
Storage map: ocs-external-storagecluster-ceph-rbd
-
-
Click Create migration plan.
SAY:
Now we wait a moment for our Migration Plan to be analysed by the system and ready to start the migration.
Let’s start our migration!
DO:
-
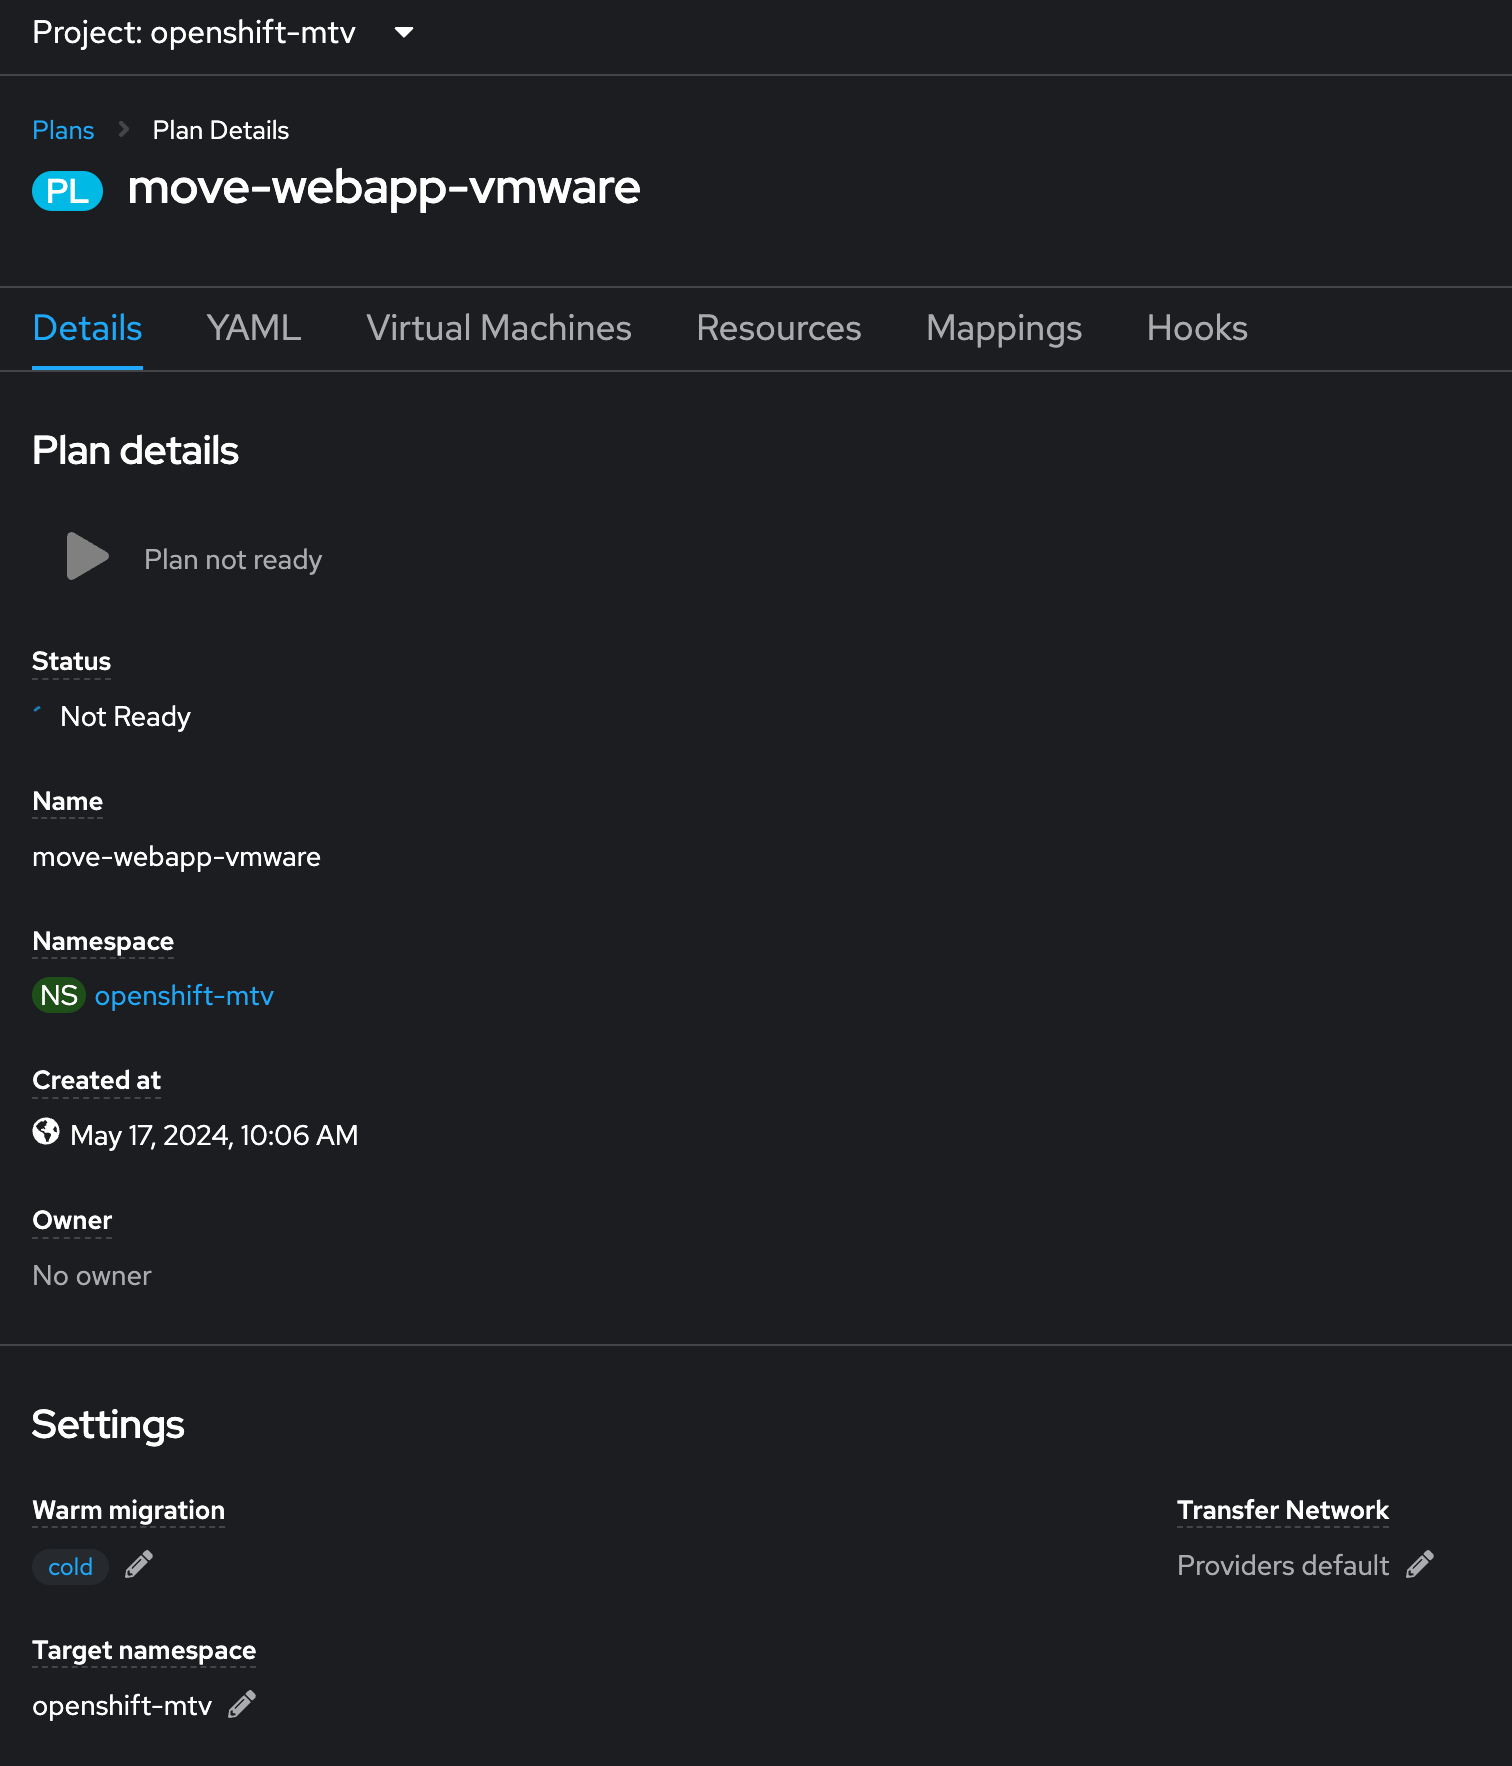
You will be taken to a new screen where you will see that the plan for migration is being made ready.
-
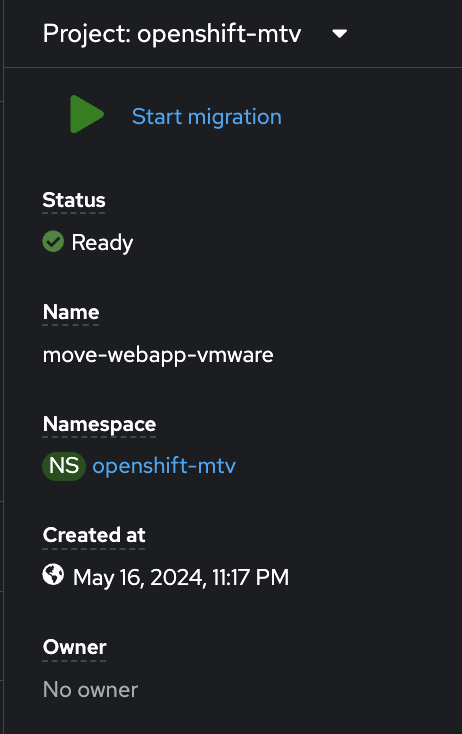
After a few moments the plan will become Ready, click on the green "Play" button in the center of the window to start the migration process.
-
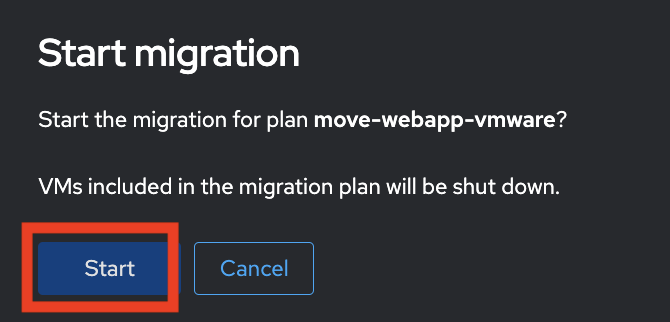
You will be presented with a confirmation box to begin the migration, click on the Start button.
-
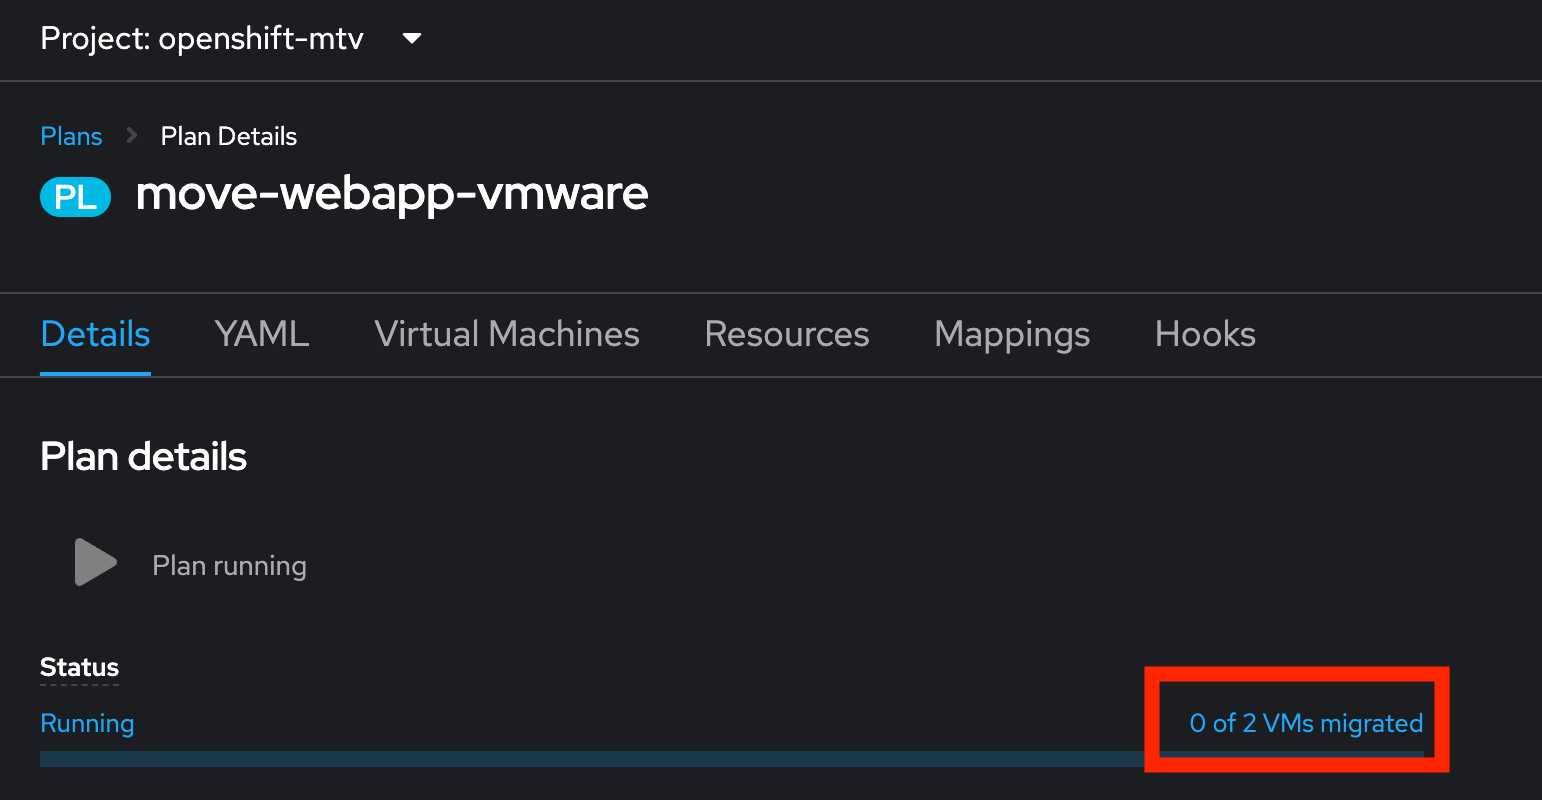
A progress bar will appear in the center of the screen along with the status of 0 of 2 VMs migrated.
SAY:
We’ll want to see the progress of our migration. So let’s click on the progress bar to see the status of our migration.
DO:
-
Click on the 0 of 2 VMs migrated link and you will be presented with a page with more details about the migration process.
SAY:
We can see here that the migration has started.
Now let’s find out even more details about the specific stage of the migration process.
You can see the several stages of the migration process in the details panel.
Let’s watch it for a moment before moving on.
DO:
-
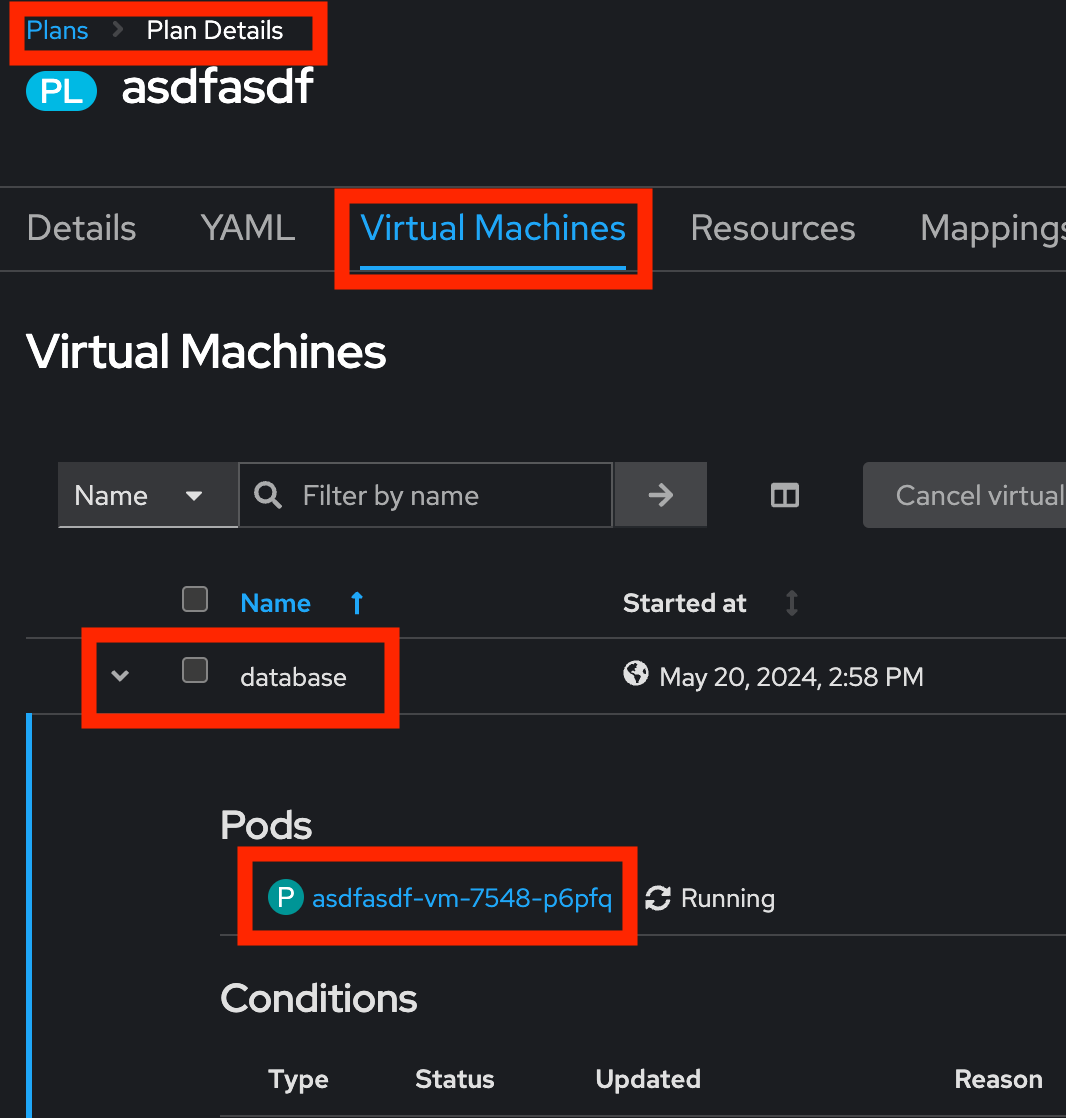
You can click the drop-down arrow next to the name of each VM being migrated to get additional details about the stages of the migration process.
-
The migration process is quite long, so display the changes for a few moments, and then move on.
-
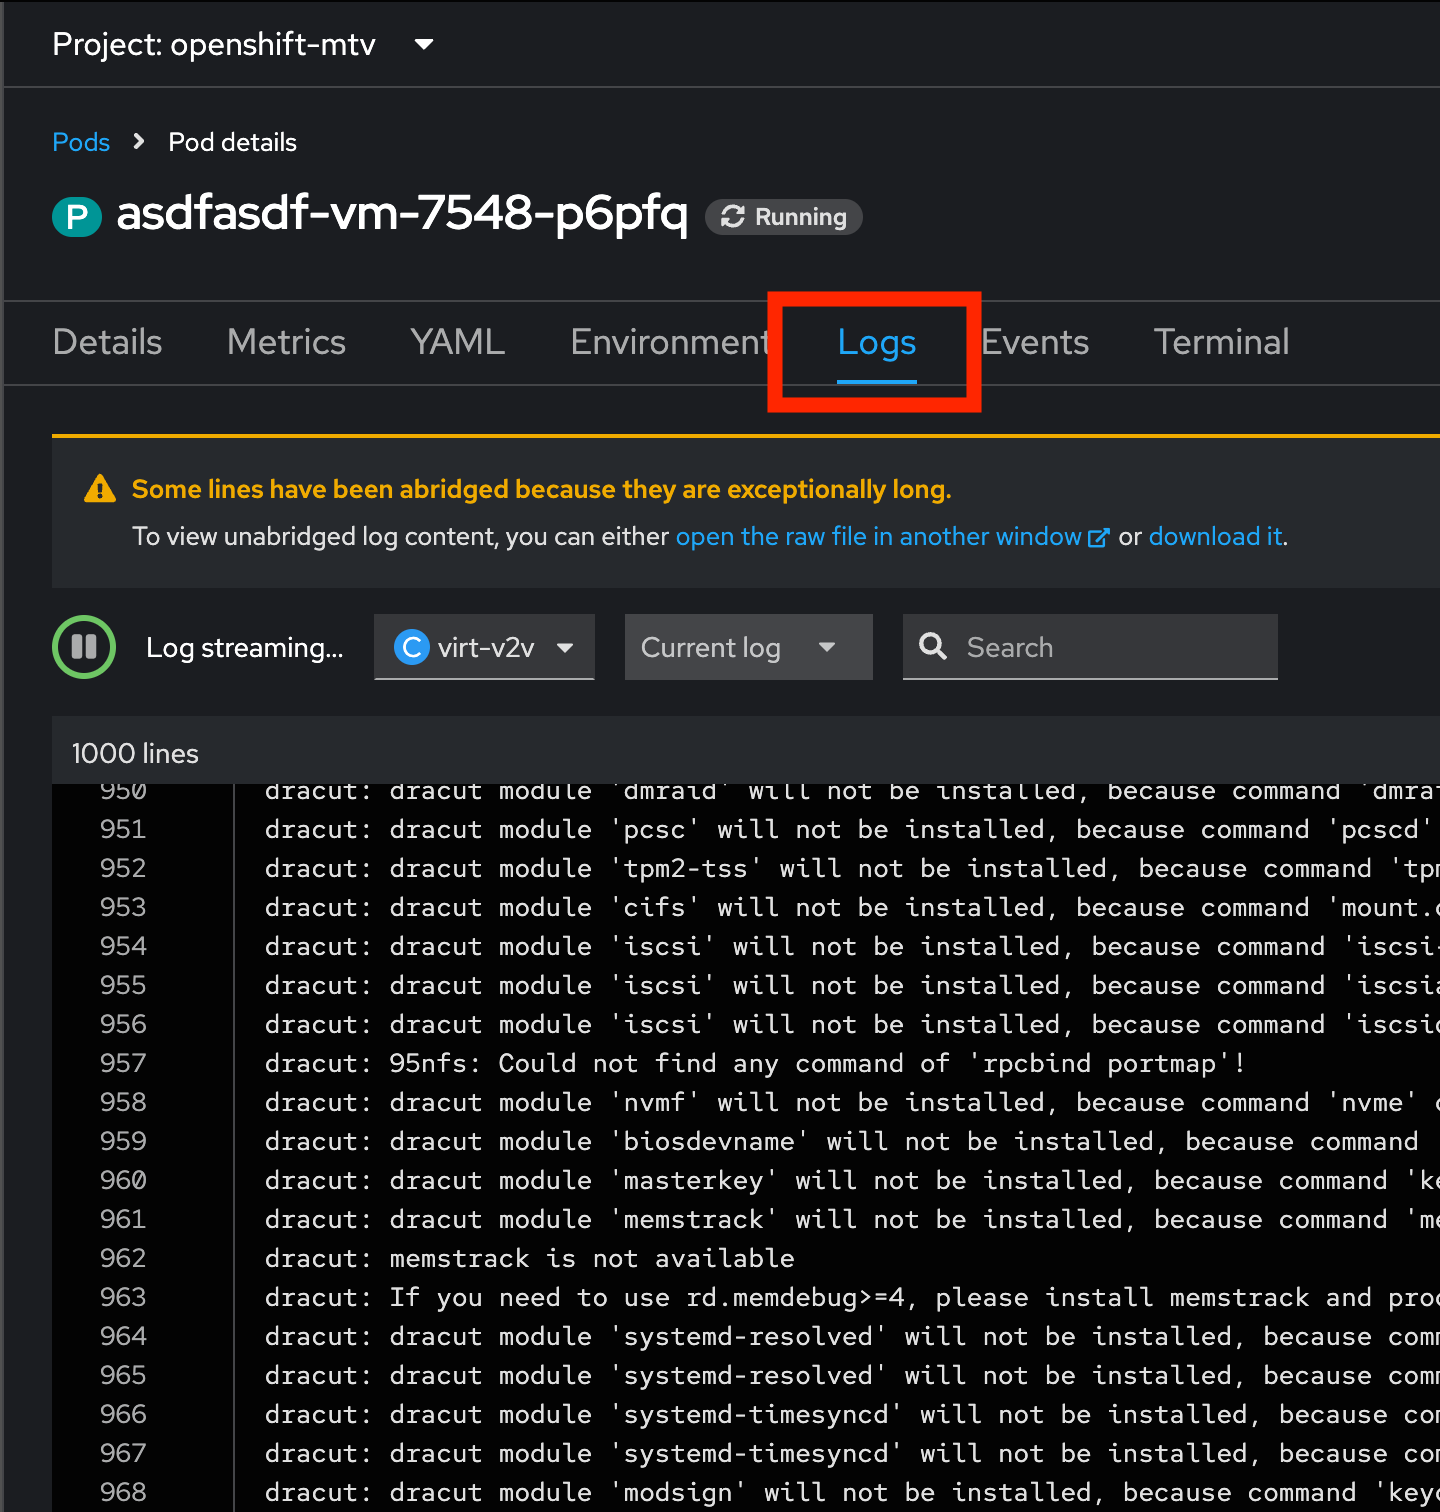
You can also show the logs of the migration process by clicking in Plan Details the tab Virtual Machines. From there you can see the logs of each VM being migrated.
Validate the Migrated Windows VMs and Application
SAY:
OK, so we don’t have to sit here and watch 60GB traveling through the network. Let’s continue with an environment that we have already migrated.
OpenShift separates work into different projects, and each project can have its own set of virtual machines.
Let’s look at one of the Windows VMs and connect to it to take a closer look.
First, we need to switch to the project that contains our pre-migrated VMs.
DO:
-
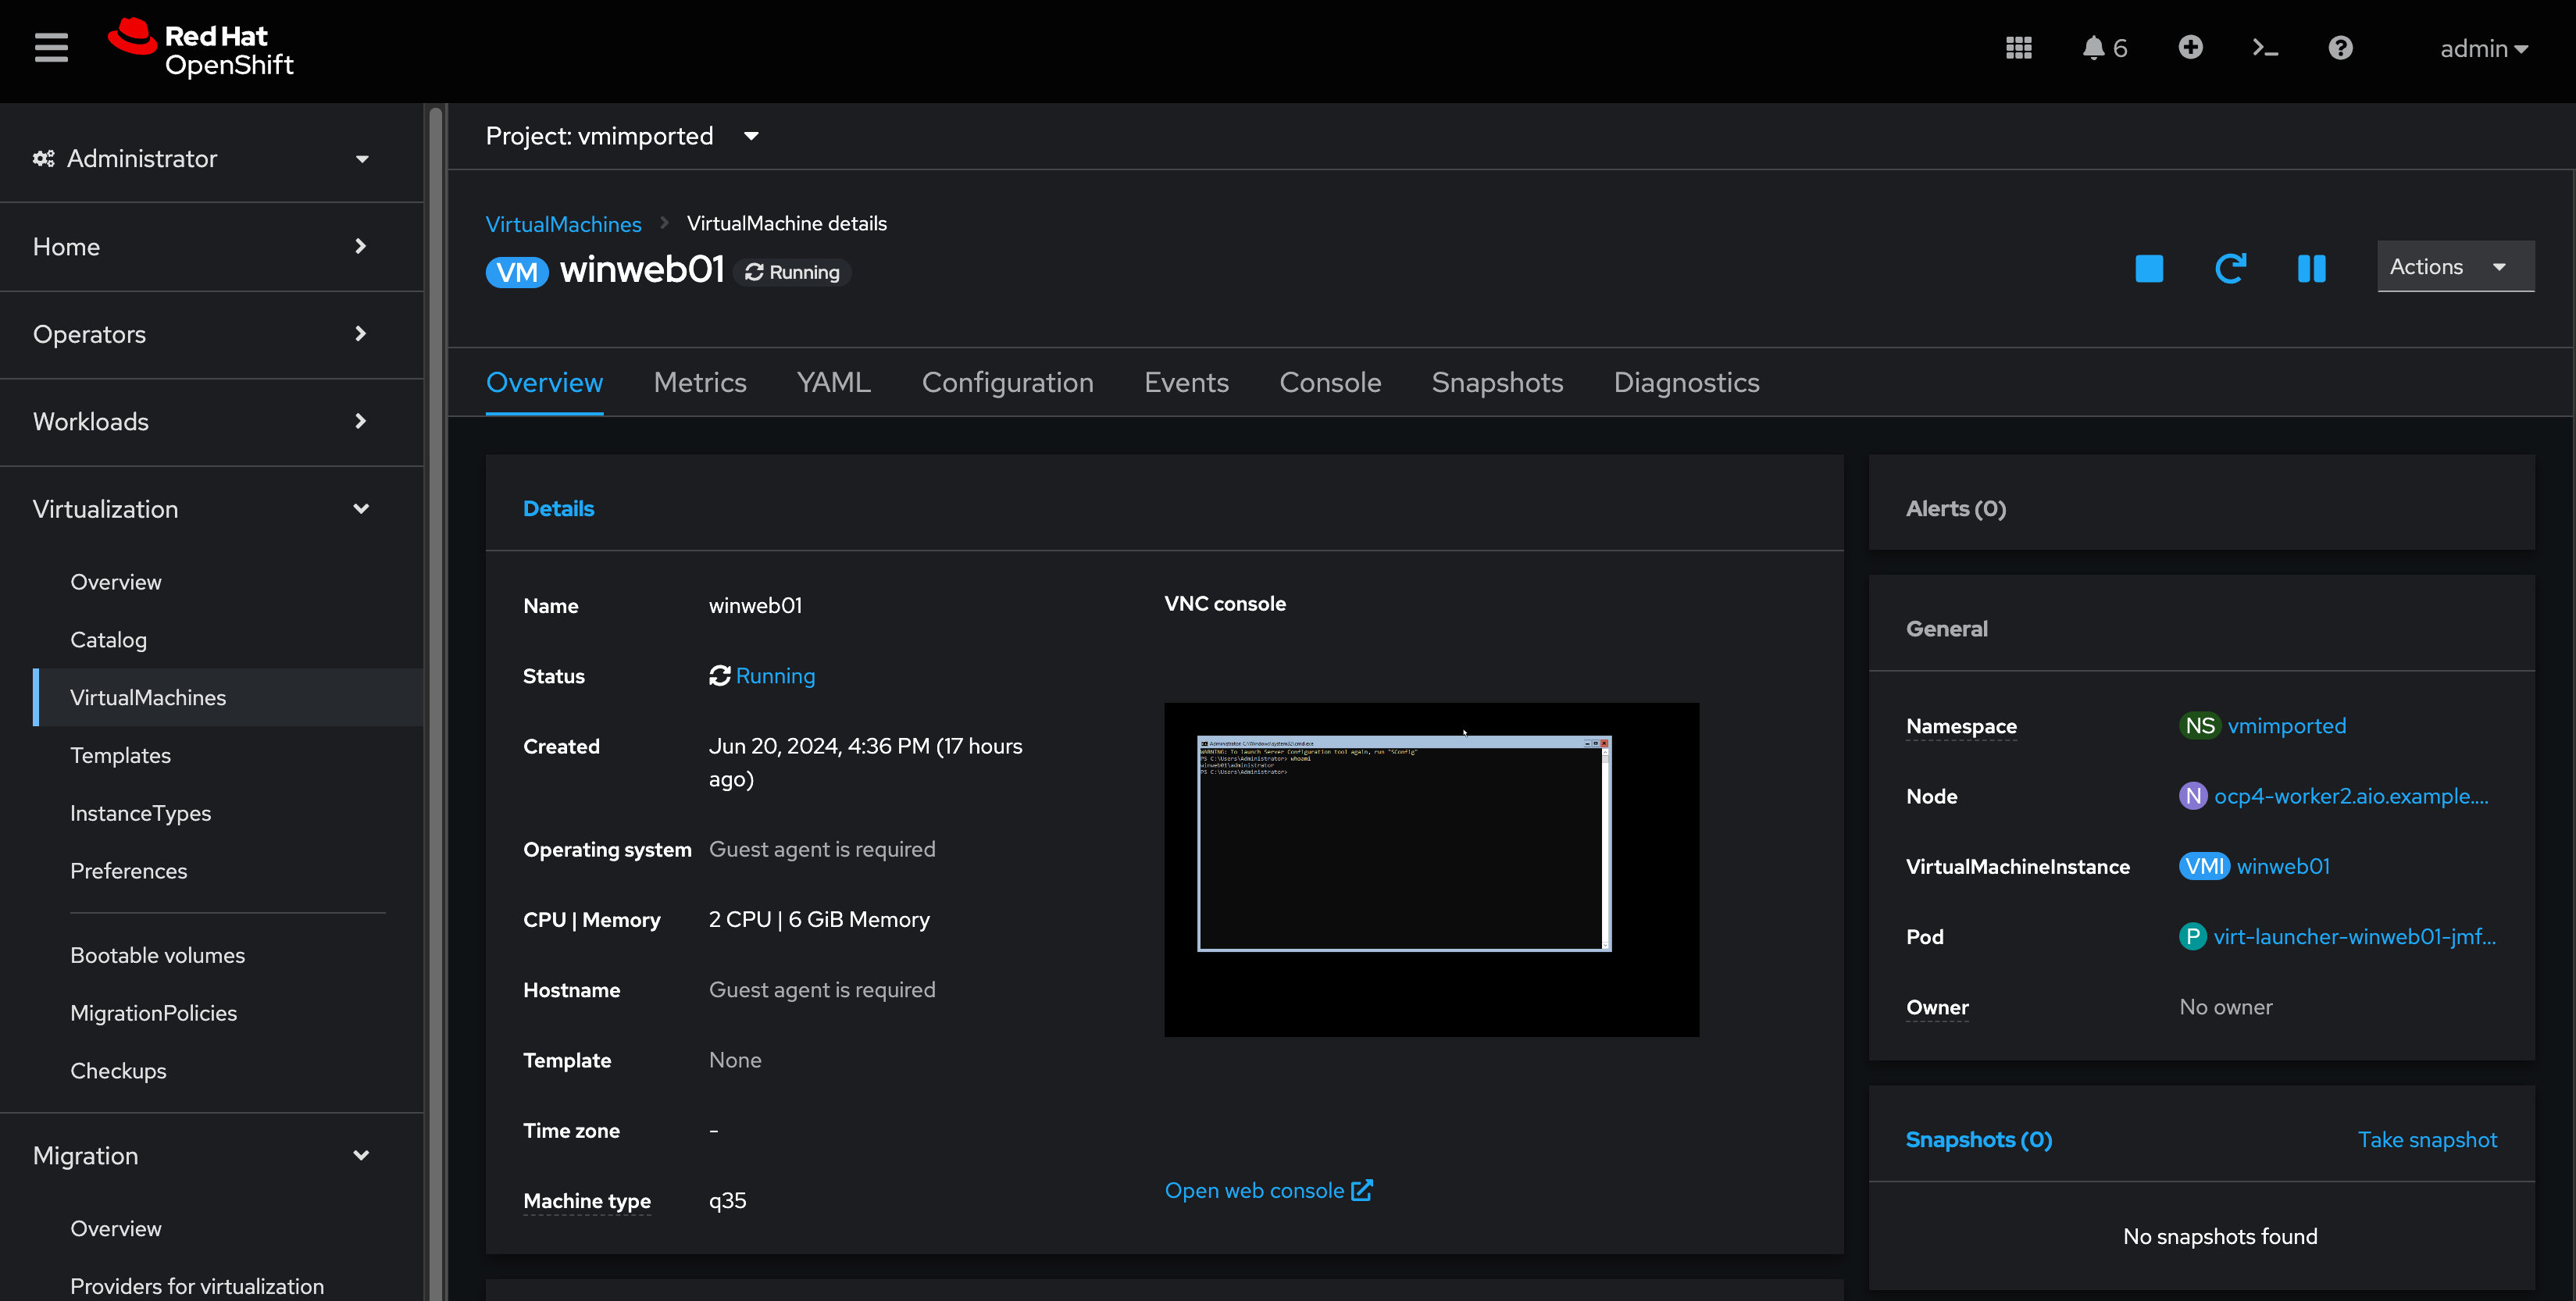
Click on Virtualization in the left menu, and then on Virtual Machines.
-
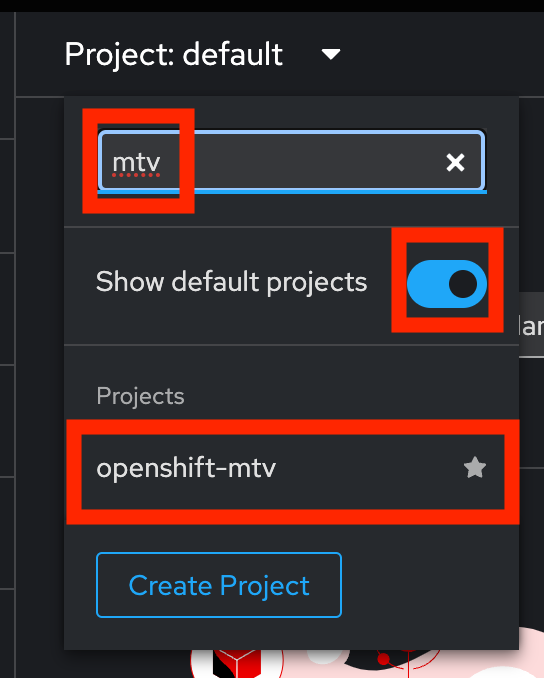
Go to the Project:
vmimported. -
Click on the
winweb01-placeholder_guidVM that is running and click on its name to see the VM details page.
SAY:
On this page we can see many details about the VMs that have been migrated to OpenShift Virtualization, especially the Windows desktop.
This Windows Server is "Windows Core".
More Info about Windows Core."
There is no desktop, by default.
You don’t need to log in, but if you need to, the password is 1qazXSW@
|
What are applications good for if you can’t connect to them?
So let’s look at the application that has been migrated and exposed to our organization.
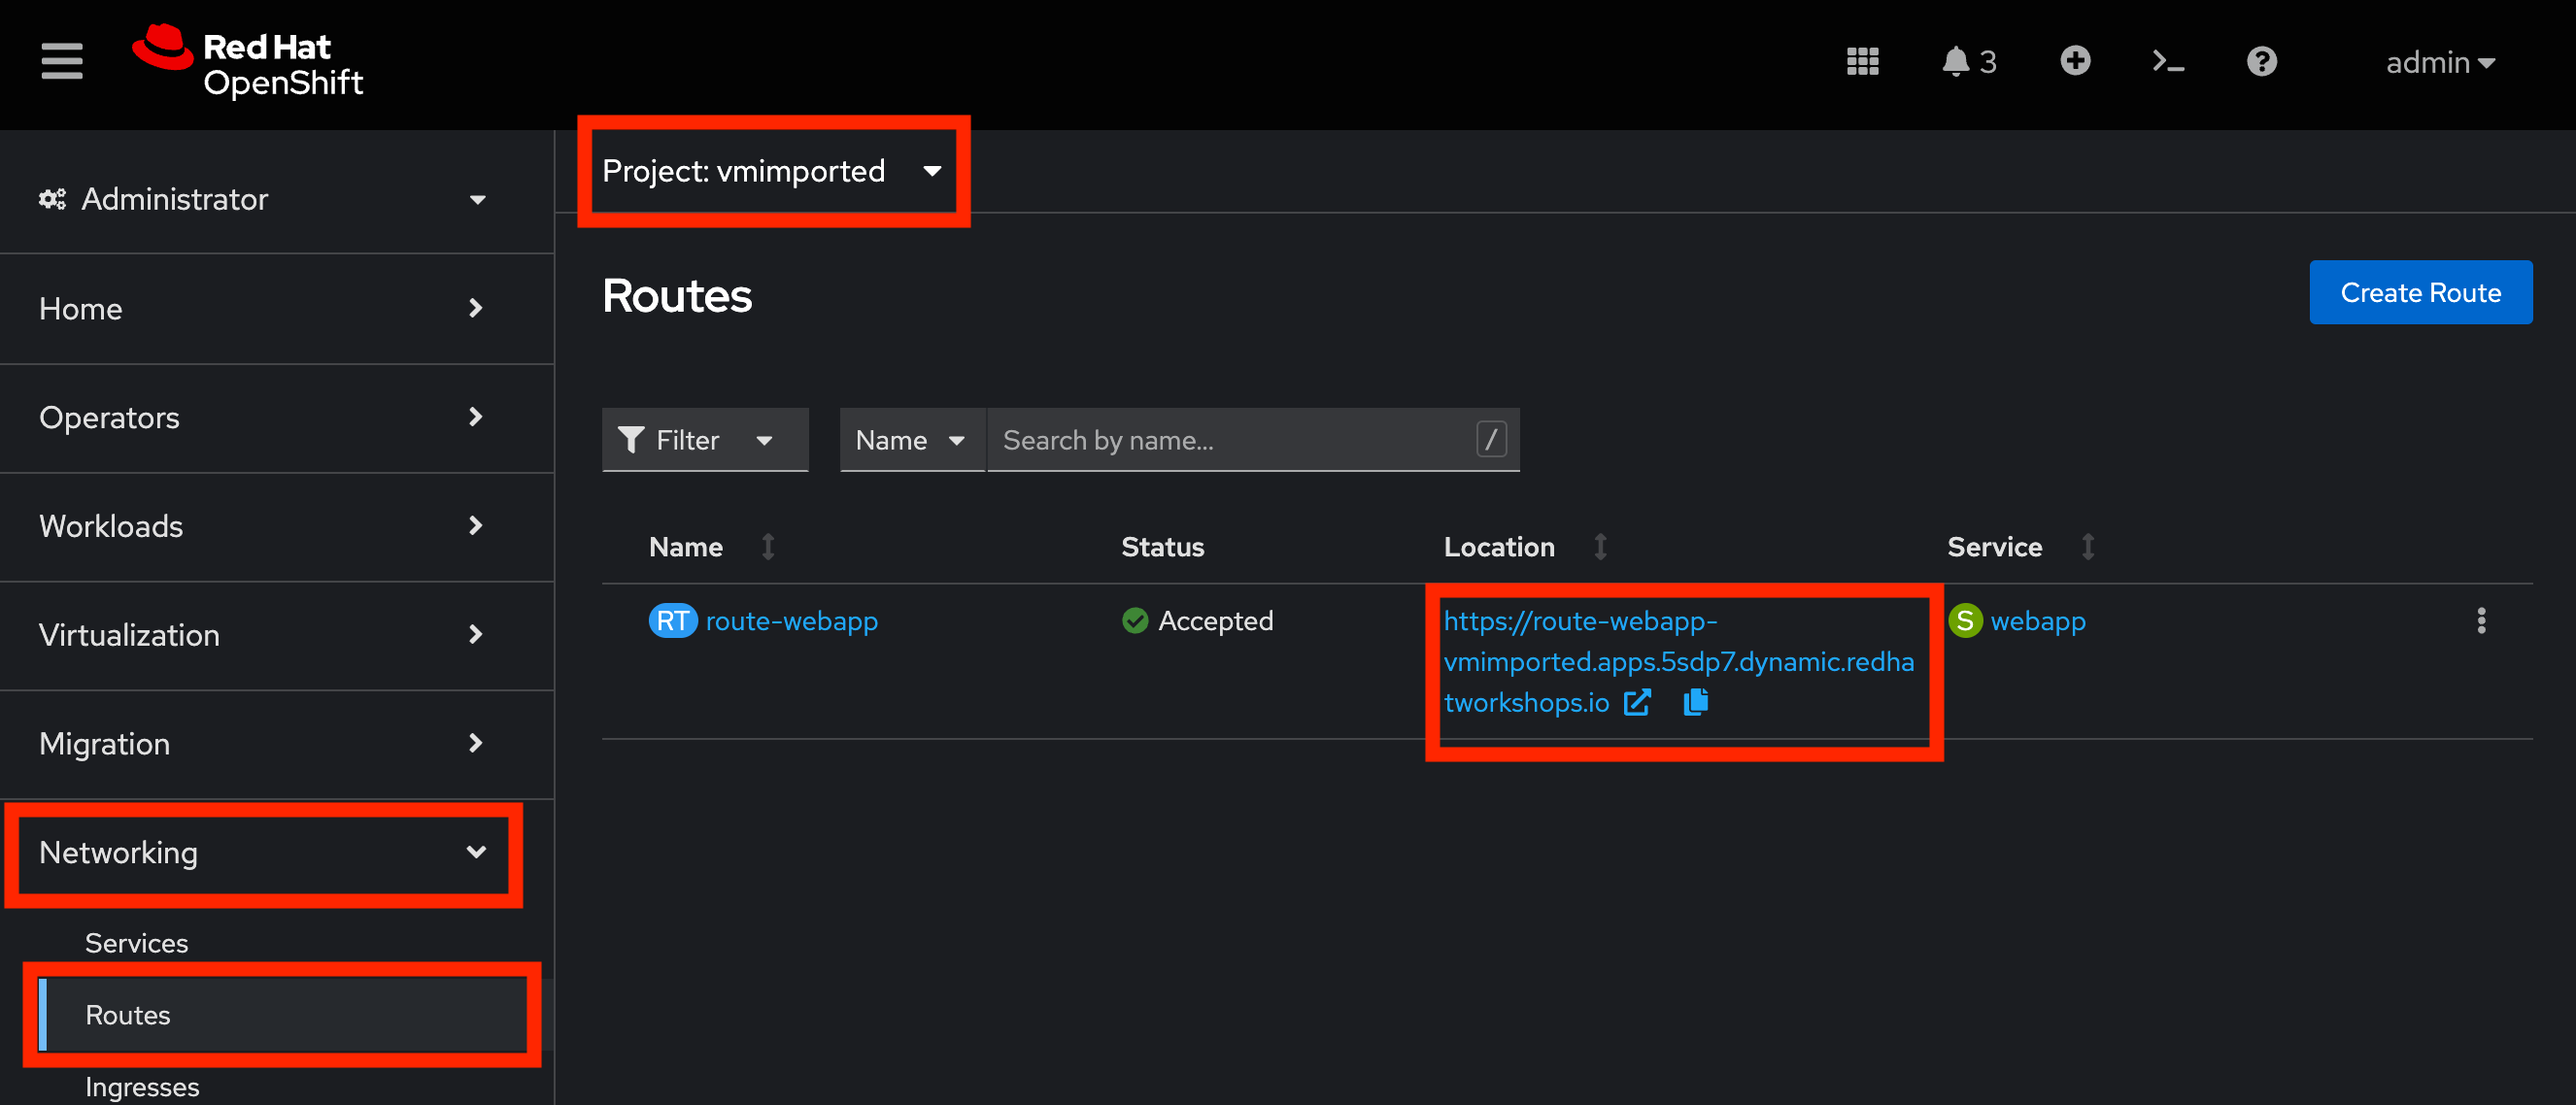
For that, we have already created a "route". You can think of this as similar to a DNS name or a load balancer.
DO:
-
Click Networking in the left menu, and then click on Routes.
-
There should only be one route,
route-webapp -
Click the Location link and your browser will open with the web application, showing the visitor counter and the web server hostname.
-
The application should look something like this
OpenShift Route is providing load balancing between the winweb01-placeholder_guid and winweb02-placeholder_guid hosts, so you might see either hostname reported.
Summary
SAY:
In this segment of the demo, we used the Migration Toolkit for Virtualization to assist with the migration of existing virtual machines from a VMware vSphere environment to OpenShift Virtualization.
| Please delete this demo from the Red Hat Demo Platform once you have completed practicing or delivering it to your customer. |
