Module 3: VM Live Migration
In this module, we will explore how application workload running on OpenShift can be migrated "live" between worker nodes.
Live migration is the process of moving a running virtual machine (VM) to another node in the cluster without interrupting the virtual workload. Live migration enables smooth transitions during cluster upgrades or any time a node needs to be drained for maintenance or configuration changes.
By default, live migration traffic is encrypted using Transport Layer Security (TLS).
Reasons for VM migration:
Load Balancing: VMs can be moved to host machines with lower usage if their host becomes overloaded or if another host is under-utilized. Through load-balancing, you can improve VMs capacity and network performance.
Energy savings: VMs can be redistributed to other hosts, and the unloaded host systems can be powered off to save energy and cut costs.
Geographic migration: VM can be moved to another physical location for lower latency or when required for fault tolerance or disaster recovery.
Live migration requirements
-
The cluster must have shared storage with ReadWriteMany (RWX) access mode.
-
The cluster must have sufficient RAM and network bandwidth.
-
If a VM uses a host model CPU, the nodes must support the CPU.
-
Configuring a dedicated Multus network for live migration is highly recommended. A dedicated network minimizes the effects of network saturation on tenant workloads during migration
Learning objectives
By the end of this module, you will be able to:
-
Migrate virtual machine between worker nodes
-
Migrate a virtual machine to a new storage class
Exercise 1: VM live migration
In this exercise, you will create a new virtual machine and migrate it between worker nodes in an OpenShift cluster.
Verify
Confirm that you have a virtual machine running with a storage class that is RWX. If not, you will need to create a new virtual machine and customize the VM’s boot volume to a storage class that is RWX enabled. ceph RBD is capable of RWX.
Create or Select a Virtual Machine
Create a new Virtual Machine (VM) or select a VM from a previous you created in a previous section of this lab.
Once you have a VM, make sure the VM is in the running state.
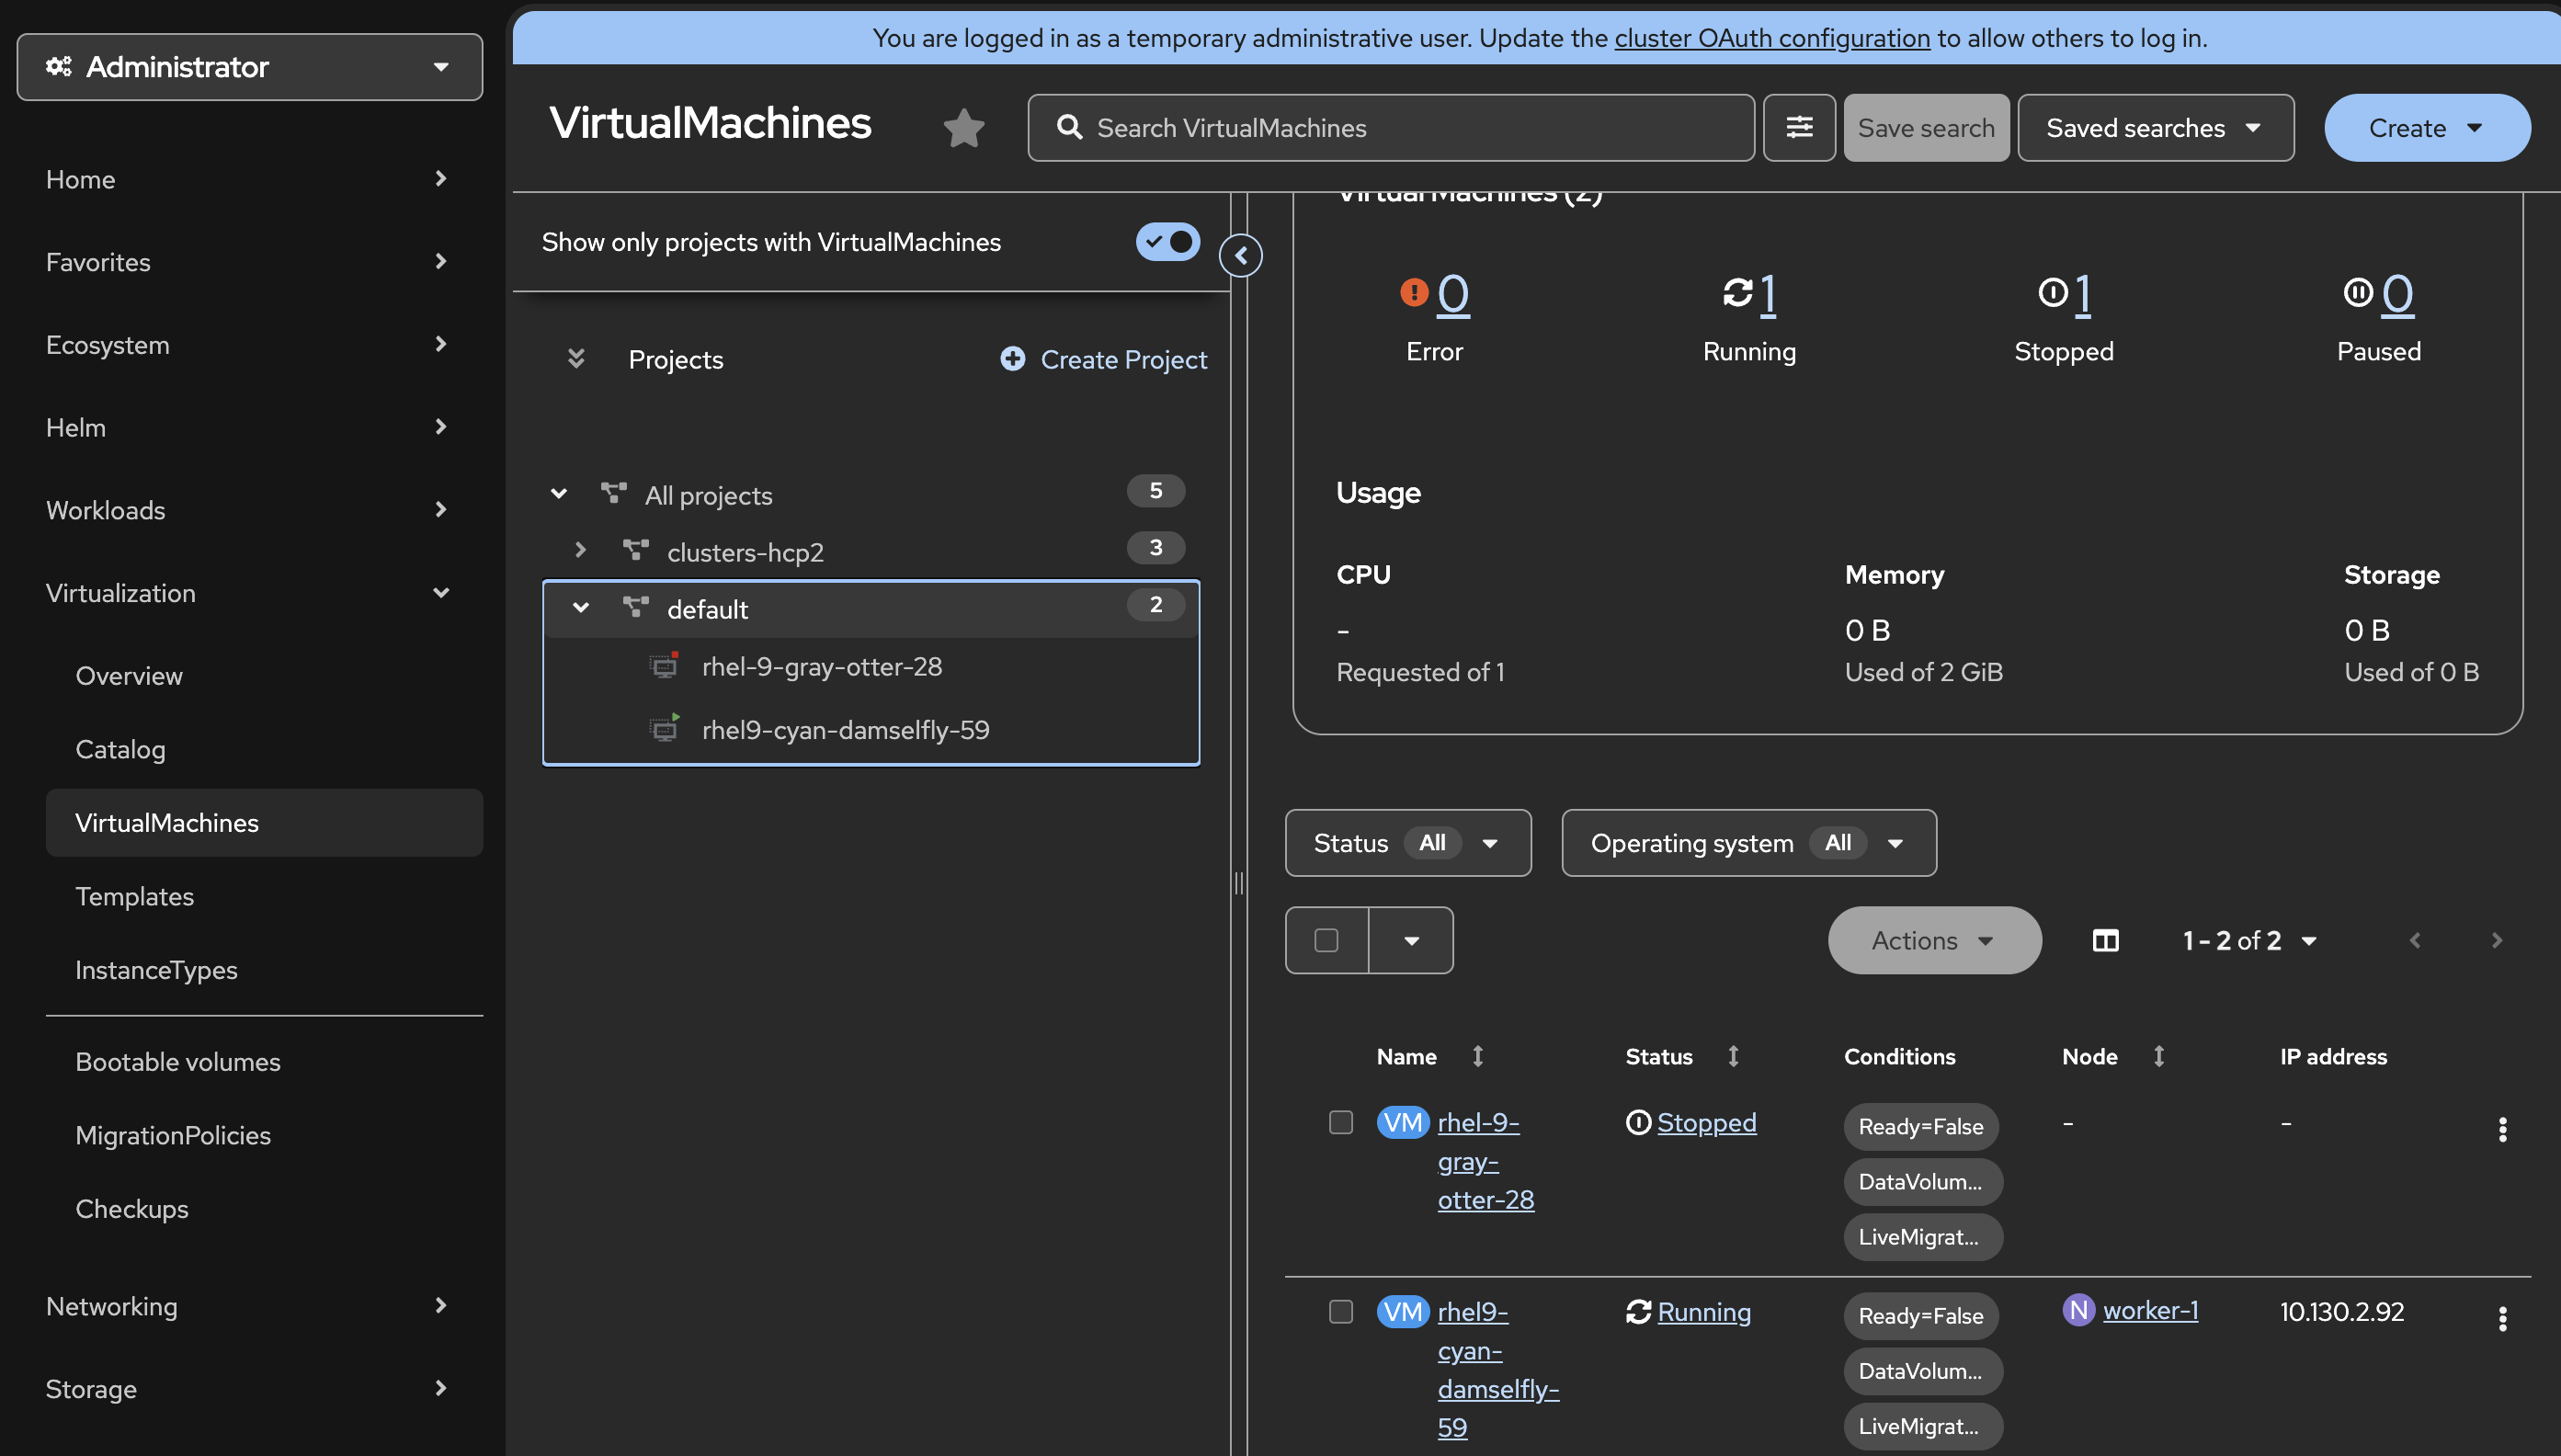
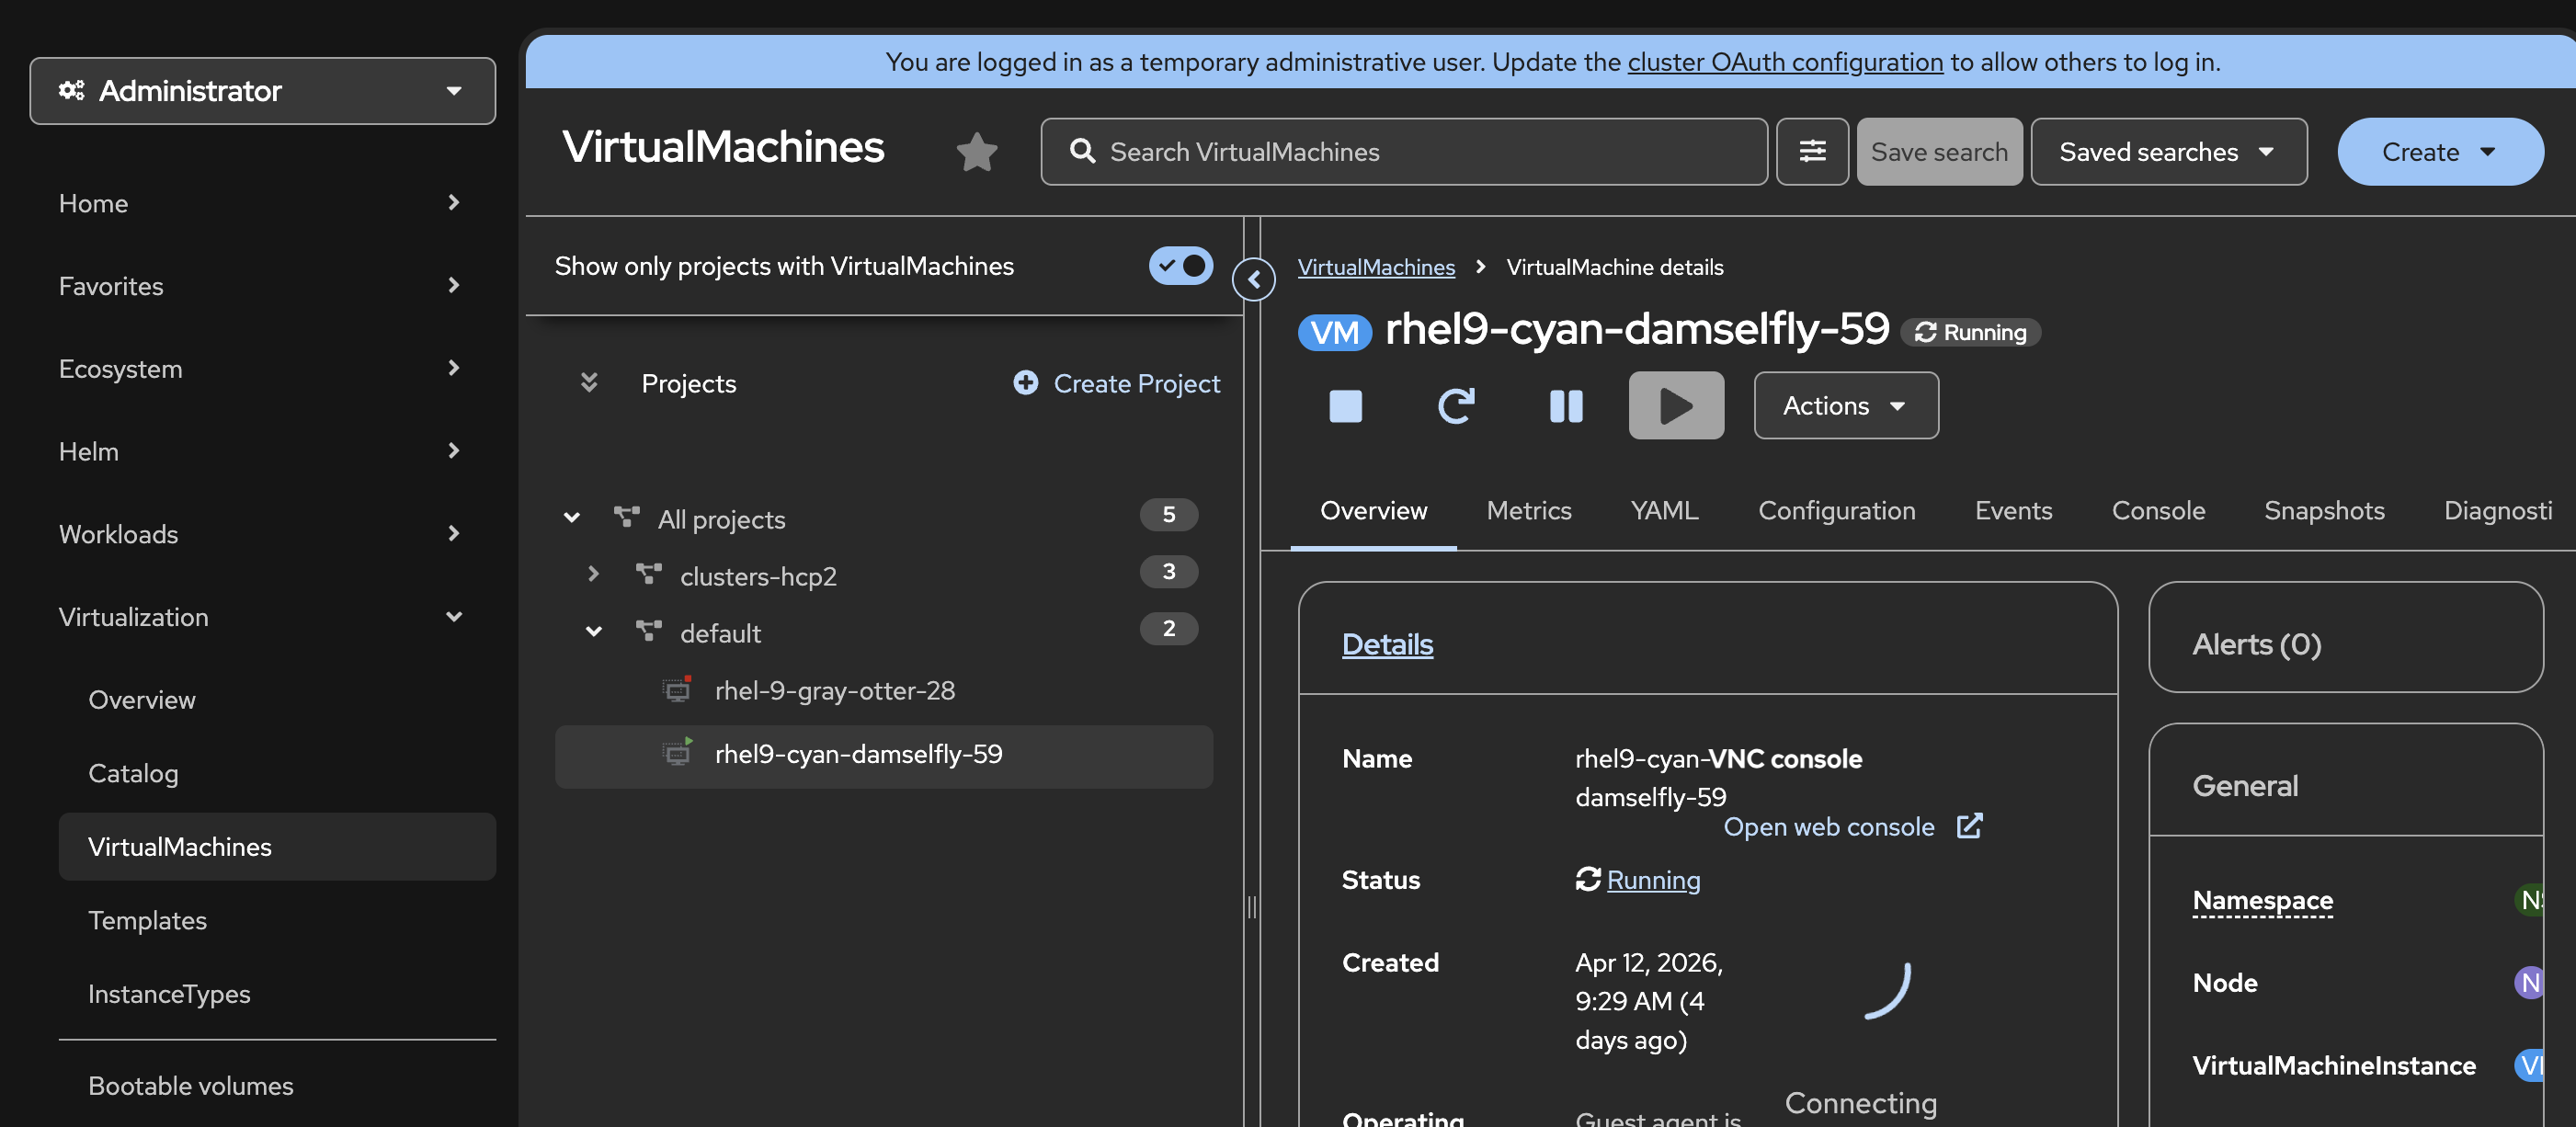
Also, take note of the "node" the Virtual Machine is running on.

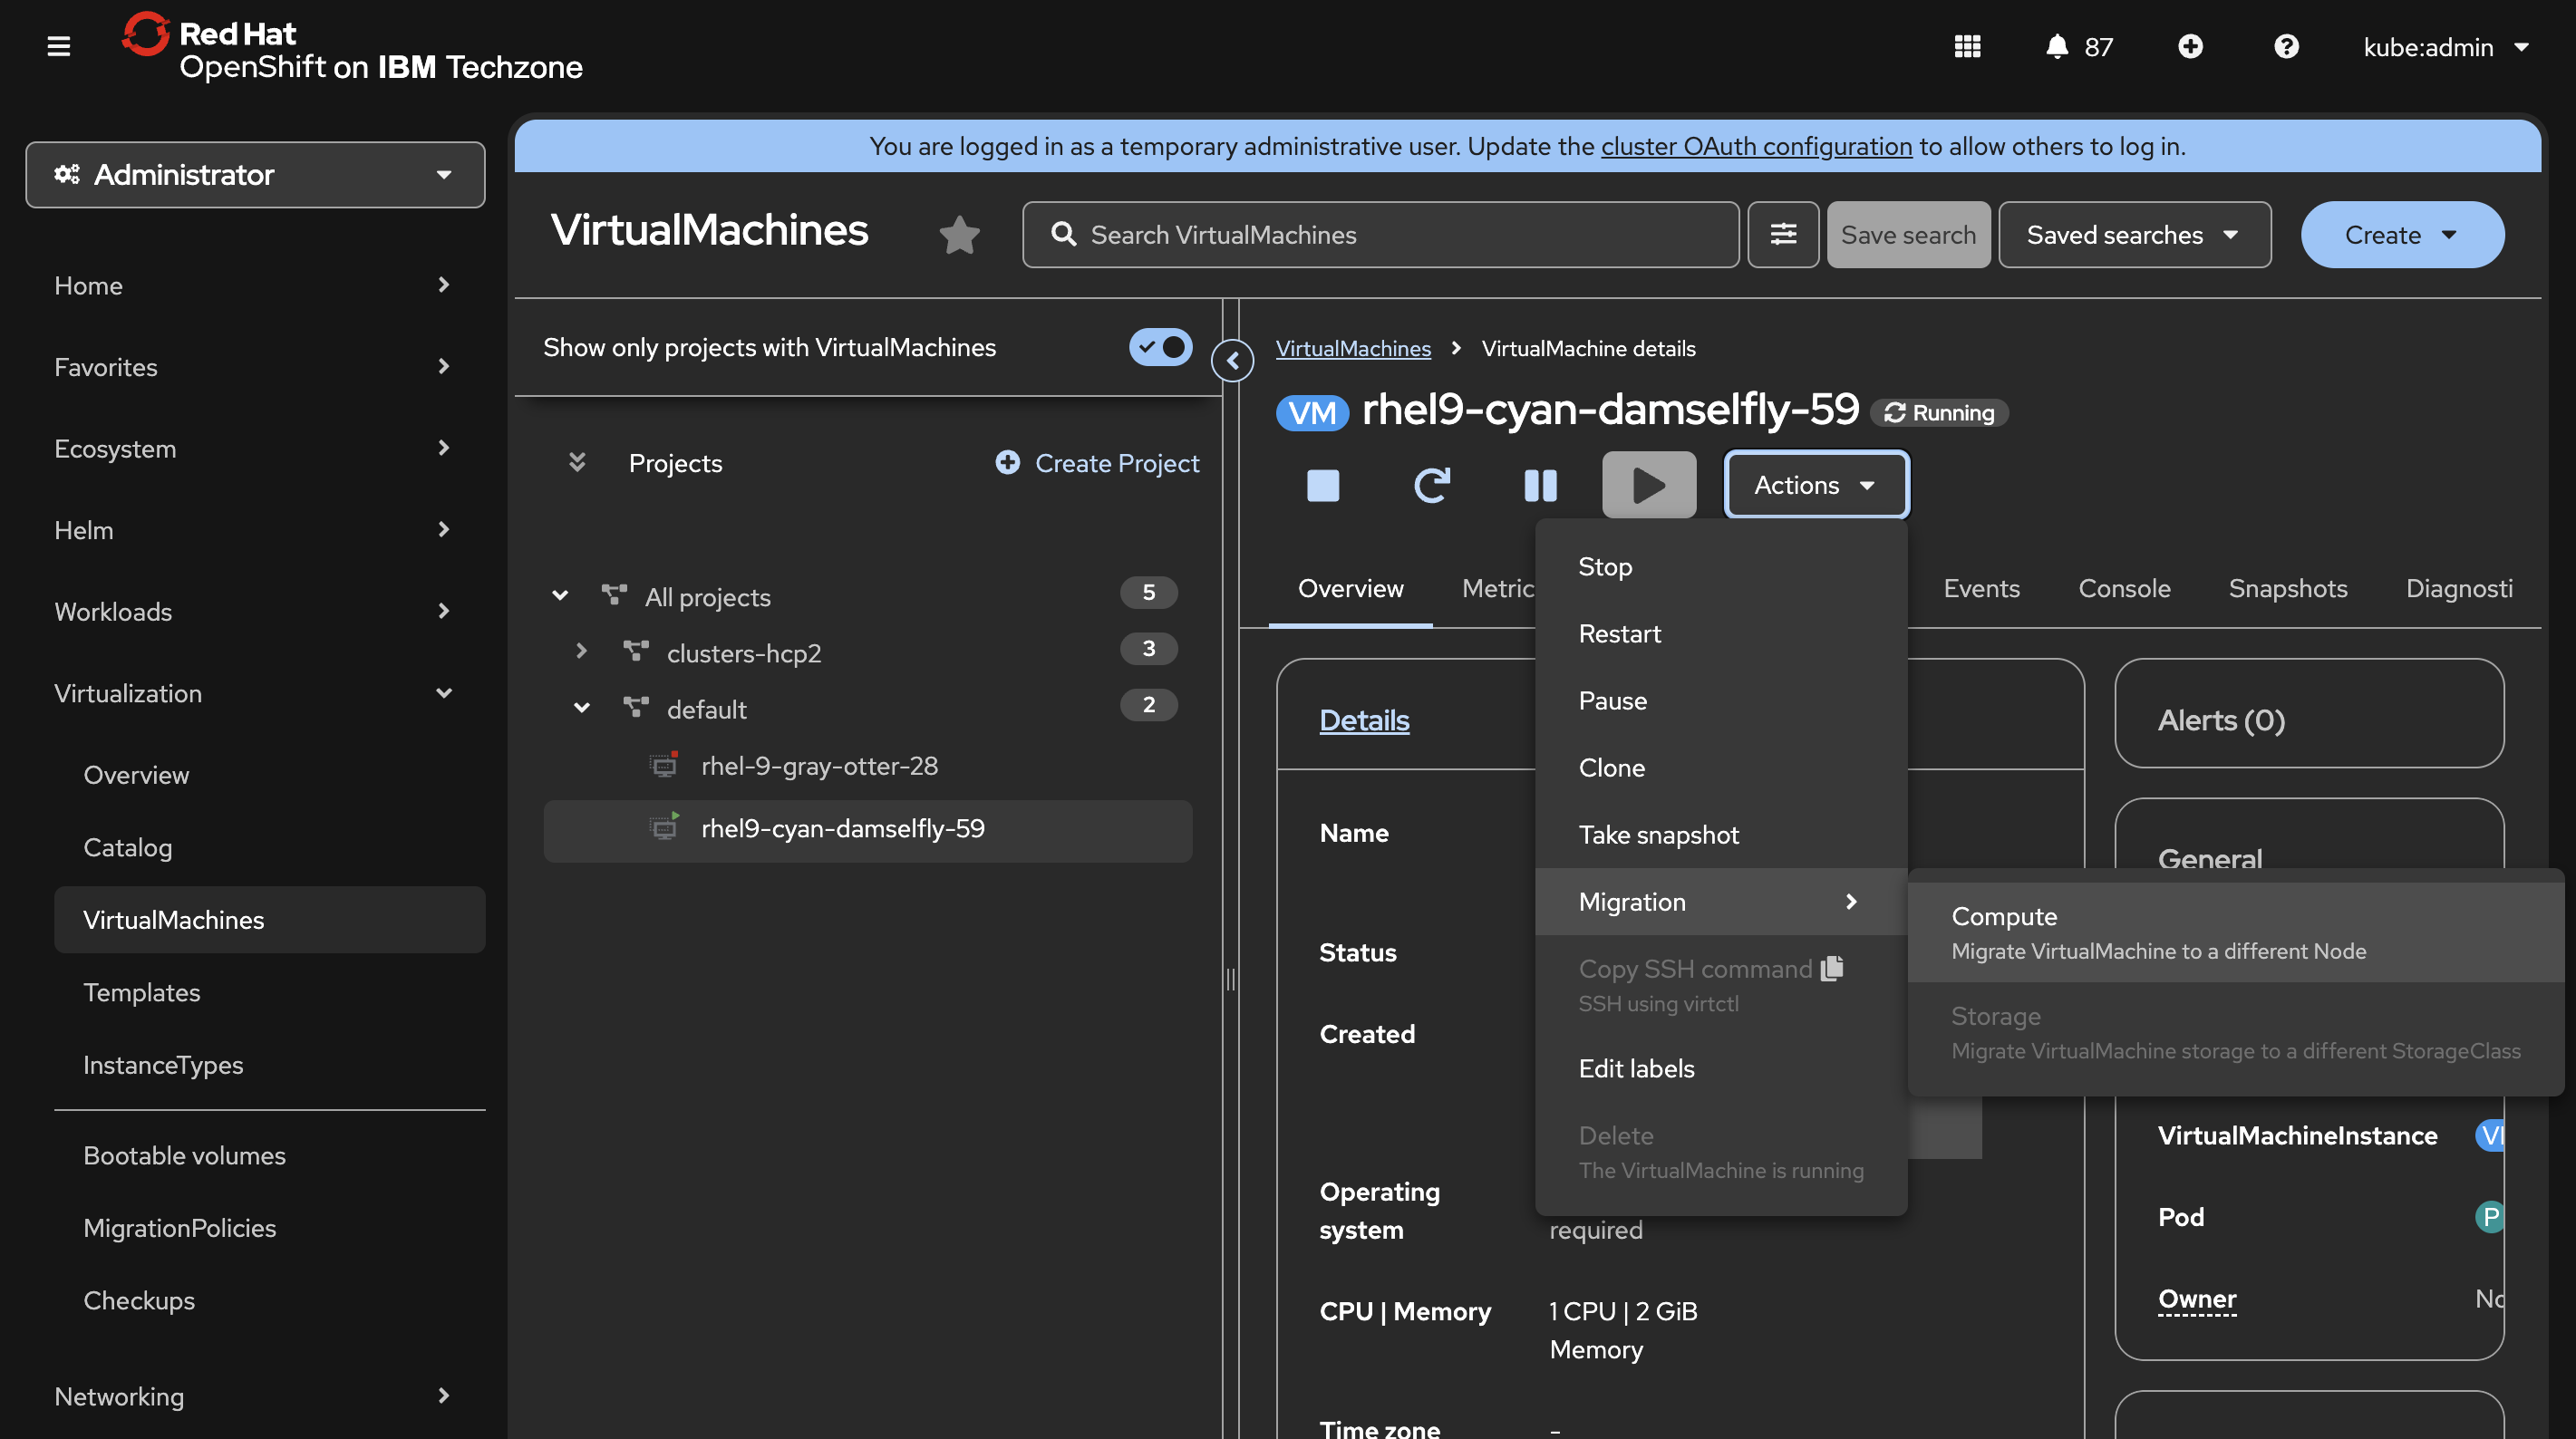
Now select actions, migration, Compute:
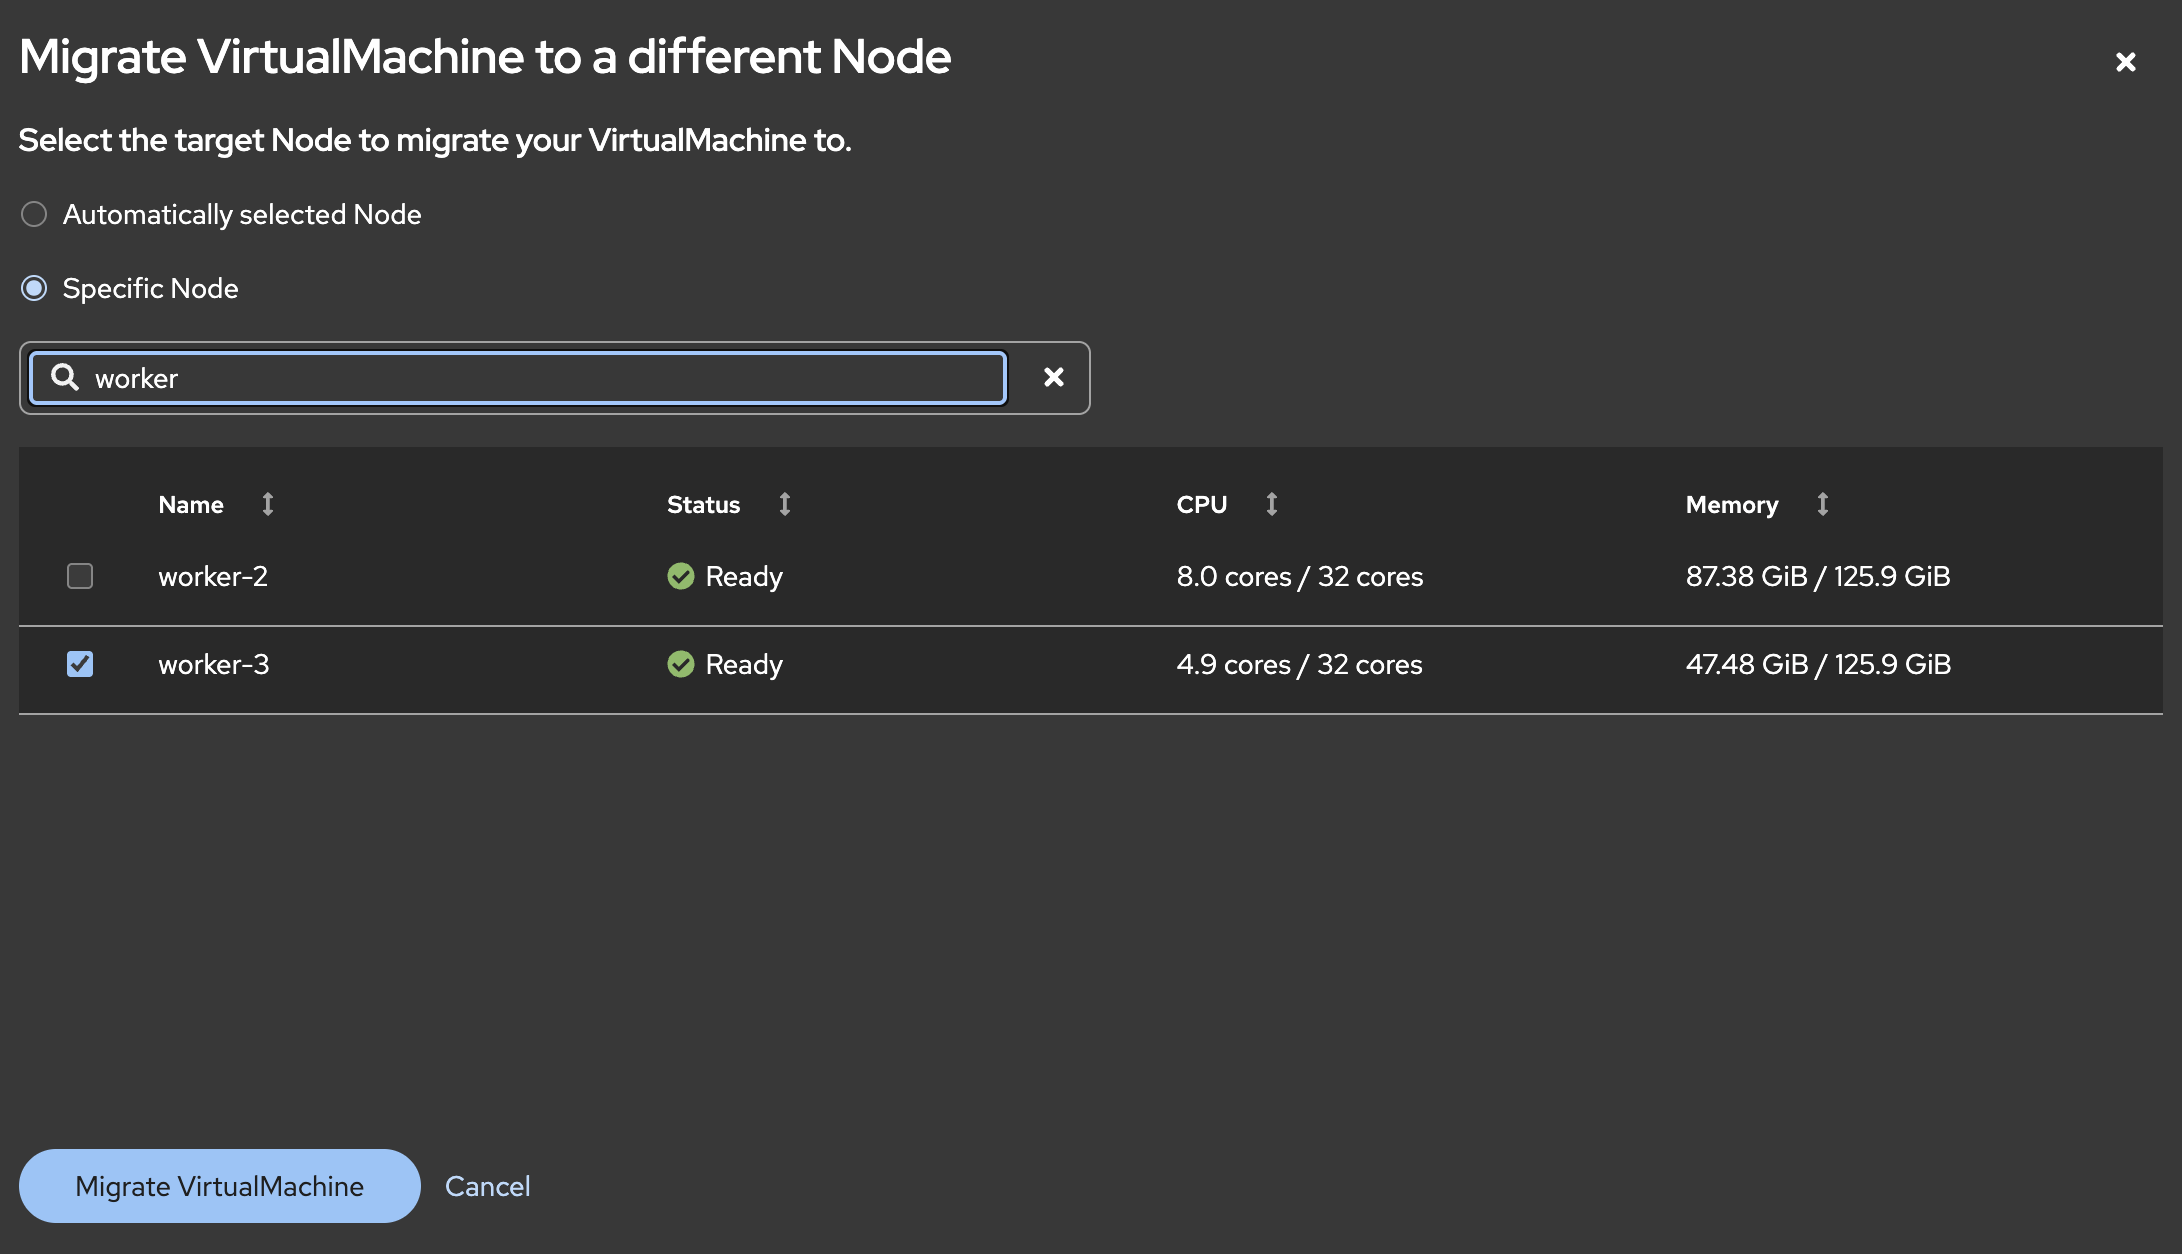
At this point you will see a dialog box: Migrate VirtualMachine to a different Node. Select Specific Node and then choose a new node for the target migration. Then click Migrate Virtual Machine
The status of the VM will change from running to migrating but can be quick so it might flash very briefly from running to migrating and back to running
Once it is complete, check the node the VM is running on. It should be the node you selected.
Exercise 2: VM live storage migration
In this exercise, you will perform a storage migration from the existing storage class to a new storage class.
As with "exercise-1", select a virtual machine you created and check its storage class. In this exercise, we will migrate to a new storage class.
Navigate to Storage, StorageClasses:
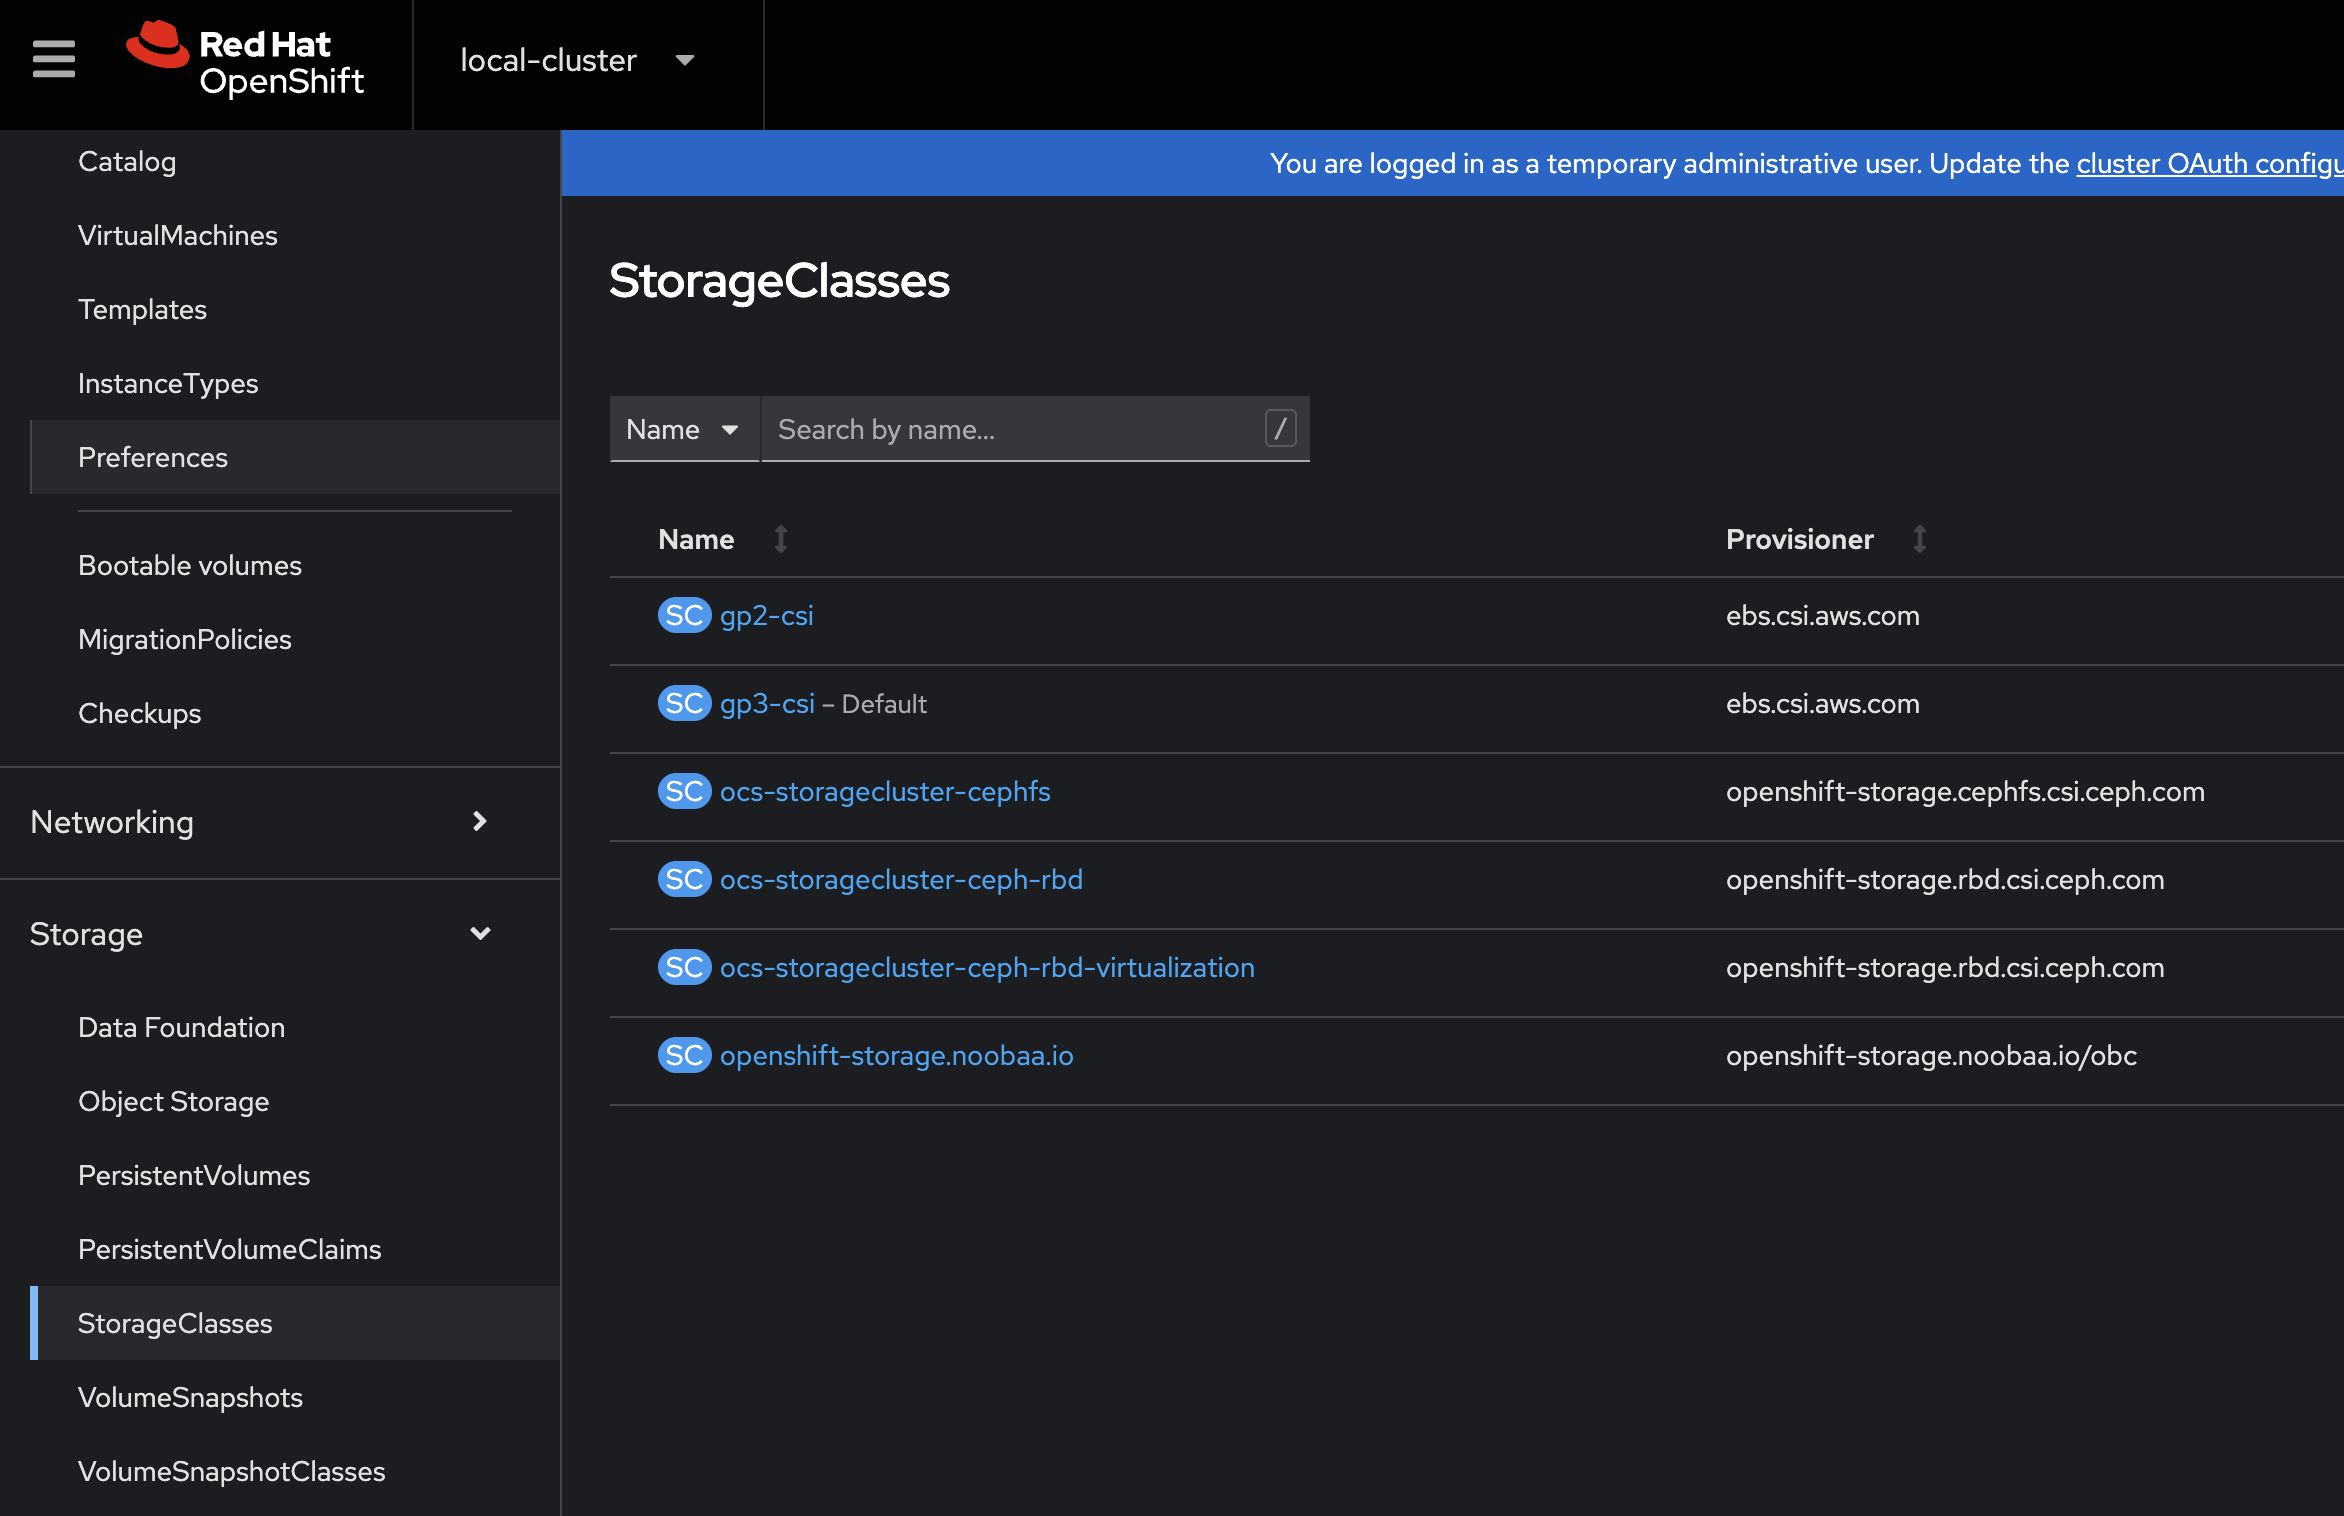
ocs-storagecluster-cephfs and ocs-storagecluster-ceph-rbd-virtualization are both good classes for virtual machines.
Navigate back to your list of virtual machines and select a running VM.
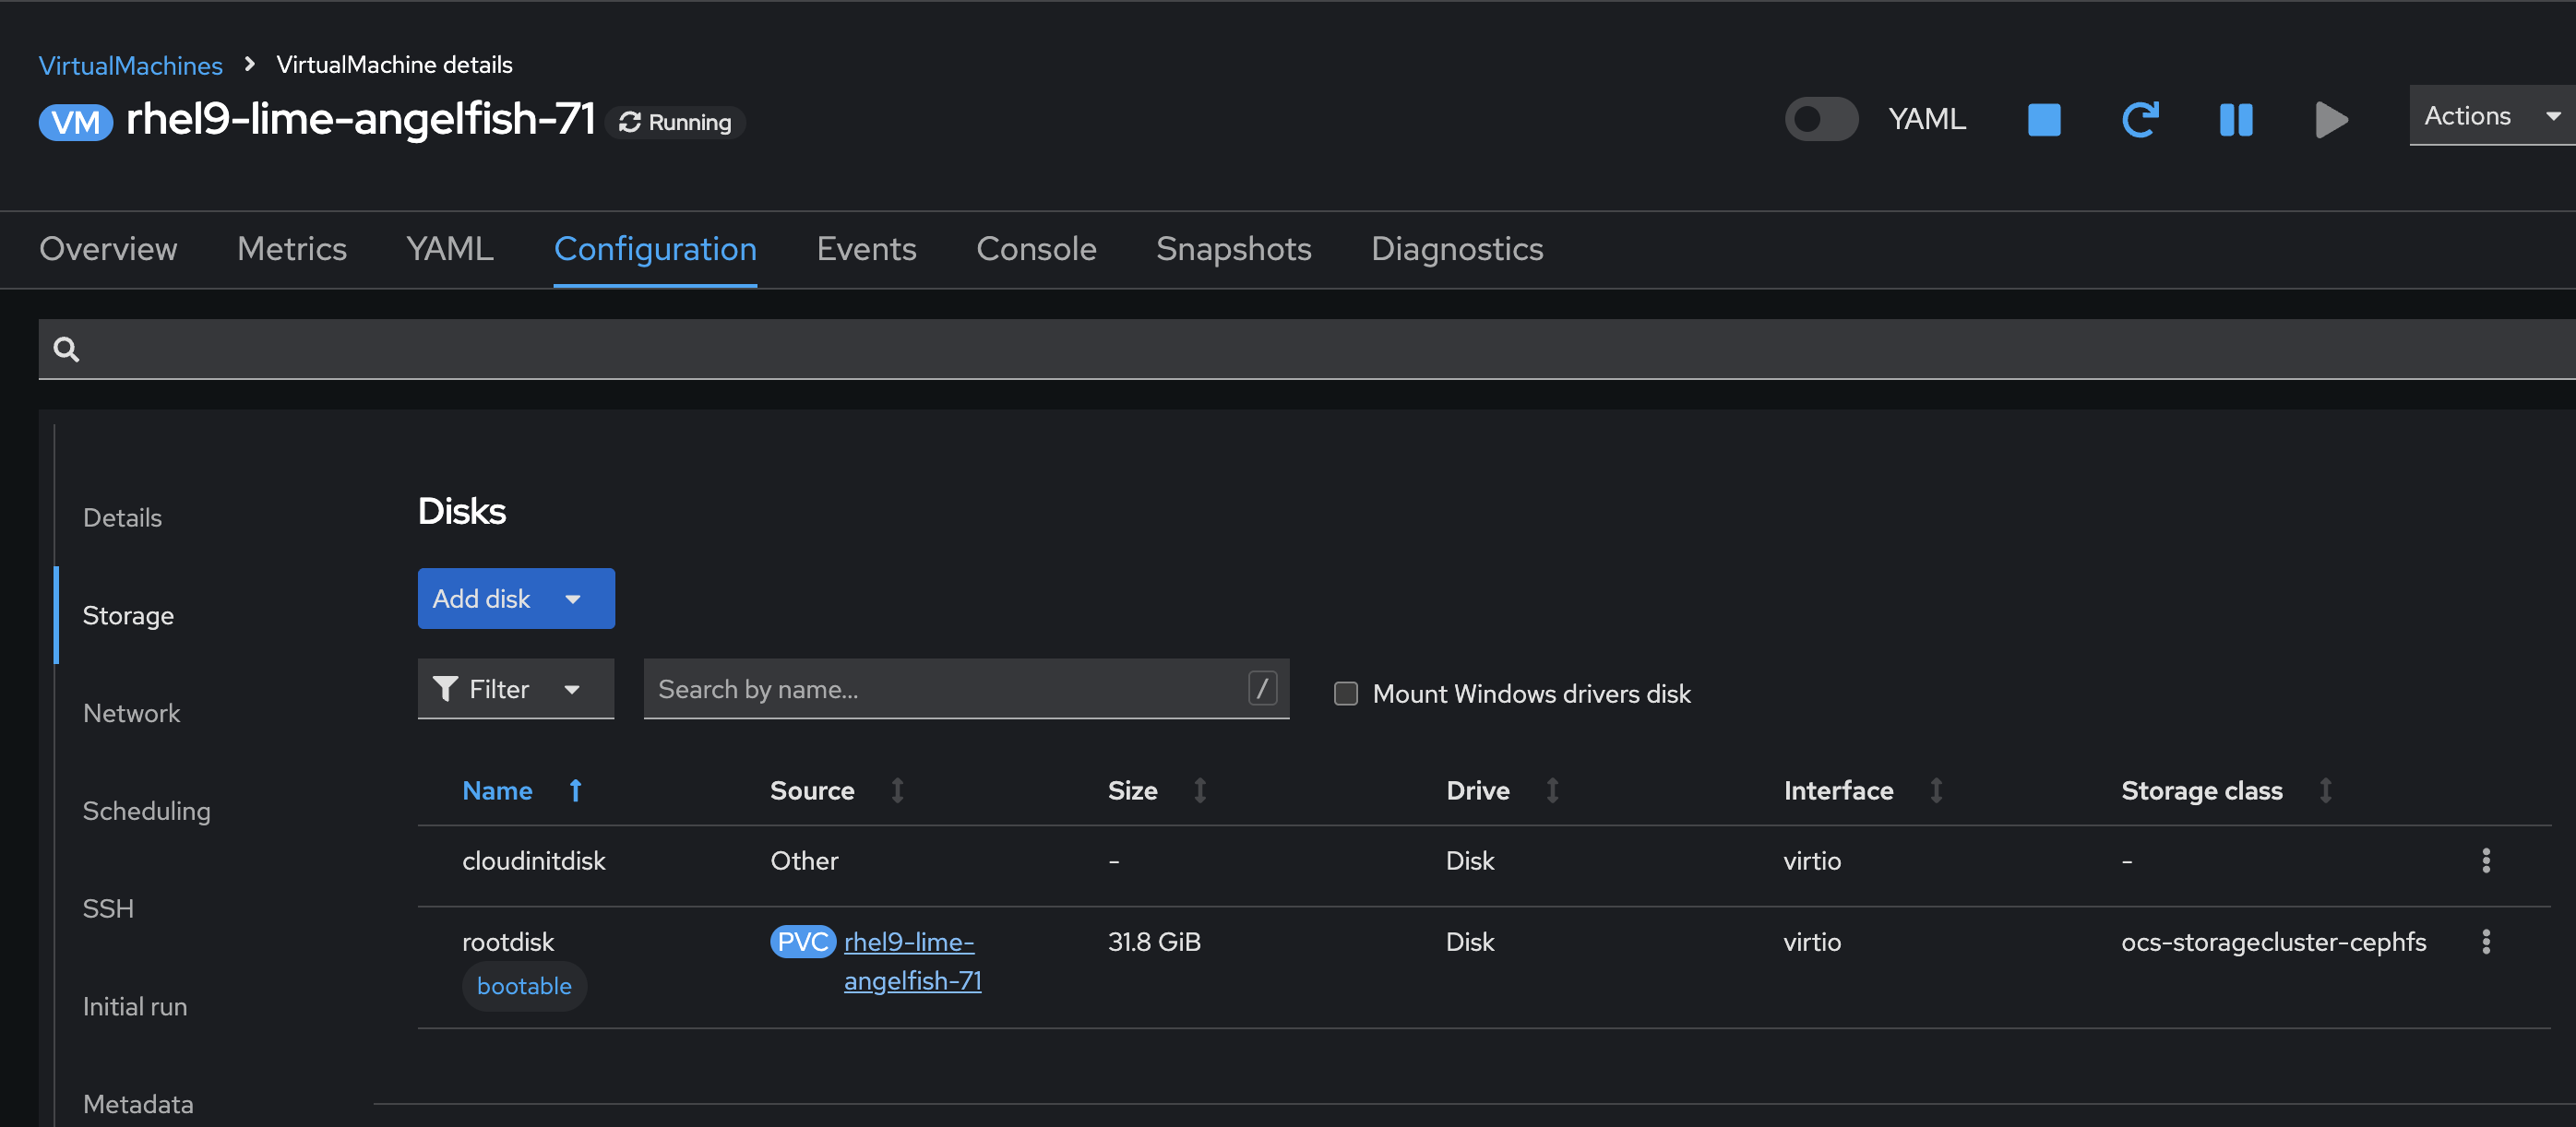
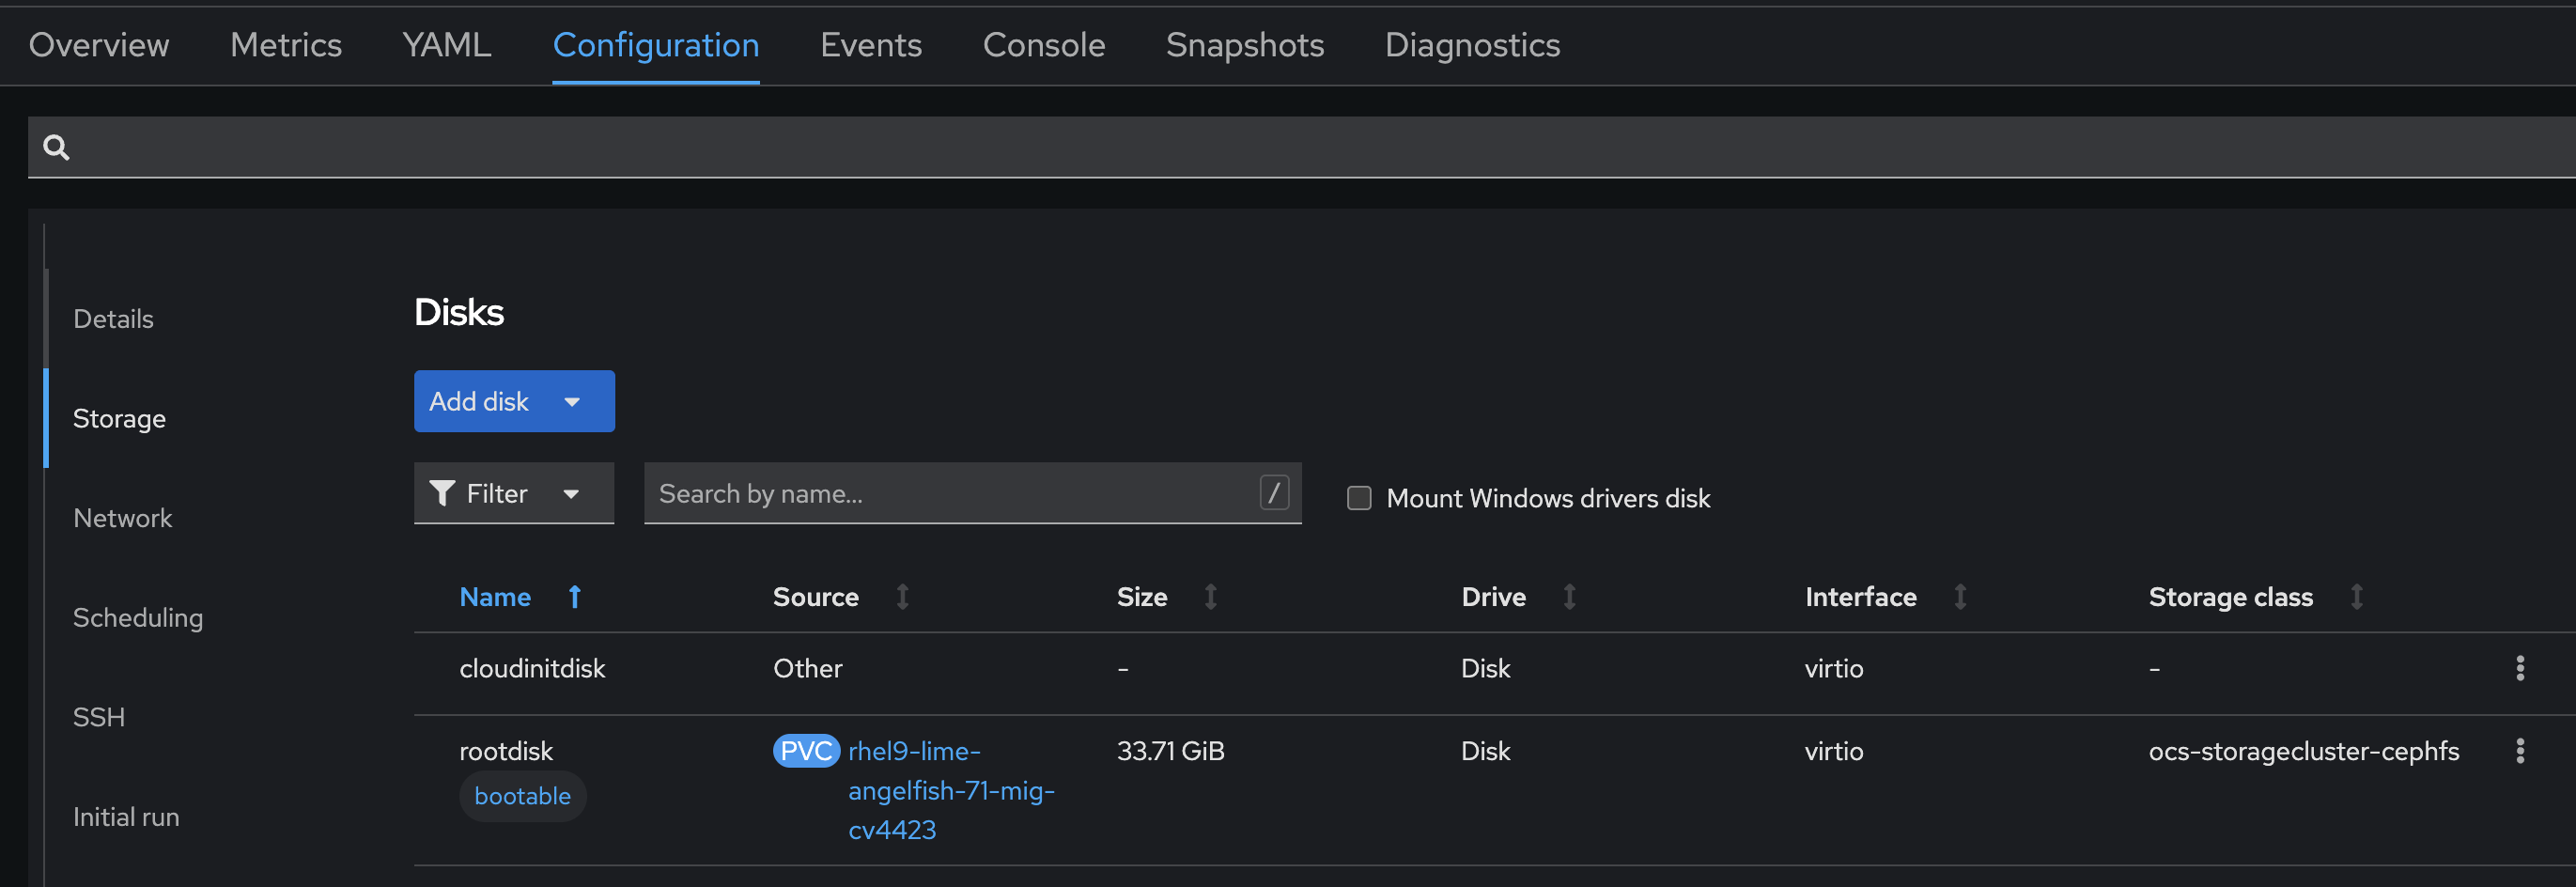
You can check the storage class in use by selecting Configuration, Storage
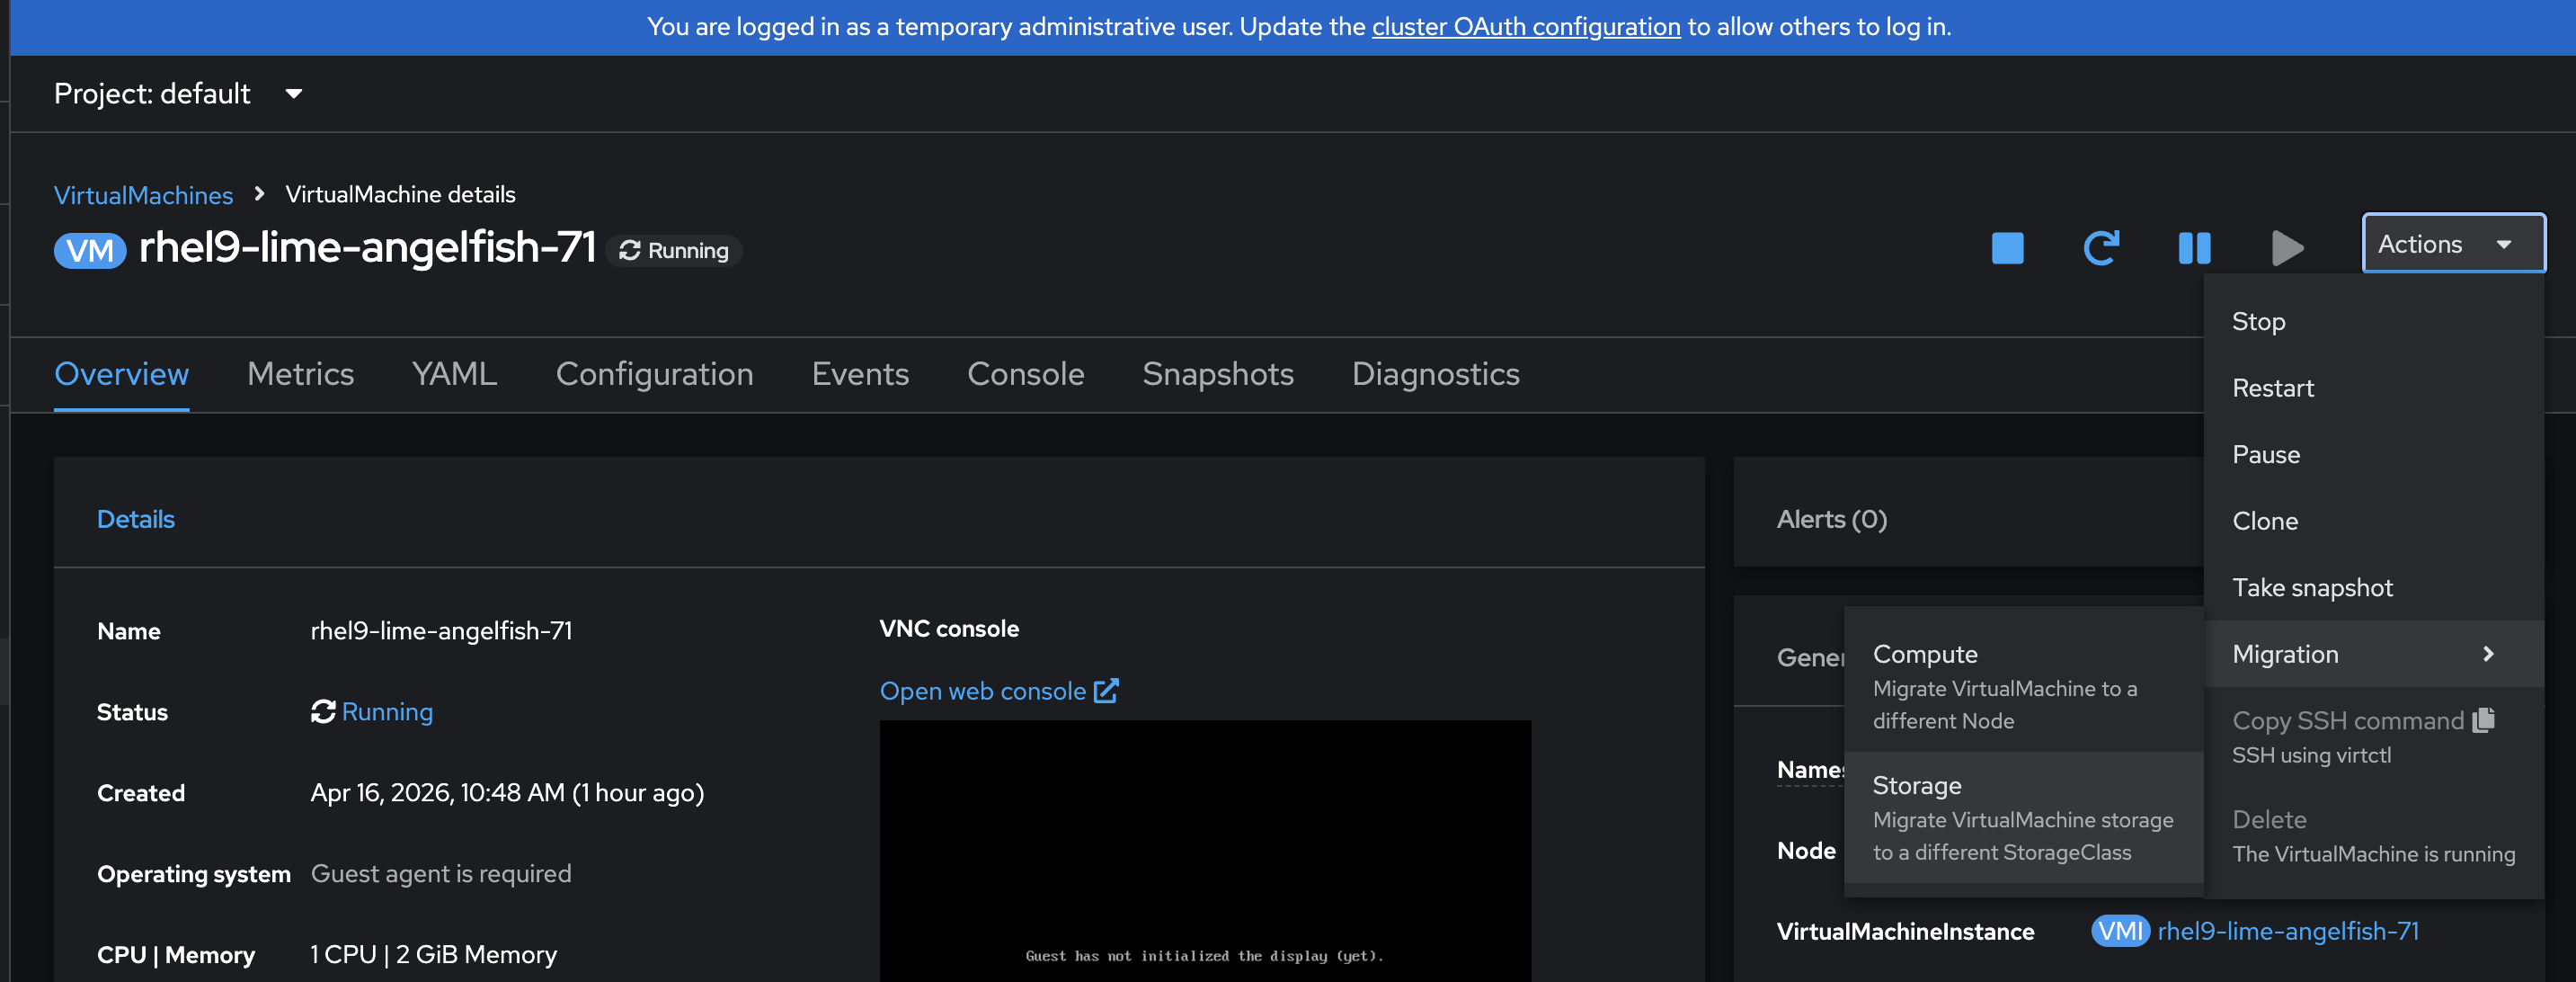
Now navigate back to the Overview and select migration, storage
This will start the dialog box:
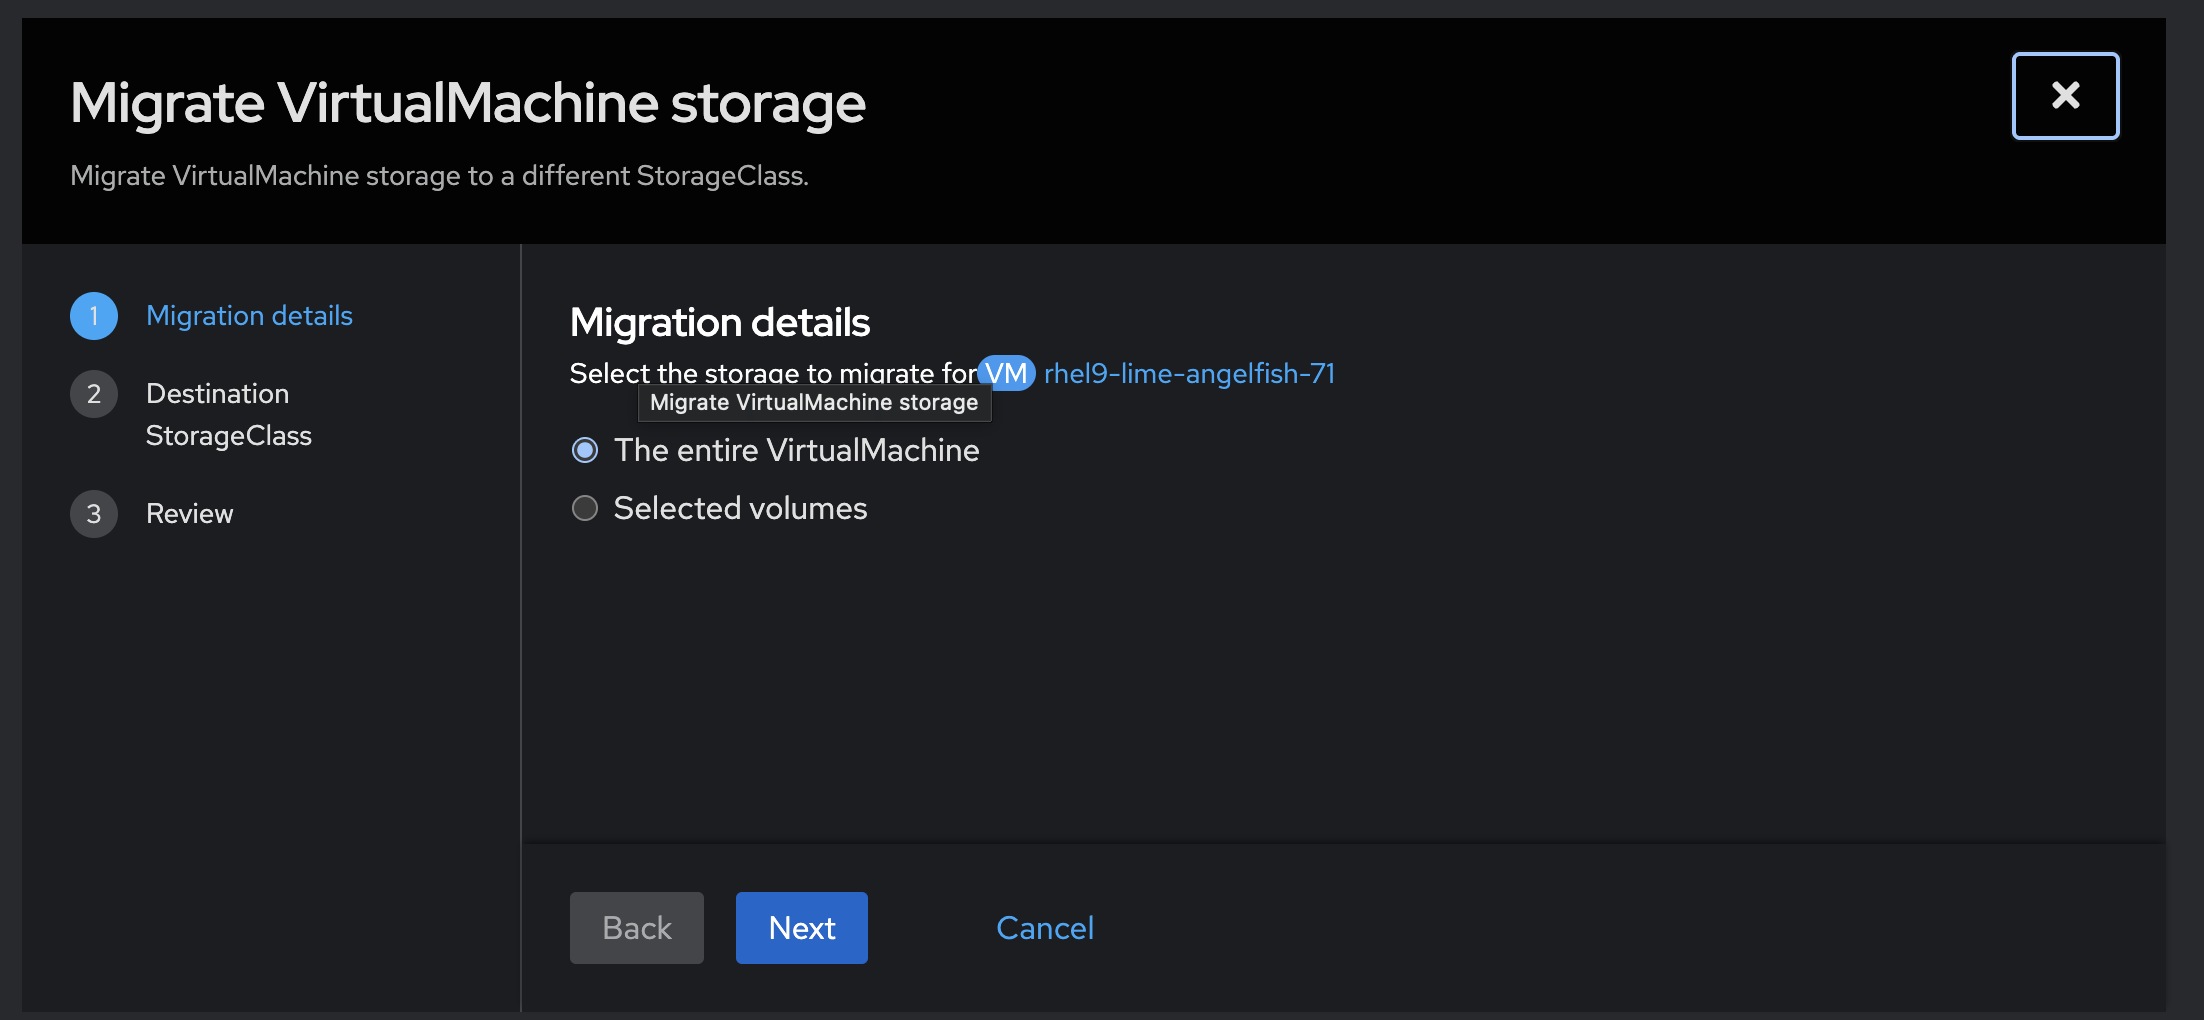
Select The entire VirtualMachine and next
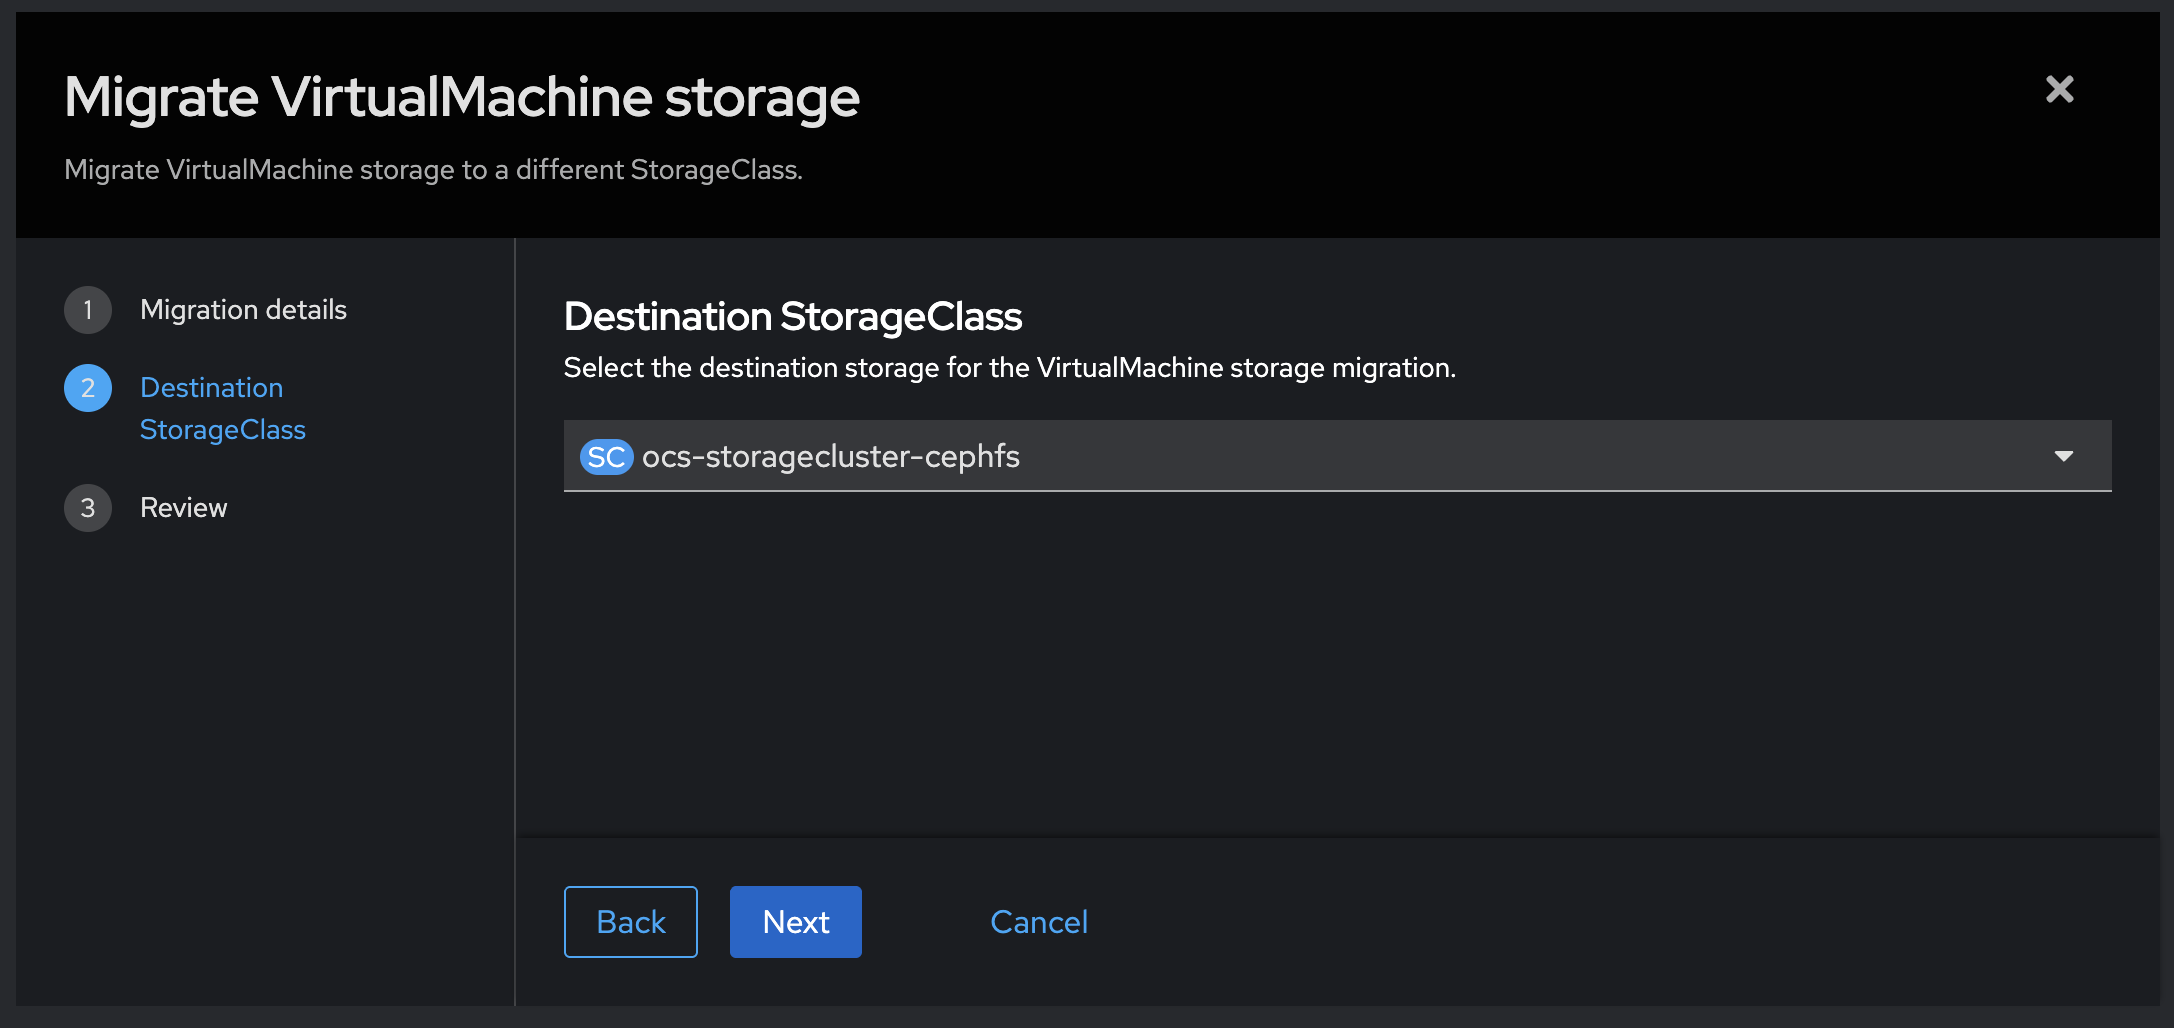
Next and then Migrate VirtualMachine:

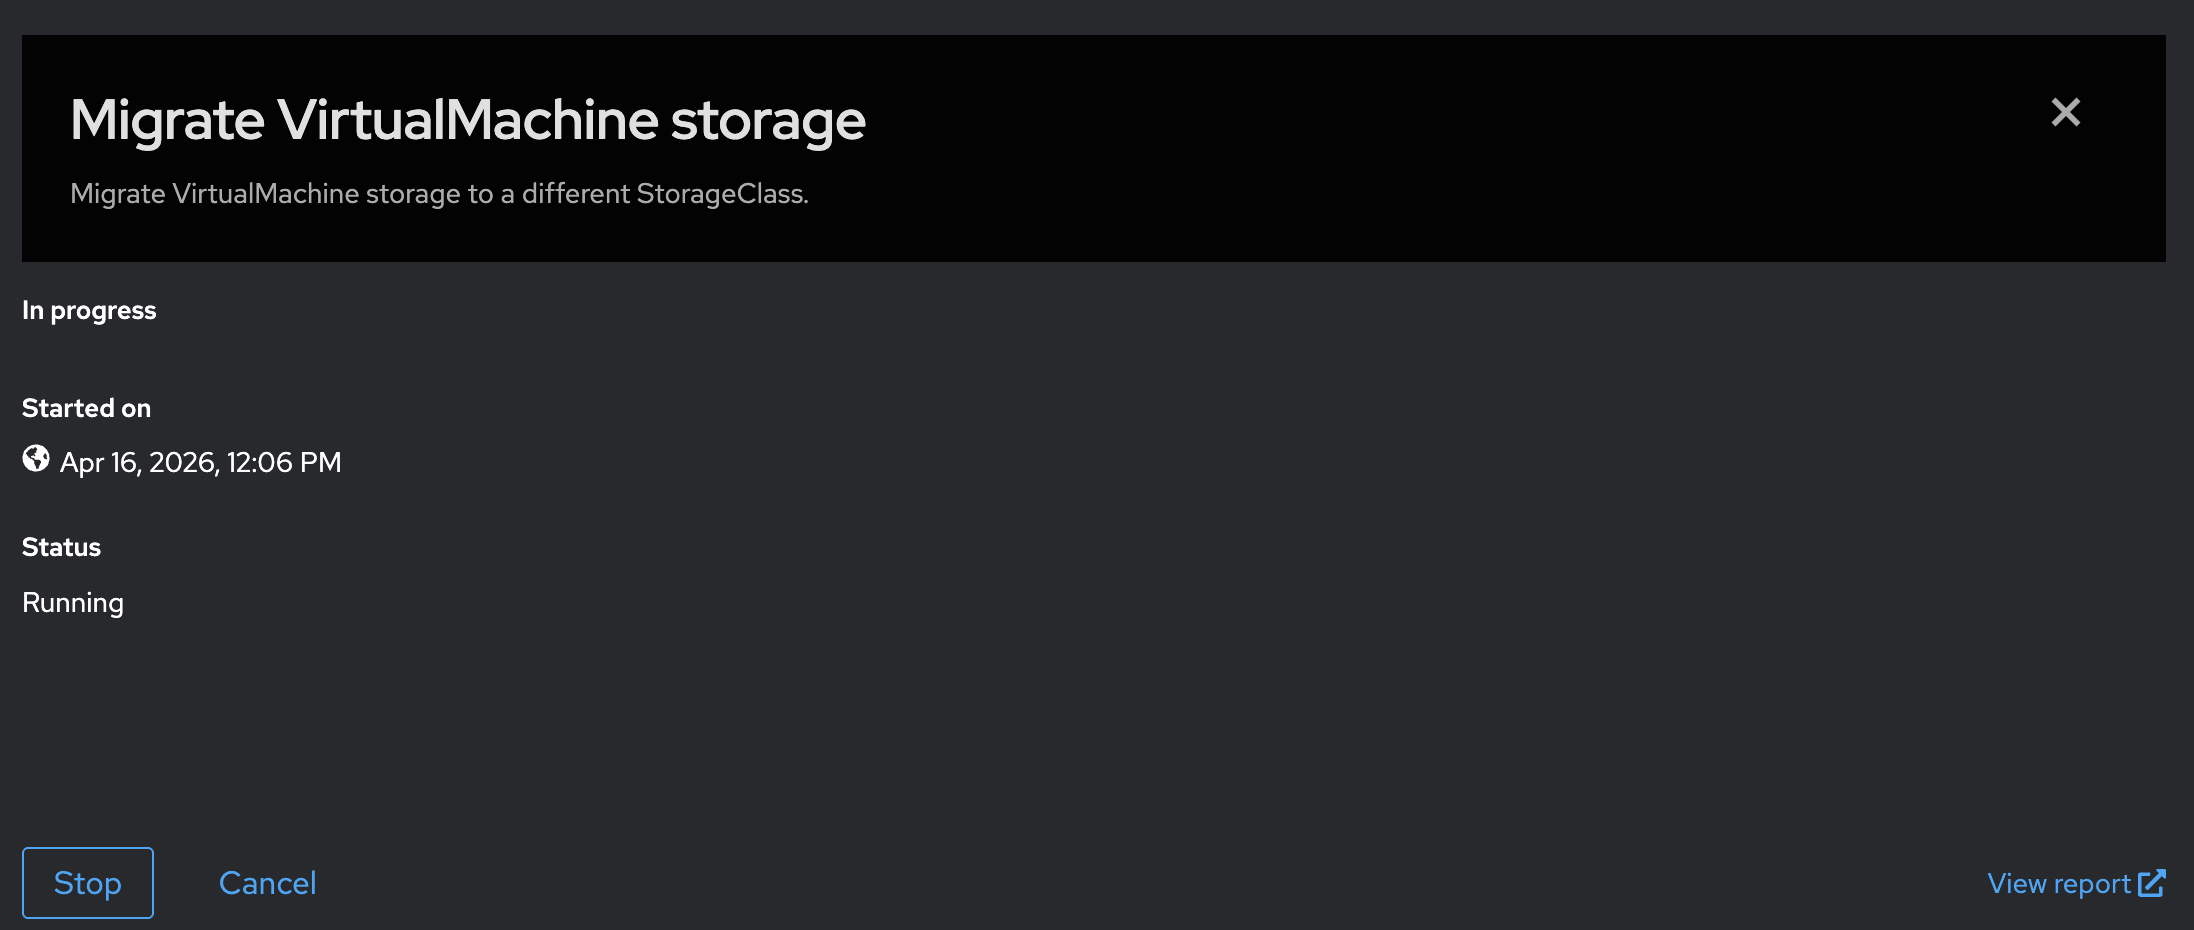
Now the migration will show running
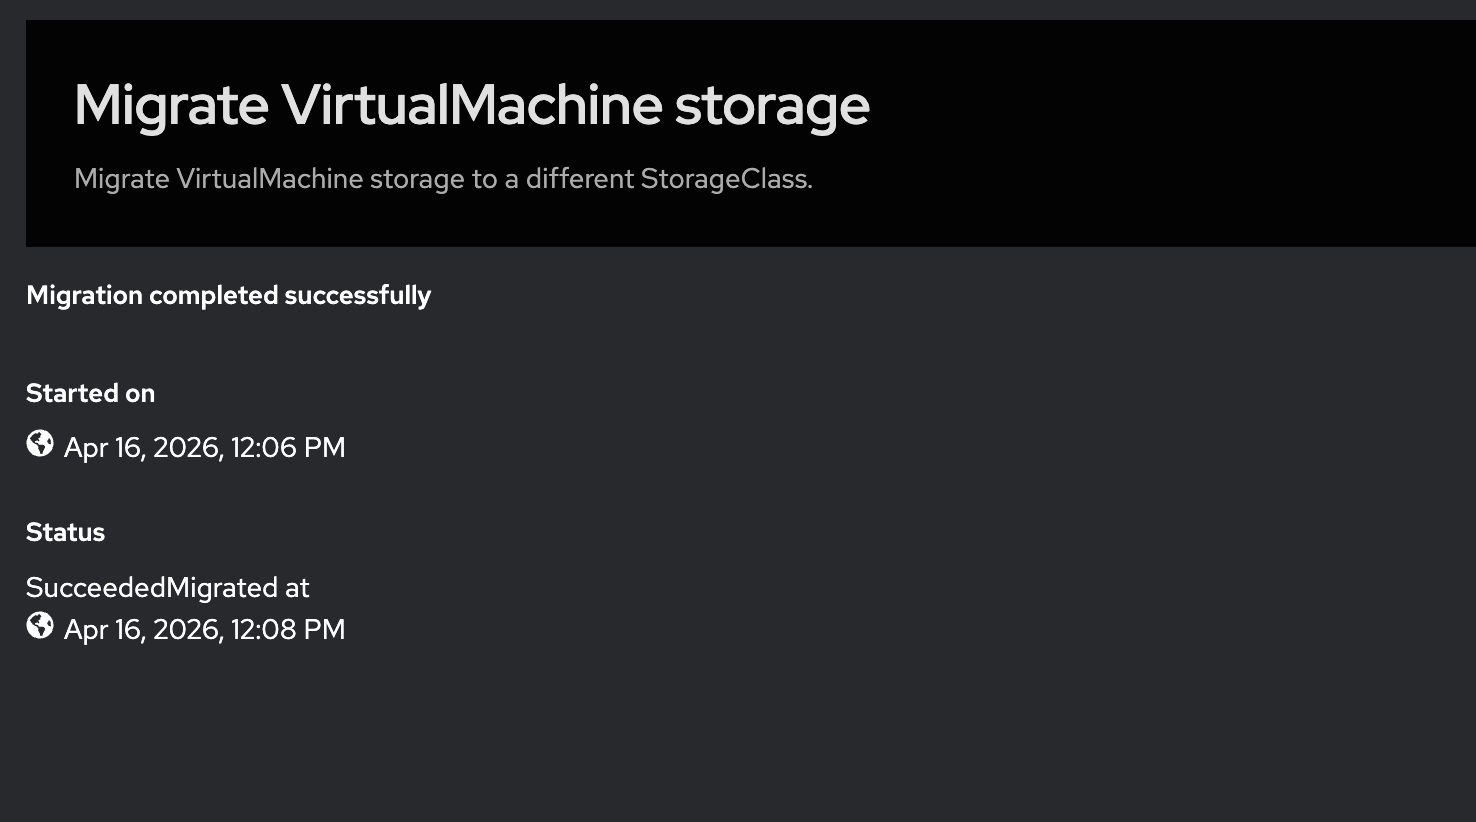
when completed
Learning outcomes
By completing this module, you should now understand:
-
How to navigate the OpenShift Virtualization interface and Start Virtual Machine Migrations
-
How to start a virtual machine compute migration
-
How to start a virtual machine storage migration
Module summary
You have successfully explored the OpenShift Virtualization environment for migrations.
What you accomplished:
-
Navigated the OpenShift Virtualization dashboard for migrations
-
Examined IBM Fusion storage classes and running nodes.
-
Migrated a virtual machine to a new worker node.
-
Changed a virtual machines storage class.
Next steps:
Module 4 will cover IBM Fusion Backup and Restore service