Bare Metal Infrastructure Management
Introduction
In this section, you will review the physical environment used during this workshop, including an overview of OpenShift deployed to bare metal hosts. This environment runs on bare metal hosts in the Equinix cloud. This review will help provide you with an understanding of how the nodes are configured in the cluster, and what their current hardware capabilities are. You will then be tasked with adding a machine and scaling the number of cluster nodes using the Red Hat OpenShift web console.
-
Explore the requirements for clusters running OpenShift Virtualization
-
Review the physical characteristics of the lab cluster.
-
Discover a new baremetal machine, and use it to scale the cluster.
Supported Platforms
Today, OpenShift virtualization is fully supported in the following environments that provide bare metal resources:
-
Self-managed bare metal servers on-premises or at a hosted site that provides bare metal resources. The lab you’re using today is an OpenShift cluster deployed to an Equinix colocation facility.
-
Amazon Web Services (AWS) bare metal instances, as well as ROSA (Red Hat OpenShift Services on AWS) with bare metal instances, are fully supported. See OpenShift Virtualization on ROSA.
-
IBM Cloud Bare Metal Servers are currently tech preview. See Deploy OpenShift Virtualization on IBM Cloud Bare Metal Nodes for details.
| Installing OpenShift Virtualization on IBM Cloud Bare Metal Servers is a Technology Preview feature only. Technology Preview features are not supported with Red Hat production service level agreements (SLAs) and might not be functionally complete. Red Hat does not recommend using them in production. Technology previews provide early access to upcoming product features, enabling customers to test functionality and provide feedback during the development process. |
Requirements for OpenShift Virtualization
Before you install OpenShift Virtualization for Red Hat OpenShift Container Platform, make sure that your Red Hat OpenShift Container Platform cluster meets the following requirements.
-
CPU requirements:
-
Supported by Red Hat Enterprise Linux (RHEL) 8/9
-
Support for Intel 64 or AMD64 CPU extensions
-
Intel VT or AMD-V hardware virtualization extensions enabled
-
NX (no execute) flag enabled
-
-
Storage requirements:
-
Supported by OpenShift
-
A CSI provisioner is strongly encouraged
-
ReadWriteMany (RWX) PVCs are required for live migration
-
A CSI provisioner that supports accelerated volume creation via CSI clones or snapshots makes creating VMs from templates much faster. If one is not available, OpenShift Virtualization will fallback to using a host copy
-
-
OpenShift cluster node requirements:
-
Red Hat Enterprise Linux CoreOS (RHCOS) installed on worker nodes
-
CPU, memory, and network capacity sufficient to host your virtual machine workload
-
Review the documentation here for specific requirements and guidance on hardware for use with OpenShift Virtualization.
| If your cluster uses worker nodes with different CPUs, e.g. Intel and AMD, live migration failures can occur because different CPUs have different capabilities. |
Review Red Hat OpenShift Cluster
When deployed using the installer provisioned infrastructure (IPI) method, OpenShift uses Metal3 to manage the hardware using the out-of-band management controller. This results in the hardware being represented in three different ways in the cluster:
-
Node - The node is viewed and used by the Kubernetes scheduler. This is the object which represents the usable resources in the cluster.
-
Machine - An object managed by an infrastructure provider. In this lab, and when using OpenShift Virtualization, this is a physical server that is abstracted by the Metal3 Operator. These are grouped and managed as a set via the MachineSet paradigm.
-
BareMetalHost - This is the lowest level and direct interaction with the management of the physical server.
Review Nodes and Machines
-
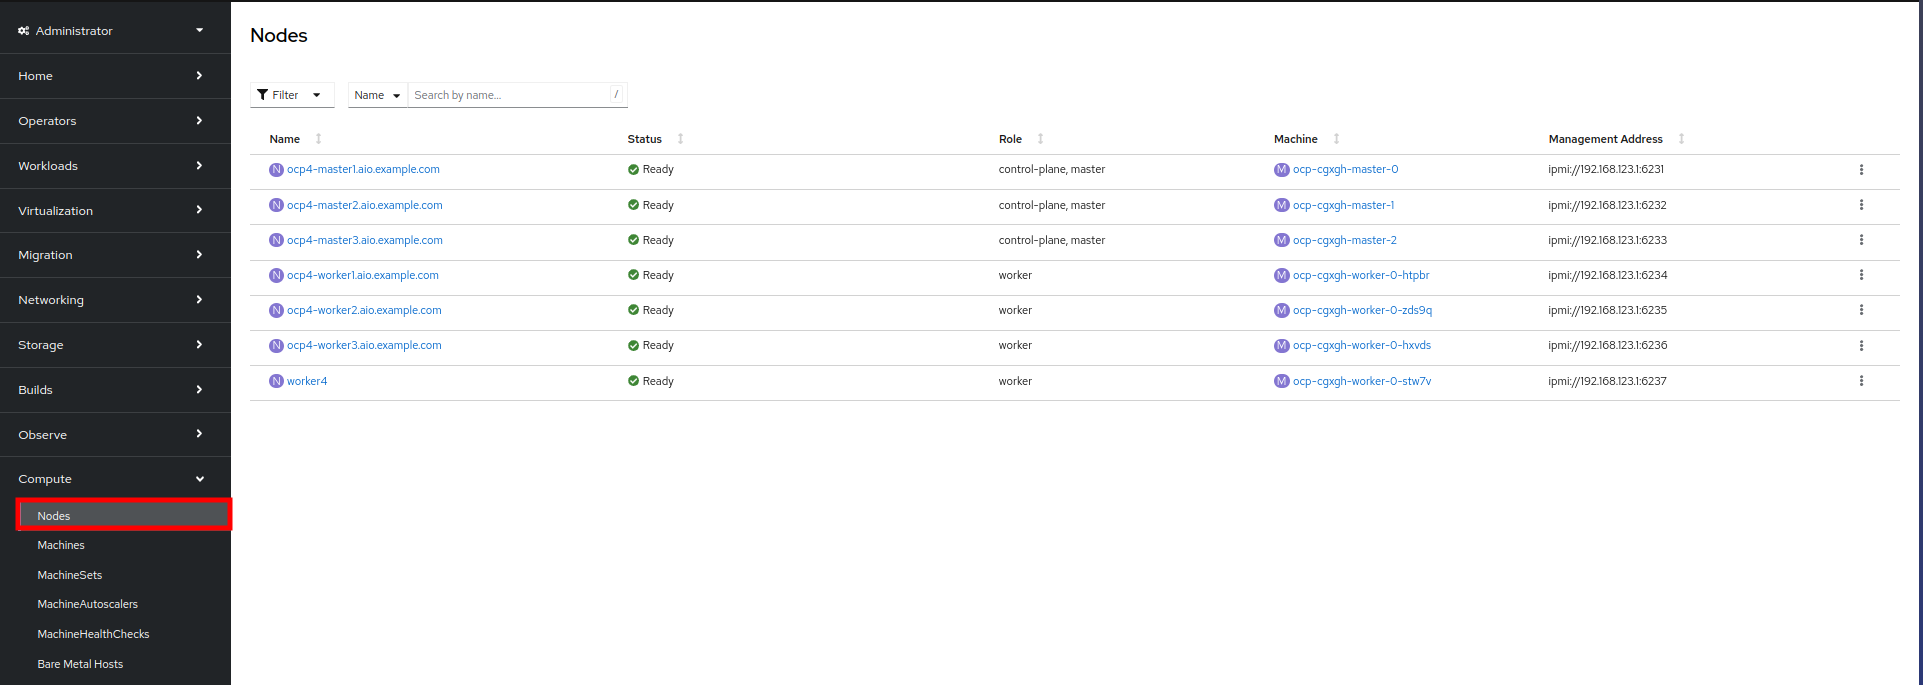
From the navigation menu on the left, select Compute → Nodes:
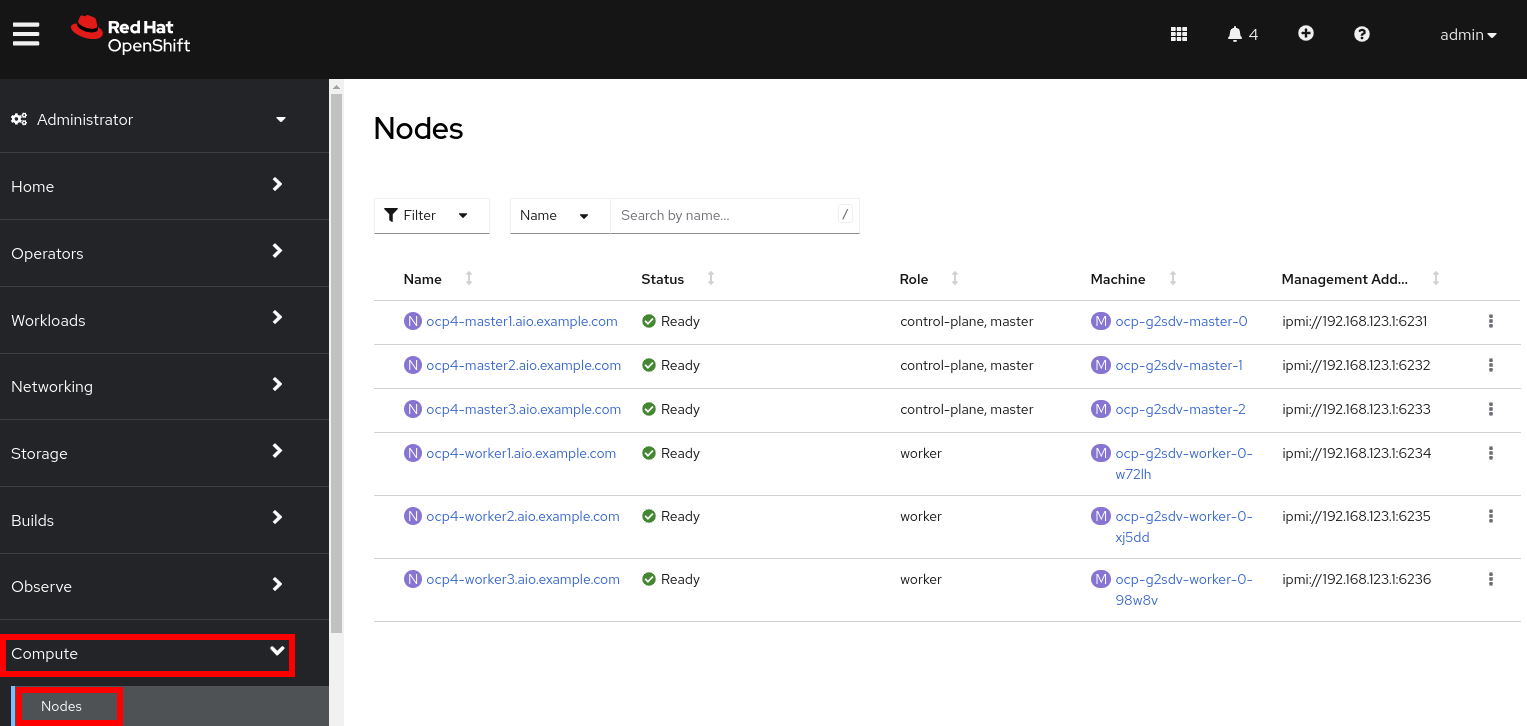
There are three control plane nodes and three worker nodes in the OpenShift 4 Cluster. In addition, ipmi (Intelligent Platform Management Interface) is being used to manage the bare metal nodes.
A node is a virtual or bare metal machine in an OpenShift cluster. Worker nodes host virtual machines and other workloads. The control plane nodes run services that are required to control and manage the OpenShift cluster.
-
Click on one of the worker nodes to obtain resource information about the node:
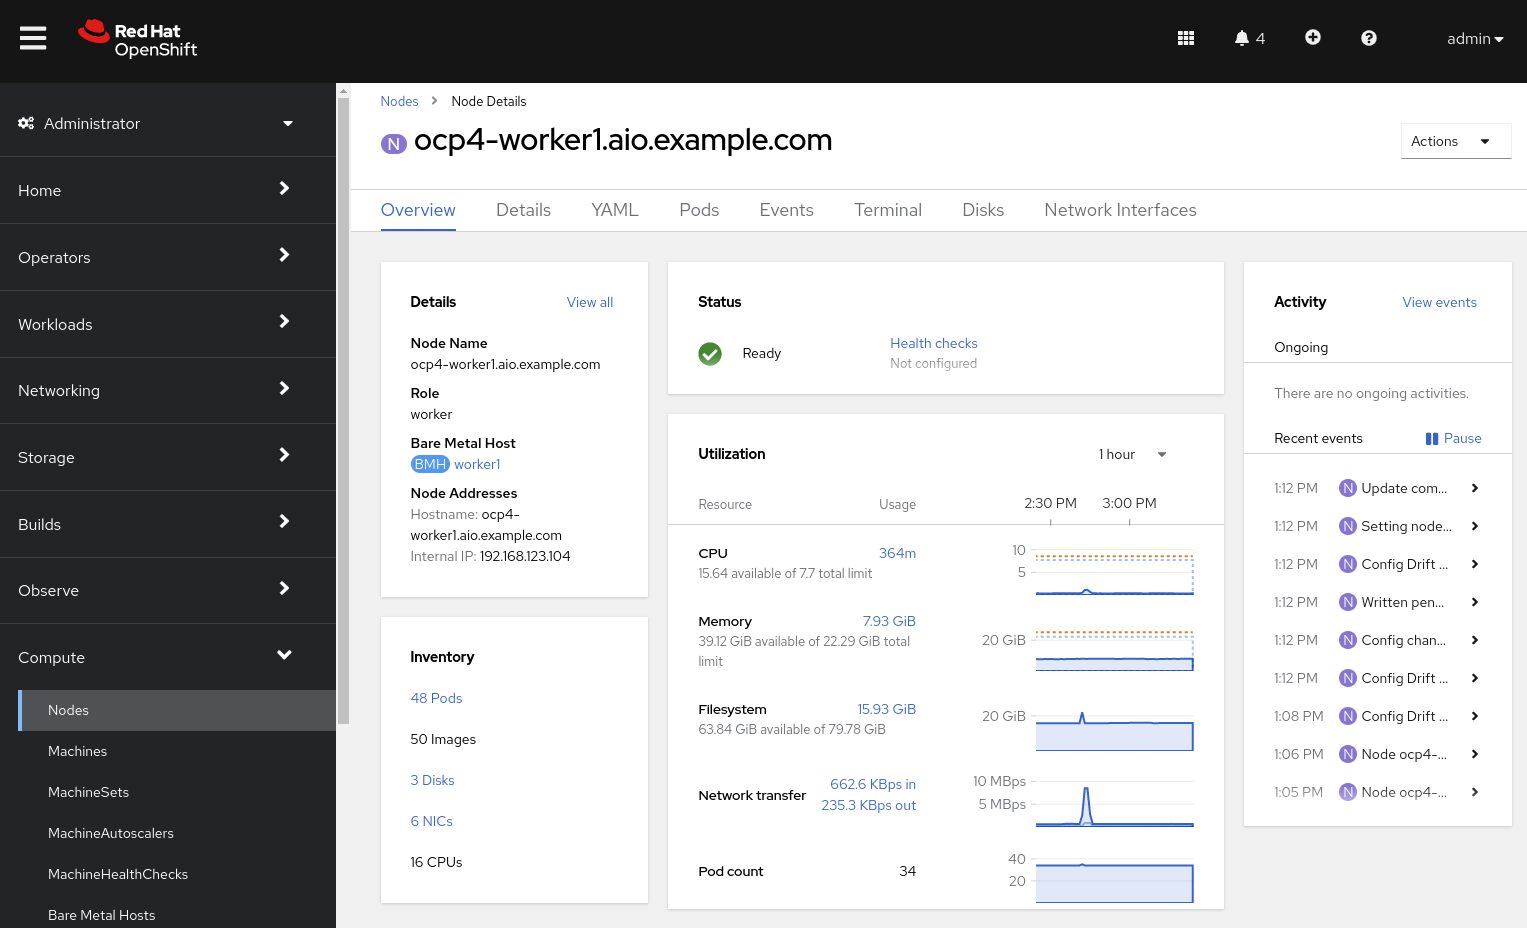
The Overview tab is showing useful information about the utilization of the resources, such as CPU and memory. It also shows all the applications (Pods) that are running inside on this node.
| At least one physical node is required for OpenShift Virtualization, "nesting" and emulation are not supported. However, other nodes in the cluster can be virtual machines, for example control plane and infrastructure nodes. |
-
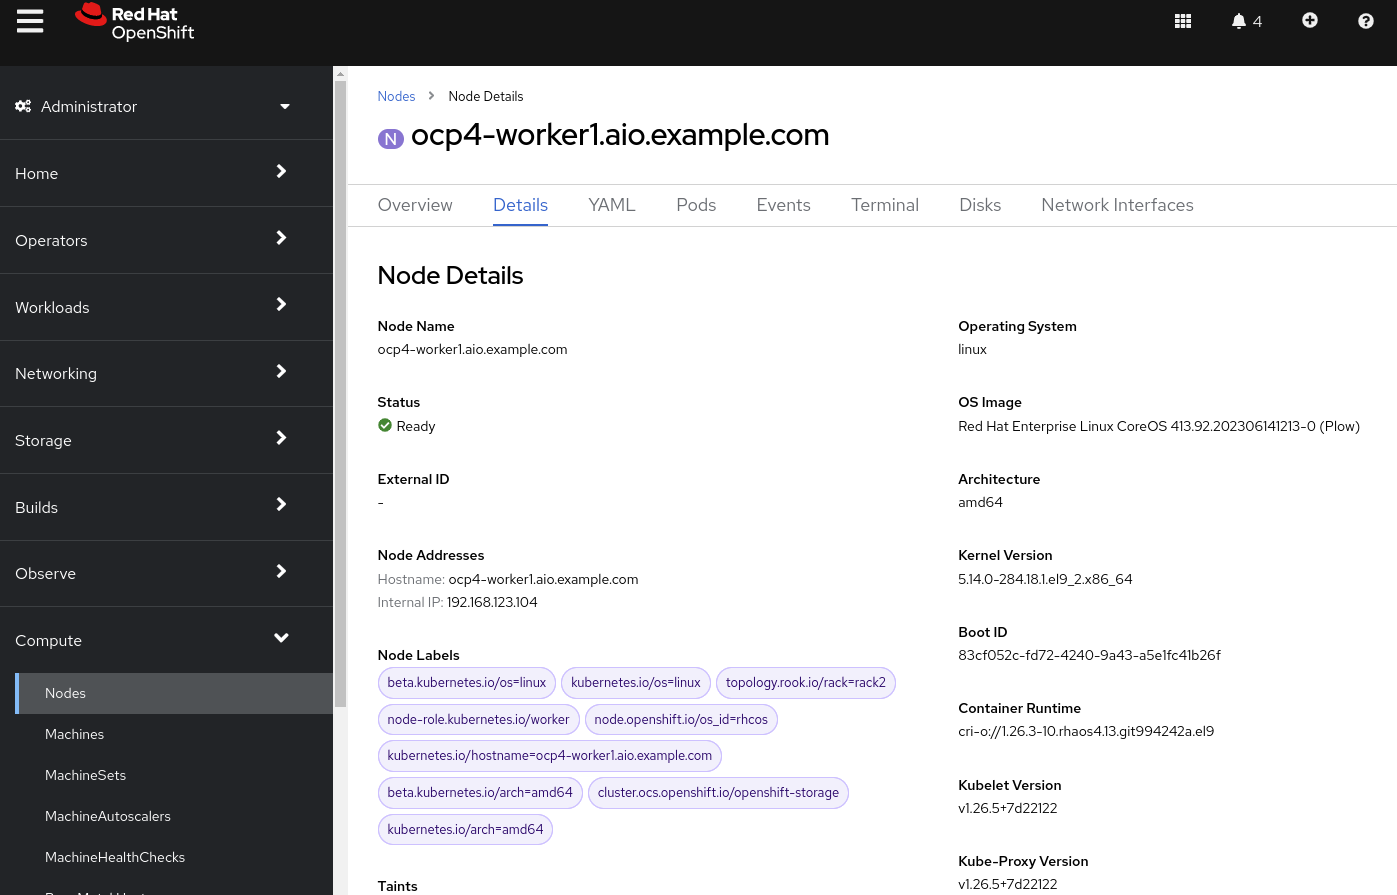
Navigate to the tab Details to obtain more information about the operating system.
Review Bare Metal Hosts
When using Baseboard Management Controller (BMC) it is possible to manage the nodes using the Red Hat OpenShift console. If you are still in the vmexamples project you will not be able to see the nodes, you will need to change your project to openshift-machine-api or to All Projects to view the nodes currently available in the cluster.
-
Select Compute → Bare Metal Hosts:
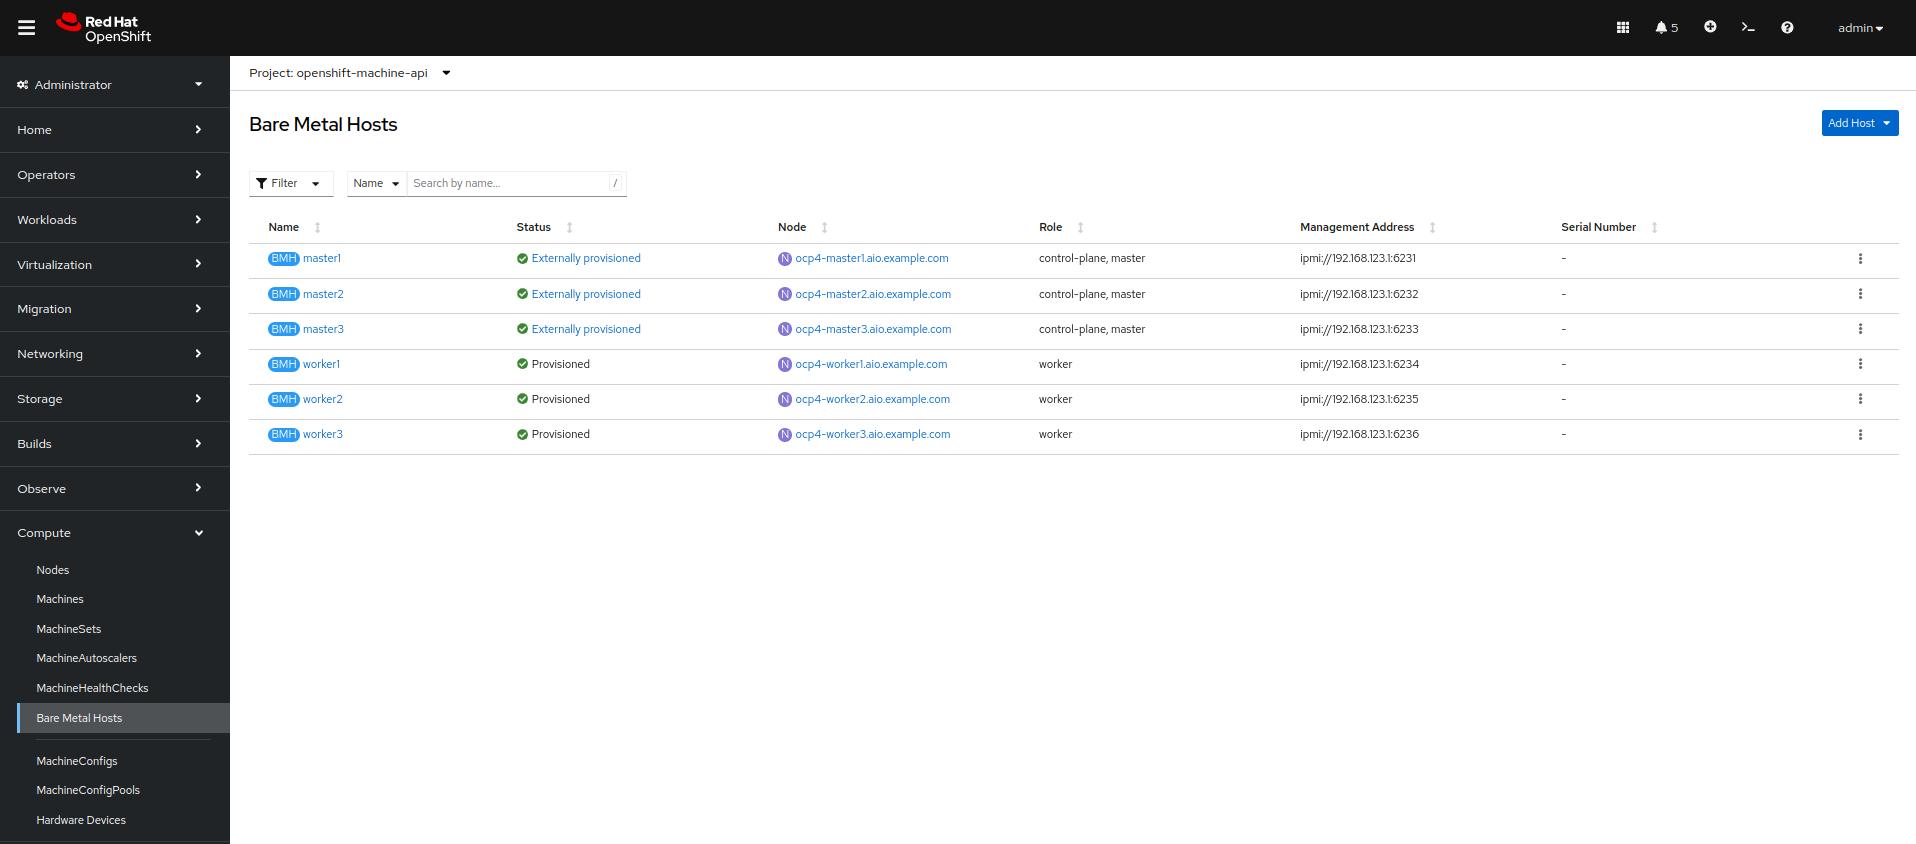
During installation, the Control Plane nodes are provisioned by the OpenShift Container Platform installation program (that is why the status is Externally provisioned) and when the control plane is ready, the Worker nodes are provisioned by the cluster itself (hence the status Provisioned) and joined to the cluster.
-
Click on any of the worker nodes to obtain information about the physical (bare metal) node:
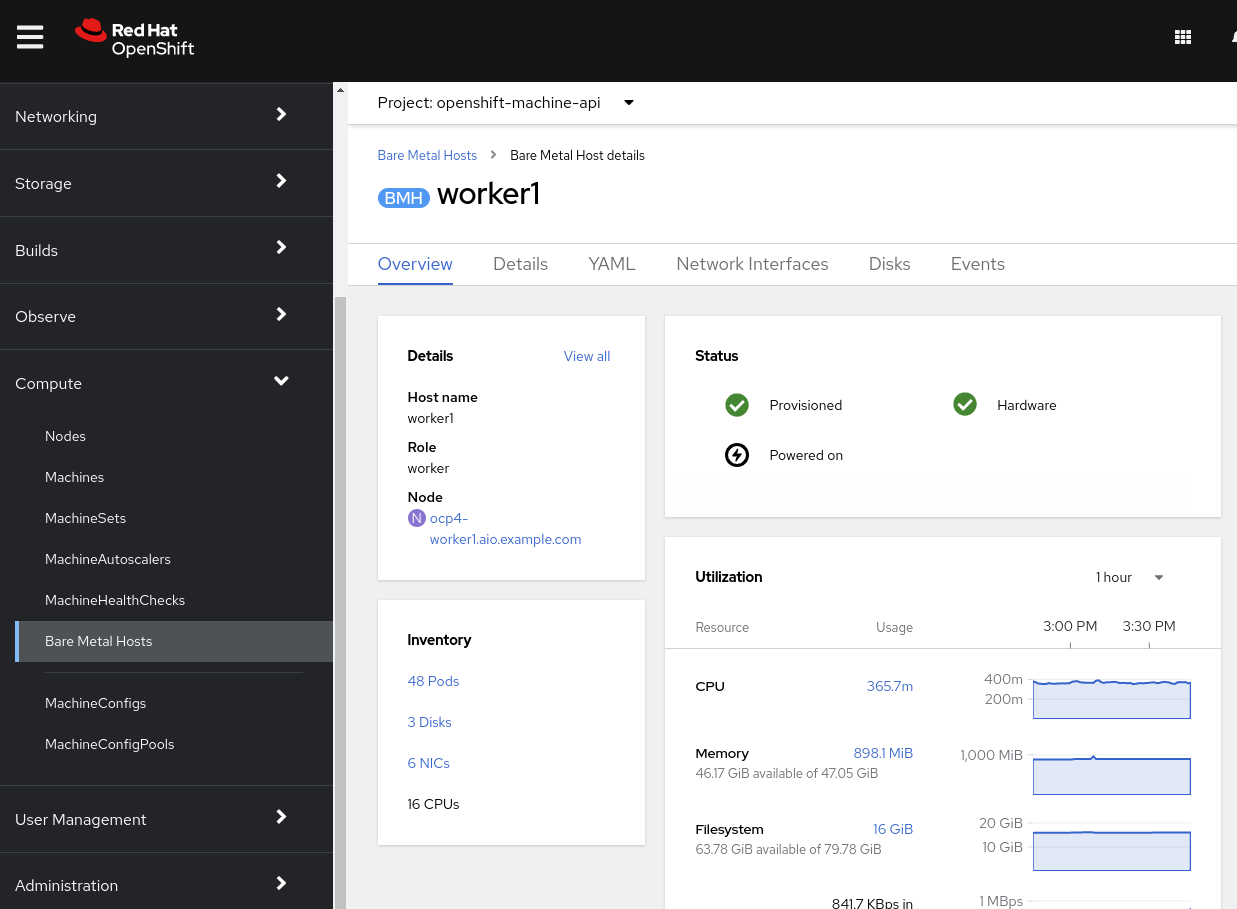
The information shown is similar to the Nodes page, with the exception of providing information related to the hardware and the physical status of the bare metal node. Using the Actions menu, it is possible to manage aspects of the bare metal host, such as restarting or stopping the system using BMC.
-
Explore the other tabs in the interface to see more details about the hosts, including the network interfaces and disks. Additionally, the host can be Deprovisioned, which will result in it being removed from the cluster, RHCOS removed, and the machine marked as ready to configure.
Scaling the Cluster with a New Bare Metal Host
| Before you begin this section of the lab, you need to switch to the openshift-machine-api project or you will not be able to see the machines, and machine discovery will not work. You may need to toggle the Show default projects switch to see the project in the drop-down list. |
In many cases it becomes necessary to add additonal physical nodes to a cluster to meet workload demands. In a virtual deployment of OpenShift, this is as simple as clicking on the appropriate machine set and choosing to scale the number of nodes available, and the hypervisor responds by cloning a VM template and spinning up new workers. In a bare metal environment there are a few more steps involved, but it’s still a fairly simple process if you have the hardware available and access to the servers through a BMC that supports the IPMI protocol.
To begin this process we are going to return to the bare metal hosts screen we reviewed earlier:
-
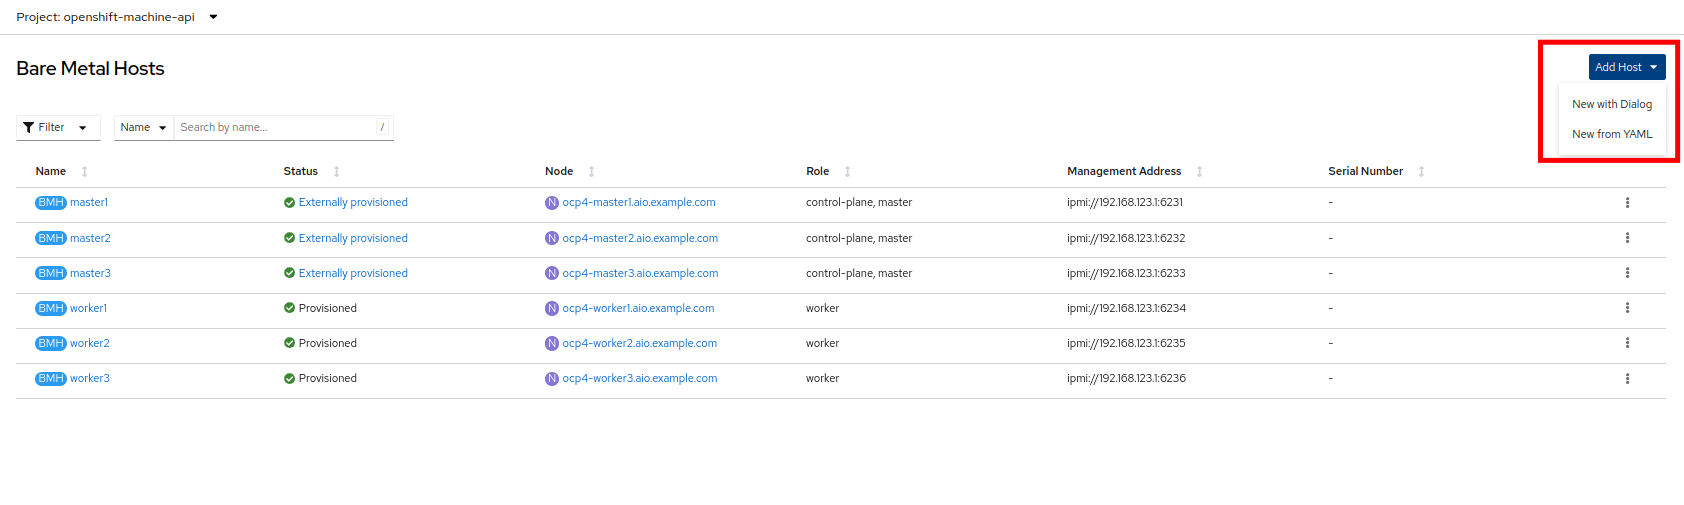
Select Compute → Bare Metal Hosts:
-
Click on the Add Host button in the upper right corner, and select the New with Dialog option.
-
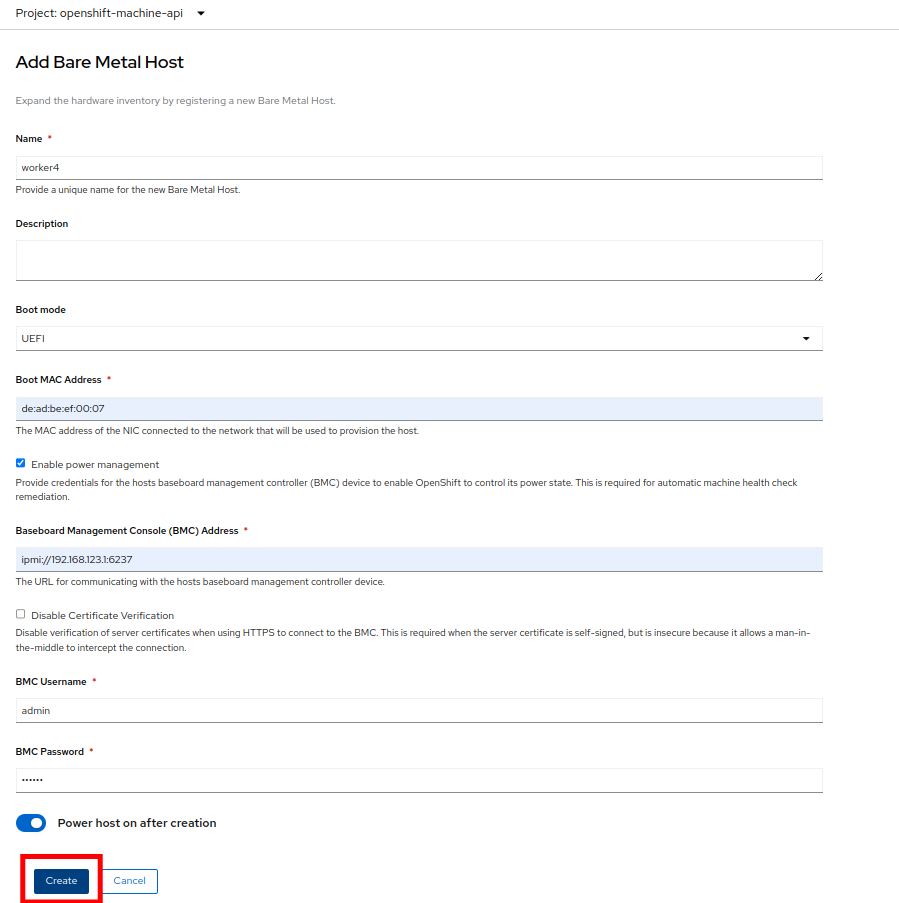
The dialog menu to add a bare metal host will ask you for the following information:
-
Name: worker4
-
Boot MAC Address: de:ad:be:ef:00:07
-
BMC Address: ipmi://192.168.123.1:6237
-
BMC Username: admin
-
BMC Password: redhat
-
-
With this information filled out, click the Create button at the bottom of the dialog page.
-
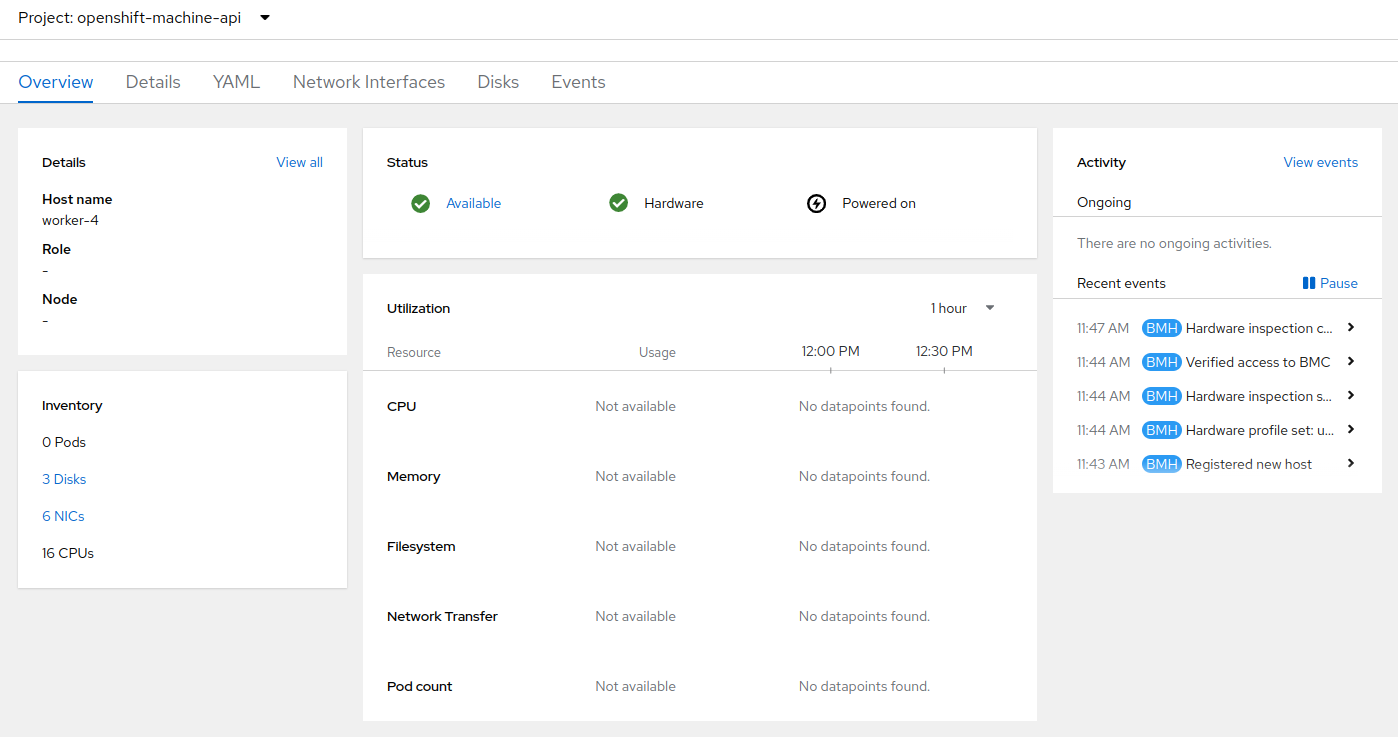
You will then be presented with the summary screen for worker4, and you will see the status update as it attempts to contact the machine and make it available as a host.
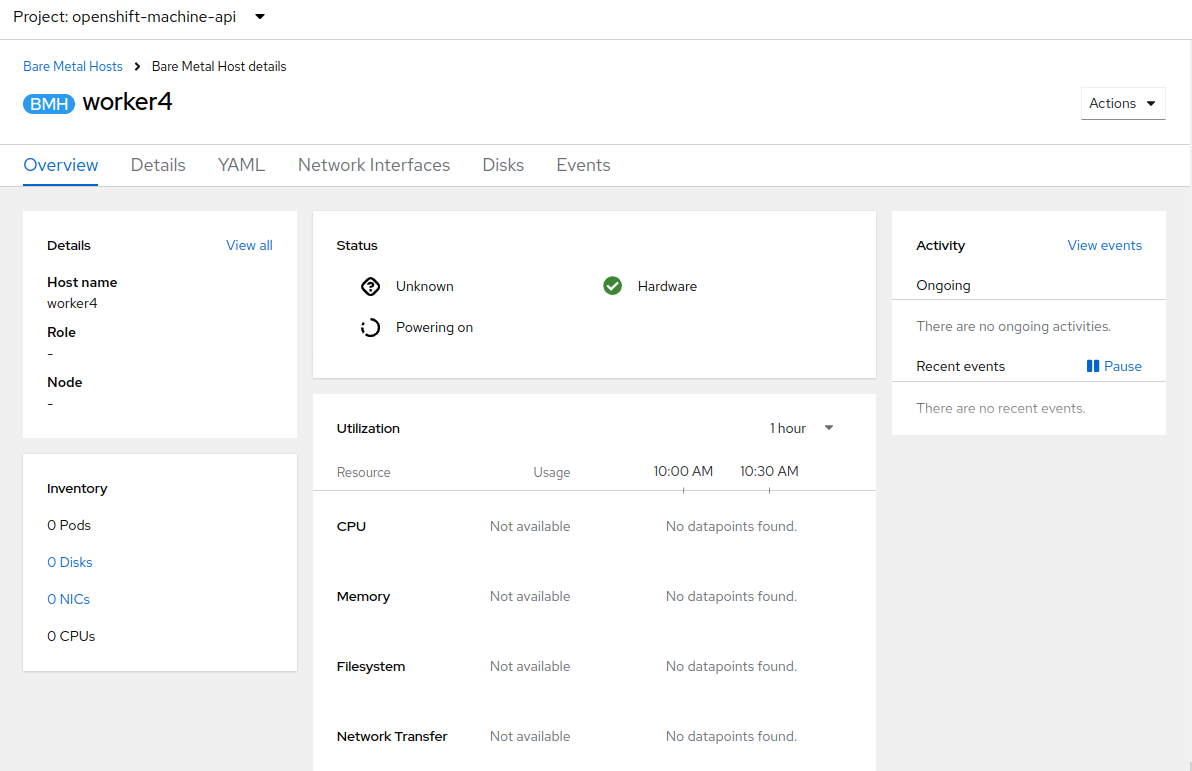
This step may take several minutes to update as it powers up the host, and collects hardware information. -
When host discovery and hardware inspection is complete you will see that it shows it’s status as Available.
-
Because this lab is being hosted in a virtualized environment we need to make a small configuration change before continuing. Click on the YAML tab at the top, and add the following two lines to the end of the spec: section to modify the type of hard disk present on the machine. Click the Save button.
  rootDeviceHints:
    deviceName: /dev/vda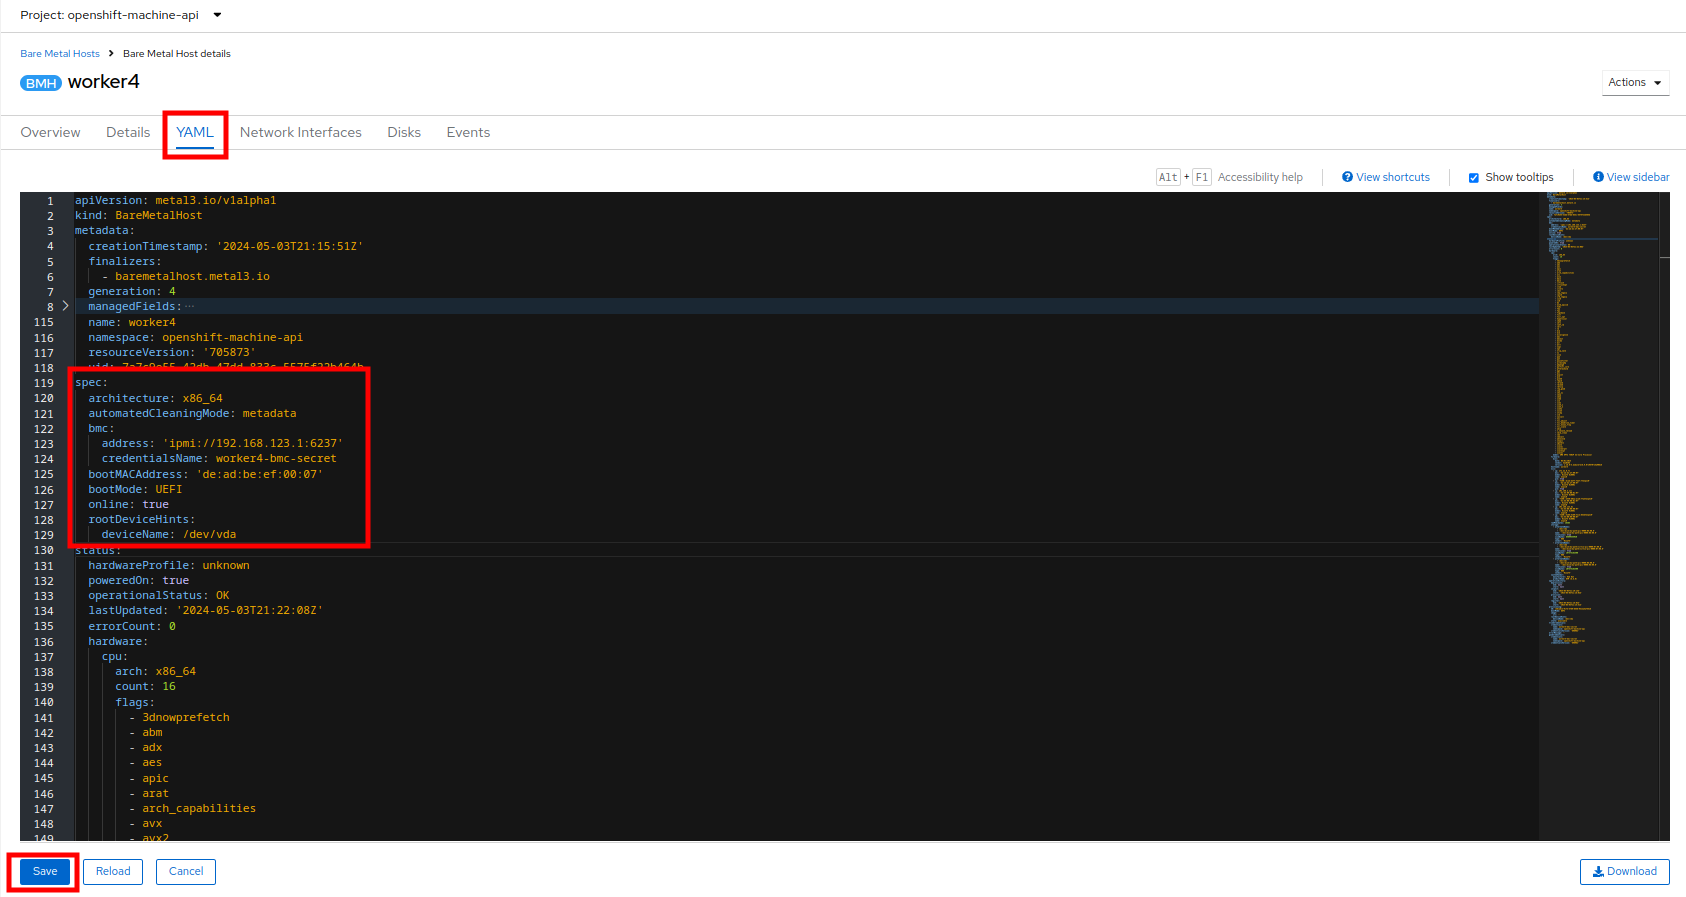
-
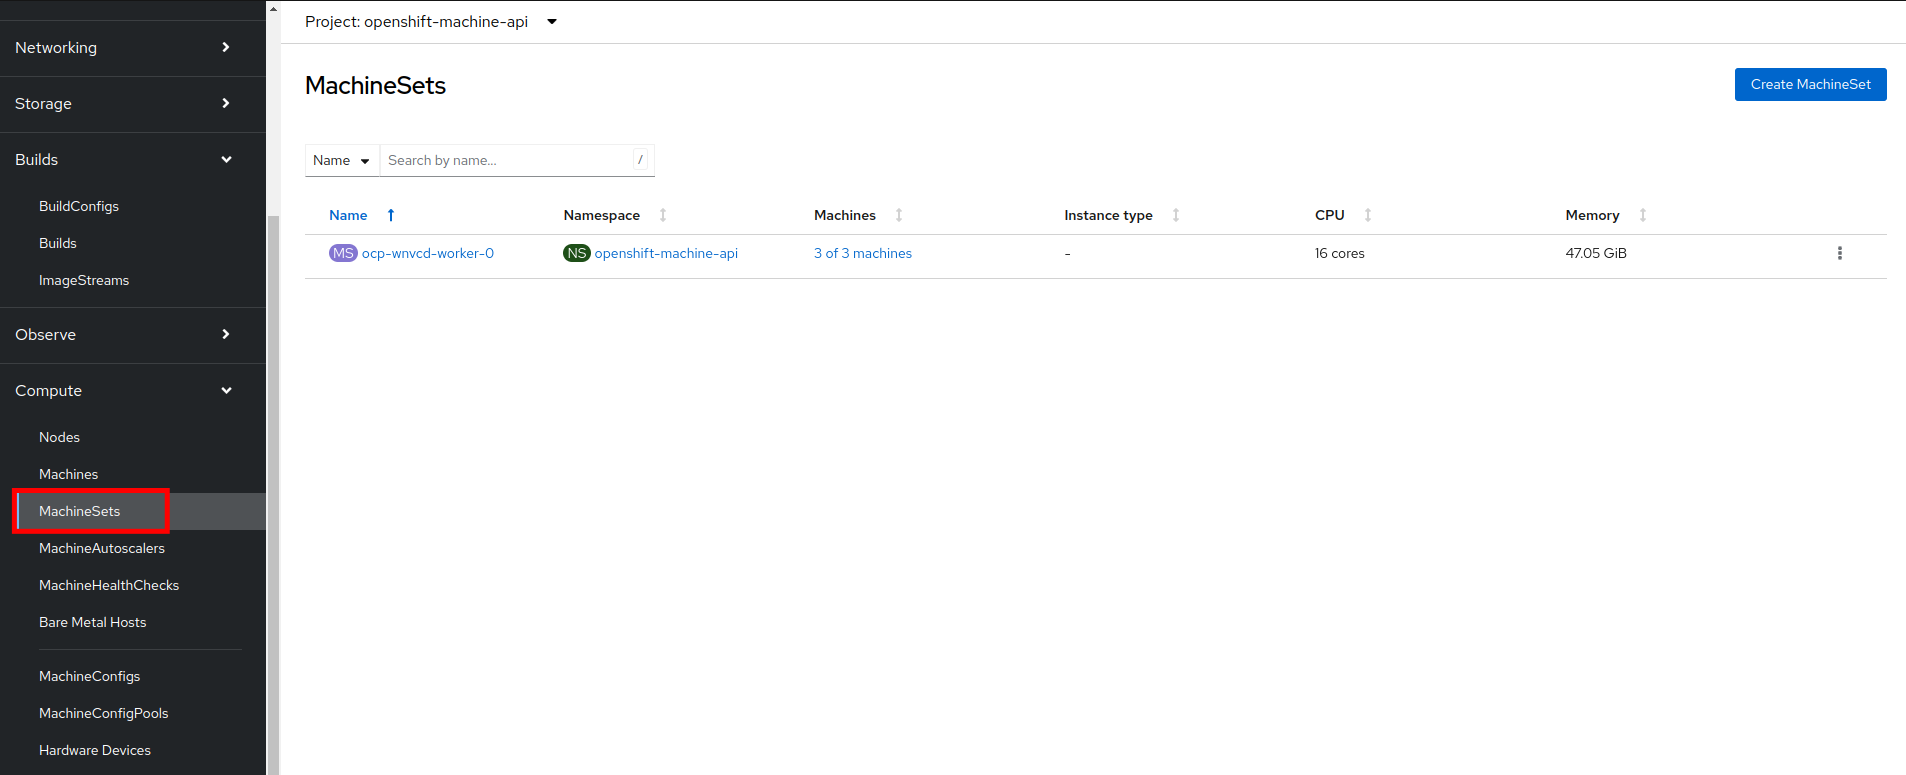
Once a host has been physically discovered the next step is to add it as a machine to be used by OpenShift. Click on the menu for MachineSets on the left under Compute.
-
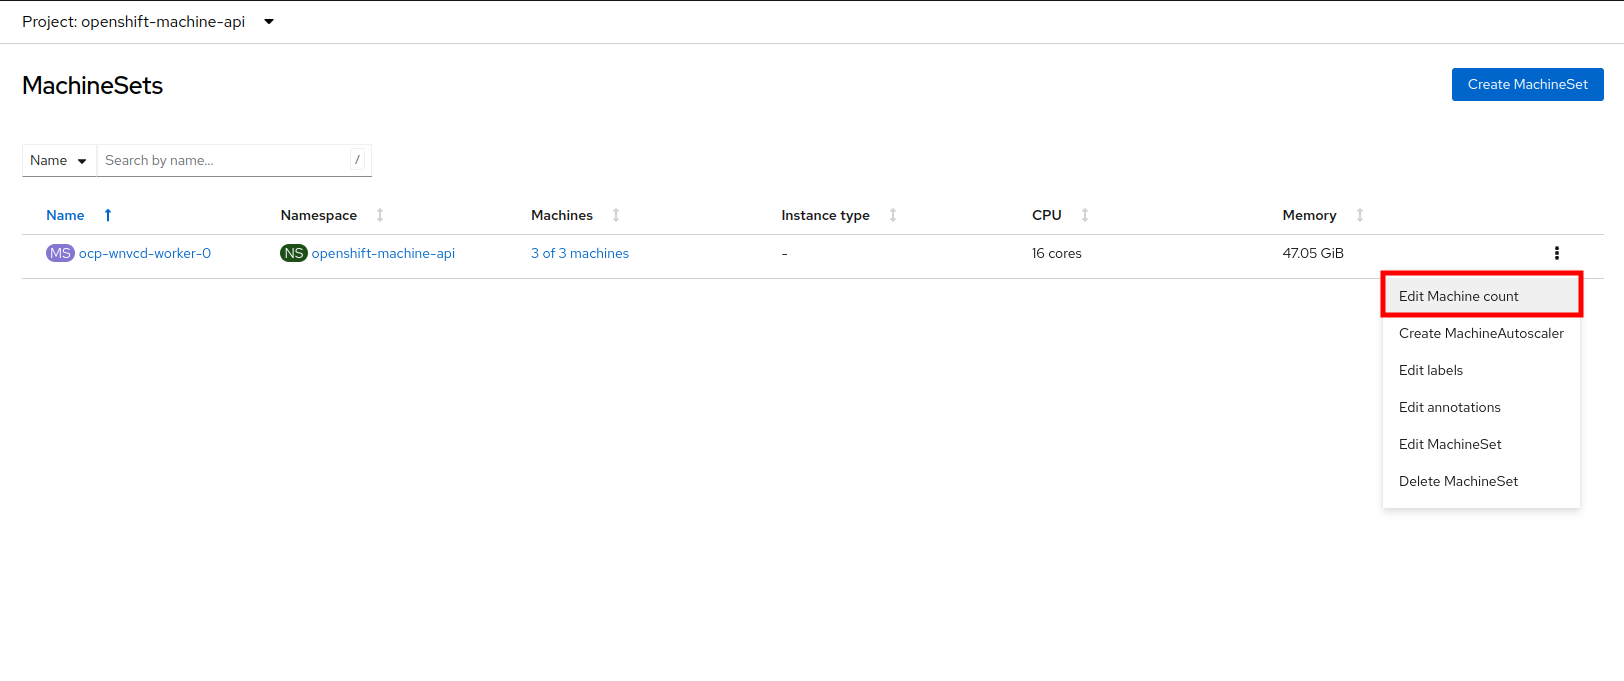
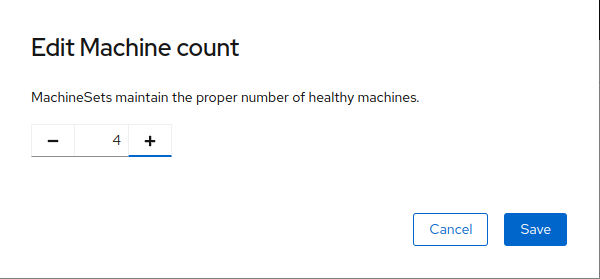
Click on the three-dot menu on the top-right side, and select Edit Machine count from the dropdown menu.
-
A new menu will appear showing the current machine count of 3, click the plus (+) sign to increase the machine count to 4. Click Save to continue.
-
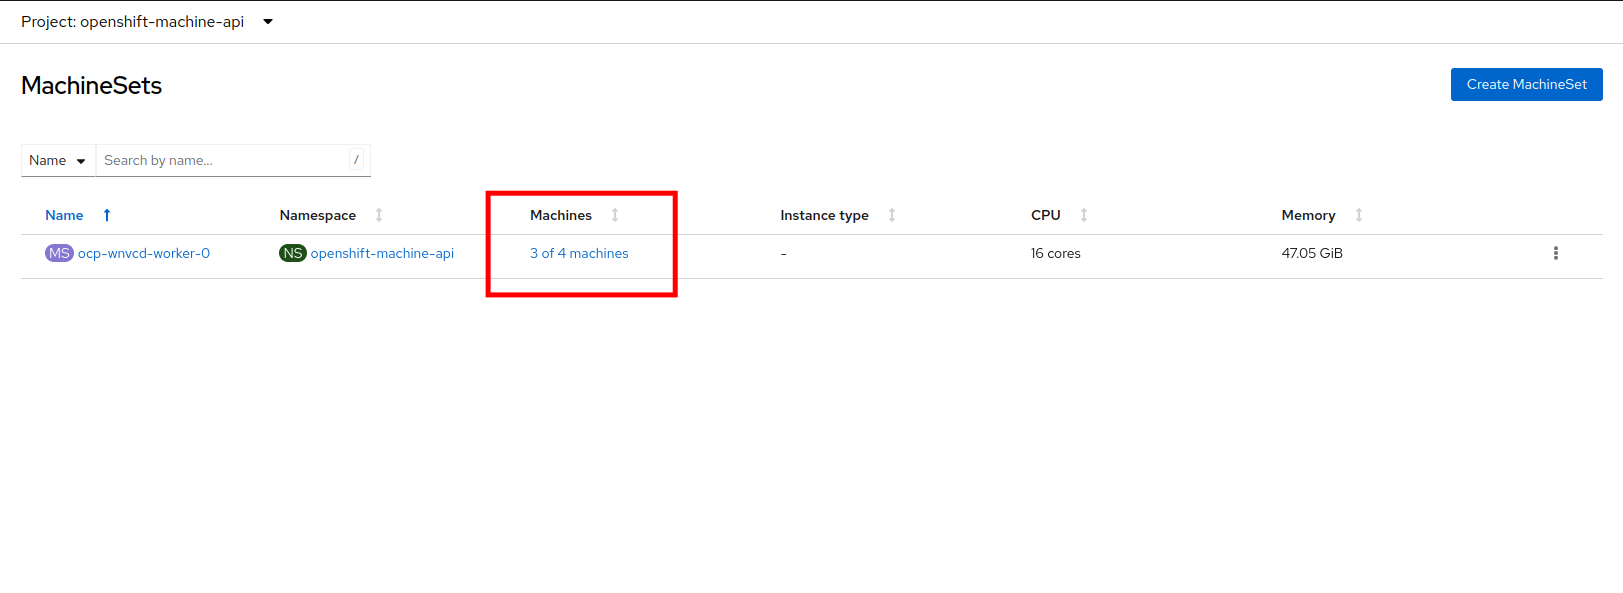
You will be returned to the MachineSets page, and you can now see that the count of machines is 3/4 machines.
-
Next, click on the Machines button on the left under Compute to see a list of all the machines, and you should see worker4 in the Provisioning state.
This step can take a few minutes to complete, as the node reboots several times during the installation process, please feel free to continue with next roadshow module and come back and check on the status of this step at your leisure. 
-
Once provisioning is complete you will see the node listed with it’s Phase set to Provisioned as node.

-
Since our new host has now been added to the machineset and provisioned as a node, we can now see it available if we click on the Nodes menu on the left.
-
We can also click directly on worker4 under the Name column to see it’s current status.
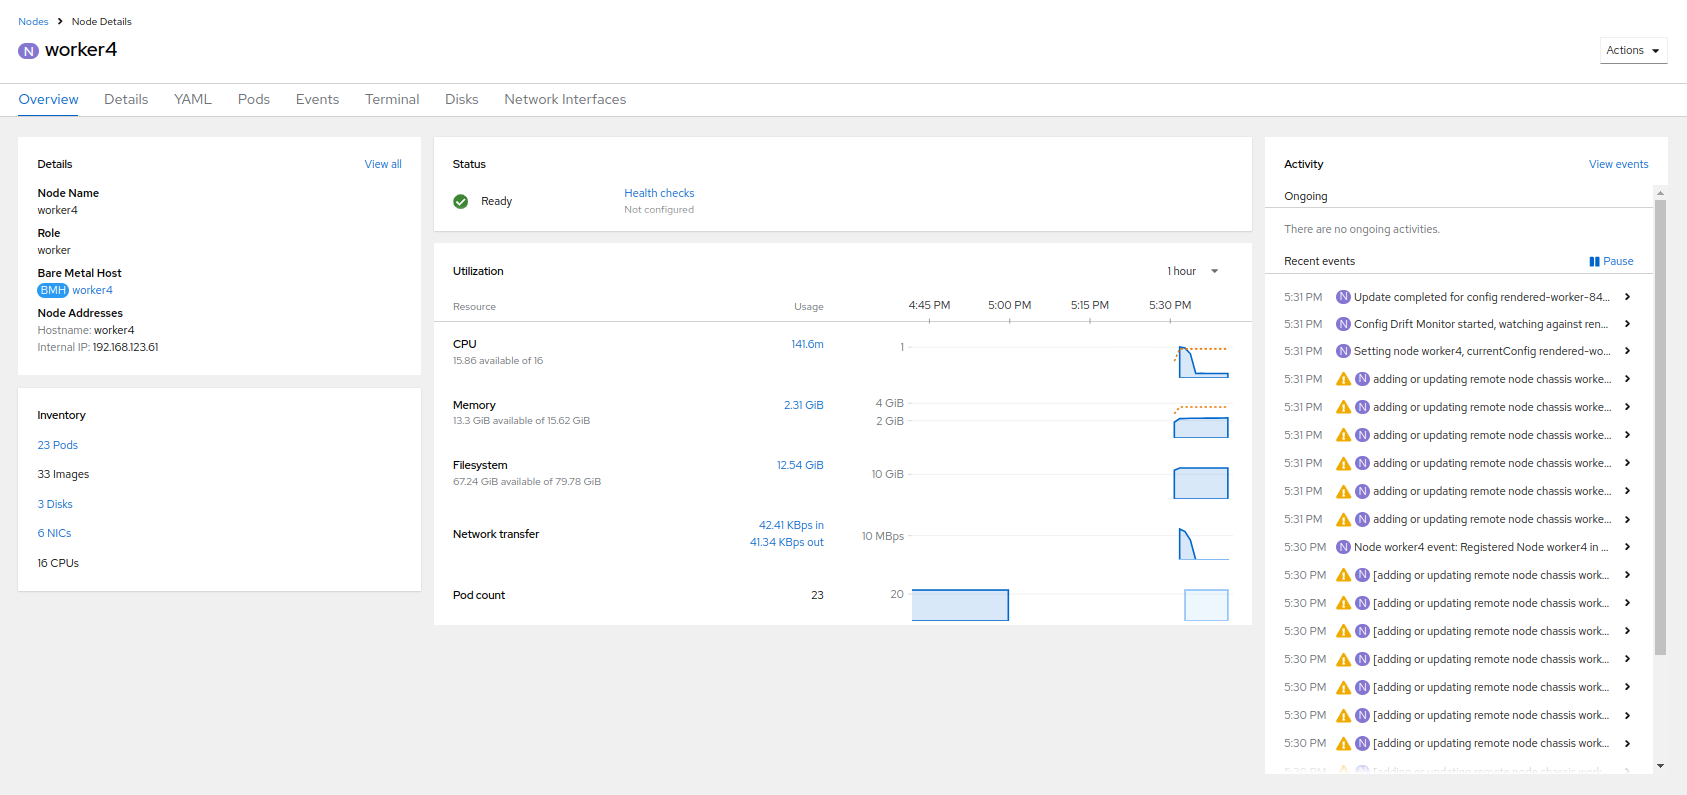
-
The details screen for worker4 is now populated with hardware information including CPU and Memory utilization, as well as the number of Pods assigned to our new worker node.
Summary
In this lab, you became familiar with your Red Hat OpenShift cluster and the hardware that makes up the environment. You also used the web console to expand your cluster by discovering an additional bare metal node, and adding it to the cluster machineset used to scale the number of worker nodes that are available.