Configuring the Automation controller
In this section, you will only be given a summary of the objects you need to create along with some screenshots of a controller that is configured with the completed code. You will also be provided the variables sections from the readme’s for each of the required roles to help you complete this task.
Task 1 - Configure settings
-
Create a file
/home/lab-user/casc_lab/group_vars/all/settings.ymlwith the below content.--- controller_settings: settings: GALAXY_IGNORE_CERTS: true ... -
Further documentation are provided below for those who are interested to learn more:
Task 2 - Configure Execution Environments
-
Create a file
/home/lab-user/casc_lab/group_vars/all/execution_environments.ymland add the required information to the listcontroller_execution_environmentsto include a new EE (that we will show how to create with code in the next module) calledconfig_as_codewith image path{{ aap_hostname }}/config_as_codethat is pullalwaysand uses the credentialcr_ah.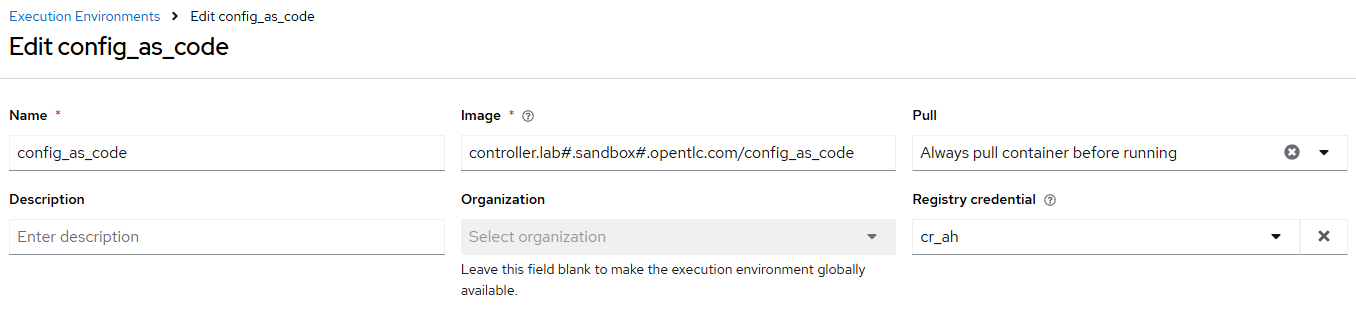 Figure 1. Config Execution Environment
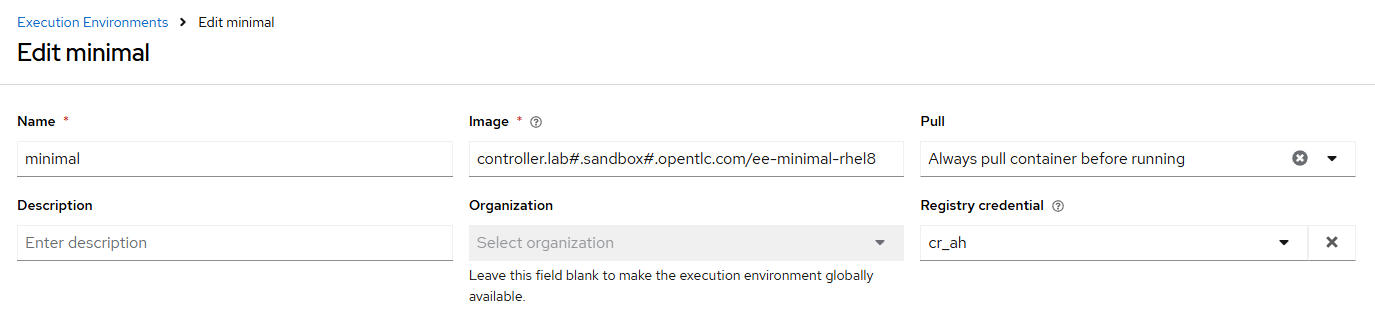 Figure 2. Minimal Execution Environment
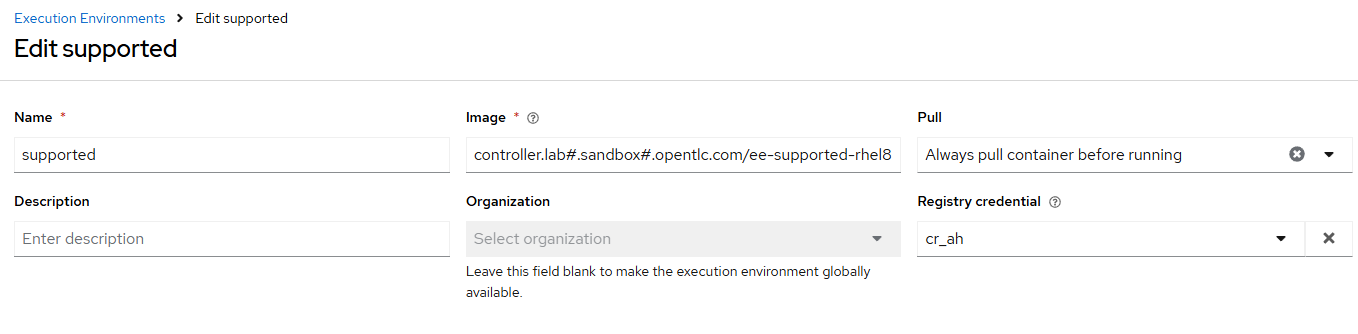 Figure 3. Supported Execution Environment
---
controller_execution_environments:
  - name: "supported"
    image: "{{ aap_hostname }}/ee-supported-rhel8"
    pull: always
    credential: cr_ah

  - name: "minimal"
    image: "{{ aap_hostname }}/ee-minimal-rhel8"
    pull: always
    credential: cr_ah

...| While you have not created this EE yet it, we have already added a version to hub so this won’t fail. |
-
Further documentation for those who are interested to learn more see:
Task 3 - Create credential types
-
Create a file
/home/lab-user/casc_lab/group_vars/all/credential_types.ymlwhere we will create a list calledcontroller_credential_typesthat has 5 variables per item defined below:-
namethis is required and will be what the credential type will be called -
descriptionthis is the description of the credential type -
kindThe type of credential type being added. Note that only cloud and net can be used for creating credential types. -
inputsEnter inputs using either JSON or YAML syntax. Refer to the Ansible controller documentation for example syntax. These will be the fields in the GUI that prompt the user for input. -
injectorsEnter injectors using either JSON or YAML syntax. Refer to the Ansible controller documentation for example syntax. These are the variables that will then be useable in a job.The role will iterate through this list and for each item in this list it will create custom credential types for using it in the controller.
---
controller_credential_types:
  - name: automation_hub
    description: automation hub
    kind: cloud
    inputs:
      fields:
        - id: verify_ssl
          type: boolean
          label: Verify SSL
        - id: hostname
          type: string
          label: Hostname
        - id: username
          type: string
          label: Username
        - id: password
          type: string
          label: Password
          secret: true
        - id: token
          type: string
          label: Token
          secret: true
      required:
        - hostname
    injectors:
      env:
        AAP_PASSWORD: !unsafe "{{ password }}"
        AAP_USERNAME: !unsafe "{{ username }}"
        AAP_HOSTNAME: !unsafe # Insert appropriate variable from above here
        AAP_TOKEN: !unsafe # Insert appropriate variable from above here
        AAP_VALIDATE_CERTS: !unsafe # Insert appropriate variable from above here
      extra_vars:
        aap_password: !unsafe "{{ password }}"
        aap_username: !unsafe "{{ username }}"
        aap_hostname: !unsafe # Insert appropriate variable from above here
        aap_token: !unsafe # Insert appropriate variable from above here
        aap_validate_certs: !unsafe # Insert appropriate variable from above here

  - name: ssh_priv_file
    kind: cloud
    description: creates temp ssh priv key to use (cannot have passphrase)
    inputs:
      fields:
        - id: priv_key
          type: string
          label: Certificate
          format: ssh_private_key
          multiline: true
          secret: true
    injectors:
      env:
        MY_CERT_FILE_PATH: !unsafe '{{ tower.filename.cert_file }}'
      file:
        template.cert_file: !unsafe '{{ priv_key }}'
...
-
-
Further documentation for those who are interested to learn more see:
Task 4 - Create credentials
-
Create a file
/home/lab-user/casc_lab/group_vars/all/credentials.ymland add the required information to the listcontroller_credentialsto configure the UI to look like the screenshot. Make it to look like the screenshot, but make sure to use parameters for the values. DO NOT PASTE YOUR PASSWORD IN CLEARTEXT FOR CREDENTIALS!--- controller_credentials: - name: aap_admin credential_type: Red Hat Ansible Automation Platform organization: config_as_code description: aap admin account inputs: host: "{{ aap_hostname }}" username: "{{ aap_username }}" password: "{{ aap_password }}" verify_ssl: false - name: hub_service_account credential_type: automation_hub organization: config_as_code description: automation hub api account inputs: hostname: "{{ aap_hostname }}" username: "{{ aap_service_account_username }}" token: "{{ ah_token }}" verify_ssl: false - name: hub_certified credential_type: "Ansible Galaxy/Automation Hub API Token" organization: config_as_code inputs: url: "https://{{ aap_hostname }}/pulp_ansible/galaxy/rh-certified/" token: "{{ ah_token }}" - name: hub_published credential_type: "Ansible Galaxy/Automation Hub API Token" organization: config_as_code inputs: url: "https://{{ aap_hostname }}/pulp_ansible/galaxy/published/" token: "{{ ah_token }}" - name: hub_community credential_type: "Ansible Galaxy/Automation Hub API Token" organization: config_as_code inputs: url: "https://{{ aap_hostname }}/pulp_ansible/galaxy/community/" token: "{{ ah_token }}" - name: hub_community_infra_repo credential_type: "Ansible Galaxy/Automation Hub API Token" organization: config_as_code inputs: url: "https://{{ aap_hostname }}/pulp_ansible/galaxy/community-infra-repo/" token: "{{ ah_token }}" - name: cr_ah credential_type: Container Registry organization: config_as_code inputs: host: "{{ aap_hostname }}" username: "{{ aap_username }}" password: "{{ aap_password }}" verify_ssl: false - name: vault credential_type: Vault organization: config_as_code description: vault password inputs: vault_password: "{{ vault_pass }}" ...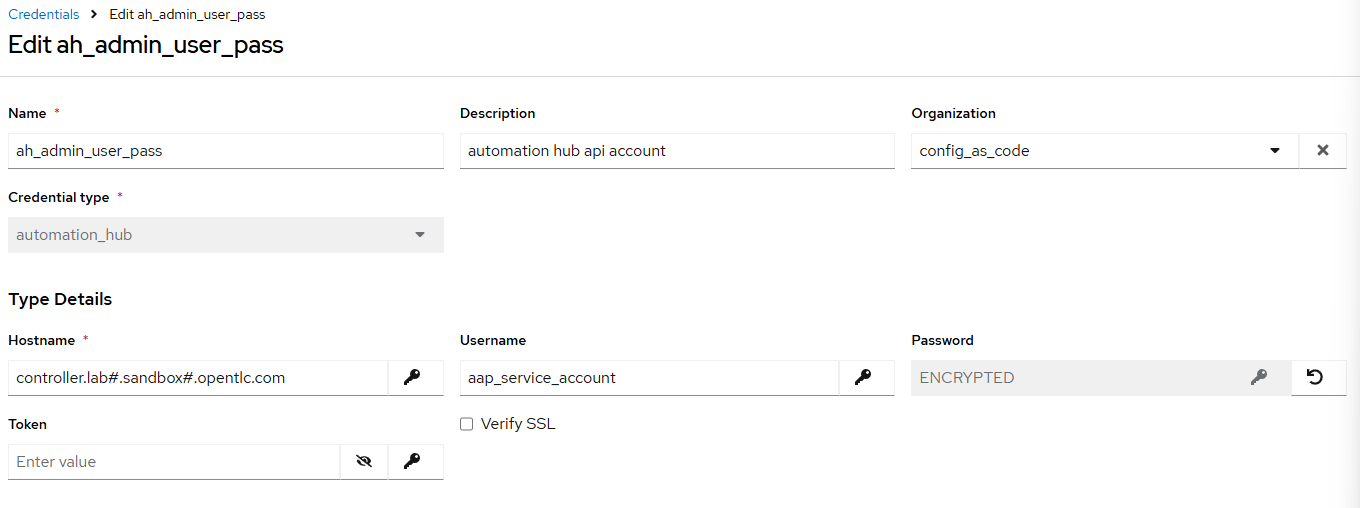 Figure 4. Credential
 -
Further documentation for those who are interested to learn more see:
Task 5 - Create organizations
-
Update the file
/home/lab-user/casc_lab/group_vars/all/organizations.ymland add the required information to the listaap_organizationsto configure the UI to look like the screenshot. Here we are adding the credentials that we created above to the Organization so we can pull collections from Automation Hub.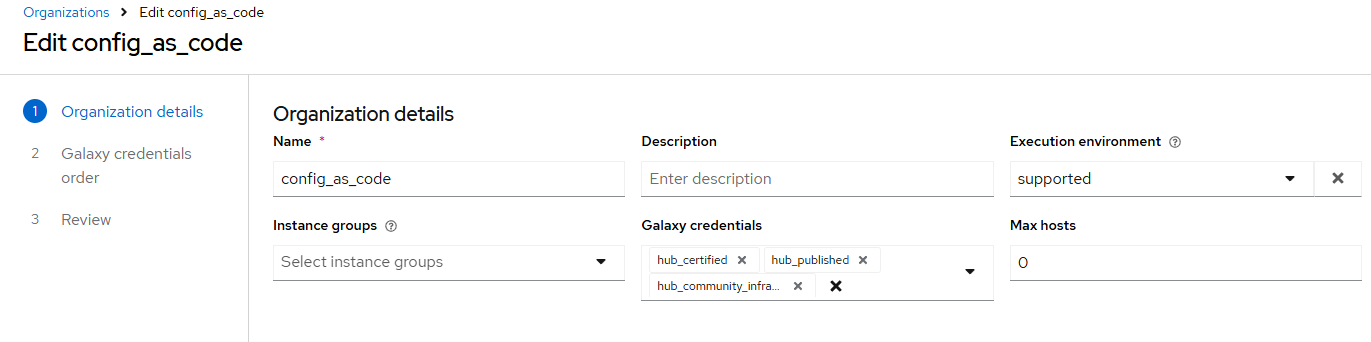 Figure 5. Config as Code Organization
--- aap_organizations: ... -
Further documentation for those who are interested to learn more see:
Task 6 - Create projects
-
Create a file
/home/lab-user/casc_lab/group_vars/all/projects.ymland add the required information to the listcontroller_projectsto configure the UI to look like the screenshot. The project you want to use ishttps://github.com/redhat-cop/aap_configuration_template
You will want to refer to the role documentation to determine which options need to be set --- controller_configuration_projects_async_delay: 5 controller_projects: ...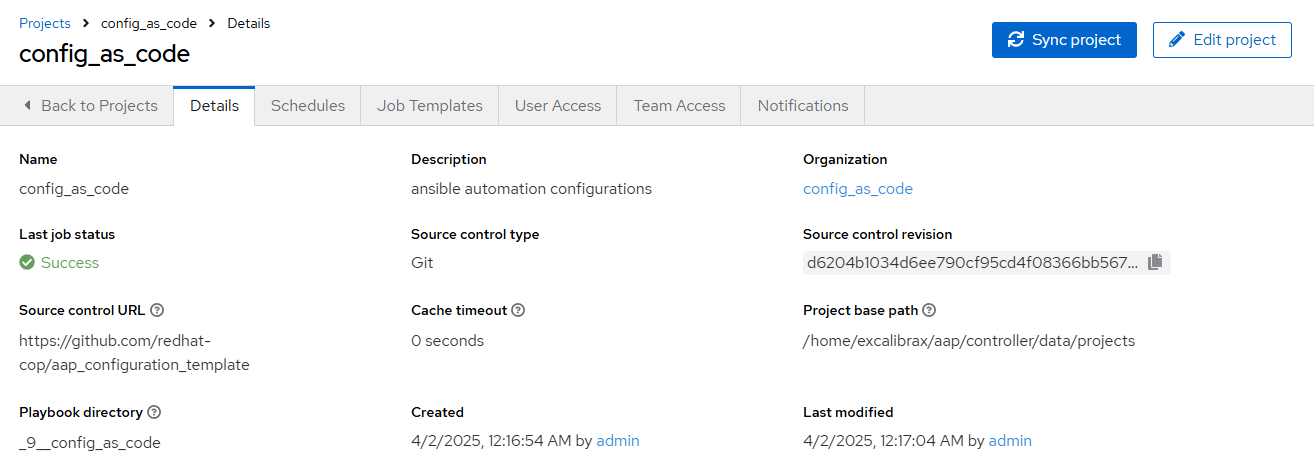 Figure 6. Project
 -
Further documentation for those who are interested to learn more see:
Task 7 - Create inventories
-
Create a file
/home/lab-user/casc_lab/group_vars/all/inventories.ymland add the required information to the listcontroller_inventoriesto configure the UI to look like the screenshot--- controller_inventories: ...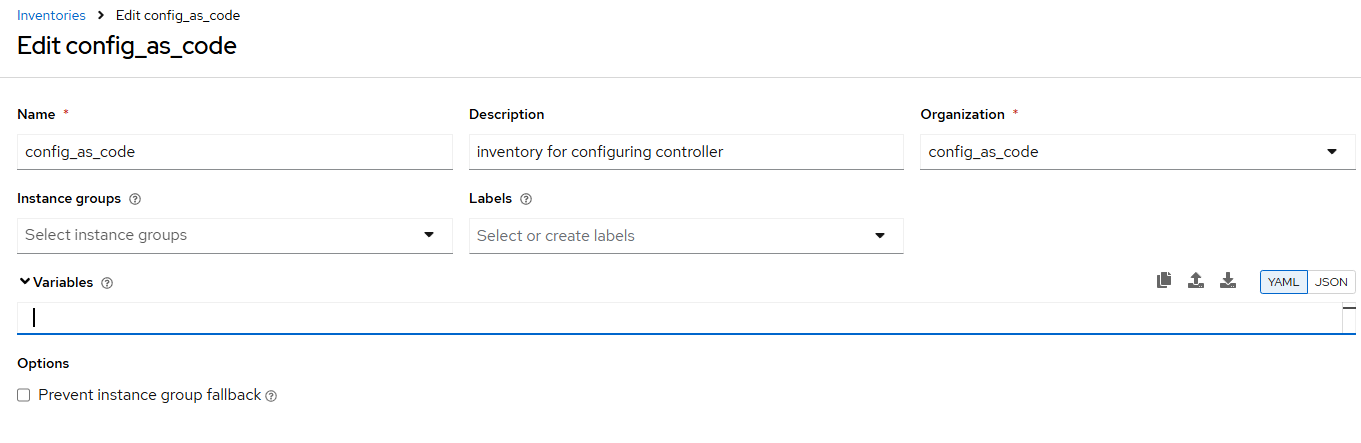 Figure 7. Inventory
 -
Further documentation for those who are interested to learn more see:
Task 8 - Create inventory sources
-
Add to file
/home/lab-user/casc_lab/group_vars/all/inventory_sources.ymland a new variable with the required information to the listcontroller_inventory_sourcesto configure the UI to look like the screenshot--- controller_inventory_sources: ...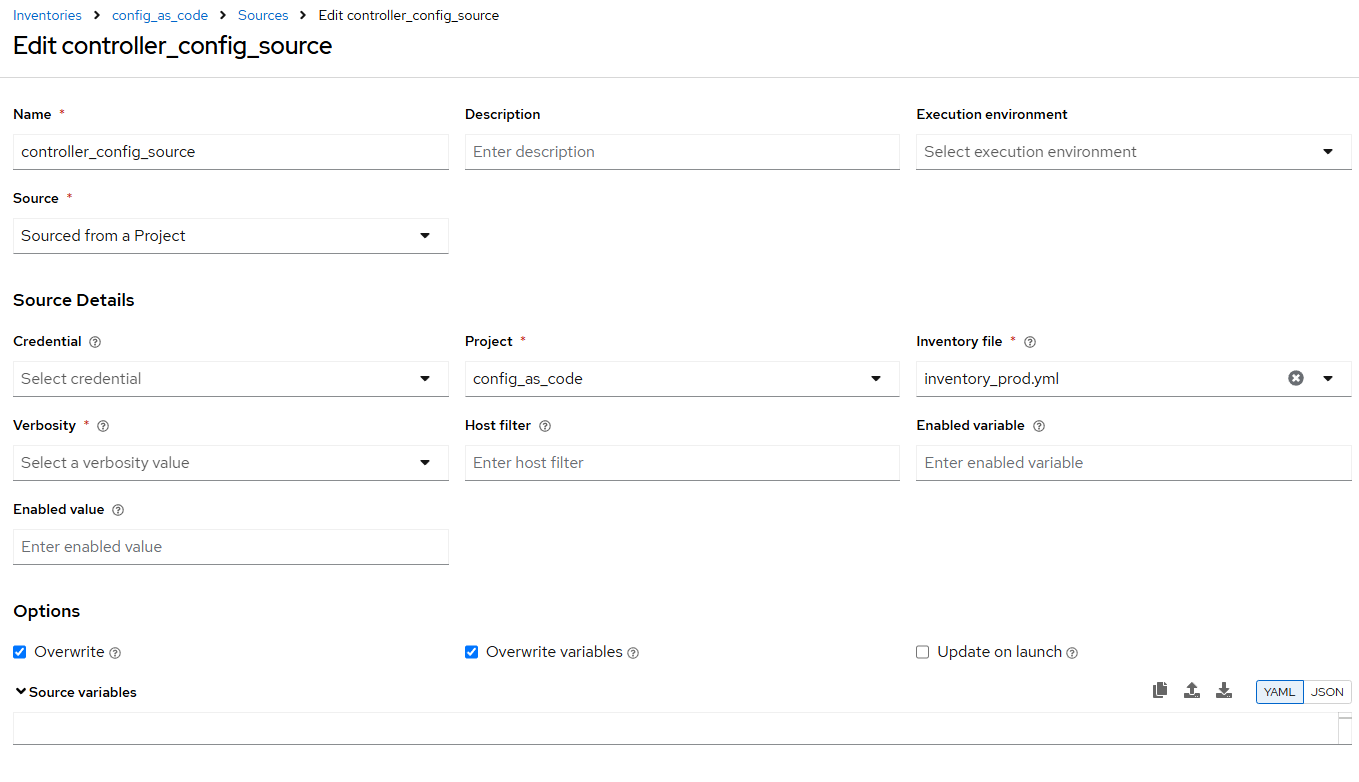 Figure 8. Inventory Sources
 -
Further documentation for those who are interested to learn more see:
Task 9 - Create job_templates
-
Create a file
/home/lab-user/casc_lab/group_vars/all/job_templates.ymland add the required information to the listcontroller_templatesto configure the UI to like the screenshot.Pay attention to the credentials attached to each job template.
--- controller_templates: ...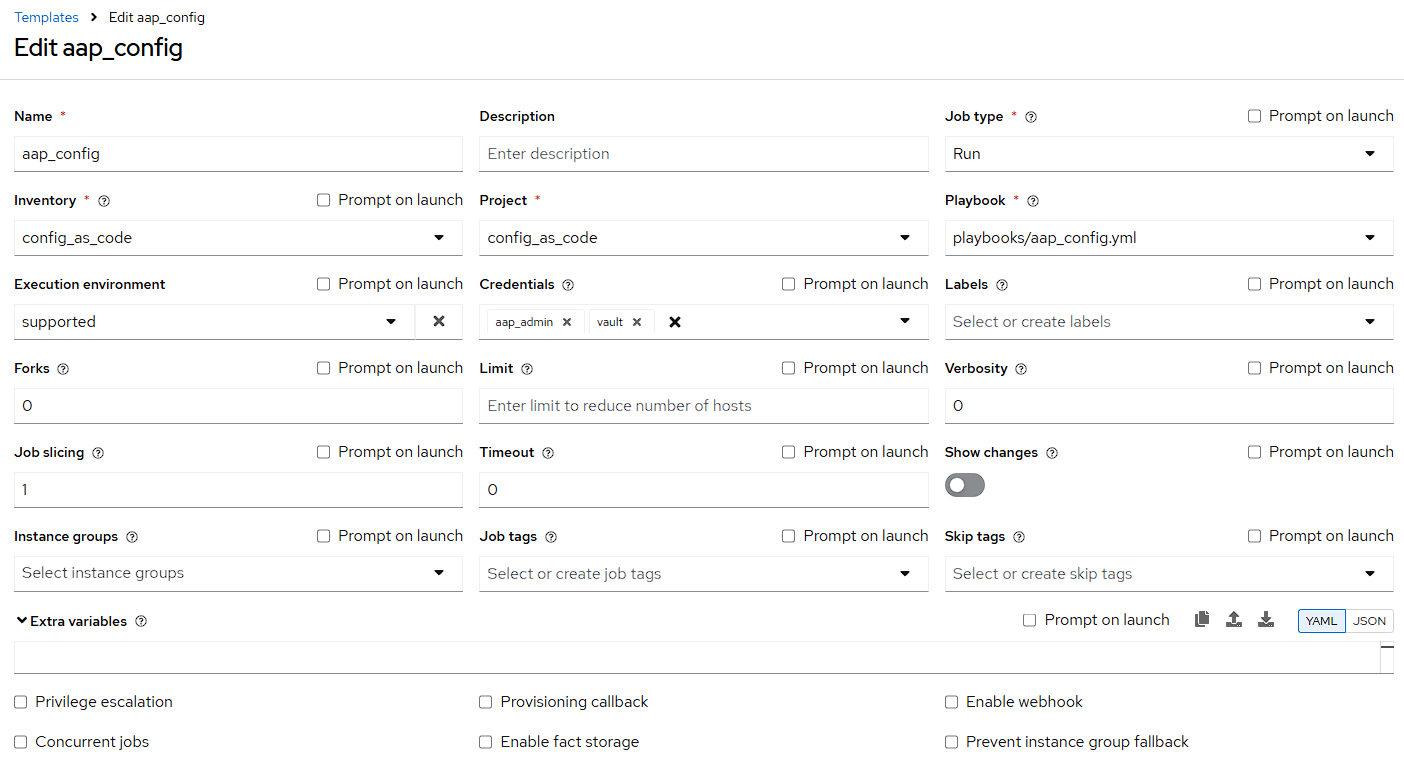 Figure 9. AAP Config Template
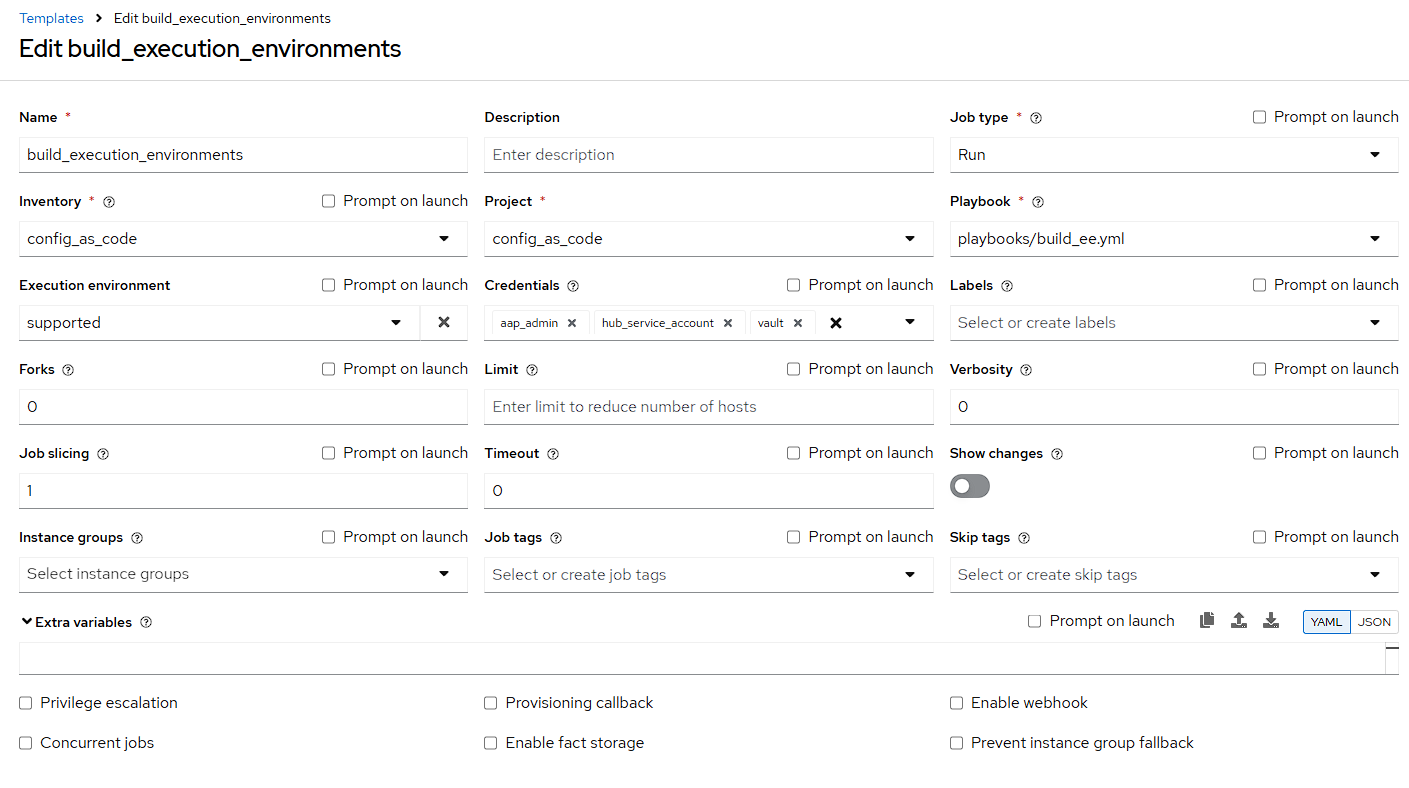 Figure 10. Build EE Template
 -
Further documentation for those who are interested to learn more see:
Task 10 - Update the Playbook
Update the playbook to get the hub token for the configuration
-
We need to create a token from Automation Hub so that we can provide it to the Platform for the collection syncing to take place.
The next step is to create a playbook/file
/home/lab-user/casc_lab/playbooks/aap_config.ymlthat will call the aap_configuration dispatch role which will apply all provided configurations in the order that they need to be created.--- - name: Playbook to configure ansible controller post installation hosts: all gather_facts: false vars_files: - ../vault.yml connection: local tasks: - name: Authenticate and get an API token from Automation Hub ansible.hub.ah_token: ah_host: "{{ aap_hostname }}" ah_username: "{{ aap_username }}" ah_password: "{{ aap_password }}" ah_path_prefix: 'galaxy' # this is for private automation hub ah_verify_ssl: false - name: Fixing format ansible.builtin.set_fact: ah_token: "{{ ah_token['token'] }}" - name: Call dispatch role ansible.builtin.include_role: name: infra.aap_configuration.dispatch ...
Task 11 - Run the playbook
-
Run
/home/lab-user/casc_lab/playbooks/aap_configplaybook.ansible-playbook playbooks/aap_config.yml -i inventory.yml -l execution -
If you run into problems, look back at the section that failed, and check the documentation for that role that was linked. If the output was hidden, look for 'Secure logging variables' on the controller_credentials role documentation.
| If you run into an error that says "Failed to get token: HTTP Error 401: Unauthorized" while other tasks pass, please rerun the playbook, this is a known issue. |