1. Edge Manager Introduction
Welcome to Edge MegaStore, Inc. (Fictional Company)
Congratulations on your new job at Edge MegaStore, Inc. (EMI)! The pay isn’t great but if you love to learn about new edge management technology you are in the right place. EMI is proud to provide our Customers with the finest Edge Equipment available including a snack bar area with refreshments (the Red-Sprinkled Donuts are a specialty).

It looks like our EMI Marketing Department has some work to do with improving AI generated images ('Dionuts' and Flying Strawberries?!) but thankfully you don’t have to worry about that.
Let’s dive into your new role.
Current Retail Store Footprint
We have four existing EMI stores spread between the East and West Coasts of the United States.
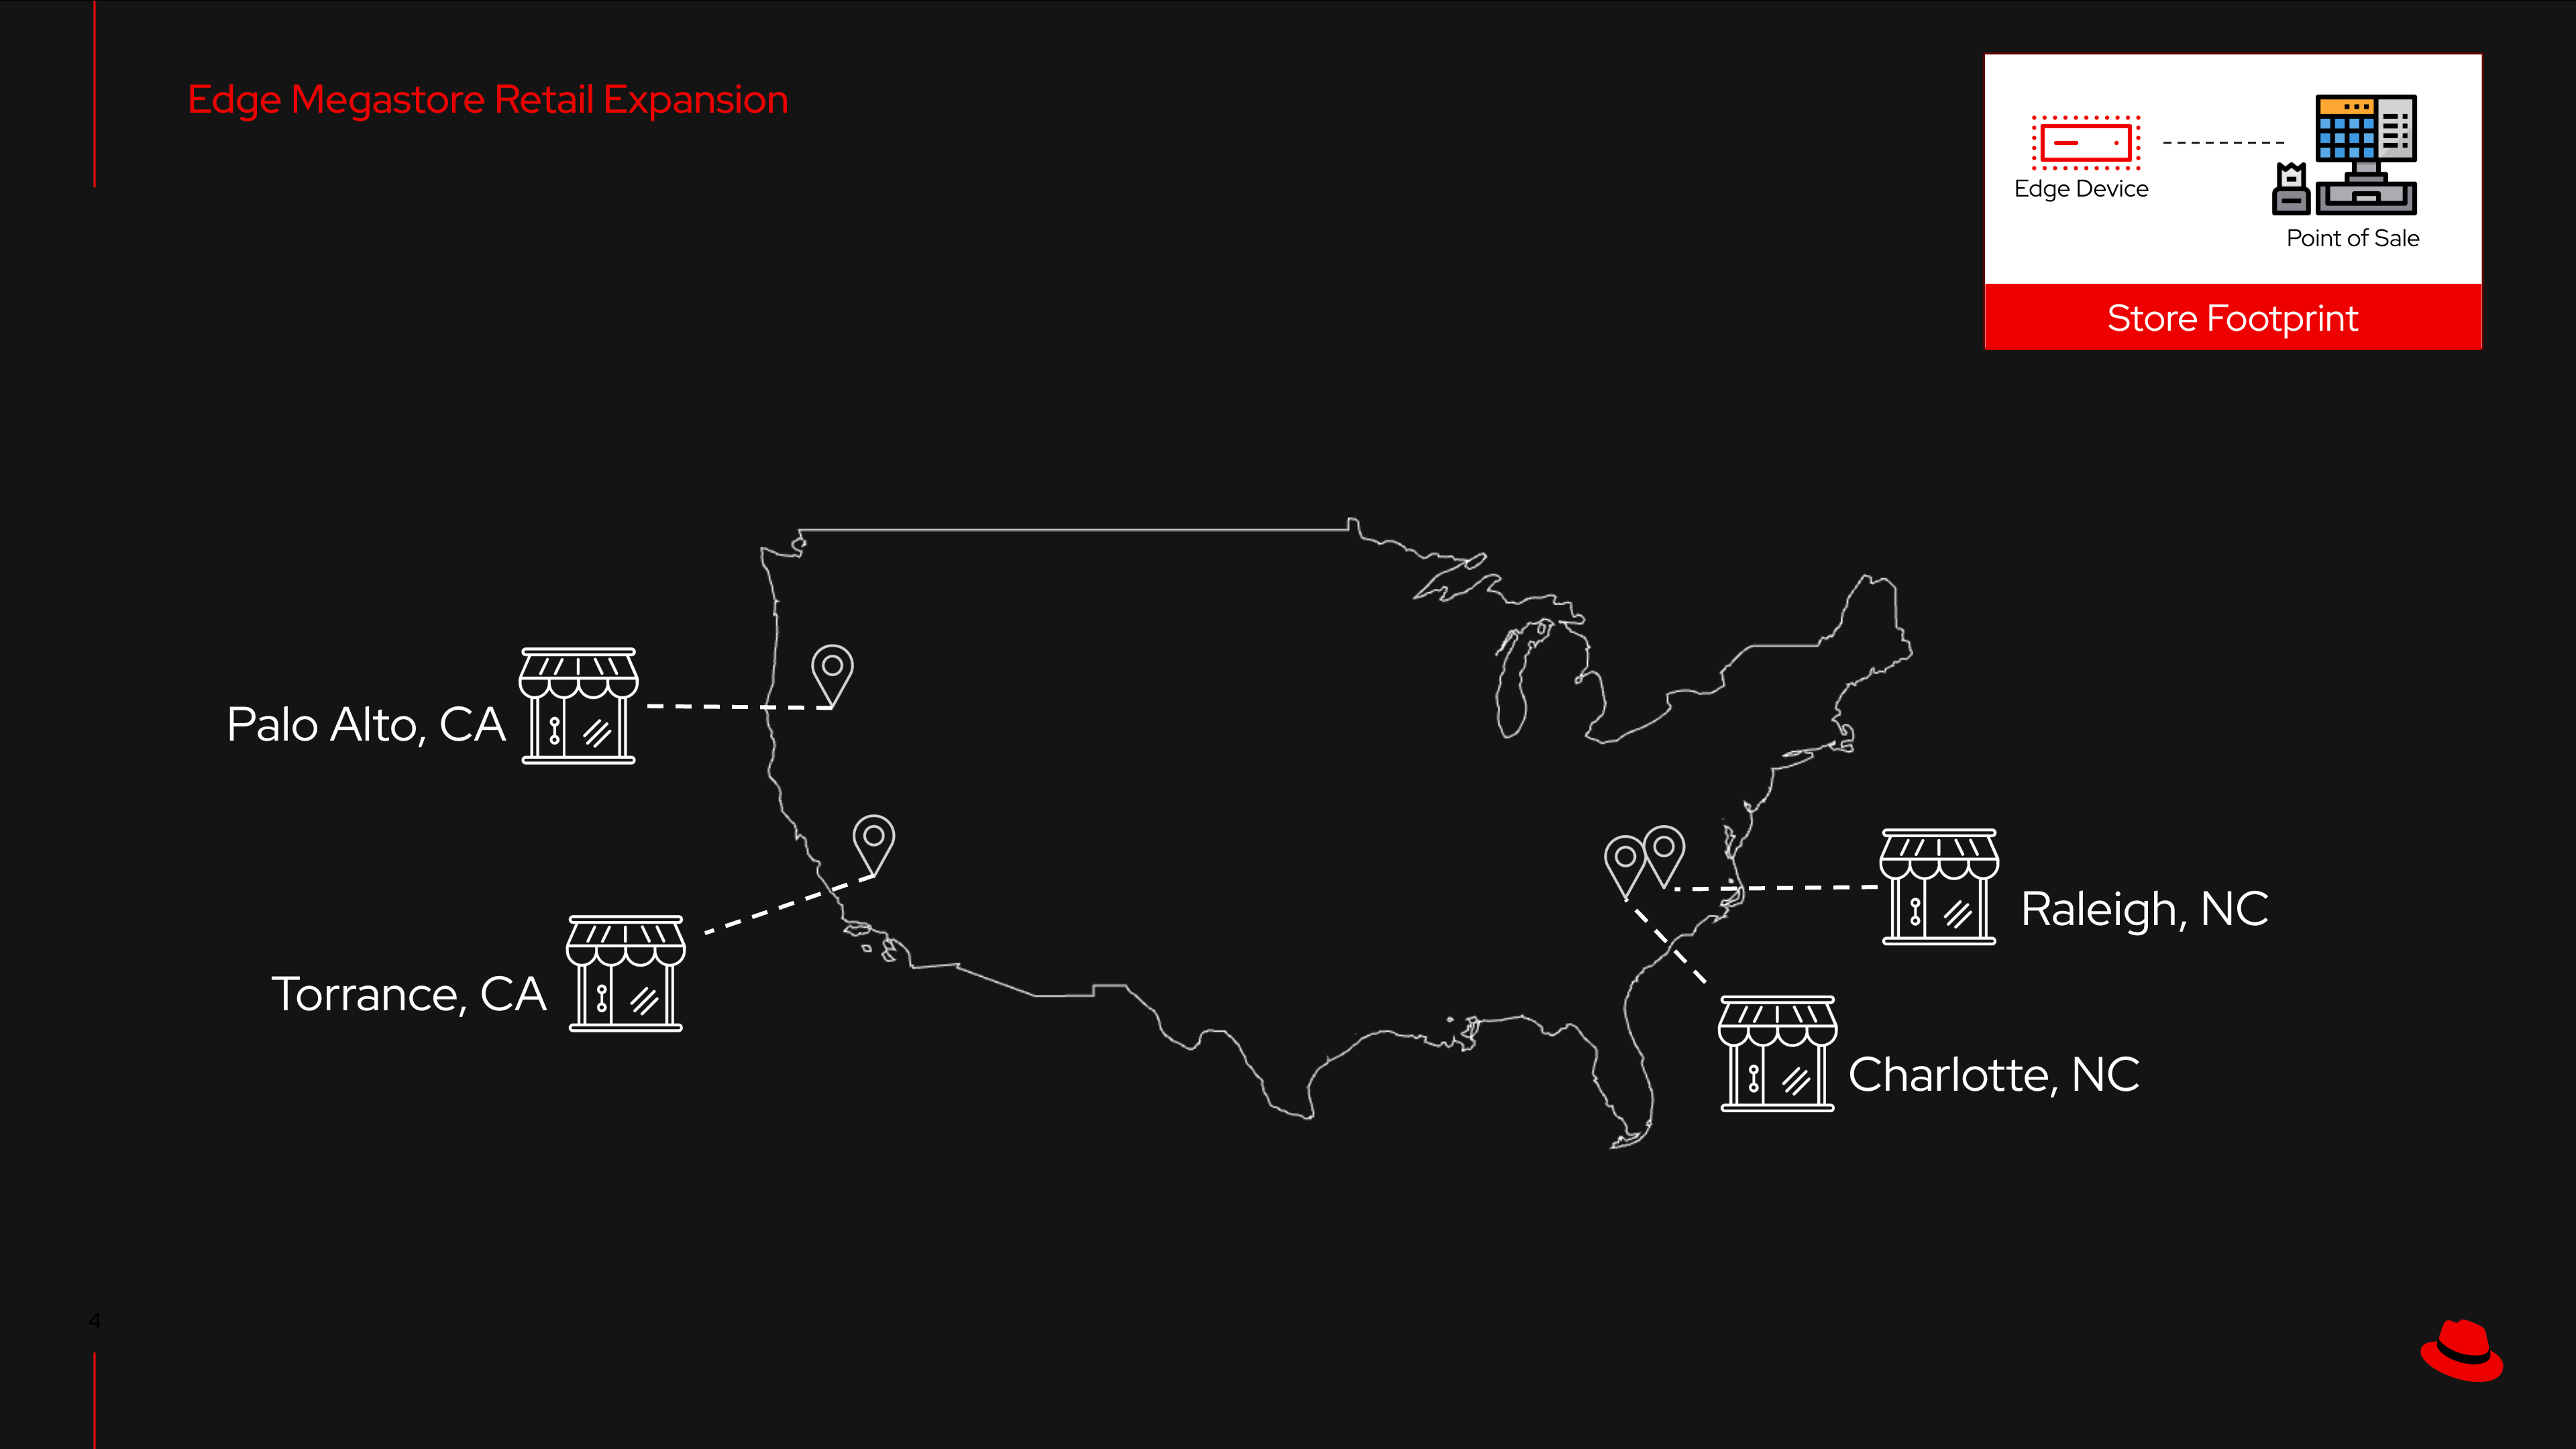
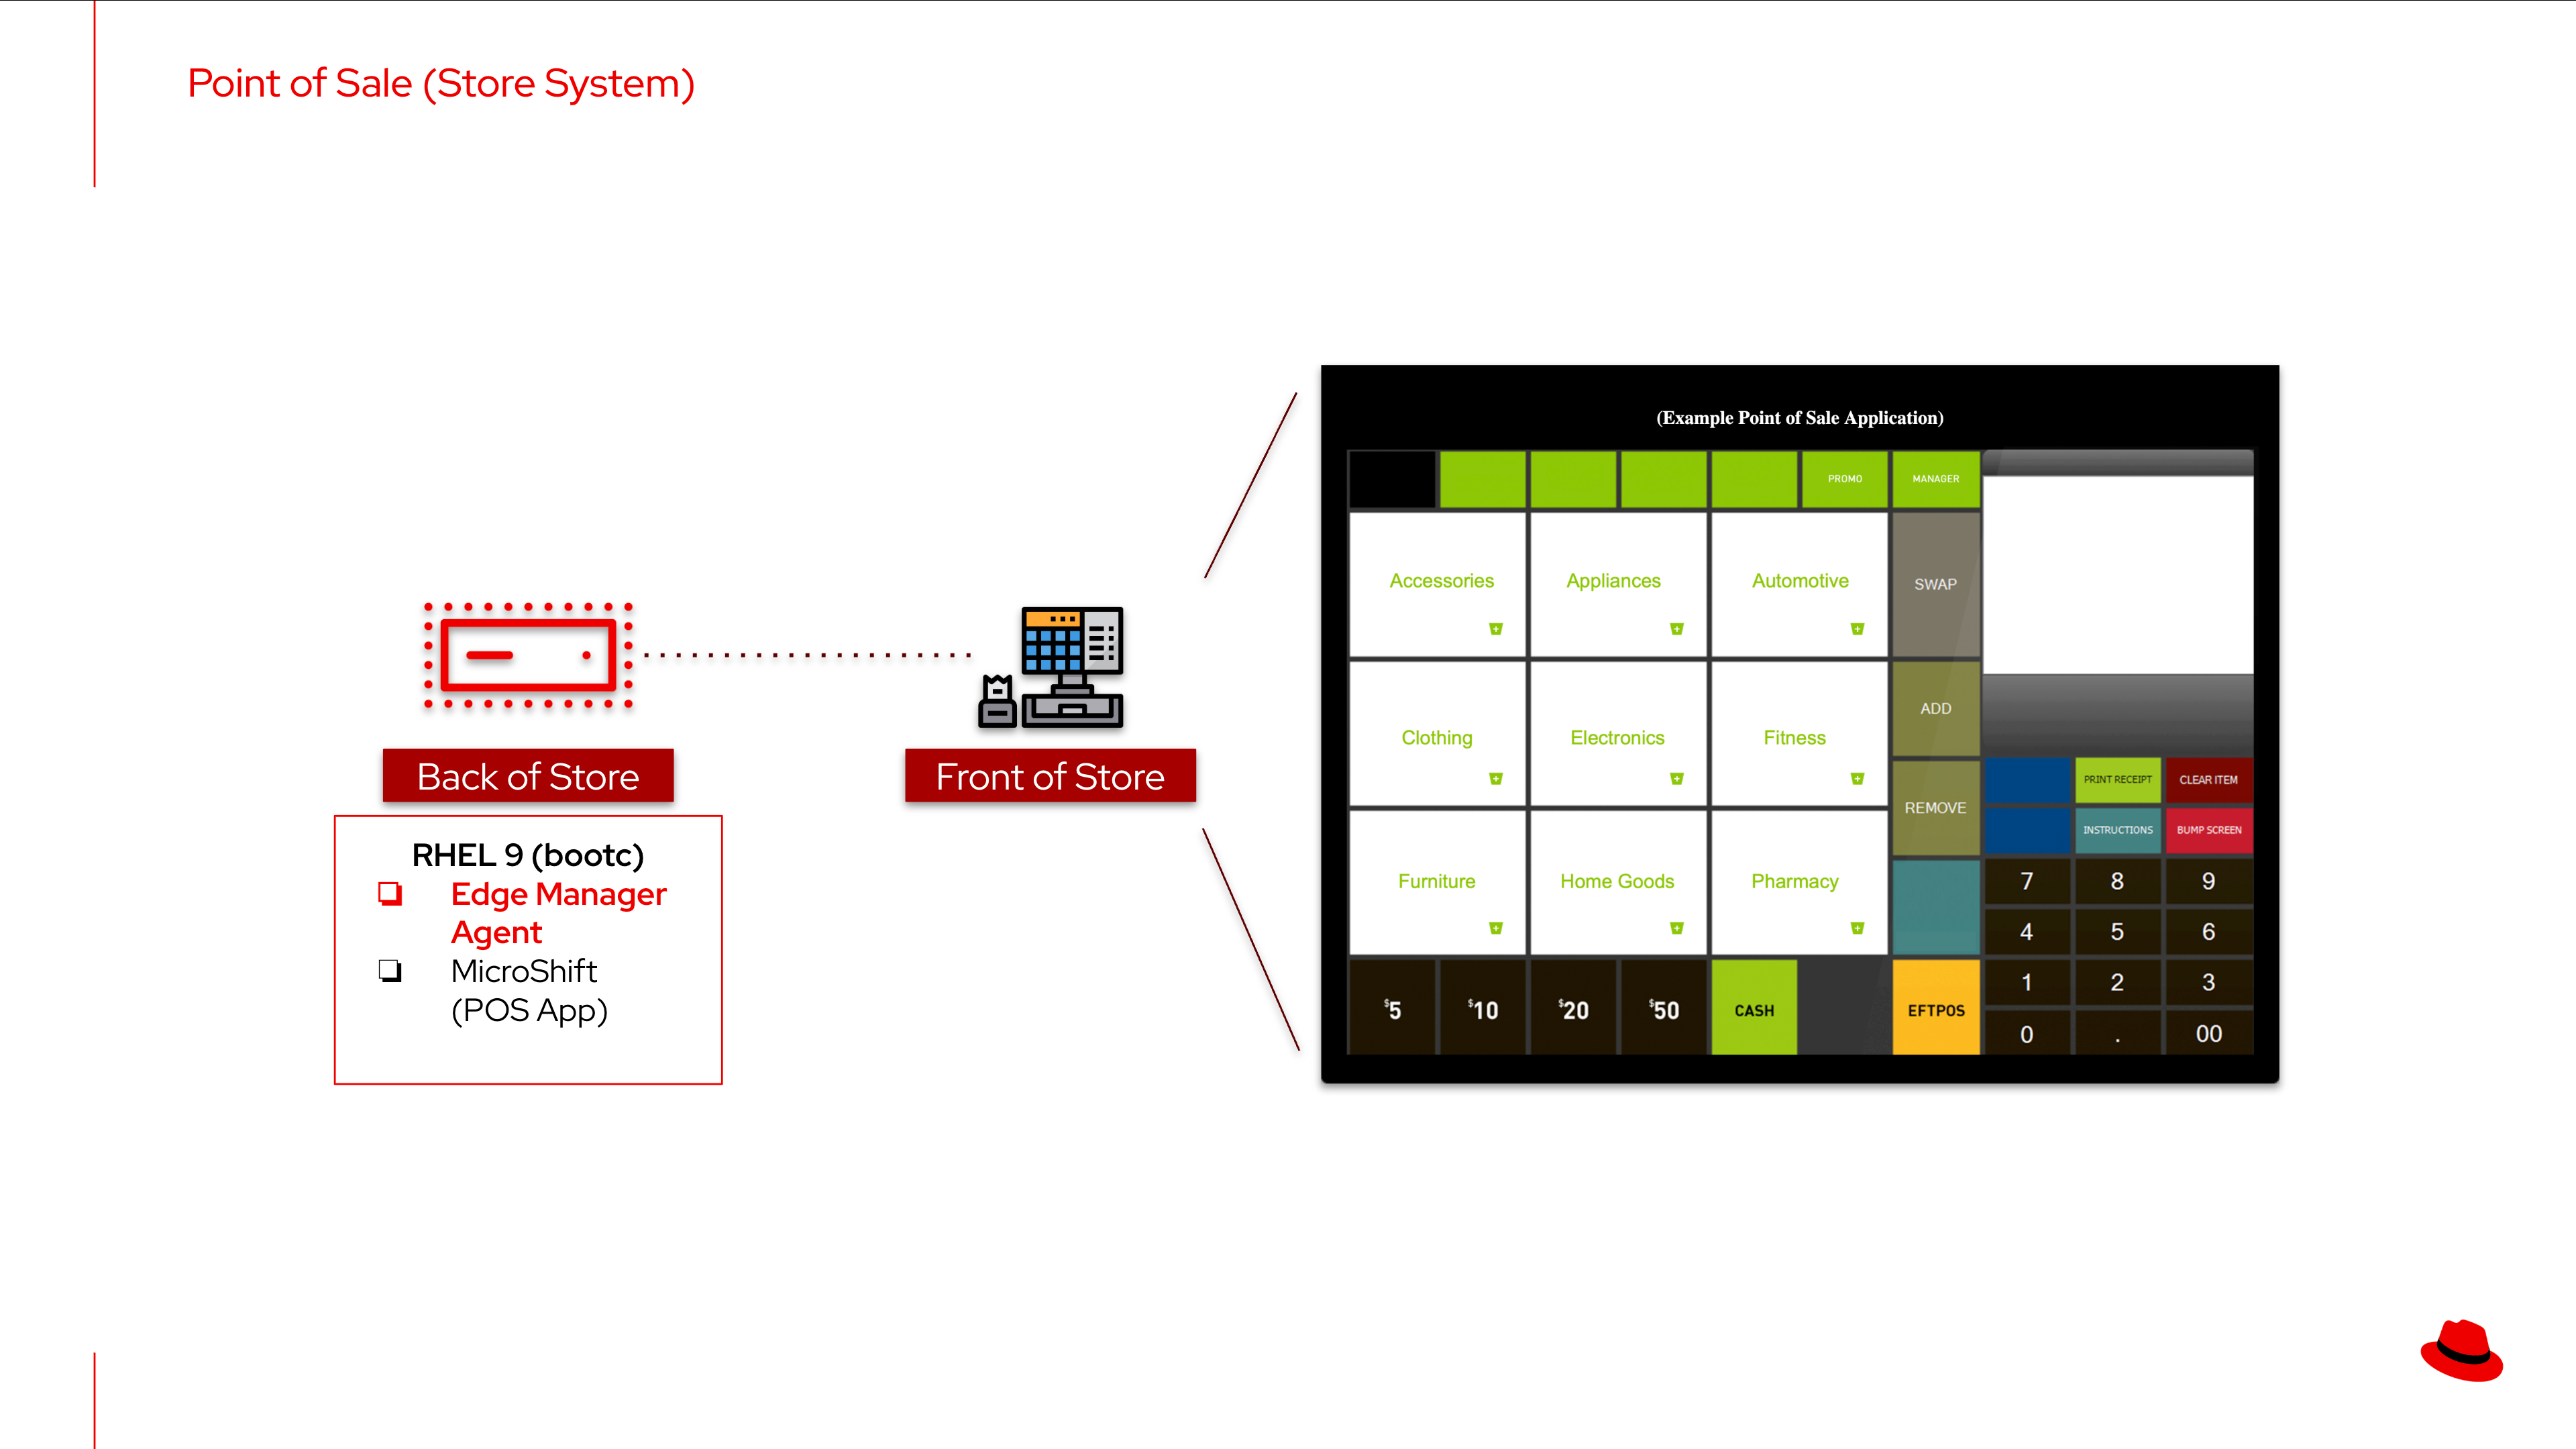
In each location we have a back of store edge device running a RHEL 9 bootc image (which also includes the mandatory Edge Manager Agent). These store devices run a Point-of-Sale (POS) application which is accessible via the front of store point of sale kiosks.
Lab Login
In a moment, we are going to need your help bringing a new store online in your home town but first let’s get you logged into your new work environment for an initial look around.
Click here to access your Lab Environment (this link will open in a new browser tab)
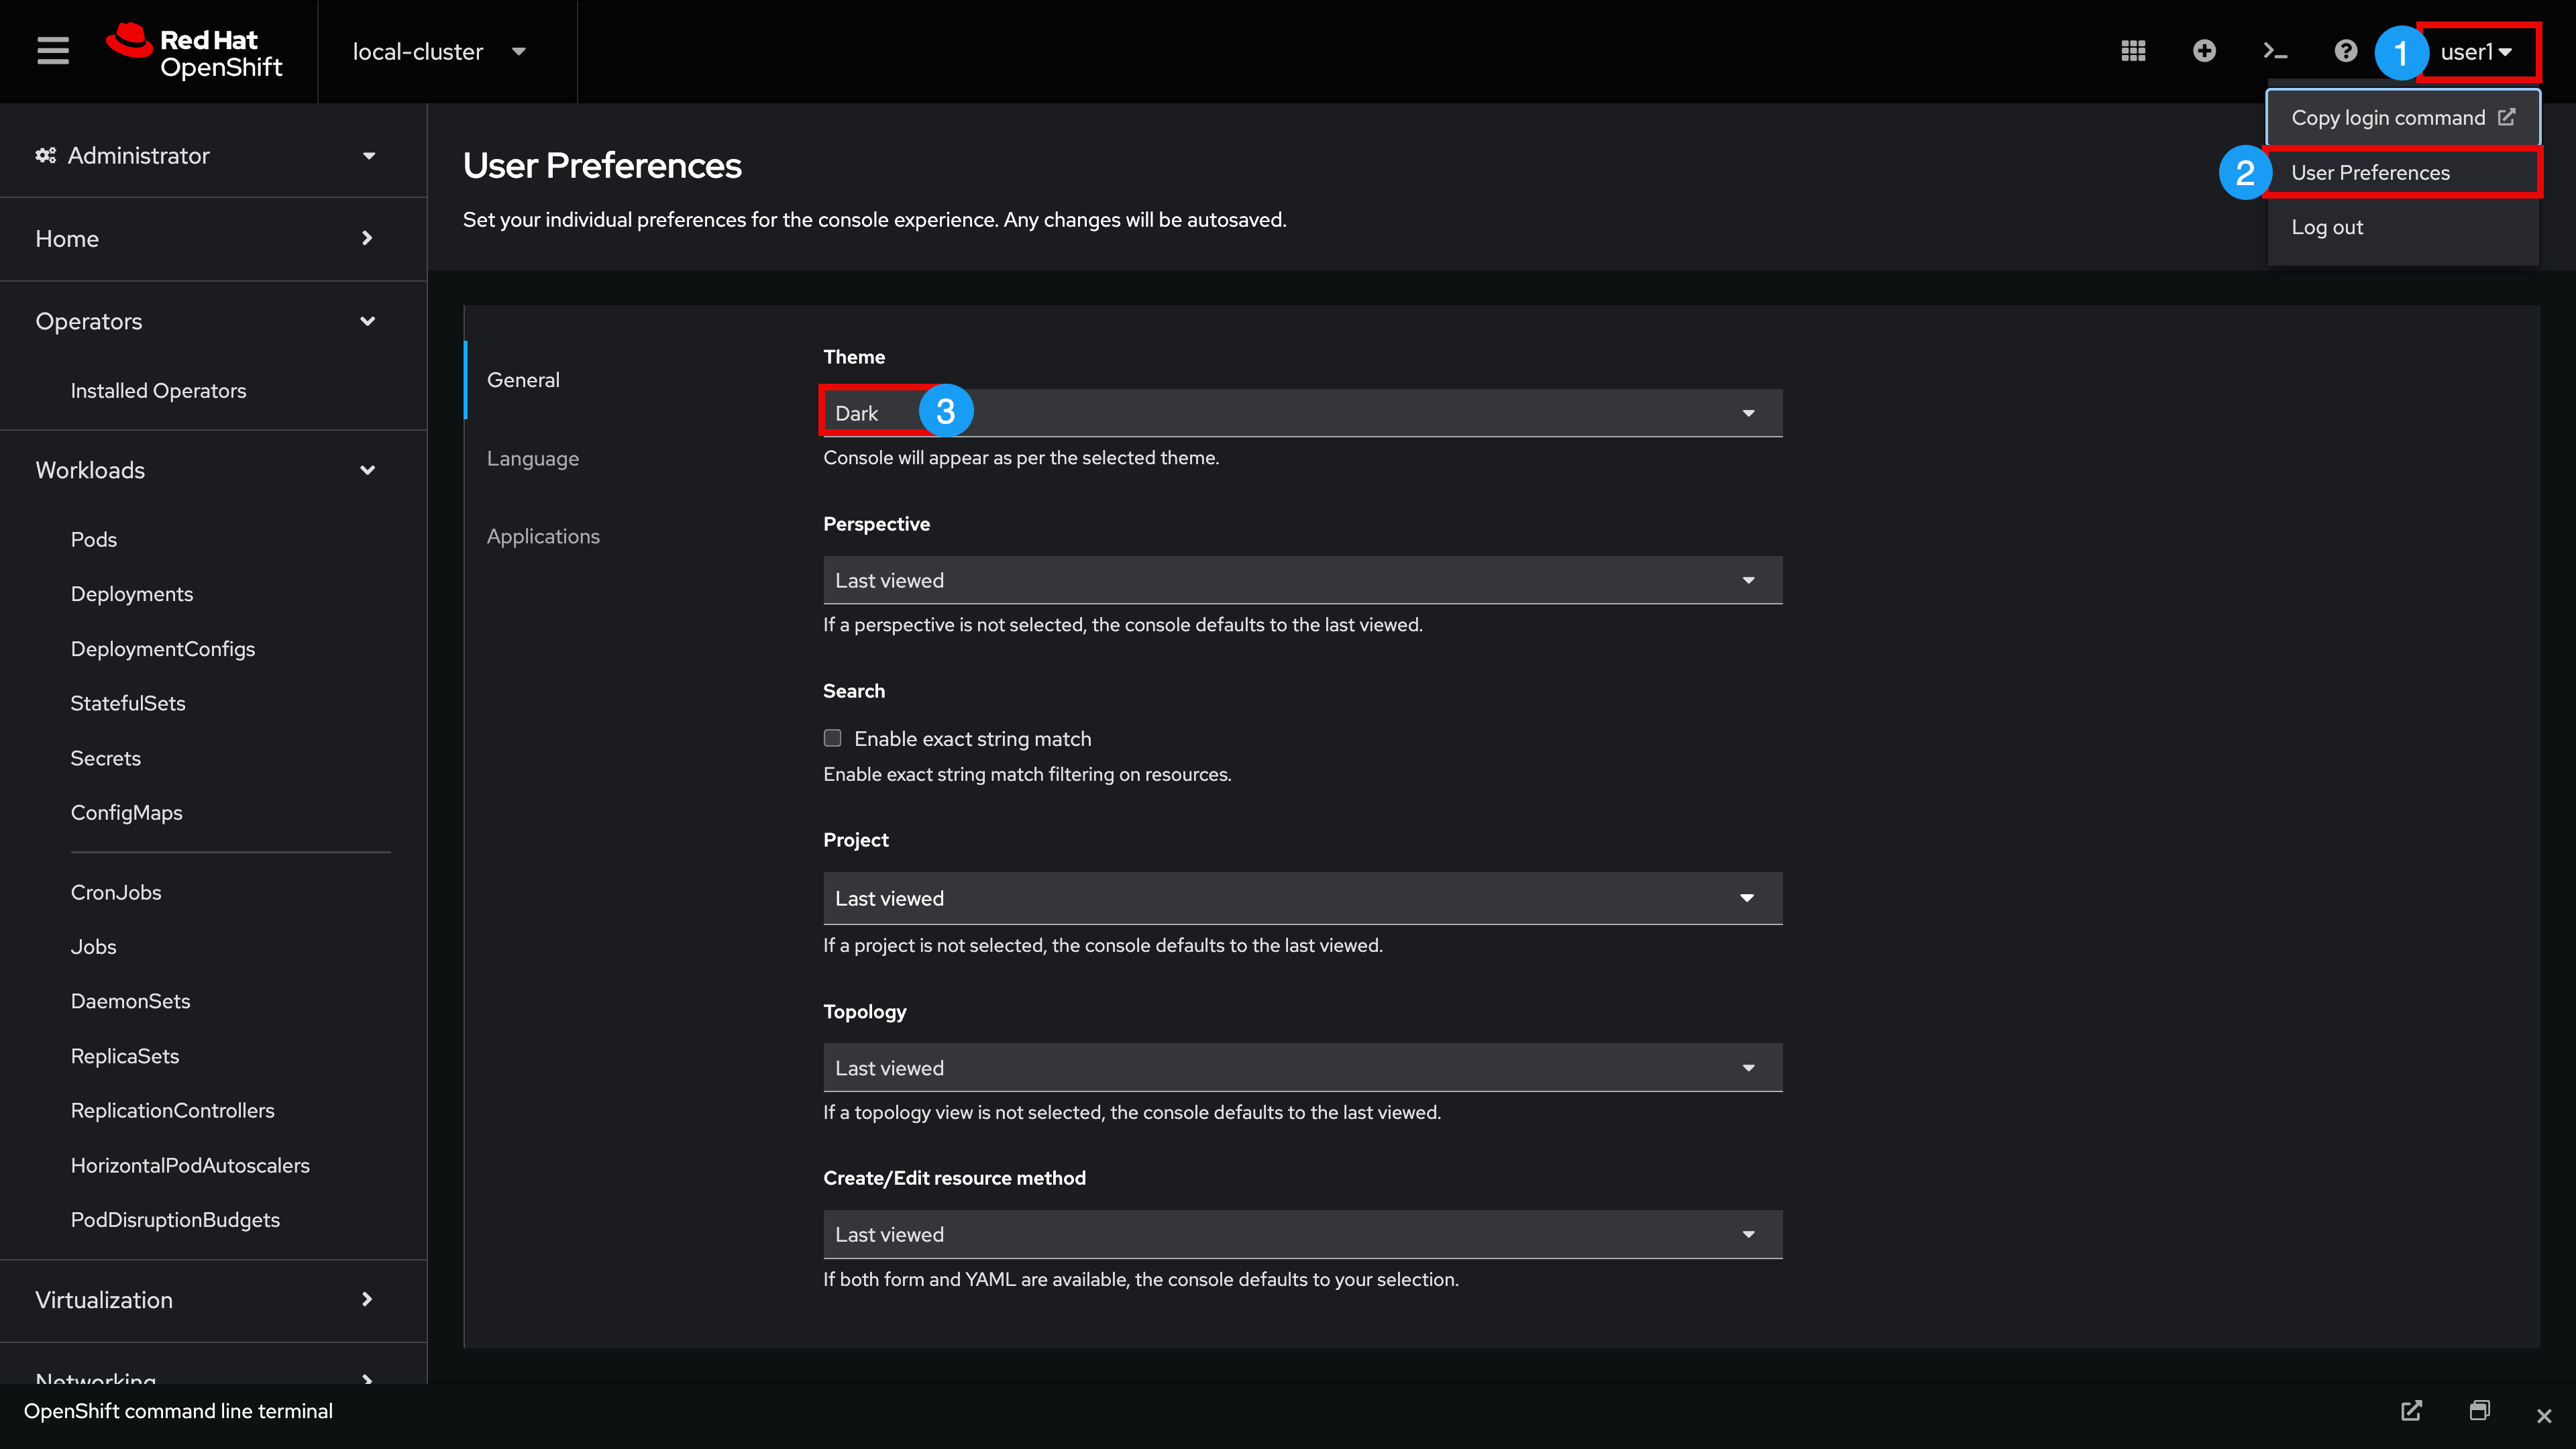
{user}{password}You can set your UI Theme as desired (System Default, Light, Dark)
-
Click username in upper-right hand corner
-
Select User Preferences
-
Set Theme to your desired choice
| For future reference, all Lab Login information is available via the left-hand nav item, "Lab Access" |
Exploring Edge Manager
You are now logged into an OpenShift Container Platform environment which also has an Advanced Cluster Management operator installed. If you have never used these capabilities before, don’t worry. We are here to examine the Edge Manager portions only. Edge Manager is running on OpenShift as a set of containerized microservices (one of which displays the UI elements that we are going to explore now)
-
Expand top menu and set to All Cluster
-
Expand the Home menu
-
Select Overview
-
Click Edge

Note that we see top level monitoring information. We also observe the current quantity of devices under management as well as their status. This helps us understand things like, "How many devices are being managed?", "Are these devices actually online (or are they in some sort of degraded state)?"
Let’s continue our exploration by examining an Edge Manager Fleet, next.
-
Expand Edge Management
-
Select Fleets
-
Click point-of-sale-prod
| Your Fleet list may differ from the screenshot below. You can utilize the Search by name filter to find point-of-sale-prod if needed |
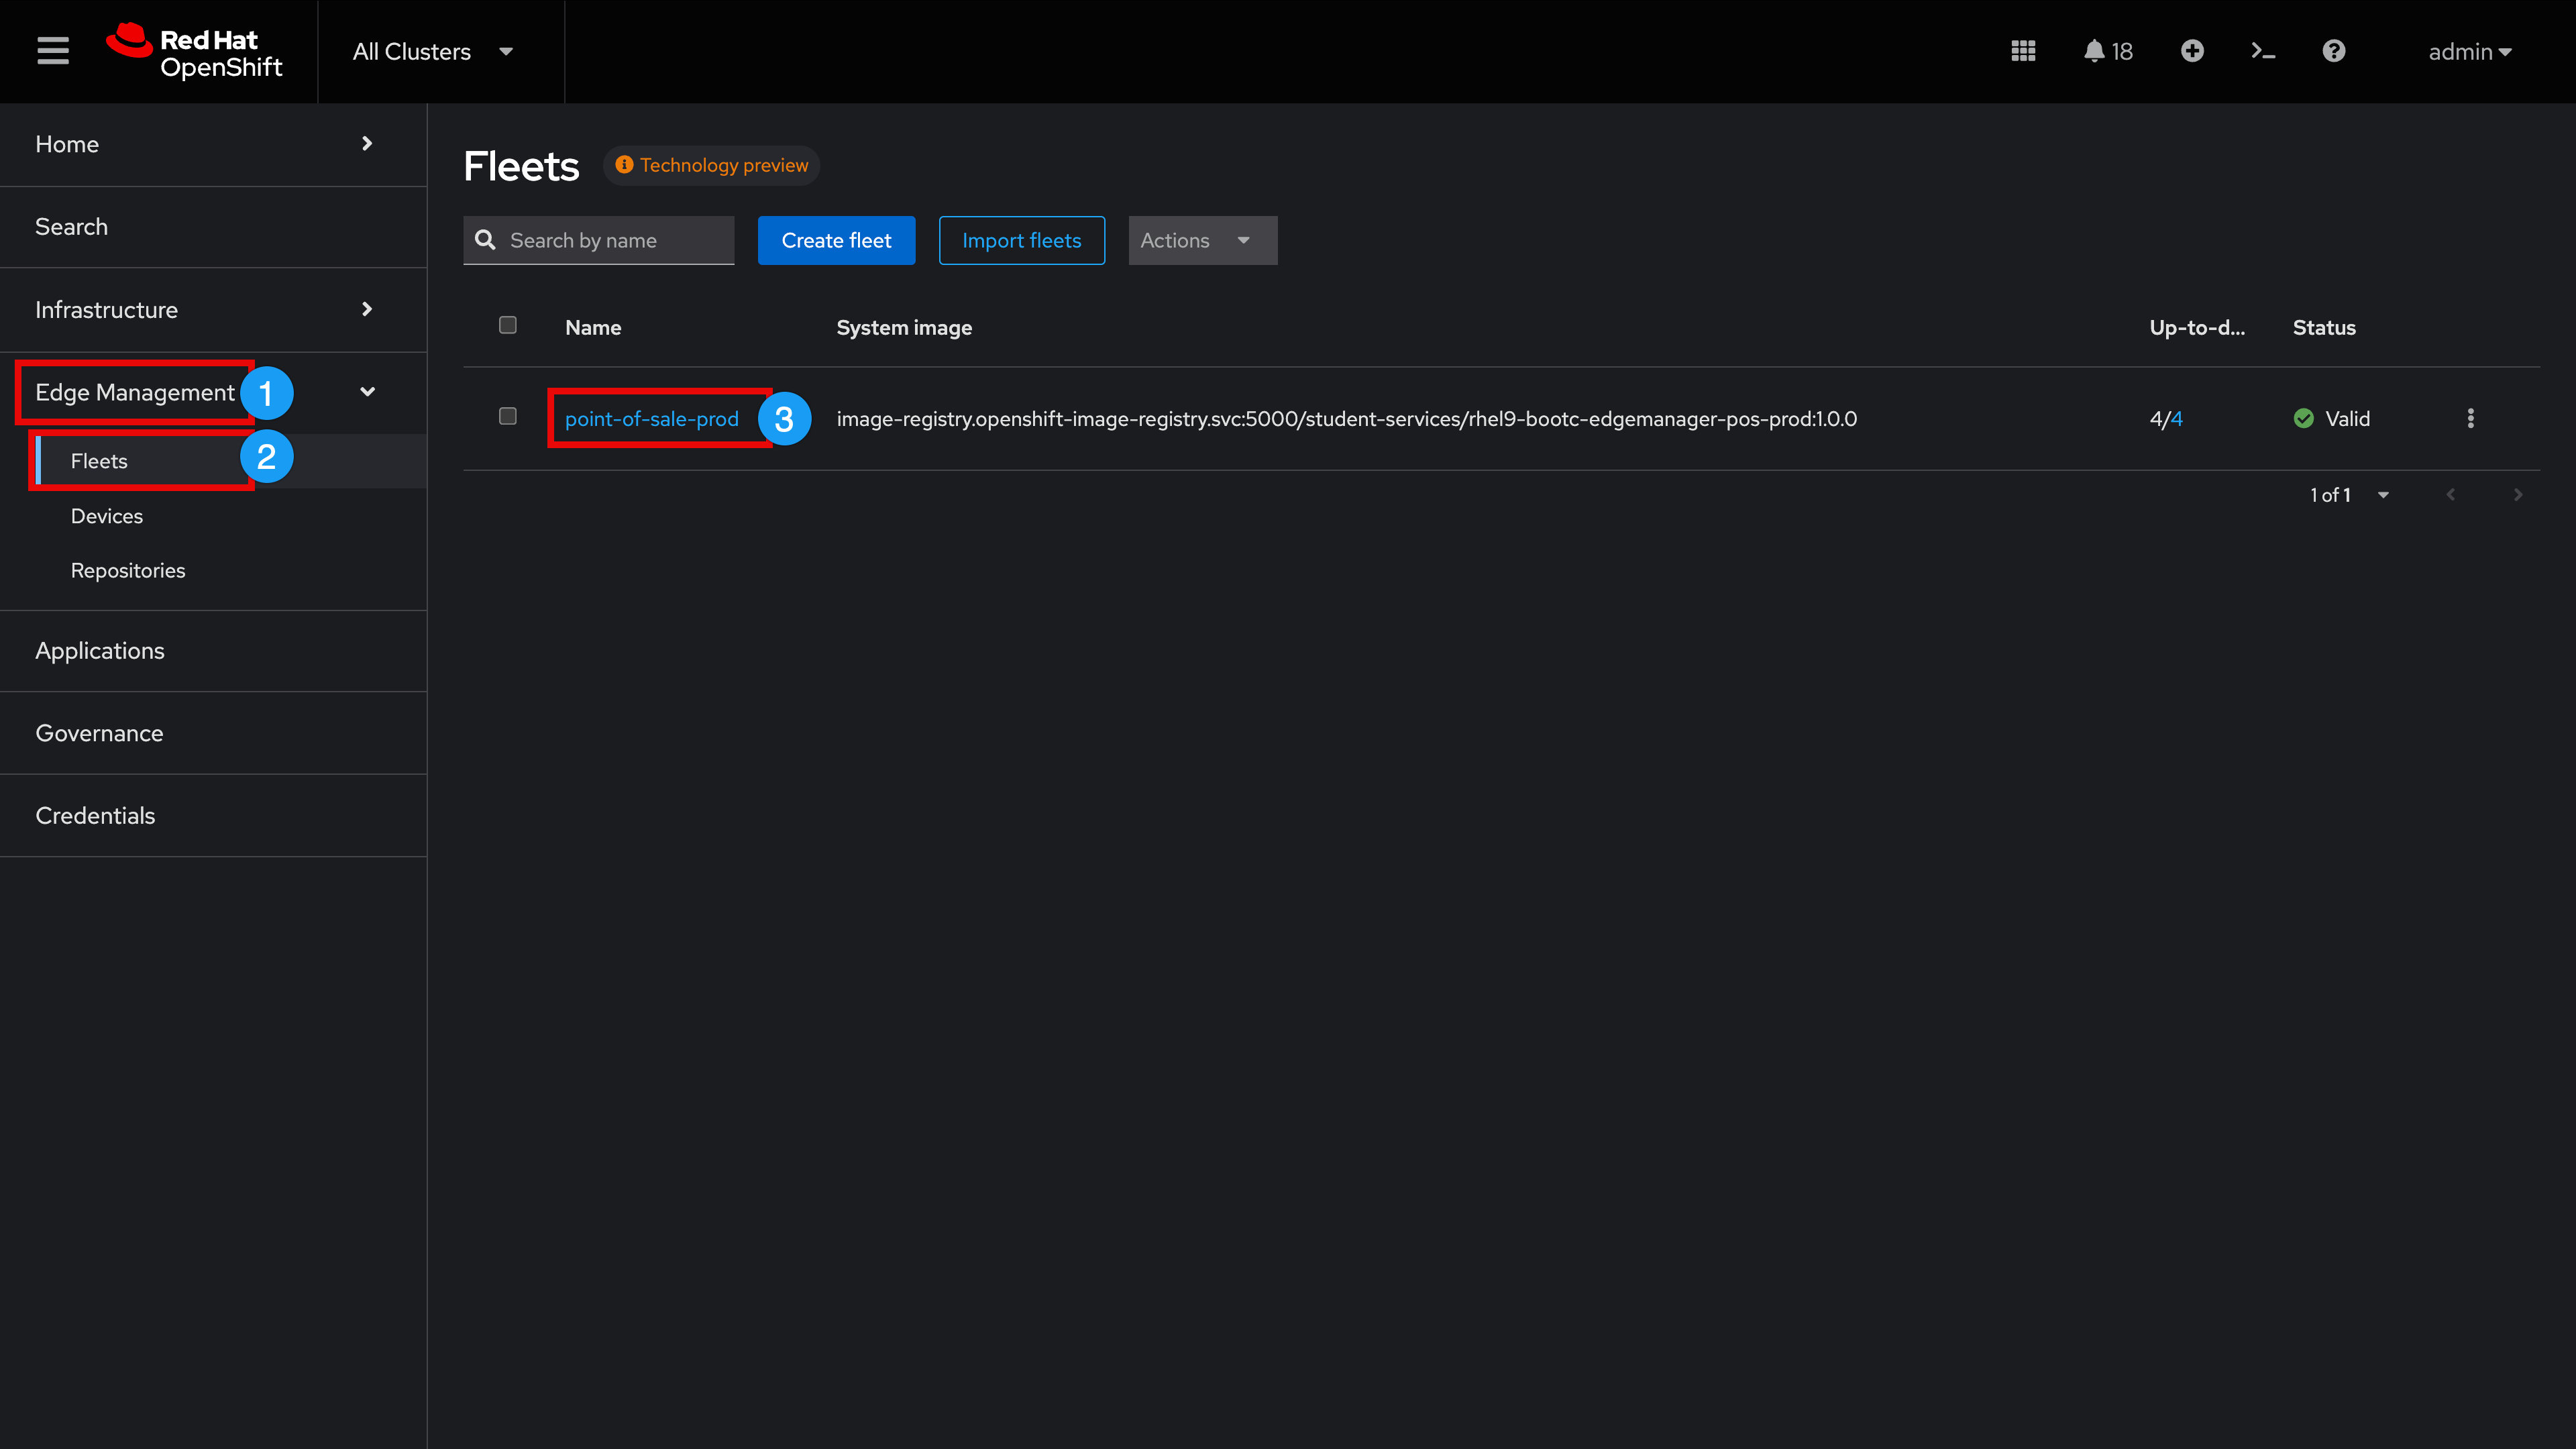
A Fleet is defined as a, "Group of Devices that share the same desired state configuraton ('device template') and common management policies"
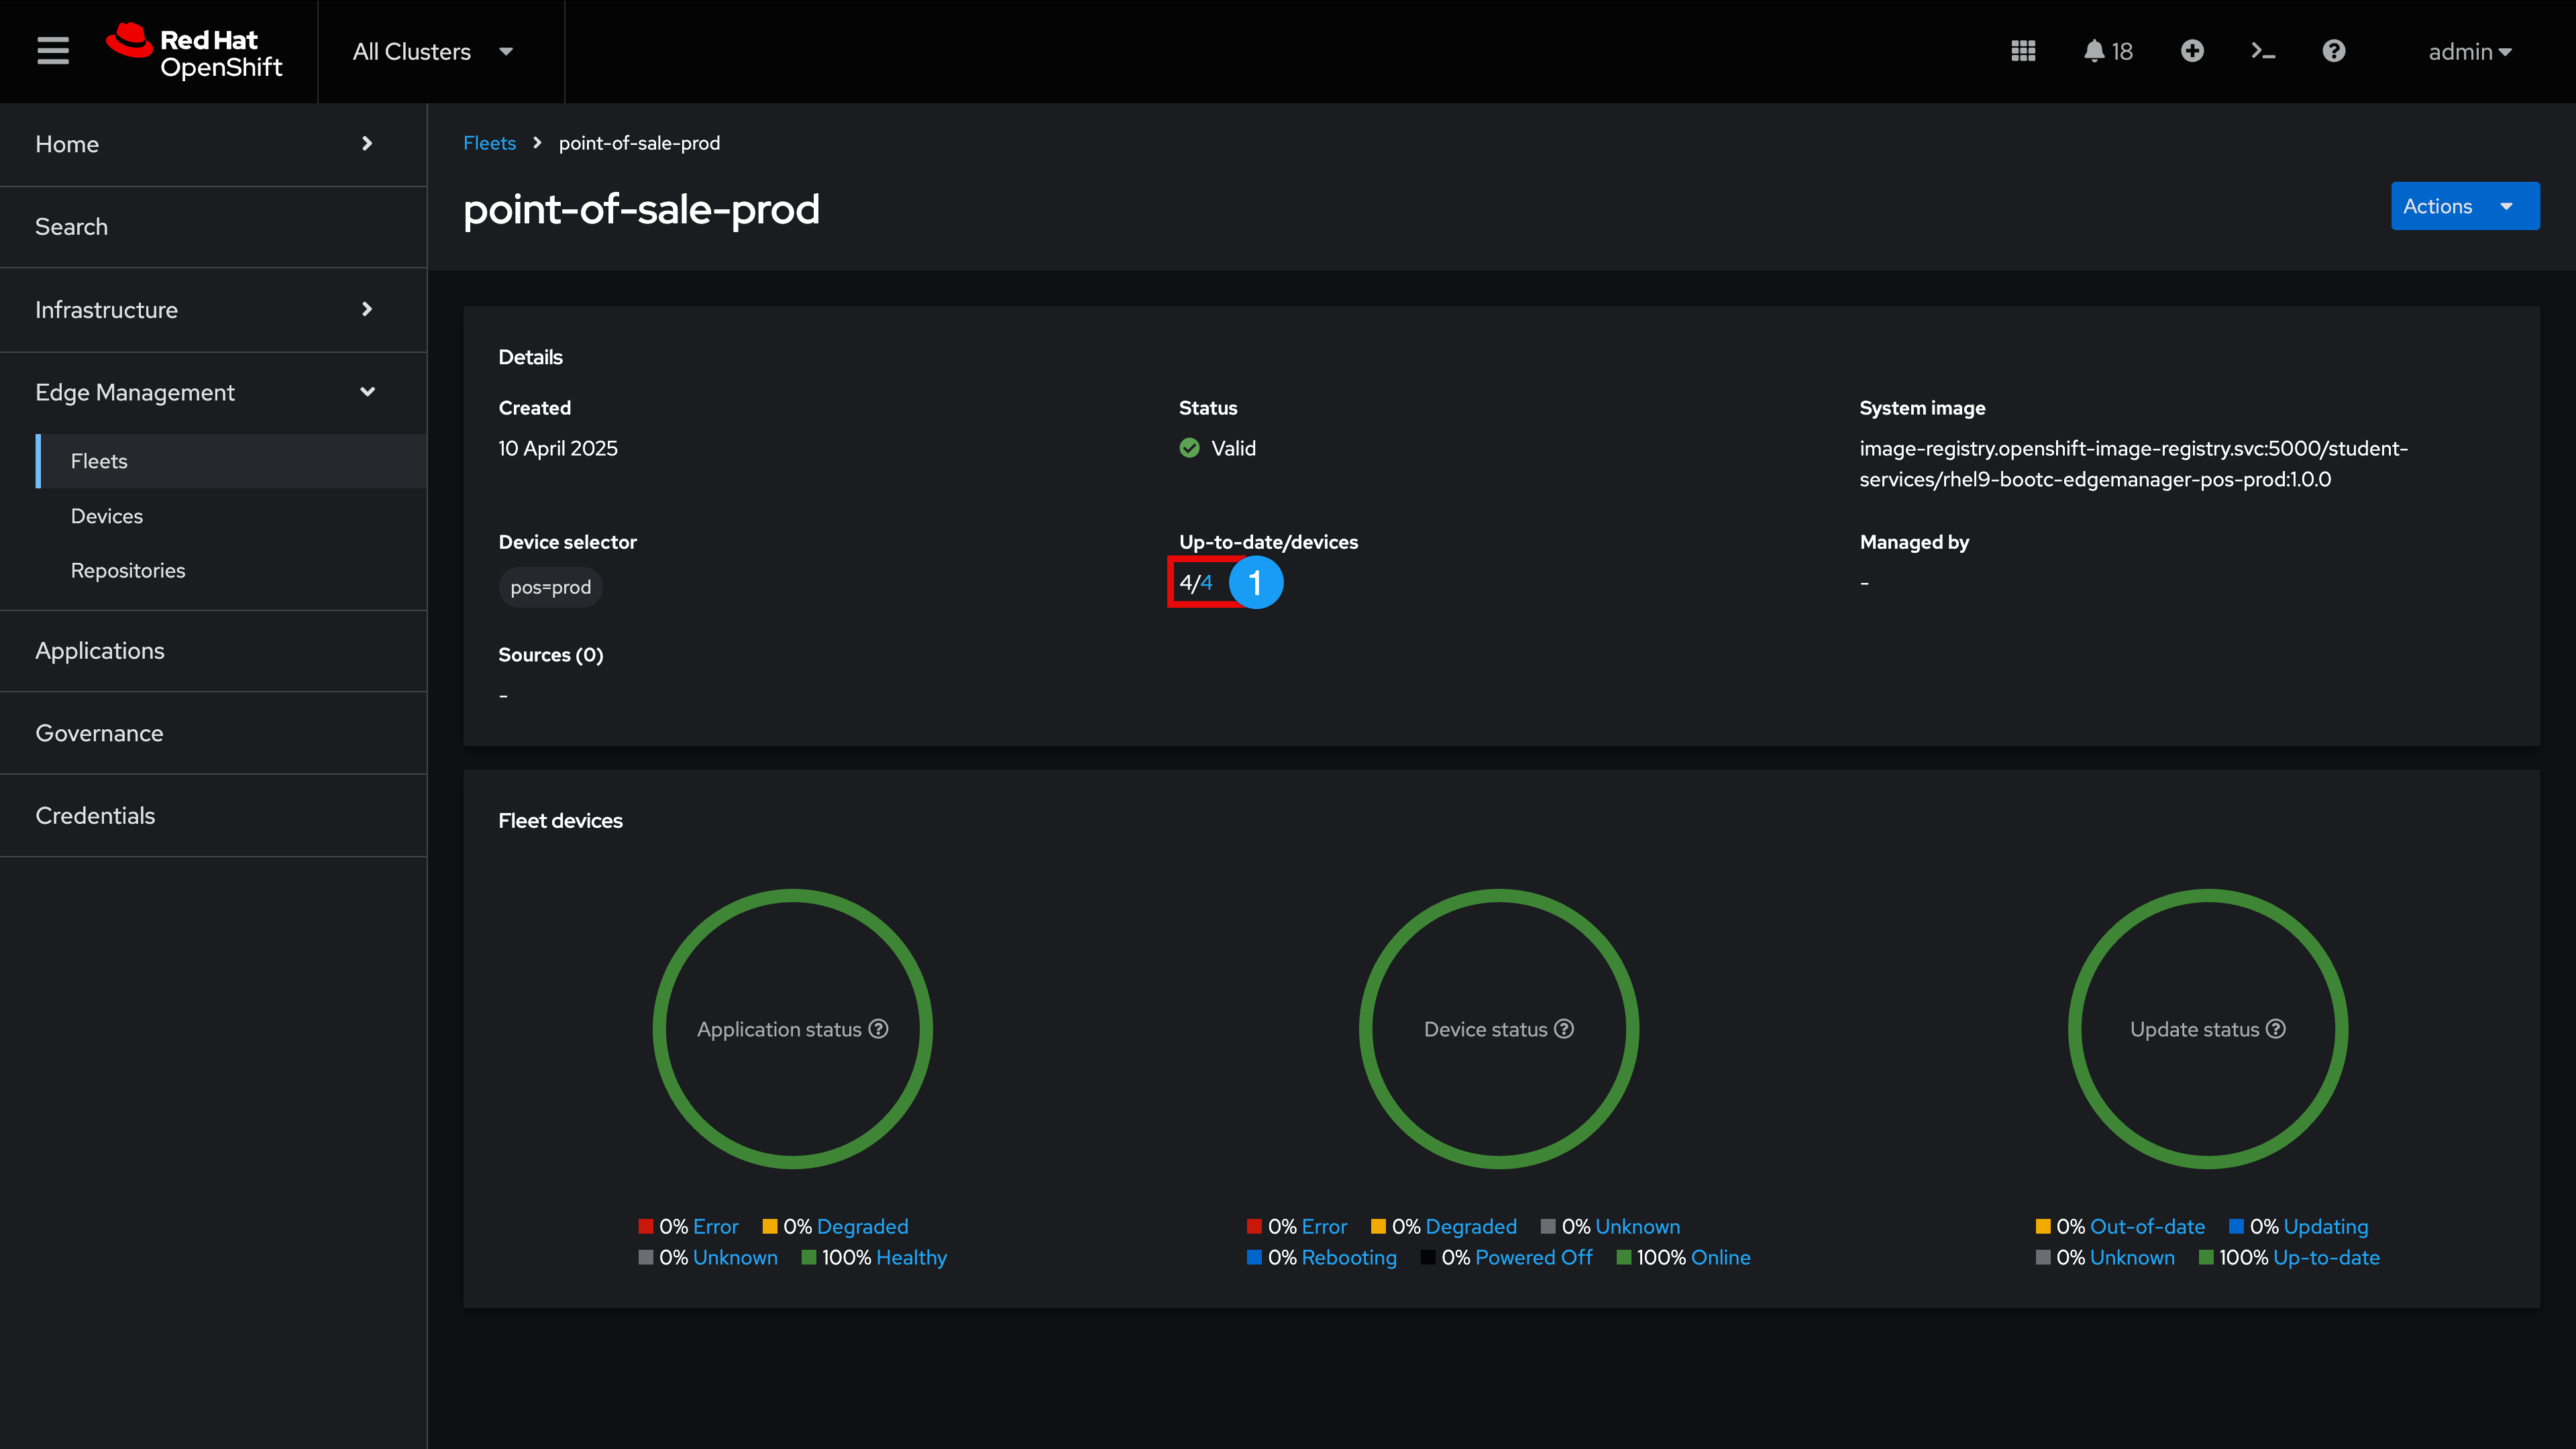
We are observing the same top level monitoring information we saw previously only now it is specific to this particular Fleet, "point-of-sale-prod"
Let’s examine the devices that are currently a member of this fleet
-
Under Up-to-date/devices, click 4
| The Device count number might be different in your lab - simply click the right-most number |
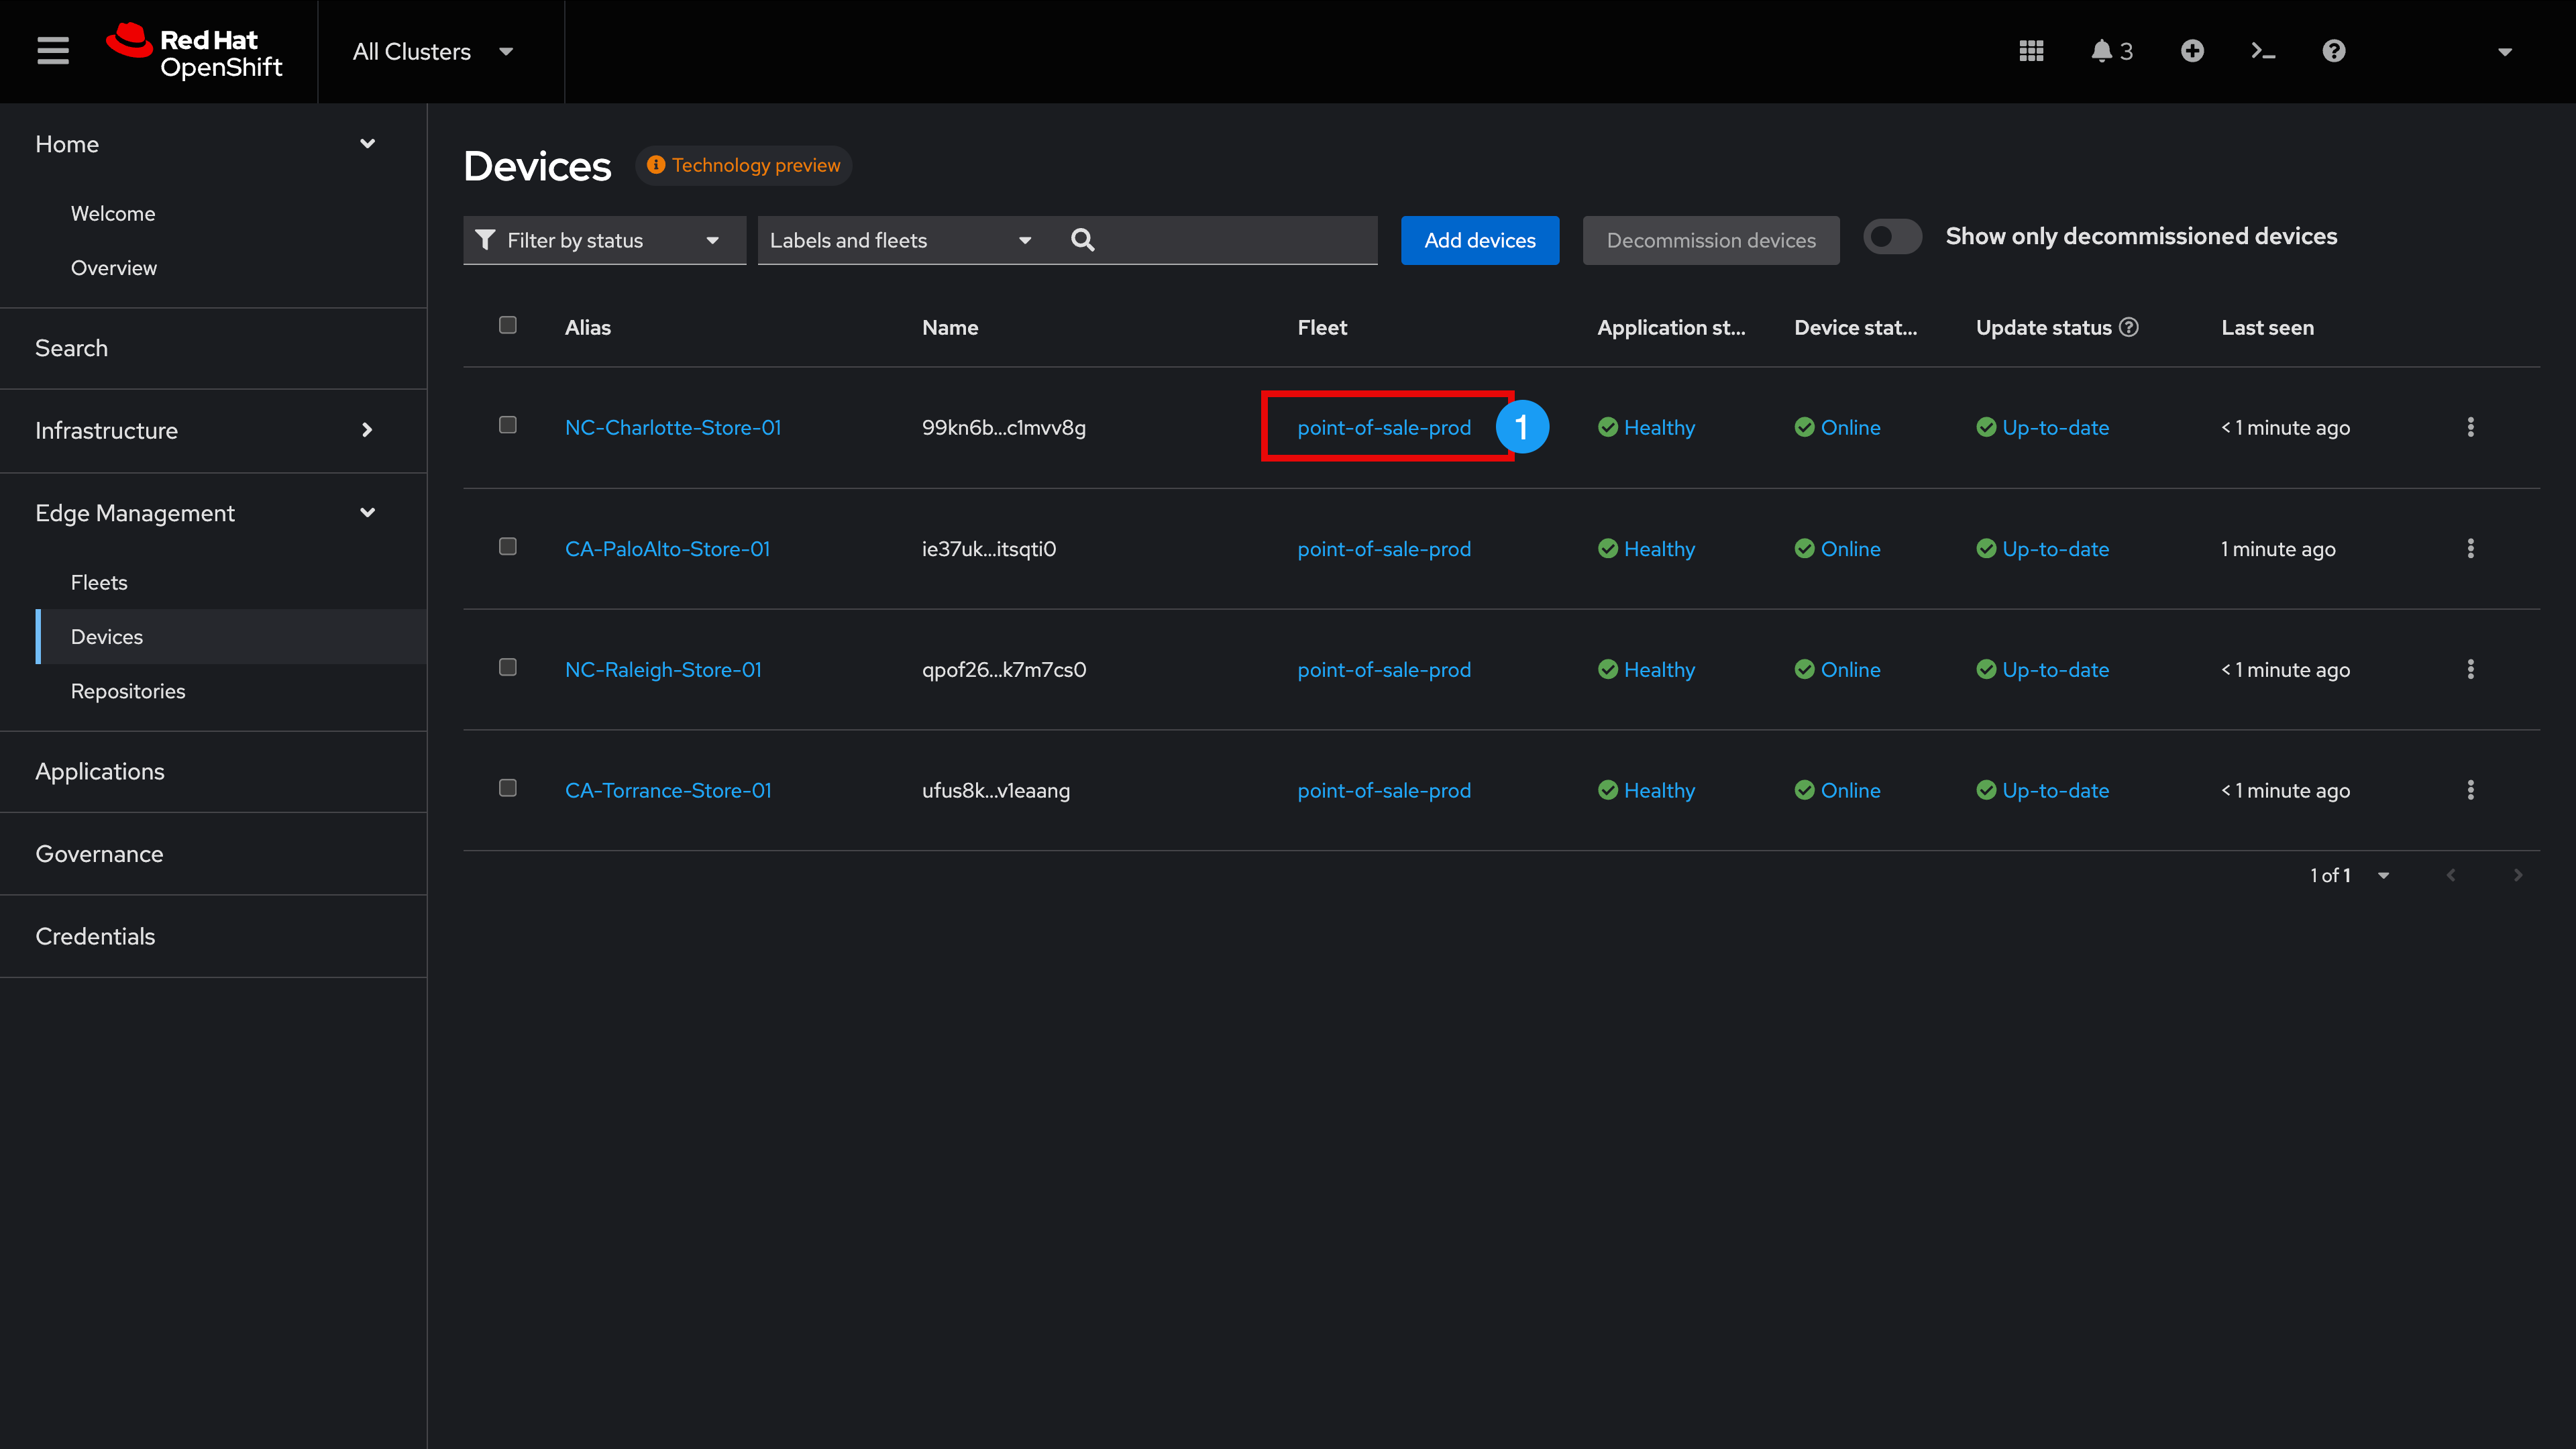
Here we observe the 4 existing EMI East/West coast store devices that we discussed earlier. They are reporting a green 'Online' device status. Let’s examine the Fleet configuration in more detail.
-
Click point-of-sale-prod
| If there are Devices pending approval you may need to scroll down to see the Devices list |
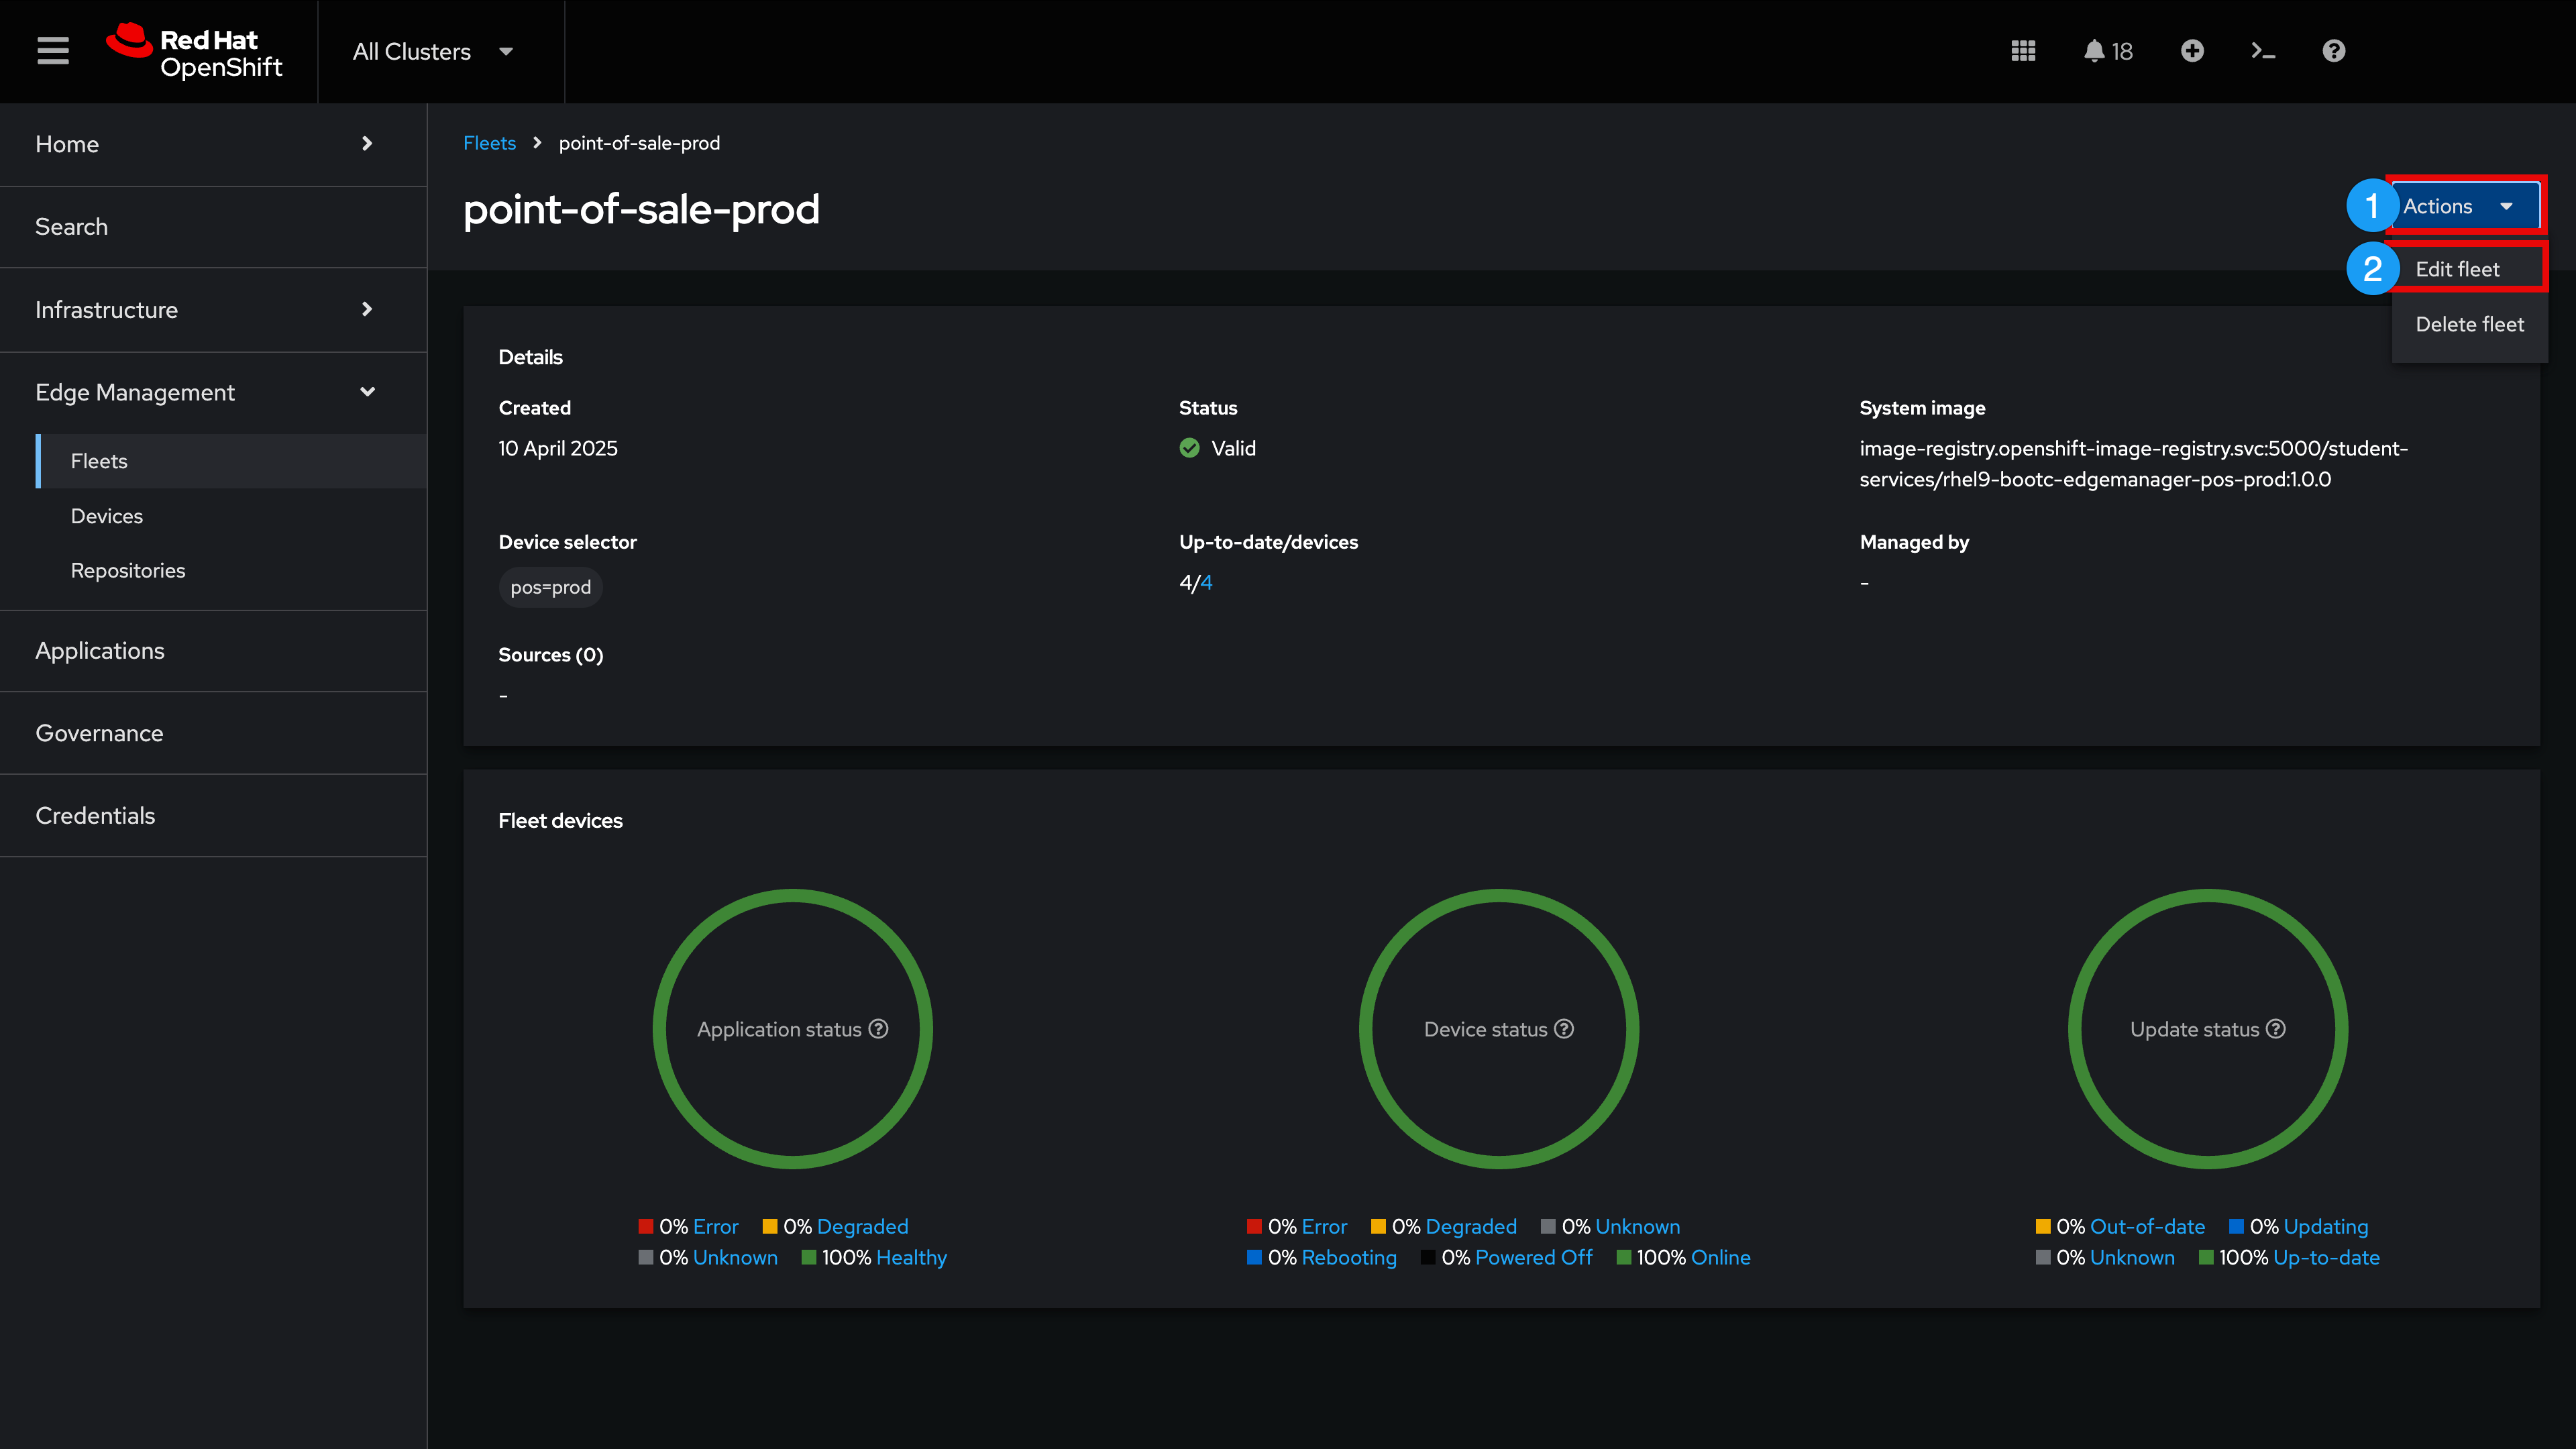
Let’s explore how this Fleet was built in more detail
-
Expand the Actions menu
-
Click Edit Fleet
-
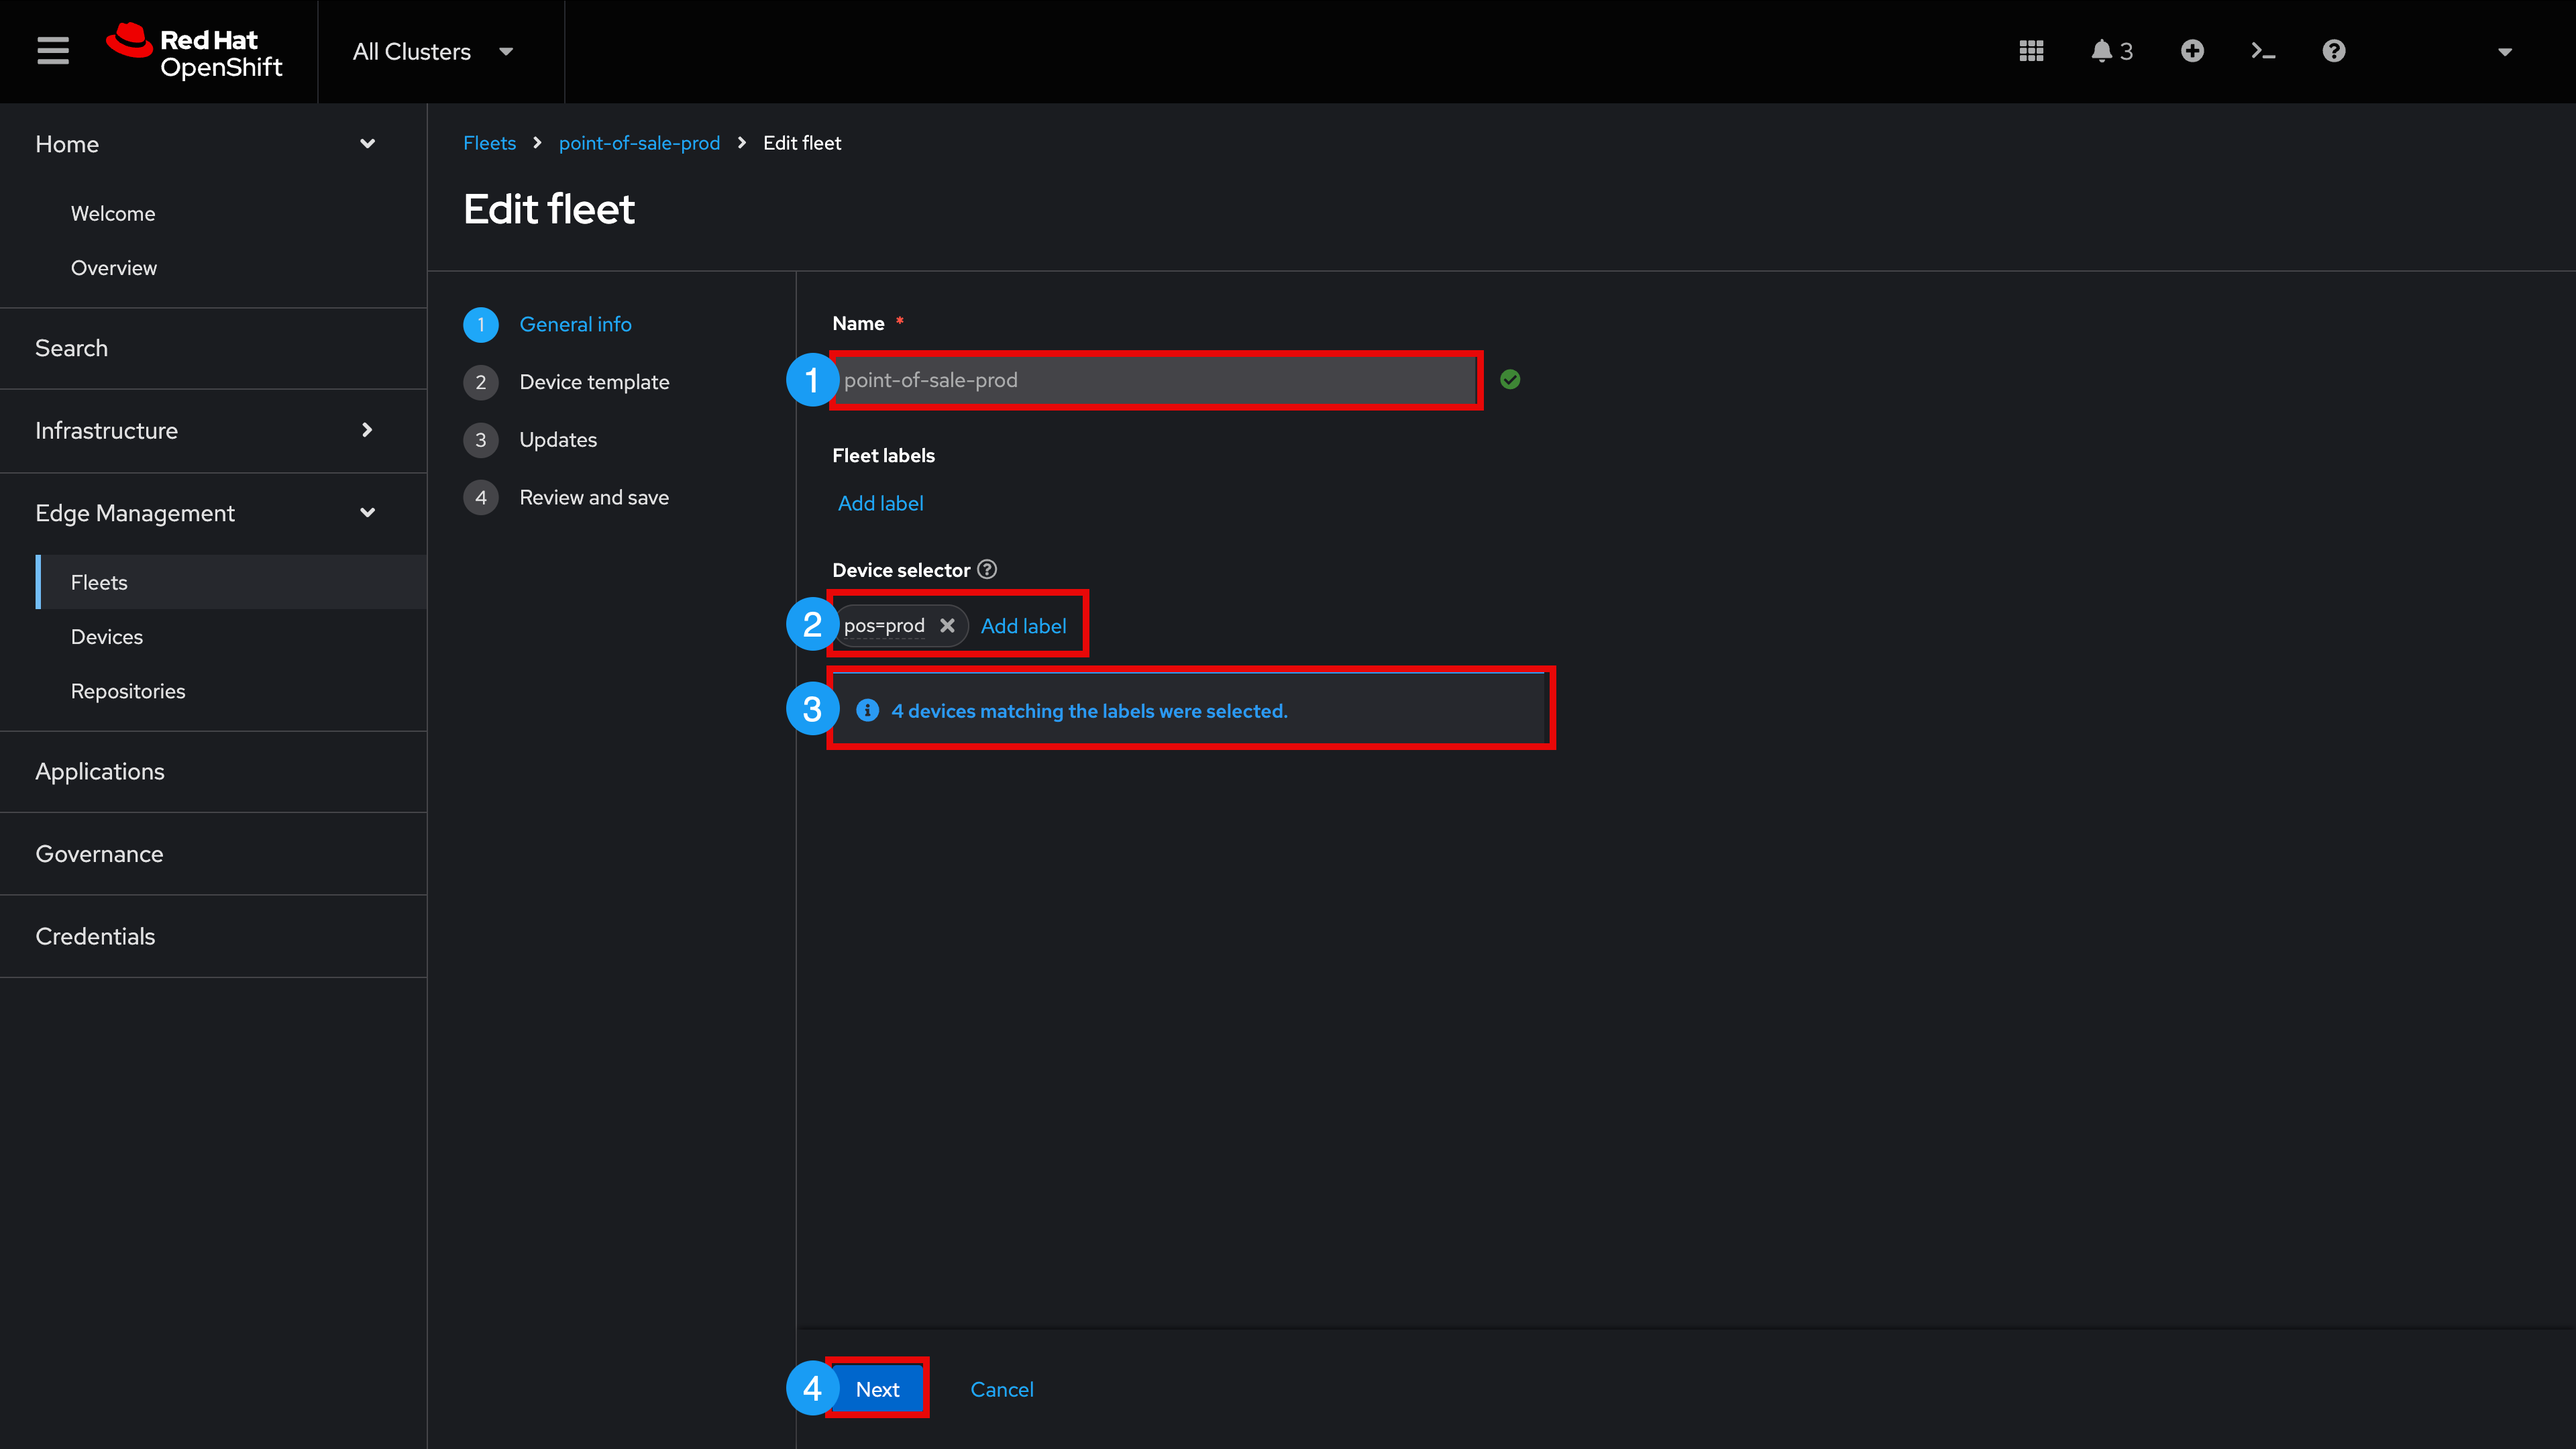
We see the friendly name that has been chosen for this fleet: point-of-sale-prod
-
A device selector label has been configured: 'pos=prod' This is a user generated key-pair value of their choosing. Any device that matches (contains) this label will automatically be made a member of this fleet. Although we haven’t done so in our lab, it is possible to have more than one label configured as a device selector (e.g. "pos=prod" and "loc=store")
-
Note that we have 4 devices matching this label (these are our existing store edge devices, your lab device count may vary)
-
Click Next
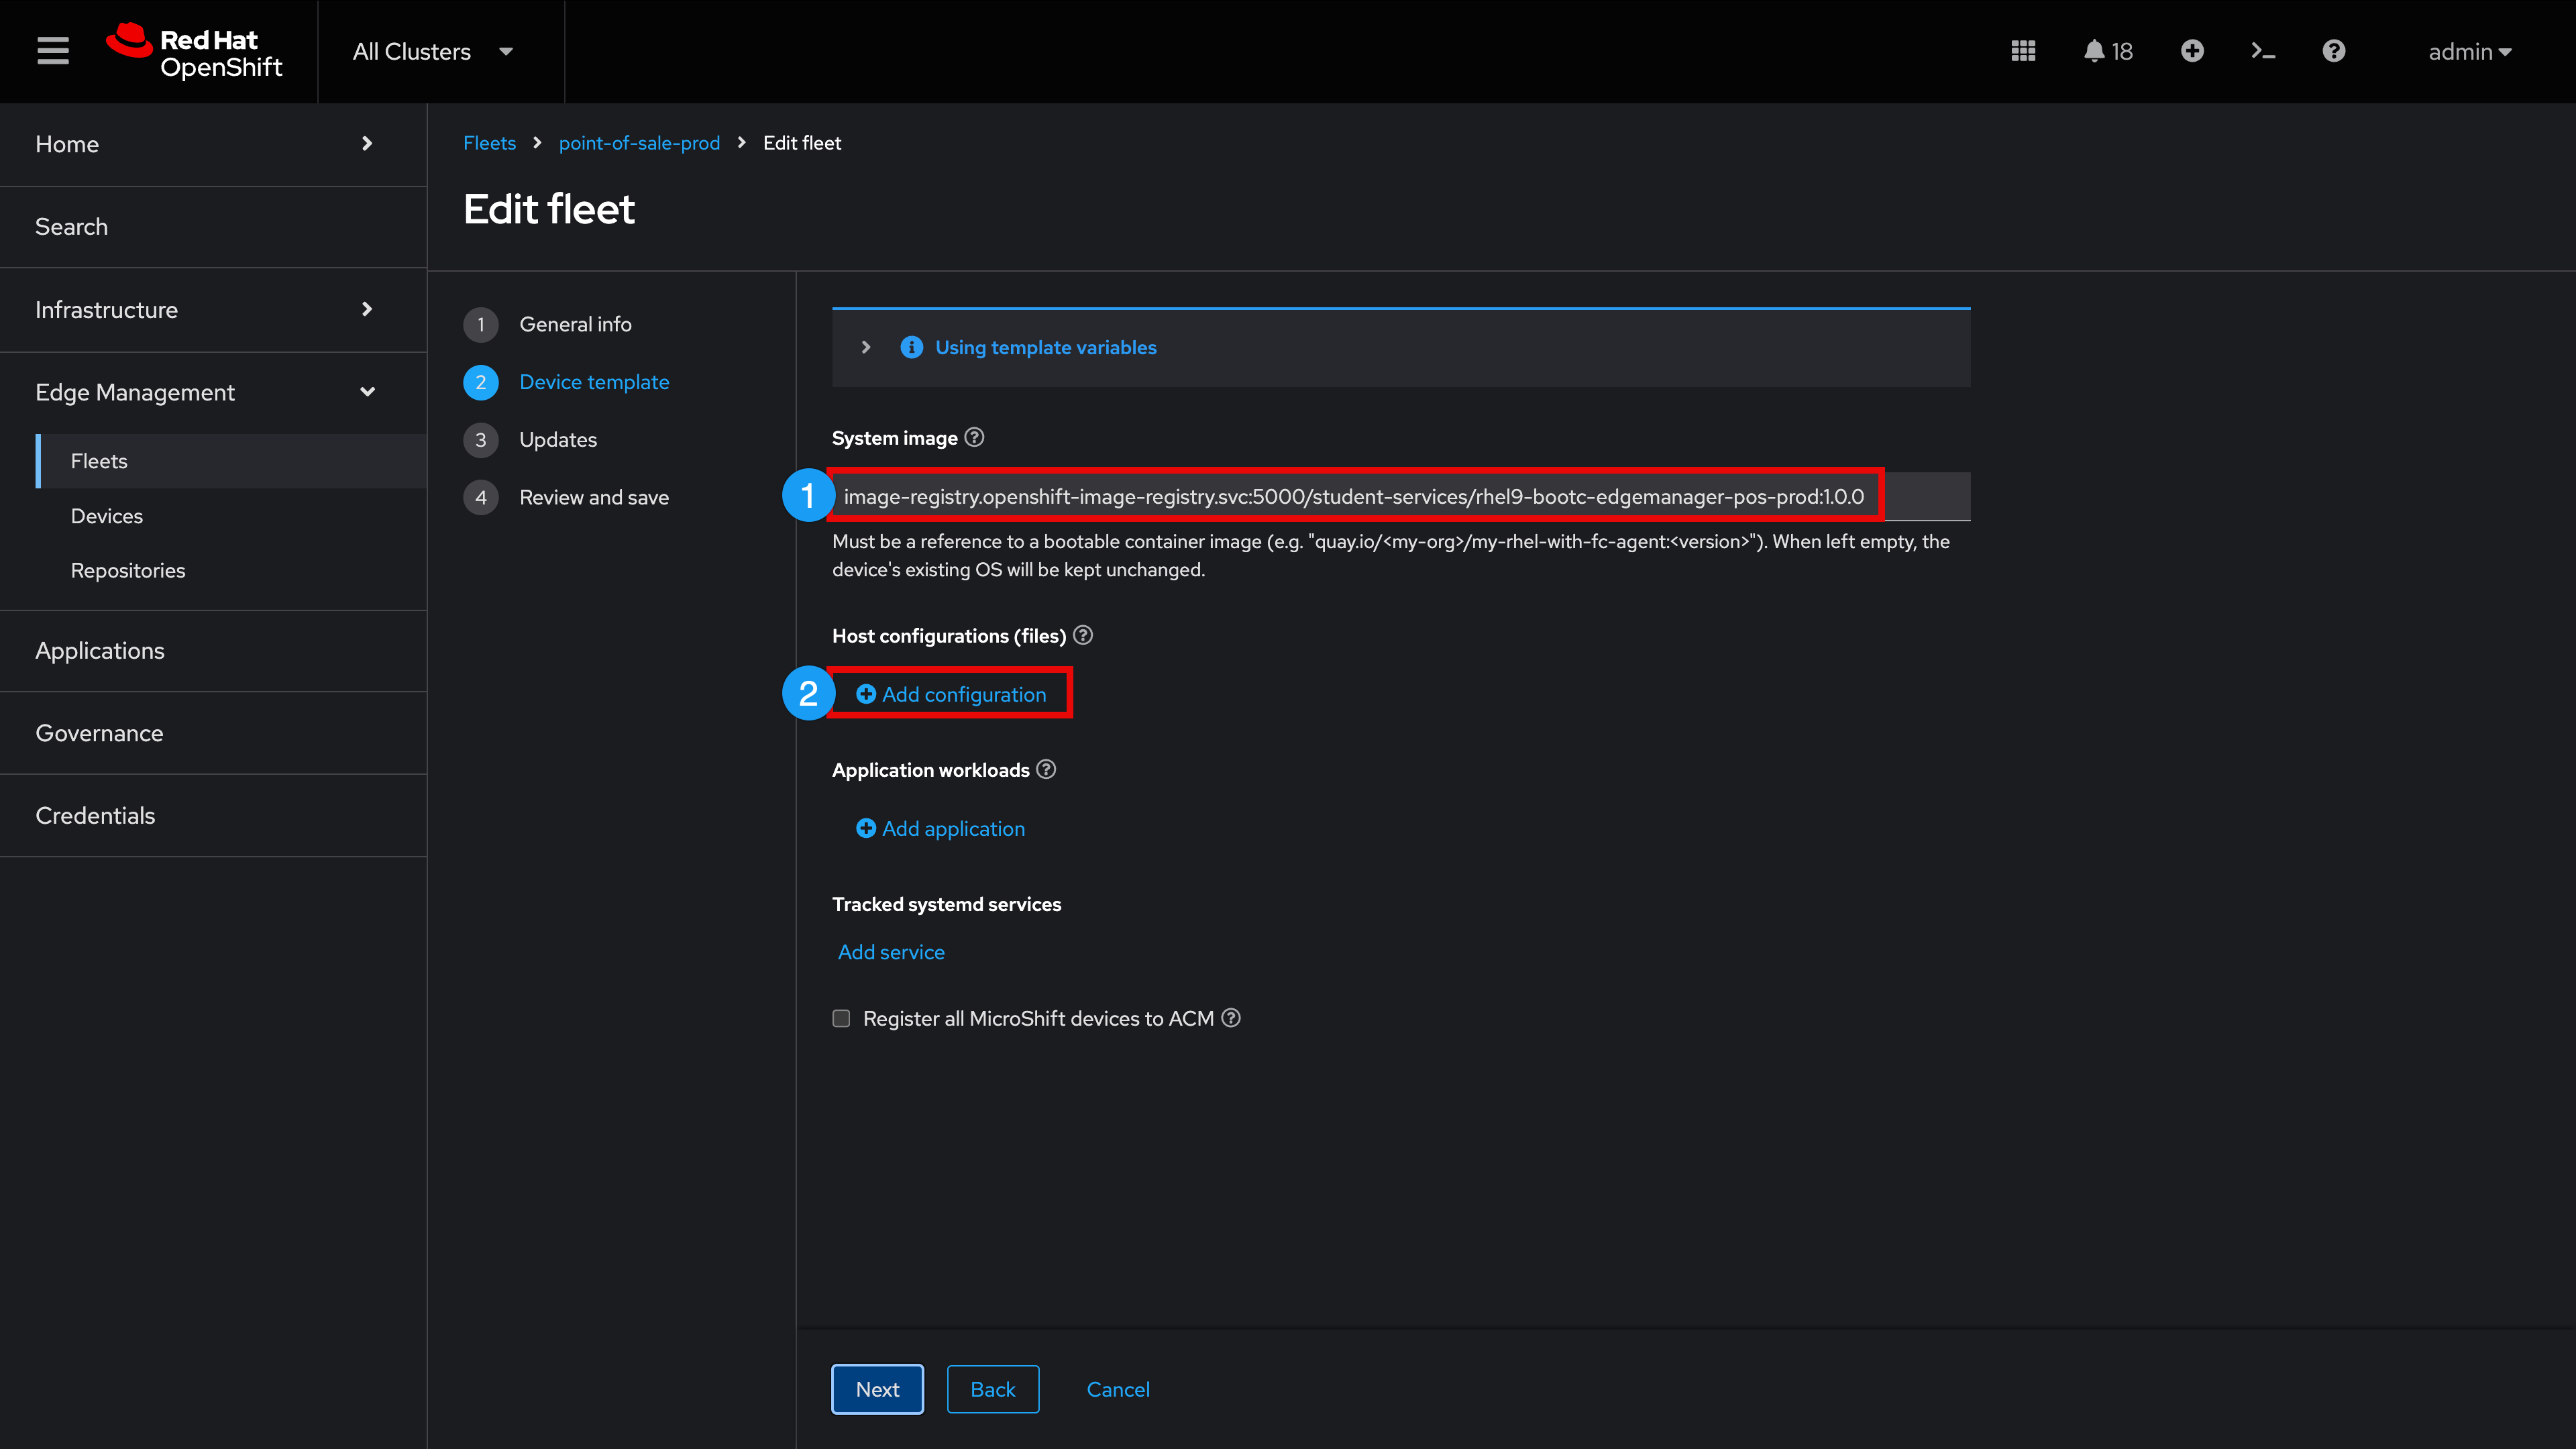
We are now looking at what we refer to as the fleet device template. The device template contains the configuration items that we want to specify declaratively (with Edge Manager responsible for enforcing these specifications, including healing a given device back to desired state, if any of these items drift).
-
Here we see the bootc image that must be running on a device in this fleet, ending in '…pos-prod:1.0.0'
-
Click + Add configuration
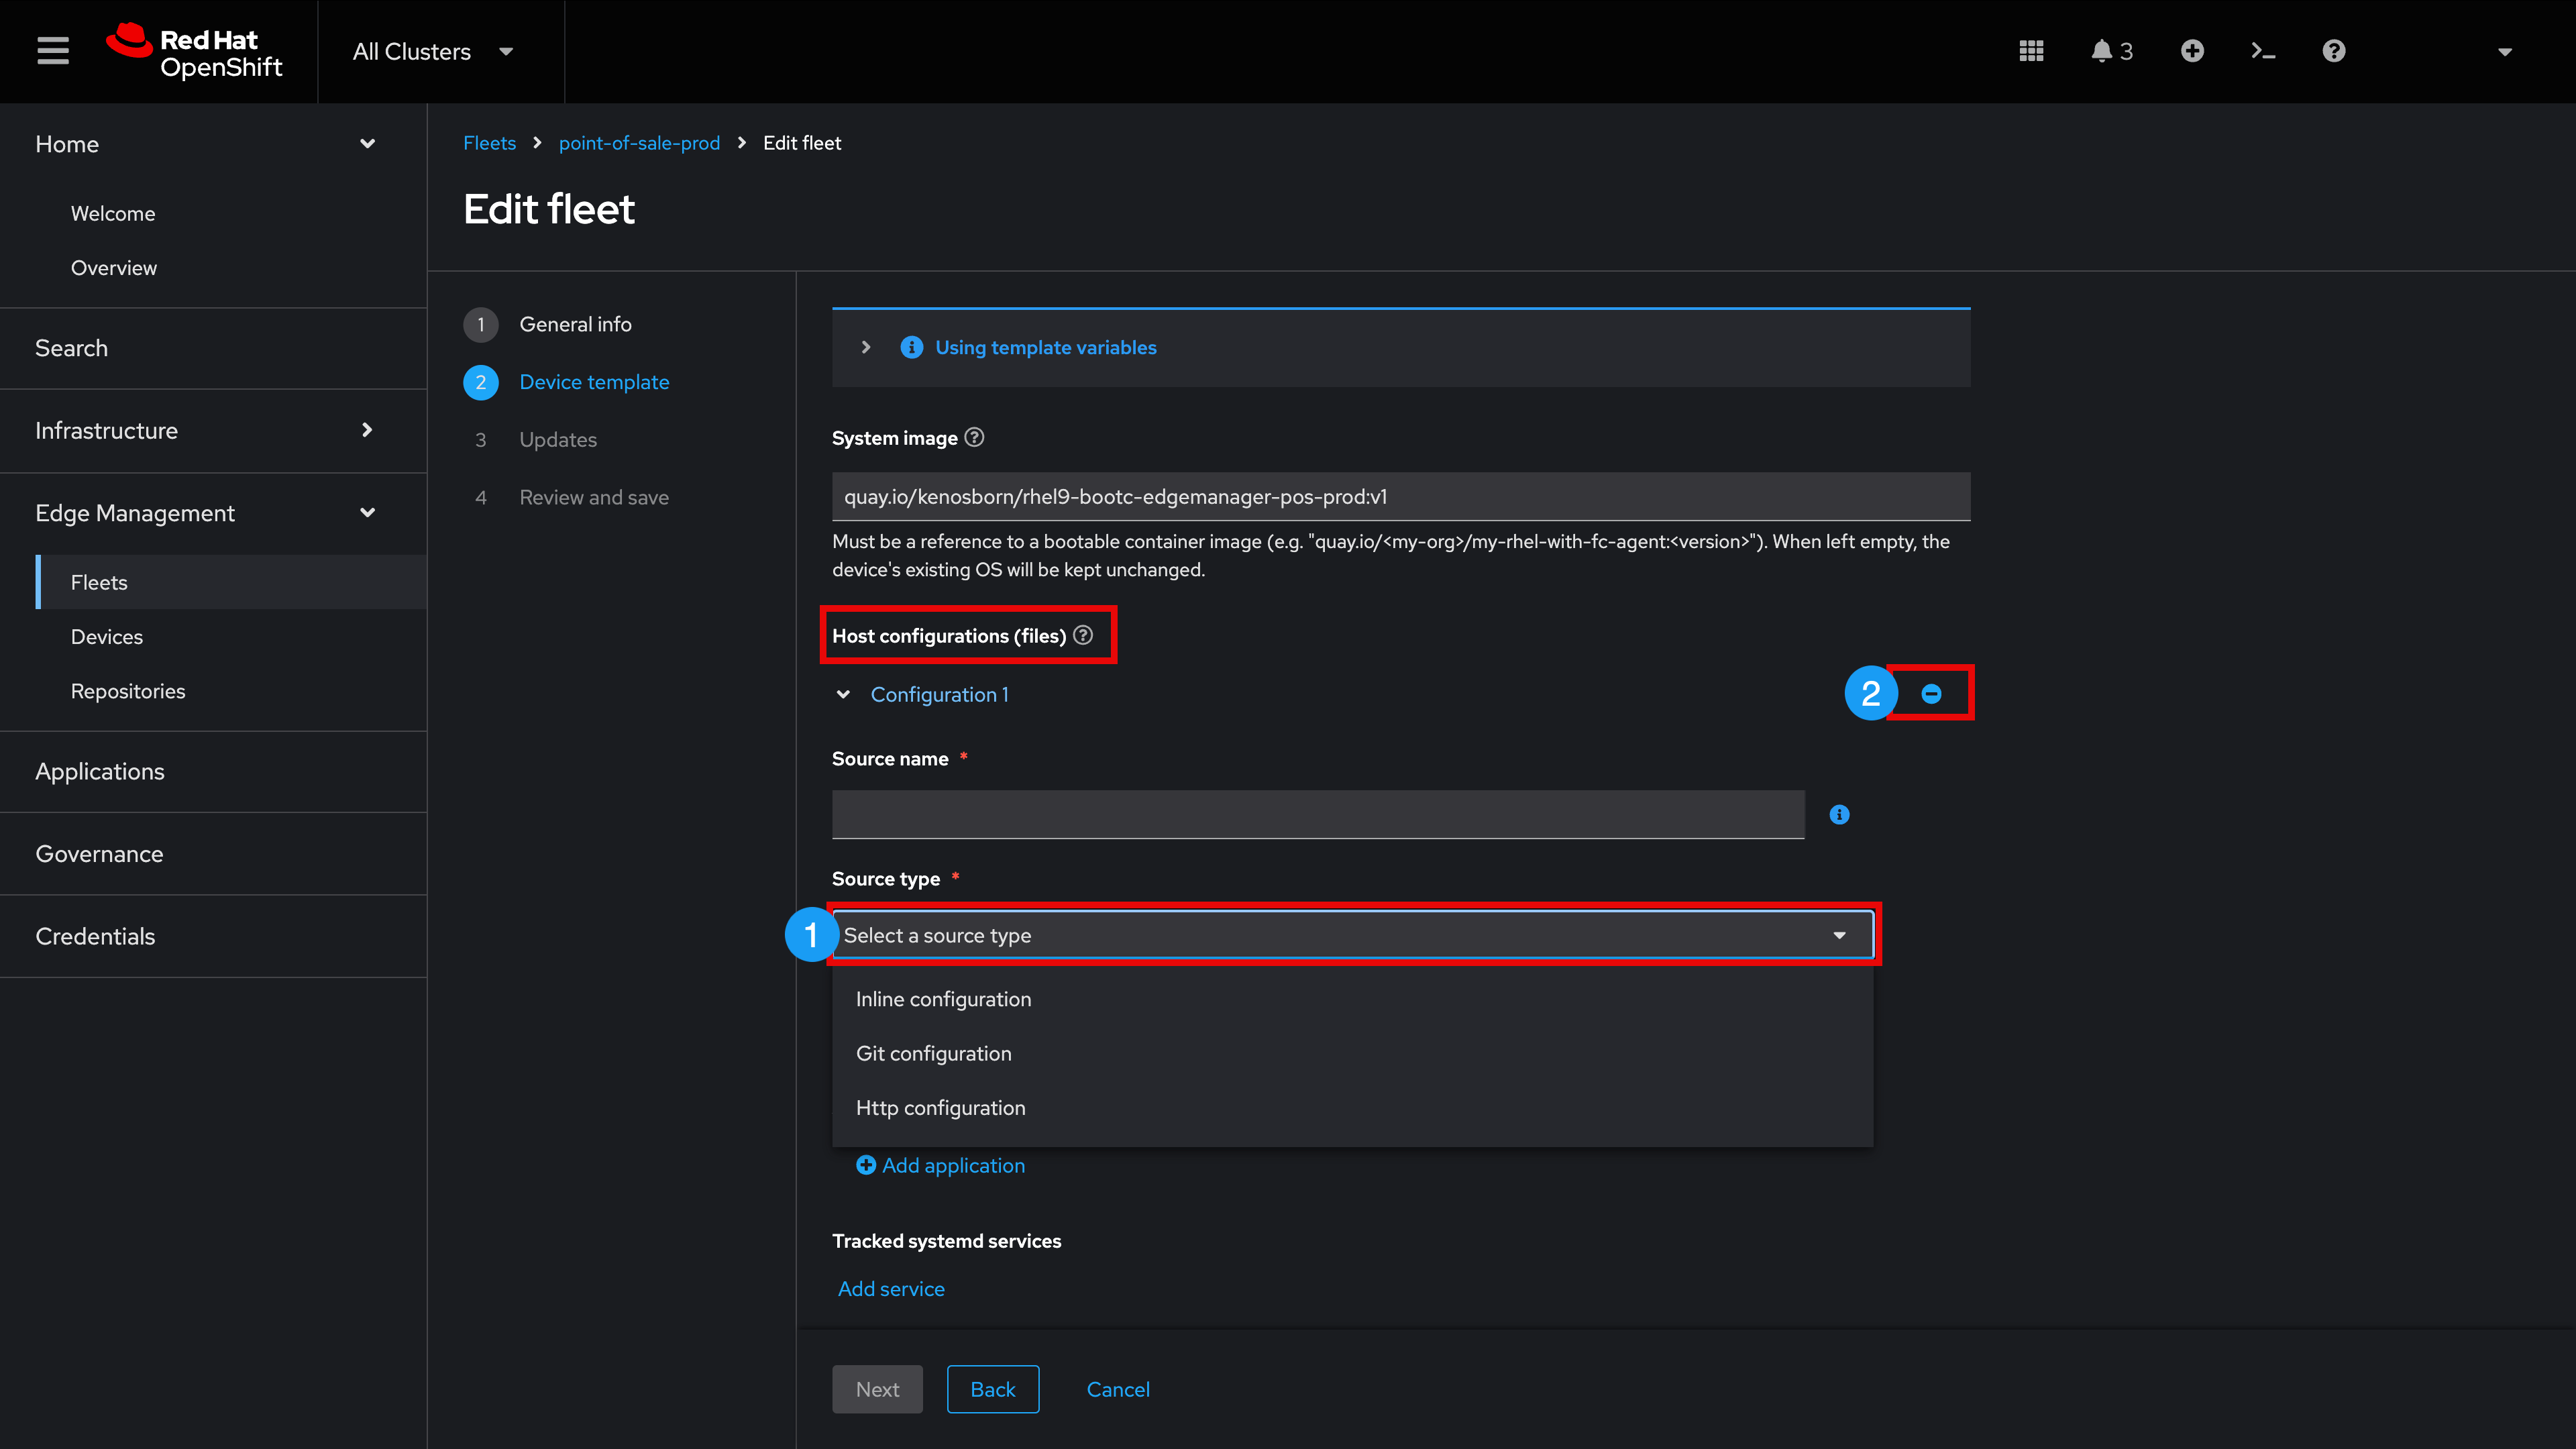
As part of the device template, We can specify additional host configuration items (like custom systemd service config, network config, etc.)
-
Expand Select a source type (Edge manager can load pre-staged (inline) configuration files on the device, configuration files stored in Git or configuration files stored on an internal web (http) repository)
-
Since we don’t want to add a new configuration at the moment, click the '-' symbol to remove this configuration section
Let’s examine another element of the device template
-
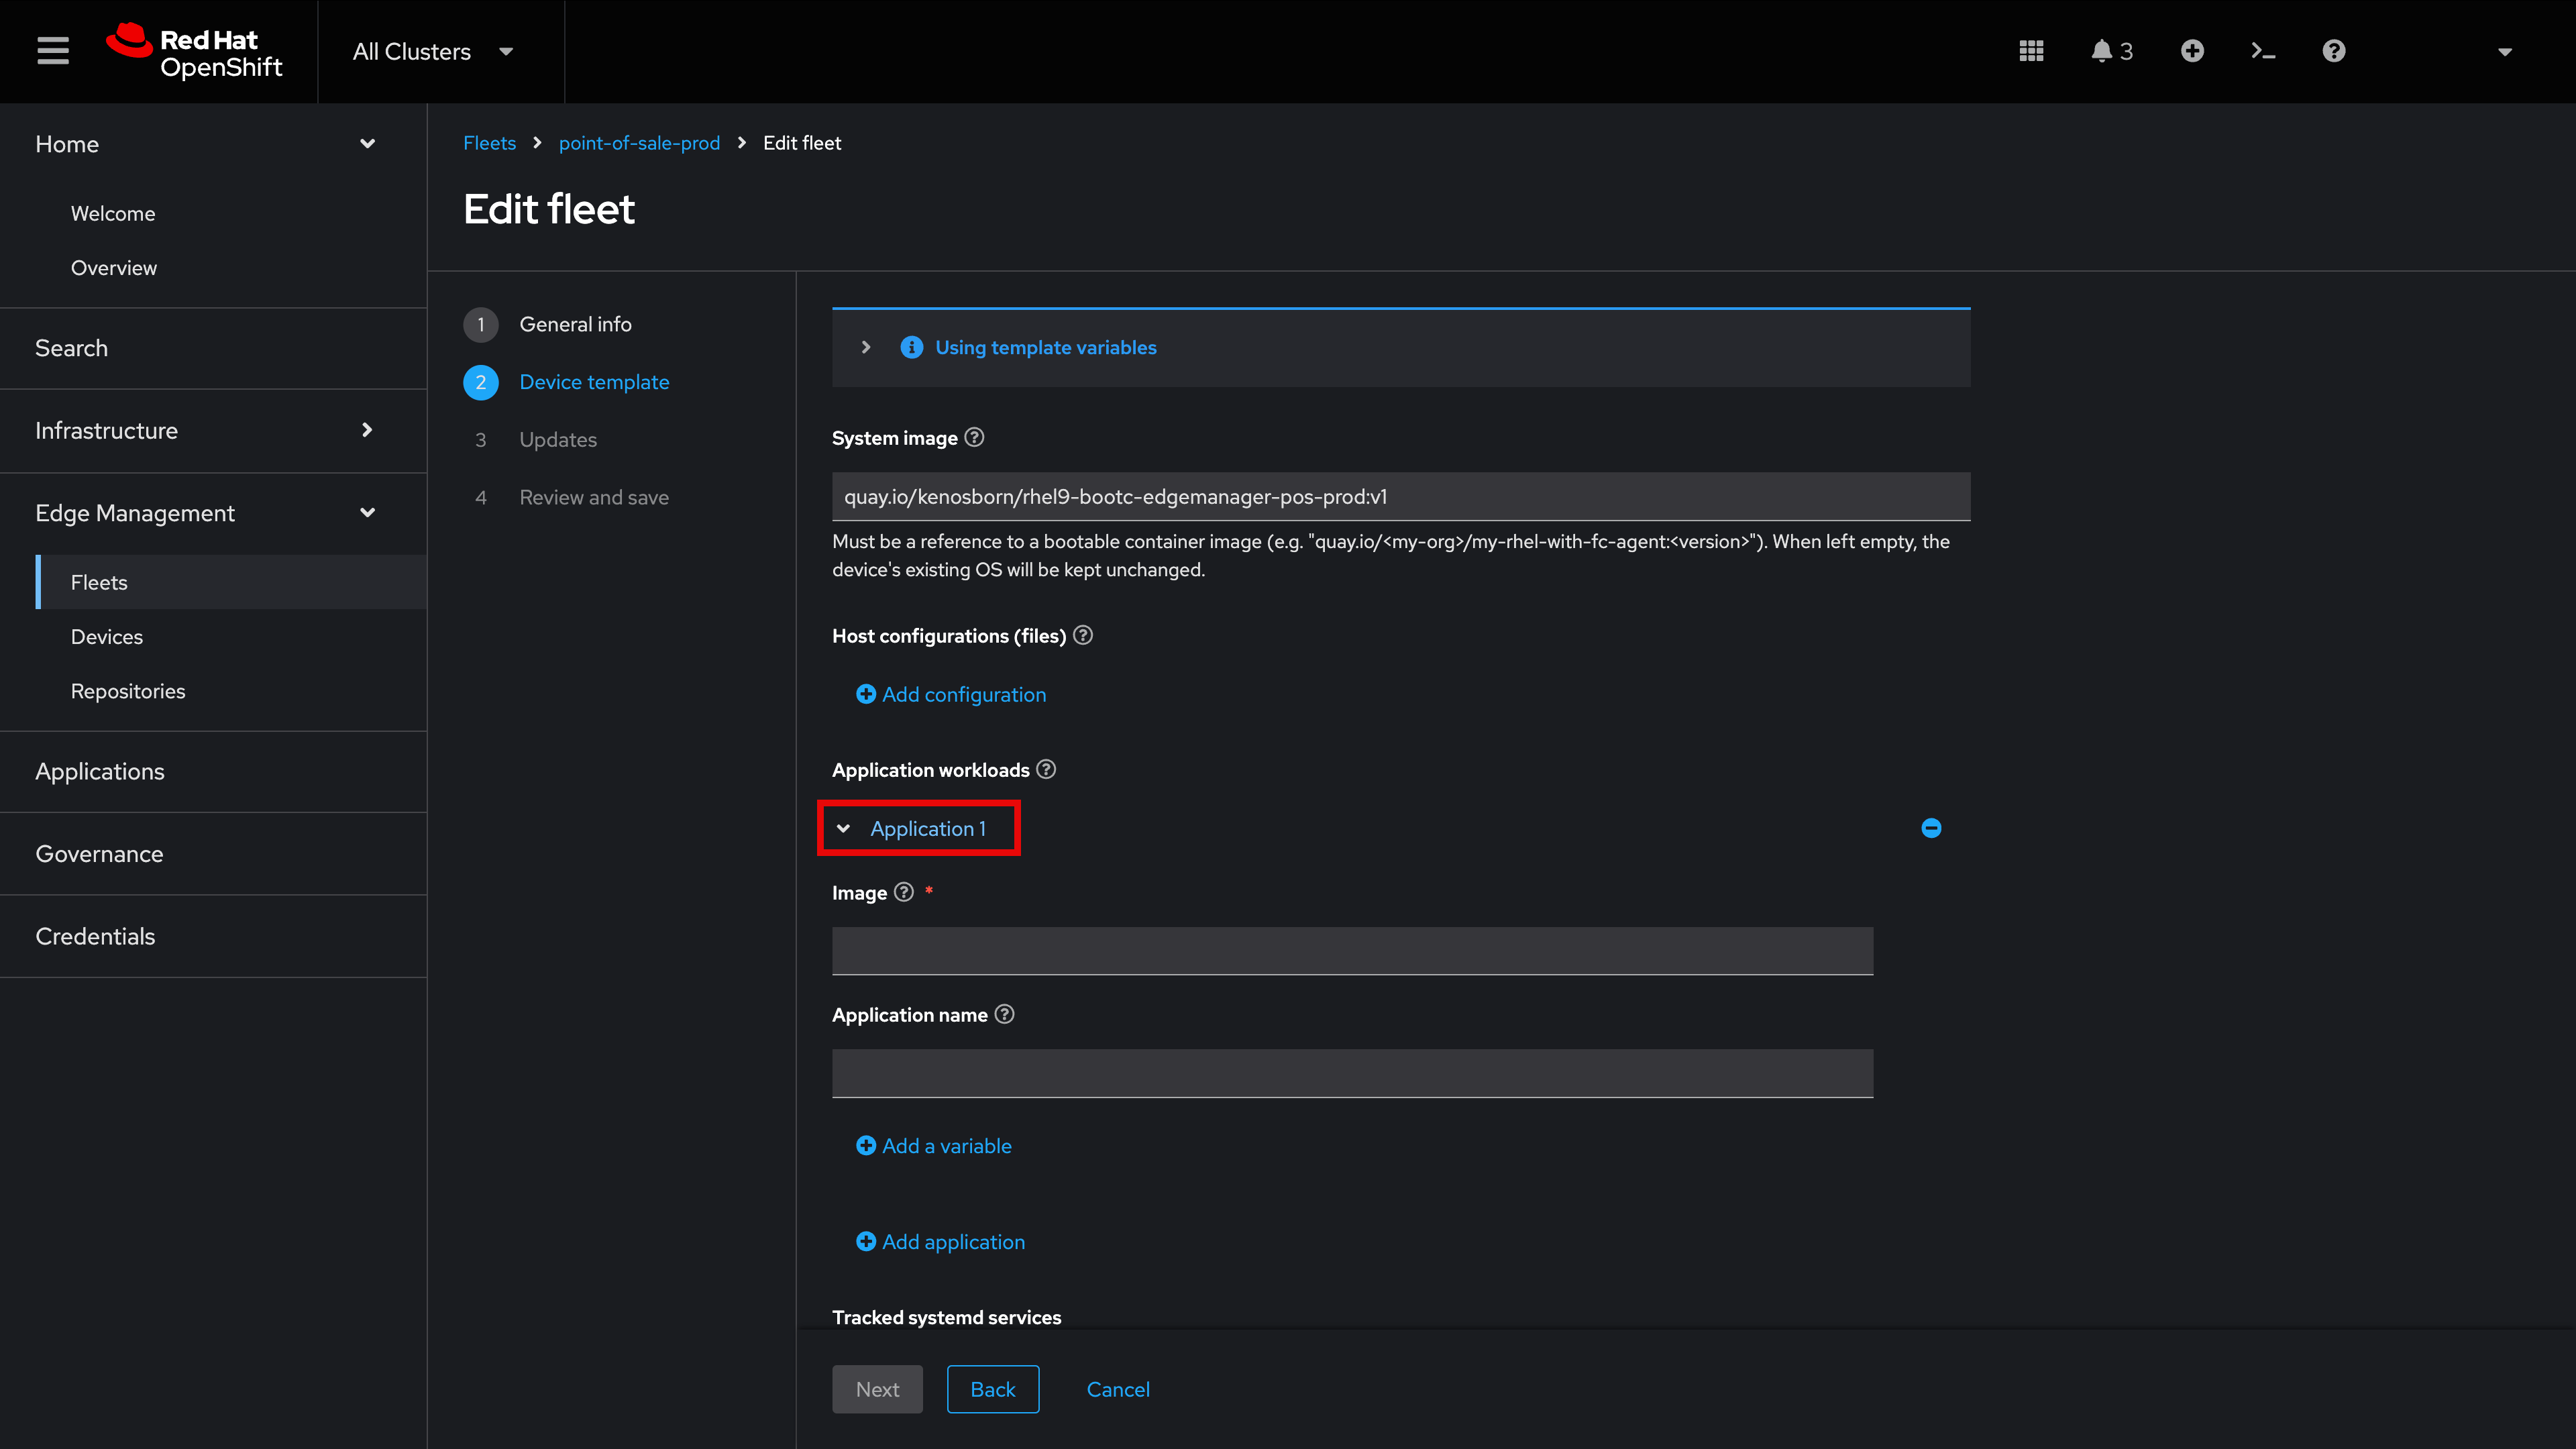
Click + Add Application
As shown, we can also tie in one or more containerized applications which must be running on devices in the fleet.
Continuing our exploration, let’s move on to one final item
-
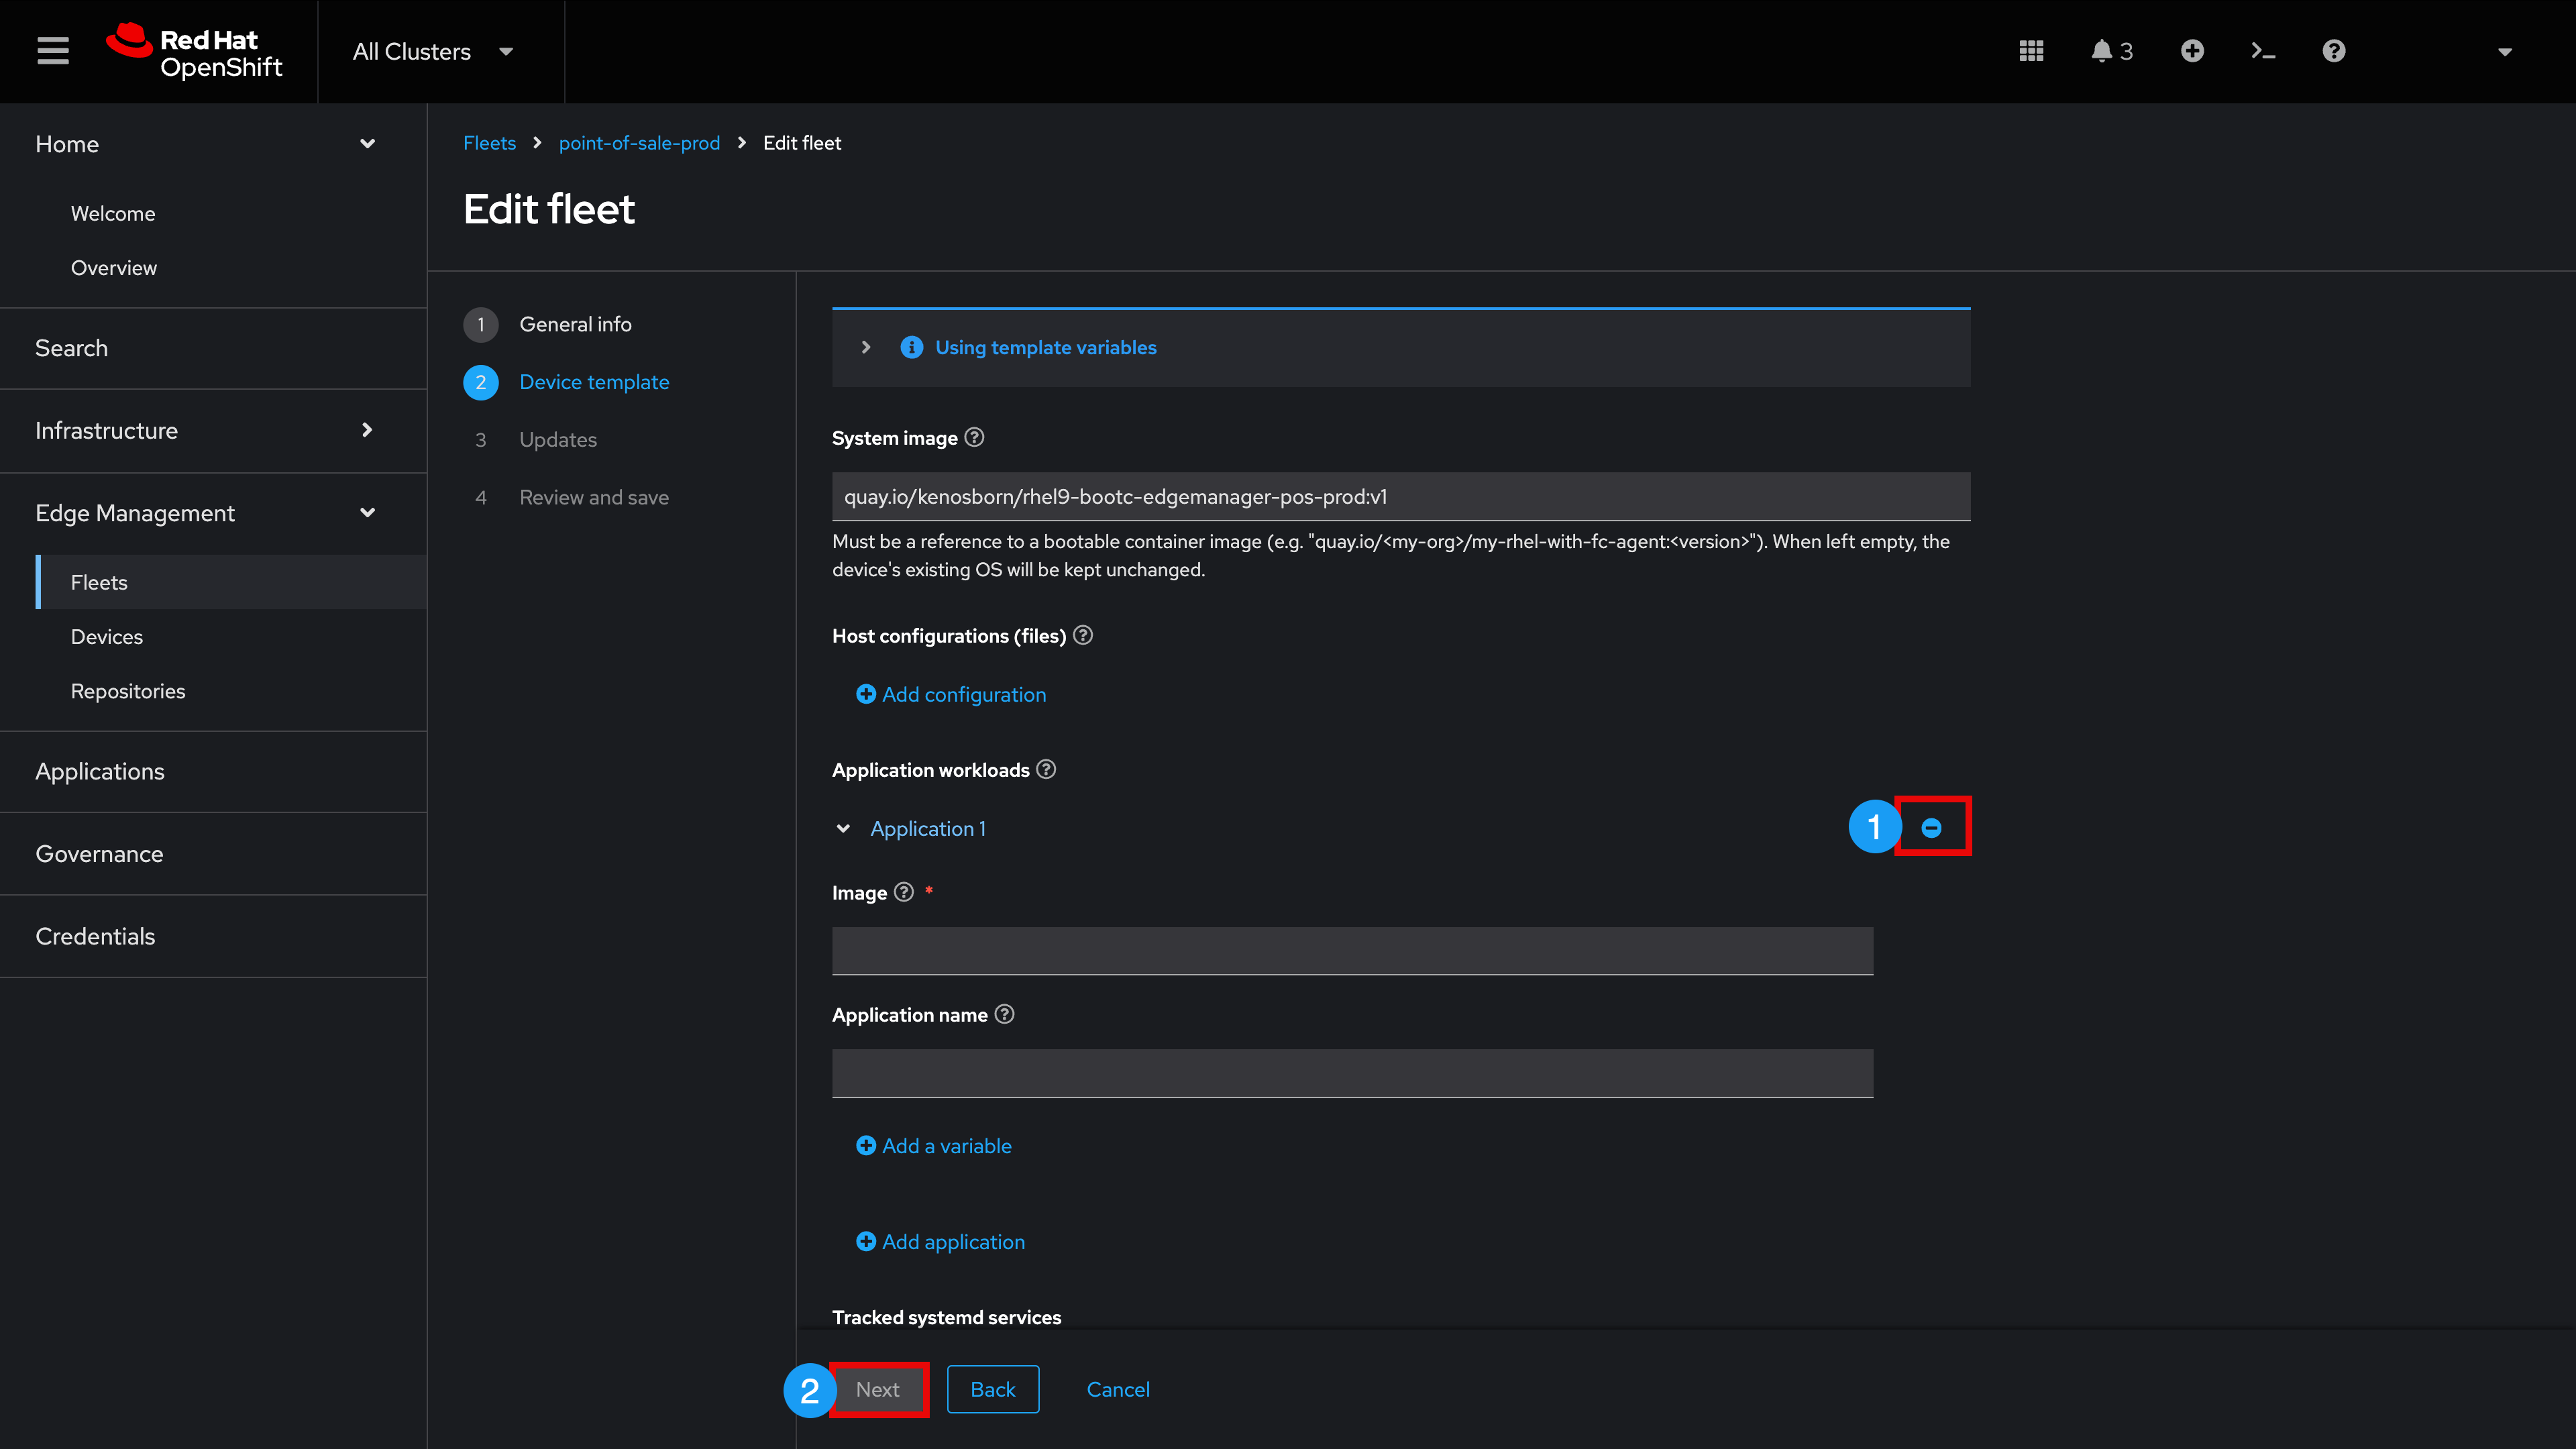
Since we don’t want to add any Application workloads at the moment, click the '-' symbol to remove Application 1
-
Click Next
When applying updates to Devices, we have the ability to specify Advanced configuration options
-
Uncheck the box next to Use basic configurations
-
Click the (?) tooltip to learn about setting rollout policies
-
Click the (?) tooltip to learn about utilizing a disruption budget
-
Click Cancel to exit out of the Fleet edit

Module 1 Summary
Thank you for completing our Module 1 Lesson.
In this Lesson, you learned how Edge Manager surfaces top level edge device monitoring information. In addition, you learned how Edge Manager Fleet specifications can be set for all devices that are members of a given fleet. This functionality allows users to declaratively specify their desired state for Edge Devices and subsequently rely on Edge Manager to enforce these specifications in order to help eliminate configuration drift.