3. Edge Manager Additional Topics
New Fleet Creation
We’re in the home stretch and our new store is almost ready to open (thanks to you).
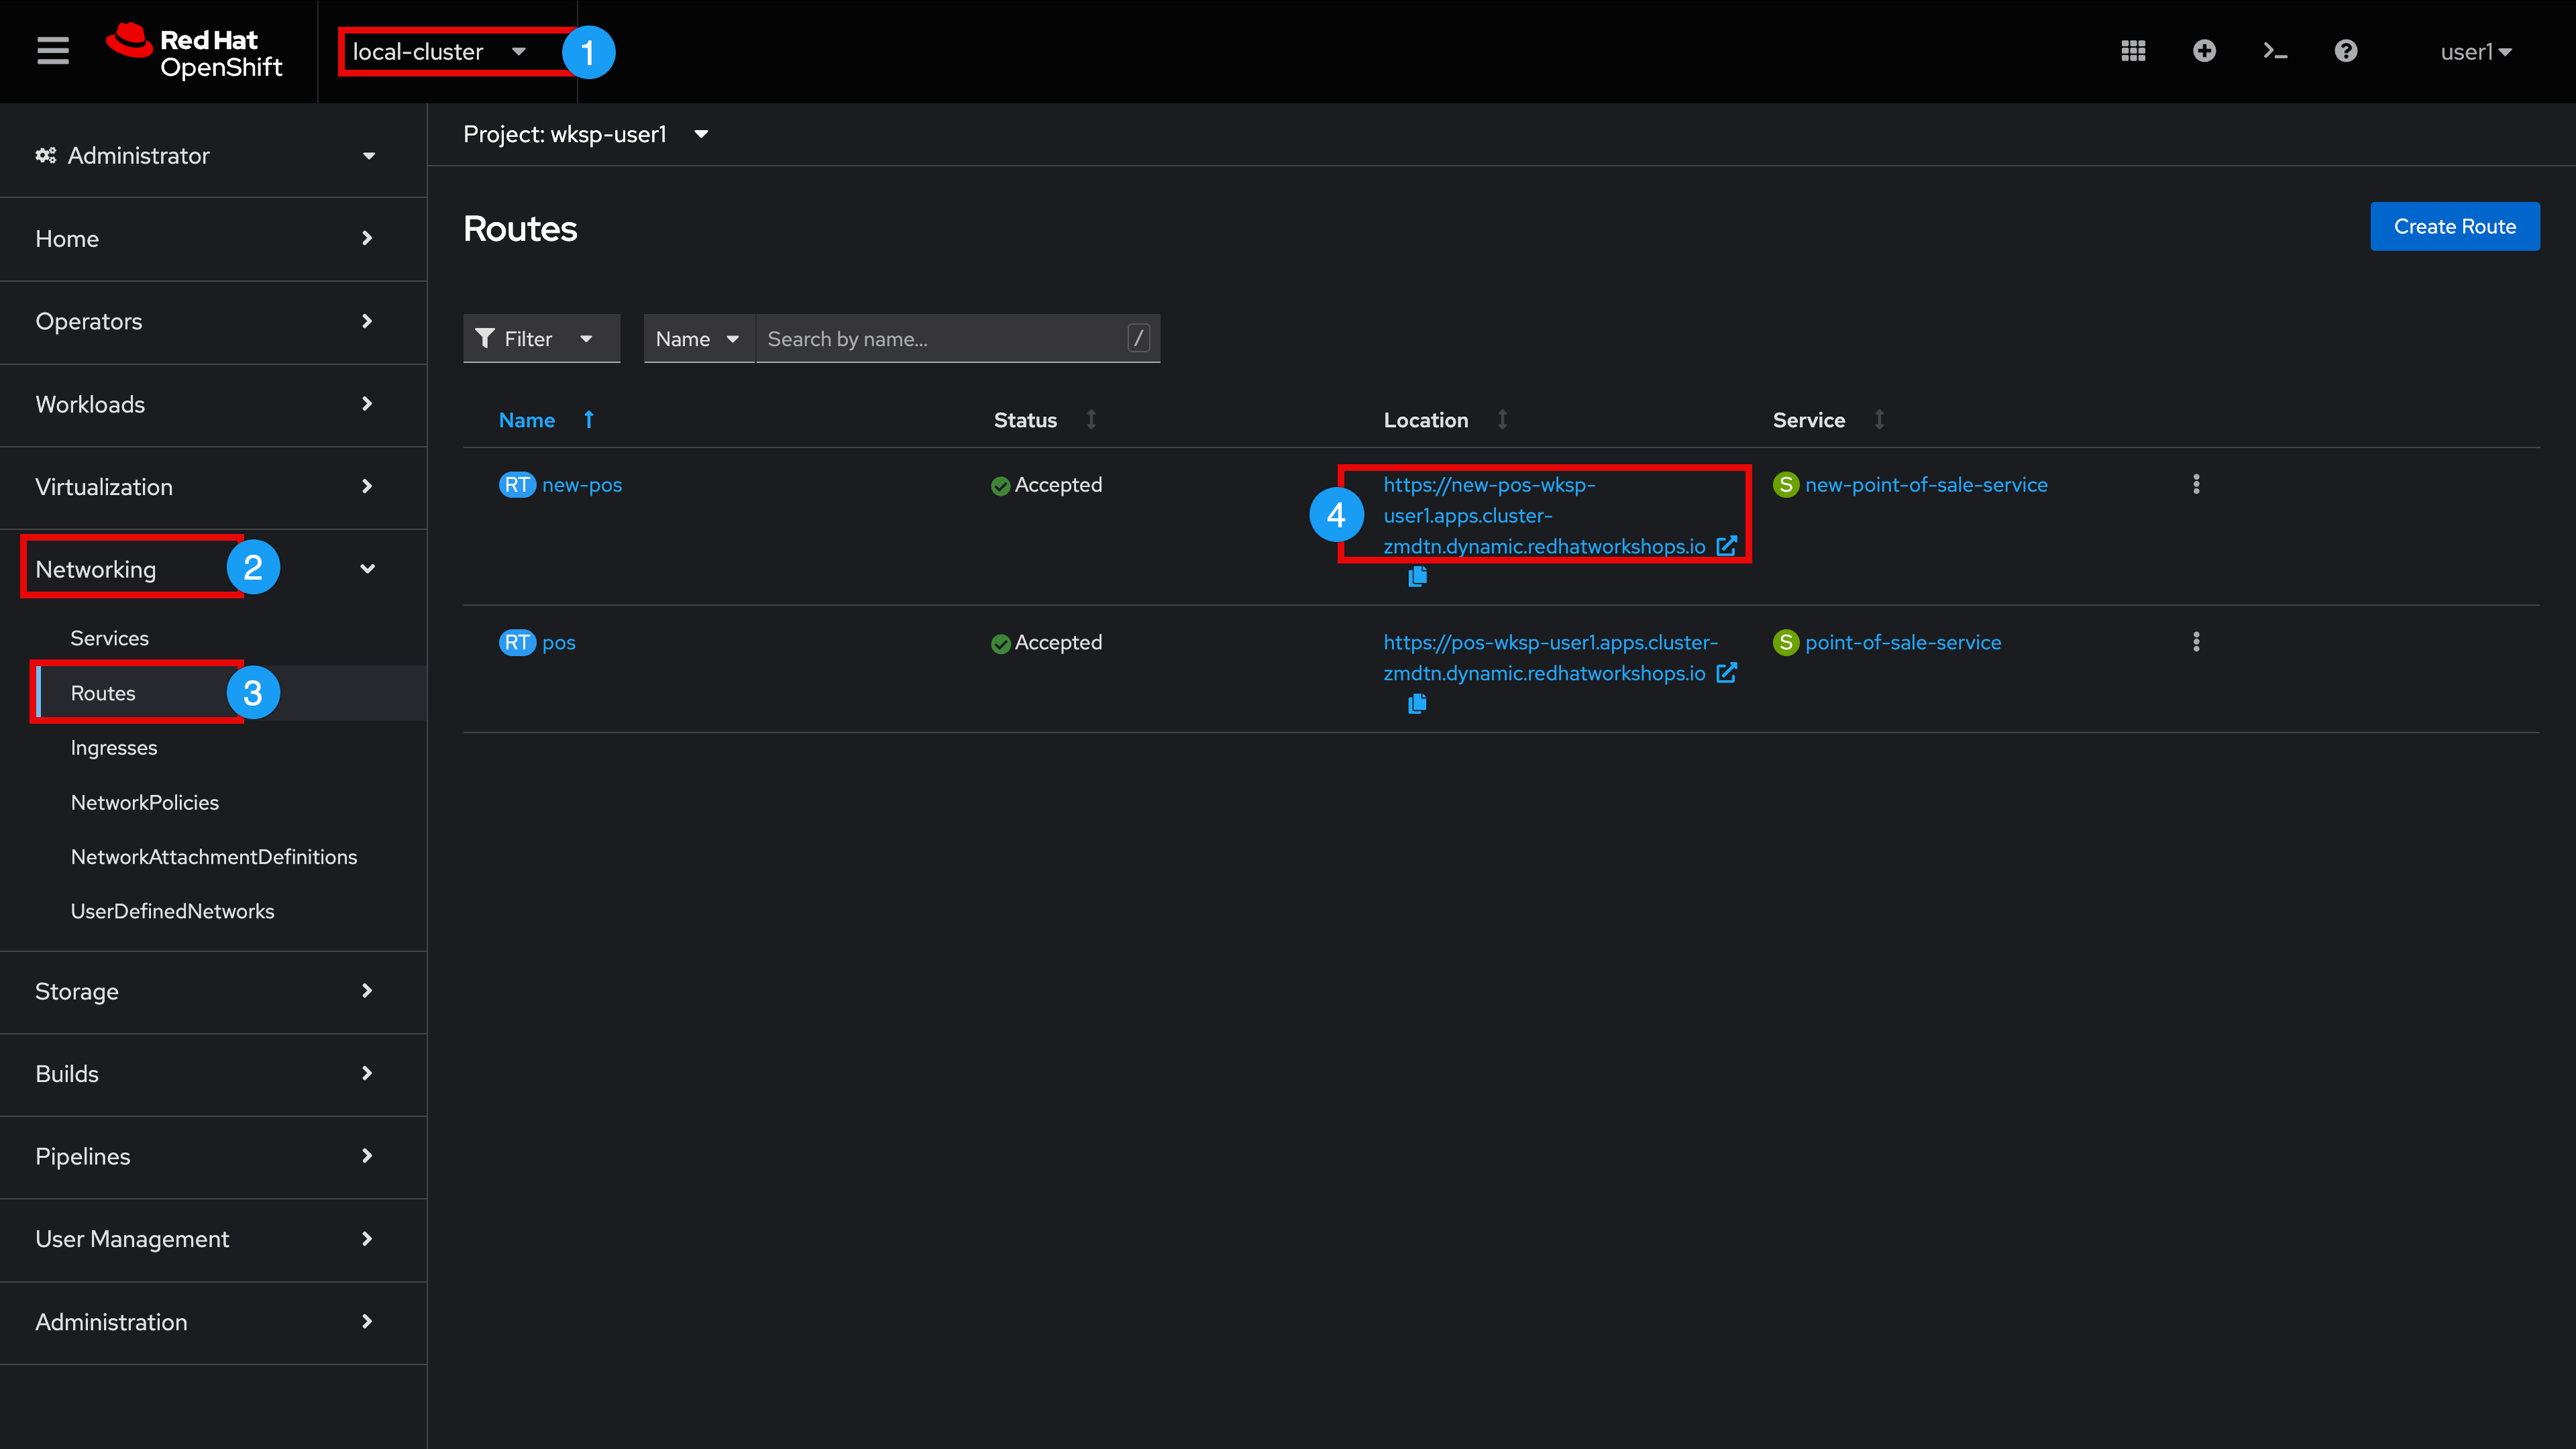
In a moment we will ask you to create a new Fleet and wire in a new (and functional) point of sale application into the fleet device template. Before doing so, let’s examine our networking route that will be utilized to access this new POS app.
-
Expand and select local-cluster
-
Expand Networking
-
Select Routes
-
Click the 'new-pos' route Location hyperlink to open this route-to-app in a new browser tab
| The 'application is not available' error message is expected at this time since we have not added the new (more functional) POS app to our device yet |
Keep the Application Browser Tab open and return to the Routes Browser Tab
-
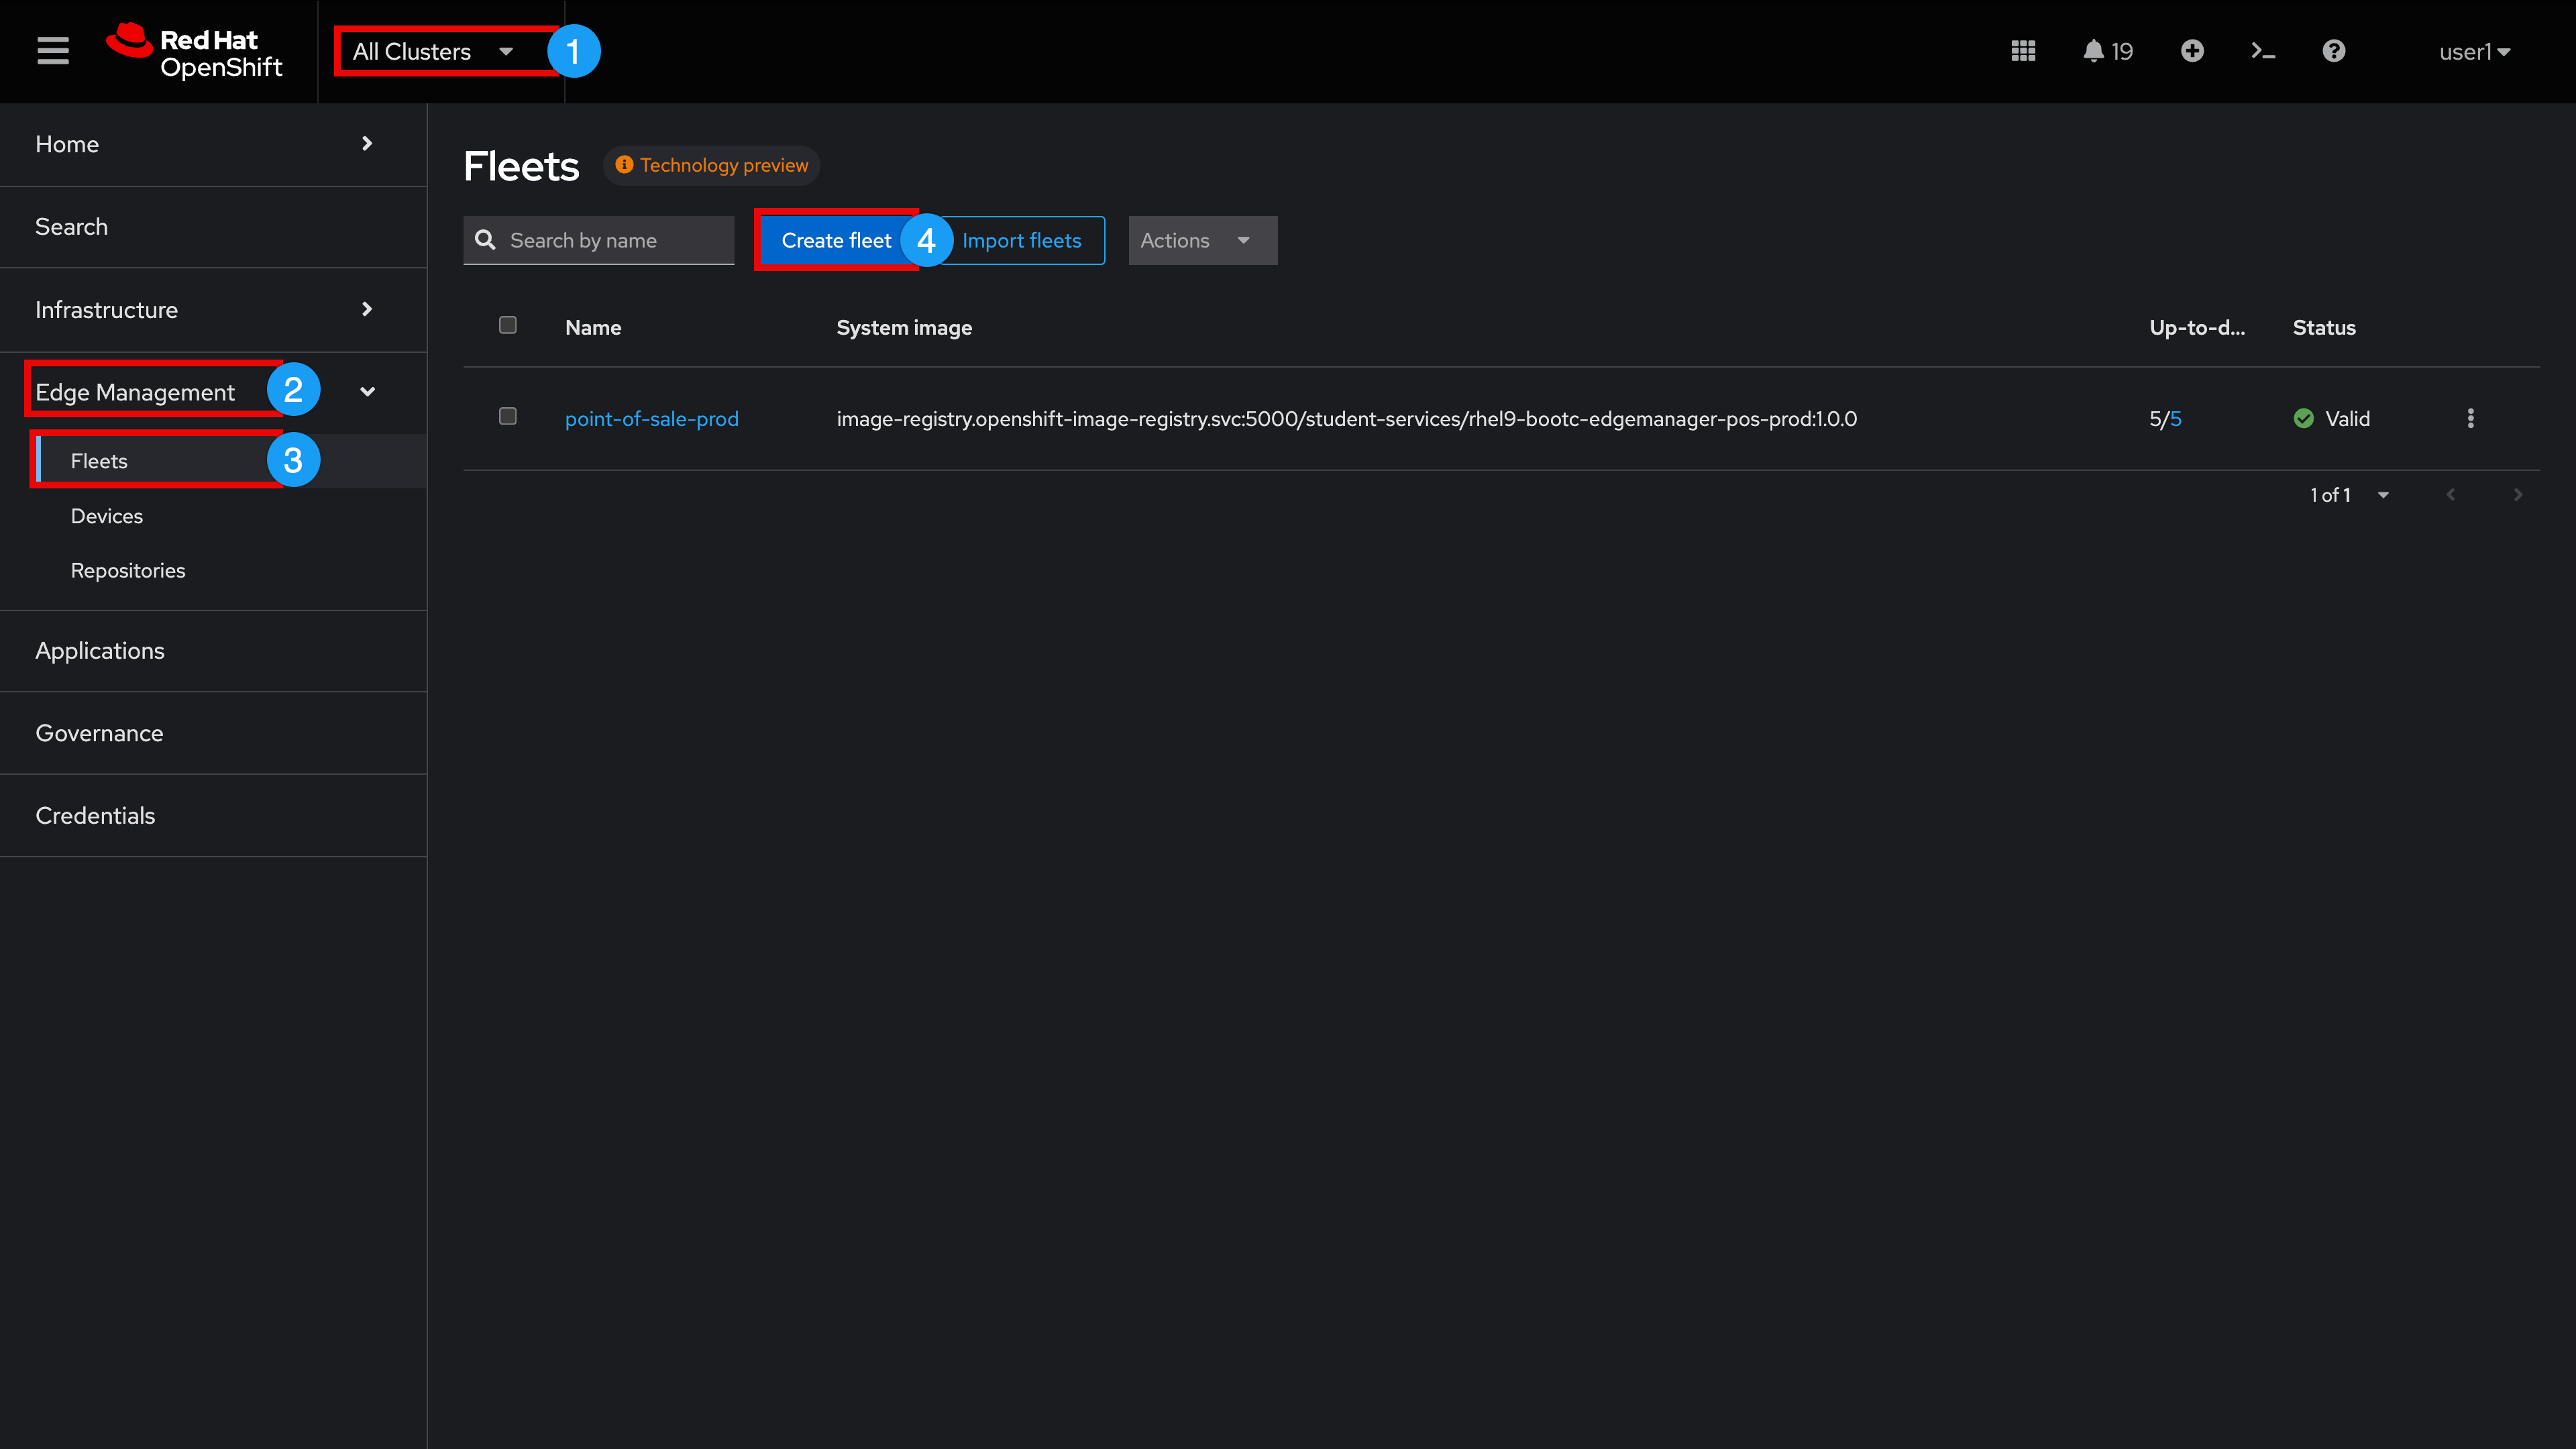
Expand and select All Clusters
-
Expand Edge Management
-
Select Fleets
-
Click Create fleet
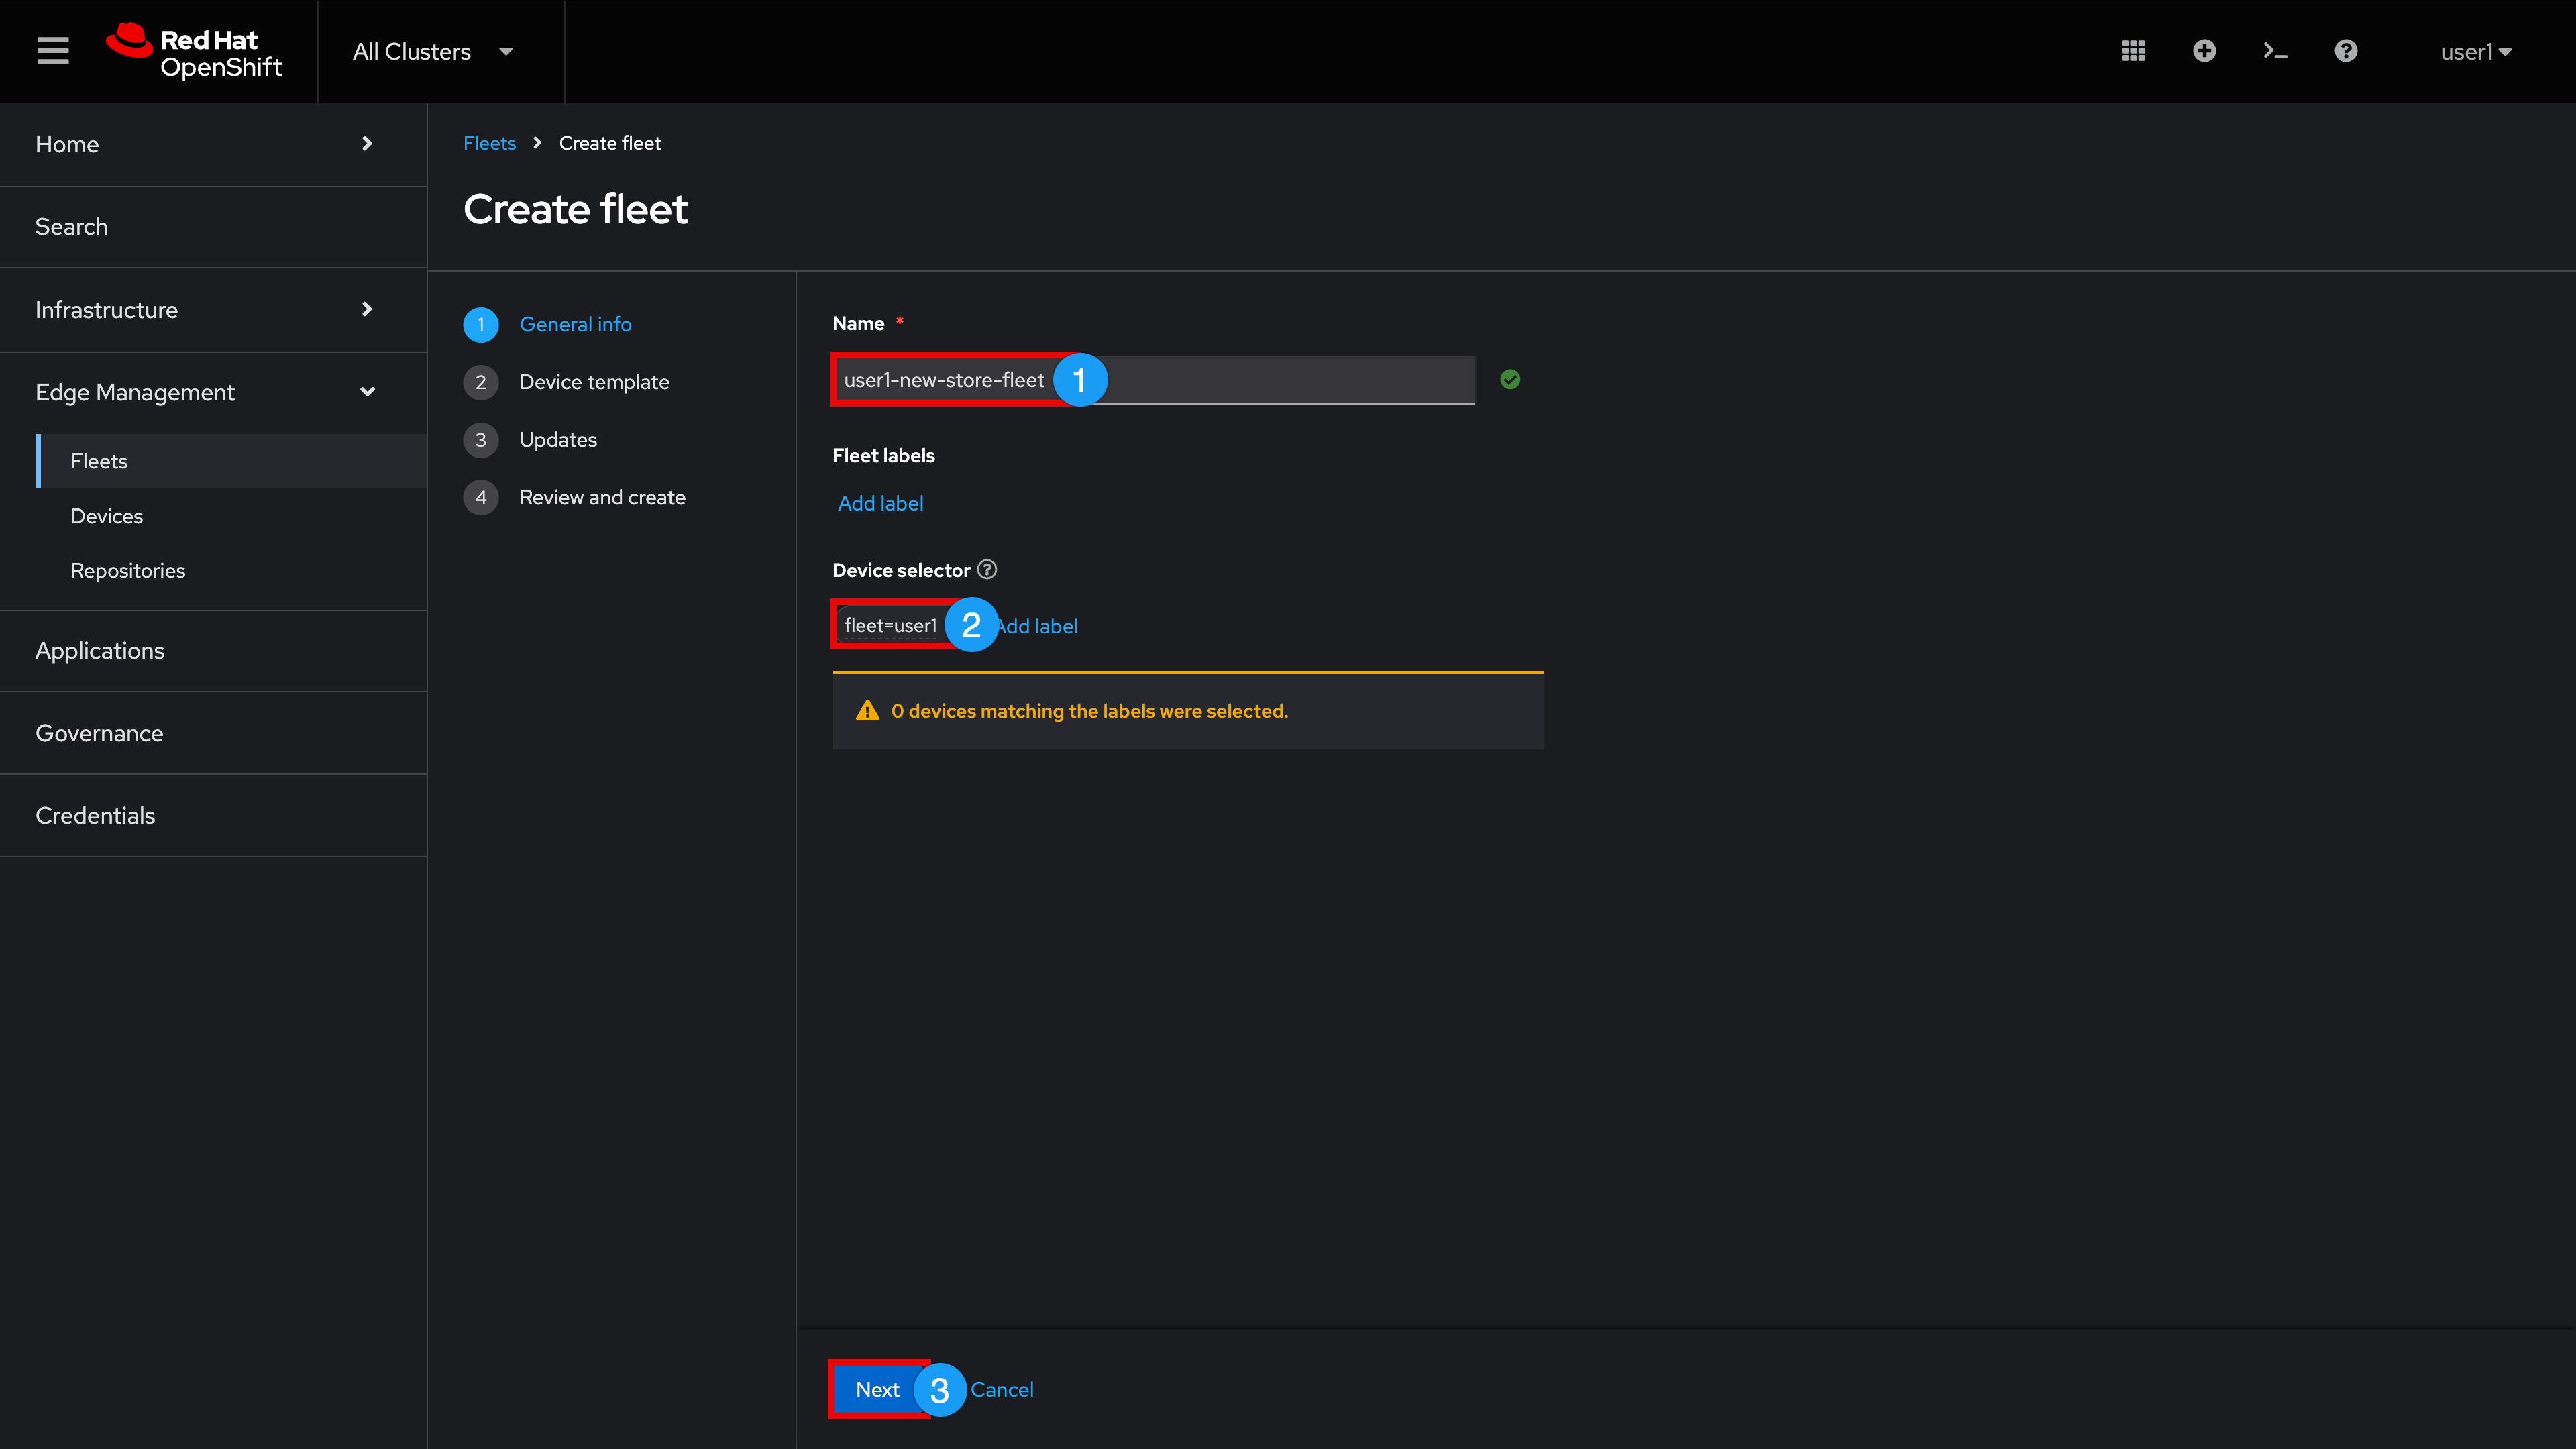
Populate the Create fleet wizard with the following General info values
-
Name:
{user}-new-store-fleet -
Device selector: (?) (Please do not select Fleet labels by mistake)
fleet={user} -
Click Next
| The following screenshots are shown for example purposes only and may not match your User ID. Unless you have been assigned, 'user1', do not use 'user1' vs. your assigned User ID: {user}. |
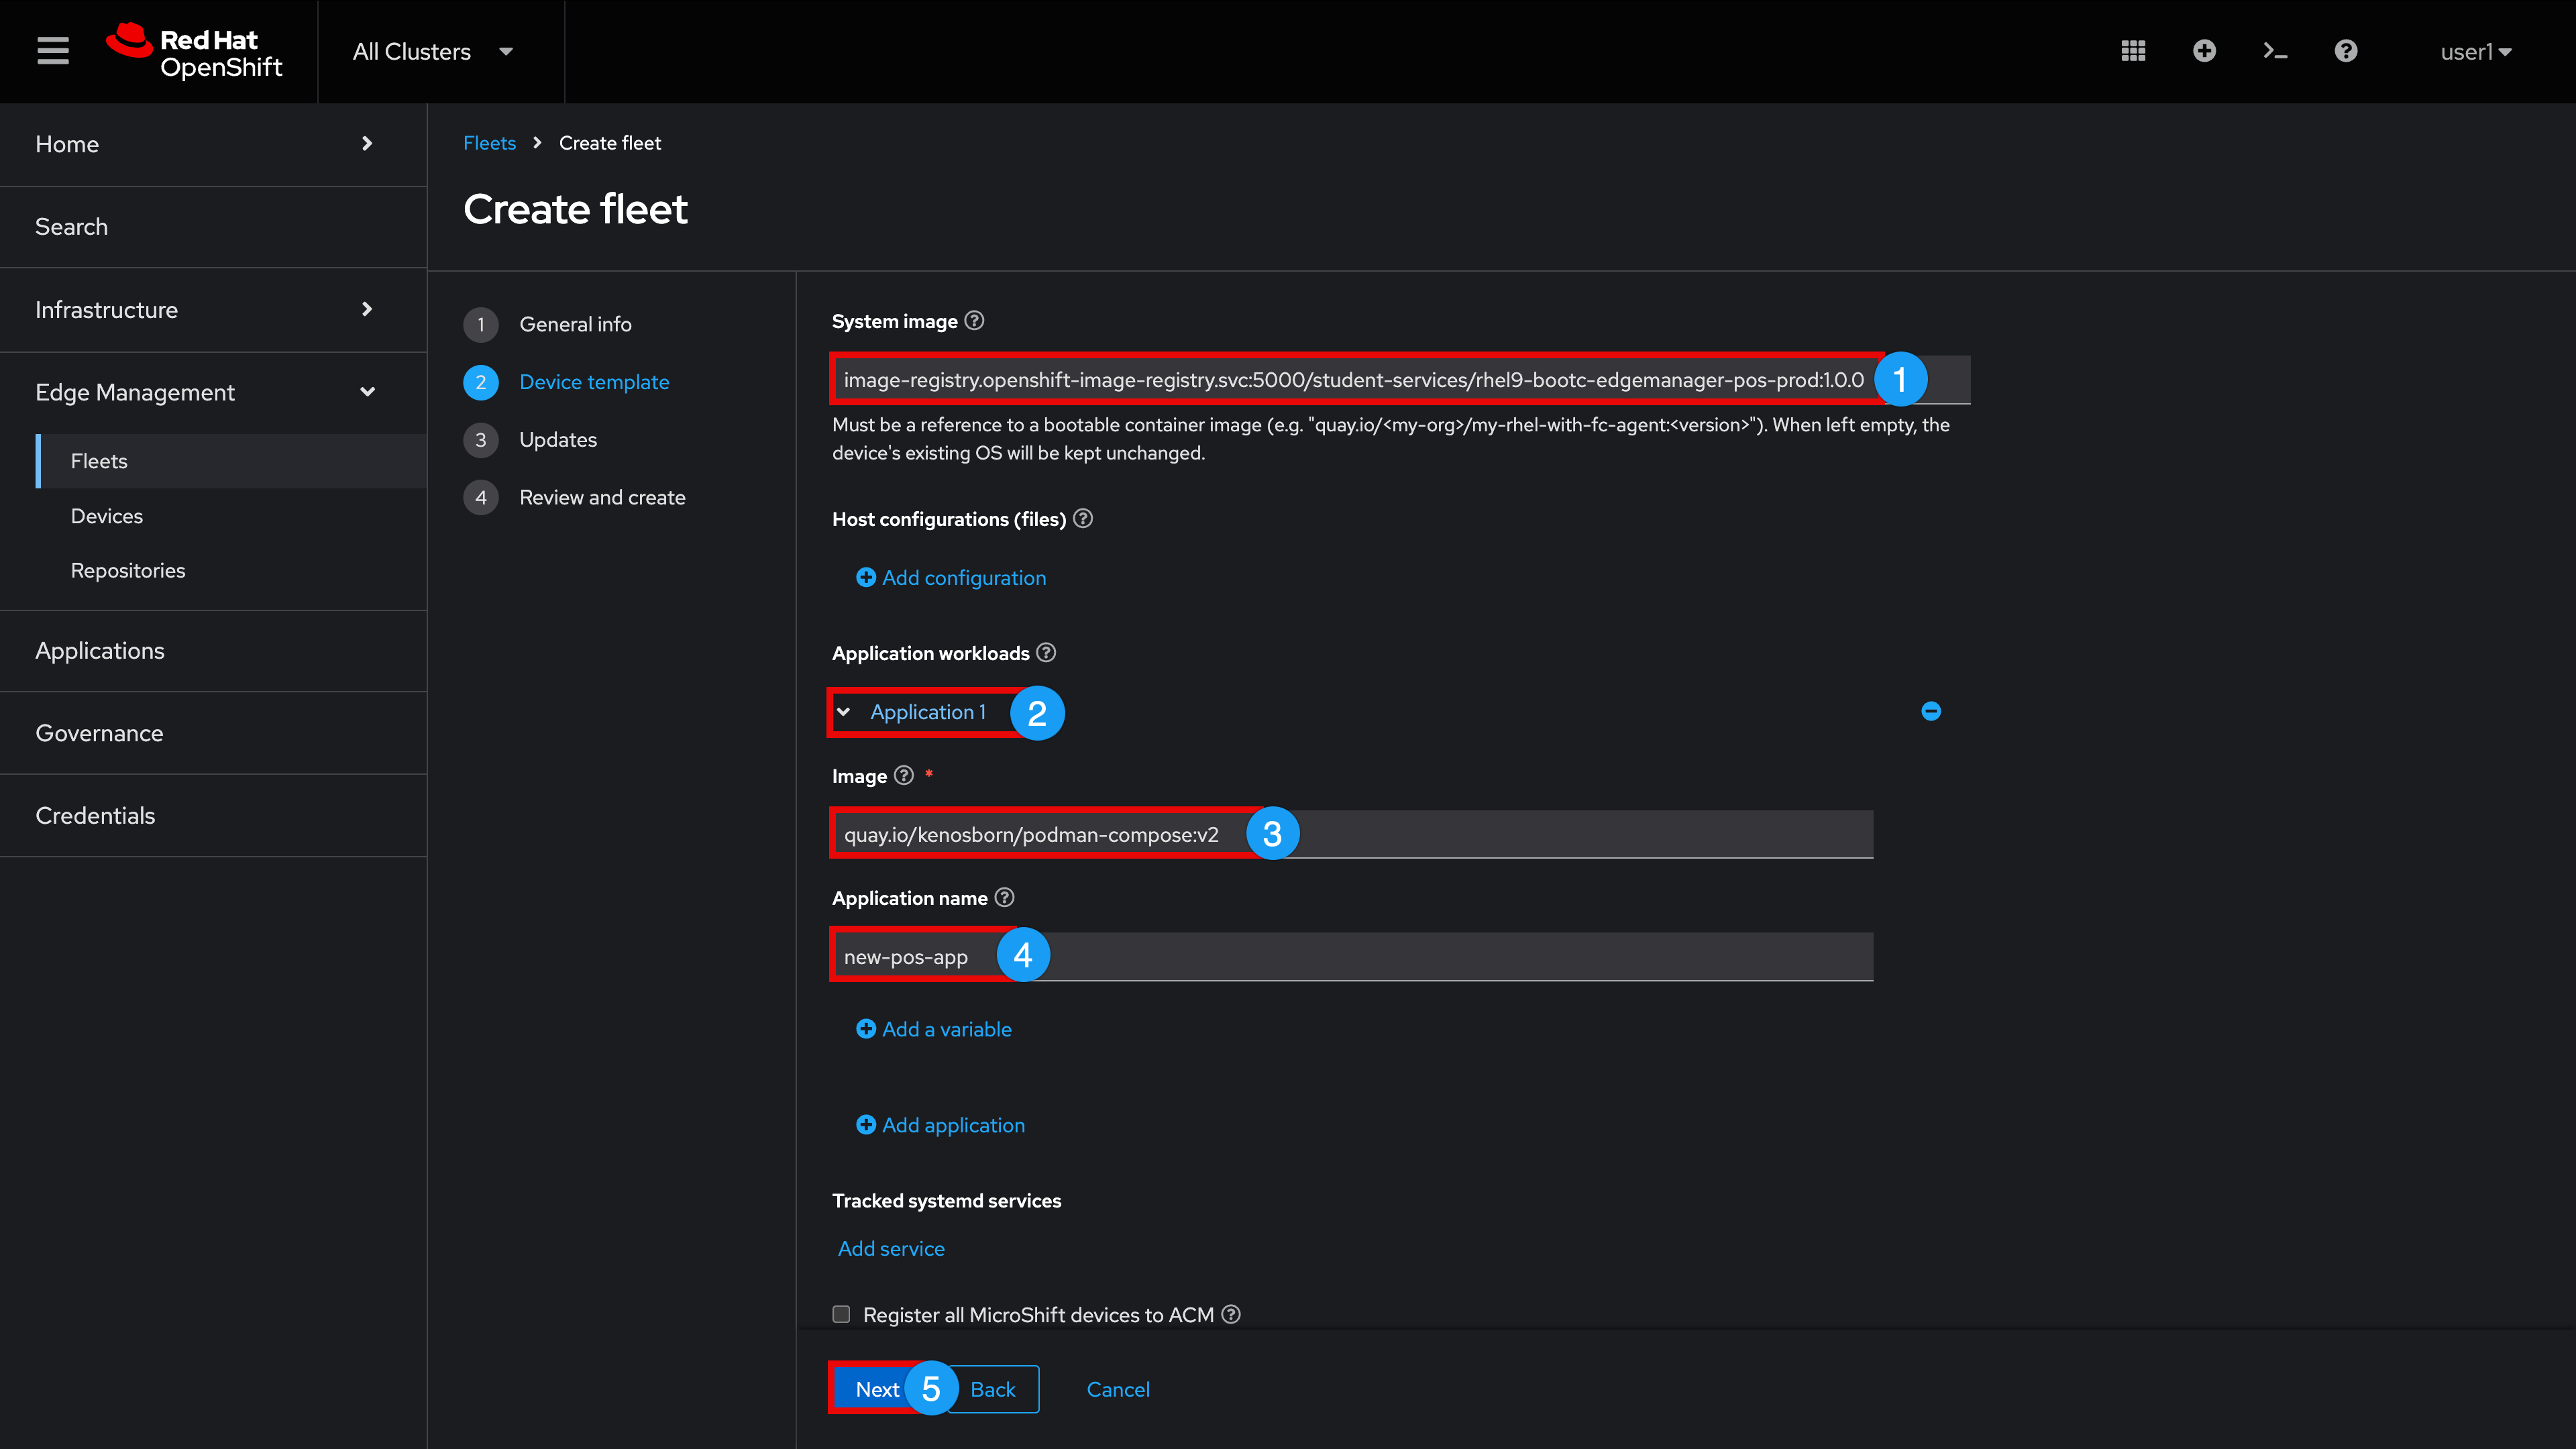
Populate the following Device template values
-
System image: (Note: this is the same '…pos-prod:1.0.0' image that we used previously)
image-registry.openshift-image-registry.svc:5000/student-services/rhel9-bootc-edgemanager-pos-prod:1.0.0 -
Click + Add application
-
Image:
quay.io/kenosborn/podman-compose:v2 -
Application name:
new-pos-app -
Click Next
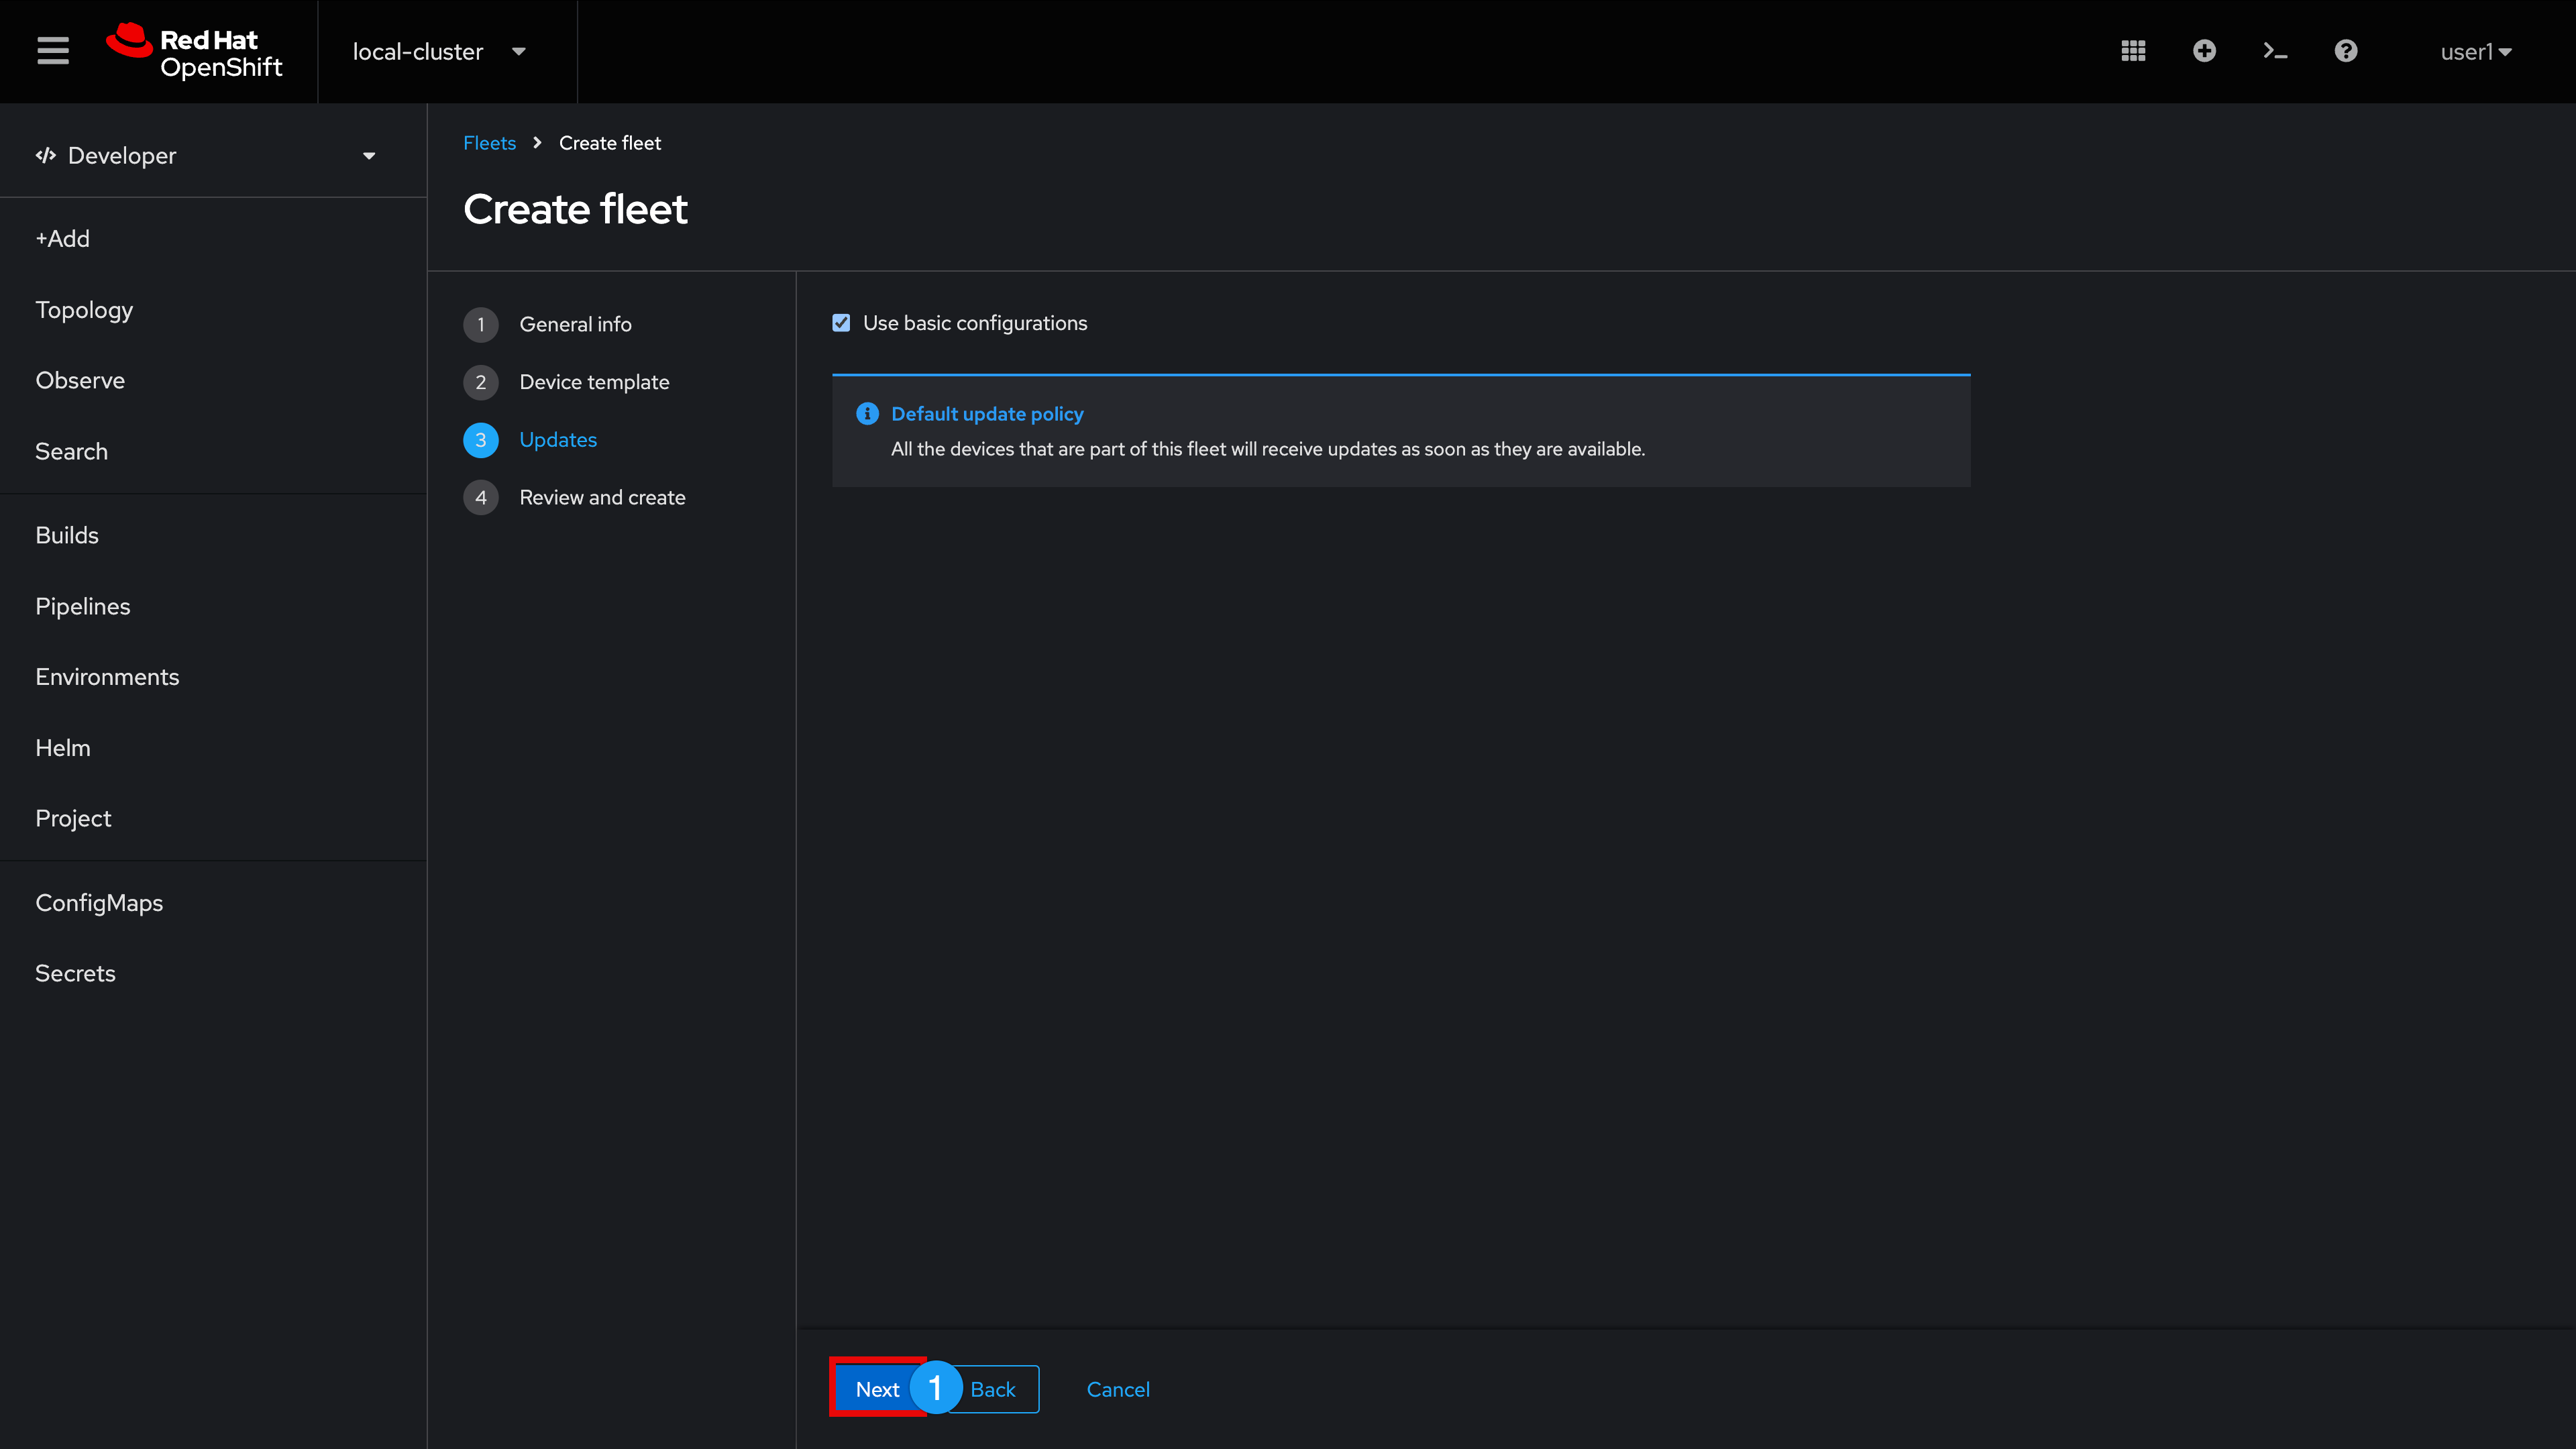
Leave the Updates parameters at their default settings
-
Click Next
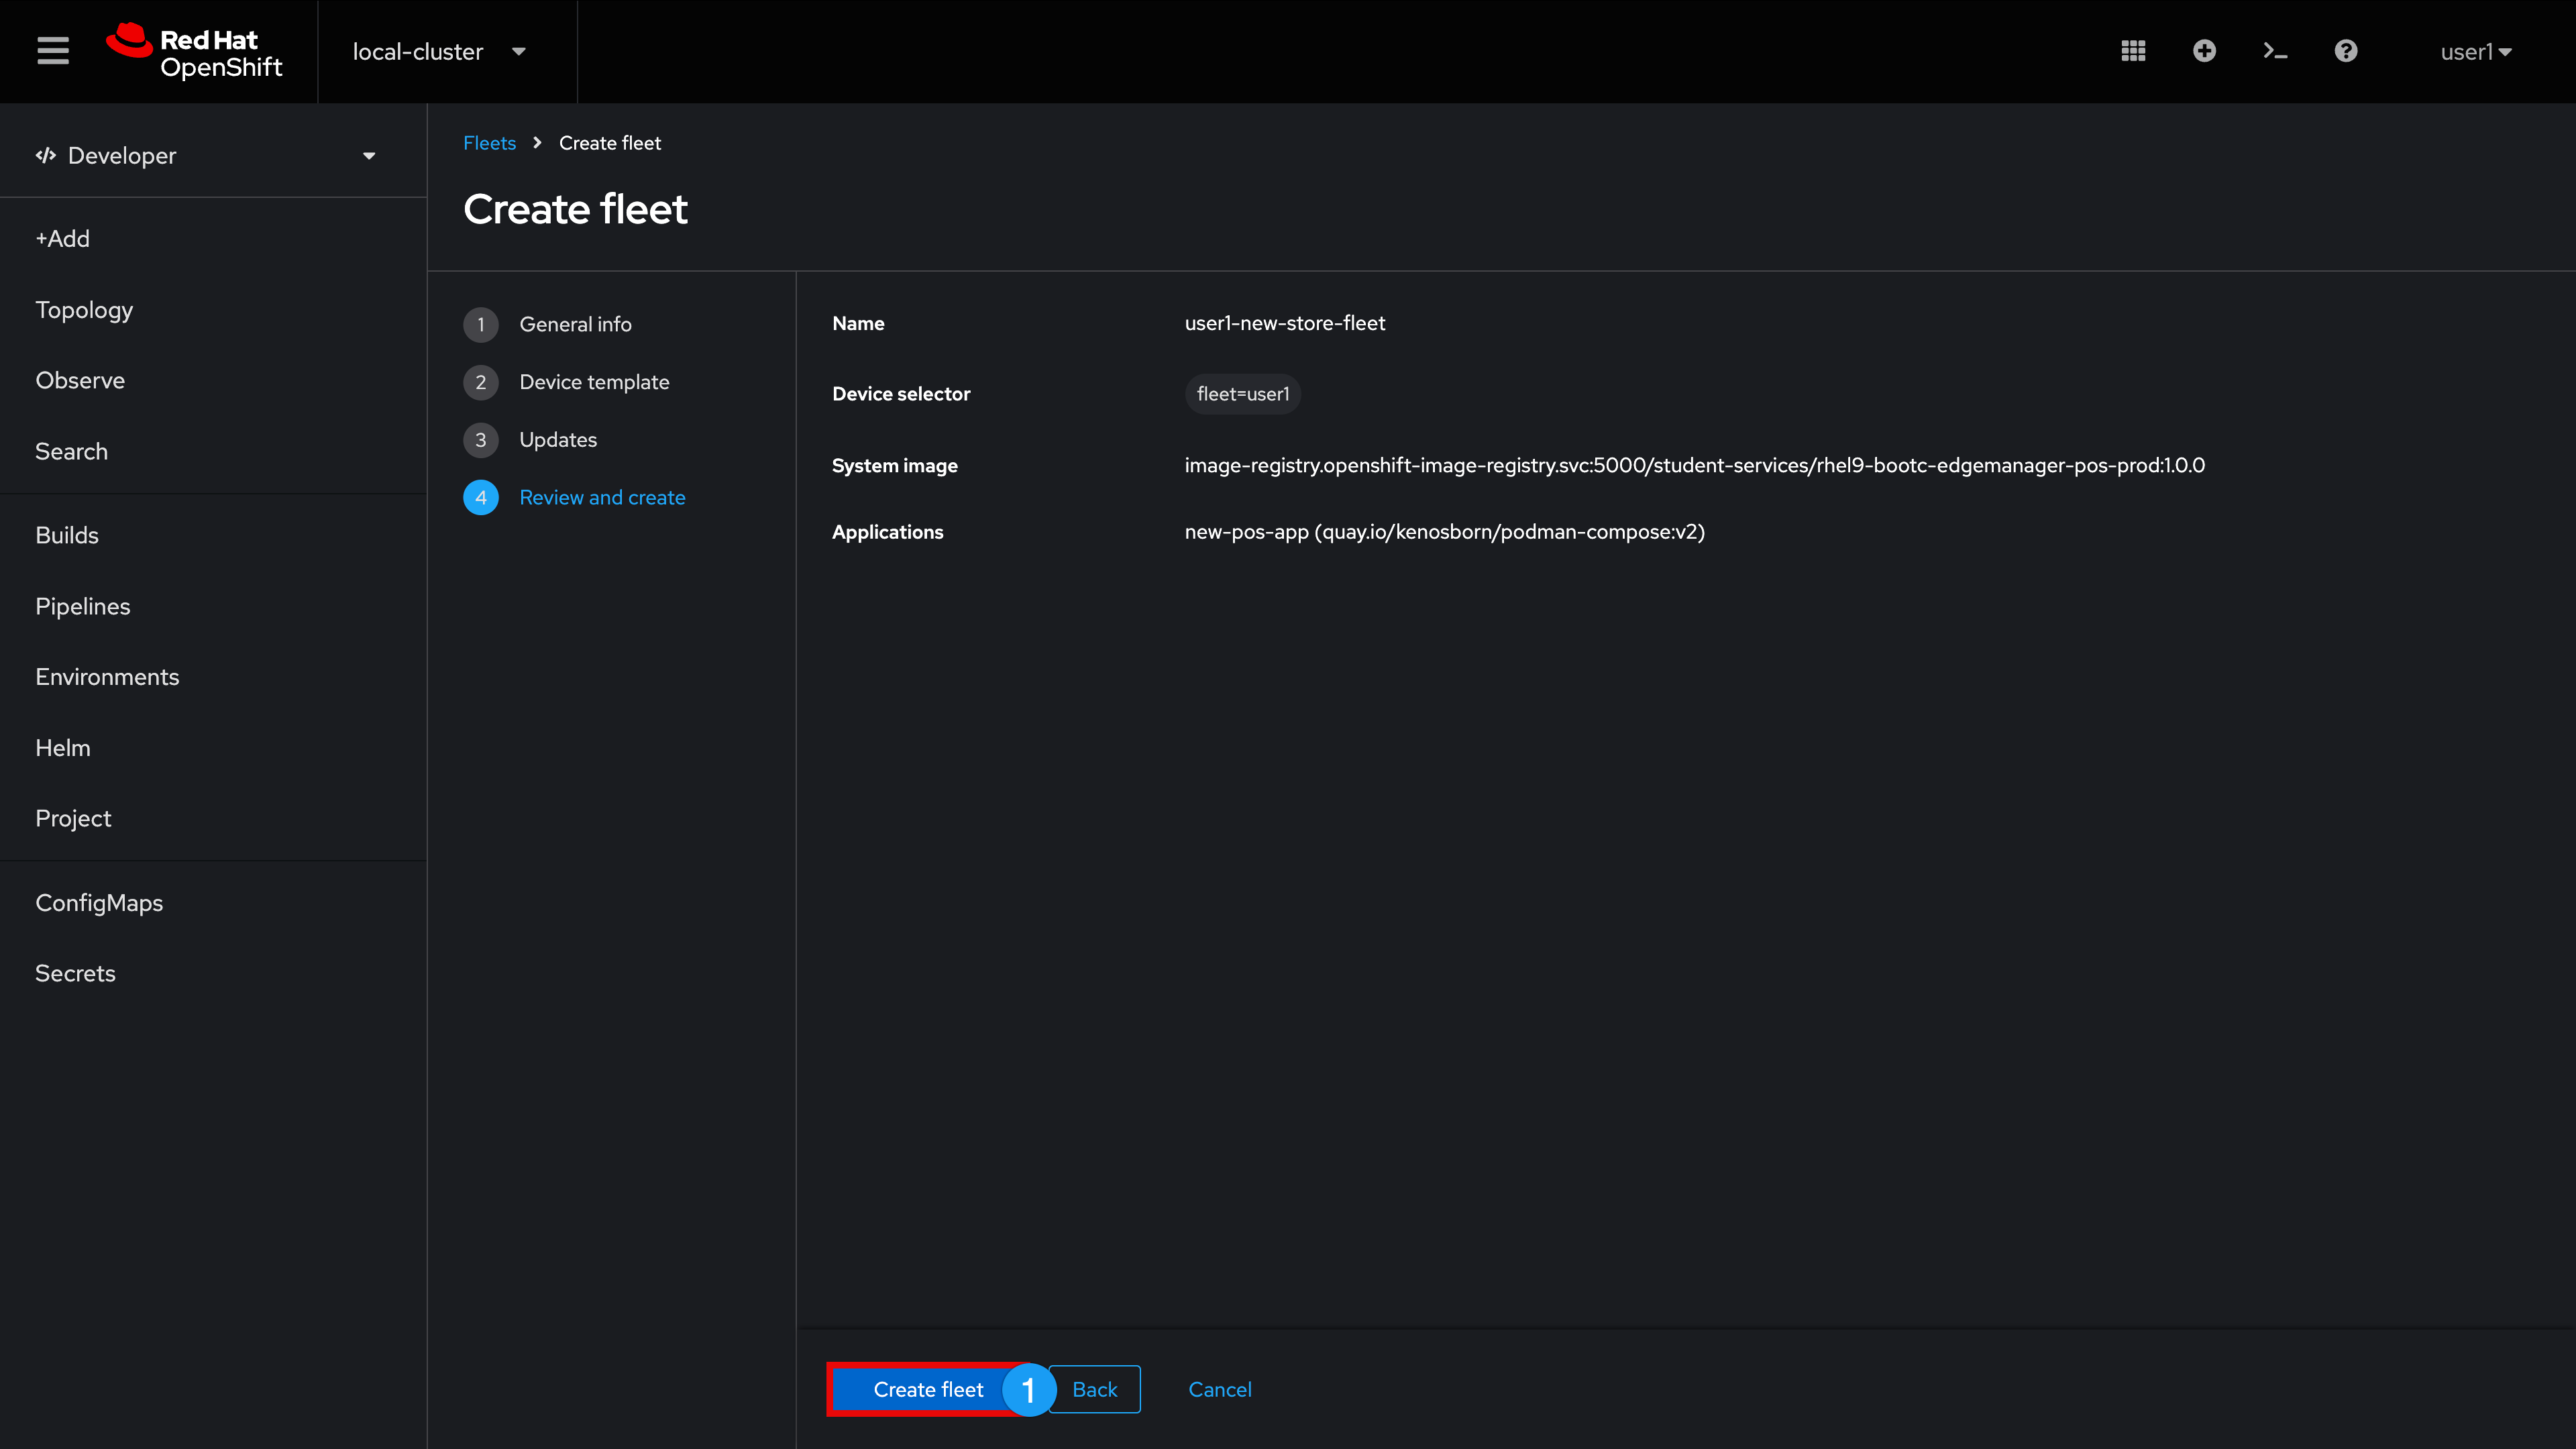
Review and create
-
Review settings and click Create fleet
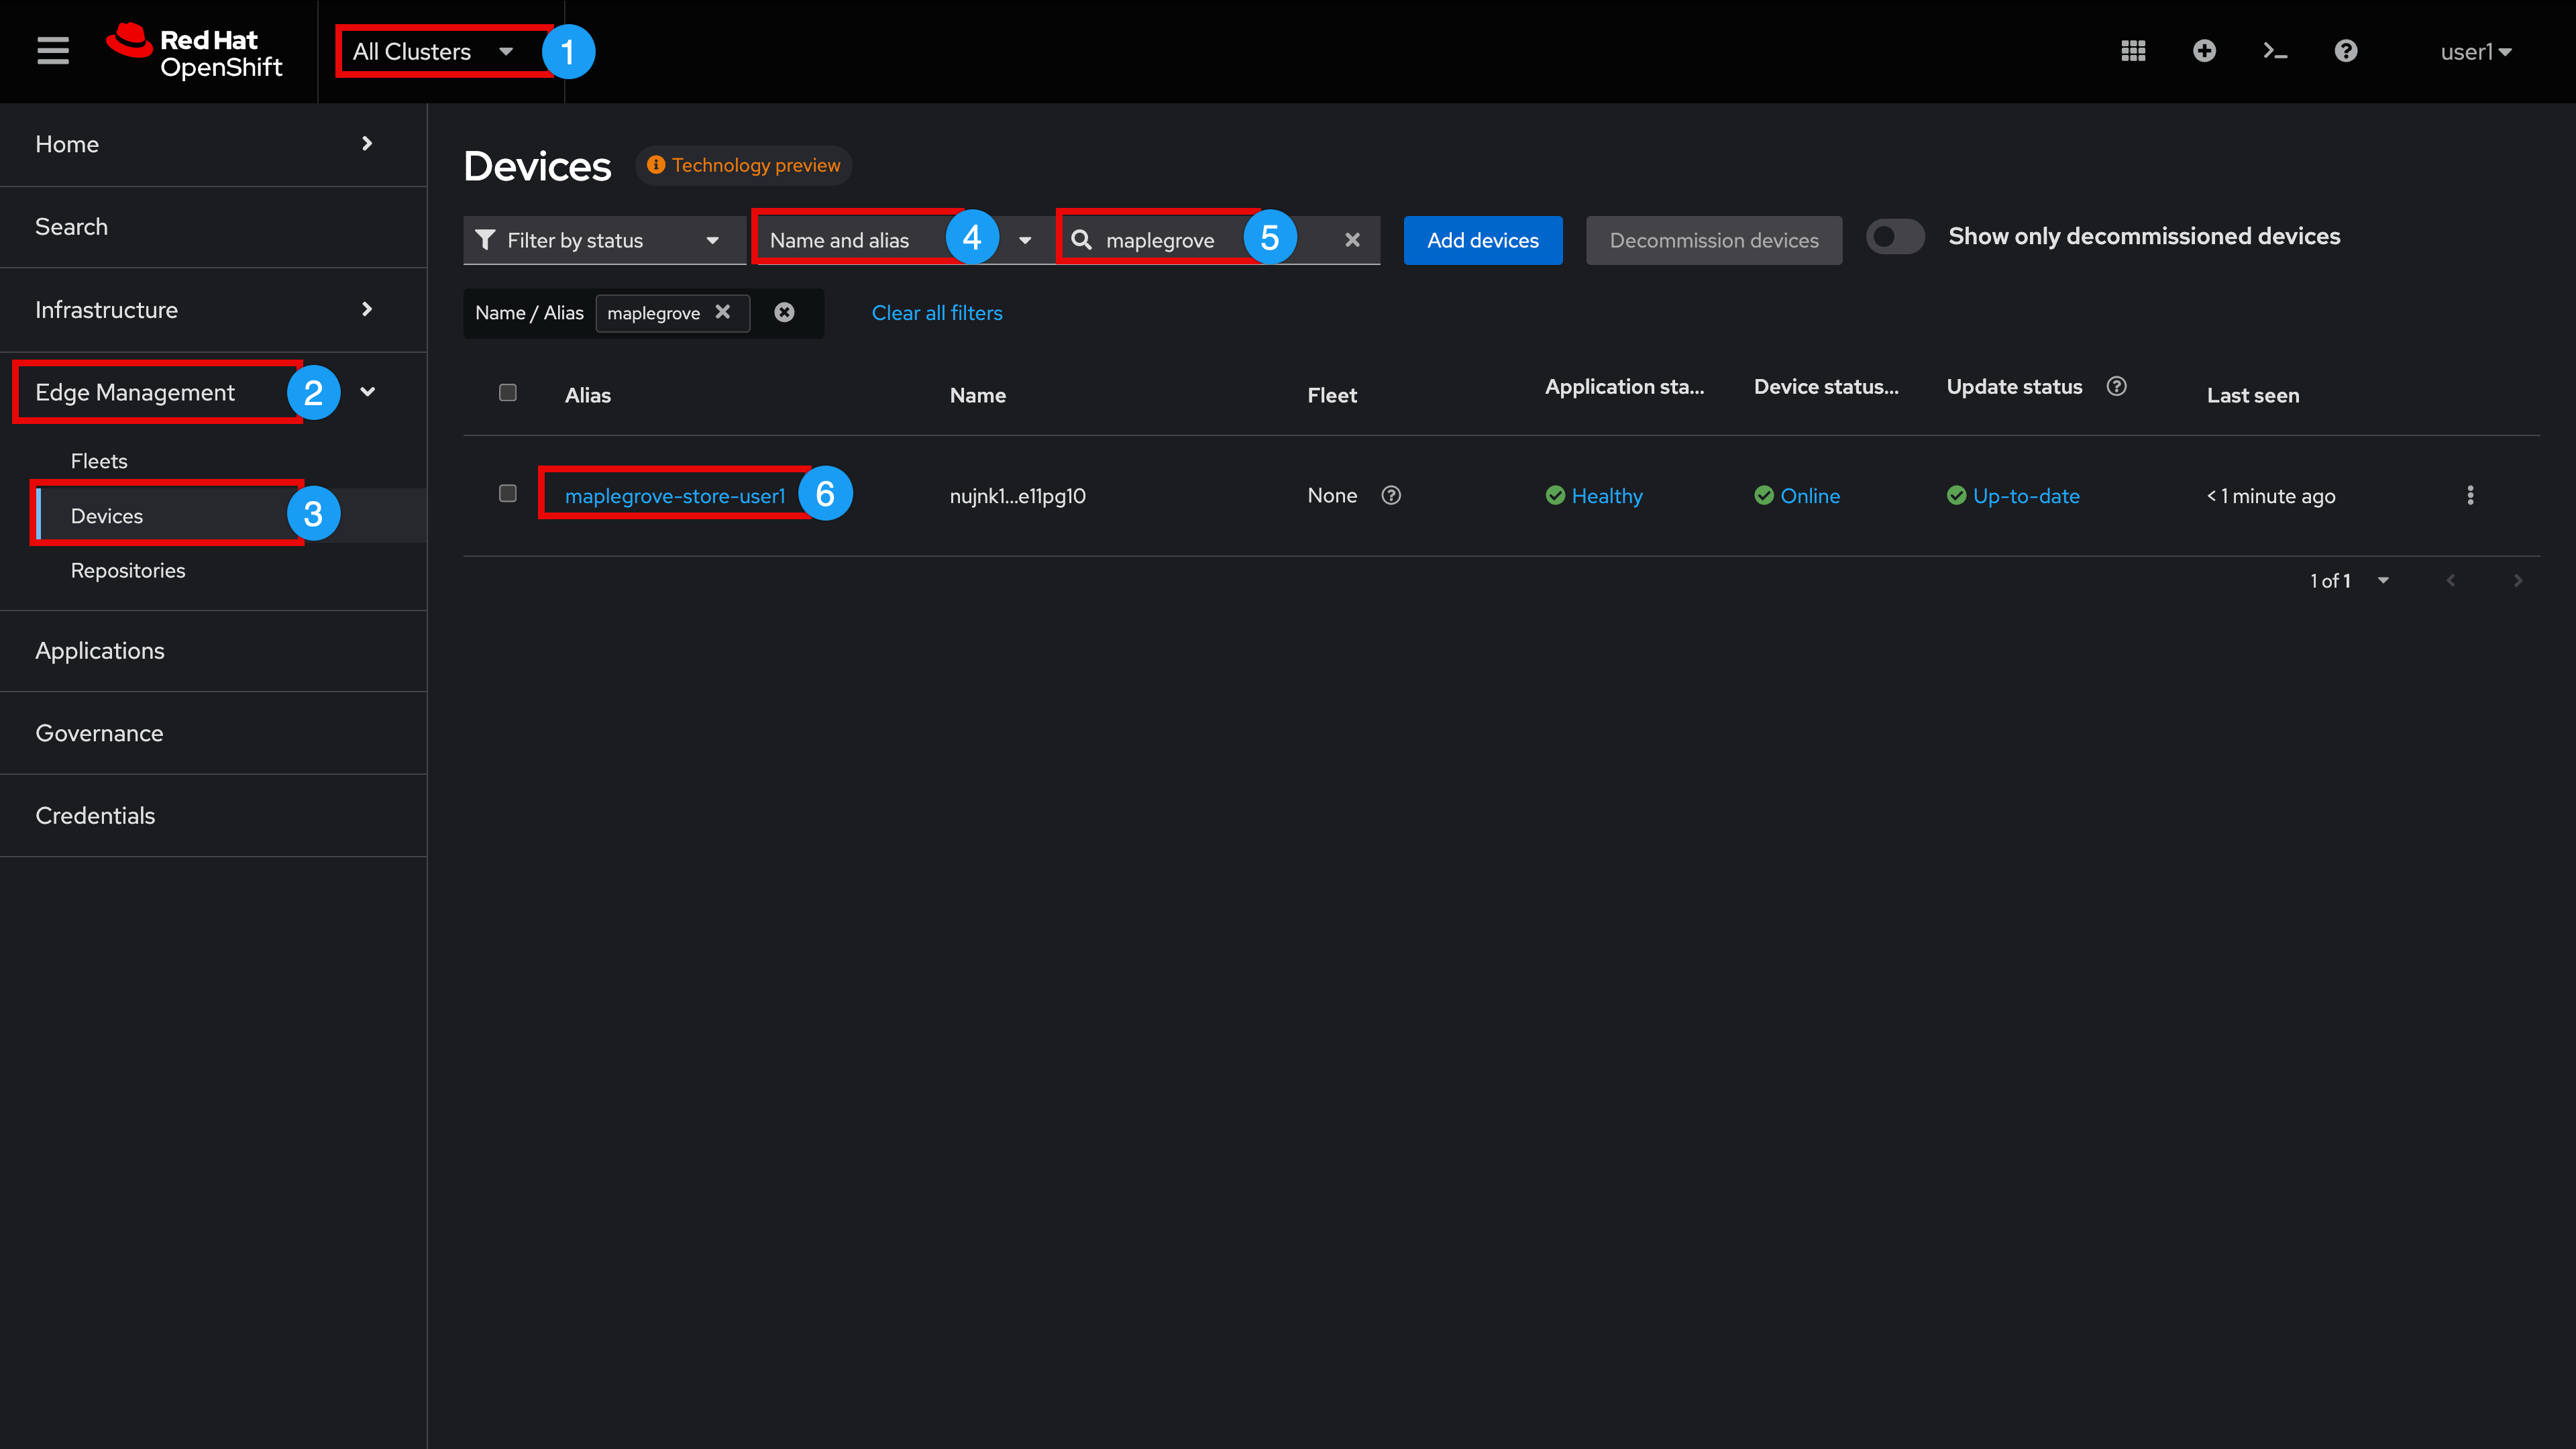
Now that the we have created our new fleet, let’s go to your recently onboarded device (from Module 2) and change its fleet membership
-
Expand Edge Management
-
Select Devices
-
Change the Devices section search filter from Labels and fleets to Name and alias (You may need to scroll down to the Devices section if there is a list of Devices pending approval present at the top of this window)
-
Enter the hometown name you chose for your device to filter the device list
-
Click YourHomeTown-store-{user} device
-
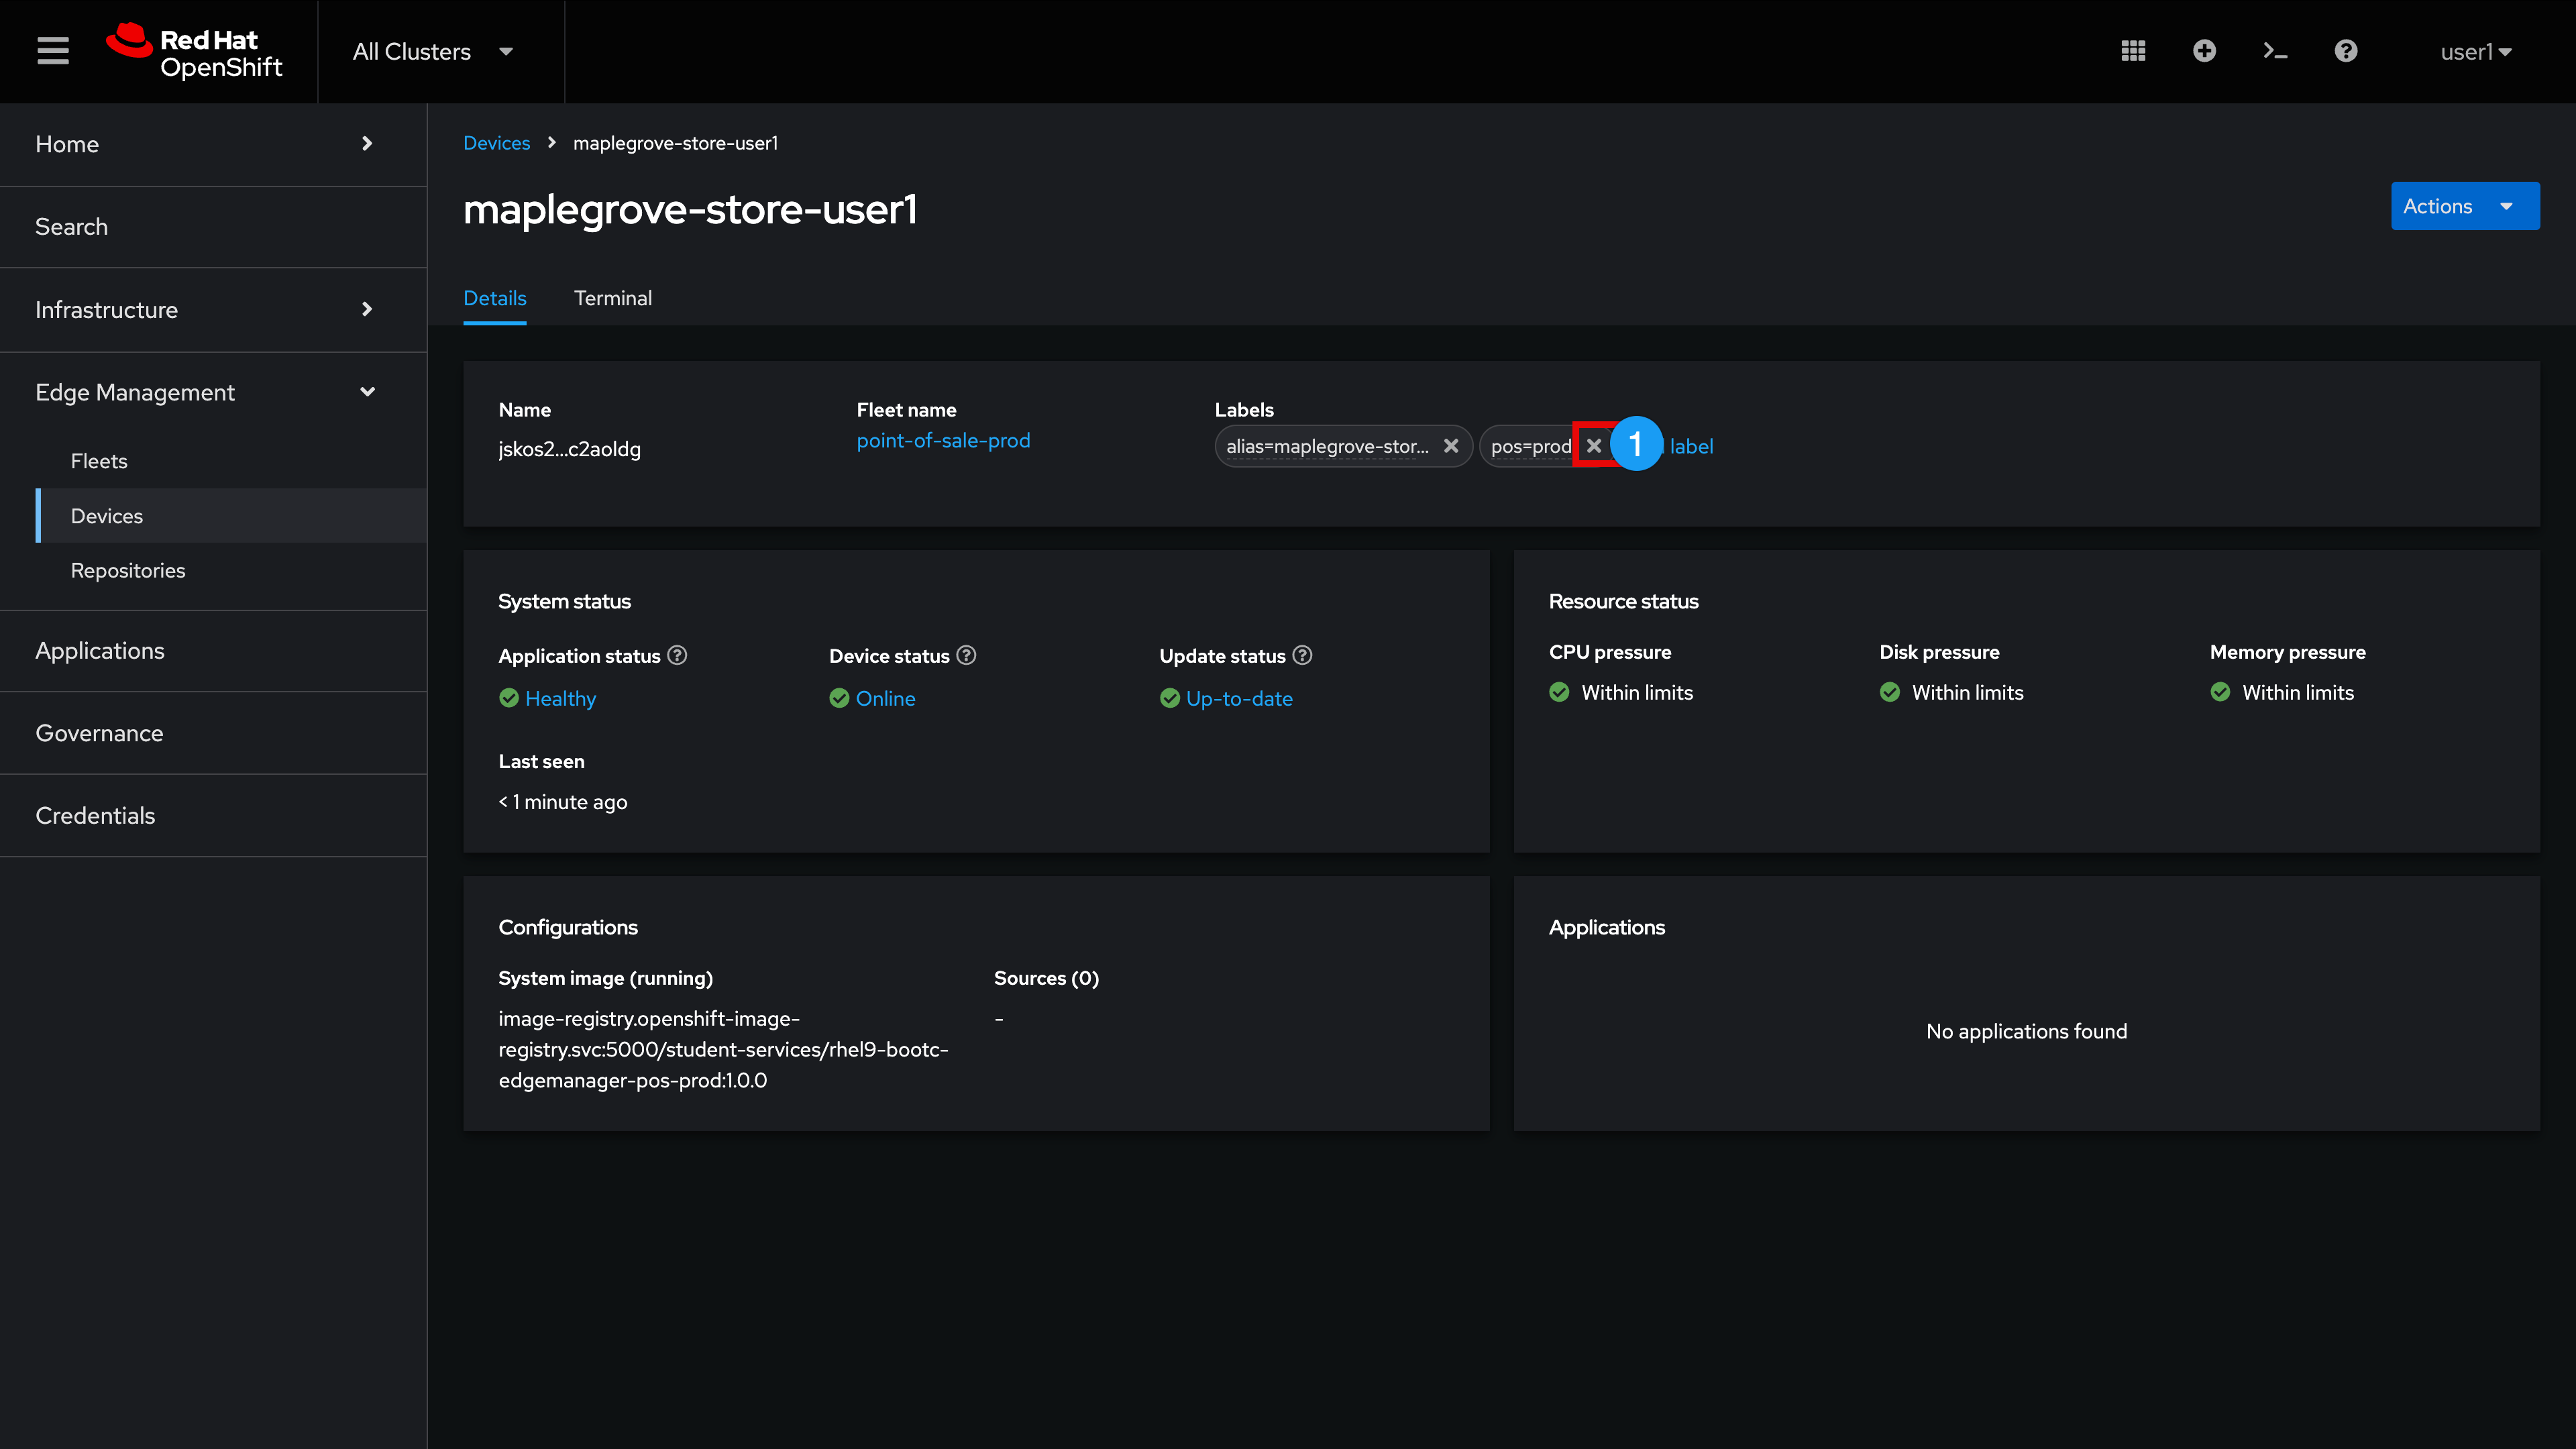
Click the X next to pos=prod to remove the current label
-
Click Add label
-
Replace key=value with fleet={user} and press enter
-
Observe that we are still running the same System image ('…pos-prod:1.0.0') (a device reboot will not be required since our new fleet uses the same image that our device is already running)
-
Observe that your device Applications pane is now populated with our containerized application
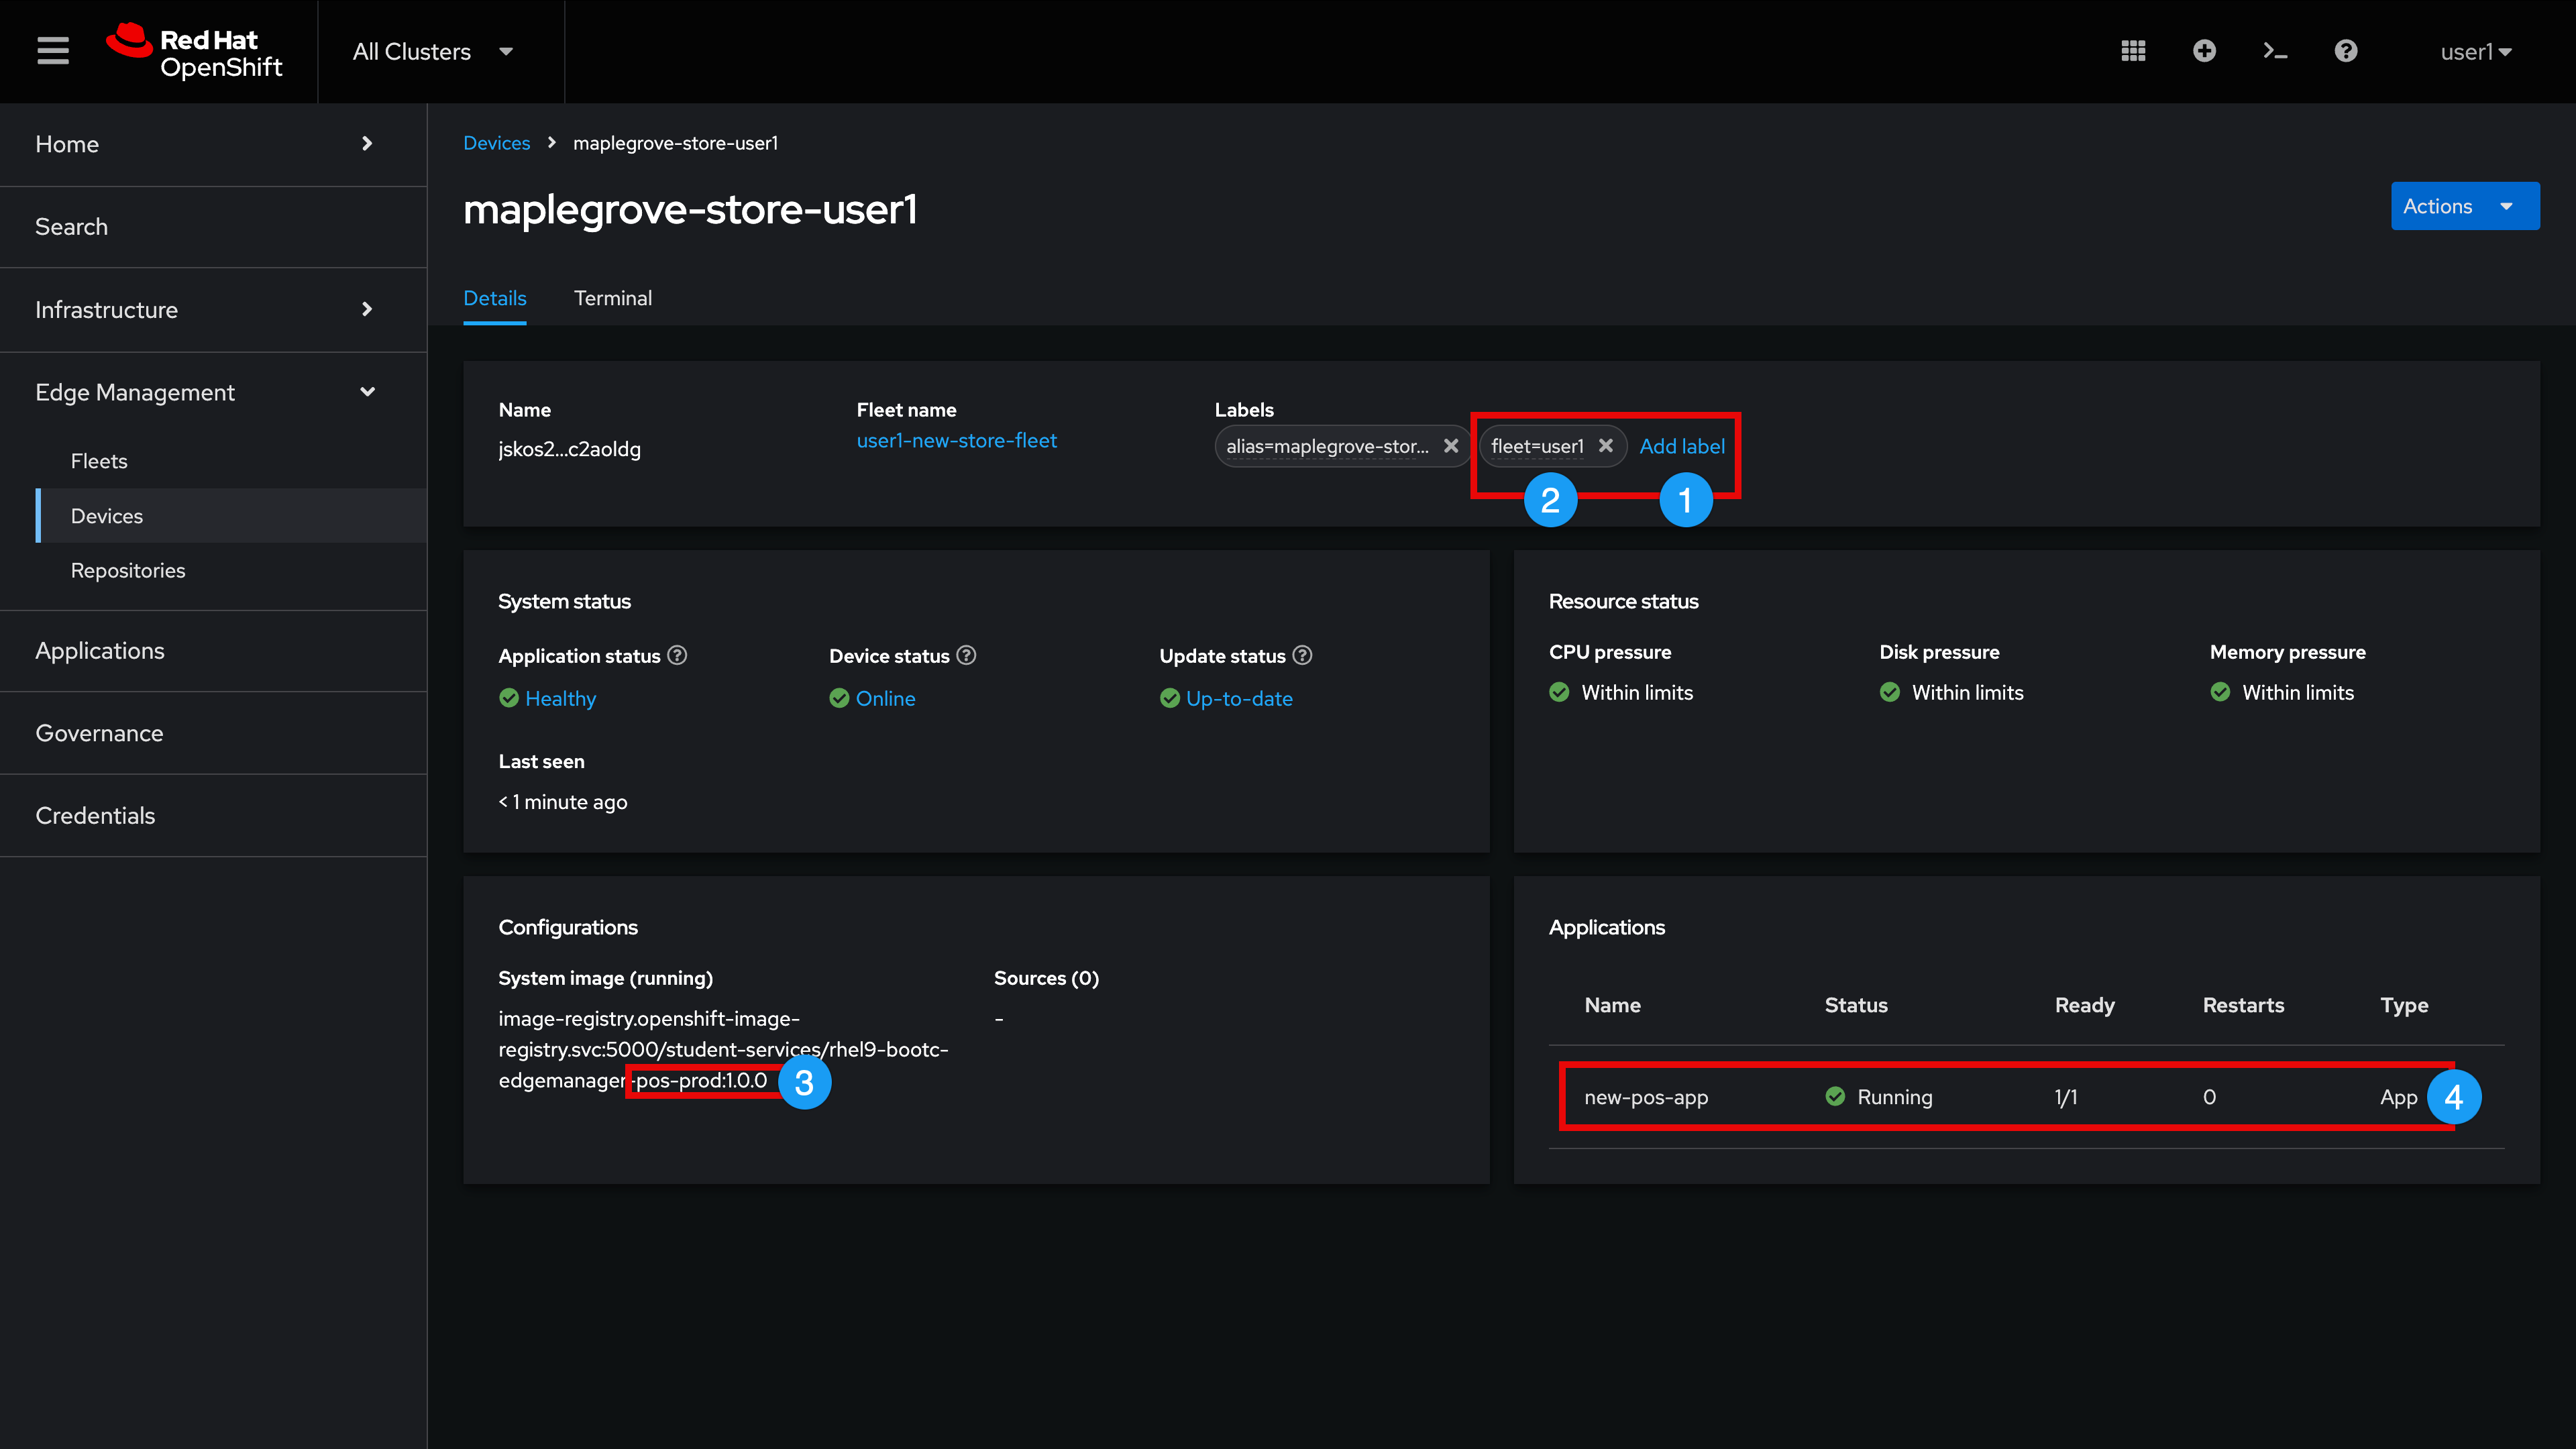
| It can take a few moments for your newly added Application to report a green Running status. Thank you for your patience. |
After your new-pos-app is returning a green Running status
-
Click Terminal
-
Check the containers that are now running on the device:
podman ps -aSample OutputCONTAINER ID IMAGE COMMAND CREATED STATUS PORTS NAMES 111b1391a311 localhost/podman-pause:5.2.2-1737721907 38 minutes ago Up 37 minutes 47a0b459f7c9-service fd0157f0e2e1 localhost/podman-pause:5.2.2-1737721907 38 minutes ago Up 37 minutes 0.0.0.0:30000->8080/tcp 9ba794295fe8-infra c0f559b1dad4 quay.io/jswanson/pos-v1-prod:1.0.0 /usr/bin/run-http... 37 minutes ago Up 37 minutes 0.0.0.0:30000->8080/tcp, 8080/tcp, 8443/tcp point-of-sale-pos-prod 6ca9d626e4bb quay.io/kenosborn/edge-megastore-pos:v1 nginx -g daemon o... 6 minutes ago Up 6 minutes 0.0.0.0:8080->8080/tcp, 80/tcp, 8080/tcp new-pos-app-173783_edge-megastore-pos_1
| The 'edge-megastore-pos:v1' container listed at the bottom is our new point of sale application. |
Return to your Application browser tab (if you inadvertently closed this tab, you can get back to this view by selecting local-cluster in the top menu, followed by selecting Networking\Routes via the left-hand nav)
-
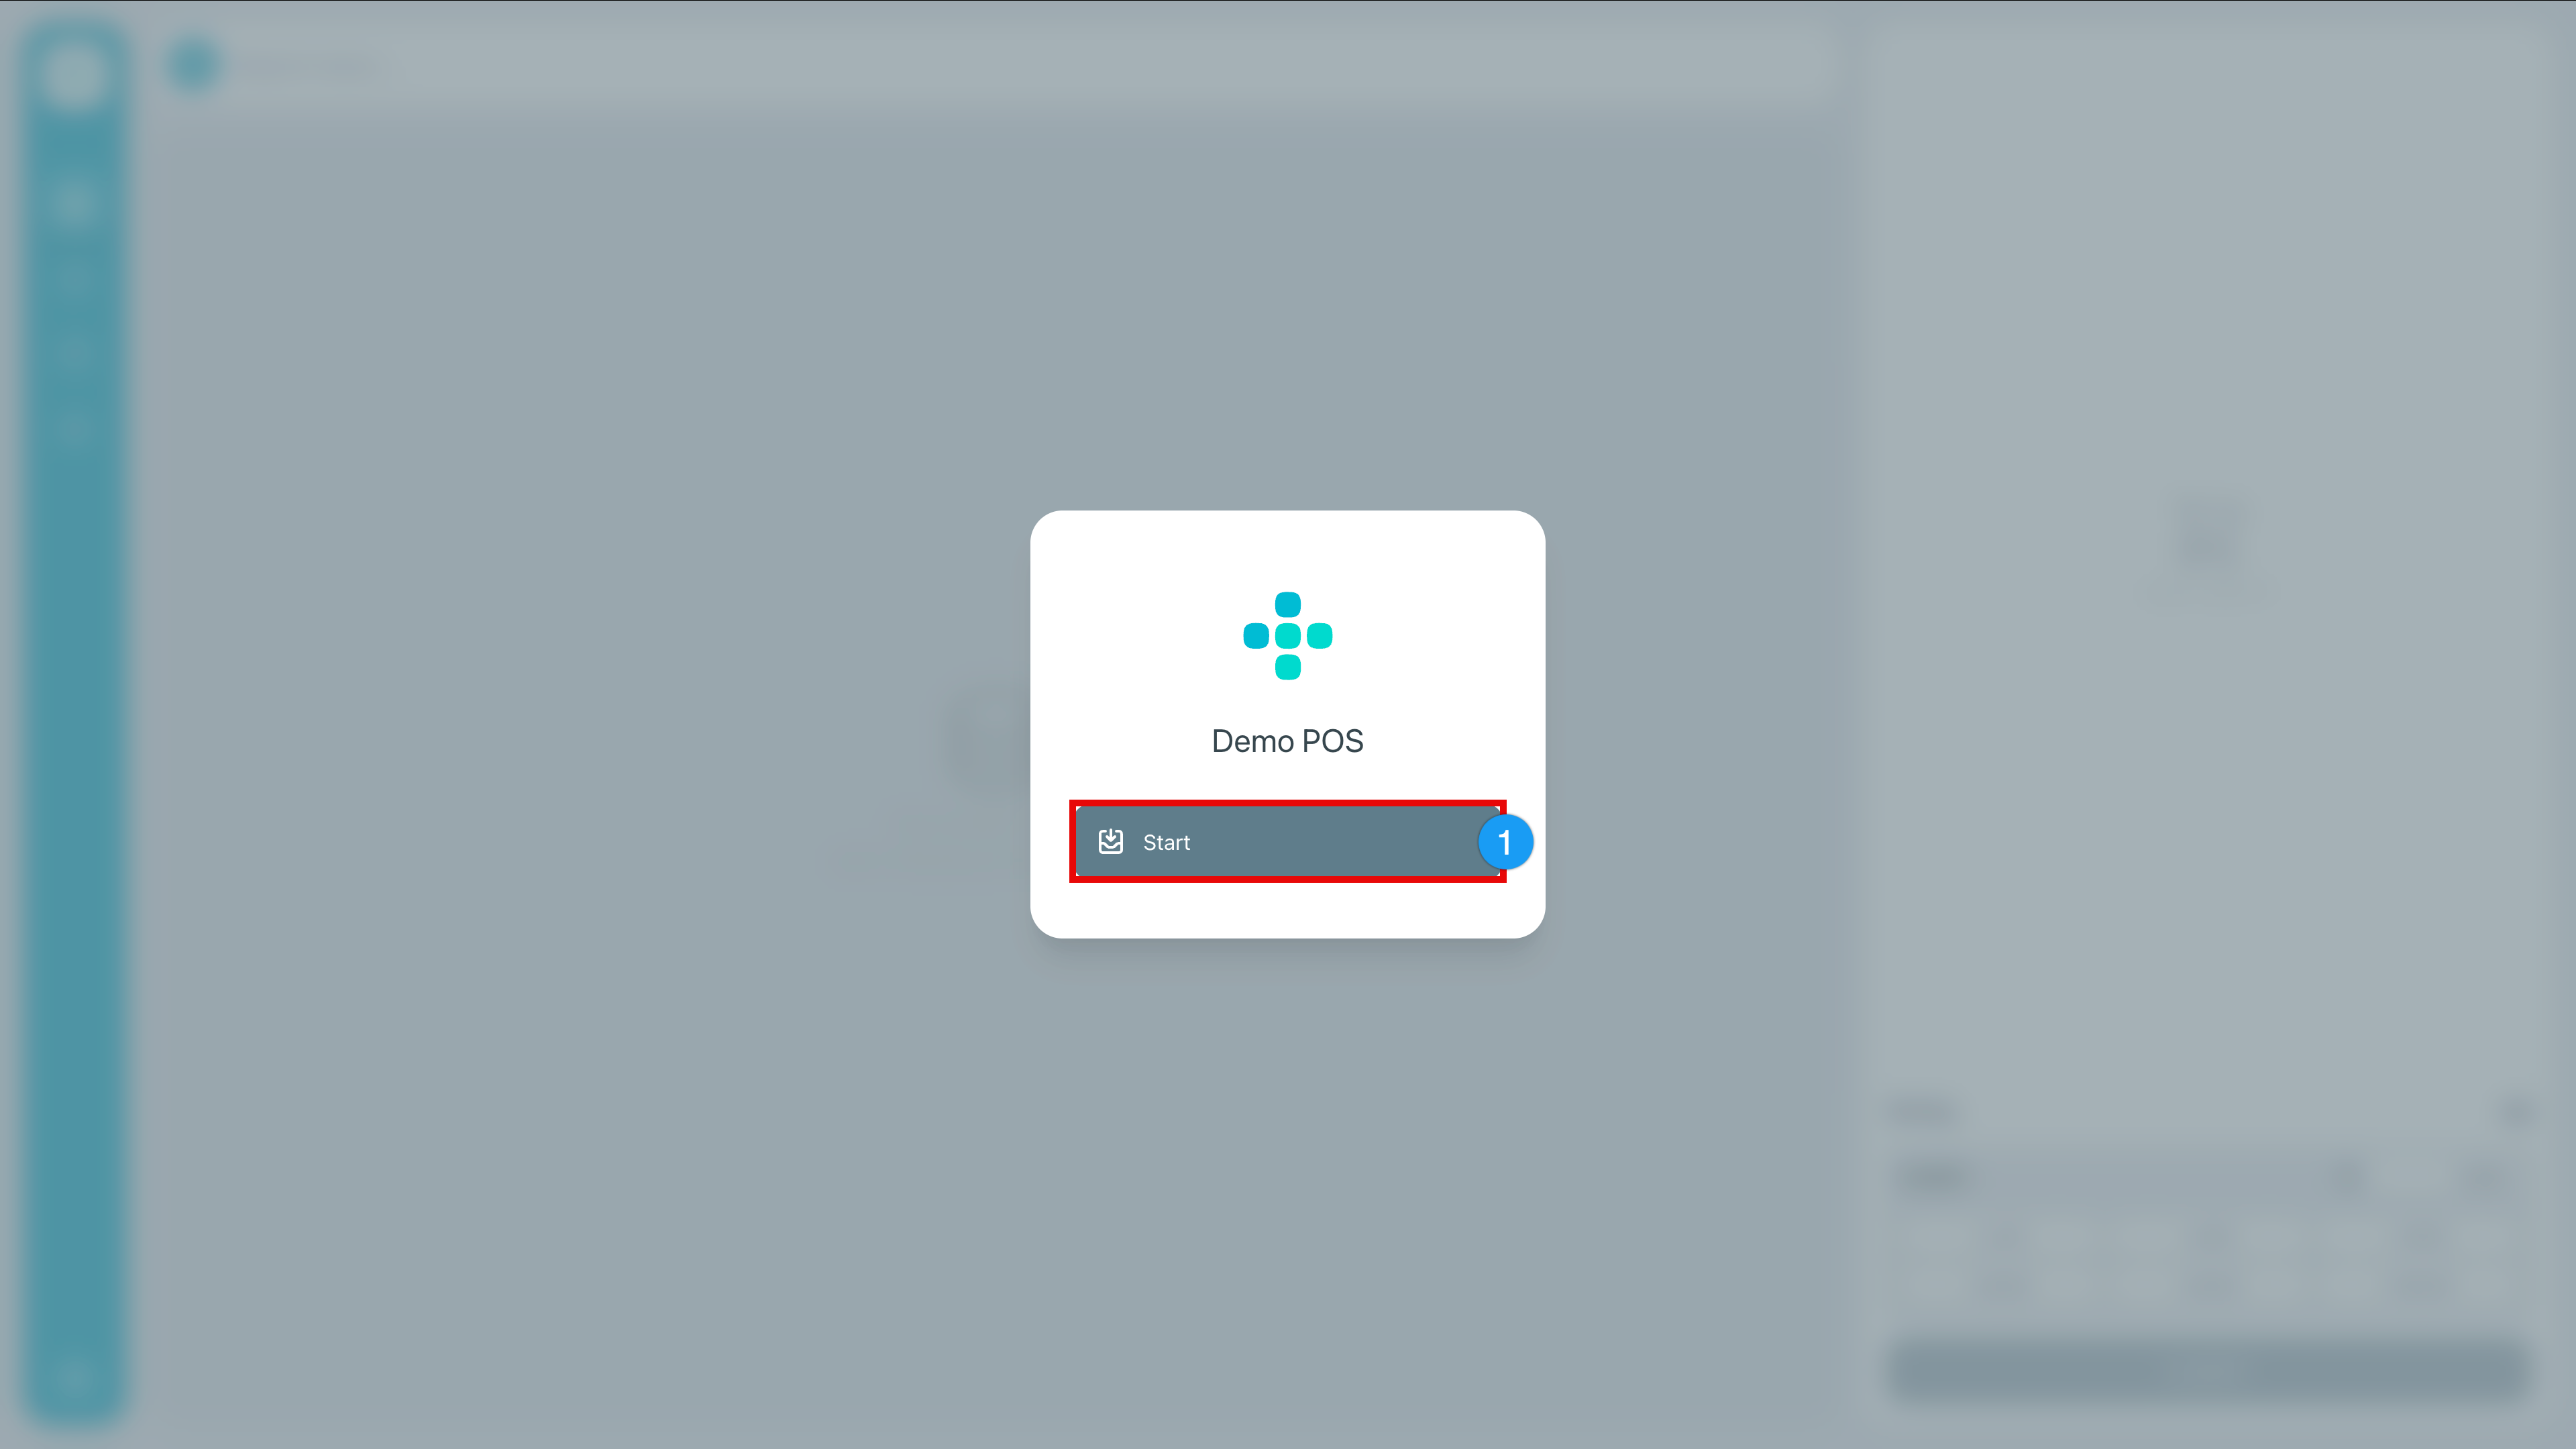
Refresh your browser and note that the new point of sale application is now available!
-
Click Start
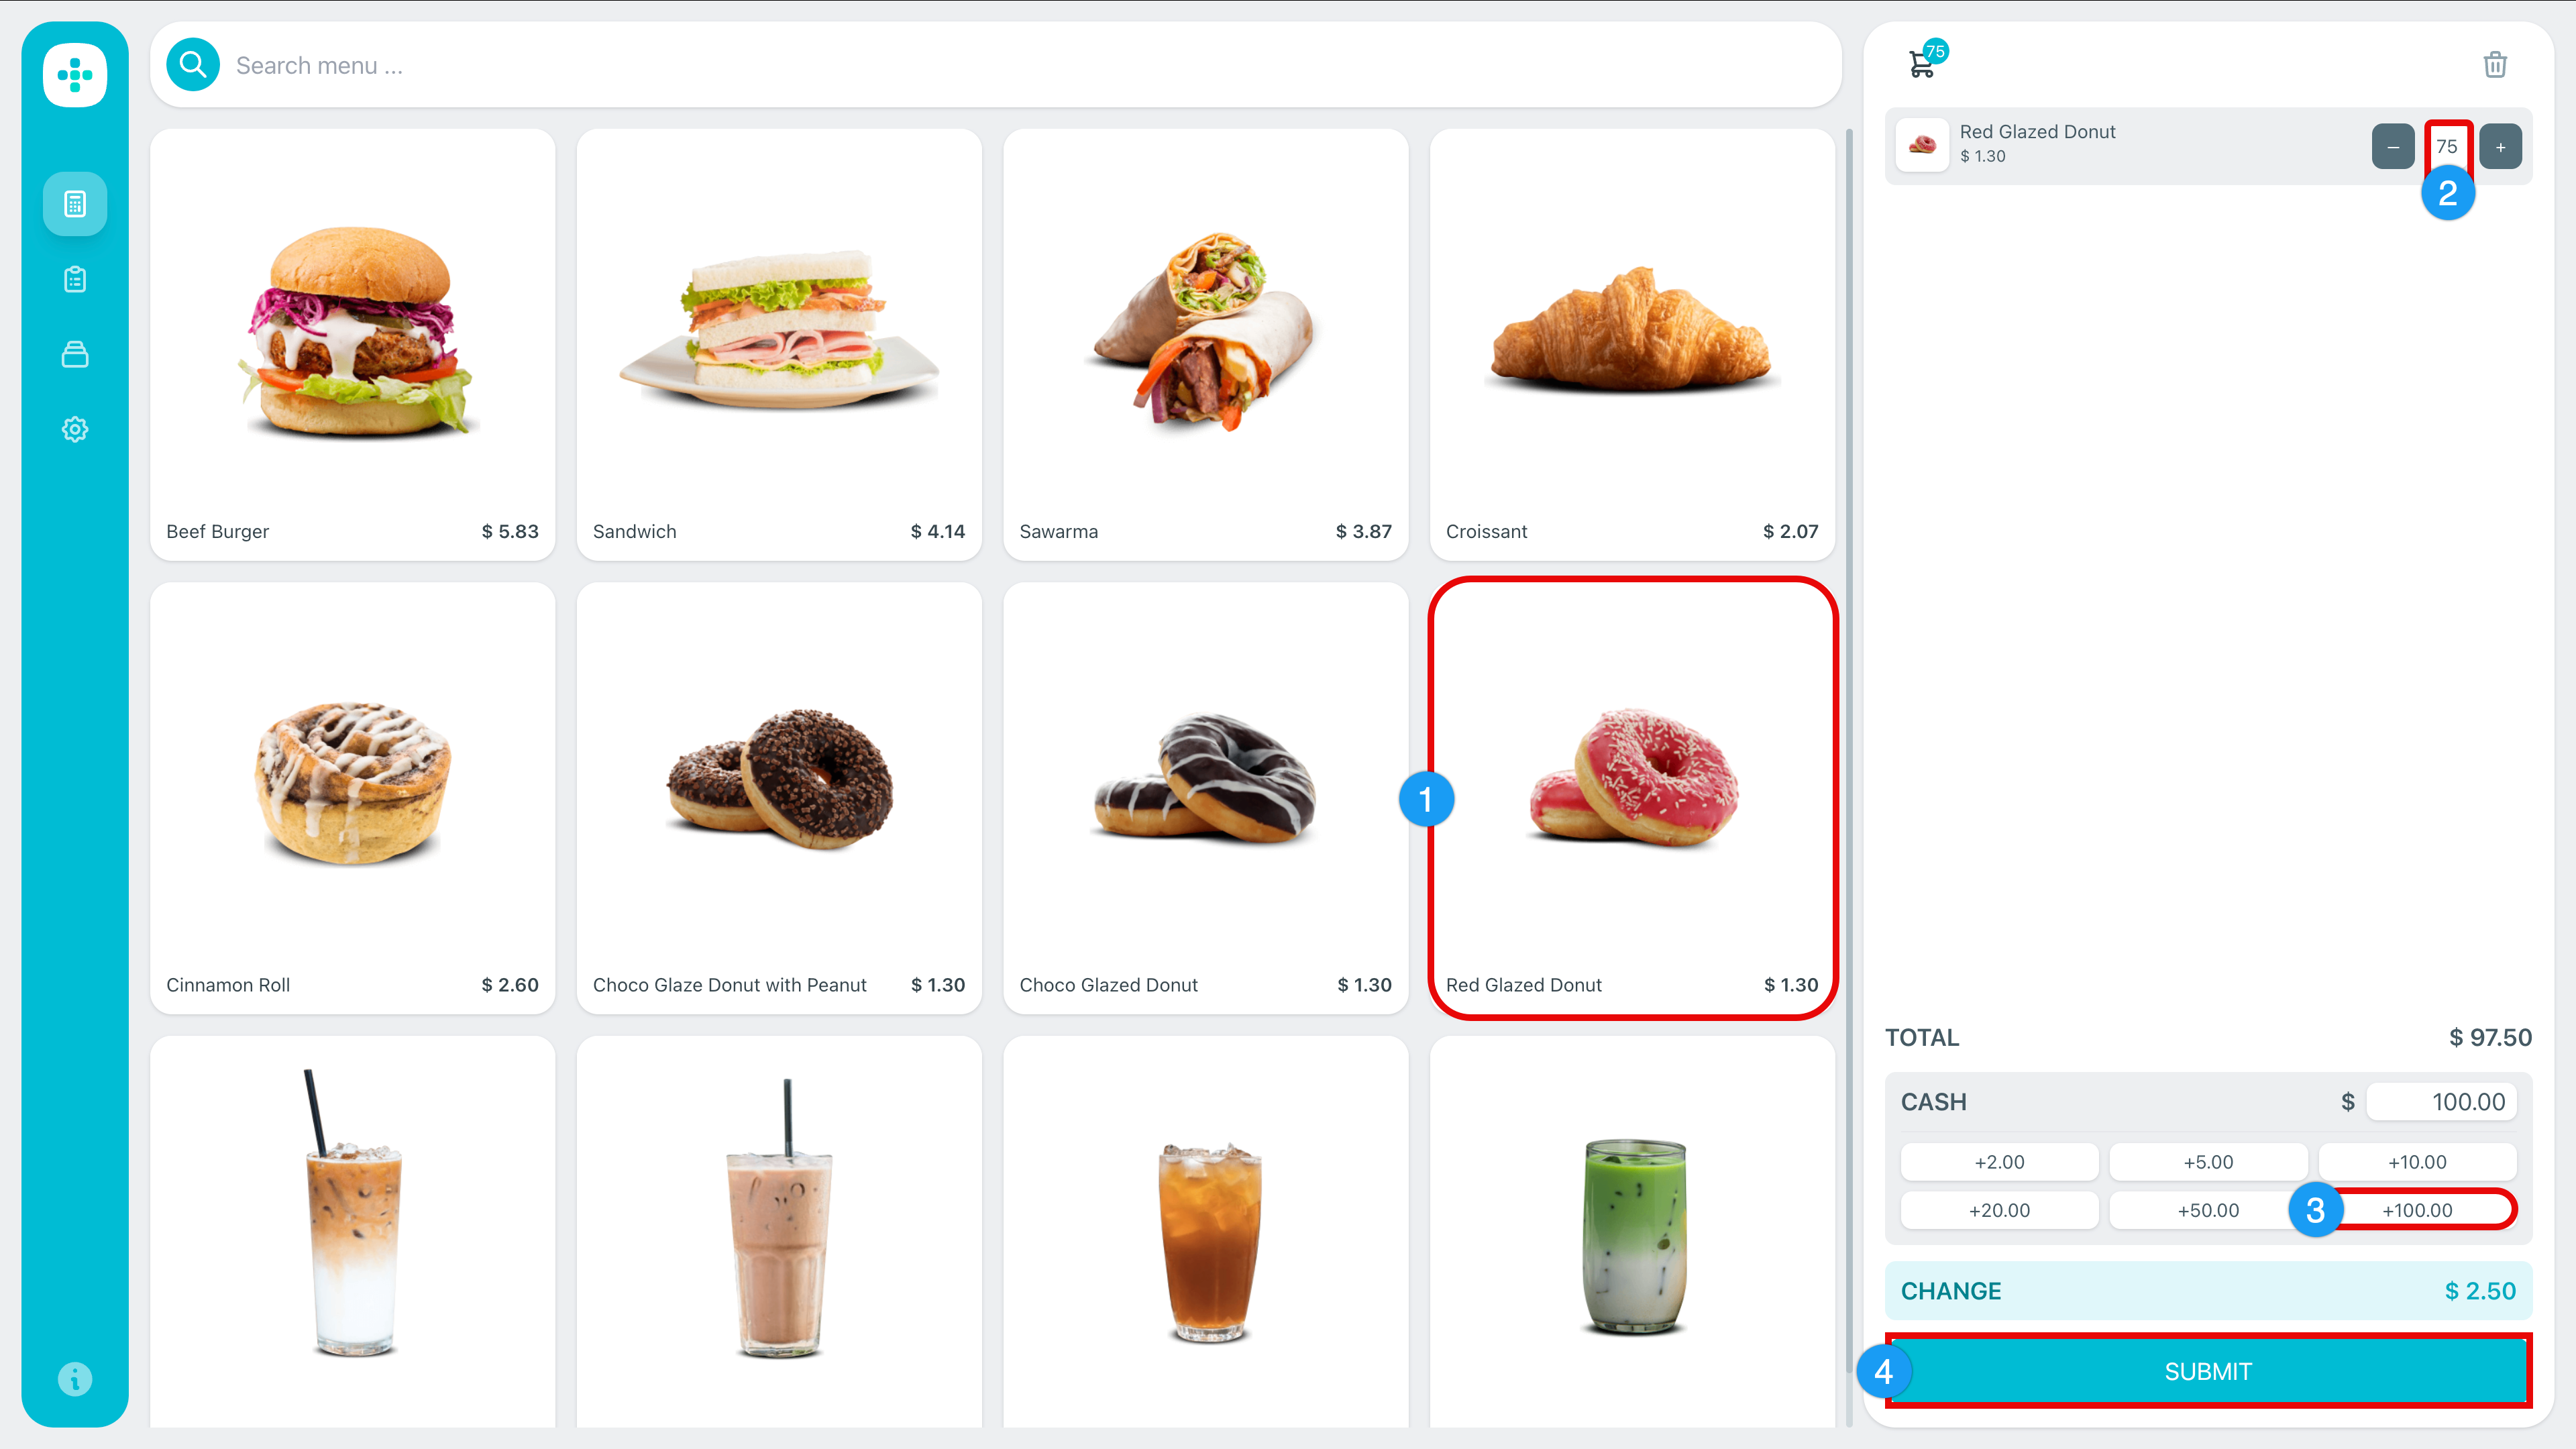
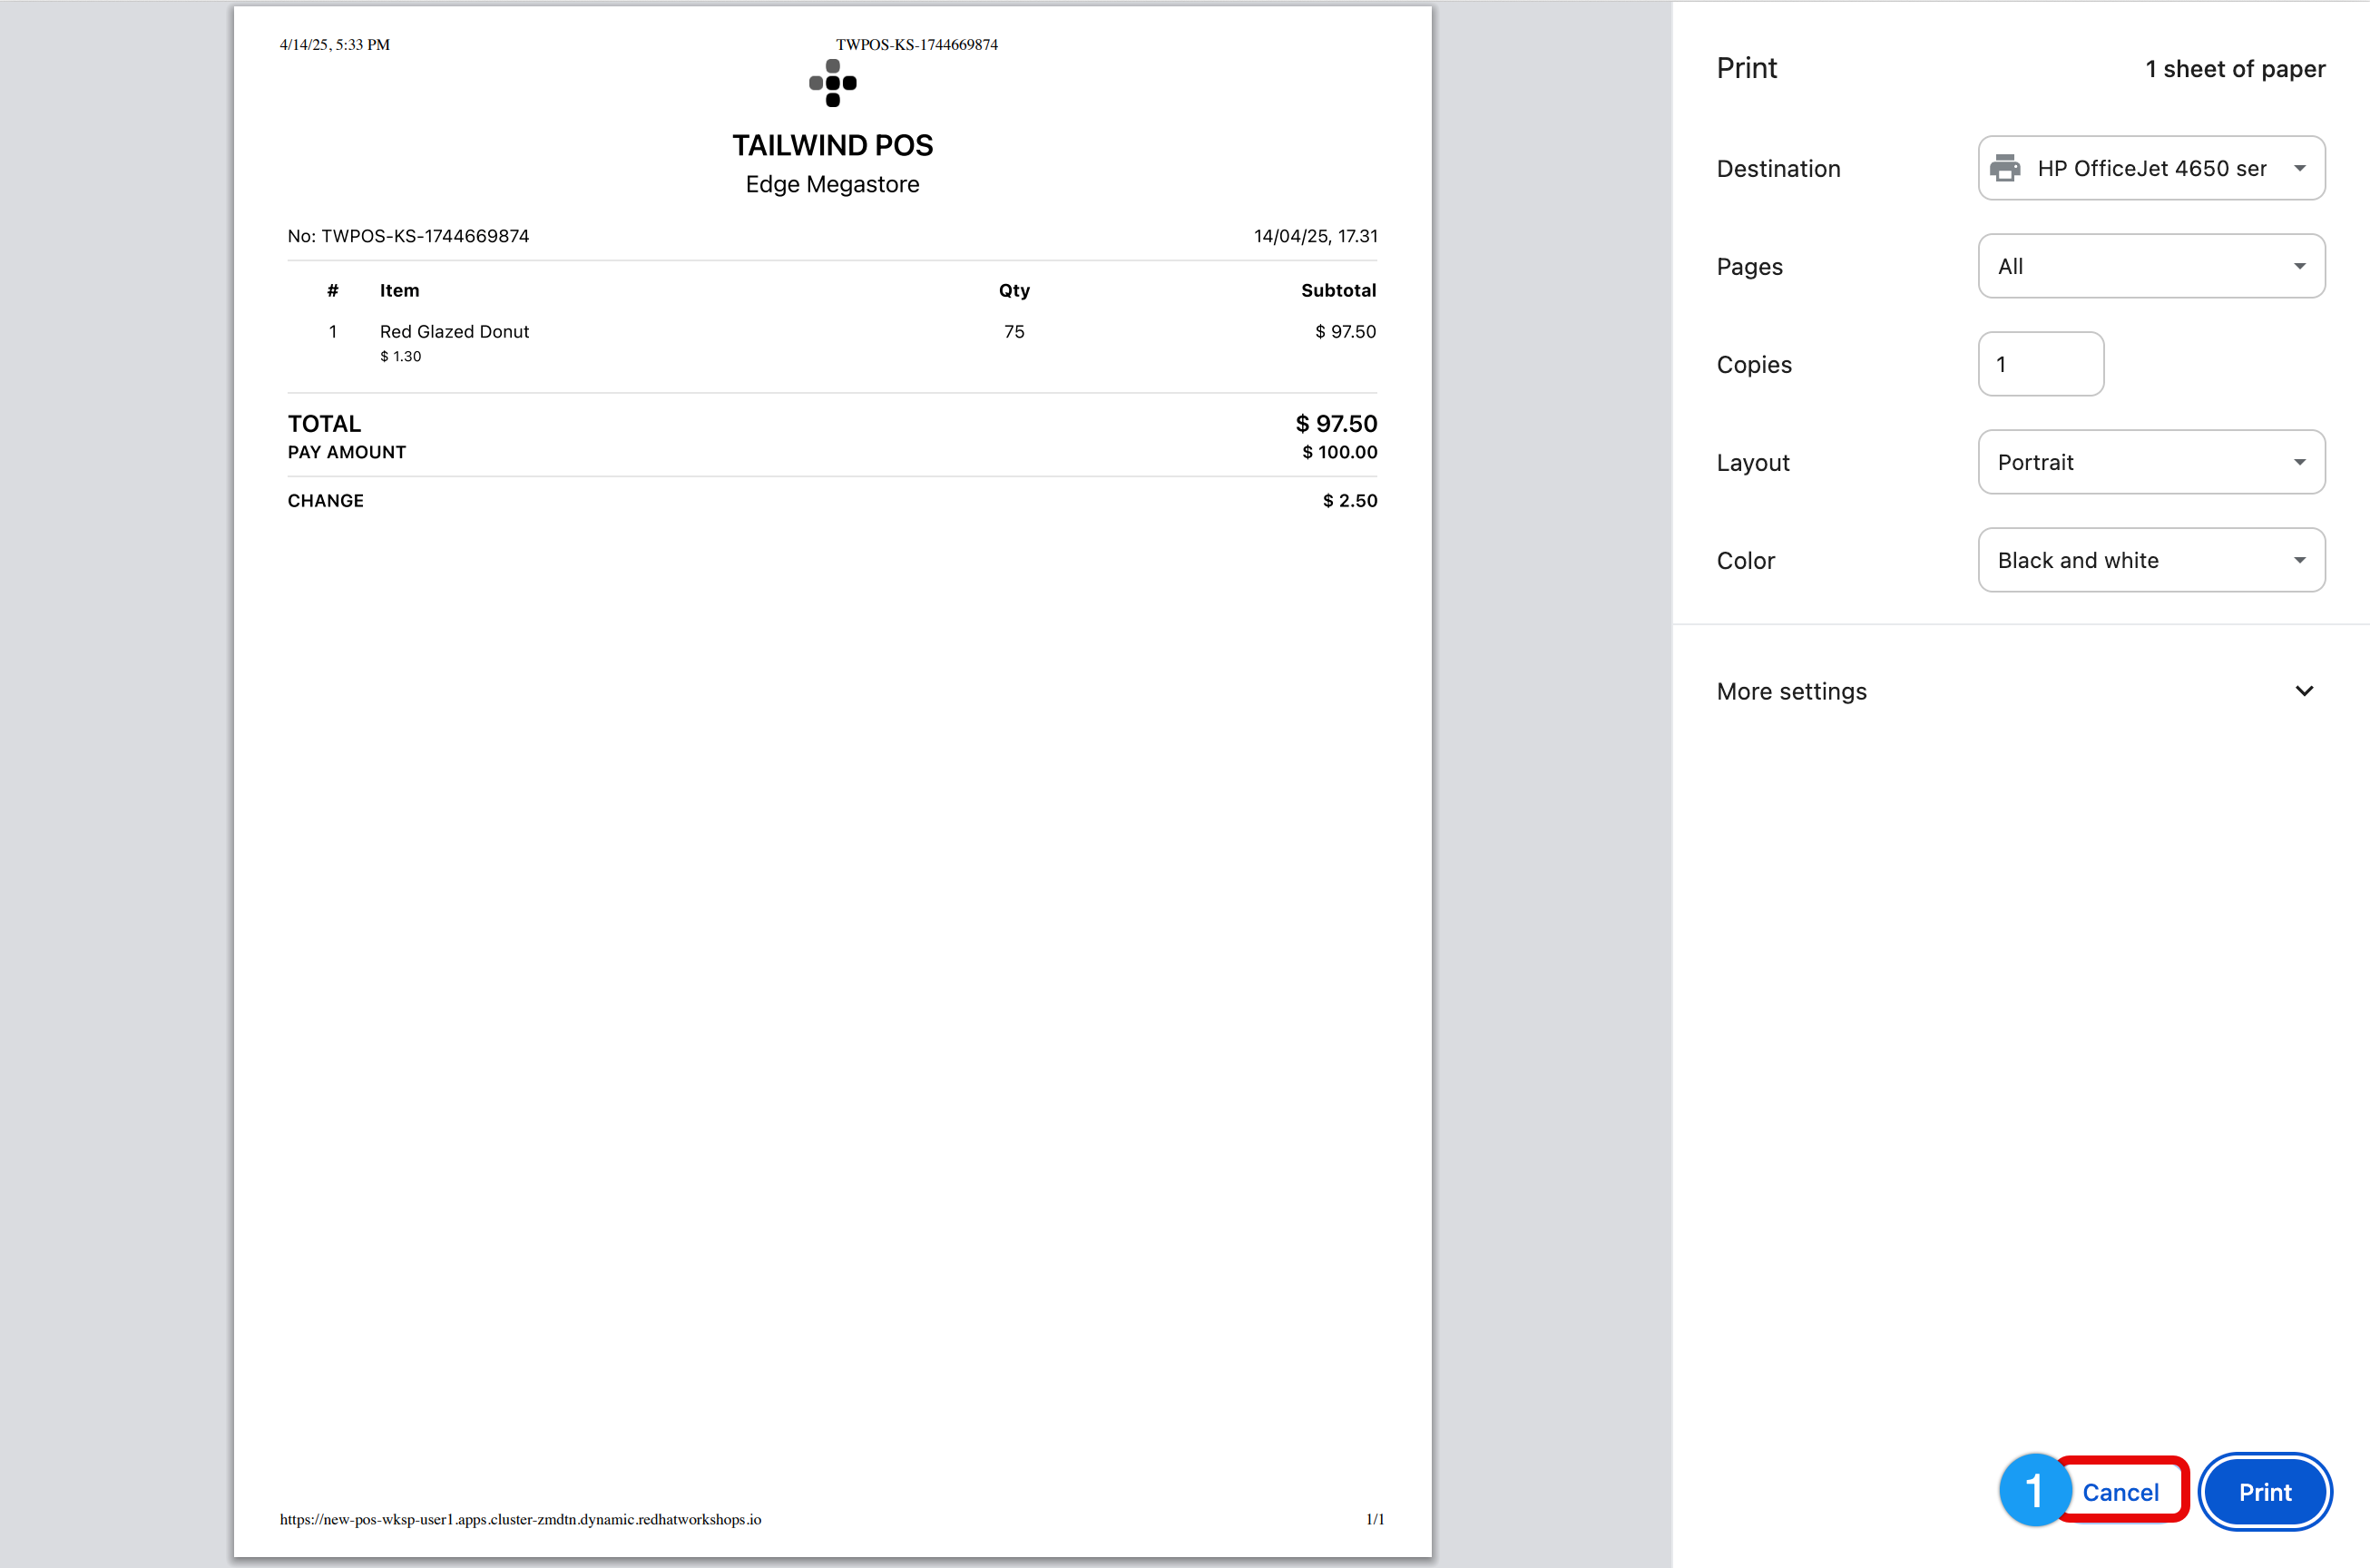
Let’s order some (pretend) donuts via the new POS App (because…why not)?
-
Select Red Glazed Donut
-
Increase quantity to 75
-
Tender a crisp 100 dollar bill by clicking +100.00
-
Click Submit
-
Click Proceed
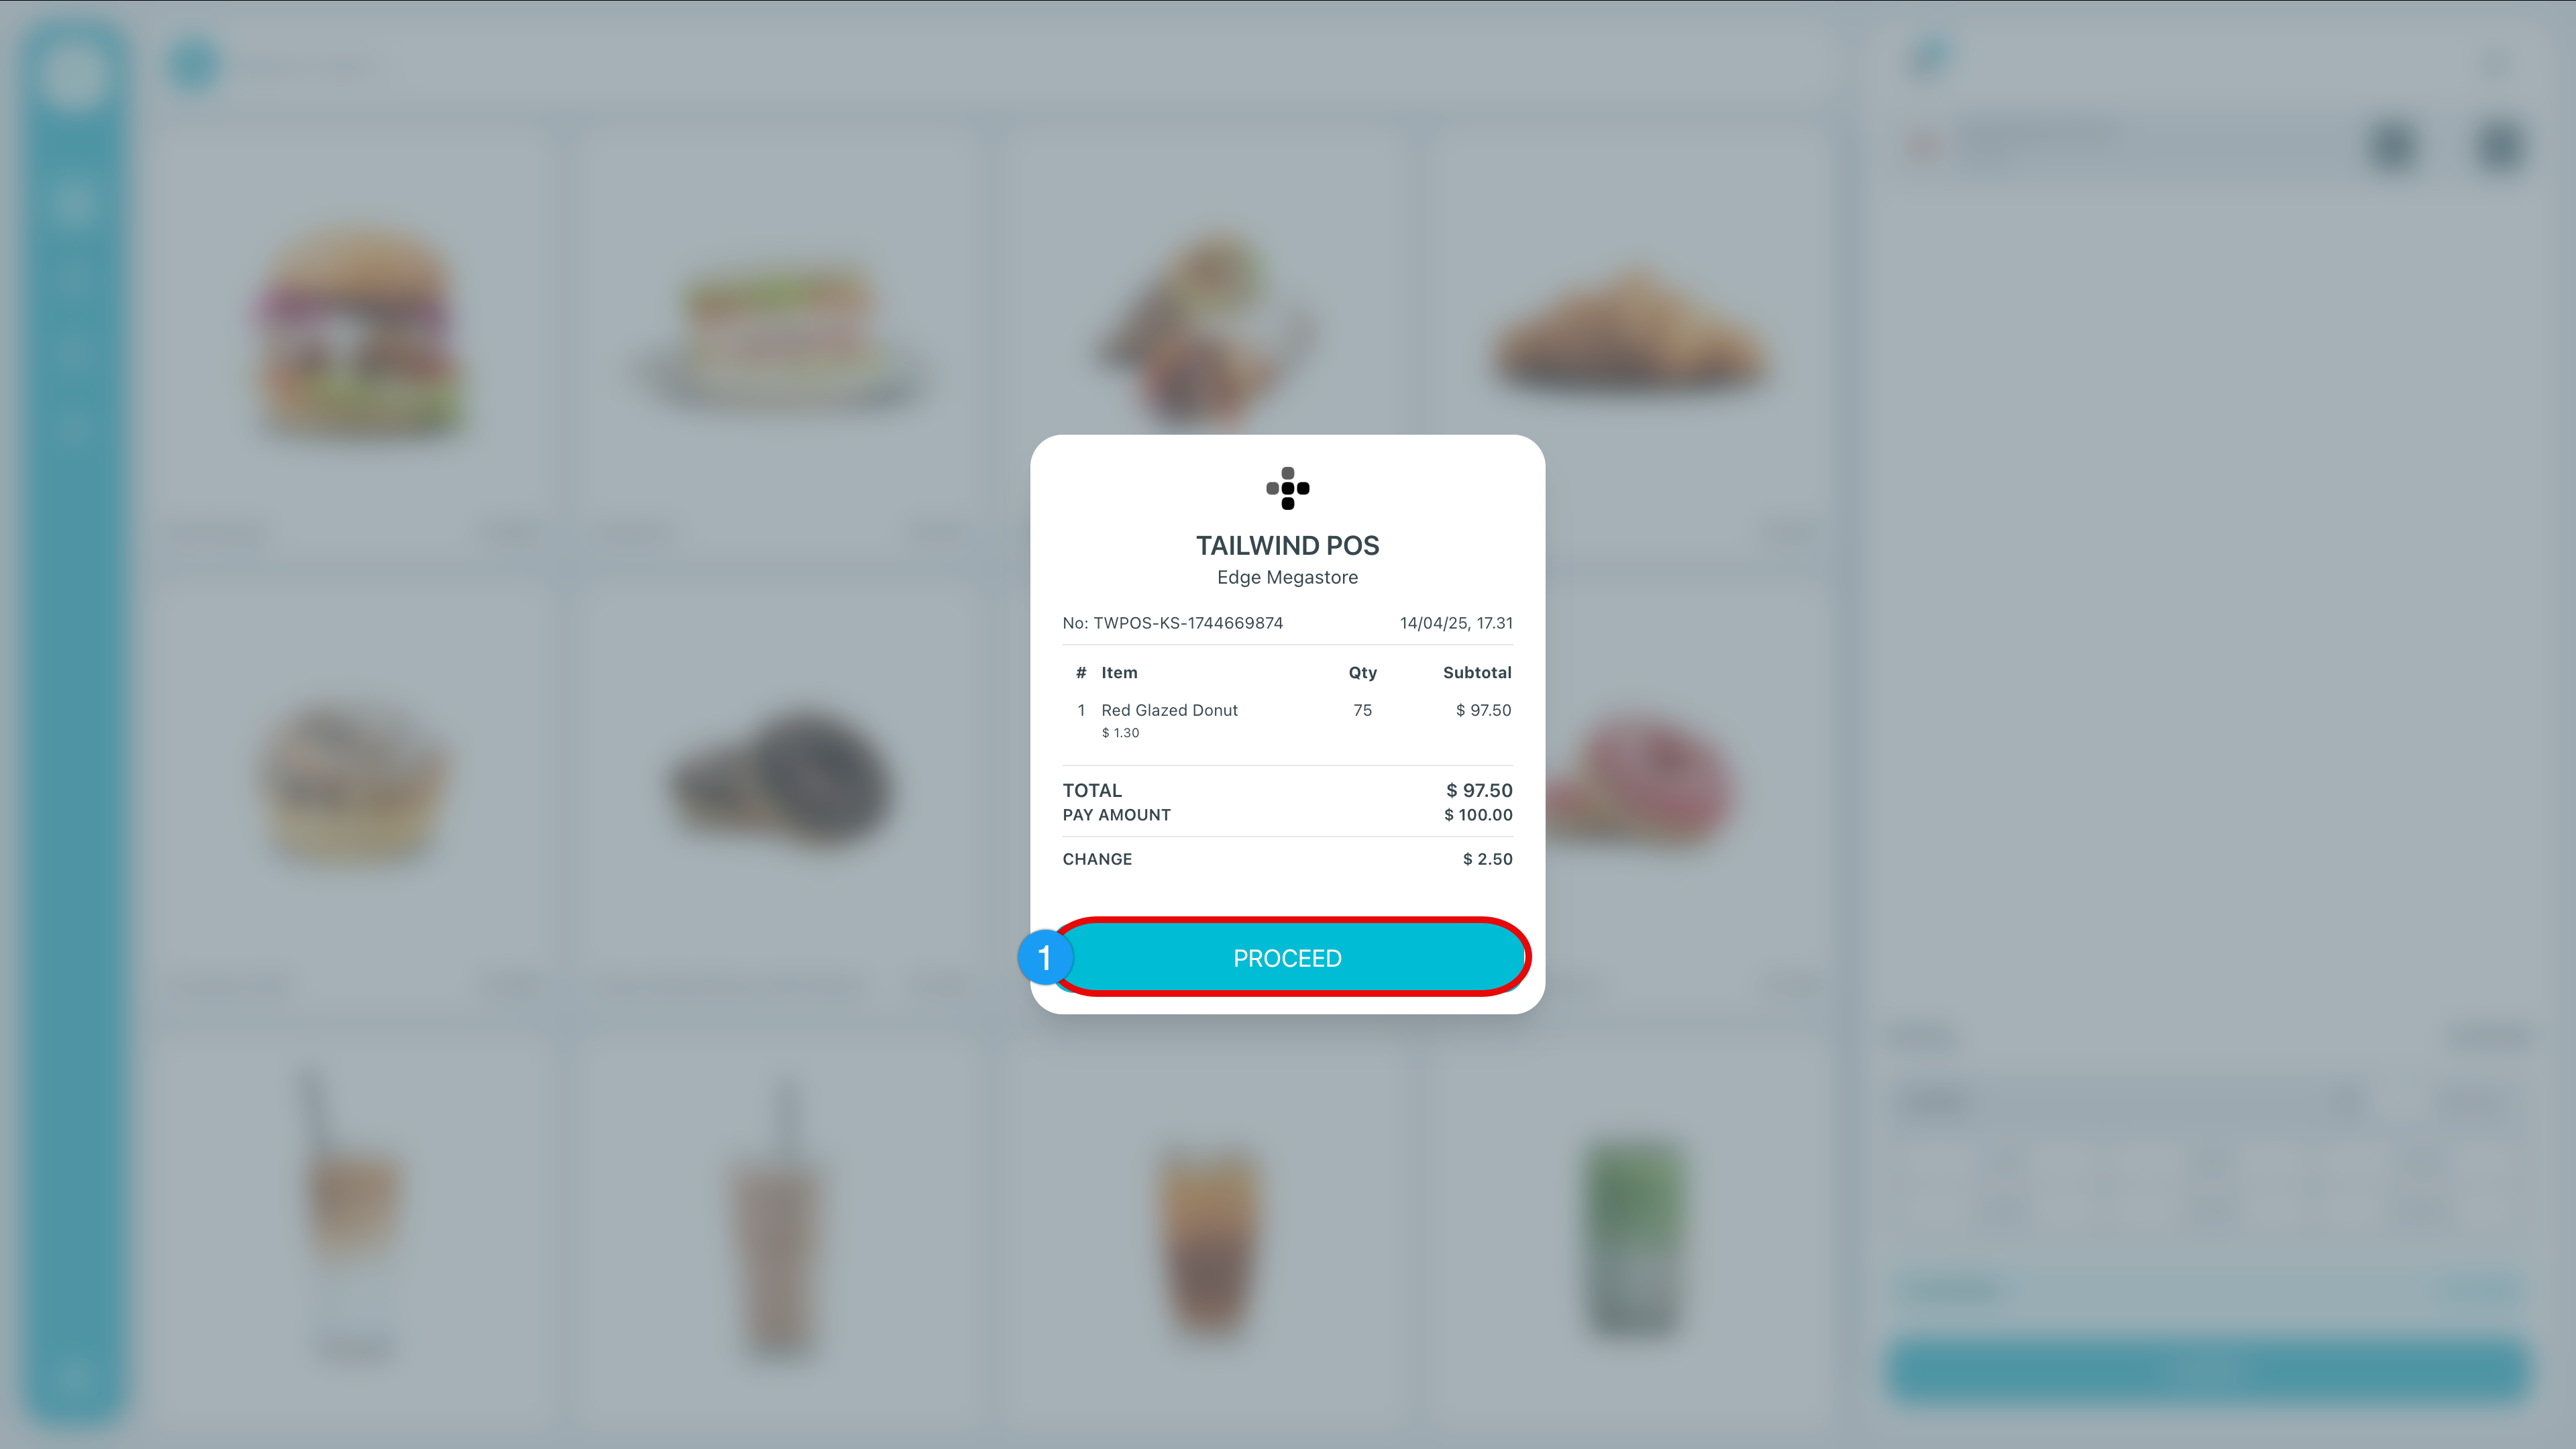
-
Click Cancel
Your new home town Edge Megastore, Inc. location is now ready to open for business
You’ve done a great job at Edge Megastore, Inc.!
If you’d like to call it a day, you are welcome to end the lab here (thank you); however, if you would like to earn some Overtime (mythical) pay and explore a few more advanced topics you are welcome to continue.
Edge Manager Command Line Interface
The Edge Manager CLI contains a robust set of commands. In fact, most (if not all) of what we have explored in this lab via the Edge Manager UI can be done via CLI.
| The Edge Manager CLI is currently still named after the upstream project: flightctl and has been pre-loaded for you in our lab environment |
-
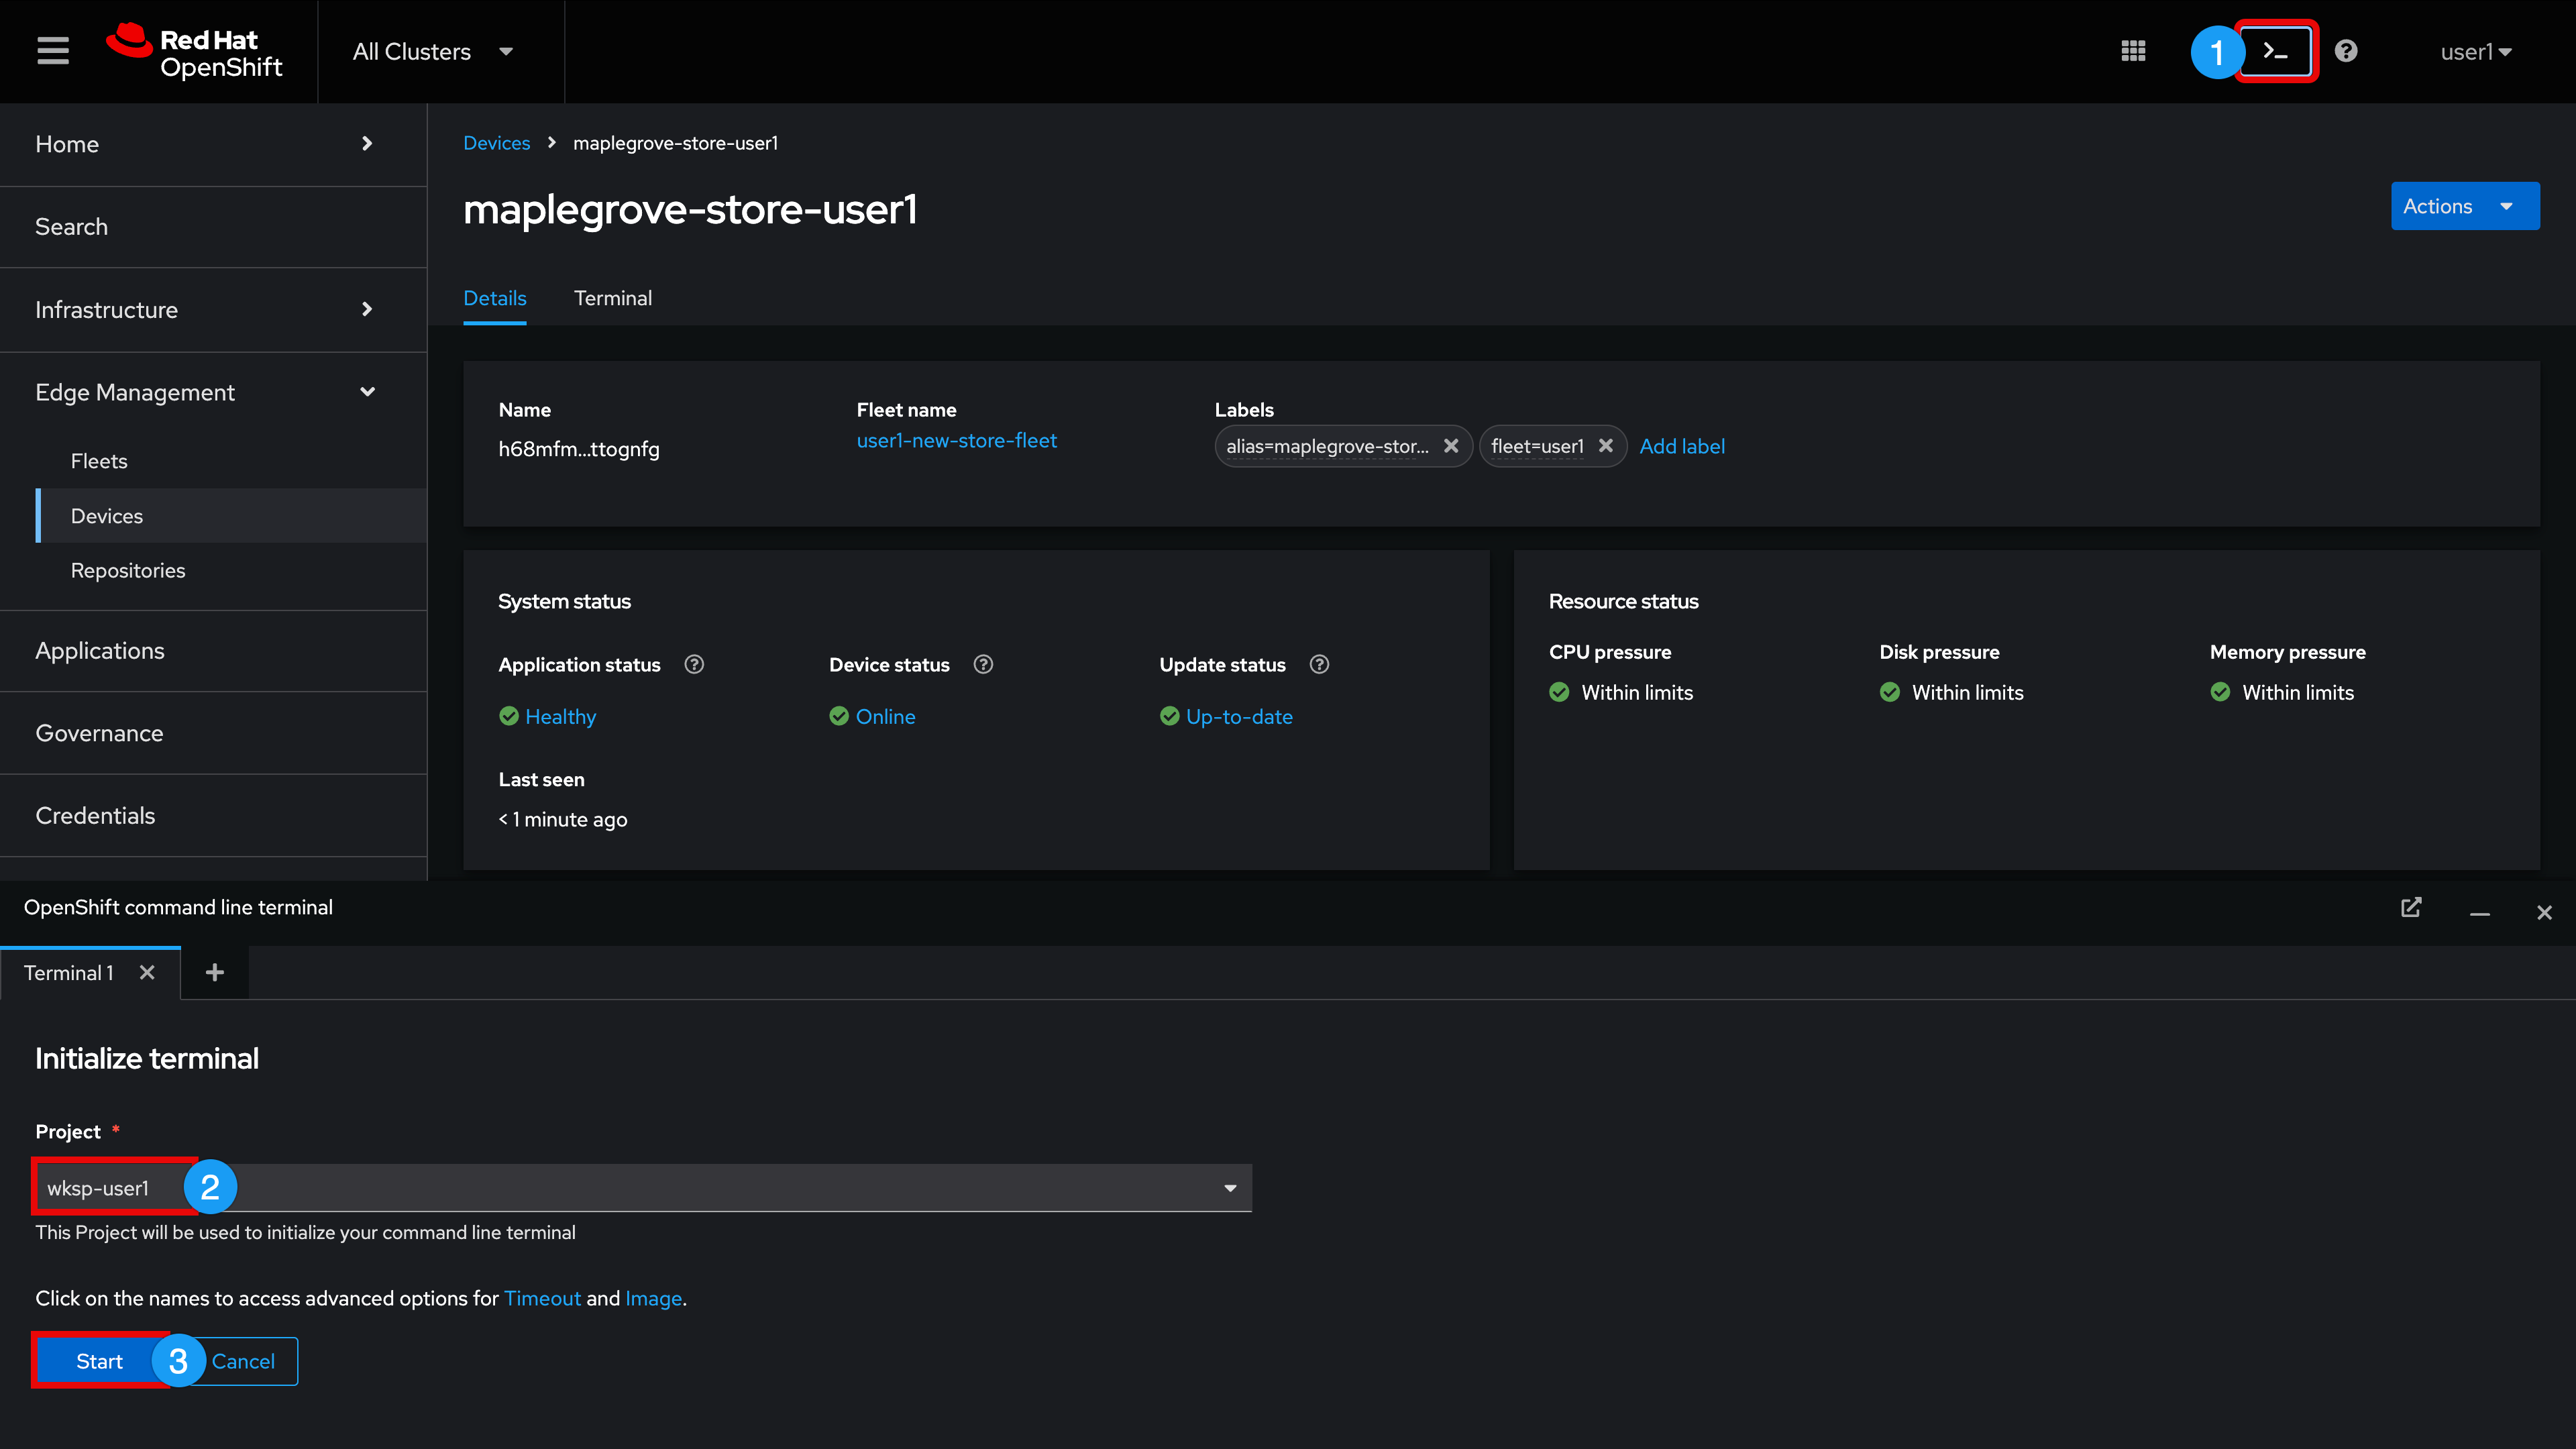
Click the OpenShift >_ (Terminal) icon in the upper-right hand corner
-
Set Project is set to: wksp-{user} (Note: You may need to scroll down to select)
-
Click Start
| The wksp-user in this screenshot may not match your user ID |
-
Give yourself some more screen real estate by clicking the Open terminal in new tab icon
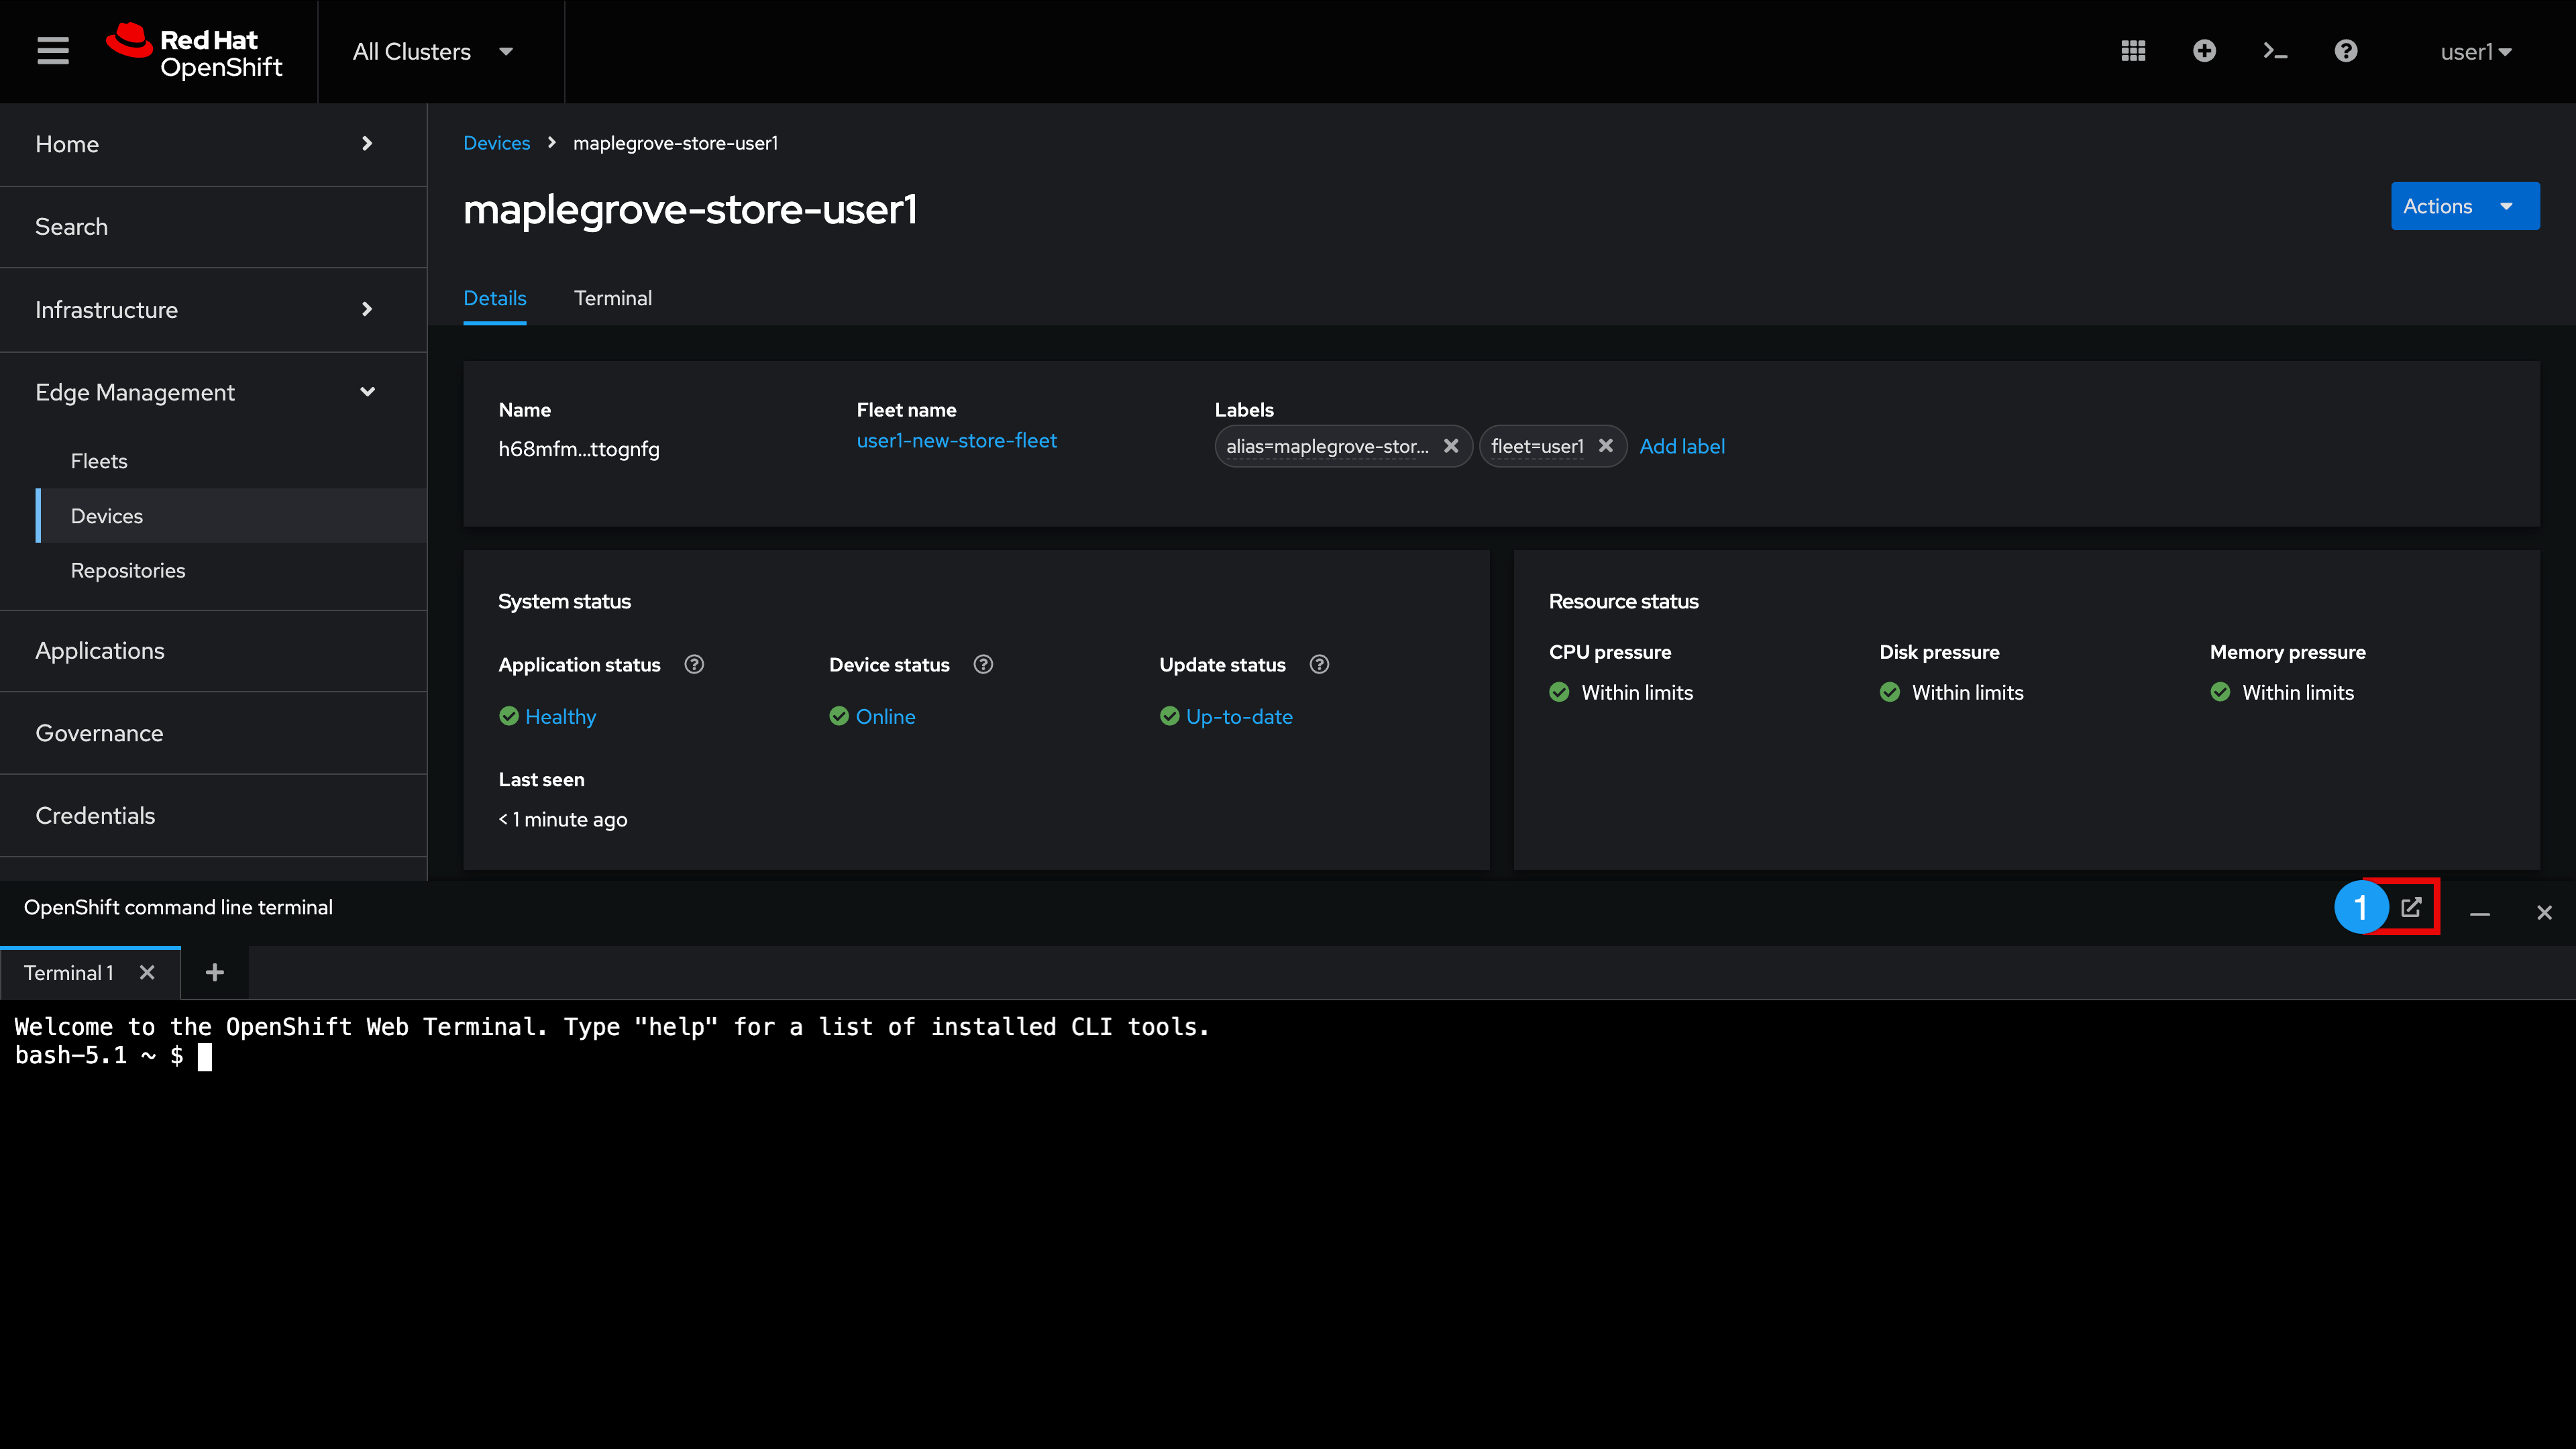
We are now going to authenticate against the Edge Manager service and issue several CLI commands
-
Authenticate to the Edge Manager service via CLI
flightctl login https://api.apps.cluster-my-guid.dynamic.redhatworkshops.io --username {user} --password {password} --insecure-skip-tls-verifySample OutputLogin successful. -
Examine the commands available
flightctlSample Outputflightctl controls the Flight Control fleet management service. Usage: flightctl [flags] [options] flightctl [command] Available Commands: apply Apply a configuration to a resource by file name or stdin. approve Approve a certificate signing or enrollment request. certificate Request a new certificate for a device with 'certificate request' completion Generate autocompletion script console Connect a console to the remote device through the server. csr-generate Generate a CSR resource config .yaml based on a .csr file and optional additional parameters decommission Decommission a device. delete Delete resources by resources or owner. deny Deny a certificate signing or enrollment request. enrollmentconfig Get enrollment config for devices get Display one or many resources. help Help about any command login Login to flight control version Print flightctl version information. Flags: -h, --help help for flightctl Use "flightctl [command] --help" for more information about a command. -
Examine versioning information
flightctl versionSample Outputflightctl CLI version: v0.5.1 flightctl service version: v0.5.1 -
Retrieve a list of devices
flightctl get devicesSample Output (your list may vary)NAME ALIAS OWNER SYSTEM UPDATED APPLICATIONS LAST SEEN 93og3n5l2n5pv3muj7oh3aut8rhn3ka1cvvhl6qo8nunihr69sng nc-raleigh-store-01 Fleet/point-of-sale-prod Online UpToDate Healthy 8 seconds ago 9sb2f8o7bko0q27tusl2c2kkegm5o90f44ej4rj0msb0pjh60m00 ca-paloalto-store-01 Fleet/point-of-sale-prod Online UpToDate Healthy 9 seconds ago h68mfmg1b63ebv278rr1no5egdcvlmjbsbe4ftc8bit6vttognfg maplegrove-store-user1 Fleet/user1-new-store-fleet Online UpToDate Healthy 9 seconds ago qgmnbi04co3lc0f3pkko281km71vv4e60vnserde63cb73jhdub0 ca-torrance-store-01 Fleet/point-of-sale-prod Online UpToDate Healthy 8 seconds ago v4uh4tbravm7fefgiqjm1prra3sfh1dgrn8uh70fjj8i9m13jo30 nc-charlotte-store-01 Fleet/point-of-sale-prod Online UpToDate Healthy 3 seconds ago
We are now going to grep for your specific hometown-store-{user} device
-
Replace 'maplegrove' with your home town name
flightctl get device | grep maplegroveSample OutputNAME ALIAS OWNER SYSTEM UPDATED APPLICATIONS LAST SEEN h68mfmg1b63ebv278rr1no5egdcvlmjbsbe4ftc8bit6vttognfg maplegrove-store-user1 Fleet/user1-new-store-fleet Online UpToDate Healthy 4 seconds ago
Double-click to select the entire ID (under the Name Column) for your device, right-click and select copy
-
Set a console variable equal to your device ID (right-click and paste your device UID value)
mydeviceid=right-click & paste your-device-id
We can retrieve your device template specifications and status by piping output to yaml (or json)
-
Pipe to yaml and examine the output
flightctl get device/$mydeviceid -o yamlSample Output (Abridged)apiVersion: flightctl.io/v1alpha1 kind: Device metadata: annotations: device-controller/renderedVersion: "13" fleet-controller/renderedTemplateVersion: "2025-04-14T21:52:26.688988475Z" fleet-controller/templateVersion: "2025-04-14T21:52:26.688988475Z" creationTimestamp: "2025-04-14T21:14:11.706159Z" generation: 3 labels: alias: maplegrove-store-user1 fleet: user1 name: h68mfmg1b63ebv278rr1no5egdcvlmjbsbe4ftc8bit6vttognfg owner: Fleet/user1-new-store-fleet resourceVersion: "1320" spec: applications: - envVars: {} image: quay.io/kenosborn/podman-compose:v2 name: new-pos-app config: [] os: image: image-registry.openshift-image-registry.svc:5000/student-services/rhel9-bootc-edgemanager-pos-prod:1.0.0 status: applications: - name: new-pos-app ready: 1/1 restarts: 0 status: Running
| The Edge Manager API is similar to a Kubernetes API in that we can utilize yaml to create/update/remove Edge Manager devices and fleets by using 'flightctl apply -f file.yaml' commands. |
For our last CLI example, let’s connect to a console session within your actual hometown-store-{user} device
-
To initiate a console session, utilize the following command
flightctl console device/$mydeviceidSample OutputConnecting to device h68mfmg1b63ebv278rr1no5egdcvlmjbsbe4ftc8bit6vttognfg Use CTRL+B 3 times to exit console
| It can take a few moments for your Terminal session to establish (thank you for your patience) |
You can now interact directly with your device via its console!
-
Examine the containers running on this device (the output should look familiar to you)
podman ps -aSample Output (your list may vary)CONTAINER ID IMAGE COMMAND CREATED STATUS PORTS NAMES 111b1391a311 localhost/podman-pause:5.2.2-1737721907 3 hours ago Up 3 hours 47a0b459f7c9-service fd0157f0e2e1 localhost/podman-pause:5.2.2-1737721907 3 hours ago Up 3 hours 0.0.0.0:30000->8080/tcp 9ba794295fe8-infra c0f559b1dad4 quay.io/jswanson/pos-v1-prod:1.0.0 /usr/bin/run-http... 3 hours ago Up 3 hours 0.0.0.0:30000->8080/tcp, 8080/tcp, 8443/tcp point-of-sale-pos-prod 6ca9d626e4bb quay.io/kenosborn/edge-megastore-pos:v1 nginx -g daemon o... 2 hours ago Up 2 hours 0.0.0.0:8080->8080/tcp, 80/tcp, 8080/tcp new-pos-app-173783_edge-megastore-pos_1
Exit the device remote console session by typing exit or by holding down your CTRL key and pressing the B key three times
Edge Manager Device Monitoring and Decommission
Let’s explore the device monitoring that is available for our new store device
-
Expand and select All Clusters
-
Expand Edge Management
-
Select Devices
-
Change the Devices section search filter from Labels and fleets to Name and alias (You may need to scroll down to the Devices section if there is a list of Devices pending approval present at the top of this window)
-
Enter the hometown name you chose for your device to filter the device list
-
Click YourHomeTown-store-{user} device
We have previously seen (in the System status pane) how Device status and Update status change depending on our device state (rebooting, online, updating, up-to-date, etc.)
-
In the System status pane, click the (?) tooltips for each of the status items and review their contents
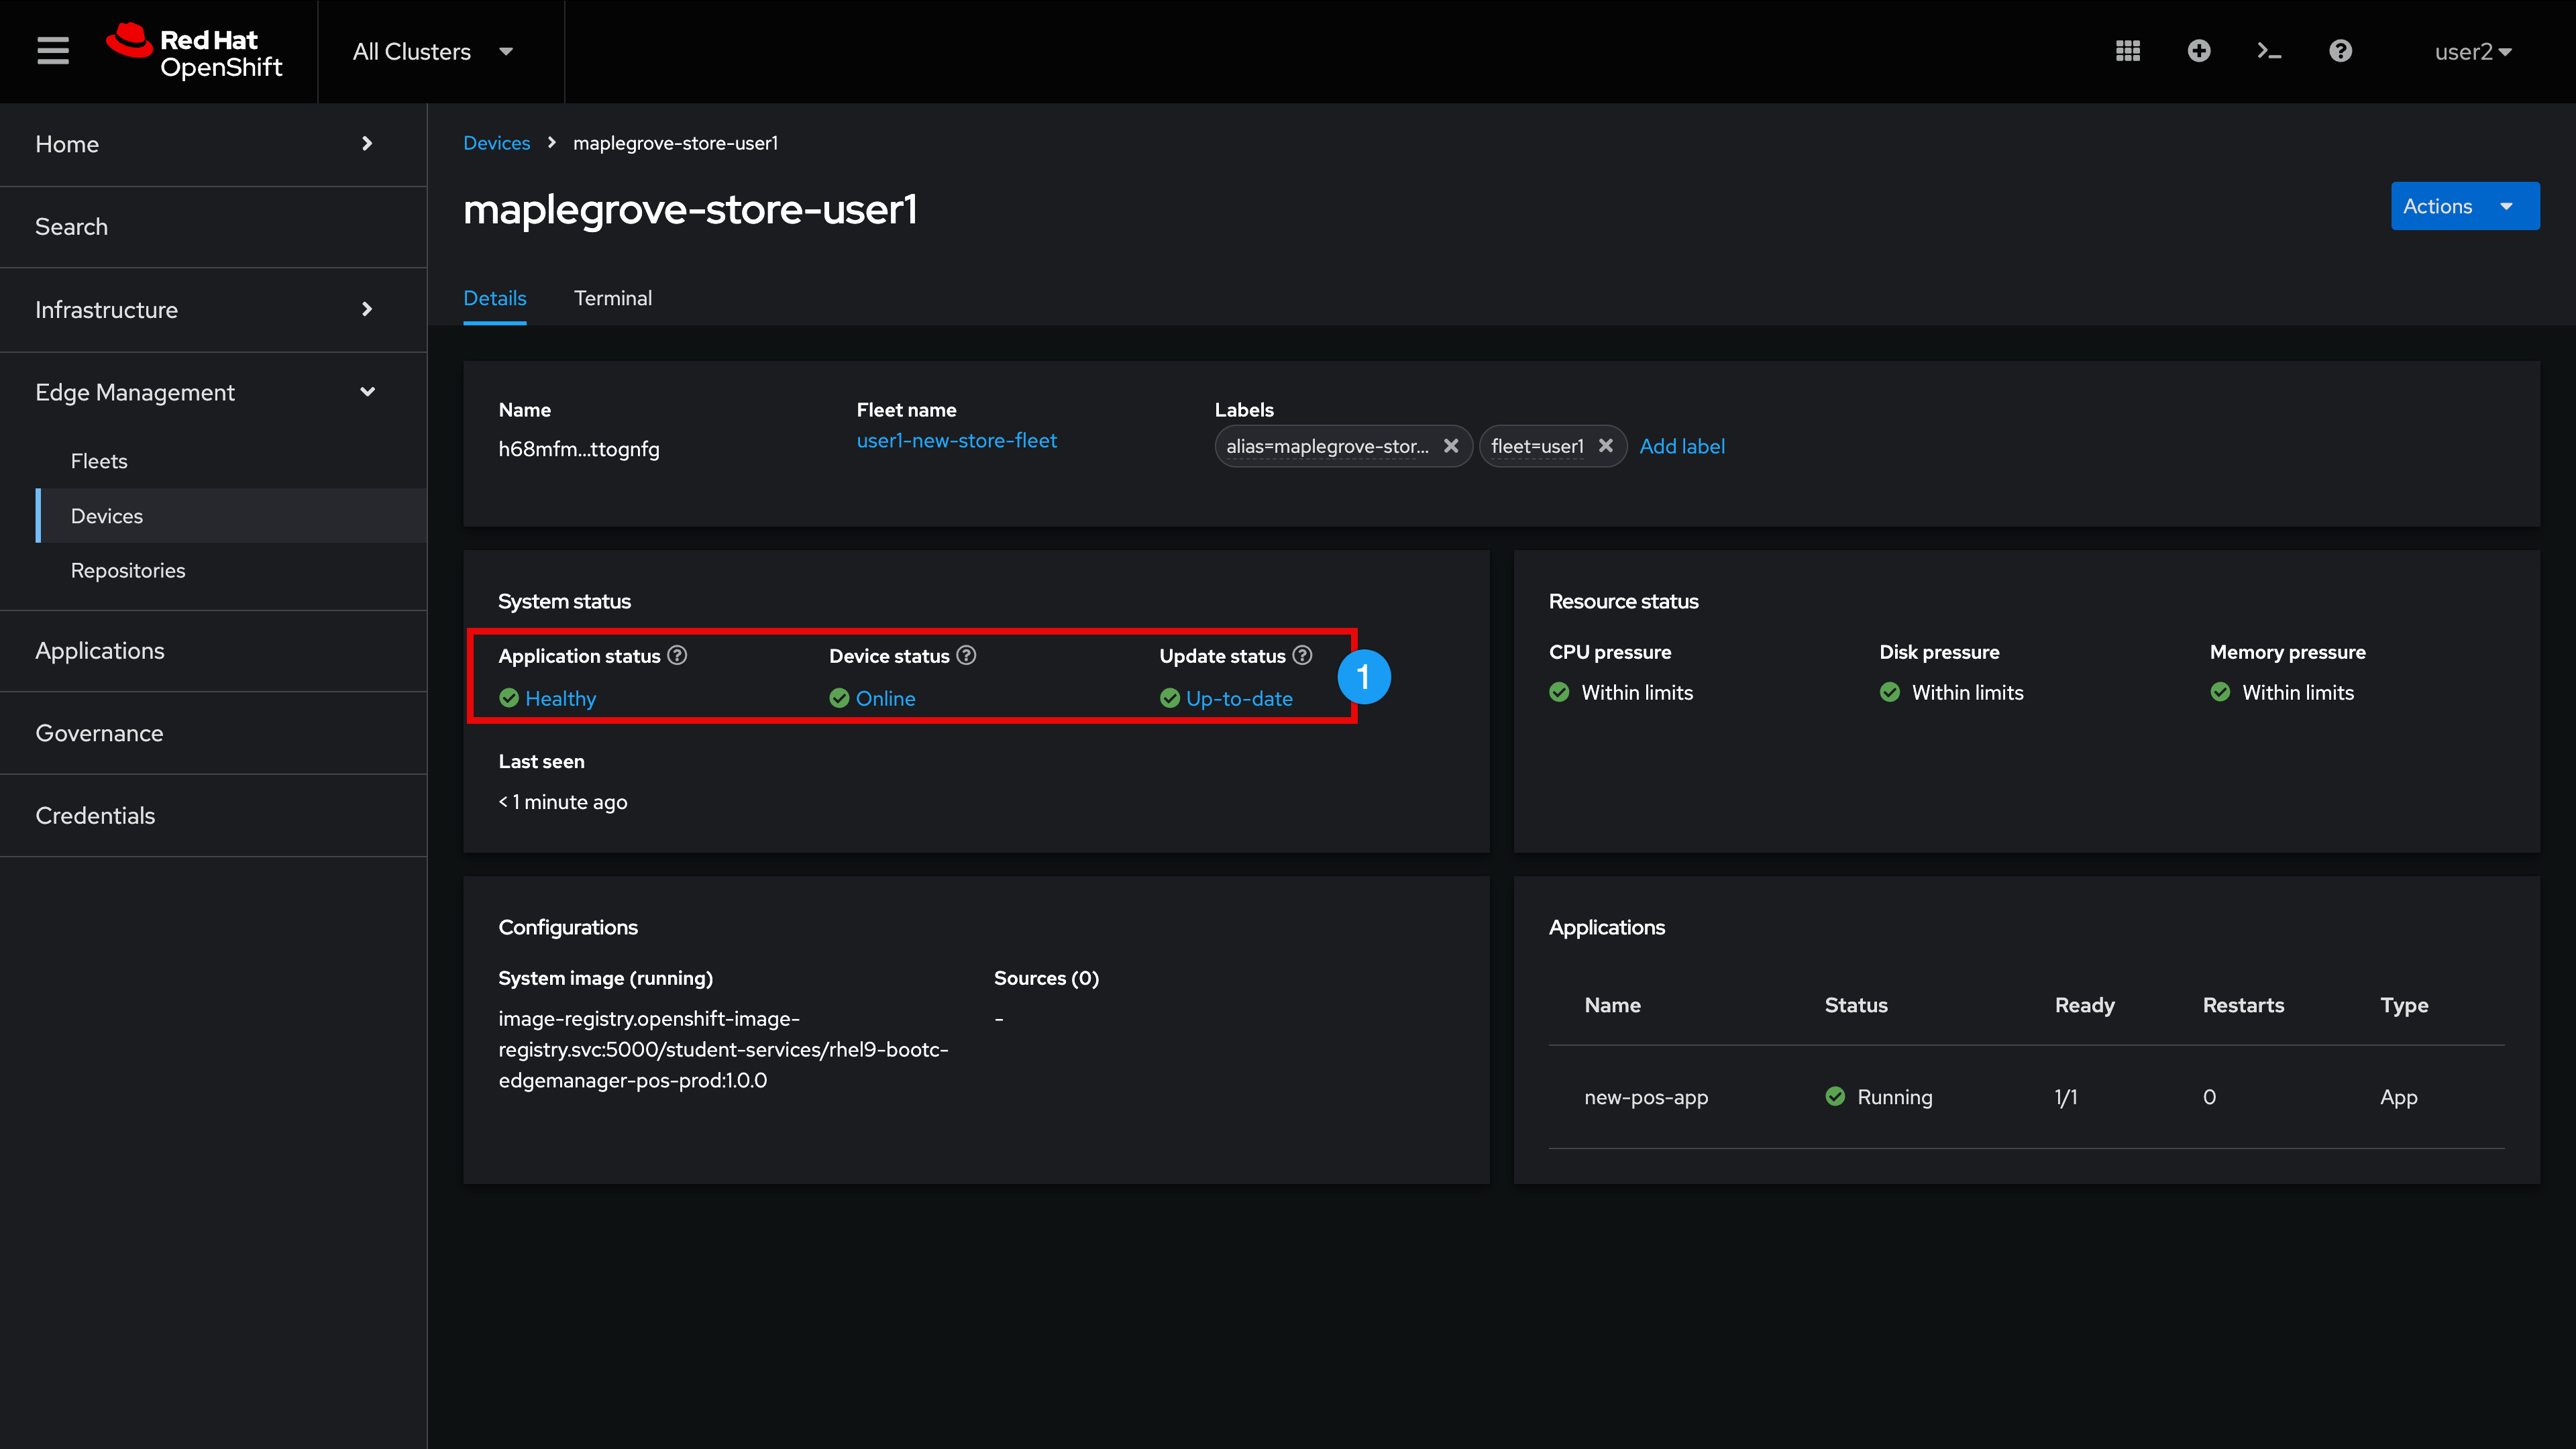
Edge Manager also surfaces Application Status in the Device Applications pane.
Let’s non-gracefully kill our new-pos-app container app and examine status
-
Click Terminal
-
Copy/Paste this command to kill our new-pos-app container
podman kill -s 9 new-pos-app-173783_edge-megastore-pos_1Sample Outputnew-pos-app-173783_edge-megastore-pos_1 -
List out the containers and note that the new-pos-app is in an 'Exited' state (via the Status column)
podman ps -aSample OutputCONTAINER ID IMAGE COMMAND CREATED STATUS PORTS NAMES 111b1391a311 localhost/podman-pause:5.2.2-1737721907 15 hours ago Up 15 hours 47a0b459f7c9-service fd0157f0e2e1 localhost/podman-pause:5.2.2-1737721907 15 hours ago Up 15 hours 0.0.0.0:30000->8080/tcp 9ba794295fe8-infra c0f559b1dad4 quay.io/jswanson/pos-v1-prod:1.0.0 /usr/bin/run-http... 15 hours ago Up 15 hours 0.0.0.0:30000->8080/tcp, 8080/tcp, 8443/tcp point-of-sale-pos-prod 6ca9d626e4bb quay.io/kenosborn/edge-megastore-pos:v1 nginx -g daemon o... 15 hours ago Exited (137) About a minute ago 0.0.0.0:8080->8080/tcp, 80/tcp, 8080/tcp new-pos-app-173783_edge-megastore-pos_1 -
Click Details and note that Edge Manager is reporting '(!) Error' in both the System status and Applications pane
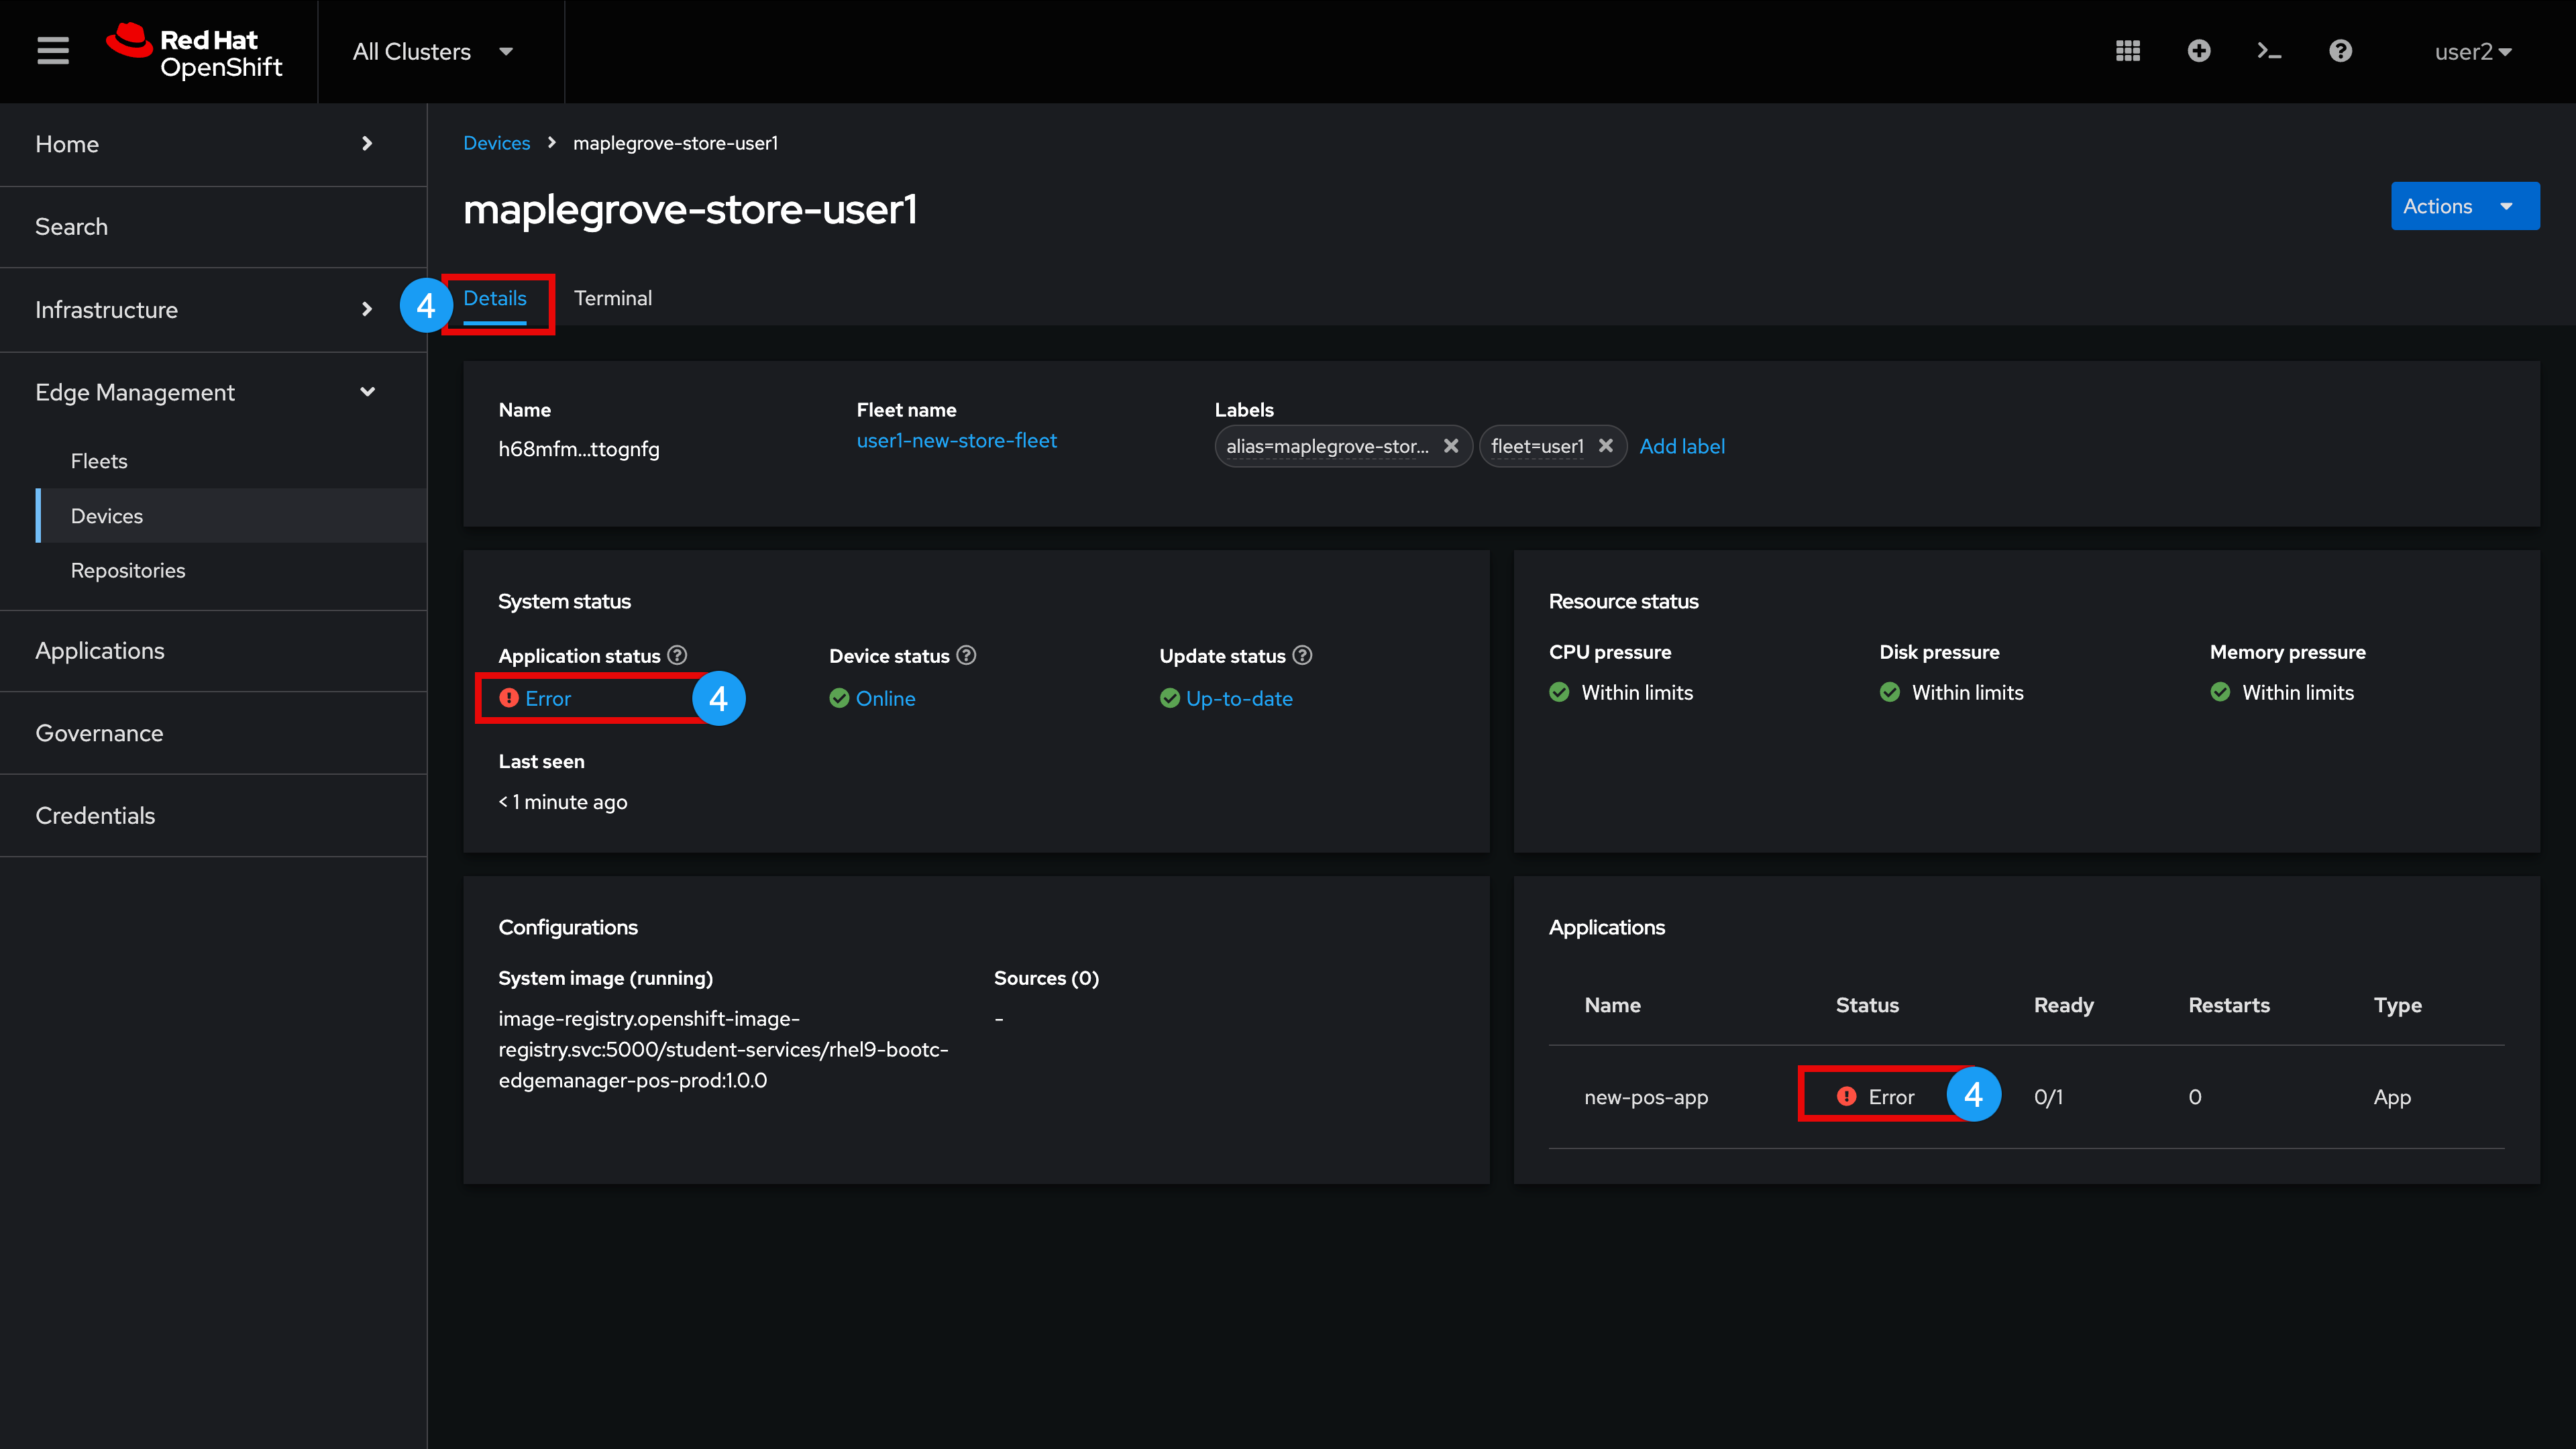
| This information is also rolled up holistically for all devices at both the Fleet level and overall Edge Manager level |
-
In the device Resource status pane, you can observe that Edge Manager is surfacing device CPU, Disk and Memory pressure status.
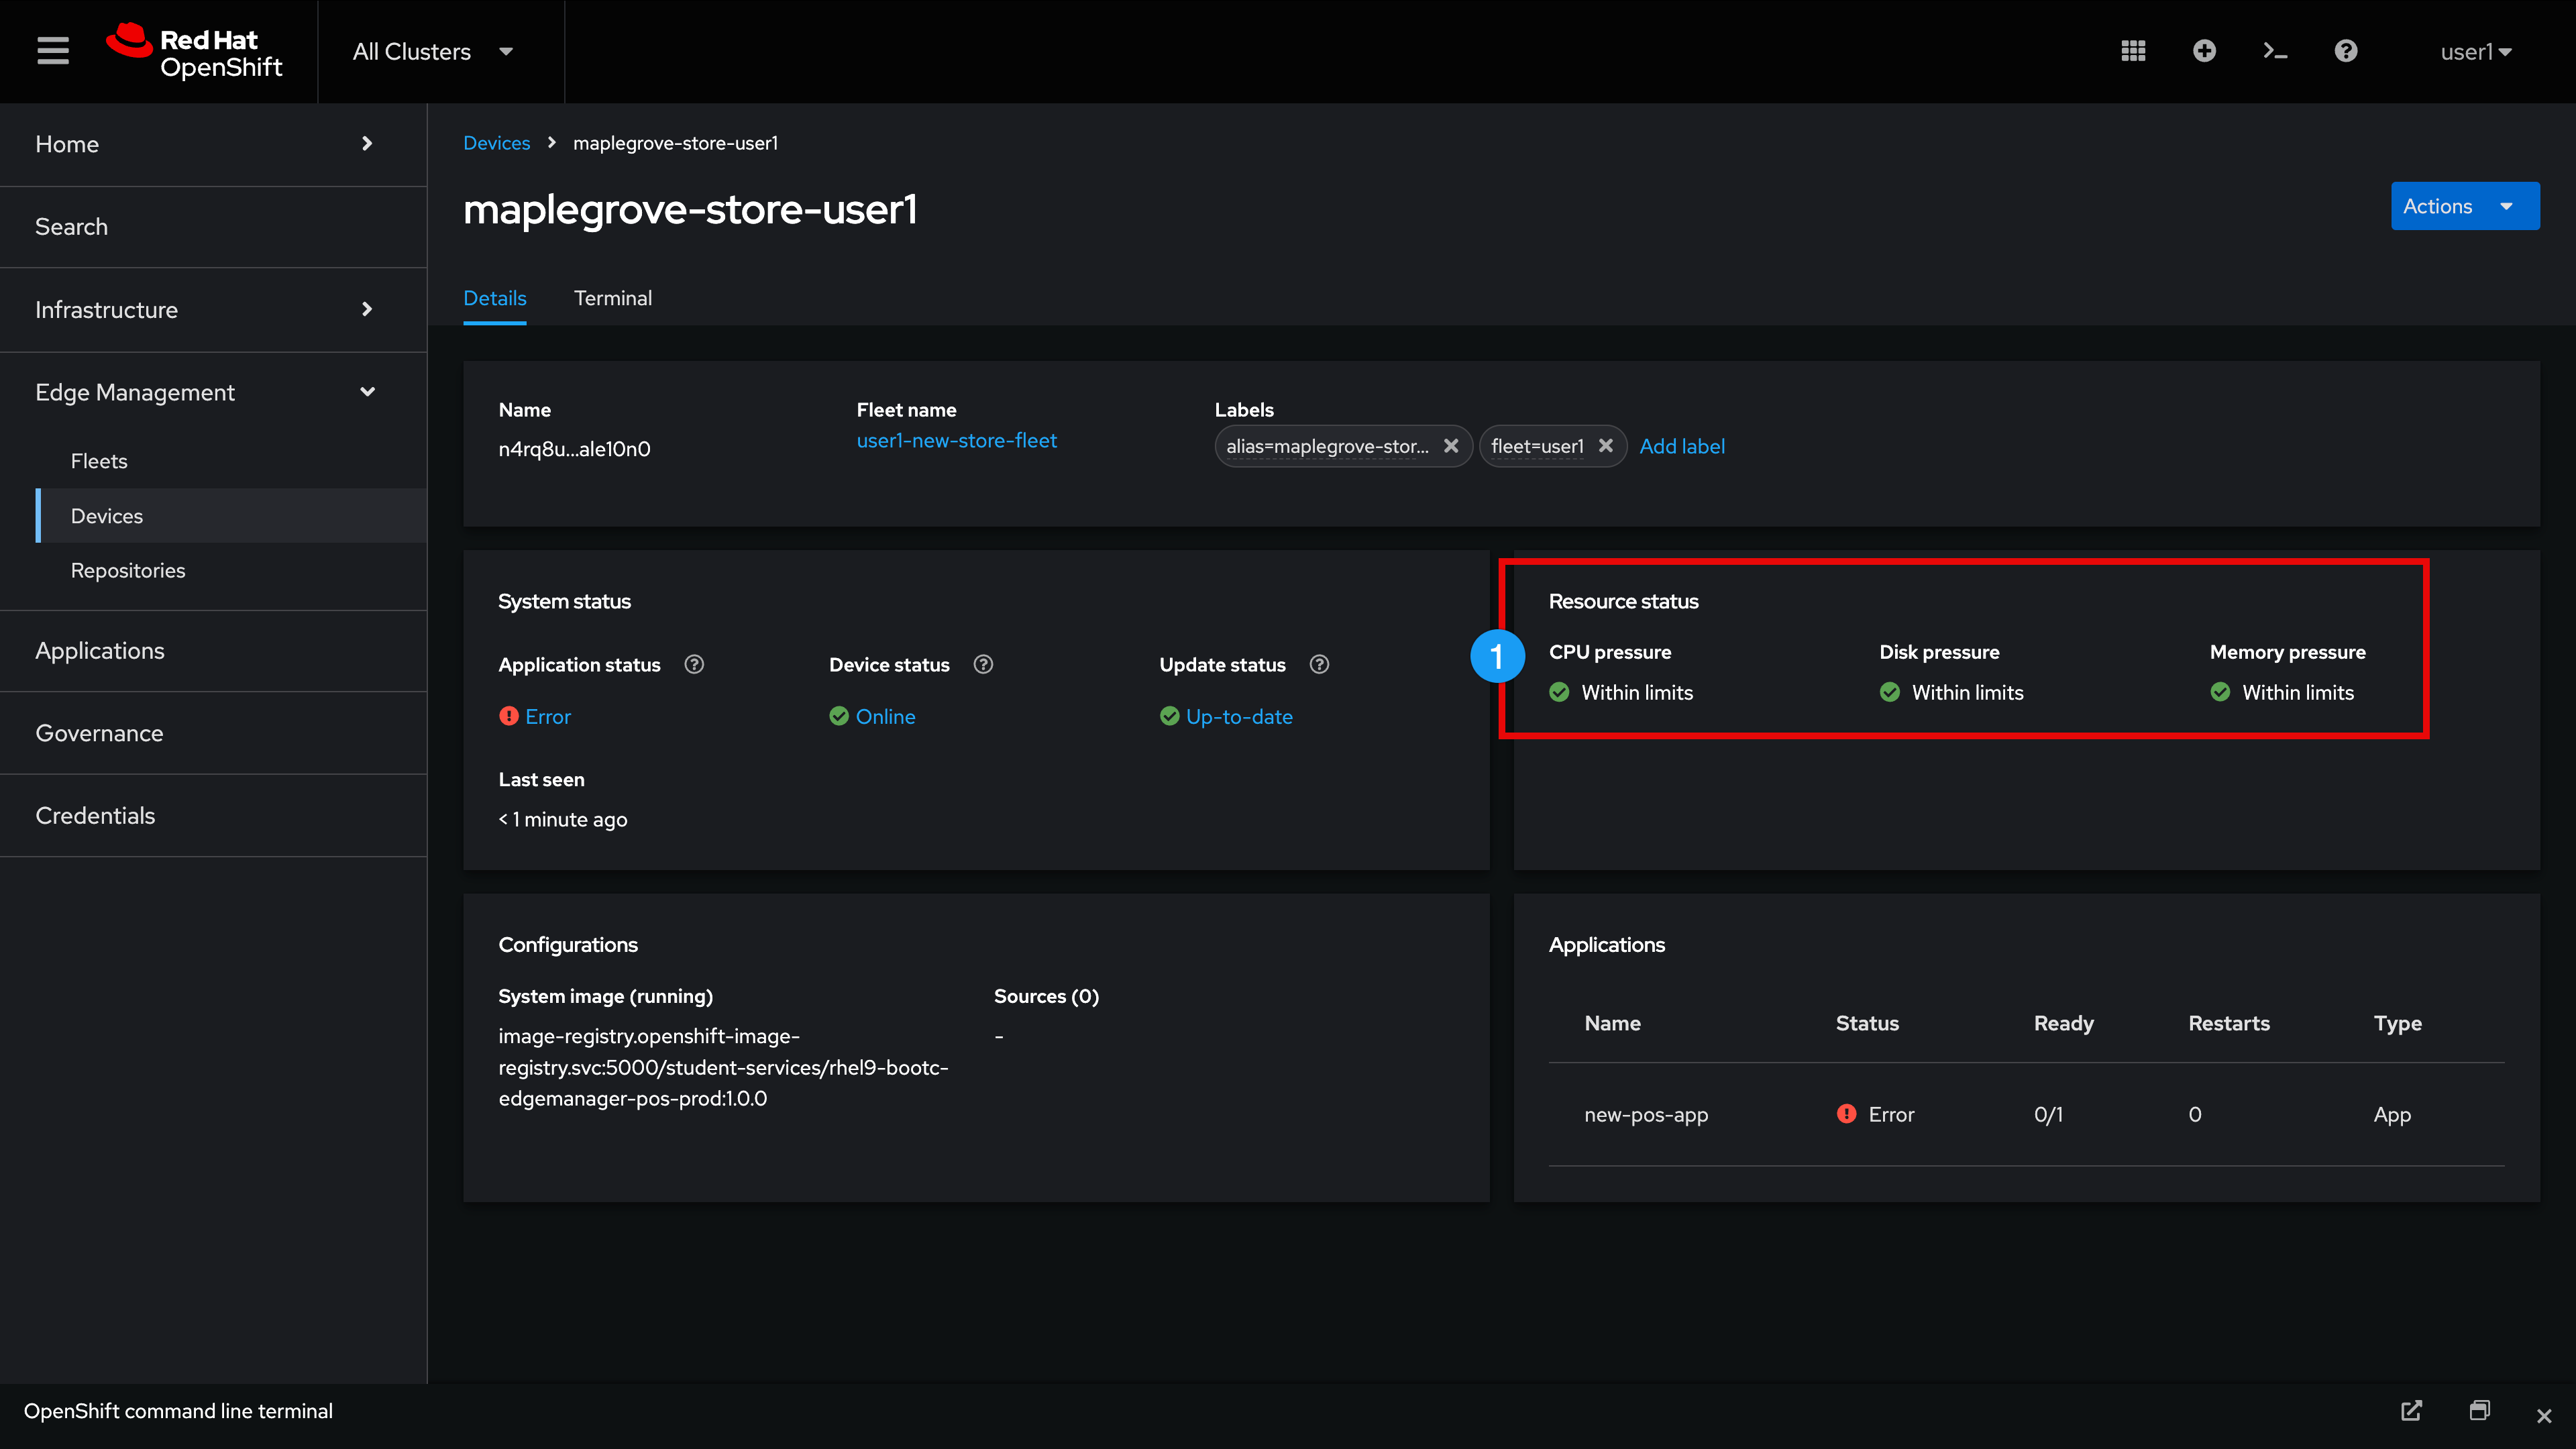
| In Edge Manager, users can customize device resource monitors and define alerts when the utilization crosses a defined threshold (for example, 'trigger a warning alert if the average disk utilization exceeds 75% for more than 30 minutes' and 'trigger a critical alert if disk utilization exceeds 90% for over 10 minutes with a sampling interval of 5 seconds."). |
Device Decommission
All things must come to an end. For our final lesson, we will bid farewell to our new store device by decommissioning it.
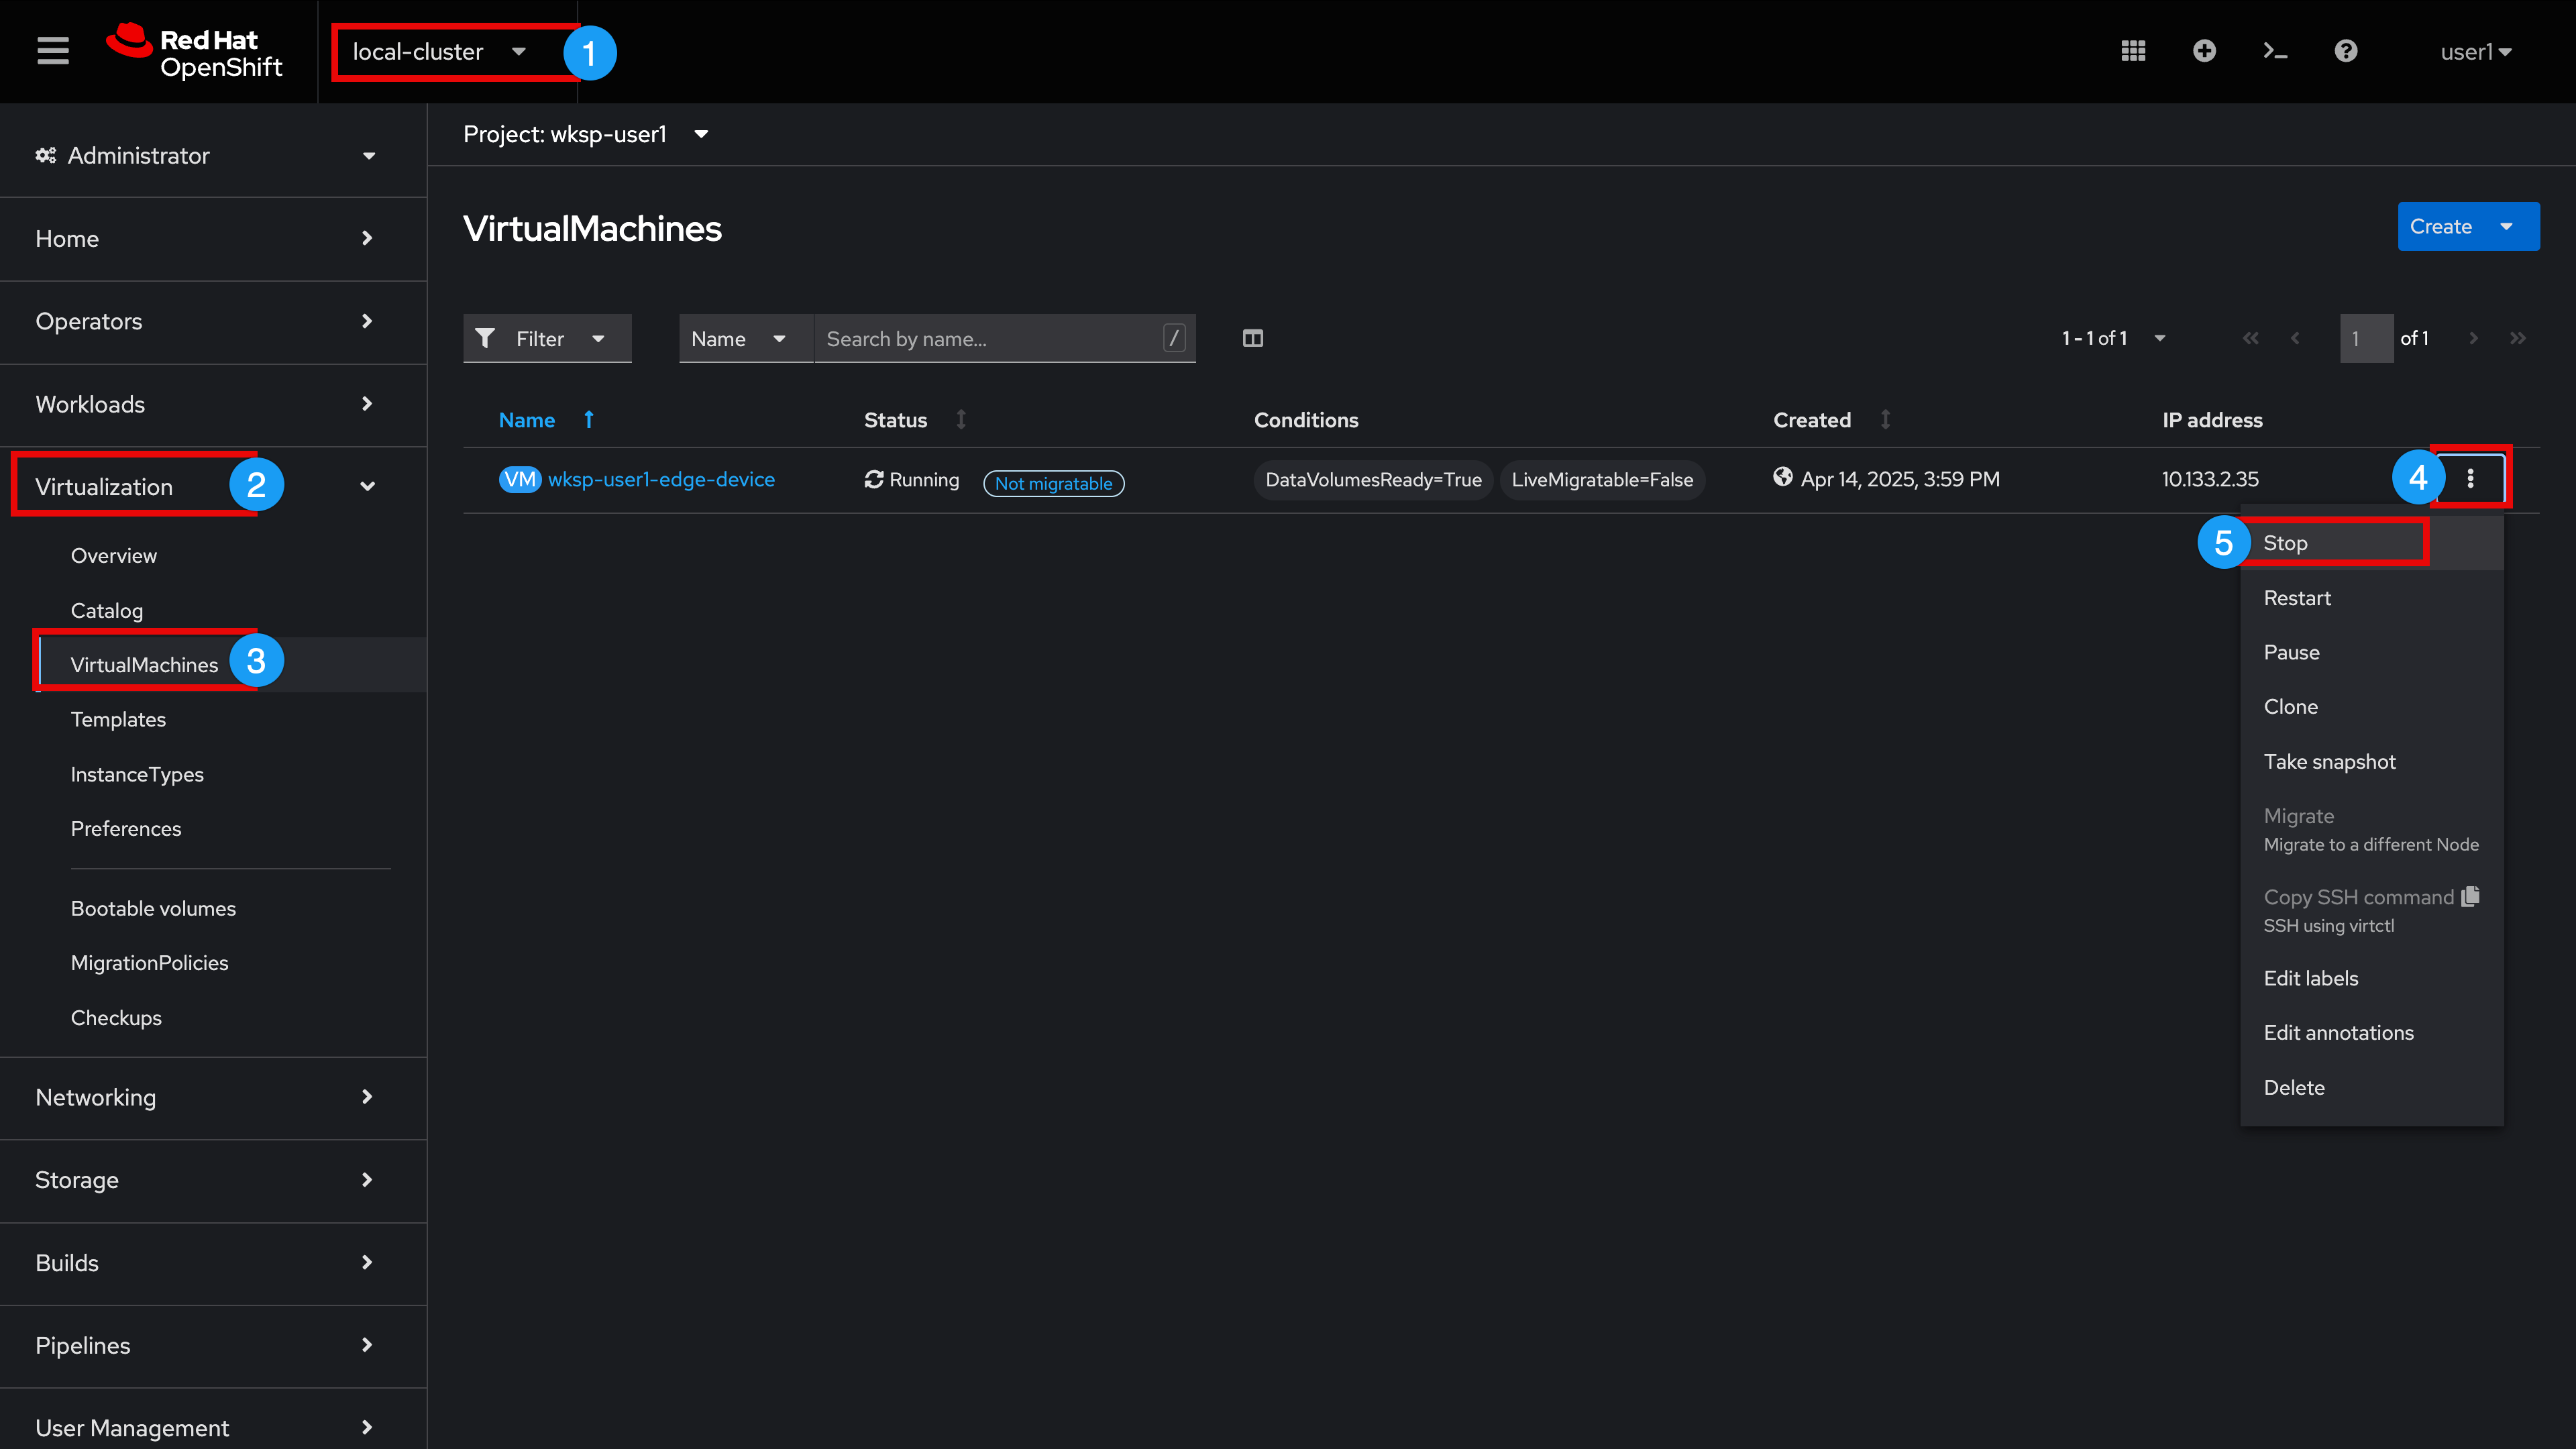
Stop your Edge Device Virtual Machine
-
Expand and select local-cluster
-
Expand Virtualization
-
Select VirtualMachines
-
Select vertical ellipses
-
Click stop
Return to your device within Edge Manager
-
Expand and select All Clusters
-
Expand Edge Management
-
Select Devices
-
Change the Devices section search filter from Labels and fleets to Name and alias (You may need to scroll down to the Devices section if there is a list of Devices pending approval present at the top of this window)
-
Enter the hometown name you chose for your device to filter the device list
-
Click YourHomeTown-store-{user} device
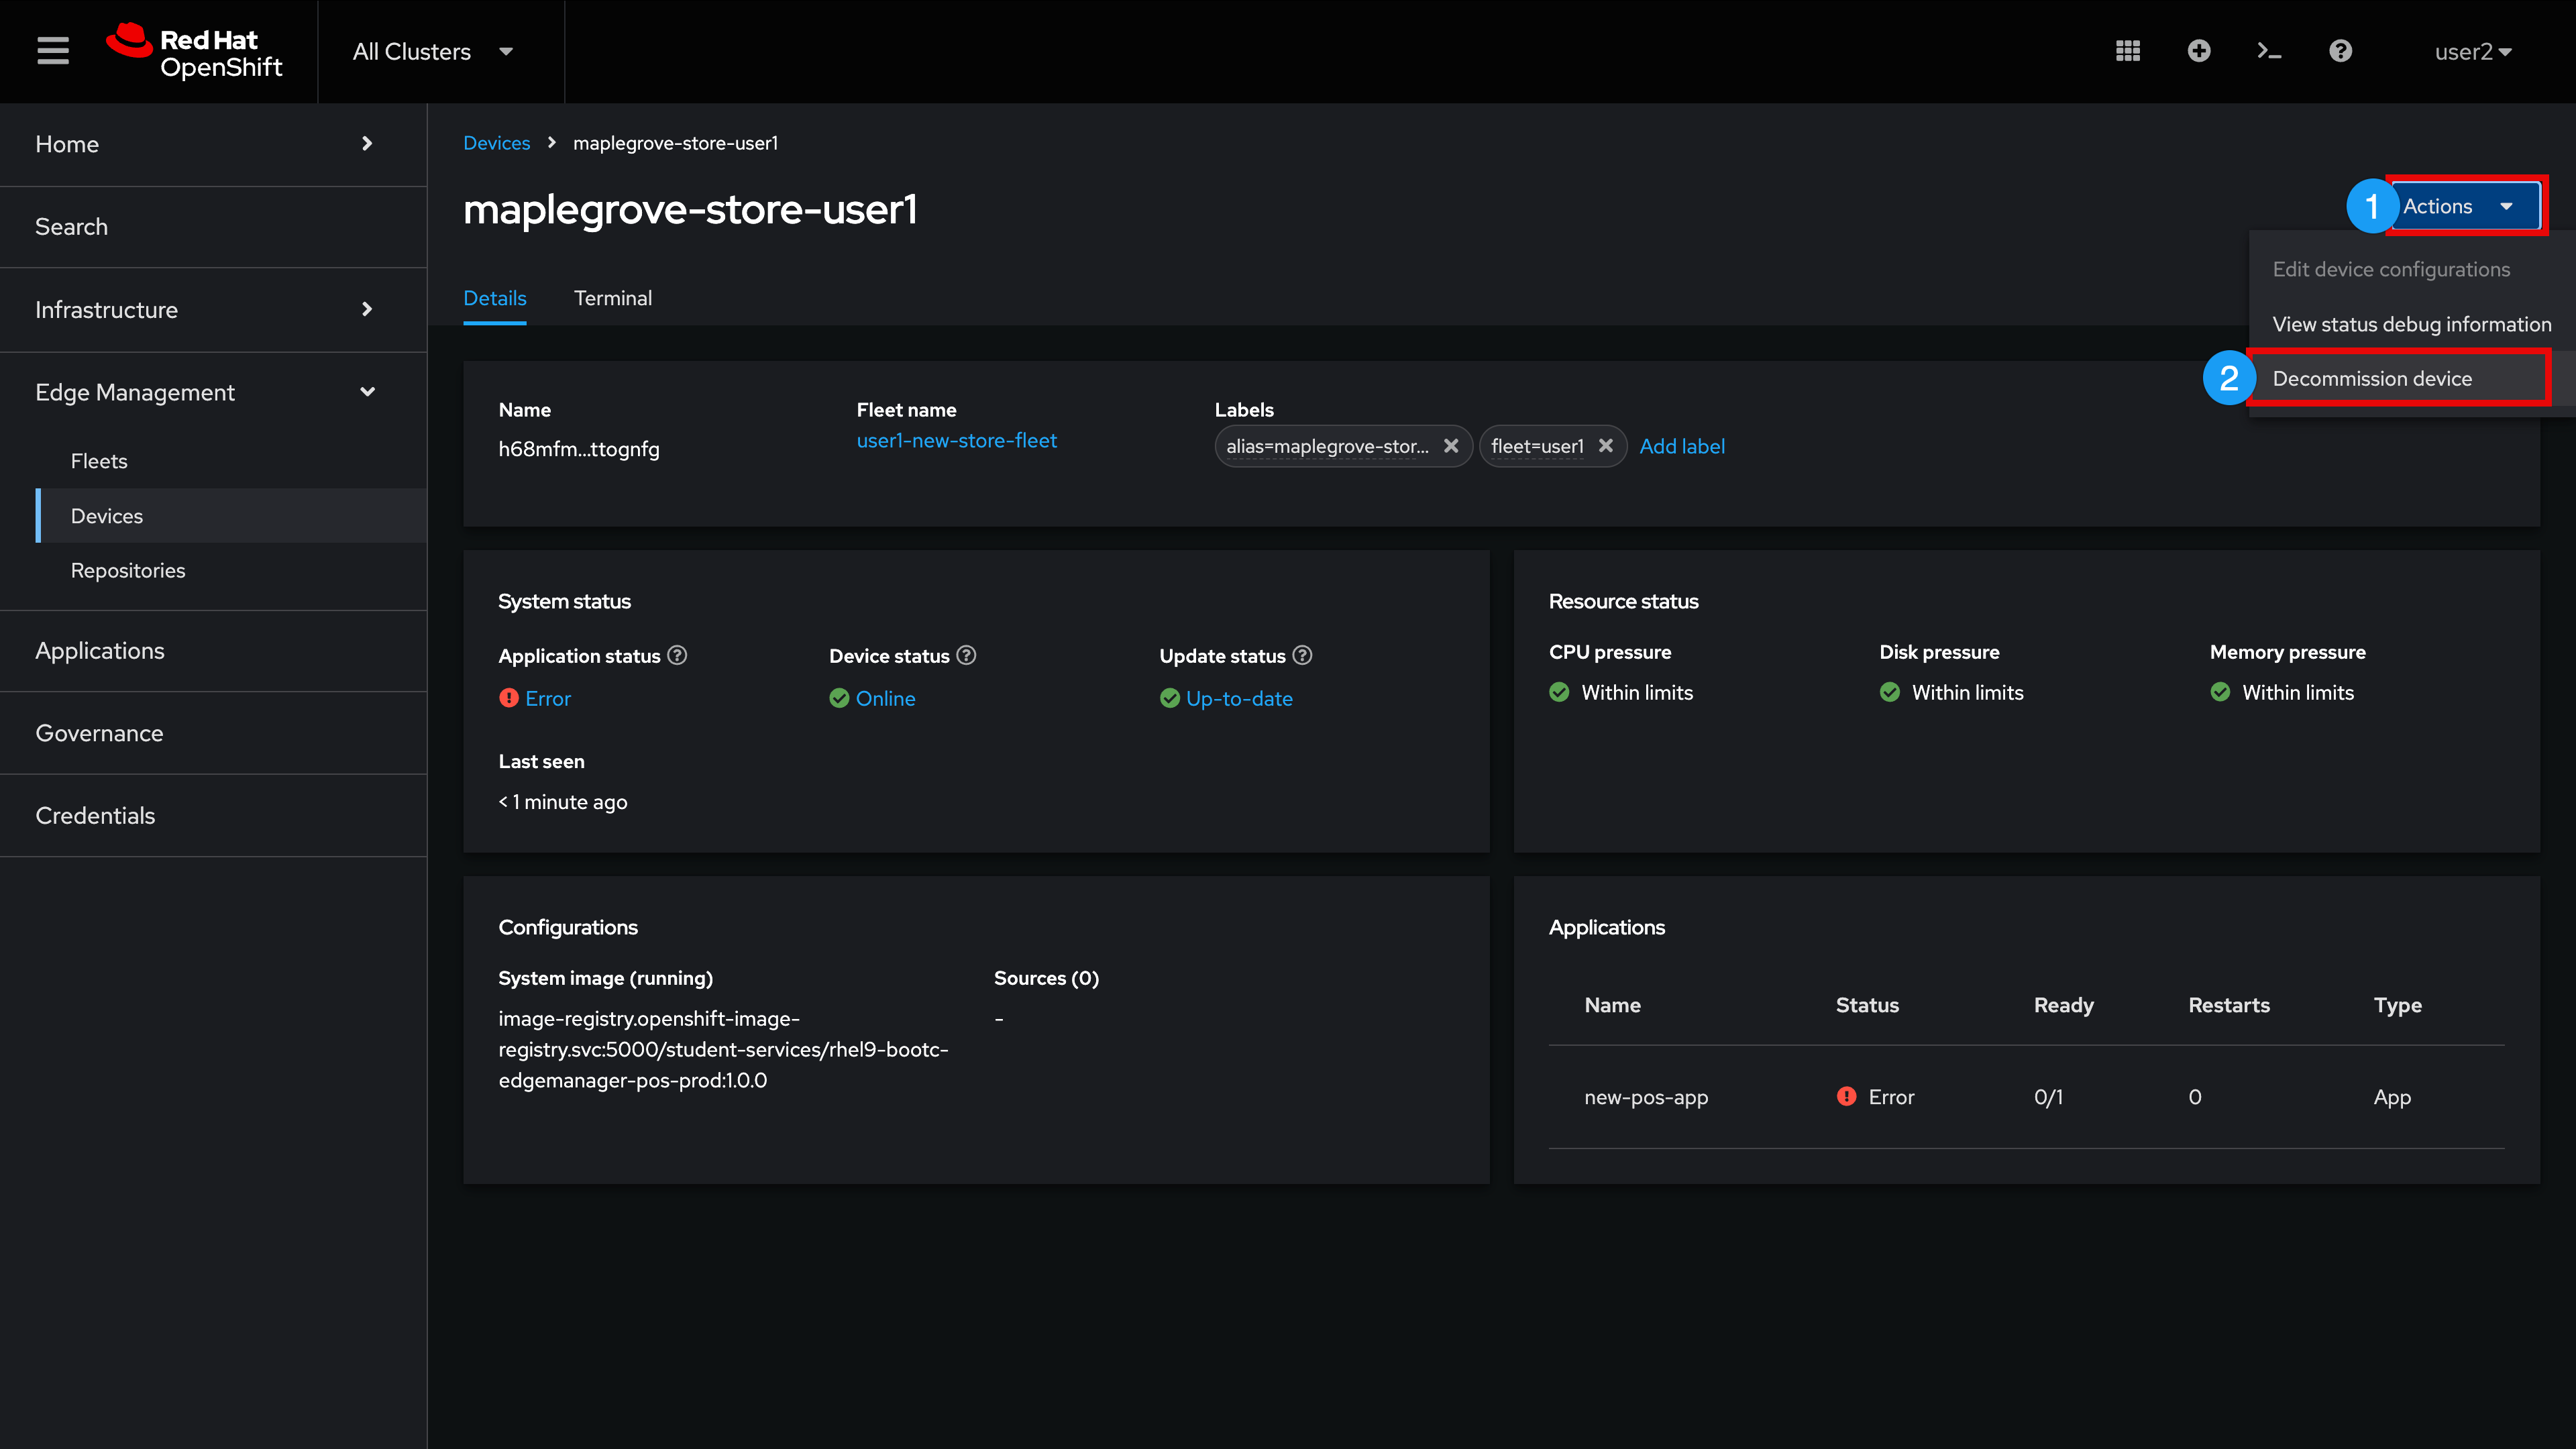
Decommission your device
-
Expand Actions
-
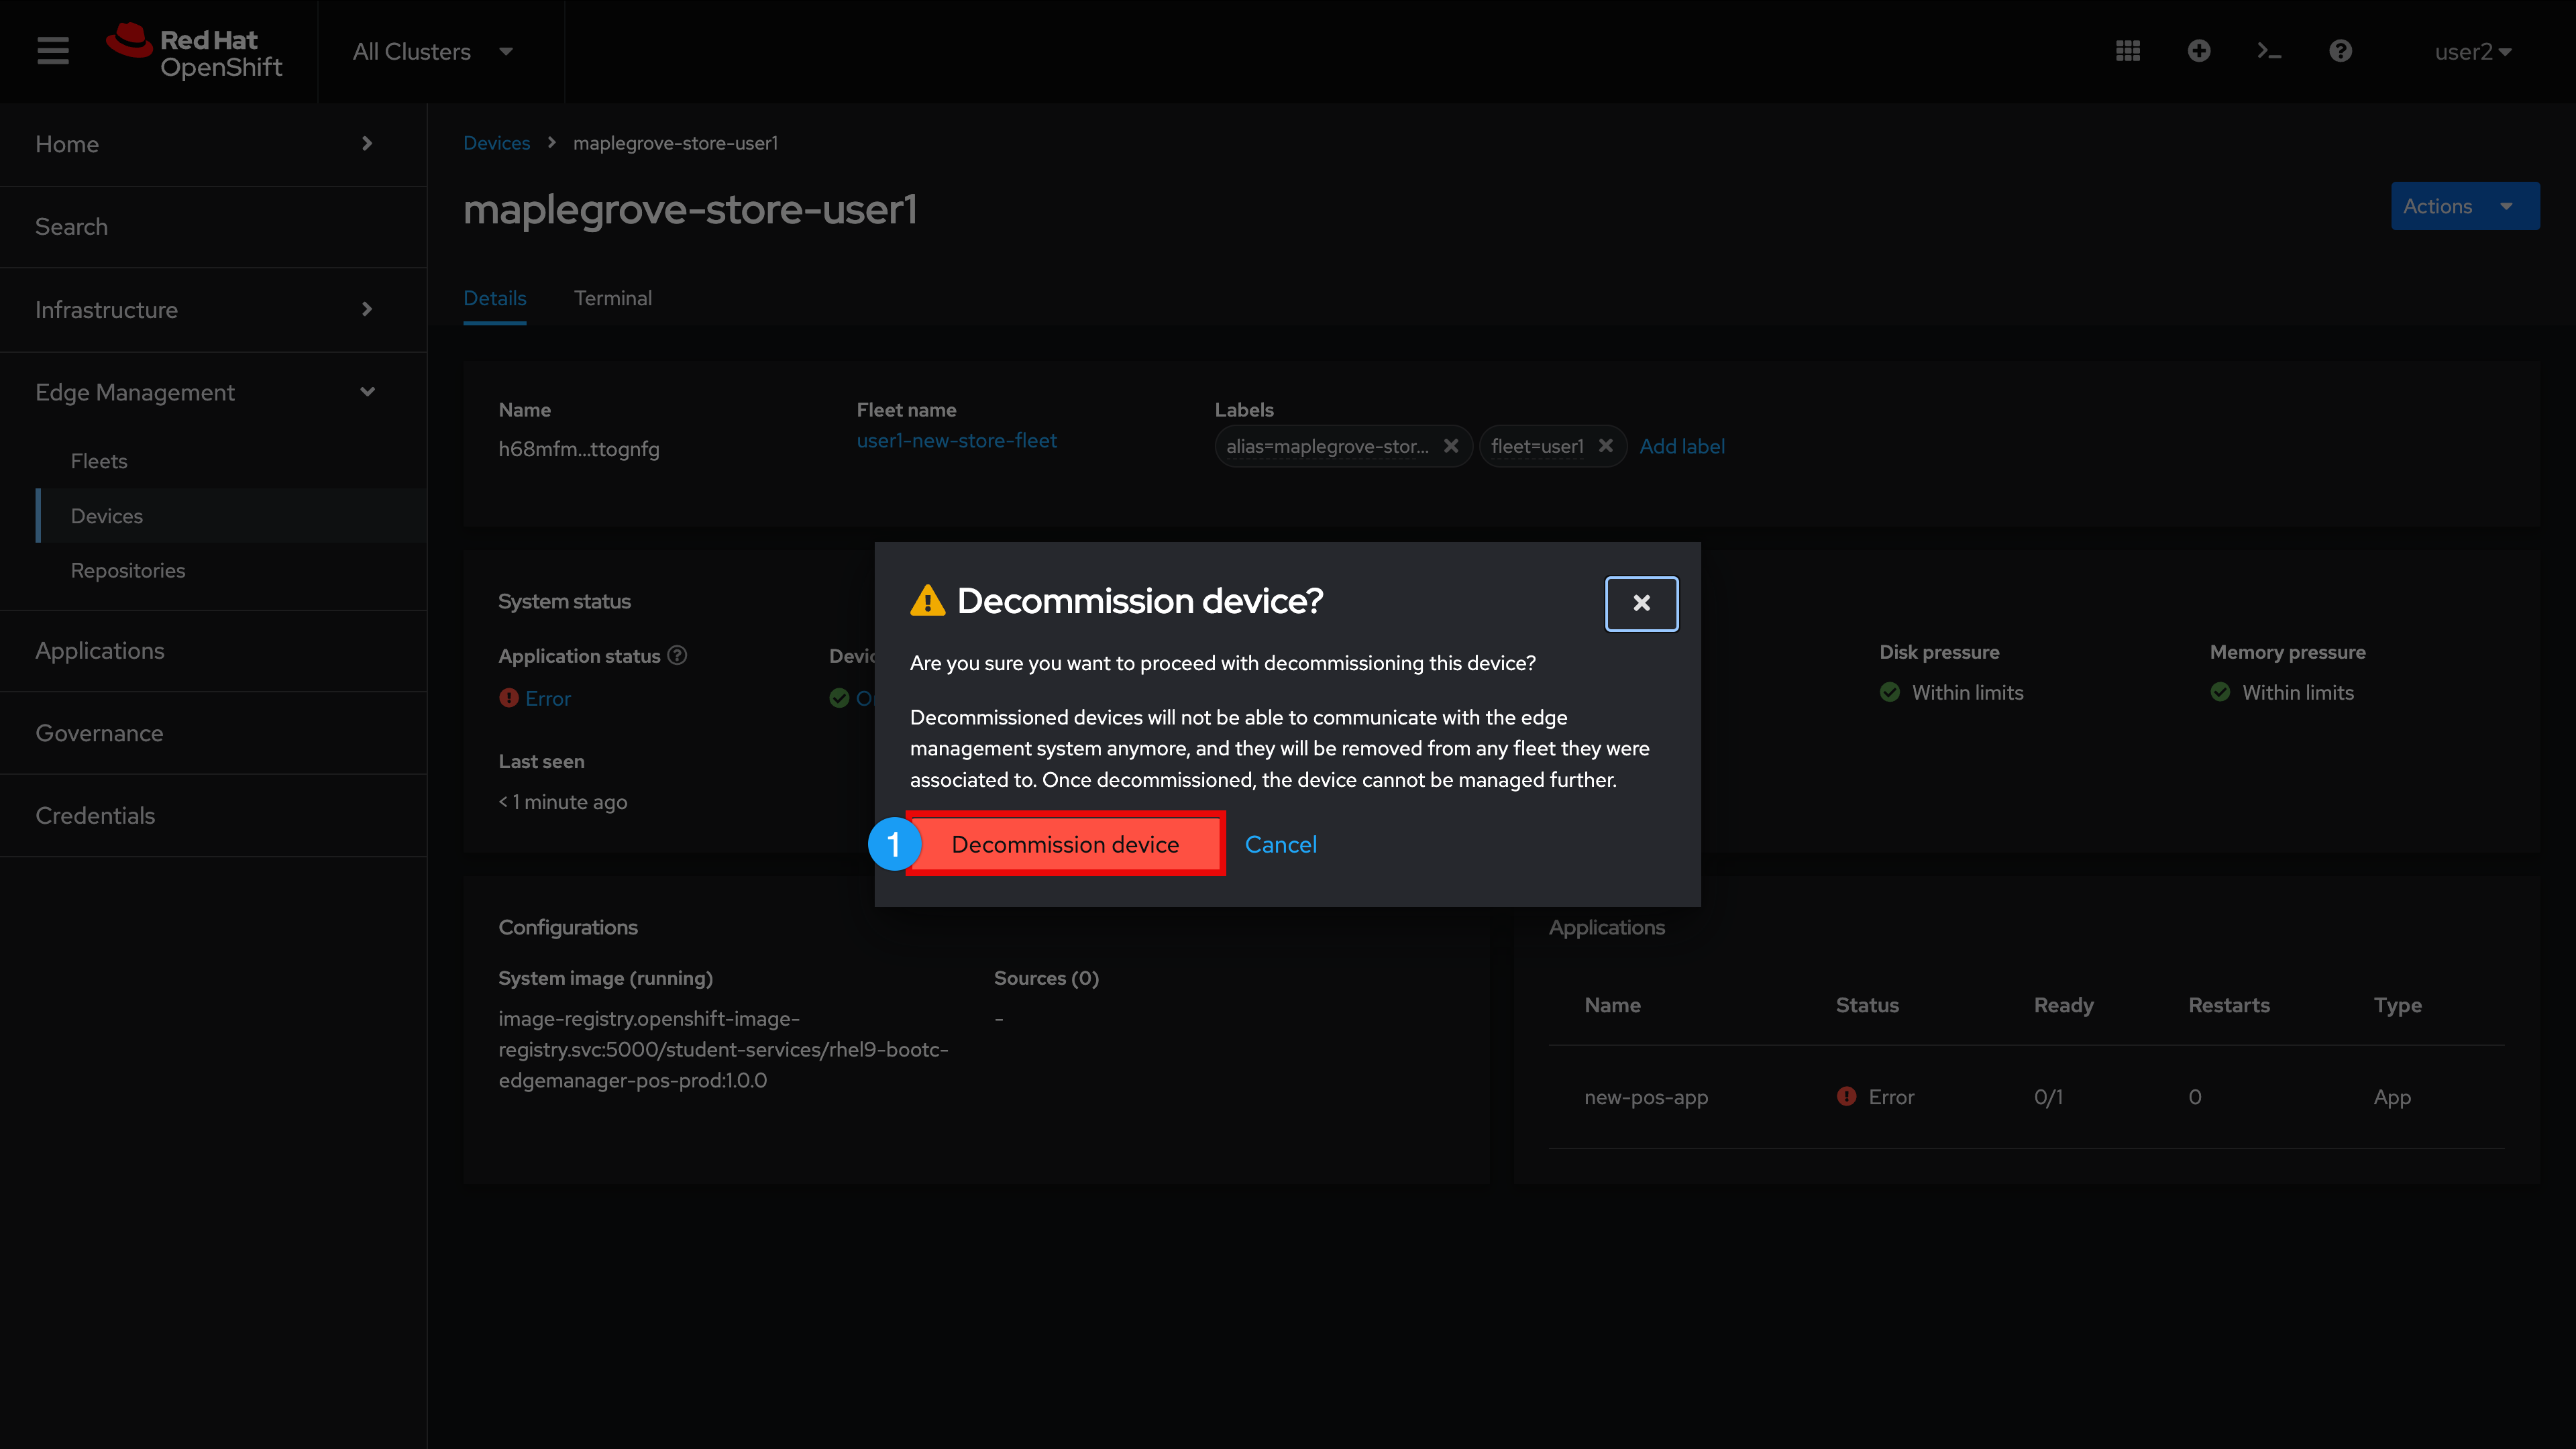
Select Decommission device
-
Click Decommission device
-
Set the Show only decommissioned devices toggle to on ((You may need to scroll down to the Devices section if there is a list of Devices pending approval present at the top of this window)
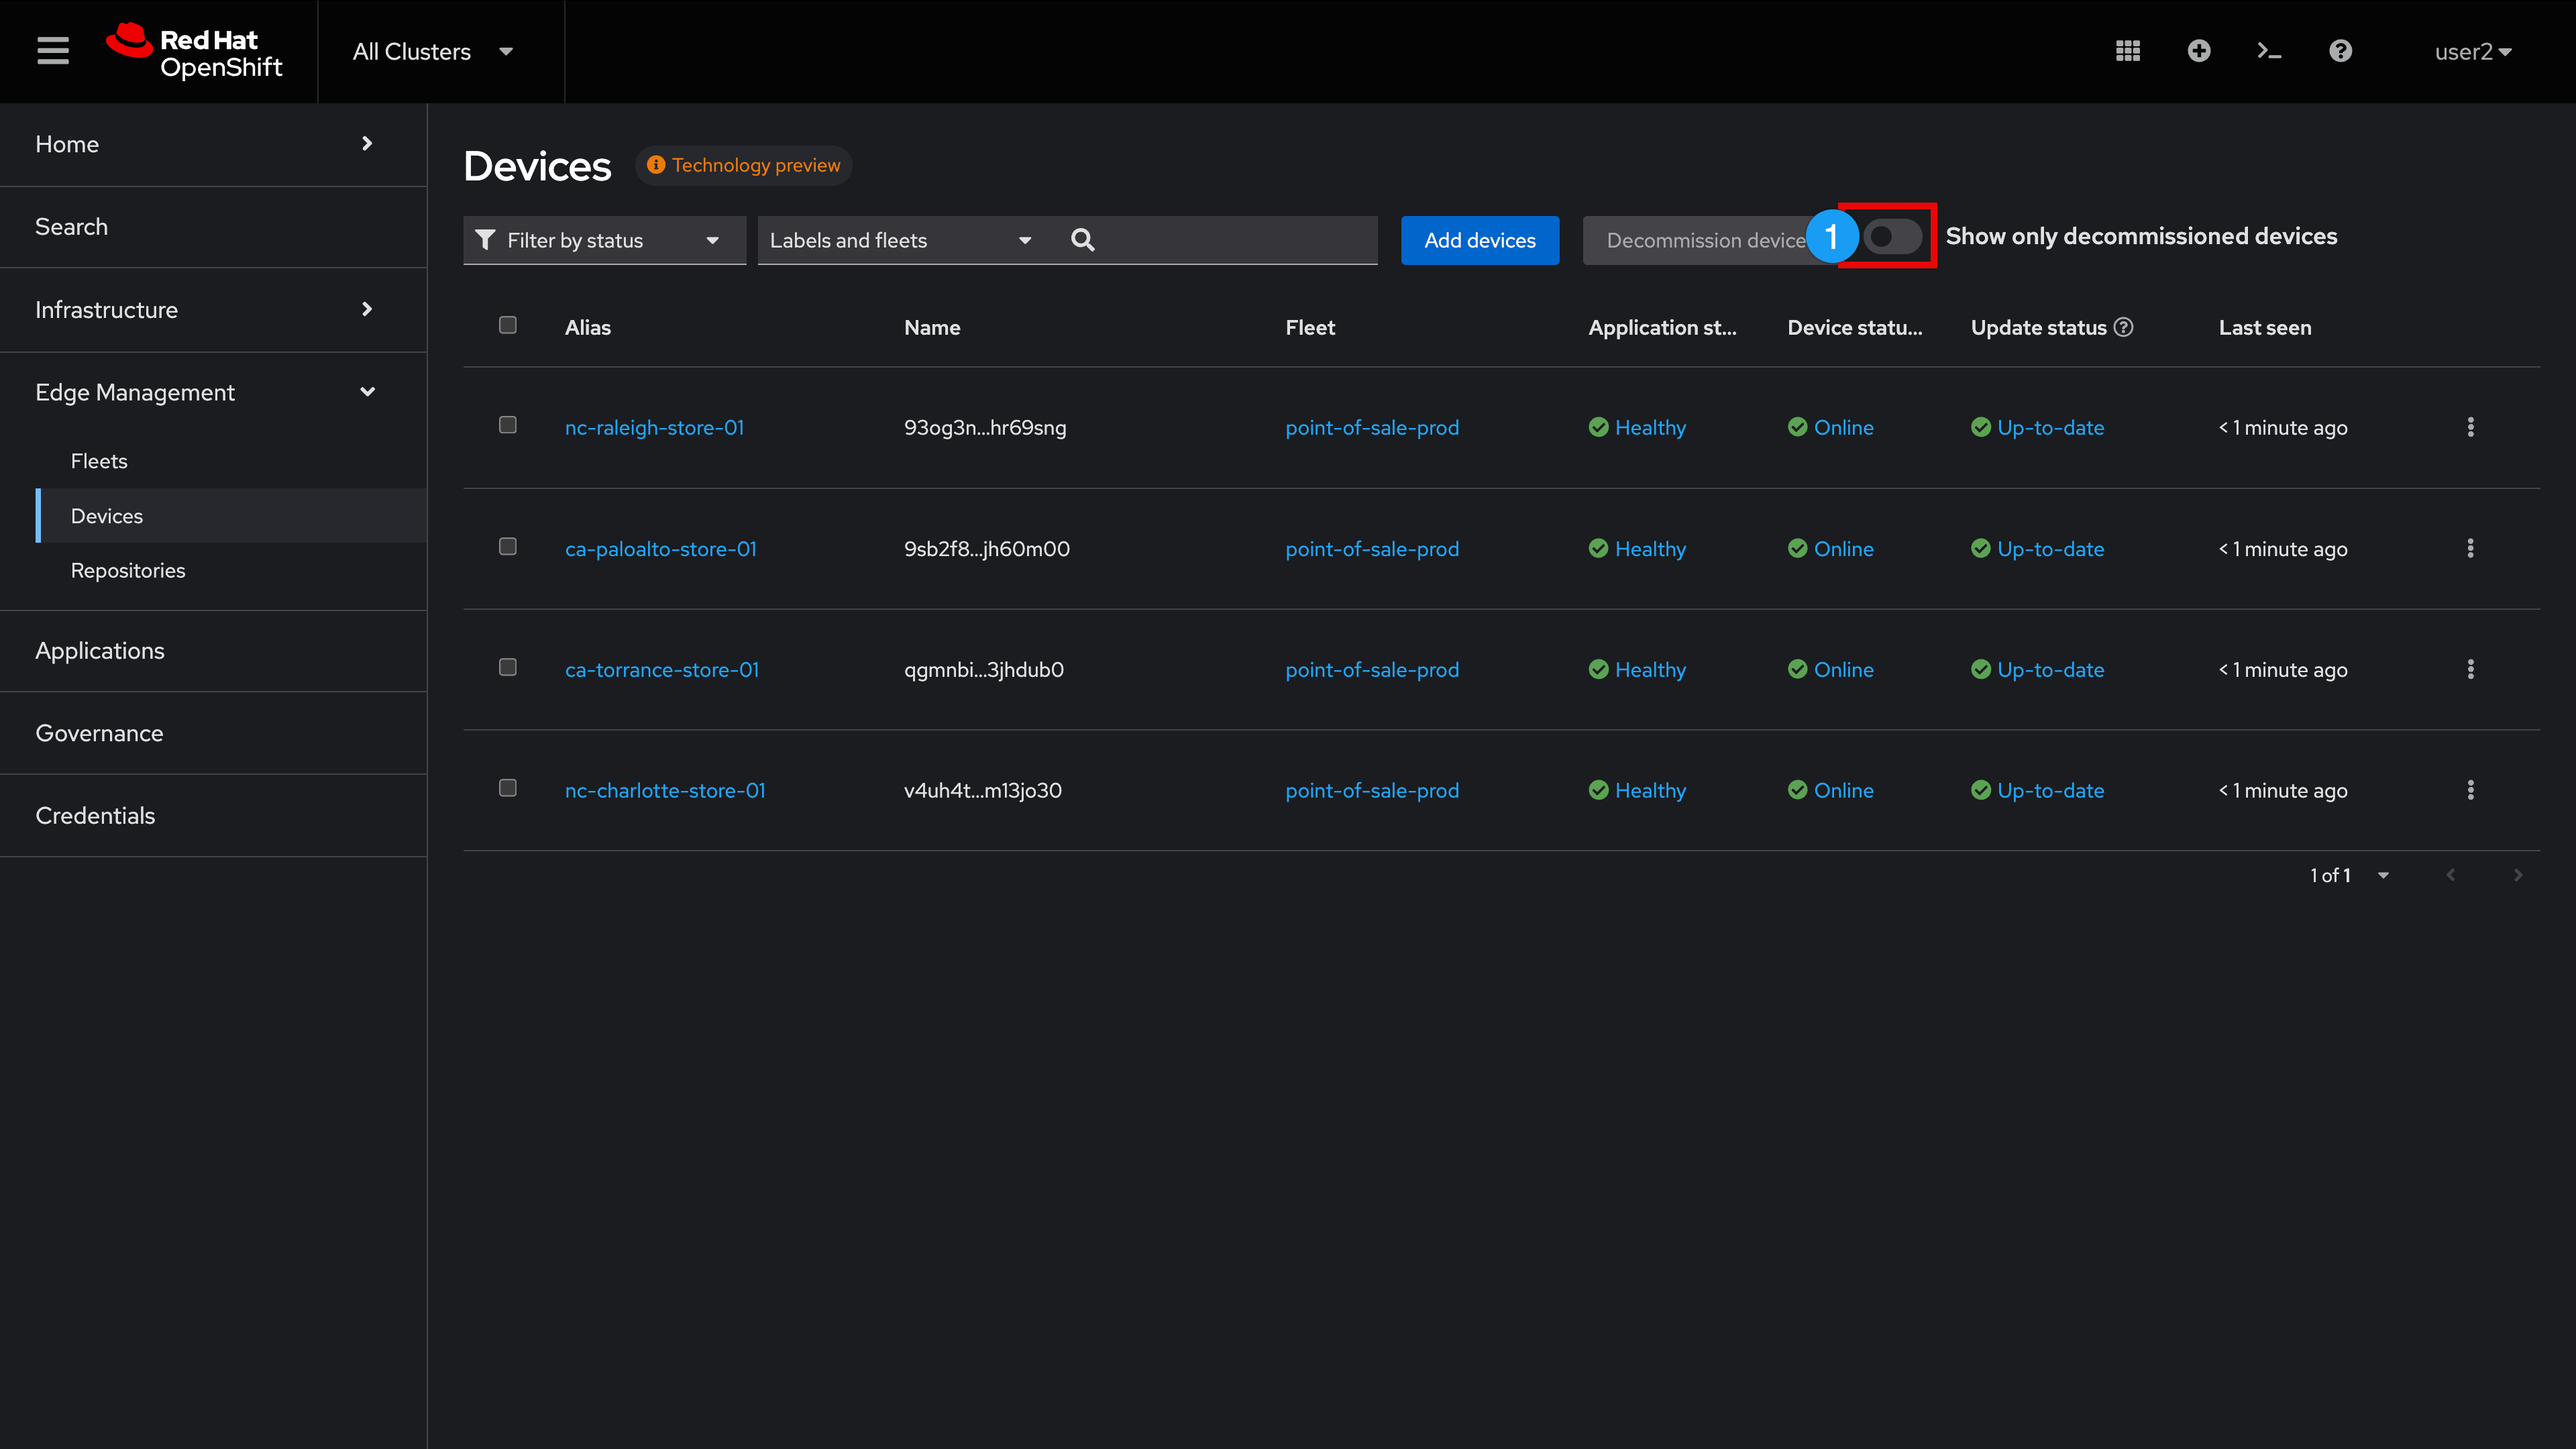
Here we can observe the list of decommisioned devices (there is no need at this point in our Lab to further delete devices)
Lab Summary

On behalf of the entire Red Hat Edge Manager team, we would like to extend a heartfelt THANK YOU for taking the time to explore this lab today.
We hope your time at Edge Megastore, Inc. has been an enjoyable and informative one.
BTW, judging by that store front image above it looks like our EMI Marketing Department has some more work to do… :)
Thank you, again - have a great day!