Level 0 - Setting up the environment
Add Granite inference server to Llama Stack
The environment will take care of establishing a connection to an existing Llama 3B inference server but for this lab we will also set up a Granite inference server. The Granite inference server is using a GPU and is launched using Red Hat OpenShift AI.
The following steps are provided to allow for you to set up the environment and run the notebooks in this lab to demonstrate the configuration of Llama Stack.
| Without these changes the notebooks will not run correctly. |
The first step will be to modify the configmap associated with the Llama Stack environment to include the Granite inference server.
Using the OpenShift console, navigate to the llama-serve project and under Workloads select ConfigMaps.
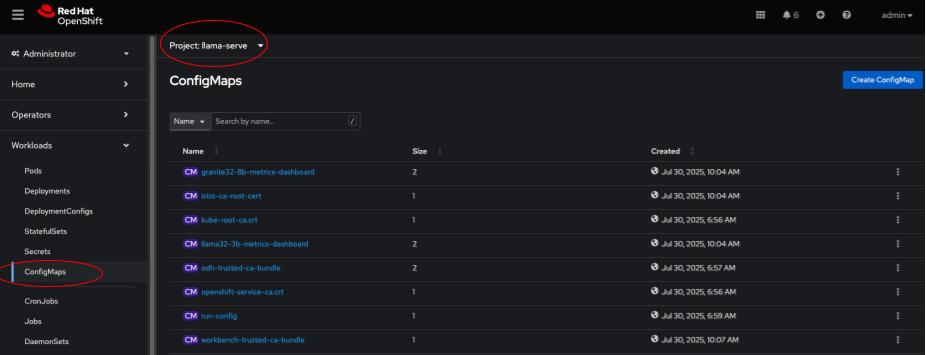
Select the run-config configmap. When the configmap opens, click on the YAML tab to view the YAML configuration. Add the following fields to the configmap under the specified sections:
| The fields providers, inference, and models are already present in the configmap. You will need to add the new provider and model under these sections. |
    providers:
      inference:
      - provider_id: granite
        provider_type: remote::vllm
        config:
          url: ${env.GRANITE_URL}
          max_tokens: 128000
          api_token: fake
          tls_verify: false

    models:
    - metadata: {}
      model_id: ${env.GRANITE_MODEL}
      provider_id: granite
      model_type: llm
After the configmap has been updated the next step will be to modify the deployment associated with the Llama Stack environment to include the Granite inference server.
Navigate to the llama-serve project and under Workloads select Deployments.
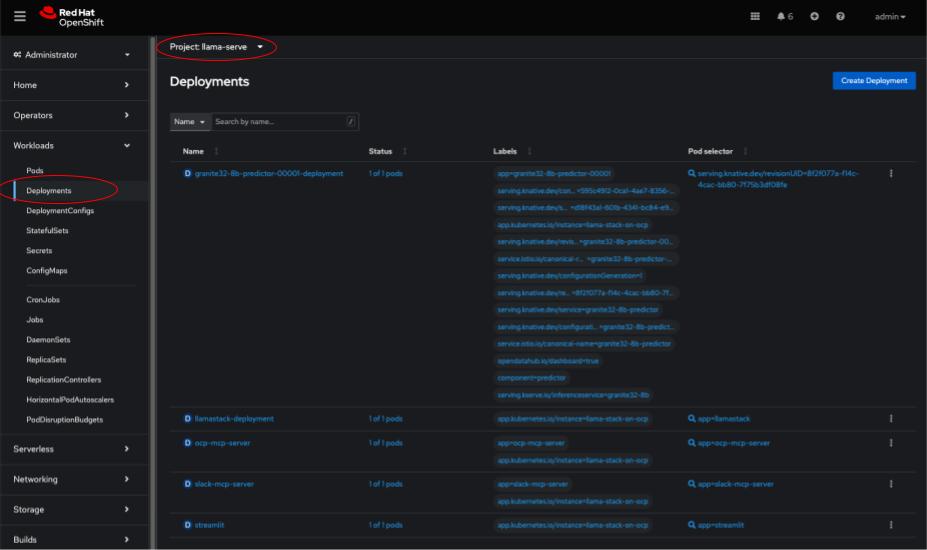
Select the llamastack-deployment deployment. When the deployment opens, click on the YAML tab to view the YAML configuration. Add the following environment variables under the spec.template.spec.containers.env section:
          env:
            - name: GRANITE_URL
              value: 'https://granite32-8b.llama-serve.svc.cluster.local/v1'
            - name: GRANITE_MODEL
              value: granite32-8b
After the deployment has been updated, a new pod will be created to reflect the changes. You can monitor the status of the pod by navigating to Workloads → Pods in the OpenShift console and look for a pod named llamastack-deployment-<random-characters>. Select the pod and click on the Logs tab to view the logs.
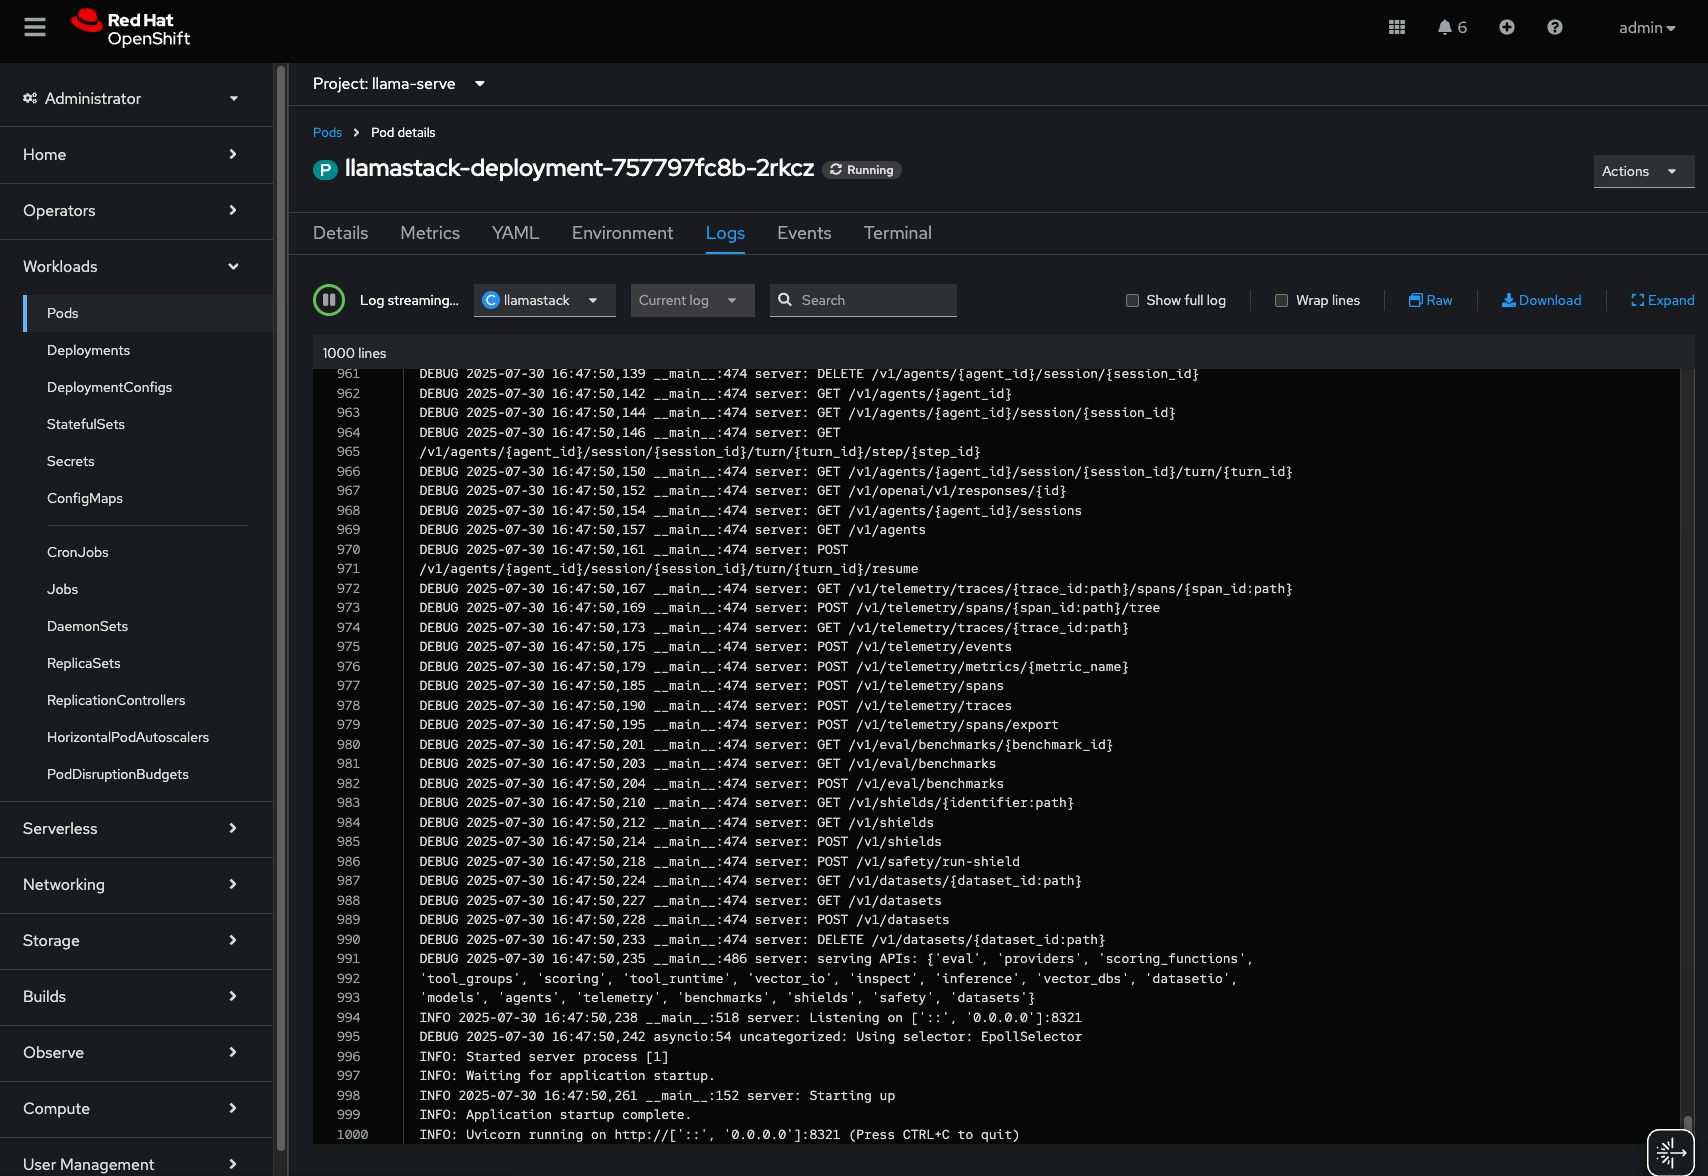
INFO: Uvicorn running on http://['::', '0.0.0.0']:8321 (Press CTRL+C to quit) is the key log message that indicates the Llama Stack environment is running successfully.
Setting up the environment
Before starting the demo, it’s essential to execute the Level 0 notebook to configure your environment. This includes tasks such as installing necessary packages and setting up environment variables using the .env file.
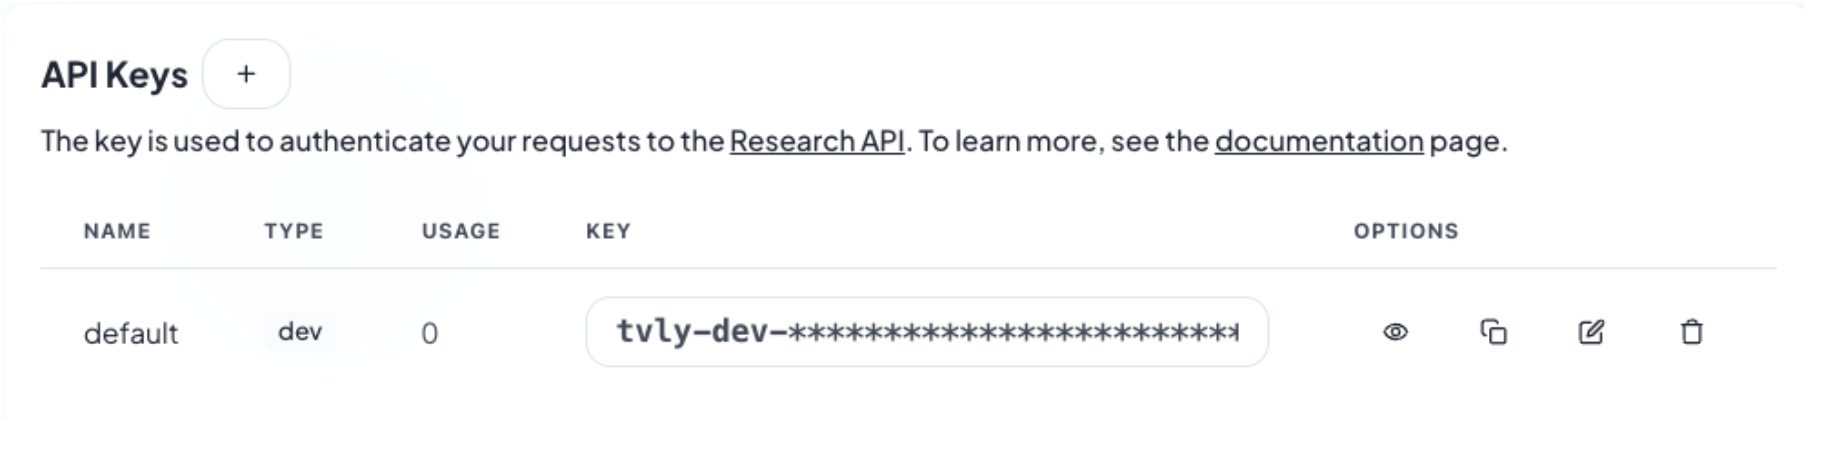
Tavily key
For running some of these notebooks, you will need a Tavily key.
Go to https://tavily.com/ and register for a free account. This is needed to enable the Llama Stack built-in web search tool.
Once logged in, access the Overview section where you will find your default API key listed under API keys. Copy this API key and store it securely as it will be used to configure your environment variables later in this tutorial. Ensure that the copied key is an exact match to avoid any issues.
Add your Tavily key to .env
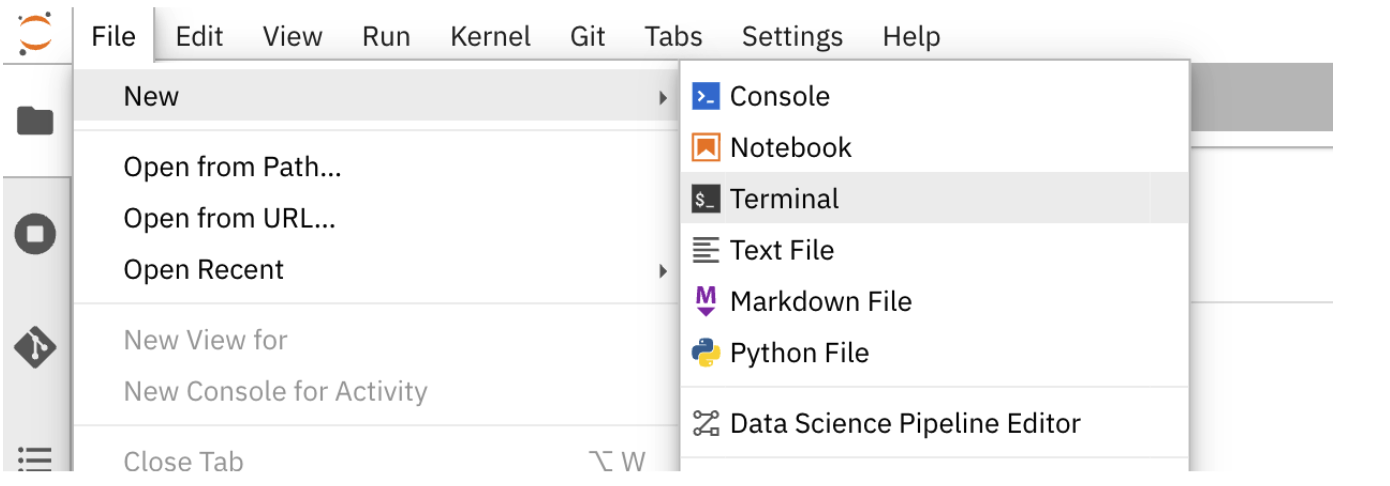
We will now add the Tavily key to our .env file. Once you have obtained your Tavily key, go back to your Jupyter workbench and navigate to File → New → Terminal to open a terminal window within the workbench.
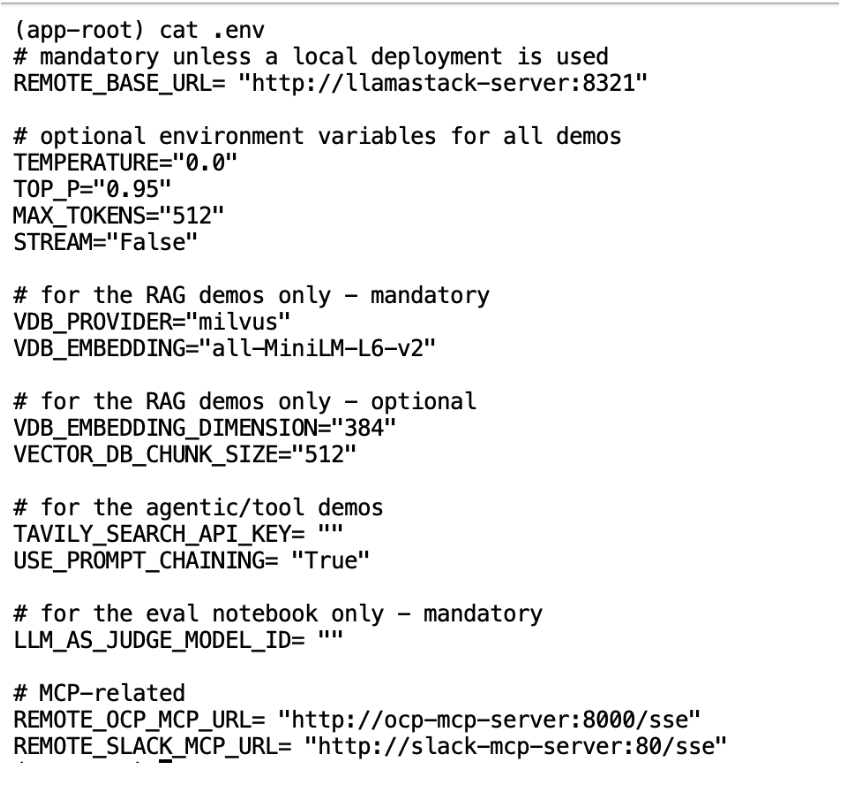
Next, run ls -a to show all the files under the current directory, including the hidden files like .env which stores our environment variables.

Lets use cat .env to look at what’s inside this file. We have set all the default environment variables as follows:
Next, we need to update this file via the vi .env command to add your Tavily key. Once opened, type i to edit the file. Update TAVILY_SEARCH_API_KEY with your api key.
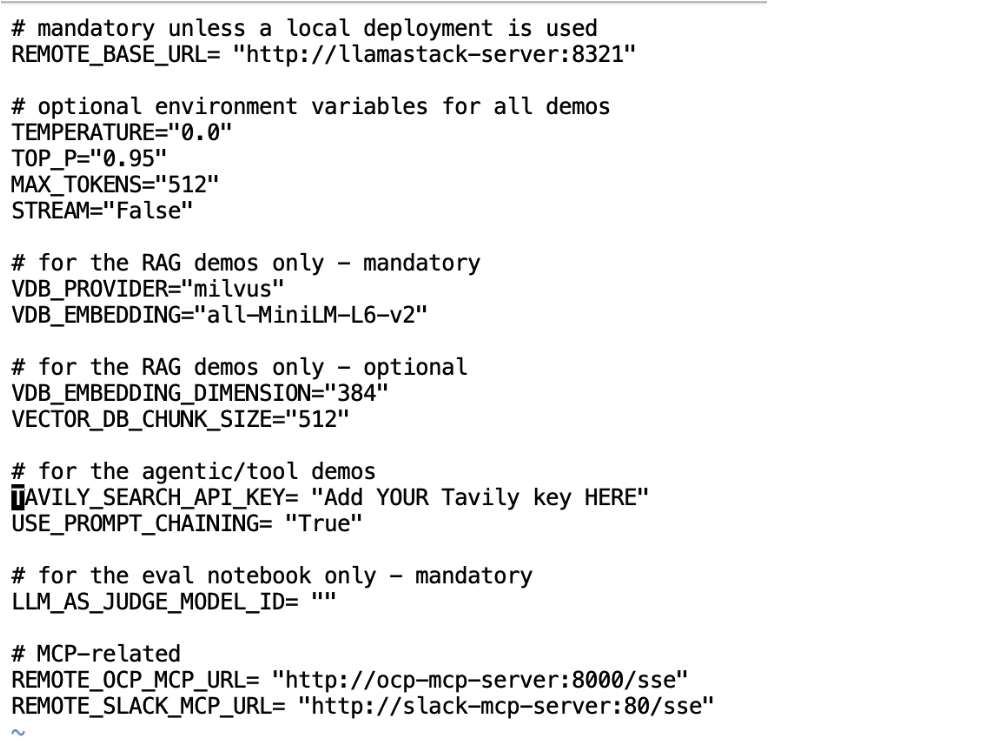
After editing, hit the esc key on your keyboard to exit from insert mode, and type :wq to save and exit.
Now we are ready to run the notebook!
