Lab Guide: Adding a Module to a Collection
A guide to adding a custom module to your Ansible collection and using it in a playbook.
Lab Briefing
In this challenge, you will be adding content in the form of a Ansible module plugin to the collection you created, and then using the module for a new playbook, which you will fix with ansible-lint before running it with ansible-navigator.
Lab Guide: Hands-On Tasks
In this exercise, you will copy an existing Python module into your collection’s plugins/modules directory. While you can develop your own modules from scratch, we will use a pre-written one for simplicity.
Task 1: Add a Custom Module to the Collection
First, you will create a new Python file and add the code for a simple cowsay module.
-
Create the module file. In the VS Code file explorer on the left, expand the
pluginsdirectory, then right-click on themodulesdirectory and select New File. Name the filecowsay.py. -
Add the Python code. Copy the following Python code and paste it into the
cowsay.pyfile you just created.from ansible.module_utils.basic import AnsibleModule import subprocess def run_cowsay(message): result = subprocess.run(['cowsay', '-t', message], capture_output=True, text=True) return result.stdout def main(): module_args = dict( message=dict(type='str', required=True) ) module = AnsibleModule( argument_spec=module_args, supports_check_mode=True ) message = module.params['message'] result = run_cowsay(message) module.exit_json(changed=False, message=result.split('\n')) if __name__ == '__main__': main()
Task 2: Create a Playbook to use the new module
Now, you will switch to your playbook project folder and create a new playbook that calls your custom module.
-
Open the playbook project folder. In the VS Code top menu, select File → Open Folder….
-
Enter the correct path. In the prompt, enter the path
/home/rhel/myansibleprojectand click the blue OK button.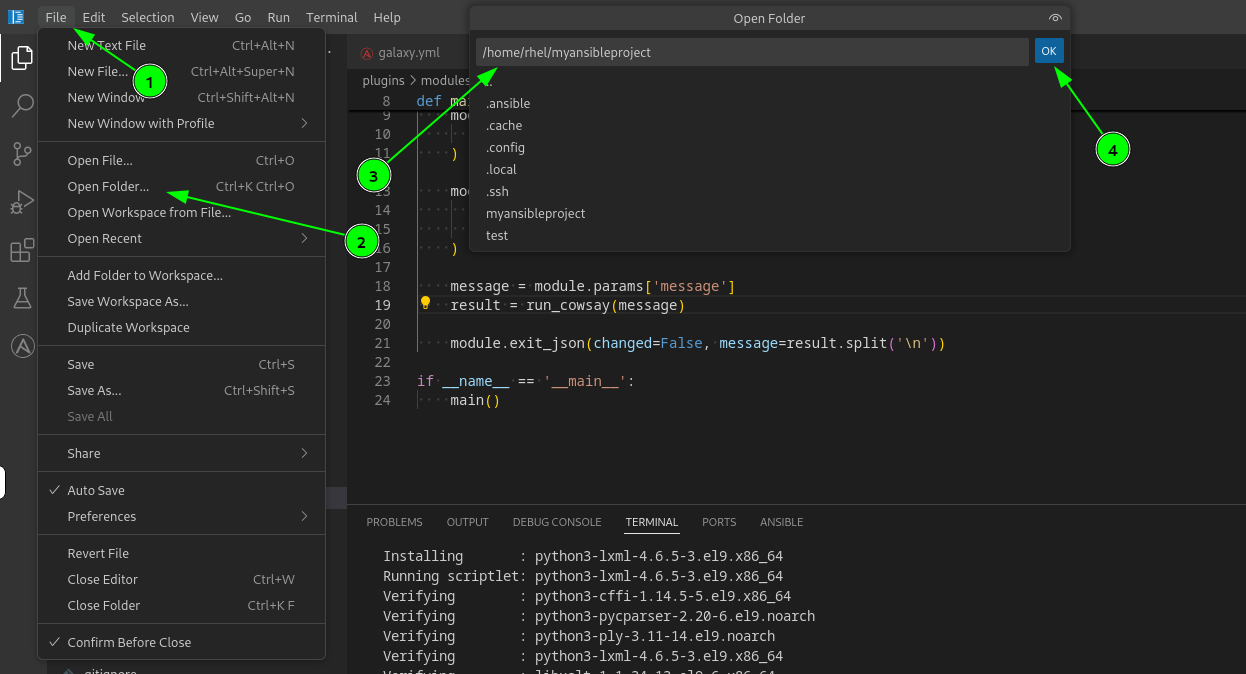
-
After the window reloads, create a new playbook file. In the file explorer on the left, right-click in the empty space below
site.ymland select New File. Name the filemycowsay.yml. -
Add the playbook content. Copy and paste the following content into the
mycowsay.ymlfile:--- - hosts: localhost tasks: - name: test the cowsay module mynamespace.mycollection.cowsay: message: Hello, Ansible! register: result - name: Display the result ansible.builtin.debug: msg: "{{ result.message }}"
Task 3: Use Ansible Lint to Fix the Playbook
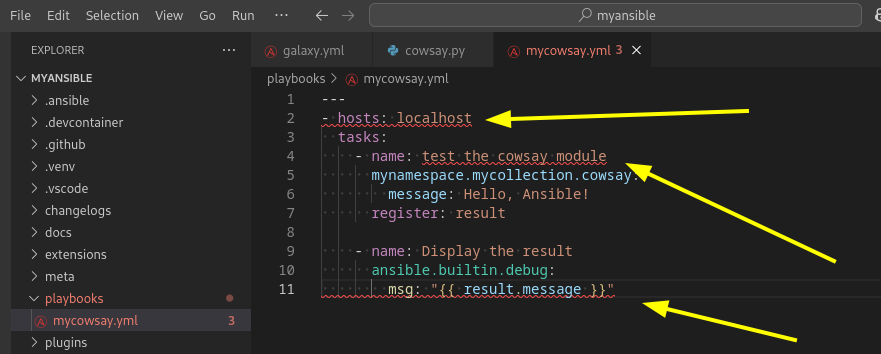
You will notice red curly lines under parts of your playbook. These are warnings from ansible-lint. You will now use its auto-fix capabilities.
-
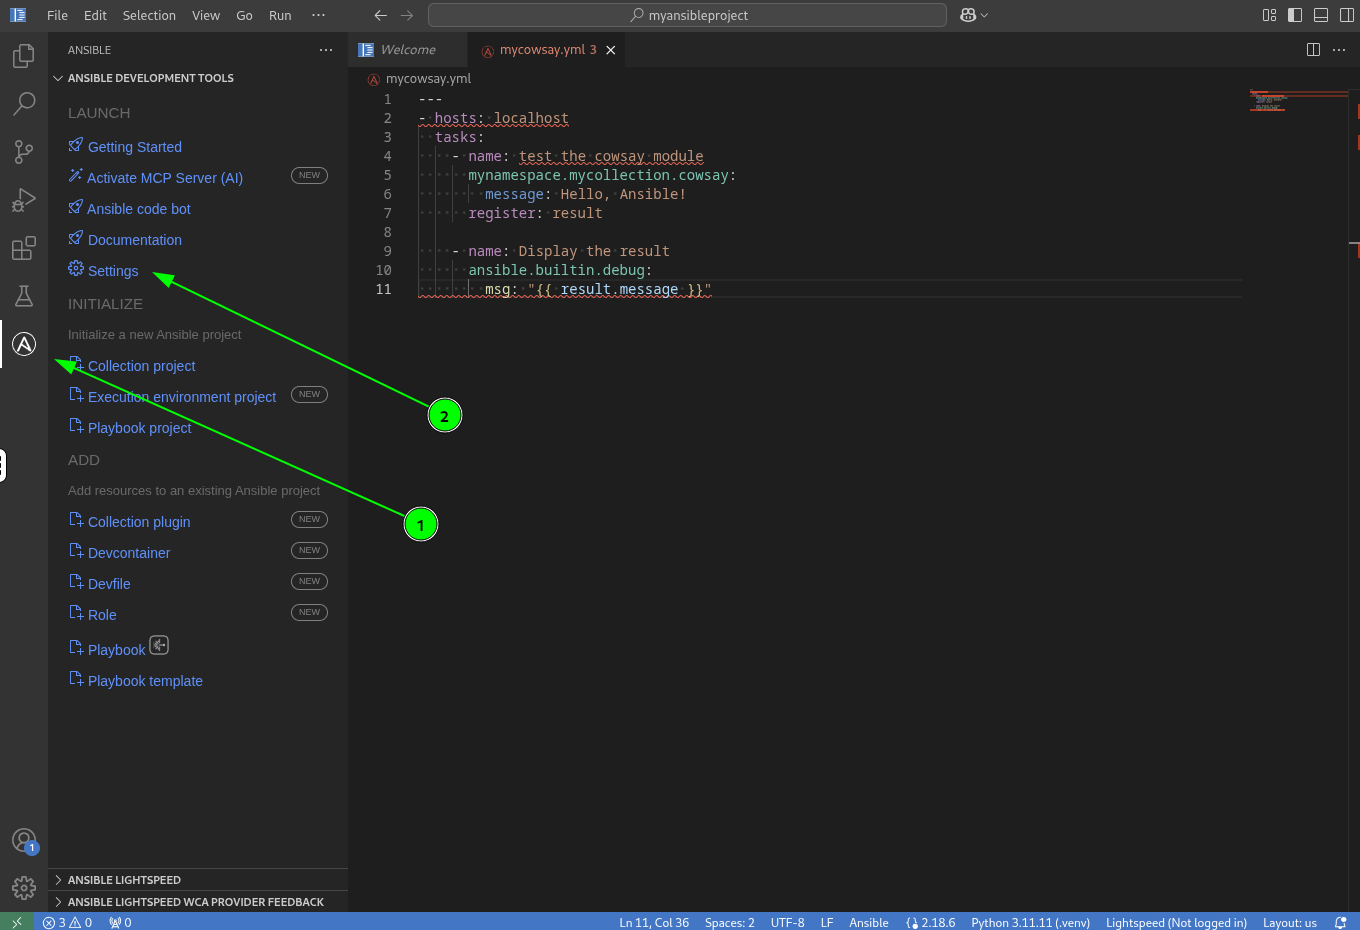
Open the Ansible extension settings. Click the Ansible icon in the left sidebar then the Settings option in the menu.
-
Enable the linter and auto-fix. In the search bar at the top, type
lintto filter the settings.-
Make sure the checkbox for
Ansible › Validation › Lint: Enabledis checked. -
In the
Ansible › Validation › Lint: Argumentsfield below, enter--fix. This tells the linter to automatically fix issues it finds.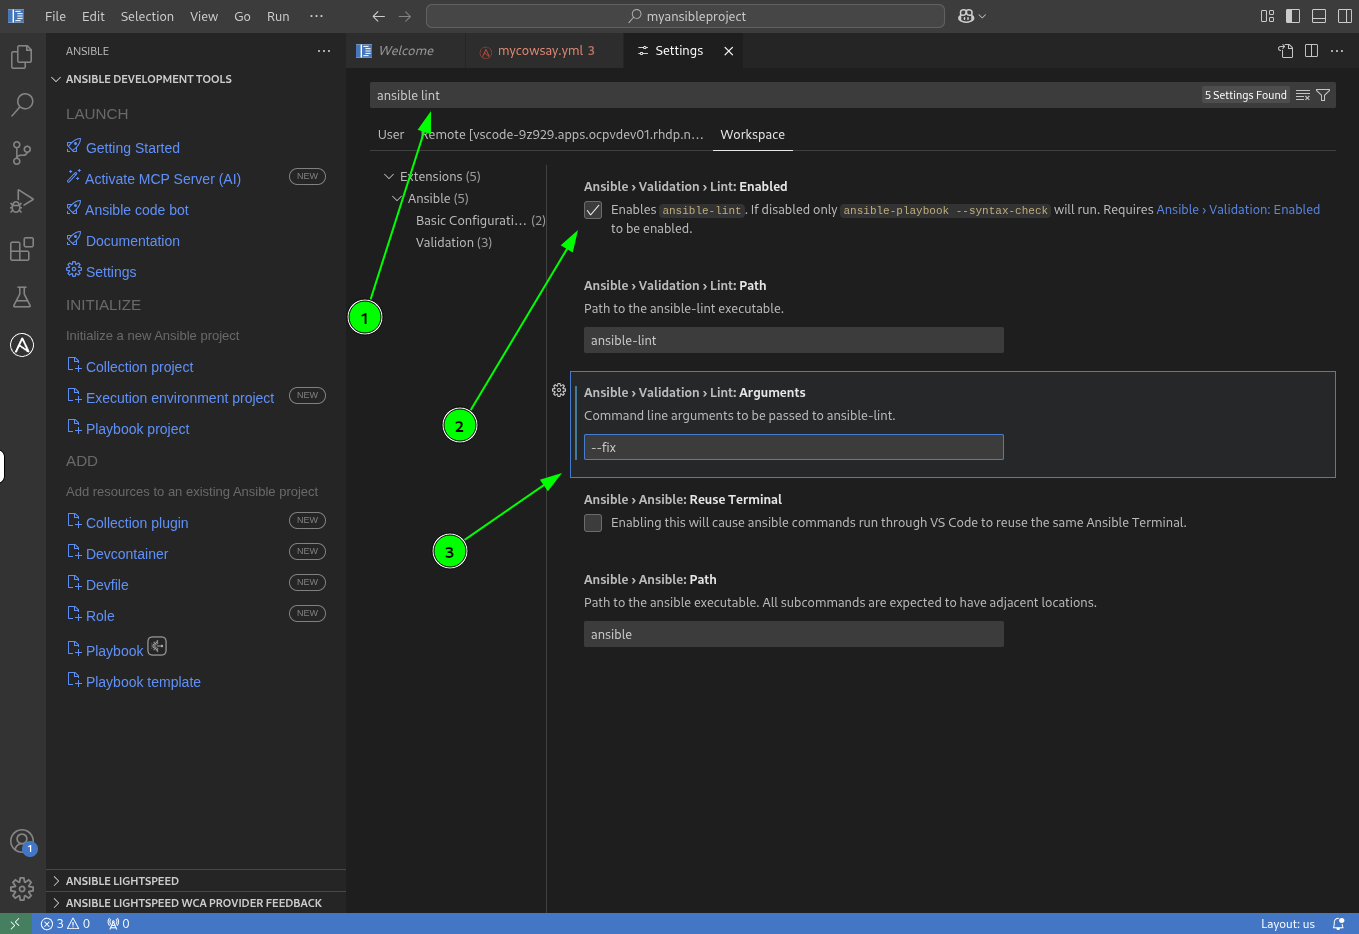
-
-
Trigger the auto-fix. Go back to the
mycowsay.ymlplaybook tab and save the file (Ctrl + SorCmd + S). Wait a few seconds foransible-lintto run. It should automatically fix several formatting issues. -
Apply the final manual fix. One warning will remain. Hover your mouse over it to see the reason: "All plays should be named." The linter cannot fix this for you. To fix it, add a
- name:line to the play. The final, correct playbook should look like this:--- - name: Using our cowsay module hosts: localhost tasks: - name: Test the cowsay module mynamespace.mycollection.cowsay: message: Hello, Ansible! register: result - name: Display the result ansible.builtin.debug: msg: "{{ result.message }}"
Task 4: Install the cowsay Dependency
Your custom module calls the cowsay binary. Before running the playbook, you need to declare this dependency in the collection’s requirements.txt so that ade installs it automatically.
-
Open the
requirements.txtfile from the file explorer on the left, inside thecollections/ansible_collections/mynamespace/mycollection/directory. Addcowsayon a new line and save the file. -
Install the dependency with
ade. Open the Terminal (Terminal → New Terminal) and run:ade install -e .
Task 5: Run the Playbook
Now that your playbook is lint-free and the cowsay dependency is installed, let’s run it using both ansible-playbook and ansible-navigator.
-
Open the
mycowsay.ymlplaybook. In the VS Code file explorer on the left, navigate to themycowsay.ymlfile and click on it to open it.Make sure the
mycowsay.ymlfile is the active tab before running the playbook. Running the playbook while another file is open will result in an error. -
Run with
ansible-playbook. In the VS Code file explorer, right-click yourmycowsay.ymlplaybook. From the context menu, select Run Ansible Playbook. The output in the terminal should display a friendly cow saying "Hello, Ansible!".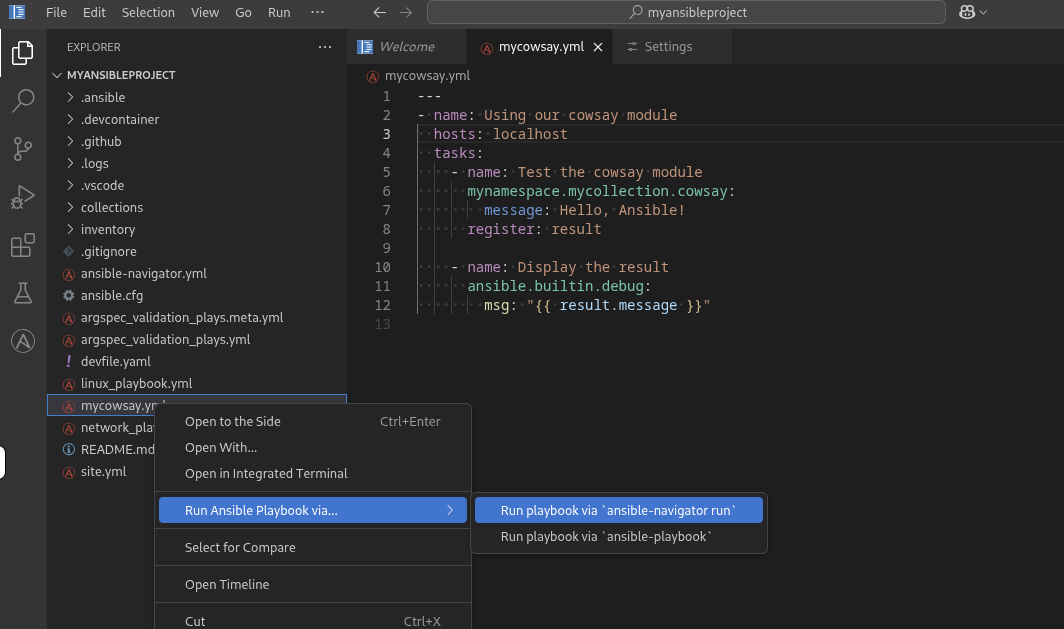
-
Run with
ansible-navigator. Right-click the playbook again, but this time select Run with Ansible Navigator. This will launch the Terminal User Interface (TUI).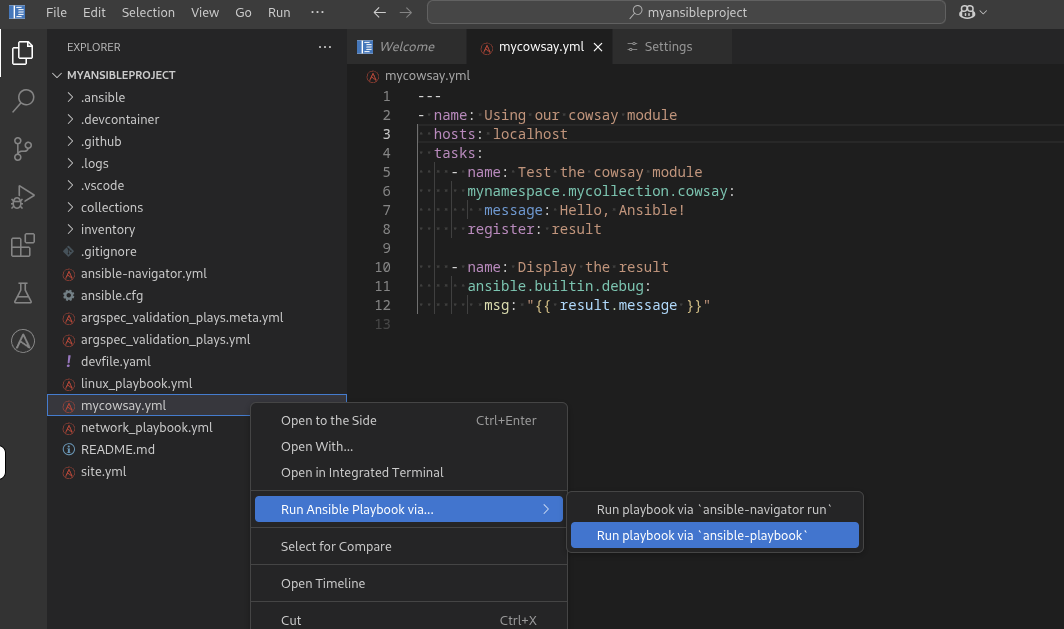
-
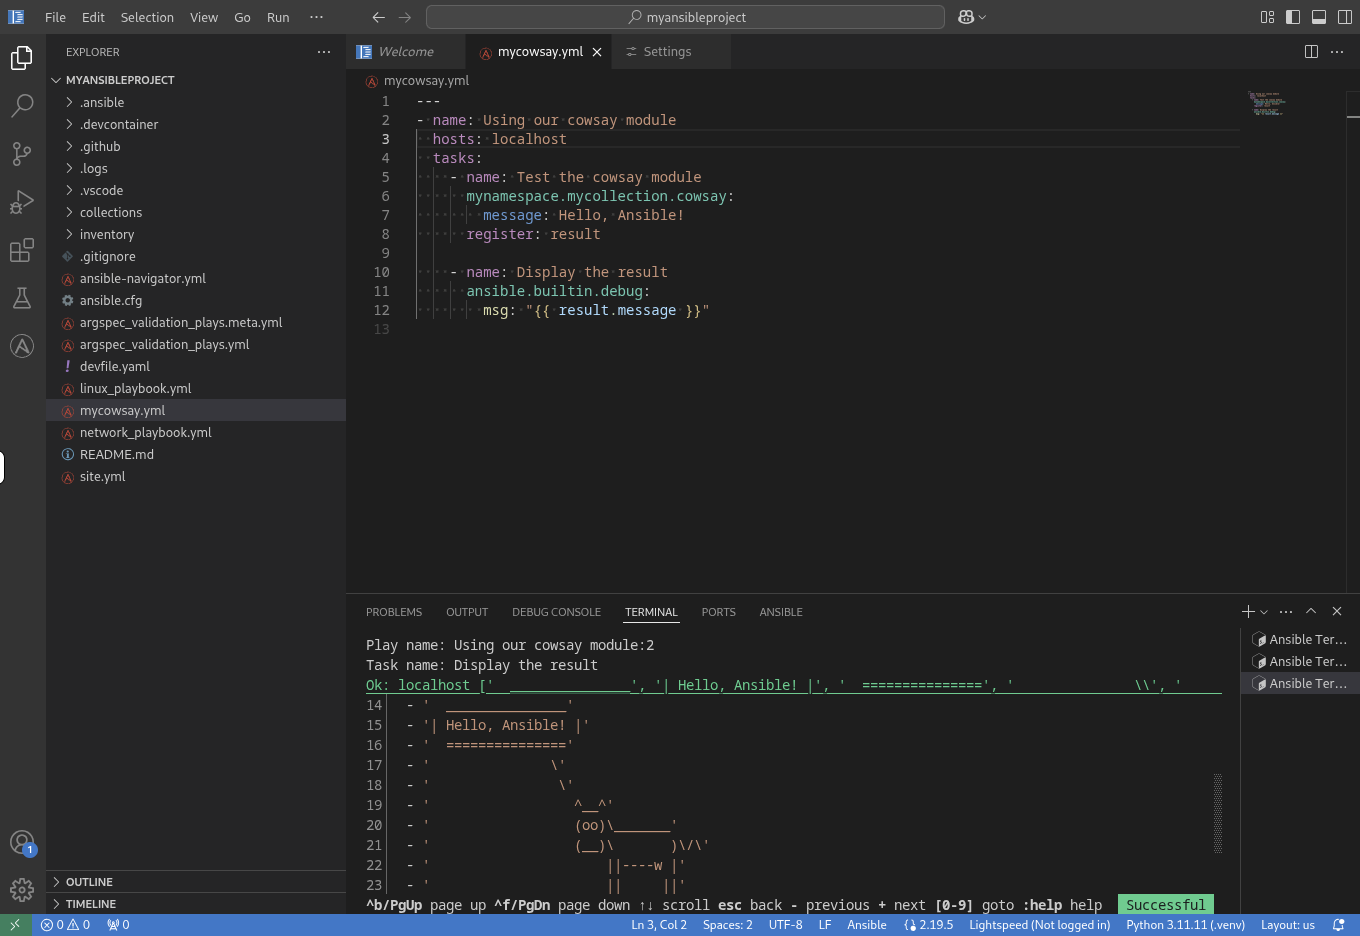
Explore the Navigator output. You are now inside the
ansible-navigatorTUI.-
To the left of the play name, you will see the number
0. Press0to drill down into the details for that play. -
You can now see the three tasks from your playbook. Press
2to see the output of the final "Display the result" task. -
You may need to scroll down to find the cow message.
-
-
Exit Ansible Navigator. Press the
ESCkey three times to exit the TUI and return to the normal terminal prompt.