Module 4: Enforce Policy and Promote Safely
Introduction
-
By this point in the workshop, you have established strong foundations of trust across the software supply chain. In Module 1, you made software composition visible by ingesting and analysing SBOMs, turning dependency risk from an assumption into evidence. In Module 2, you anchored trust in cryptographic provenance, ensuring every build artifact is signed, traceable, and verifiably produced by your CI pipeline. In Module 3, you reduced developer friction by centralising access to tools and security capabilities through Red Hat Developer Hub, using GitOps to configure authentication, plugins, and catalog discovery as a consistent, secure entry point for developers.
-
One critical challenge remains: “How do we prevent unverified or unsafe images from reaching staging and production?” Security controls only scale when developers do not have to think about them. If teams must manually assemble pipelines or decide when policies apply, trust quickly erodes. This is where Software Templates, also known as Golden Paths, come in. In this module, you will use software templates to define opinionated, secure workflows that embed the guardrails established in earlier modules by design, including SBOM generation and analysis, code and image signing, vulnerability scanning, and Enterprise Contract policy checks.
| Enterprise Contract is the policy engine that governs whether an application can be promoted through the delivery pipeline. It is based on the upstream open-source project Conforma, which provides policy-driven verification of software supply chain evidence such as SBOMs, vulnerability scan results, image signatures, and build attestations. |
-
By the end of this module, you’ll see how RHADS turns trusted building blocks into repeatable, production-ready Golden Paths. Every application starts secure. Every promotion is governed. And teams move fast without bypassing trust.
Step 1: Set up image vulnerability scanning
-
Red Hat Advanced Cluster Security (ACS) provides vulnerability analysis and policy evaluation for container images. It integrates directly with container registries to scan images before they are deployed or promoted.
1.1 Configure ACS - Quay Integration
-
In this step, you will configure ACS to scan images stored in Quay and validate that vulnerability data can be evaluated as part of the trusted supply chain.
-
You will use the ACS API to create the integration programmatically, mirroring how platform teams automate integration setup in production environments.
-
In the Showroom terminal, run the following command to create the Quay integration:
curl -k -X POST \ -u "{rhacs_admin_user}:{rhacs_admin_password}" \ -H "Content-Type: application/json" \ {rhacs_admin_console}/v1/imageintegrations \ -d '{ "name": "acs_quay", "type": "quay", "categories": ["REGISTRY", "SCANNER"], "quay": { "endpoint": "{quay_host}", "oauthToken": "{quay_admin_token}", "insecure": true }, "skipTestIntegration": false }' -
This command creates a new image integration in ACS with the following configuration:
-
Integration name:
acs_quay -
Type: Quay registry with vulnerability scanning capabilities
-
Endpoint:
{quay_host}- your Quay registry instance -
Authentication: OAuth token for secure access
-
Test on create: The integration will be validated before being saved
-
-
Upon successful execution, you will receive a JSON response confirming the integration has been created and tested.
-
At this point, ACS can securely access images stored in Quay and perform scans automatically.
For more details on configuring Quay Container Registry as a scanner integration, refer to the official Red Hat ACS documentation.
1.2 Scan and evaluate an image
-
To confirm that scanning and policy evaluation are working end to end, you will now scan the signed image you produced in module 2.
-
This next command retrieves vulnerability data for the image and returns a detailed scan report.
-
In the Showroom terminal, run:
roxctl image scan --image={quay_host}/tssc/tekton-chains-test:latest-
This command evaluates the image against ACS policies and reports whether it meets deployment requirements.
roxctl image check --image={quay_host}/tssc/tekton-chains-test:latest-
Together, these checks demonstrate that:
-
Container images can be scanned deterministically from the registry using ACS
-
Vulnerability findings are associated with a specific image digest, not a mutable tag
-
Policy evaluation can be performed programmatically as part of a CI/CD workflow
-
-
This ensures that vulnerability scanning and policy evaluation are applied consistently across all workloads, as an integrated part of the delivery pipeline exposed through our Software Template.
Step 2: Execute the Software template
2.1 Step introduction
-
Up to this point, you’ve been working in the role of a platform engineer.
-
Now let’s switch personas and step into the role of a developer (User1), which you created earlier.
-
As a developer, your goal is simple, get a ready-to-use development environment so you can focus on building your new feature.
-
This is exactly what Software Templates, or Golden Paths, are designed to provide.
-
Under the hood, they use the Backstage scaffolder to automate the creation of repositories, configuration, and CI/CD resources based on platform-approved patterns, as you’ll see in the next section.
2.2 Run the Software Template
-
Switch to the RHDH tab in the Showroom.
-
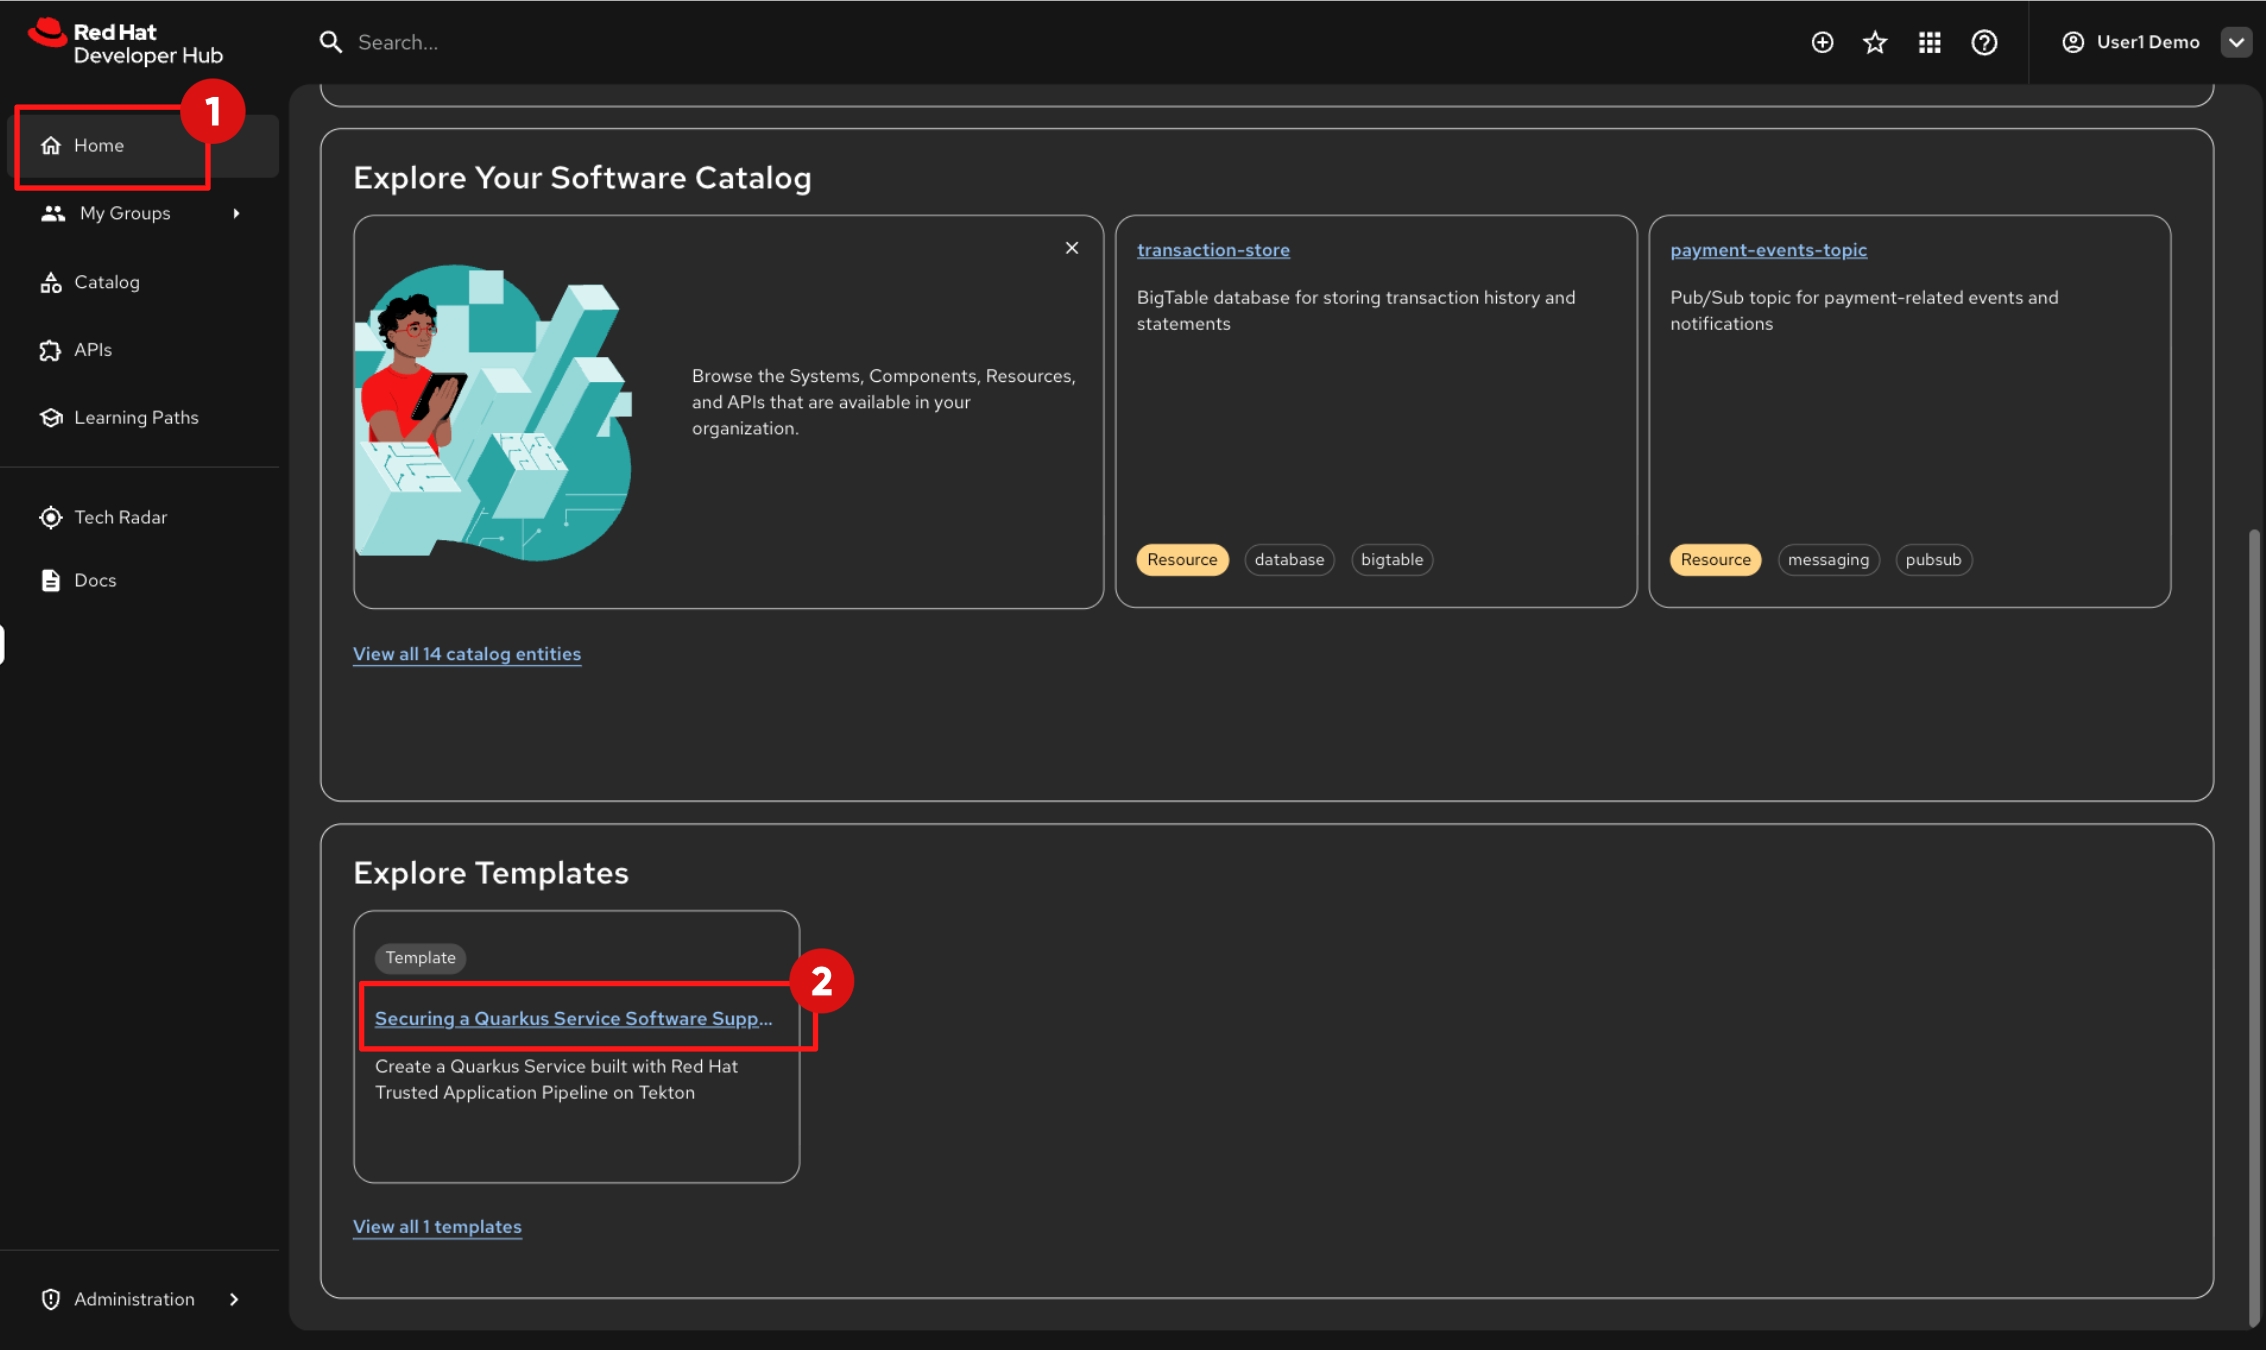
Click on Home in the left navigation menu
-
From the RHDH home page, scroll down until you see the Explore Templates section.
-
At the moment, only one template is available, but in real environments, platform teams typically provide multiple Golden Paths for different application types and technology stacks.
-
Click on the link: “Securing a Quarkus Service Software Supply Chain (Tekton)”.
-
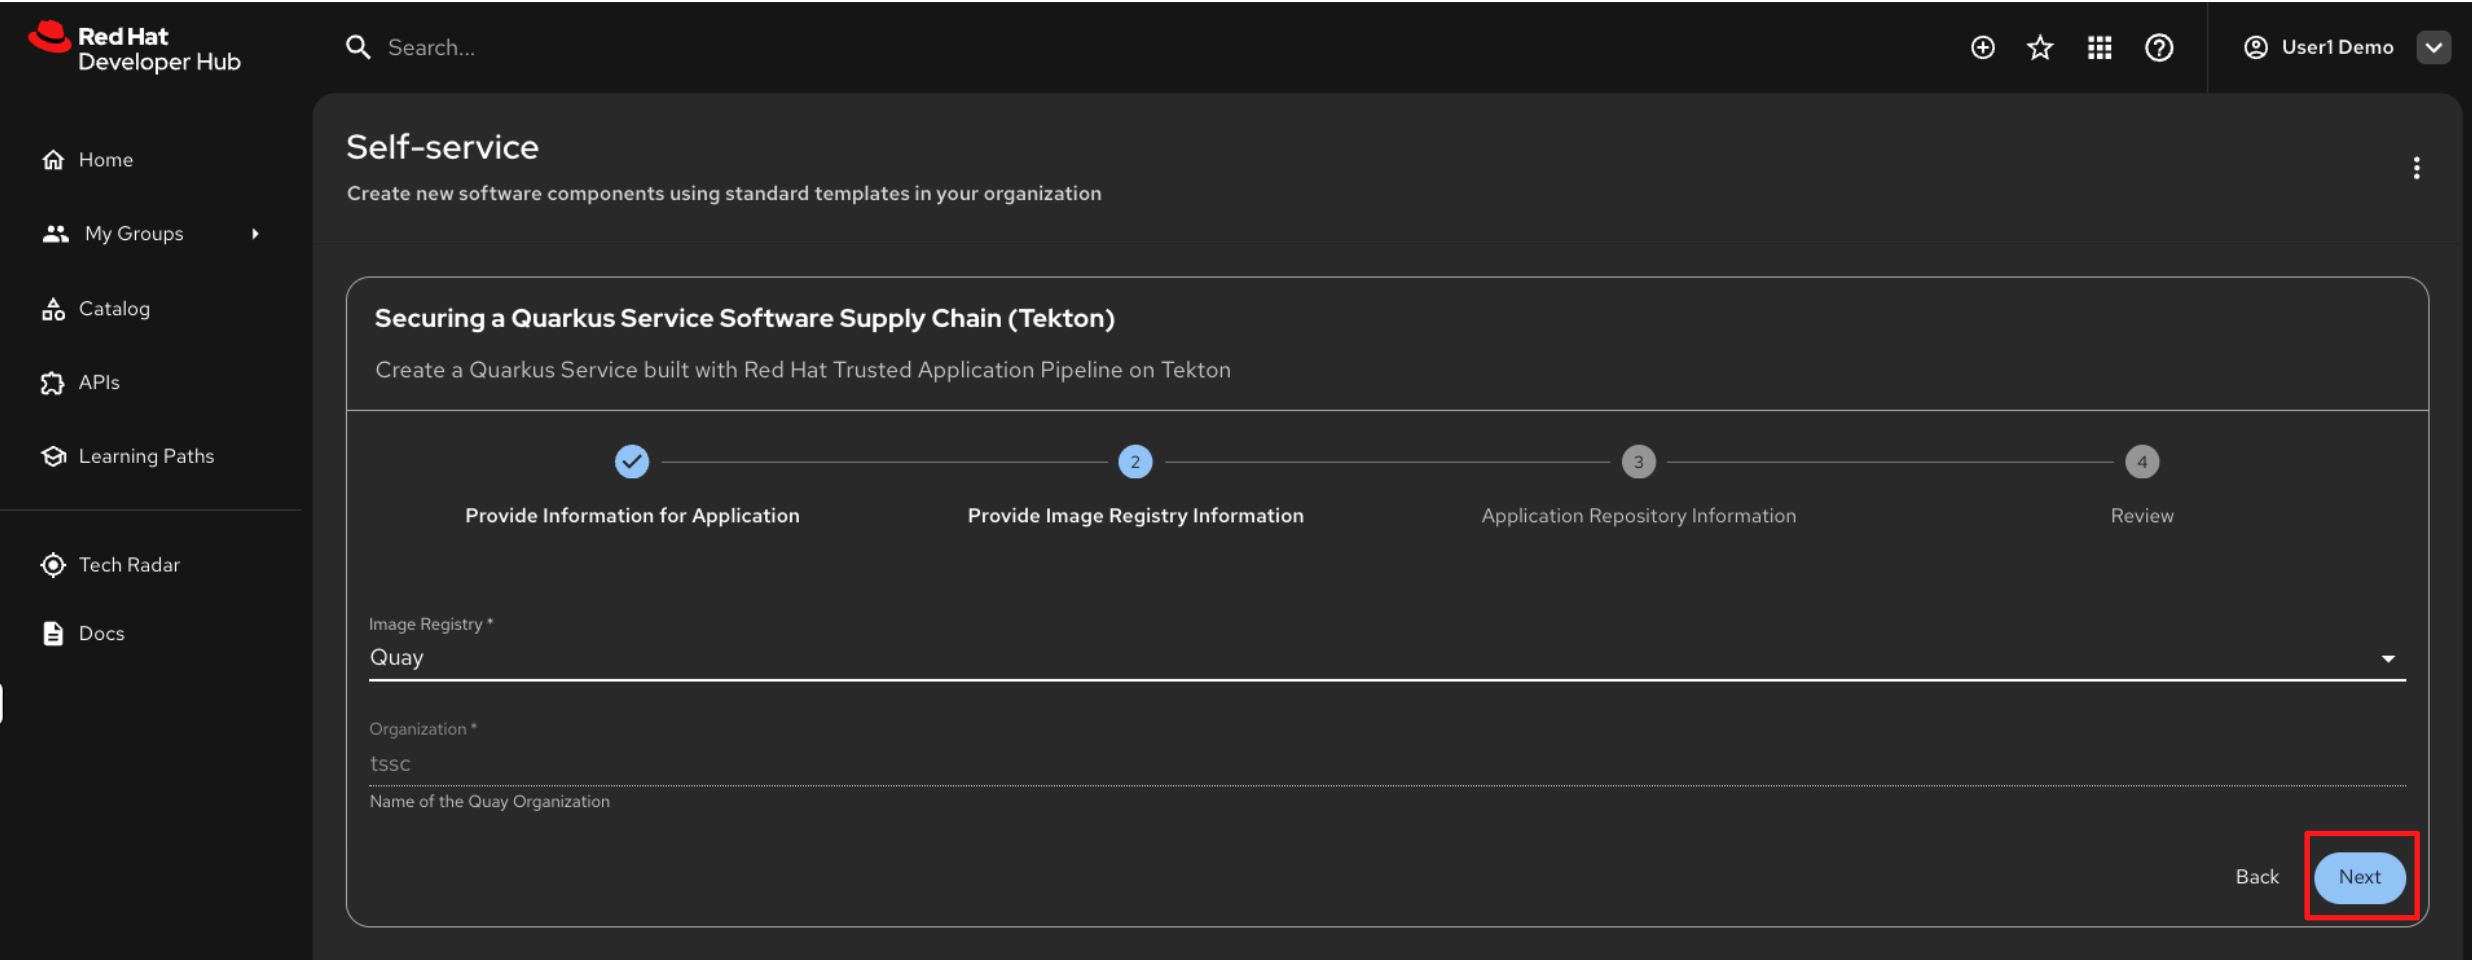
You will be guided through a four-step, wizard-style form to collect the required inputs.
-
Instead of raising tickets and waiting for manual setup, this workflow applies platform standards automatically, as defined by the template.
-
In the first form, you are prompted to enter application-specific parameters.
-
Default values are already provided by the template, so keep the defaults and click Next.

-
The second form provides container image registry details.
-
In this workshop, container images are pushed to Quay.io.
-
The required values are pre-filled, so click Next to continue.
-
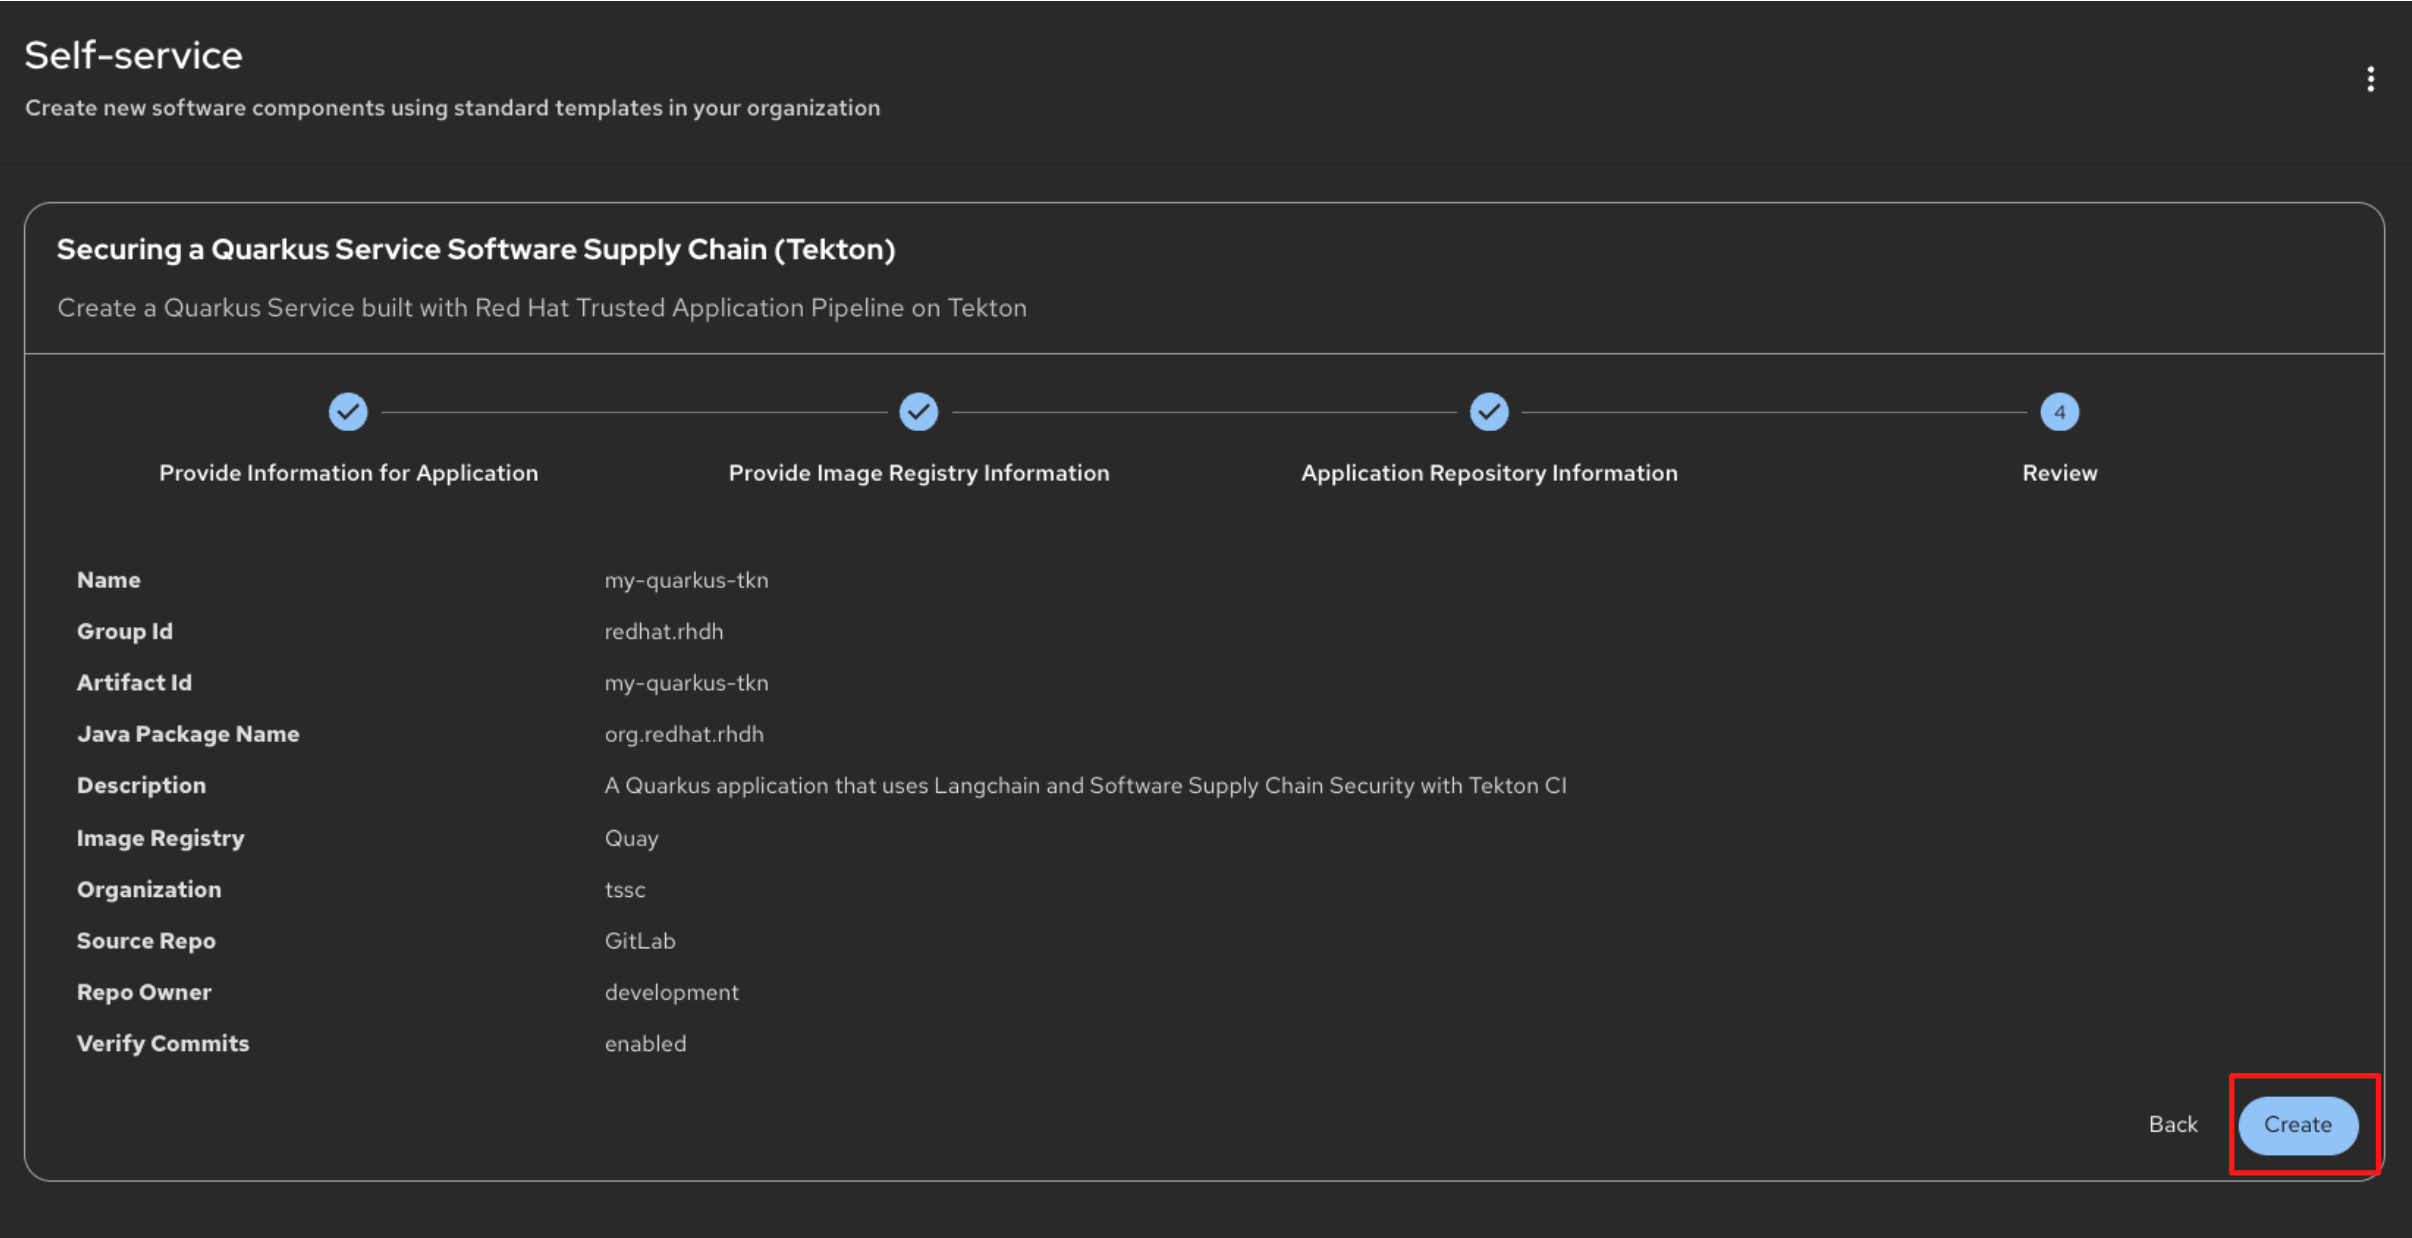
In the third form, you configure the source code repository, which is GitLab in this environment.
-
Set Verify Commits to Enabled. This enforces commit signature verification in the pipeline, ensuring that only signed and trusted commits are accepted during the build process.
-
Leave the remaining values as provided by the template.
-
-
Click Review to proceed.

-
You will now see a summary of all the parameters that will be passed to the scaffolder when executing the template steps.
-
These values are used to:
-
Create the Git repository and application skeleton
-
Configure CI pipelines
-
Register the component in the RHDH Software Catalog
-
-
Review the values, then click Create to start the scaffolding process.
-
After a short time, the scaffolder workflow will complete and you will see a confirmation screen with green checkmarks indicating each step has succeeded.
-
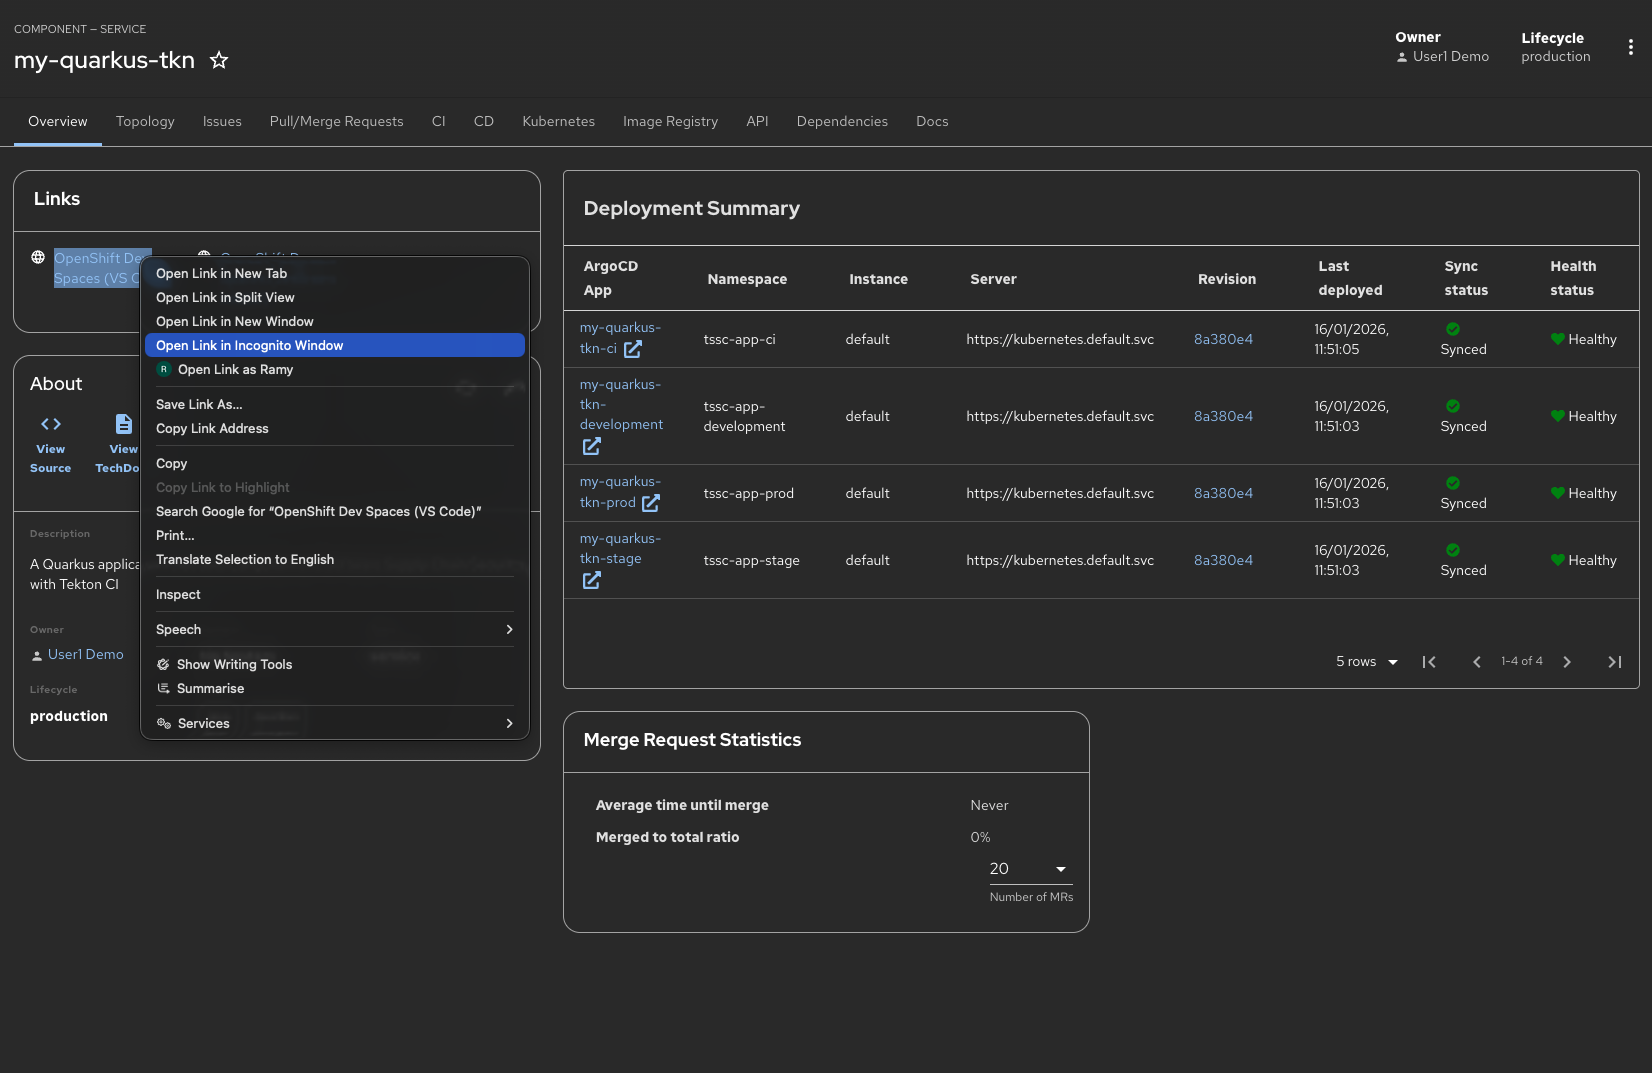
Click Open Component in Catalog to view your newly created application in the Developer Hub.

Optional Deep Dive: Understanding Software Templates
-
Software Templates are the primary mechanism used by Red Hat Developer Hub to expose Golden Paths to development teams.
-
Templates are defined using YAML and rendered as rich, validated forms in the Red Hat Developer Hub UI. Developers interact with a simple form. Behind the scenes, the platform does all the heavy lifting.
-
This YAML is processed by the Scaffolder, RHDH's templating engine, which executes the steps outlined in the template.
-
This ensures that every new service is created in a standardized, automated, self-service way.
-
Let’s examine the structure of a template using
=== Software Template YAML Structure
-
At a basic level, the Template Entity resembles a Kubernetes Custom Resource. Note, Backstage resources are stored in the Backstage instance’s database and are not managed via the Kubernetes API Server.
-
Where the Template Entity differs is that it contains additional fields:
-
Header: Here, you provide essential information about the template.
-
Parameters: This section is for gathering inputs from the user.
-
Steps: In this section, you define the actions to be executed by the Scaffolder.
-
Output: This section is optional and allows you to provide details about the tasks performed by the Scaffolder.
-
-
Let’s examine each in more detail.
=== Template Header
-
The header section is mandatory for every template.
-
The Component card on the Create Component page is displayed based on the details in the Header section.
-
For example, this is the header of the Software Template you will execute in the coming steps:
apiVersion: scaffolder.backstage.io/v1beta3
kind: Template
metadata:
  name: quarkus-stssc-template
  title: Securing a Quarkus Service Software Supply Chain (Tekton)
  description: Create a Quarkus Service built with Red Hat Trusted Application Pipeline on Tekton
  tags:
    - recommended
    - java
    - quarkus
    - maven
spec:
  owner: tssc
  type: service
# other fields removed for brevity-
The Software Template card is displayed in RHDH based on the header information, including the title, description, and tags.
=== Template Parameters
-
Within the template, the spec.parameters field is used to generate the form.
-
You can choose to break up the parameter prompting into form steps or collect all the parameters in a single step.
-
This allows RHDH to generate a wizard like step by step process
-
In other words the parameters property is an array, each entry in the array is a form step.
-
Each form step must specify a title, which properties it will ask from the user, and if any of them is required.
-
Following is snippet of te properties section of the Software template you’ll execute in the following steps.
-
RHDH renders as three steps, each with a seperate form:
-
Provide Information for Application
-
Provide Image Registry Information
-
Application Repository Information
parameters:
    # Parameters can be spread across multiple forms/pages, each
    # with their own titles and set of parameters
    - title: Provide Information for Application
      required:
        - name
        - javaPackageName
      properties:
        name:
          title: Name
          type: string
          description: Unique name of the component
          default: my-quarkus-tkn
          ui:field: EntityNamePicker
          maxLength: 23
         # other fields removed for brevity
    - title: Provide Image Registry Information
      required:
        - imageHost
        - imageOrganization
      properties:
        imageHost:
          title: Image Registry
          type: string
          default: Quay
          enum:
            - Quay
        imageOrganization:
          title: Organization
          type: string
          description: Name of the Quay Organization
          default: tssc
          ui:readonly: true
    - title: Application Repository Information
      required:
        - repoHost
        - repoOwner
        - repoVerifyCommits
      properties:
        repoHost:
          title: Source Repo
          type: string
          default: GitLab
          enum:
            - GitLab
        # other fields removed for brevity
-
=== Template Steps
-
Steps define the actions that are performed by the Scaffolder during its execution.
-
They are executed sequentially as defined in the template.
-
Each step utilizes actions for tasks such as publishing to a Gitlab repository (publish:gitlab) or registering a component in the catalog (catalog:register).
-
RHDH offers various built-in actions, and you can define custom actions as well.
steps: - id: fetch-provision-data name: Fetch Provision Data action: catalog:fetch input: entityRef: component:default/provisioning-data # other steps removed for brevity - id: publish-gitlab-source name: Publish action: publish:gitlab input: repoUrl: 'gitlab-gitlab.${{ steps["fetch-provision-data"].output.entity.metadata.labels["ocp-apps-domain"] }}?owner=${{ parameters.repoOwner }}&repo=${{parameters.name}}' repoVisibility: public # other steps removed for brevity - id: register-source name: Register Source action: catalog:register input: repoContentsUrl: ${{ steps['publish-gitlab-source'].output.repoContentsUrl }} catalogInfoPath: '/catalog-info.yaml' # other steps removed for brevity -
Notice how the parameters are referenced in the input of the steps?
-
Another point of note is that subsequent steps can access output from prior steps.
-
To see the available actions in RHDH and understand their input and output parameters, go to the Create Content page by selecting Create from the left sidebar menu.
-
Next, open the Kebab menu at the top right of the Create Content page and choose Installed Actions.
=== Template Output
-
The spec.output can be used to display useful information such as:
-
Links to newly created Components
-
Source Code Repository links
-
Links to Git Merge Requests that are needed etc
-
output:
    links:
      - title: Source Repository
        url: ${{ steps['publish-gitlab-source'].output.remoteUrl }}
      - title: GitOps Repository
        url: ${{ steps['publish-gitlab-gitops'].output.remoteUrl }}
      - title: Open Component in catalog
        icon: catalog
        entityRef: ${{ steps['register-source'].output.entityRef }}
      - title: Open GitOps Resource in catalog
        icon: catalog
        entityRef: ${{ steps['register-gitops'].output.entityRef }}
Step 3: Sign Your Code and Enter the Trusted Supply Chain
-
In this step, you will make a small code change from within OpenShift Dev Spaces (VS Code) and commit it to Git. The commit will be signed automatically using your OIDC identity, and this signed commit will trigger the CI pipeline.
-
Your trusted identity is now carried forward into the build, verification, and promotion stages of the software supply chain.
3.1 Sign in to OpenShift Dev Spaces
-
Right Click the link for OpenShift Dev Spaces and choose Open in Inconito Window. This will launch your cloud-based development environment in a separate browser window.
If you do not use a Private/Incognito window, your session will open using the admin credentials instead of the intended user1 account. Since code signing is configured specifically for user1, it will not work correctly when logged in as the admin user, which can prevent your development workspace from functioning as expected. -
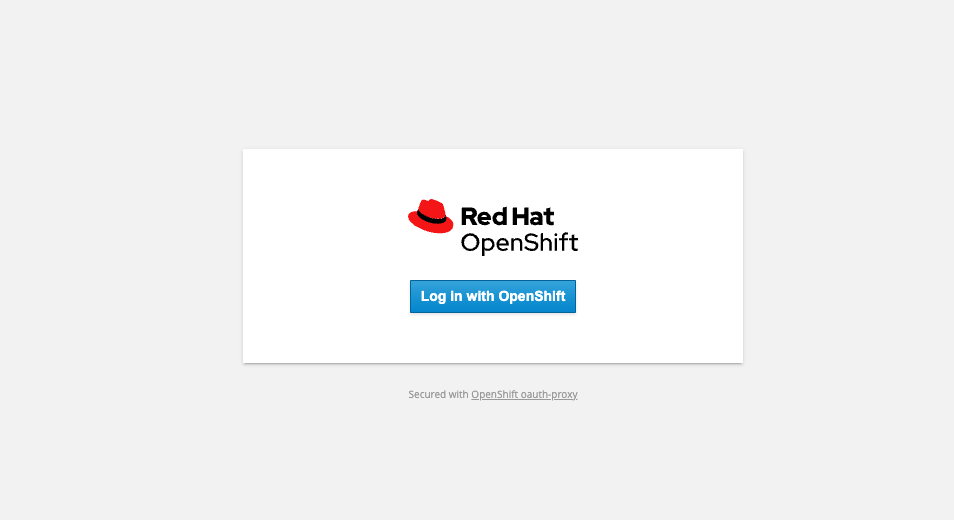
You will be prompted to authenticate using your OpenShift credentials. Click Log in with OpenShift to continue.
-
Provide your credentials follows:
-
Username:
user1 -
Password:
{password}
-
-
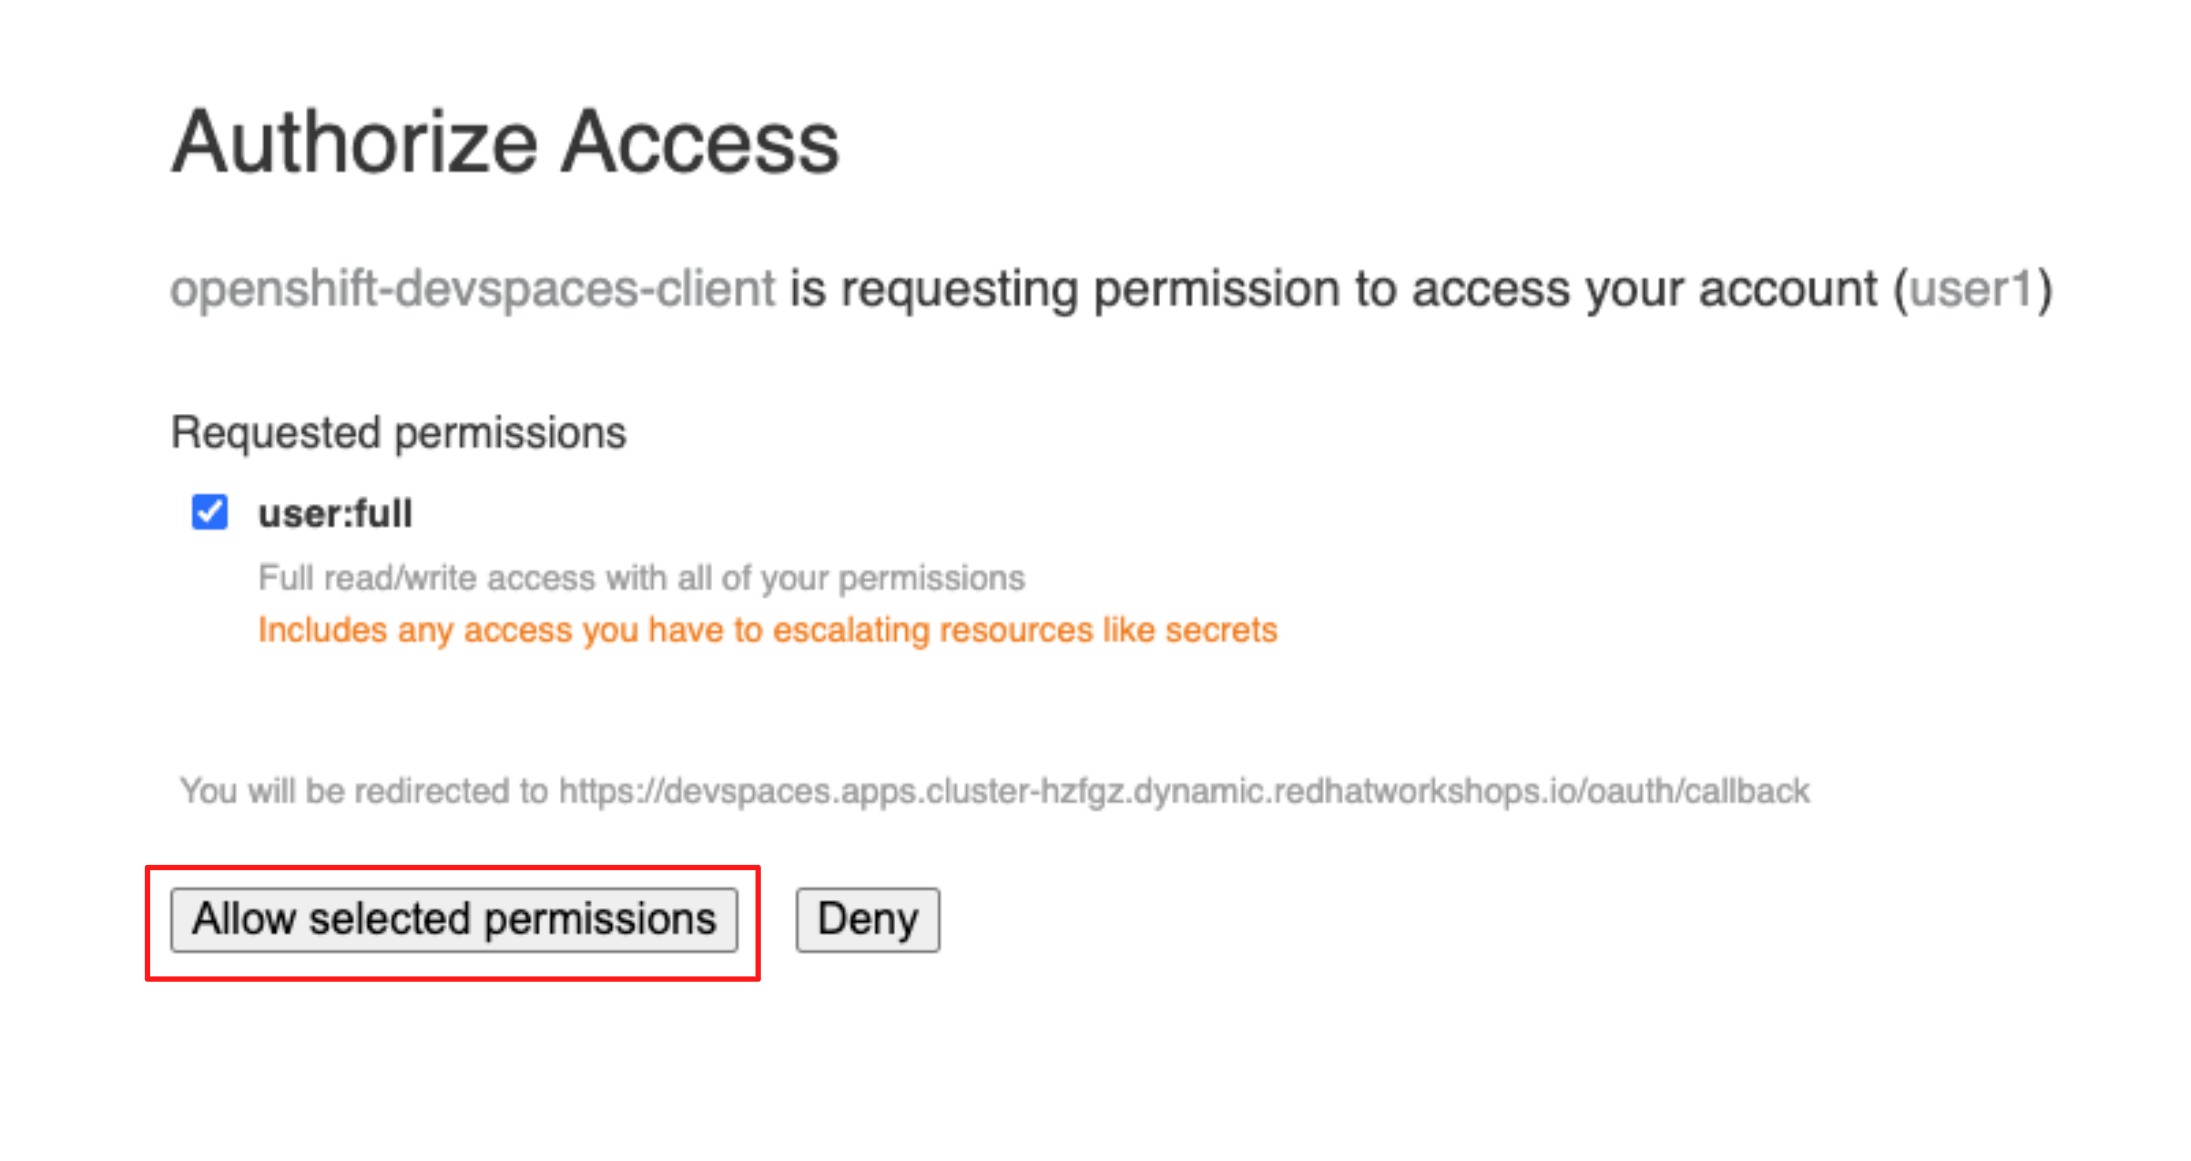
Next, you will be asked to authorize access for the OpenShift Dev Spaces client. Review the requested permissions and click Allow selected permissions to proceed.
-
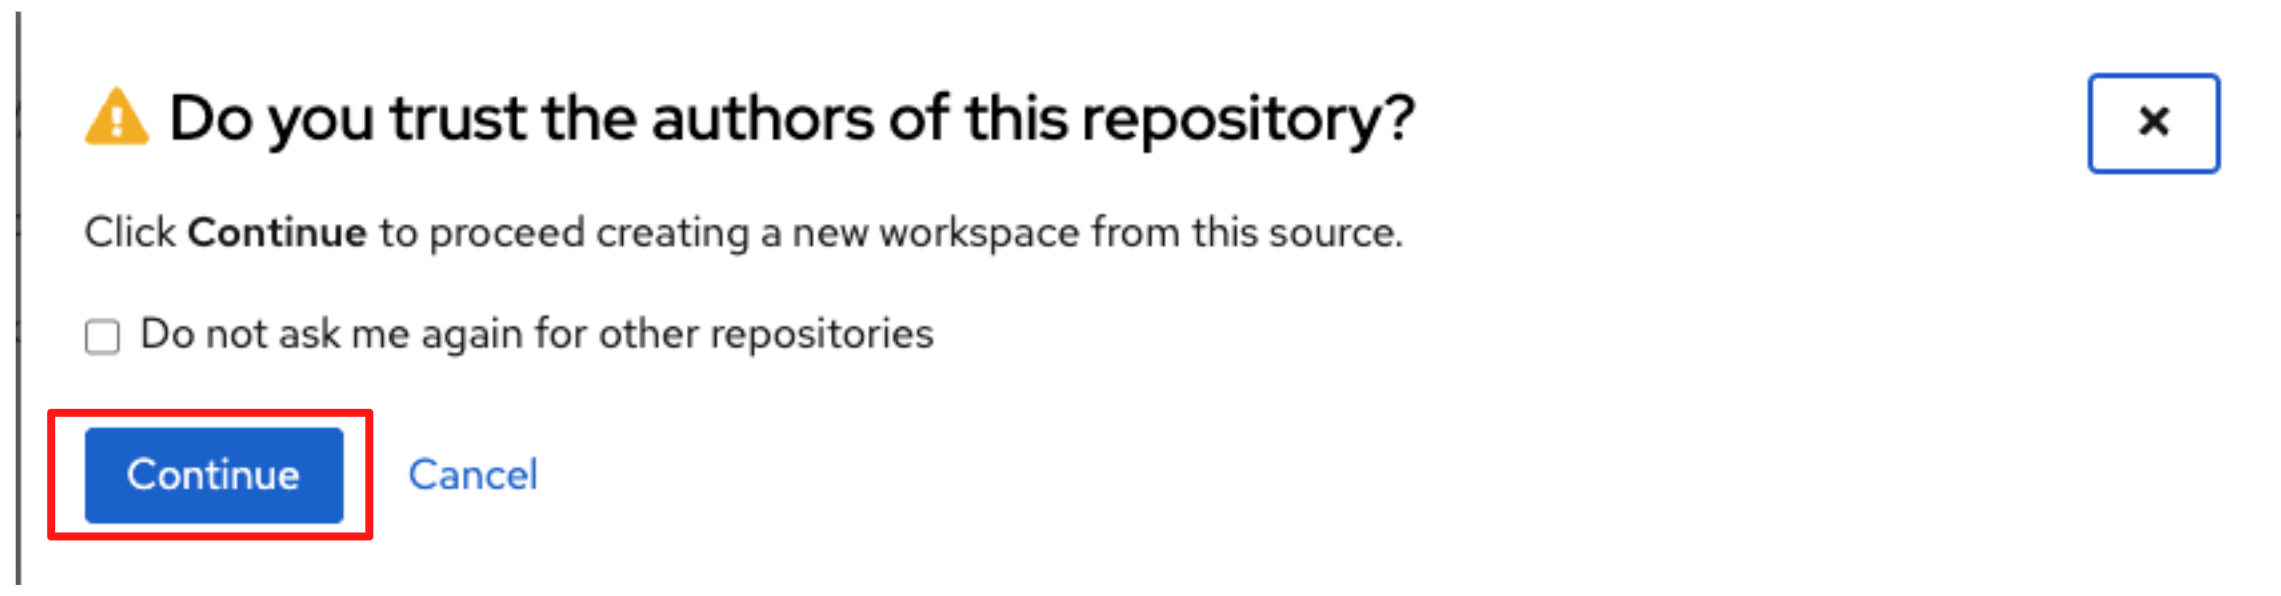
Confirm that you trust the repository by clicking Continue to proceed with creating the workspace.
-
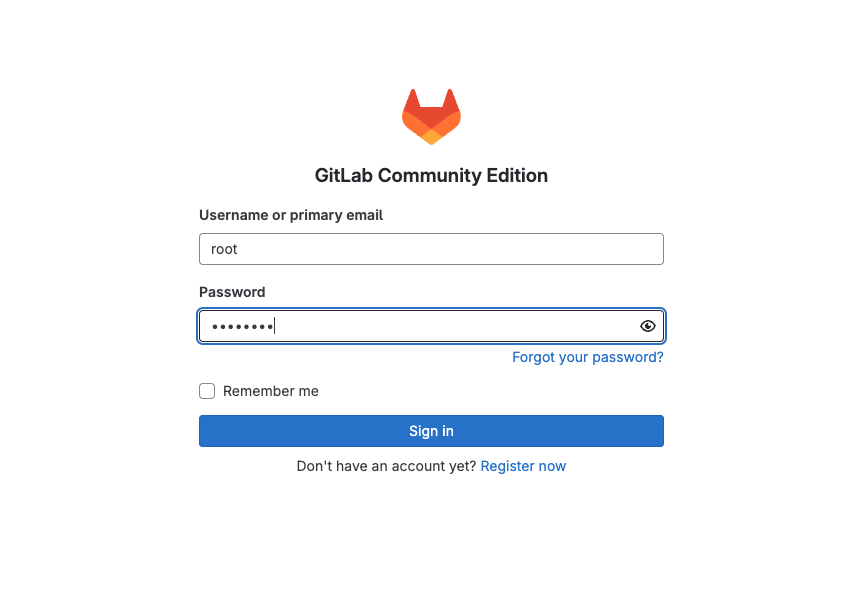
You will then be prompted to provide GitLab credentials.
-
Provide your credentials follows:
-
Username:
{gitlab_root_user} -
Password:
{gitlab_root_password}
-
-
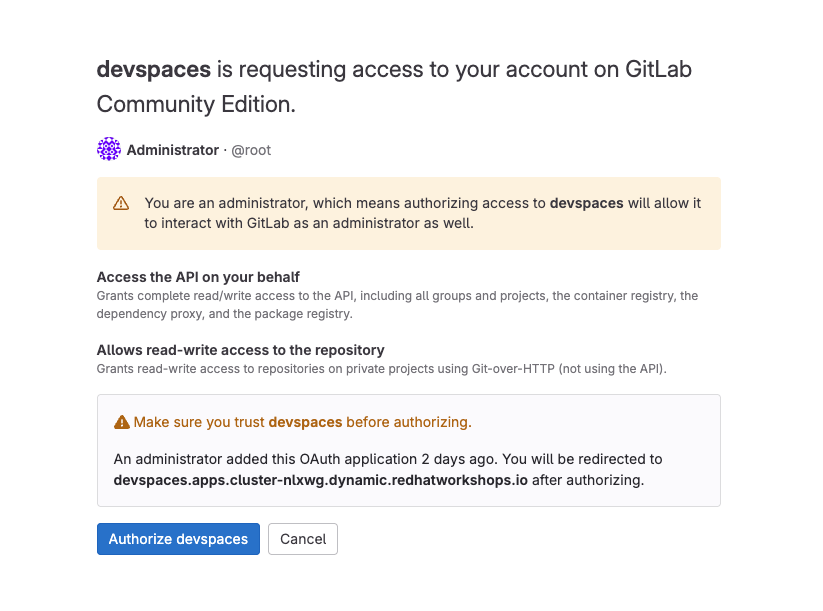
When prompted, authorize OpenShift Dev Spaces to access GitLab by clicking Authorize devspaces.
-
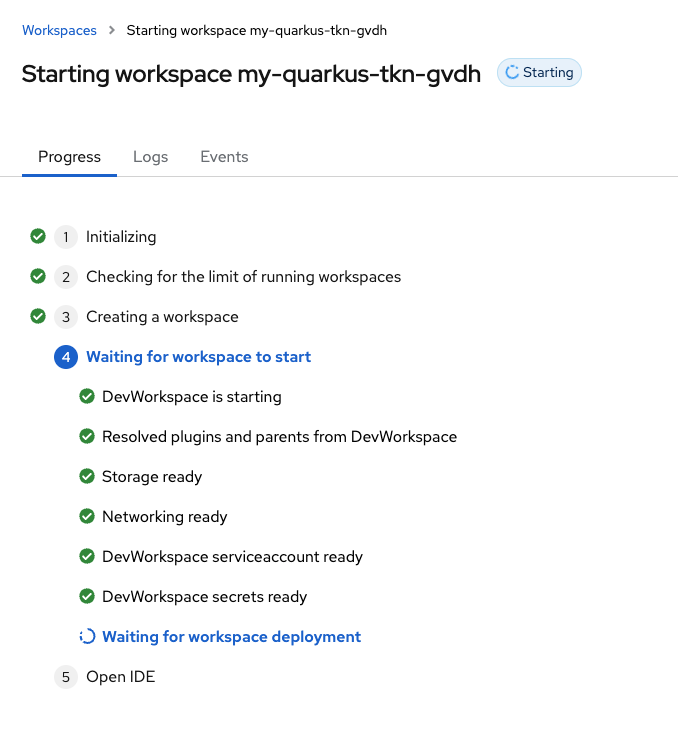
OpenShift Dev Spaces then begins creating your workspace.
-
After waiting a few minutes for OpenShift Dev Spaces to finish setting up your workspace, you’re presented with your IDE.
-
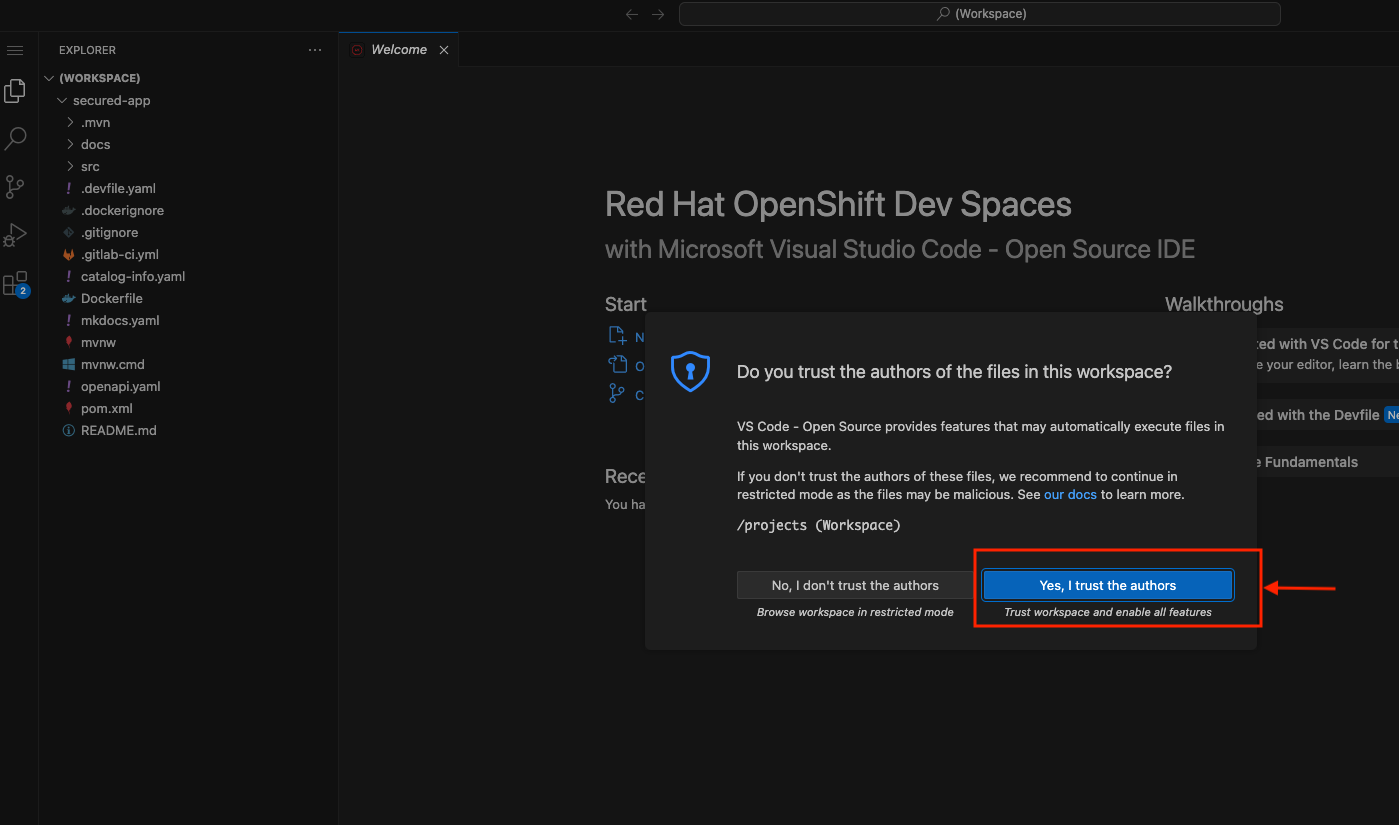
When asked click Yes, I trust the authors.
-
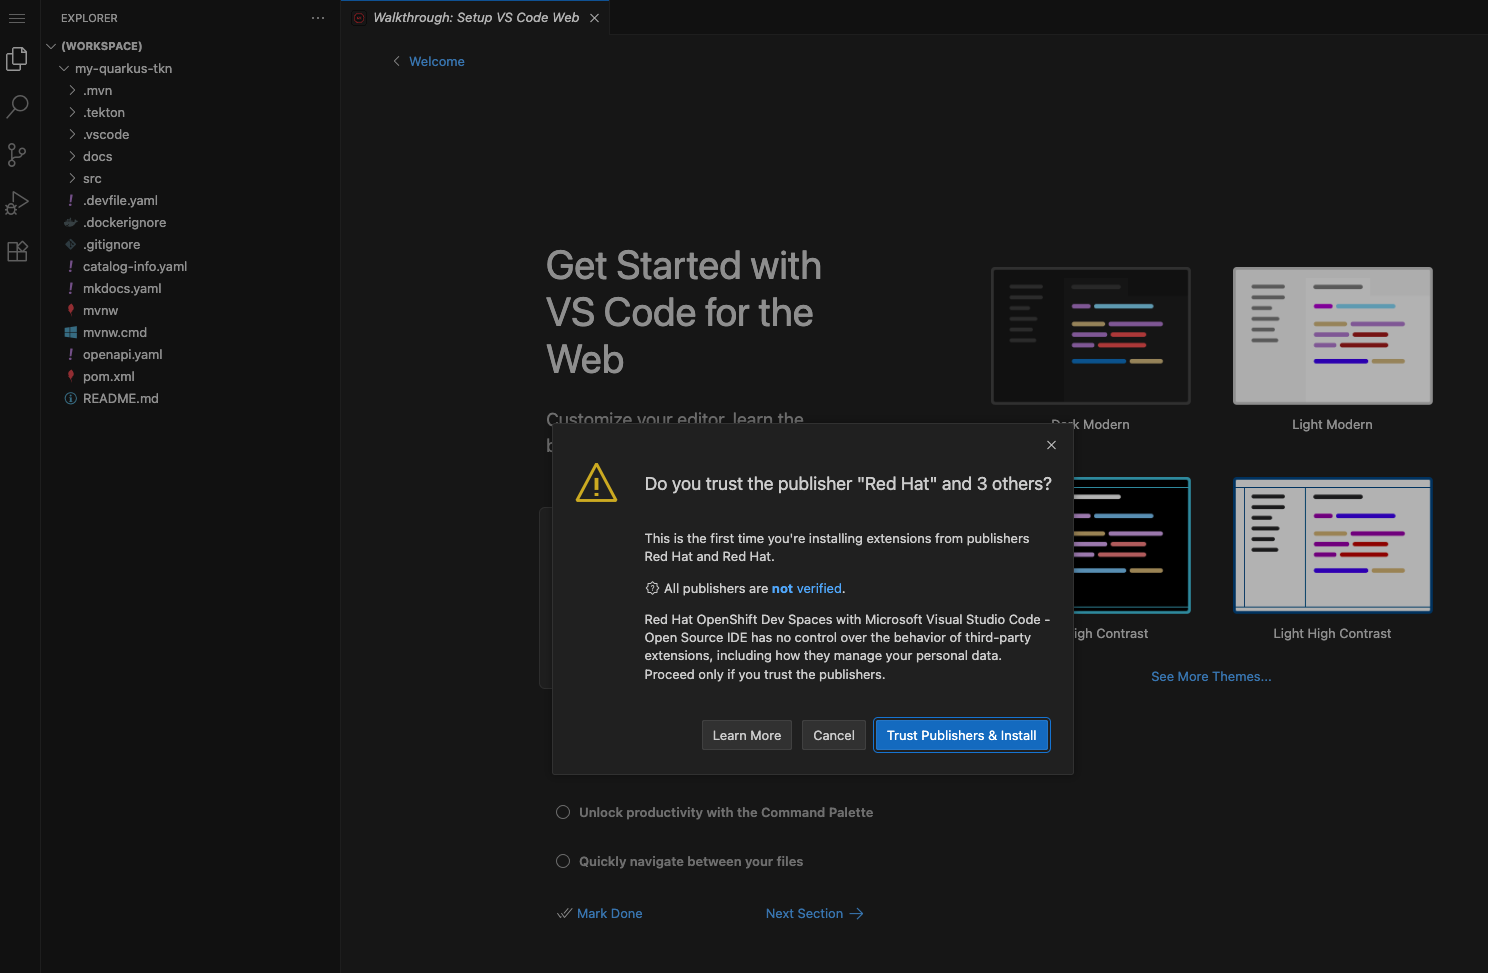
When prompted, confirm the installation of the required extensions by clicking Trust Publishers & Install to proceed.
3.2 Verify Git Signing Configuration in OpenShift Dev Spaces
-
Before committing any code, verify that Git commit signing is correctly configured in your OpenShift Dev Spaces workspace.
-
The development environment has already been configured to use gitsign based on the configuration applied earlier in the Devfile.
-
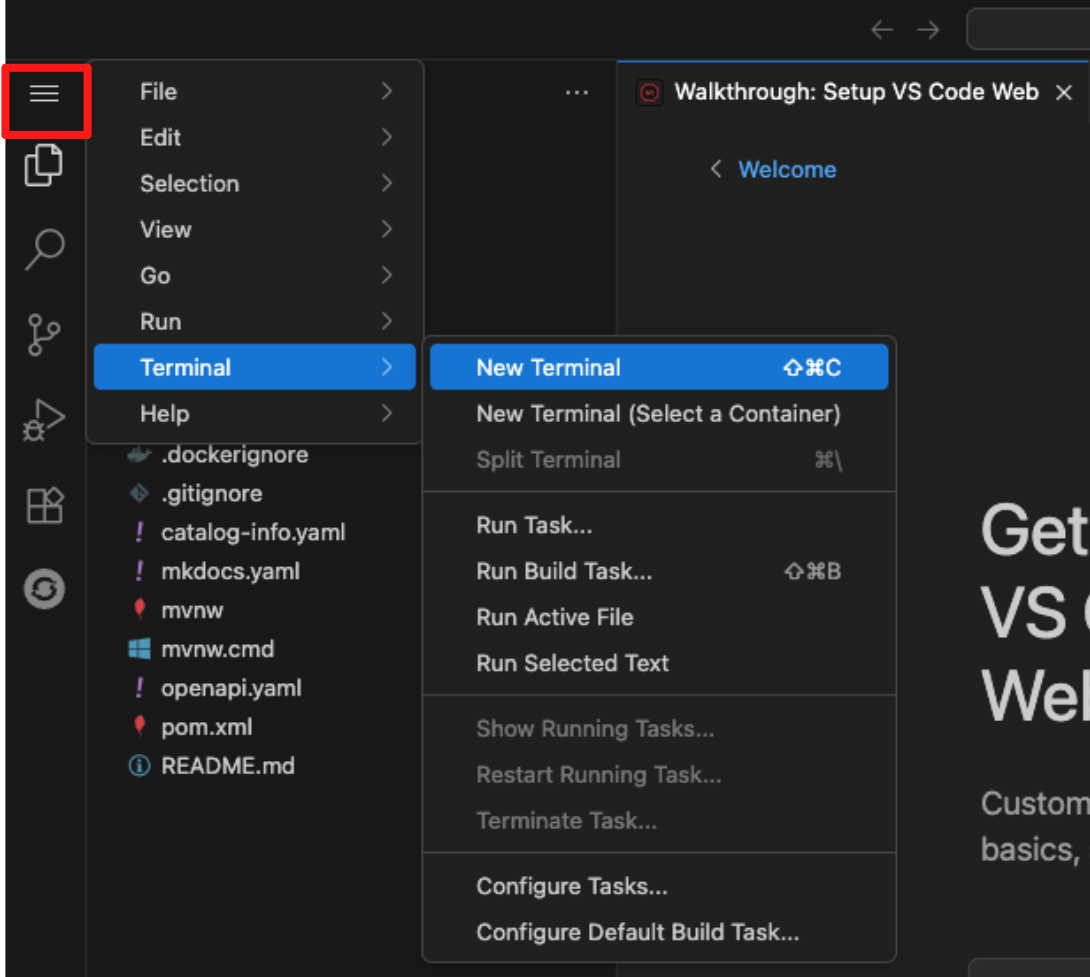
To confirm this, open the VS Code terminal inside your workspace by clicking the menu (hamburger) icon in the top-left corner, selecting Terminal, and then choosing New Terminal.
Then run the following command, you may be prompted by your browser to allow paste access into the terminal. If so, approve the prompt to proceed.
git config --global --list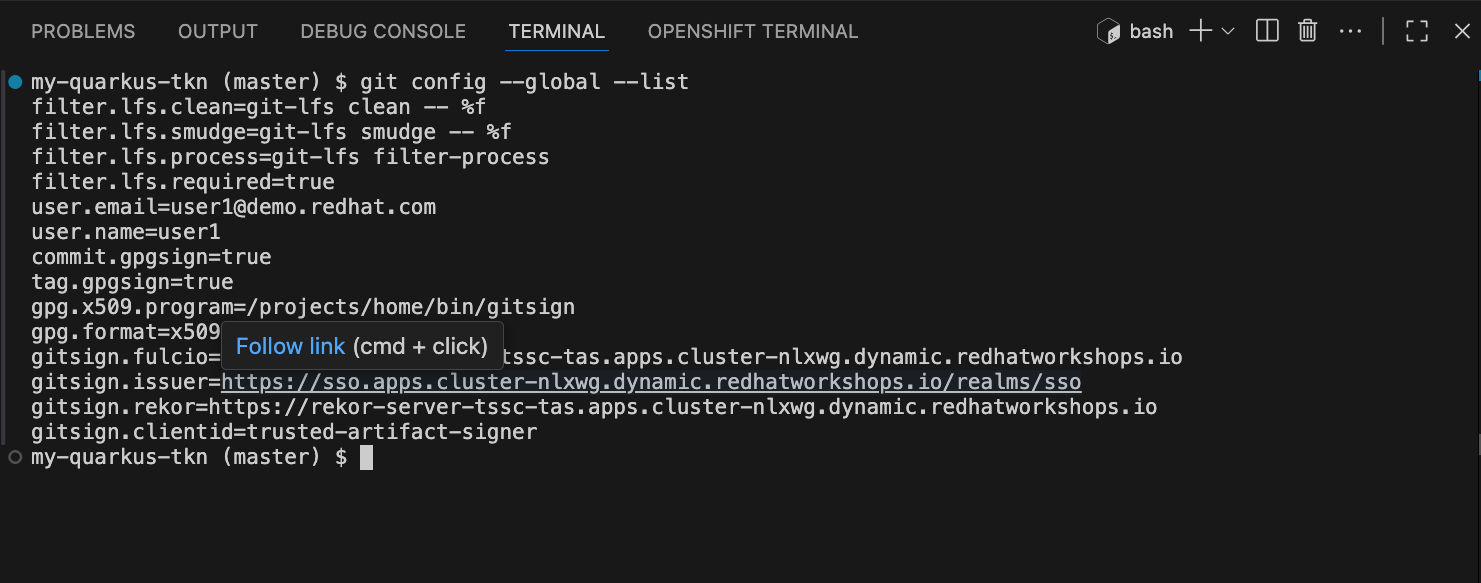
-
3.3 Apply a simple code change
-
To see code signing in action, you will apply a simple change by adding a comment to the documentation.
-
Navigate to the docs folder and open the index.md file.
-
Add the following line at the bottom of the document:
# Test code signing.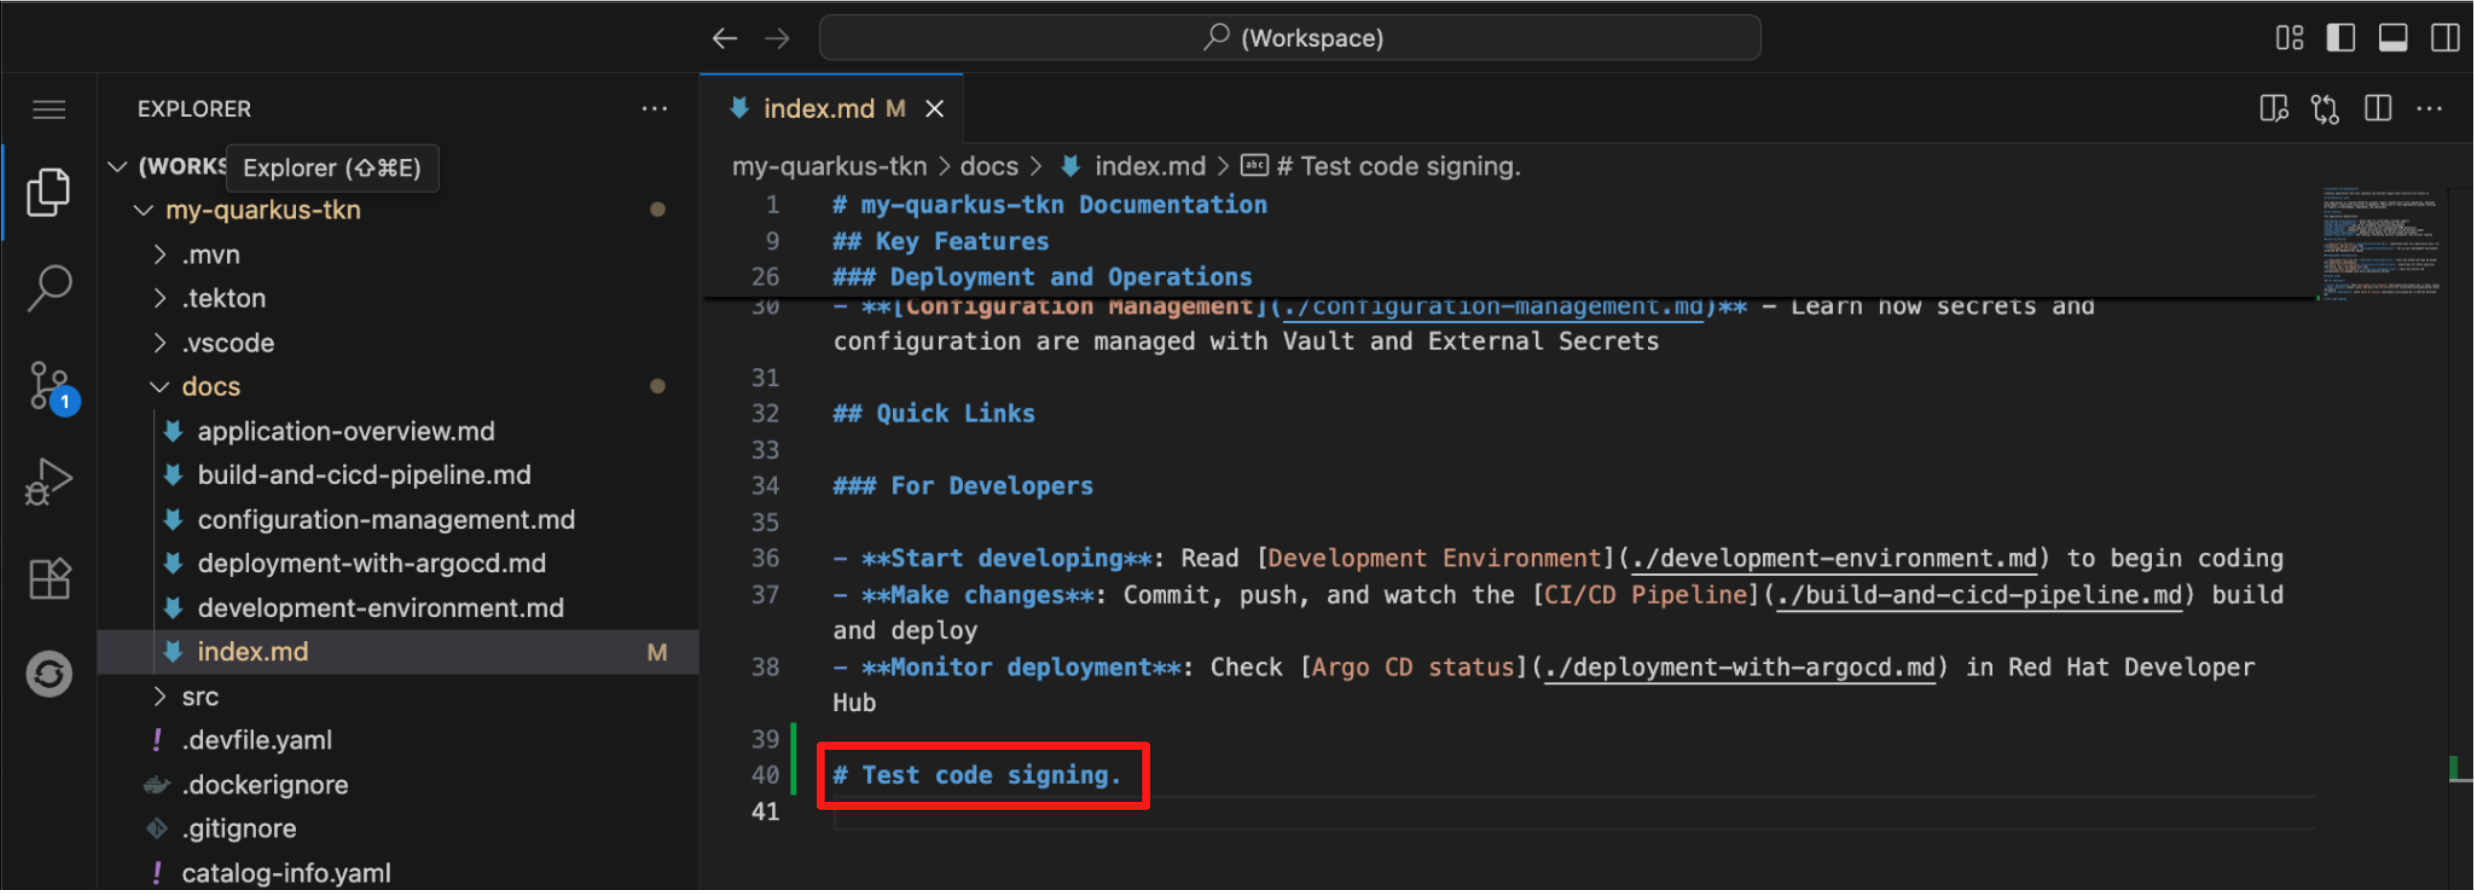
-
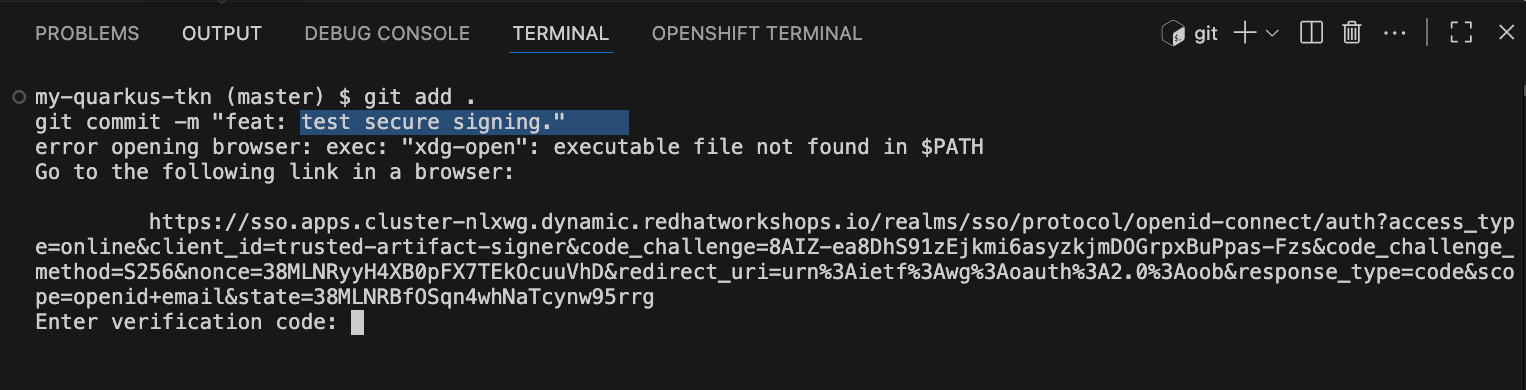
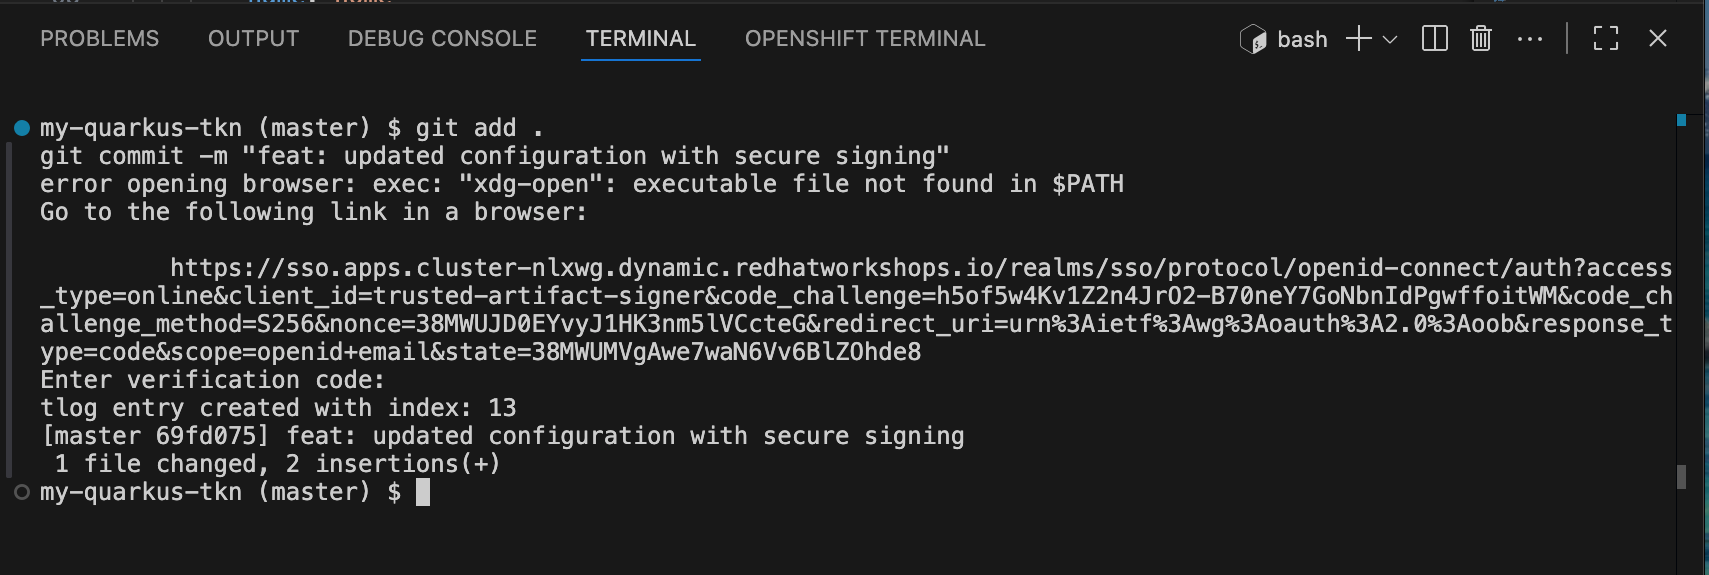
To begin commiting your code to the repository, run the following command to add your changes to staging and commiting your changes:
git add . git commit -m "feat: test secure signing." -
You will notice that you receive an error message that states error opening browser: exec: "xdg-open": executable file not found in $PATH. This is because our VS Code terminal is trying to open a browser window to obtain your credentials for signing but is unable to as it is running as a container. * However, Gitsign allows you to provide your signing credentials by copying and pasting the url it outputs into a separate browser window.
-
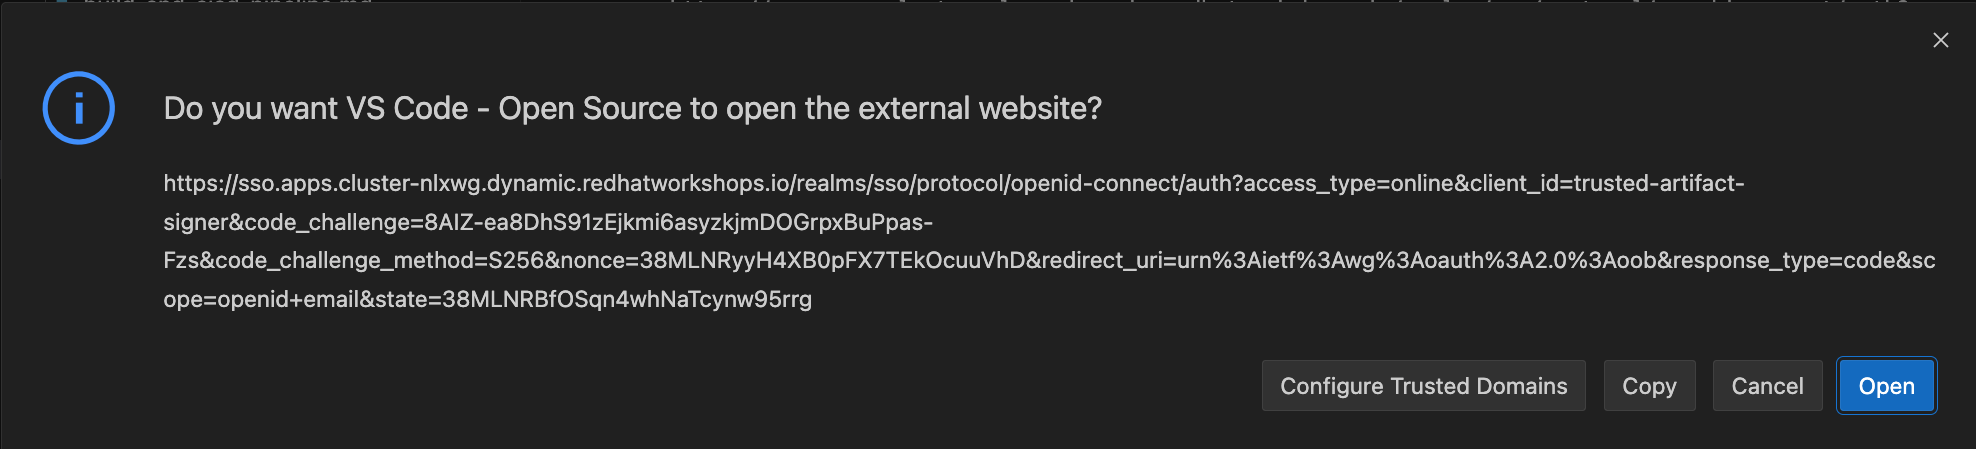
Hover over the https://sso.apps<…>; URL and use
CMD + Click(Mac) orCTRL + Click(Windows/Linux) to open the Red Hat SSO login page in your local browser, where you will authenticate and obtain the verification code required to complete the signed commit. -
Click Open to allow VS Code to open the Red Hat SSO authentication page in your local browser.
-
The browser will prompt you for your credentials.
-
Provide your credentials follows:
-
Username:
user1 -
Password:
{password}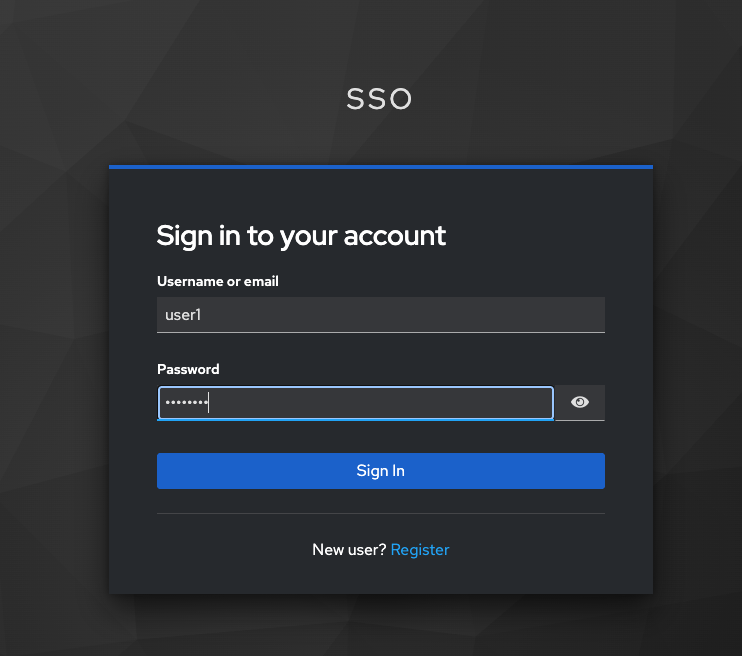
-
-
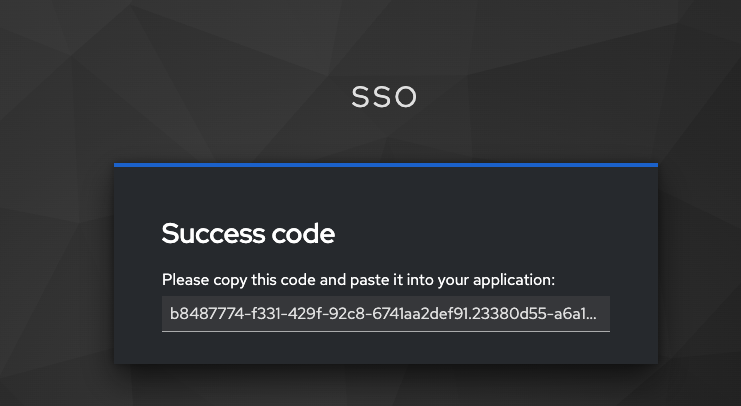
You will then be redirected to another page that will present a verification code. Copy this code into your clipboard.
-
Return to Dev Spaces and paste this code into the waiting prompt in the VS Code terminal.
Once you’ve pasted the code, depending on your browser, you may be presented with a popup to allow paste functionality in Devspaces. Click Allow and then hit Enter. If no popup appears, just hit Enter. -
If successful, you should receive a successful commit message:
-
Push the code to the repository with the below command:
git push origin master -
This action sets the build pipeline into motion.
-
5.4 Explore the Tekton Pipeline
In this step, you will observe the CI pipeline that was triggered by your signed commit and follow its execution through the different verification stages.
Switch back to Red Hat Developer Hub in Showroom and select the CI tab from the top menu. You should see the pipeline execution in progress. Note that the pipeline may take a few minutes to complete.

In the meantime, let’s explore the key tasks in this pipeline that demonstrate the security guardrails enforced throughout the workflow.
5.5 Verify Commit
-
The first task executed after the Git repository is cloned is to verify that the code change you just committed was made by a trusted identity.
-
This task succeeds only if the pipeline can validate the signature on the commit that triggered the run. This is the signature you created using gitsign when you committed the change from OpenShift Dev Spaces.
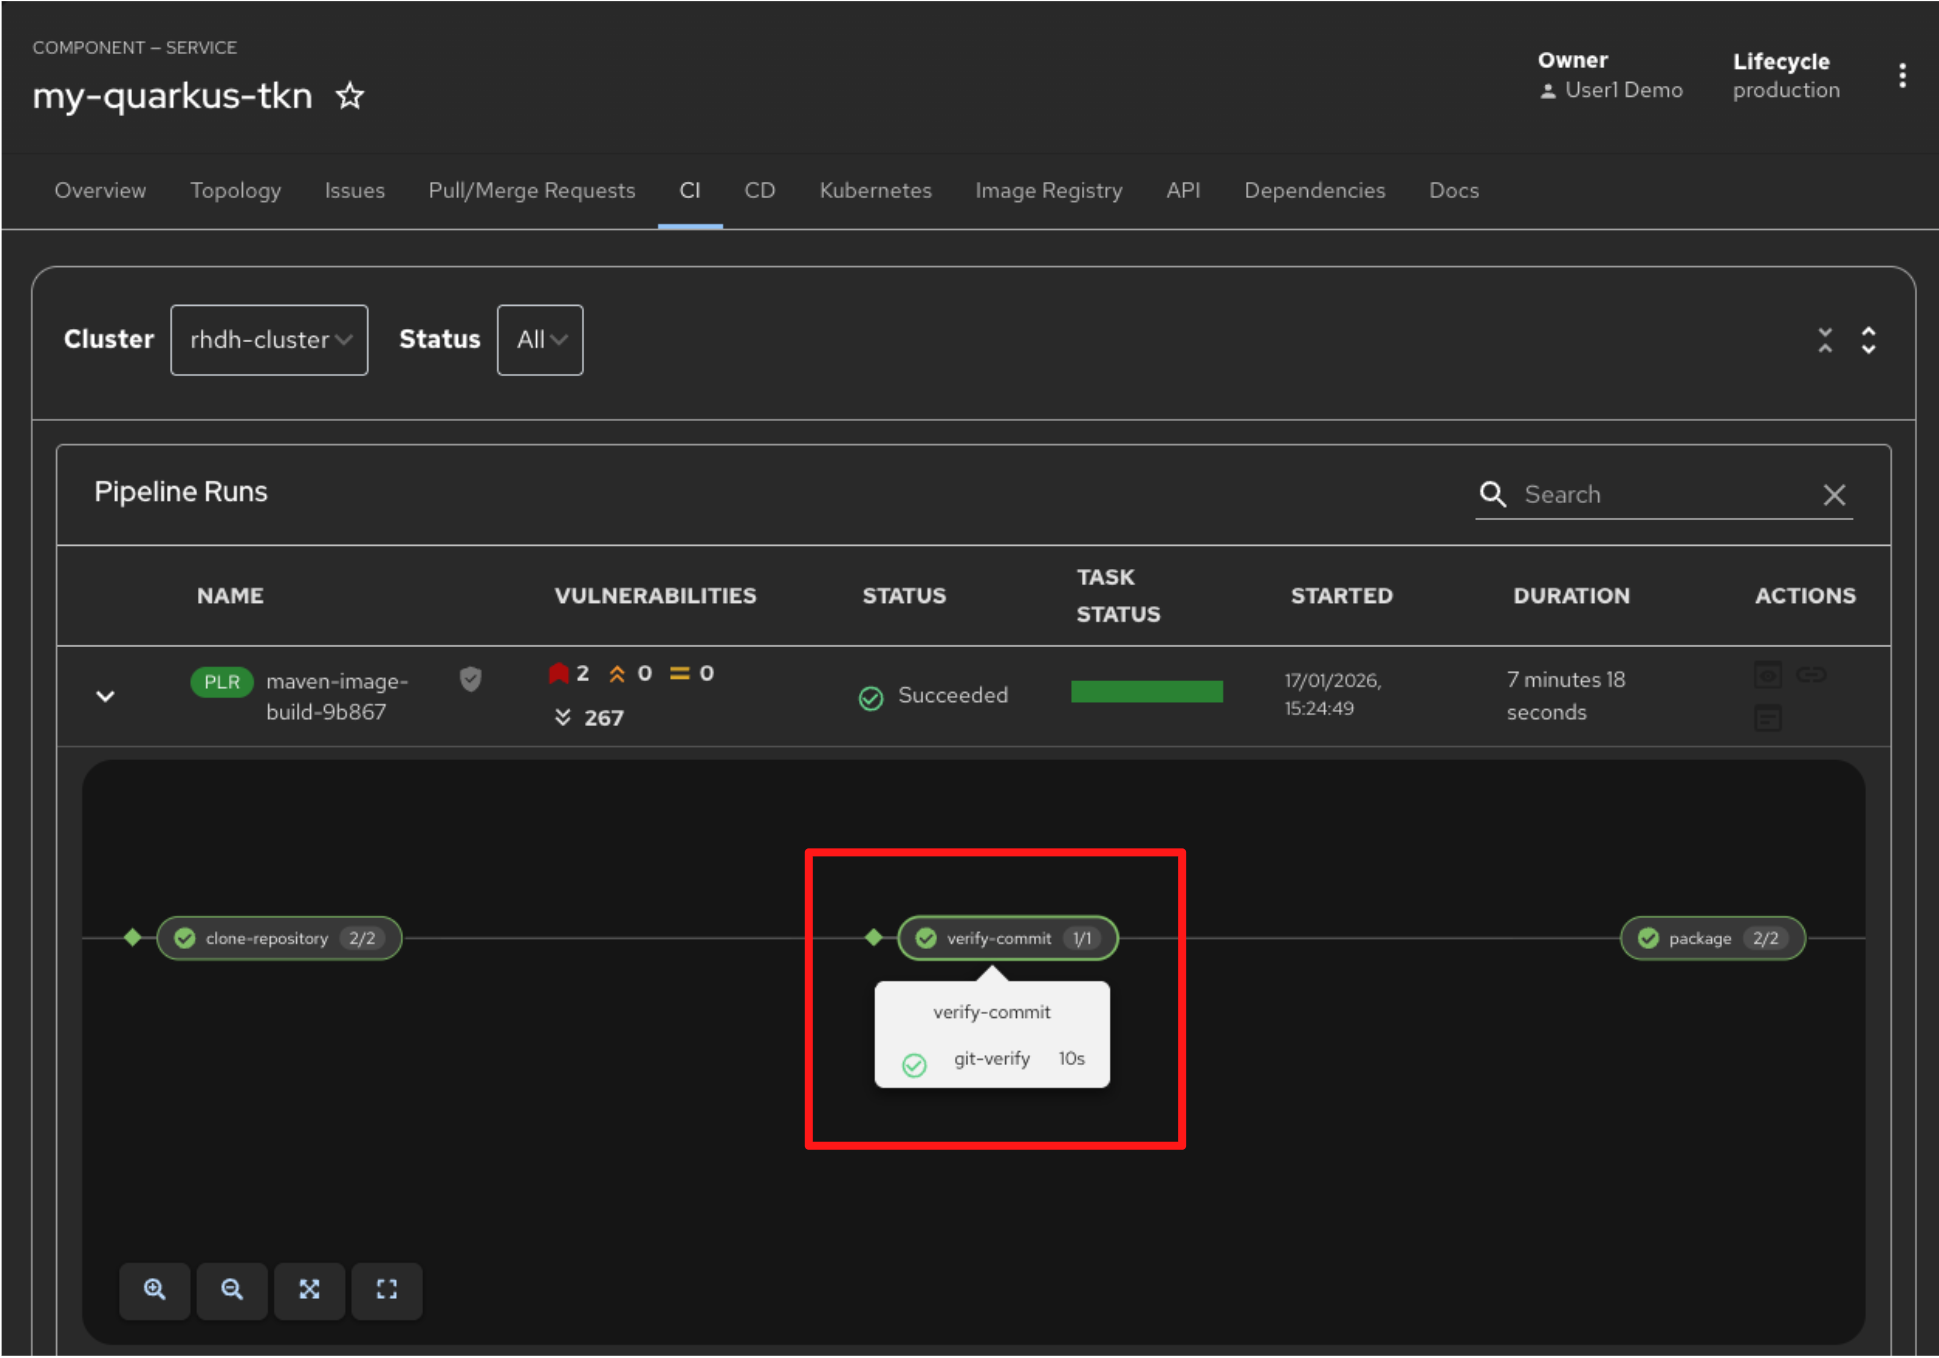
-
Click on the verify-commit task to view the logs.
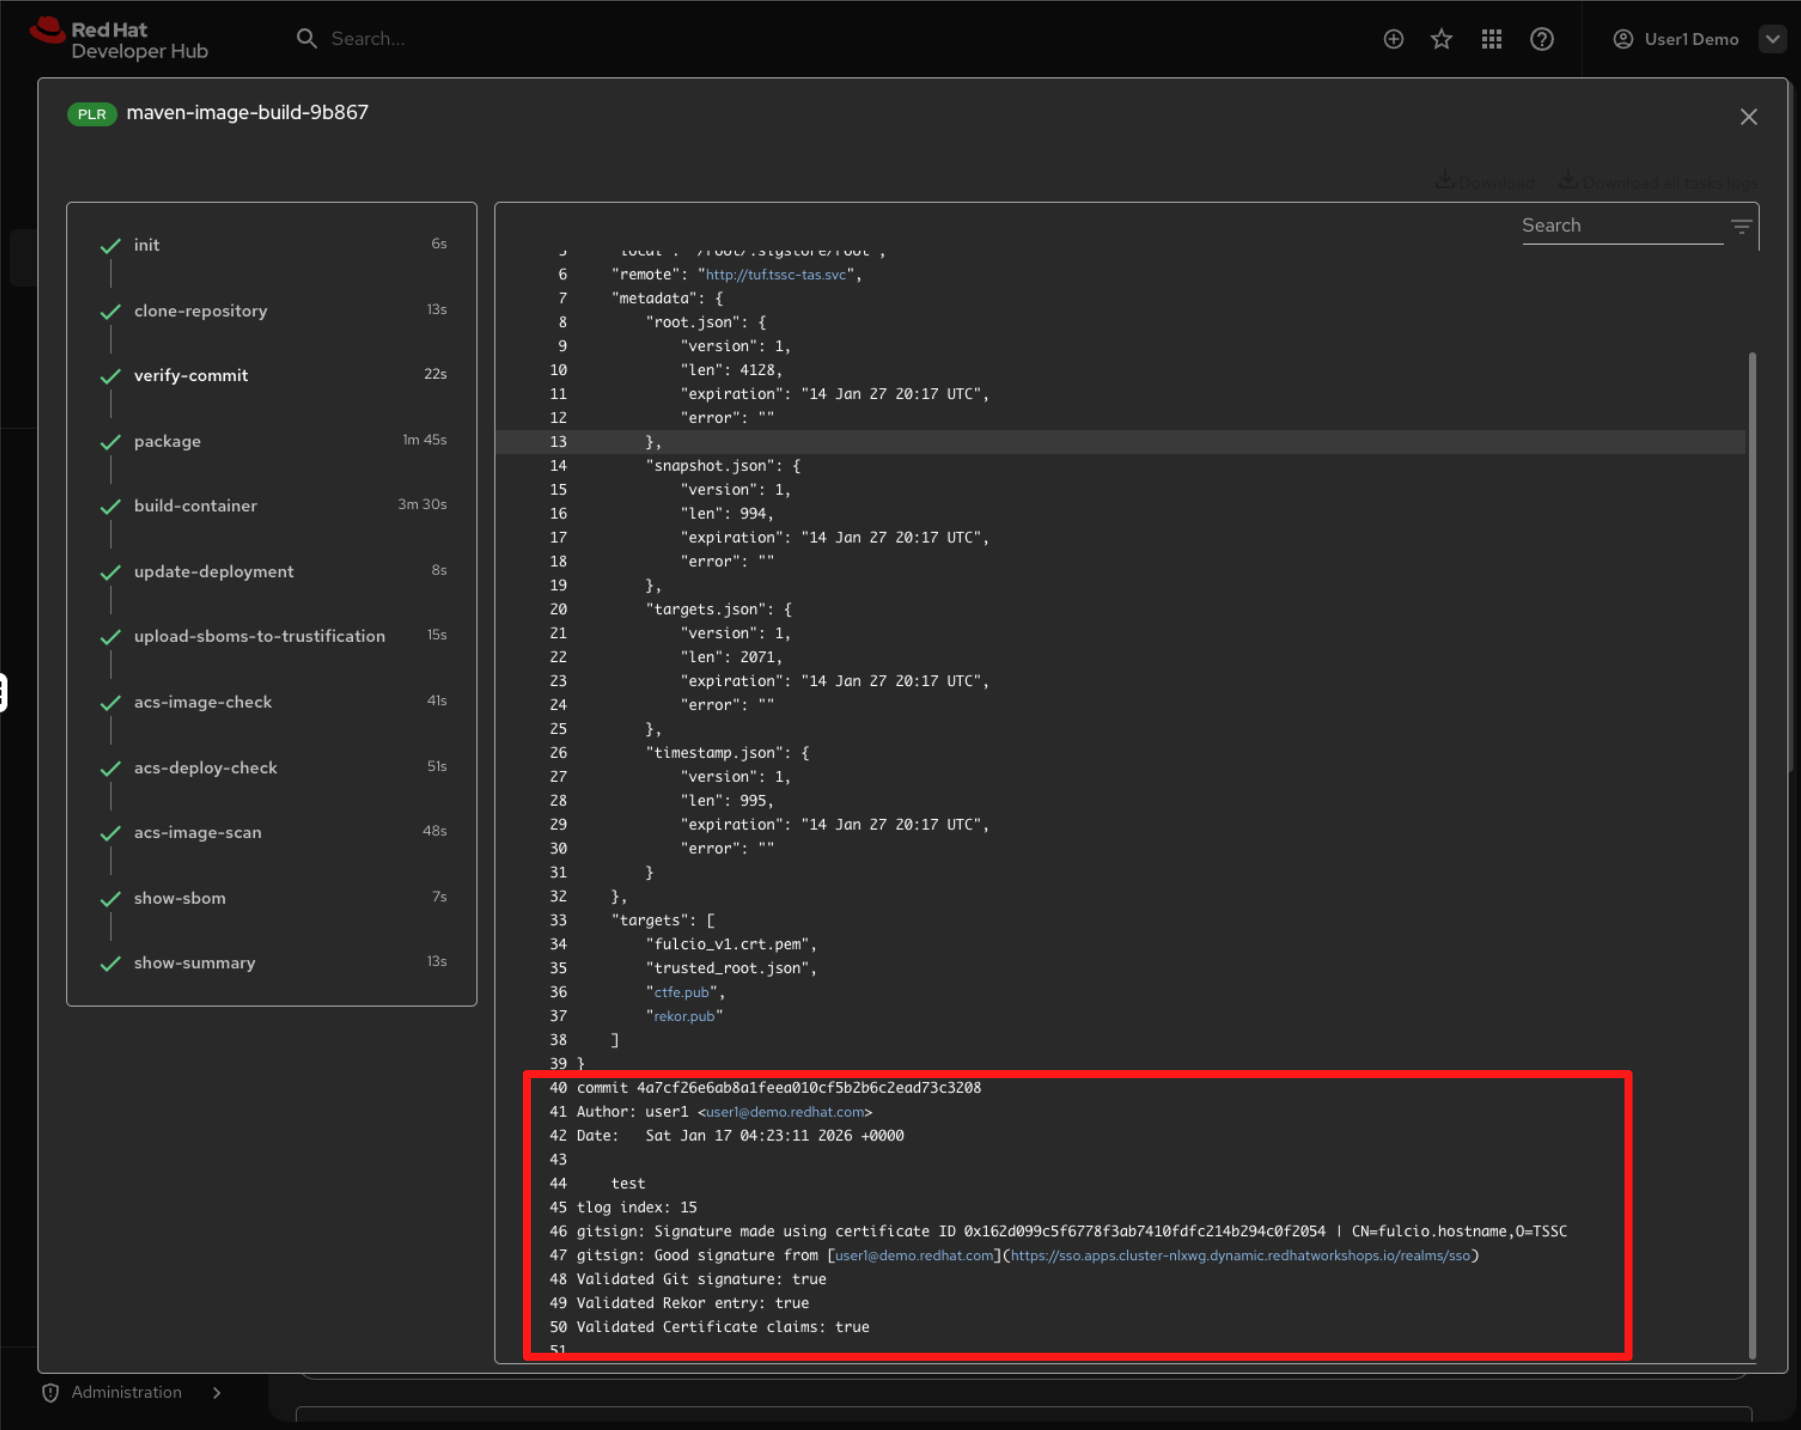
-
In the output, you can see that the commit signature you created earlier has been successfully validated. The log confirms a good signature from user1, along with successful verification of the Fulcio certificate, Rekor transparency entry, and certificate claims.
-
Close the log and return to the pipeline view to explore the next task.
5.6 Build Container
-
After the source code is packaged, the build-container task builds a container image from the verified source. As part of this step, the image is attested and a Software Bill of Materials (SBOM) is generated.
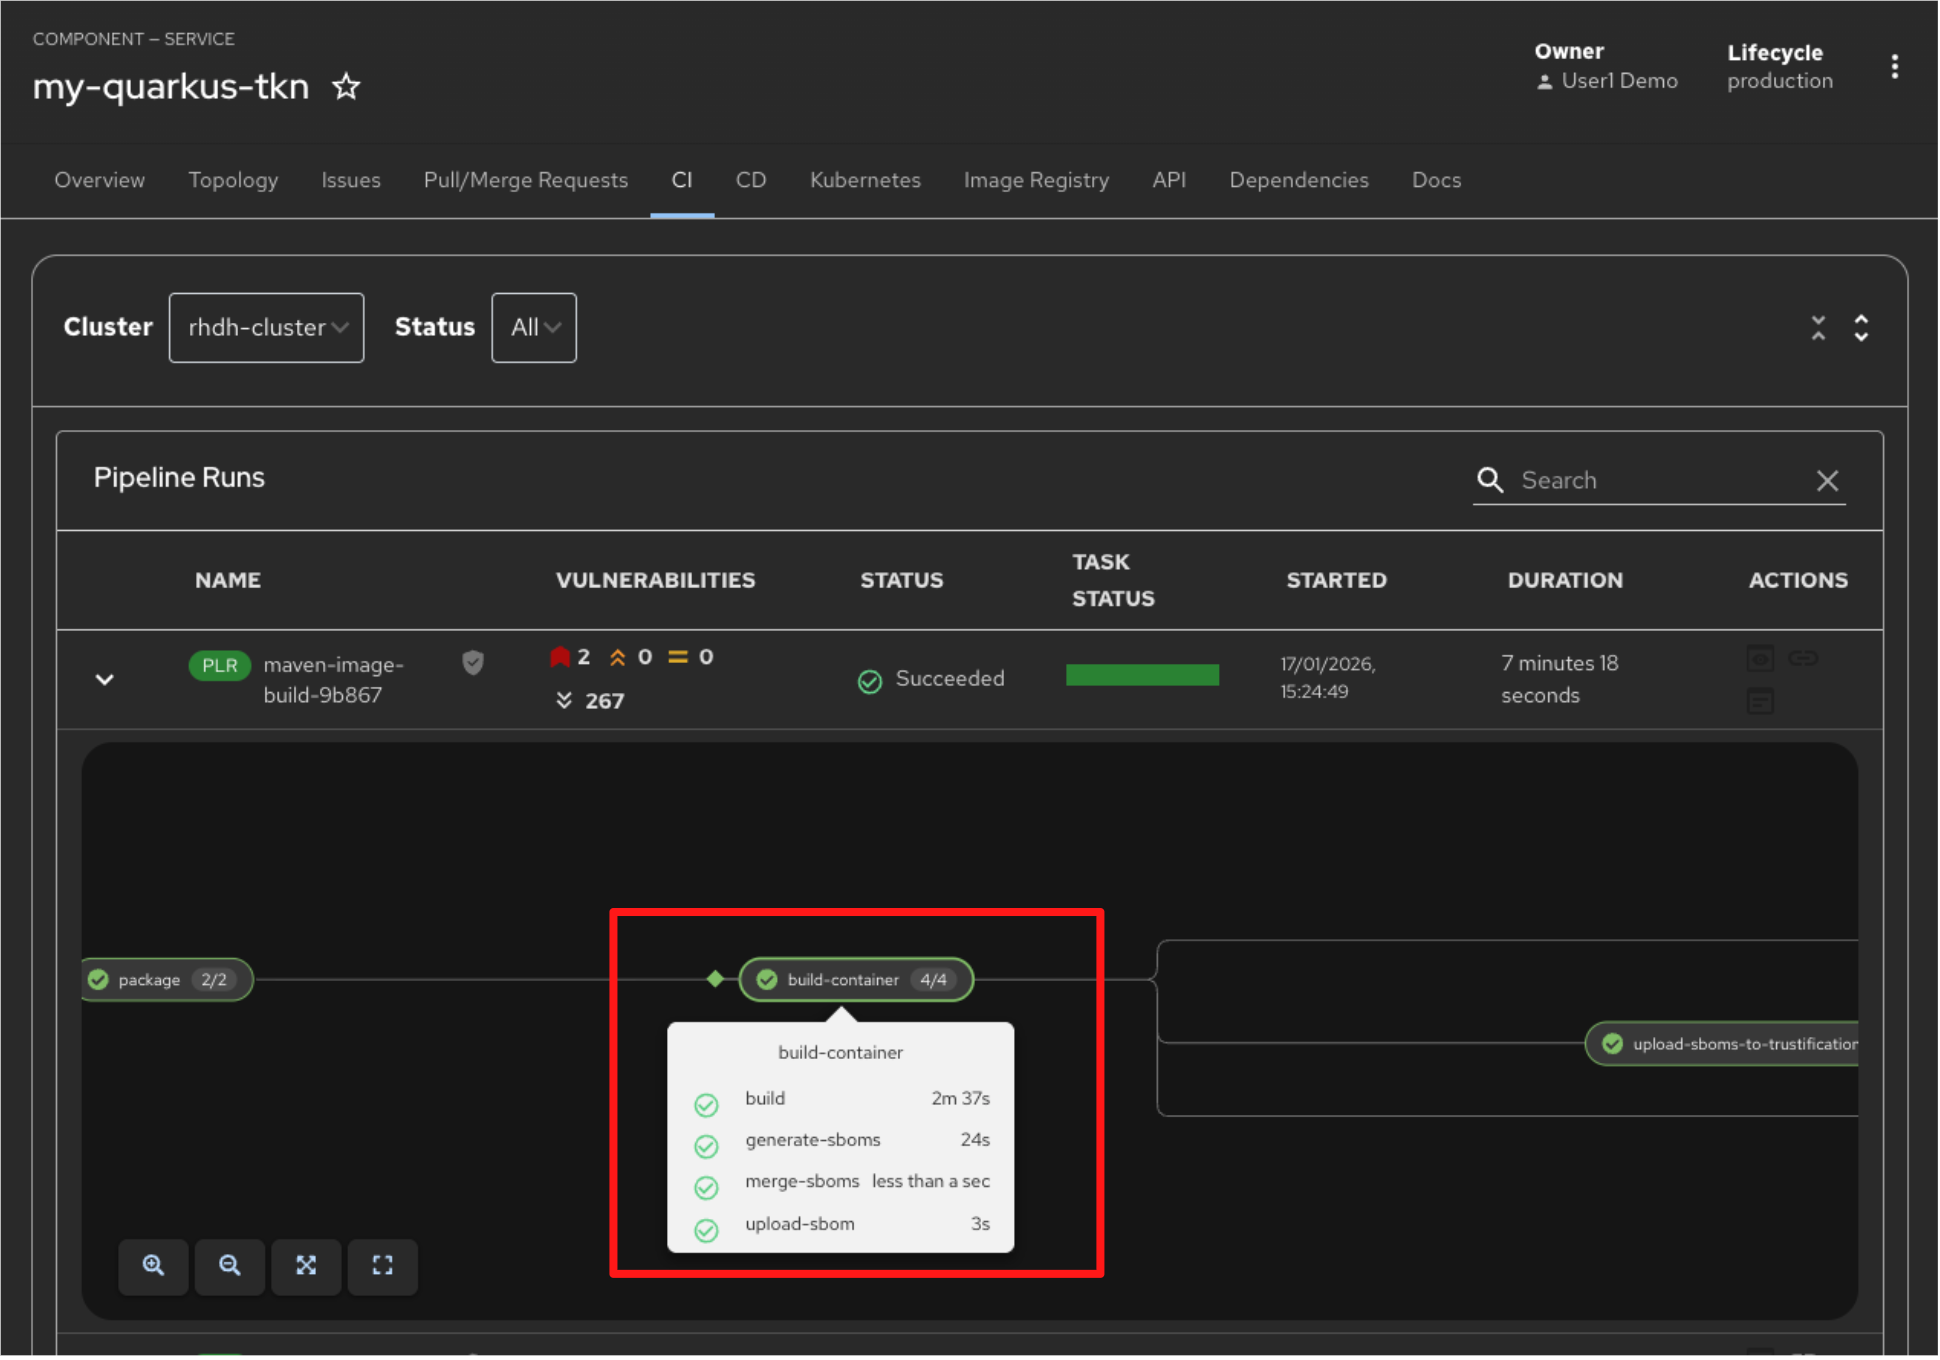
-
On successful completion, the container image, along with its associated attestations, signatures, and SBOM, is pushed to Red Hat Quay.
-
The SBOM is stored in the image registry alongside the container image, ensuring that composition data travels with the artifact.
-
Switch to the Image Registry tab and observe that the generated signature, attestation, and SBOM files appear side-by-side with the container image produced by the pipeline.
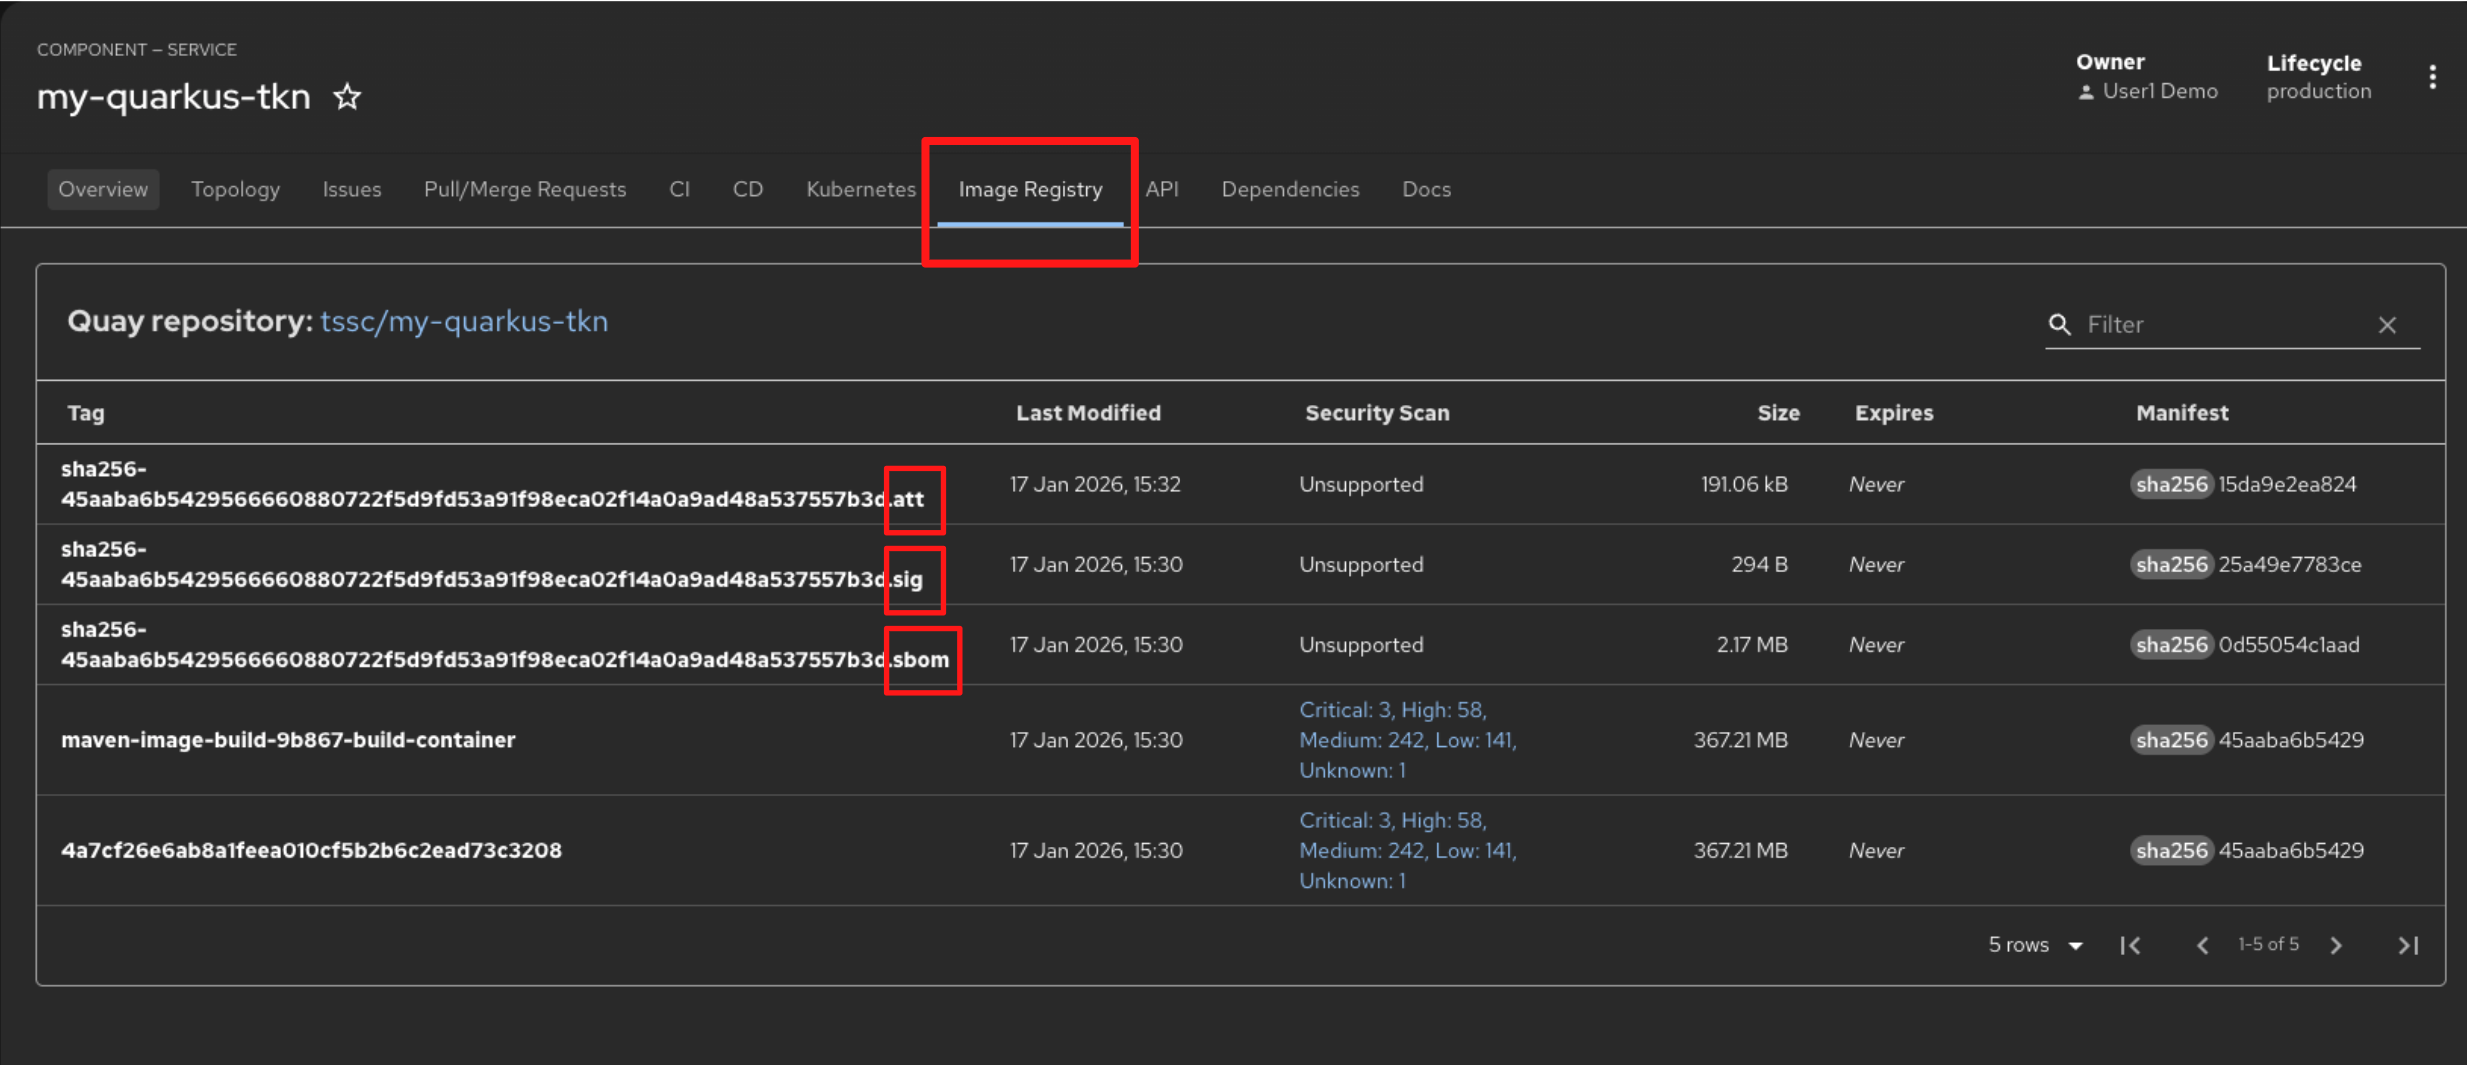
-
Switch back to the CI tab to explore the next task.
5.3 Upload SBOM to Repository
-
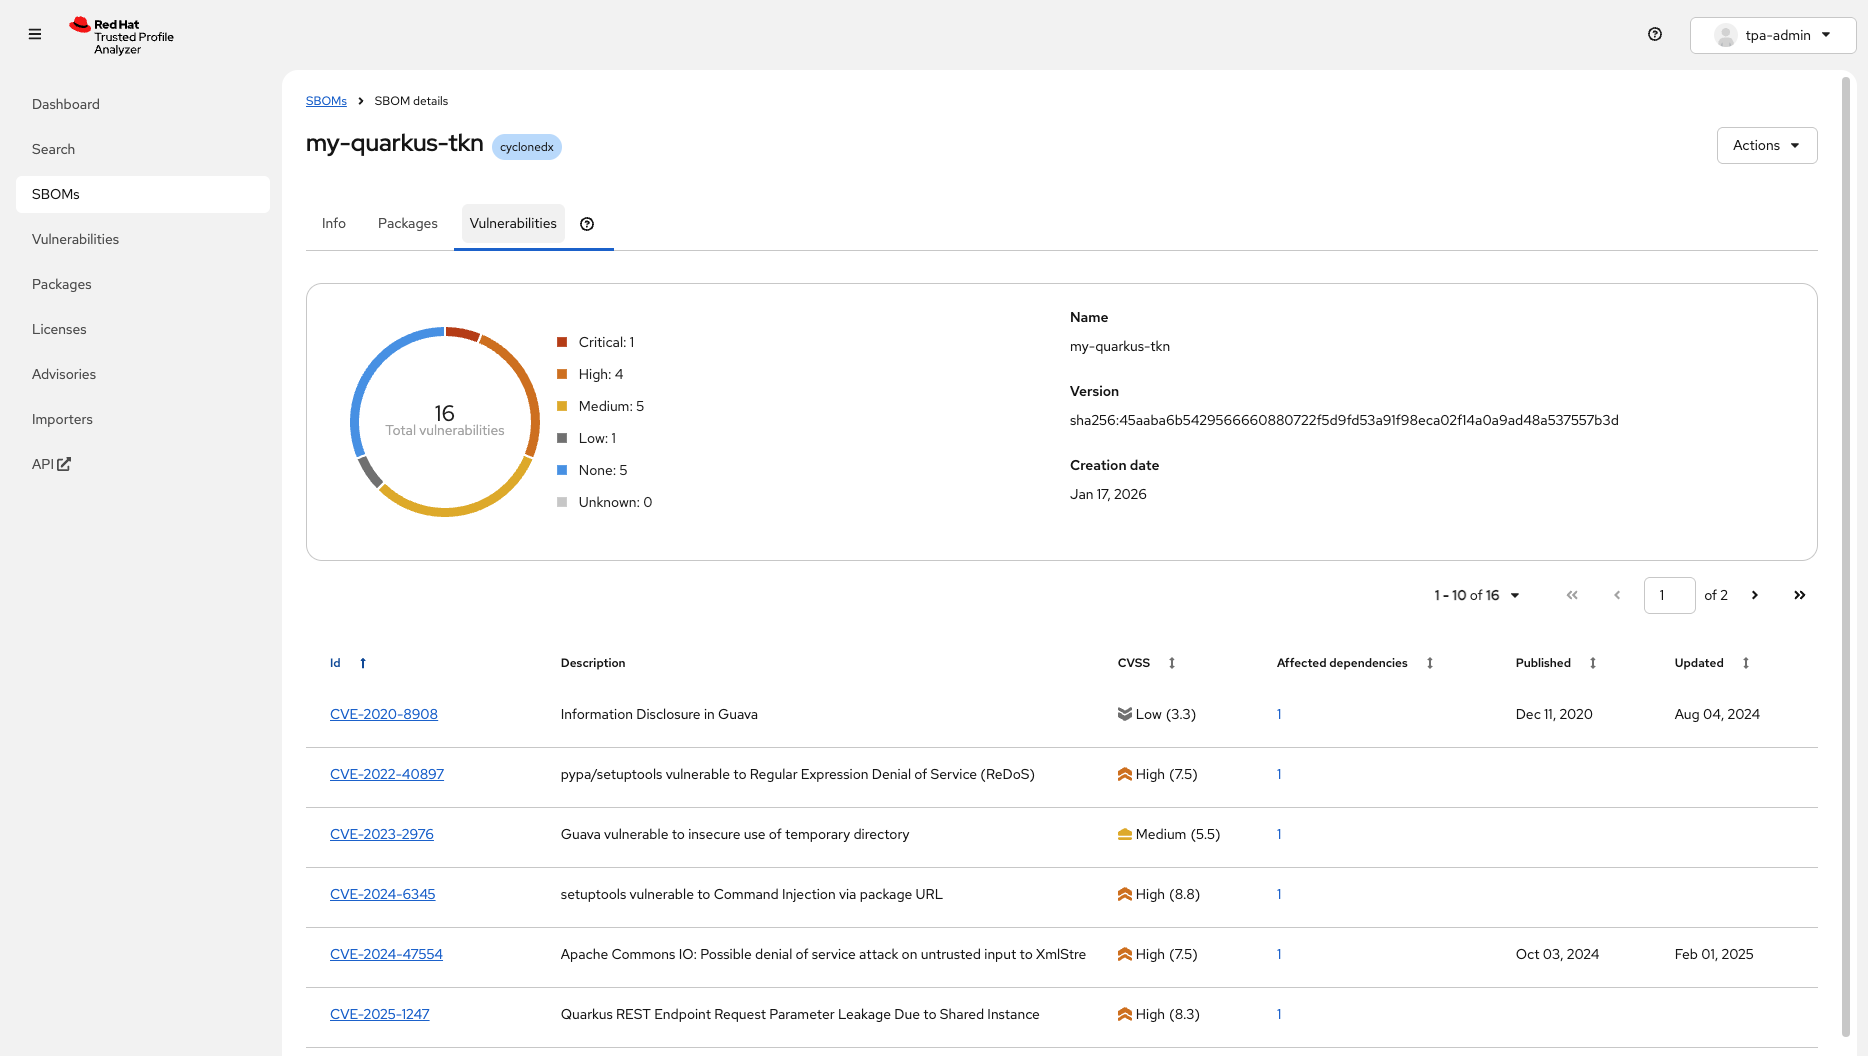
Once the SBOM has been generated, the next step is to upload it to Red Hat Trusted Profile Analyzer (RHTPA).

-
Just like in Module 1, you can now inspect the packages included in the container image and assess identified vulnerabilities directly in Red Hat Trusted Profile Analyzer. This provides security teams and auditors with an end-to-end supply chain view, establishing verifiable software provenance, confirming open source licence compliance, and delivering a tamper-evident record of when components were introduced, updated, or removed across the build lifecycle.
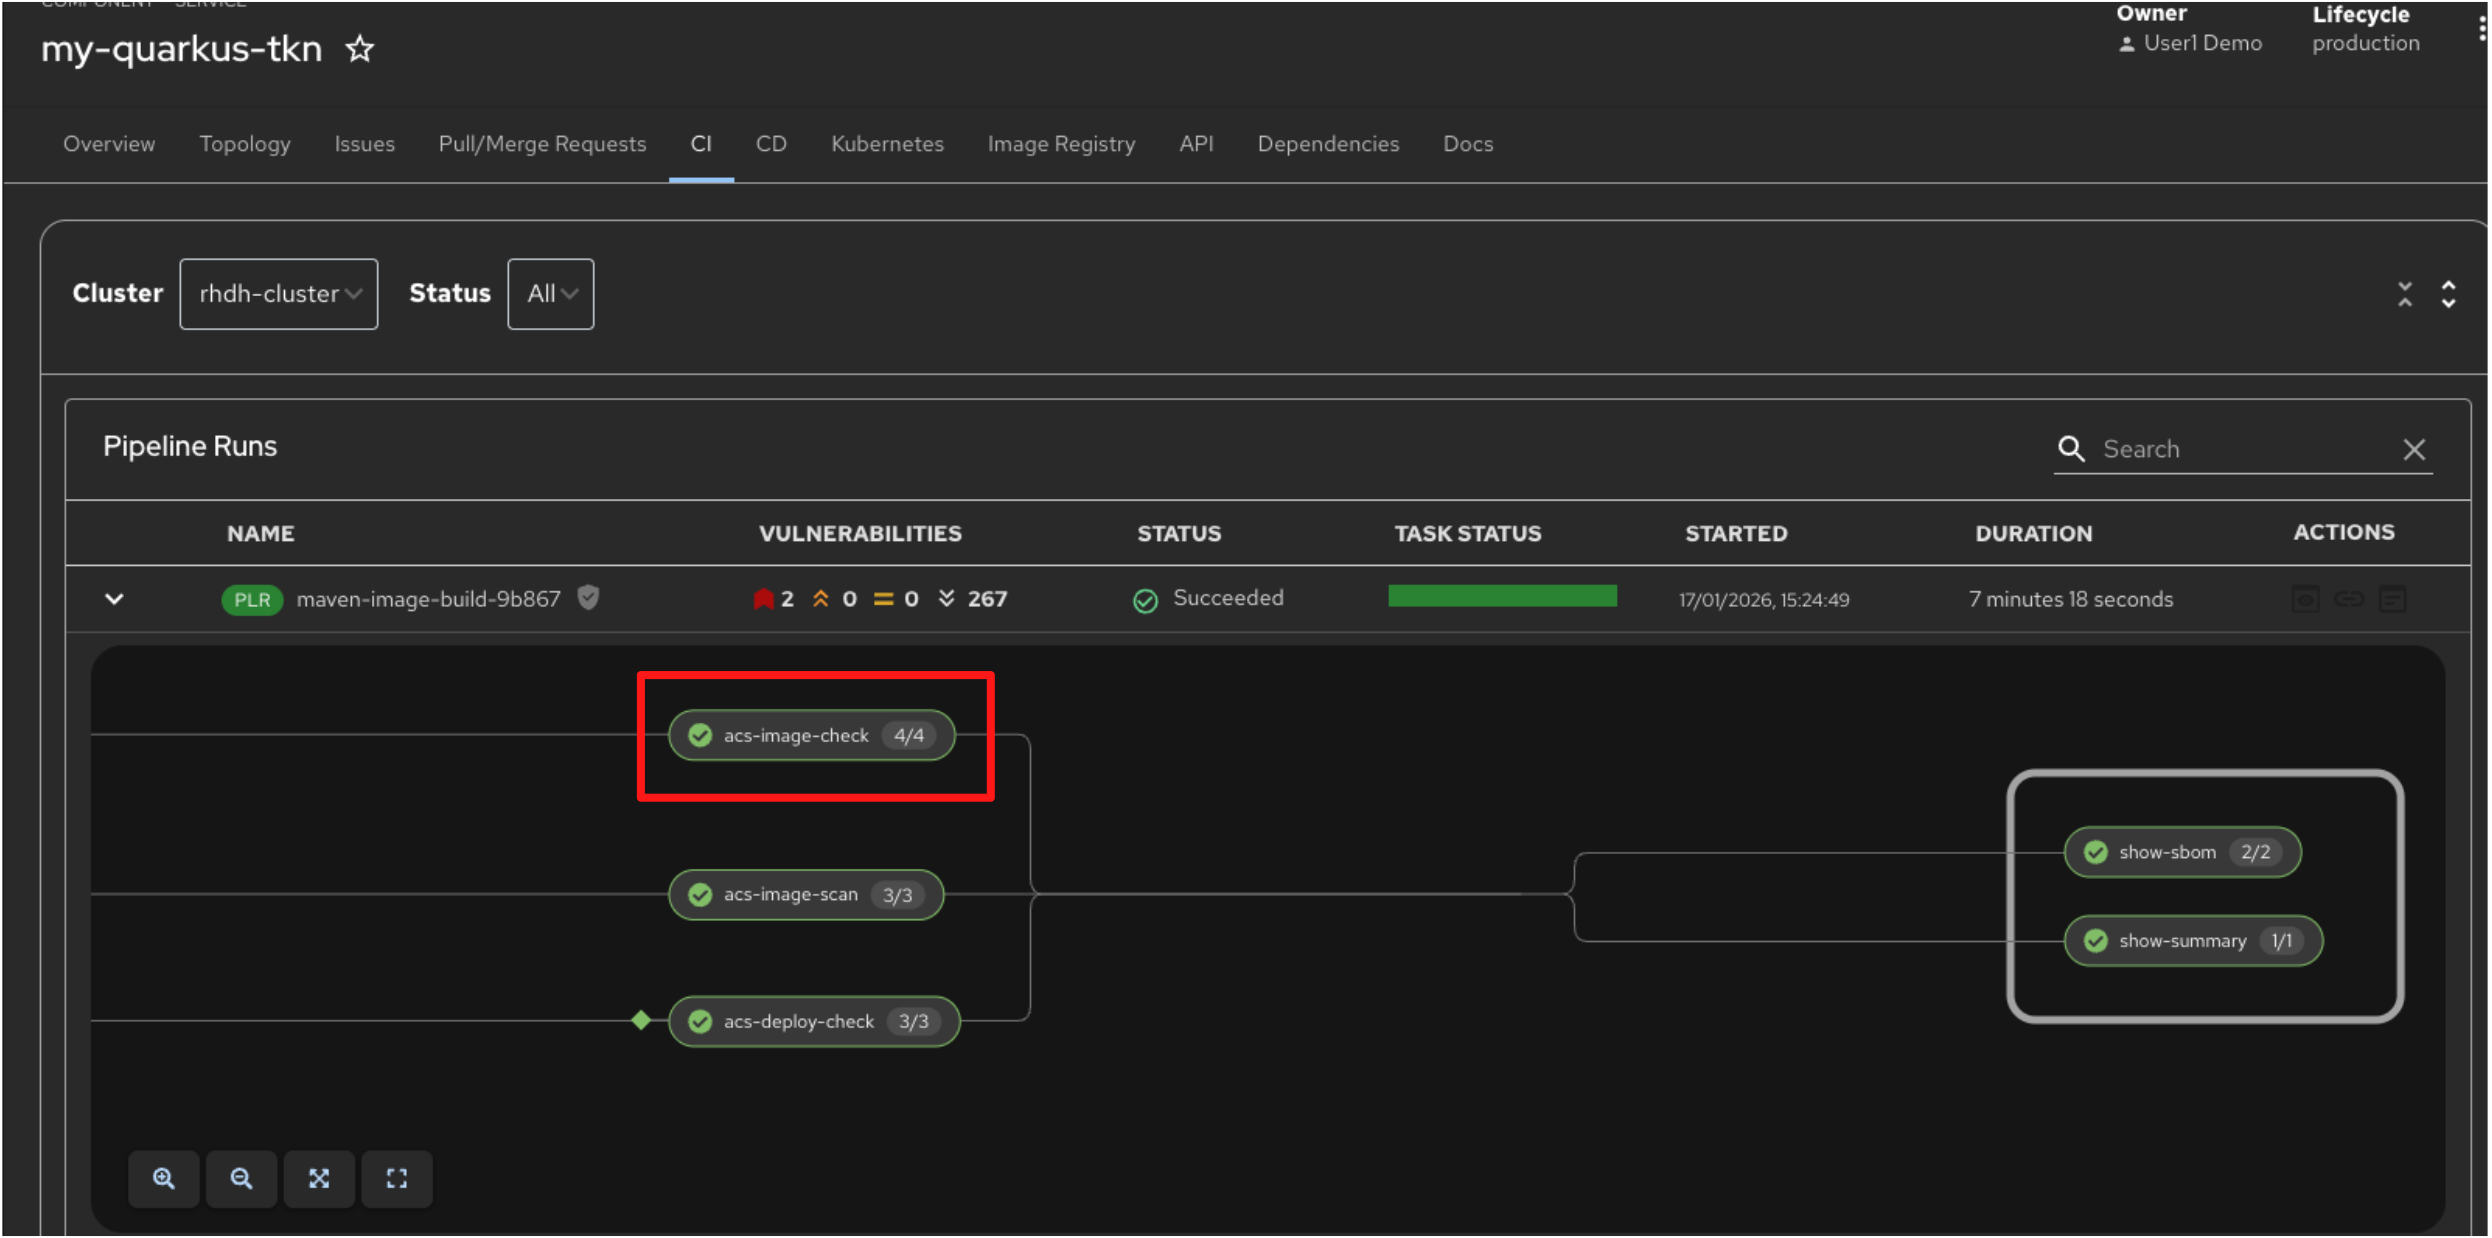
5.4 ACS Image Check
-
Switch back to the pipeline view. The next task, acs-image-check, assesses whether the container image adheres to predefined security and compliance policies.
-
The acs-image-check task evaluates the image against policies such as running as a non-root user, using approved base images, and avoiding prohibited or high-risk packages.
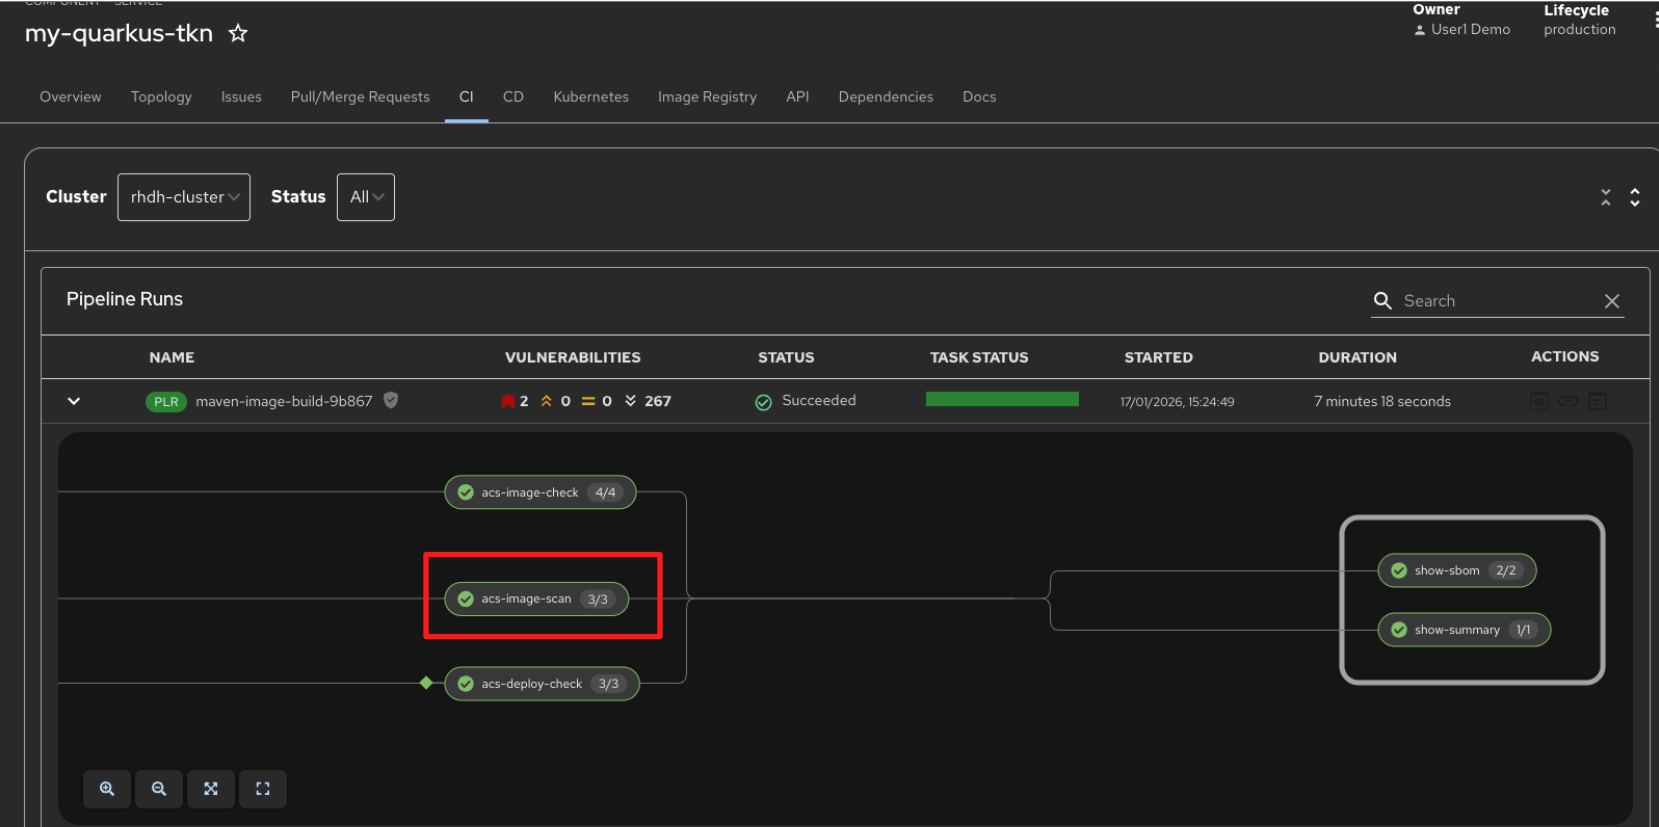
5.5 ACS Image Scan
-
Switch back to the pipeline view, the acs-image-scan task scans the container image for known vulnerabilities by comparing its components against vulnerability databases. This identifies any CVEs that could affect the security of the image.
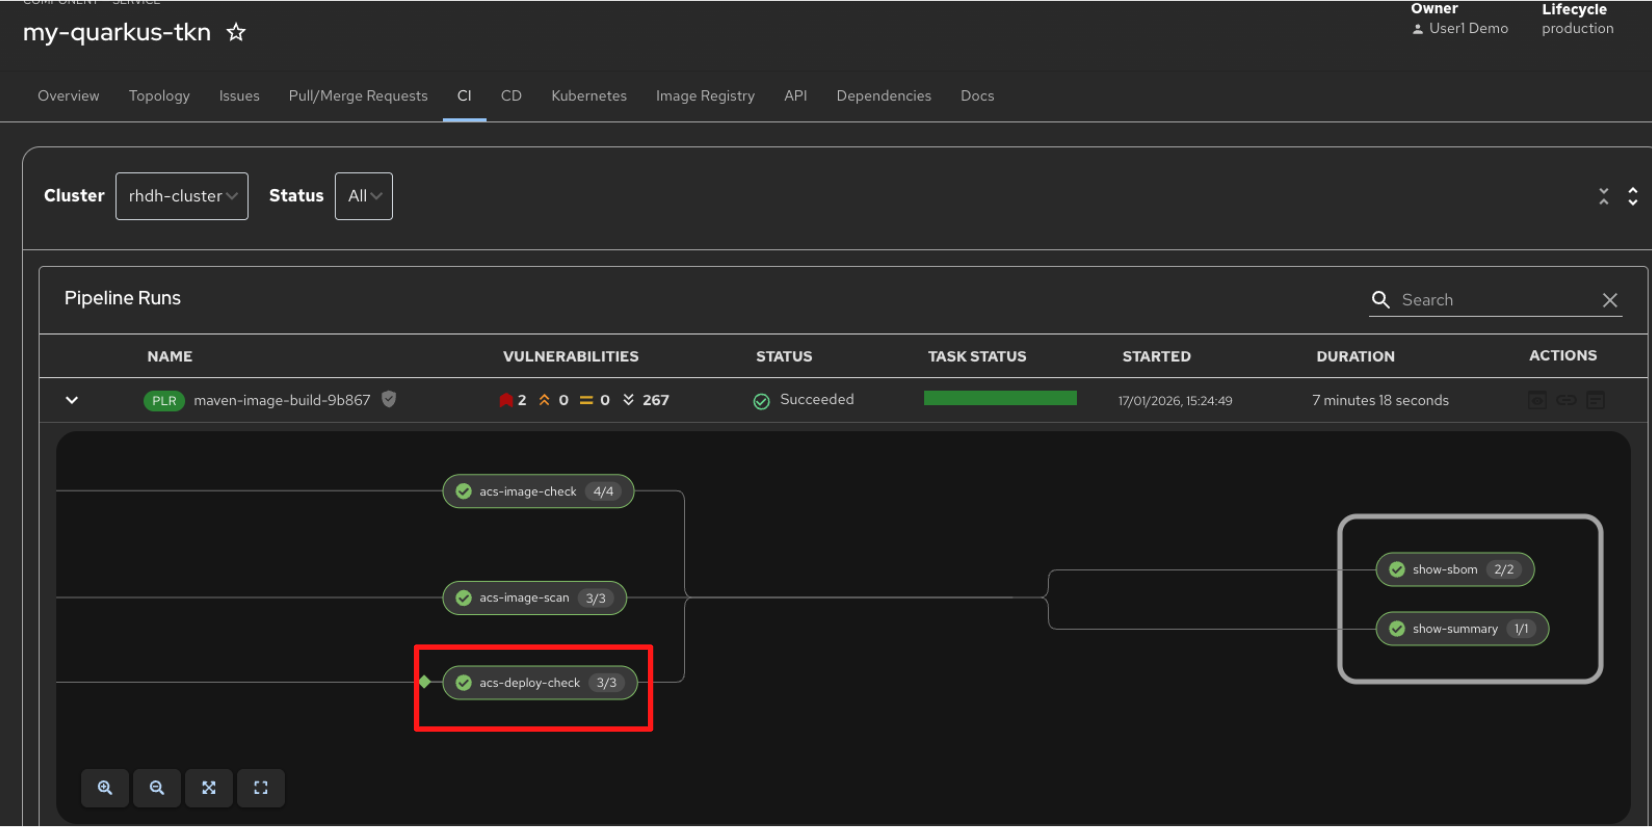
5.6 ACS Deploy Check
-
The acs-deploy-check task evaluates whether the container image is allowed to be deployed into the target environment.
-
Unlike the image scan and image check tasks, which analyse the image itself, this task enforces deployment-time policies such as blocking images with critical vulnerabilities, failed policy checks, or missing attestations.
-
This ensures that only images that meet all security and compliance requirements are permitted to progress toward deployment.
5.7 ACS Report Output
-
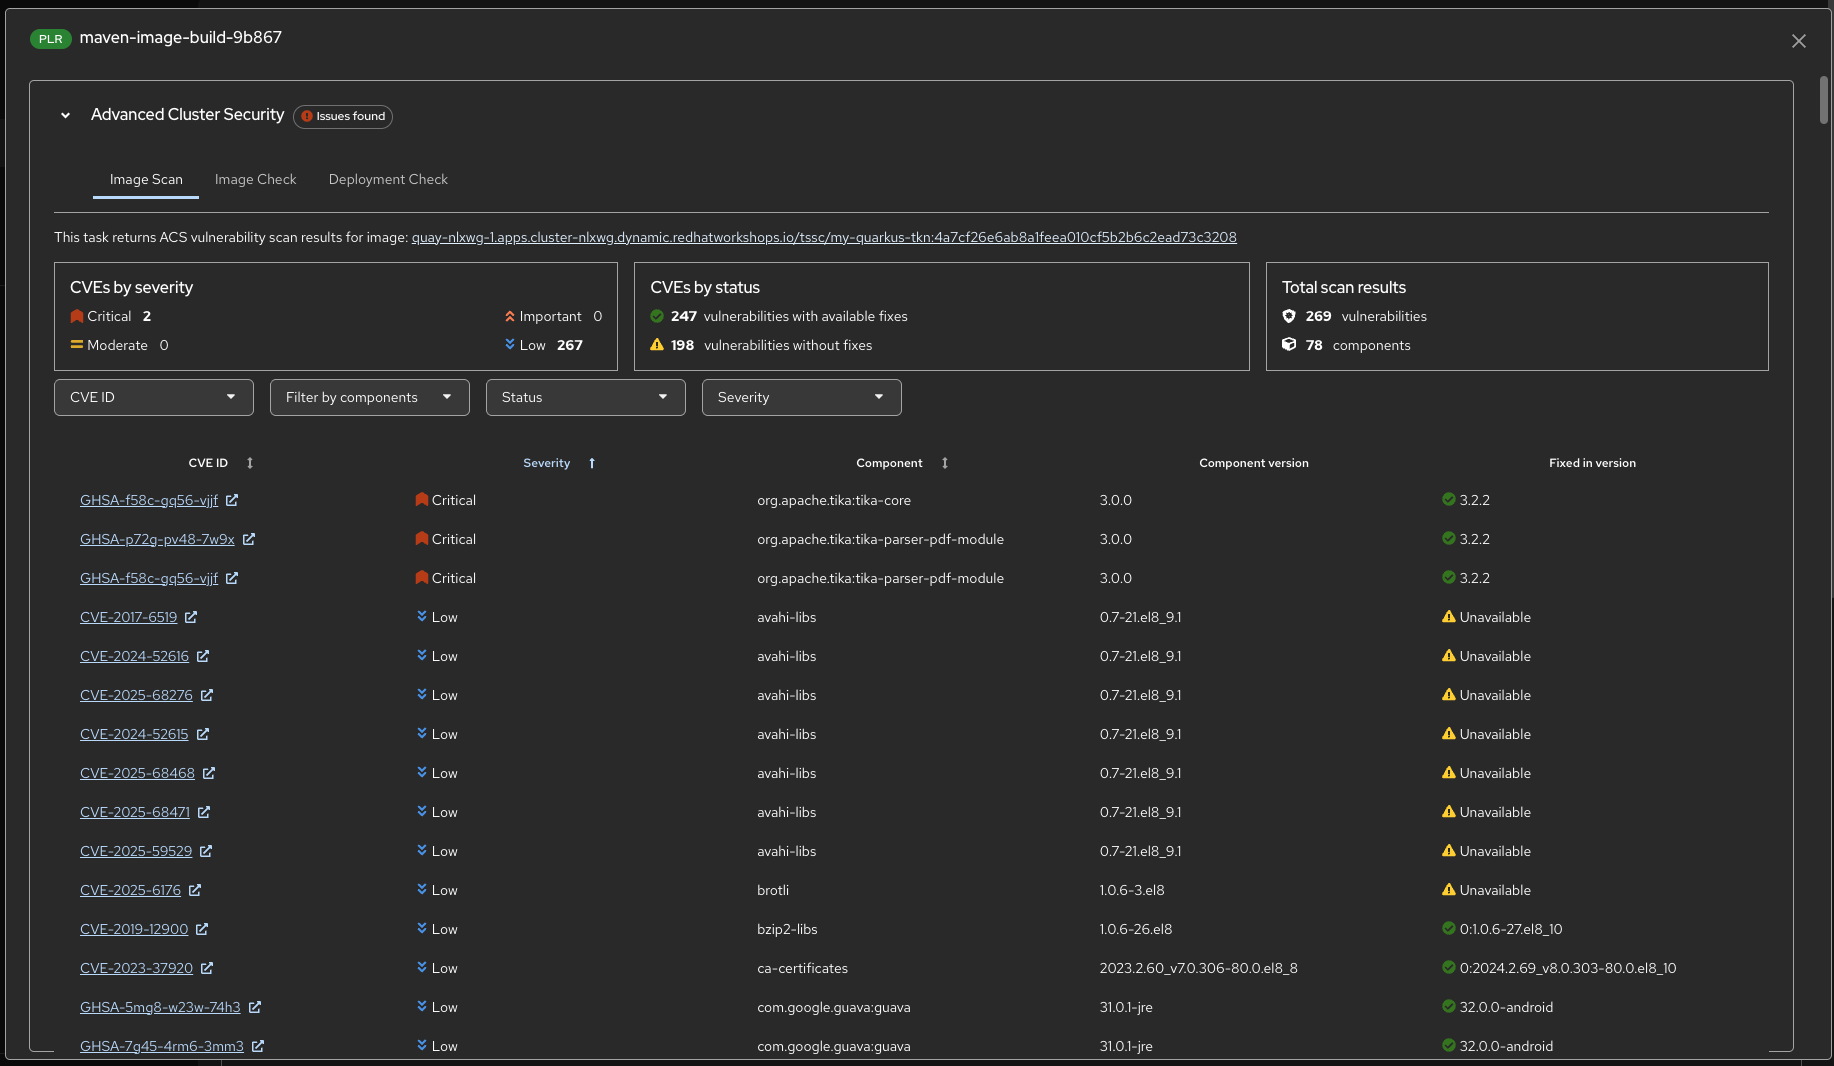
You can review the vulnerability scan results generated by ACS directly from the pipeline. Click the Output icon under Actions for the pipeline run.
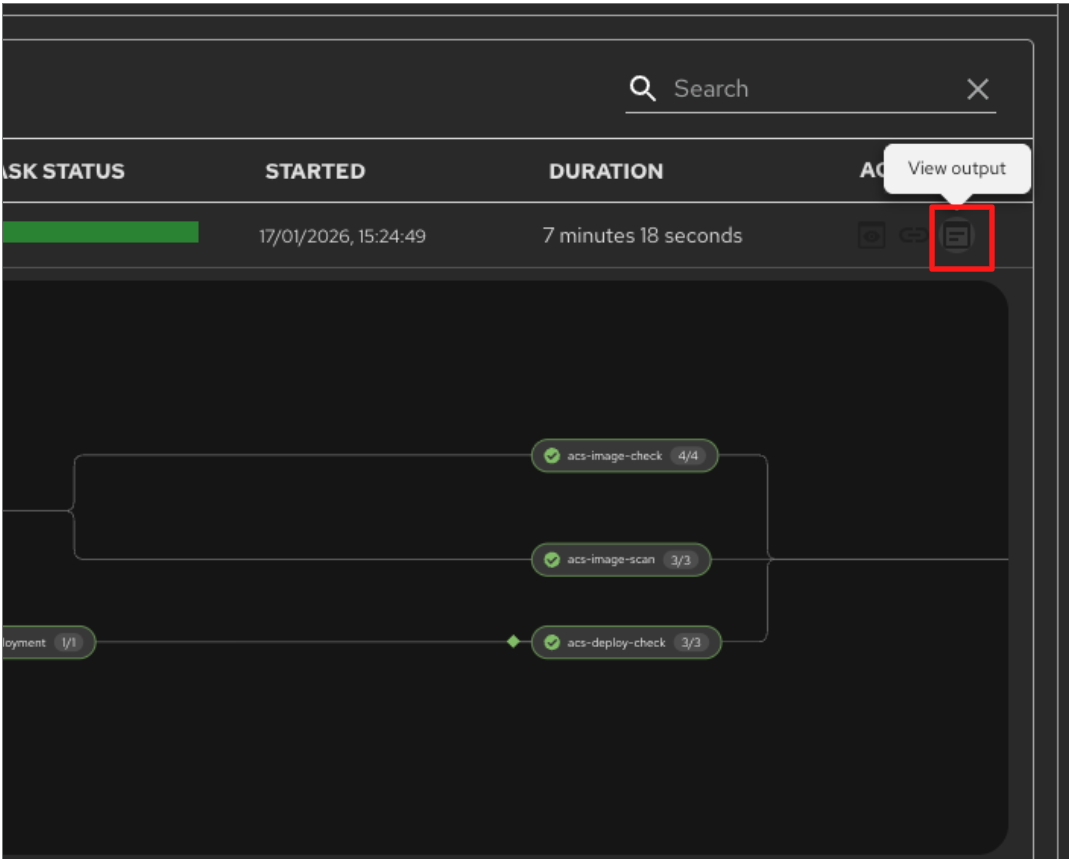
-
The report summarises detected vulnerabilities by severity and status, highlighting critical findings, whether fixes are available, and which components are affected. This allows teams to quickly assess risk and determine whether the image meets deployment requirements.
-
You can also review the policy check results directly here, switch to the Image Check Output.
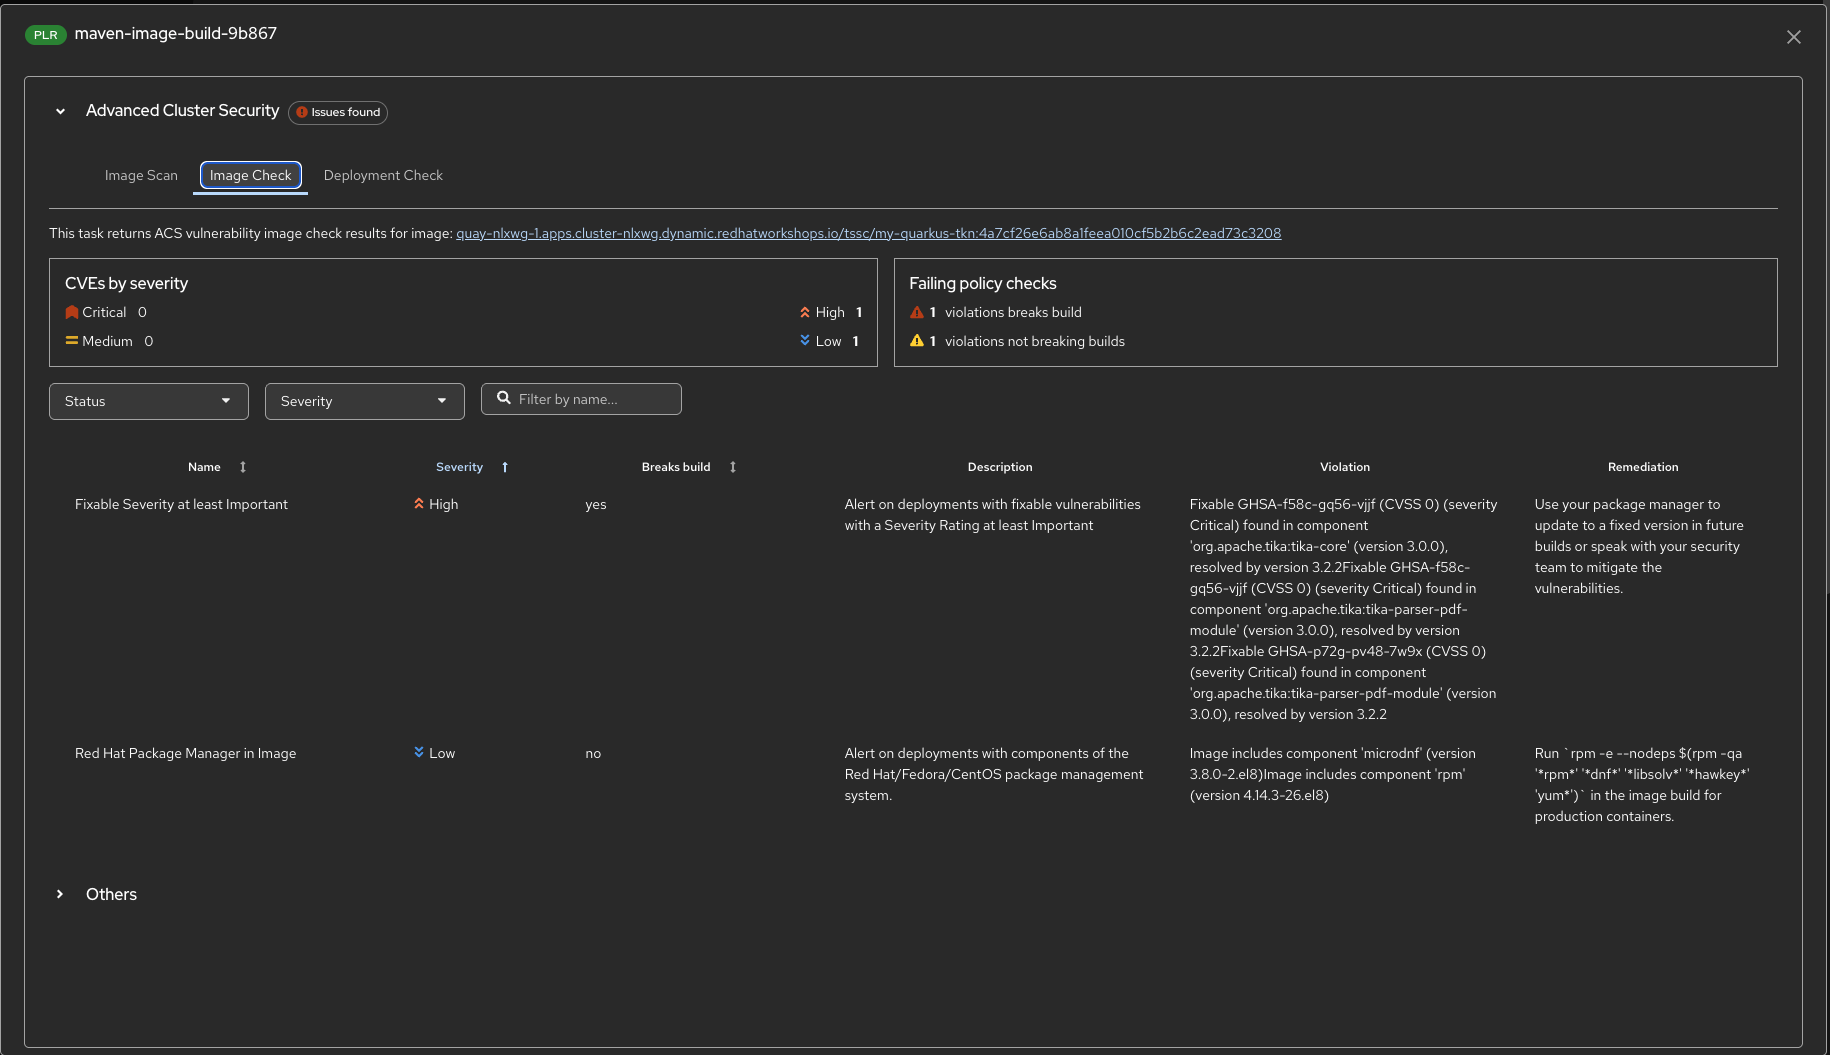
-
This report highlights policy violations detected by ACS, including which violations break the build and which are informational. For each violation, you can see the affected component, the reason for the failure, and the recommended remediation, helping teams understand exactly why an image may be blocked and how to fix it.
-
Finally, review the deployment-time policy checks by switching to the Deployment Check output.
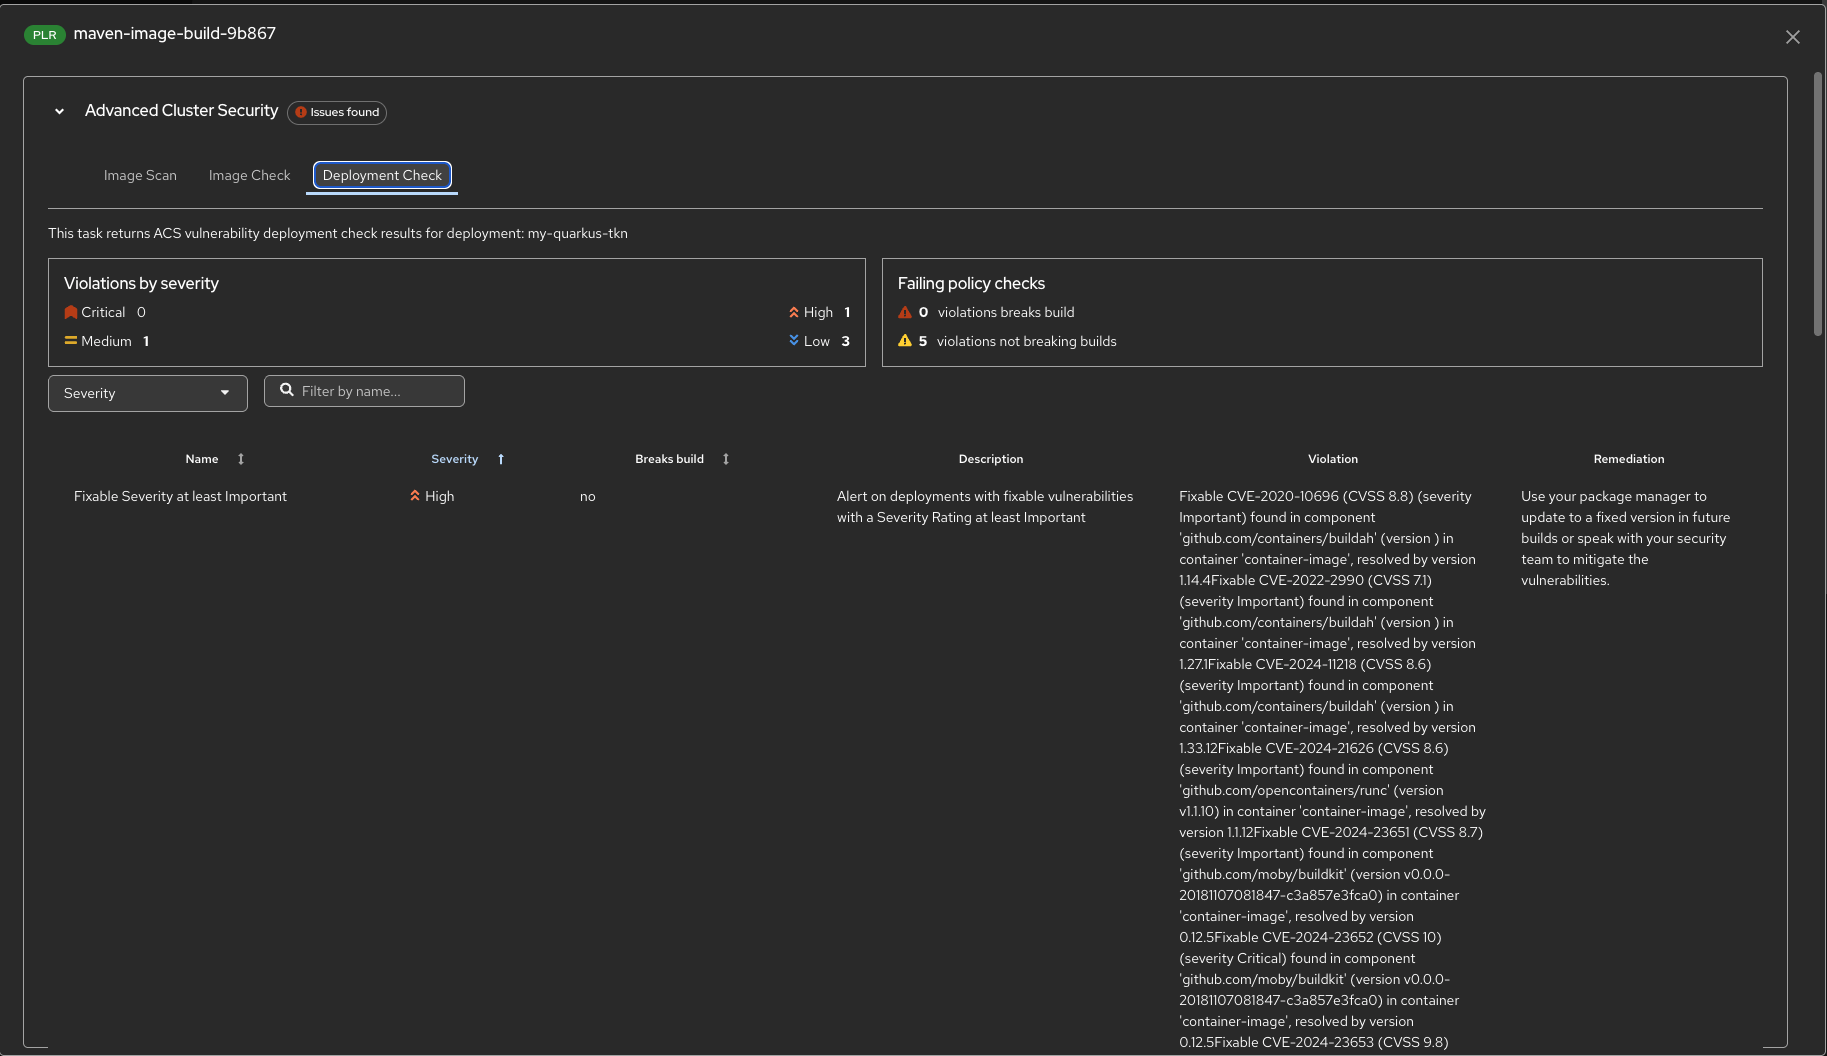
-
This report shows whether the image is permitted to be deployed into the target environment. It highlights any policy violations, distinguishes between build-breaking and non-blocking findings, and provides remediation guidance for issues that would prevent deployment.
Step 4: Explore the Application
Now that the build is complete, let’s examine the application features and how it works.
Step 4.1: Explore the Application’s Source Code
Examine the application’s source code and deployment manifests:
-
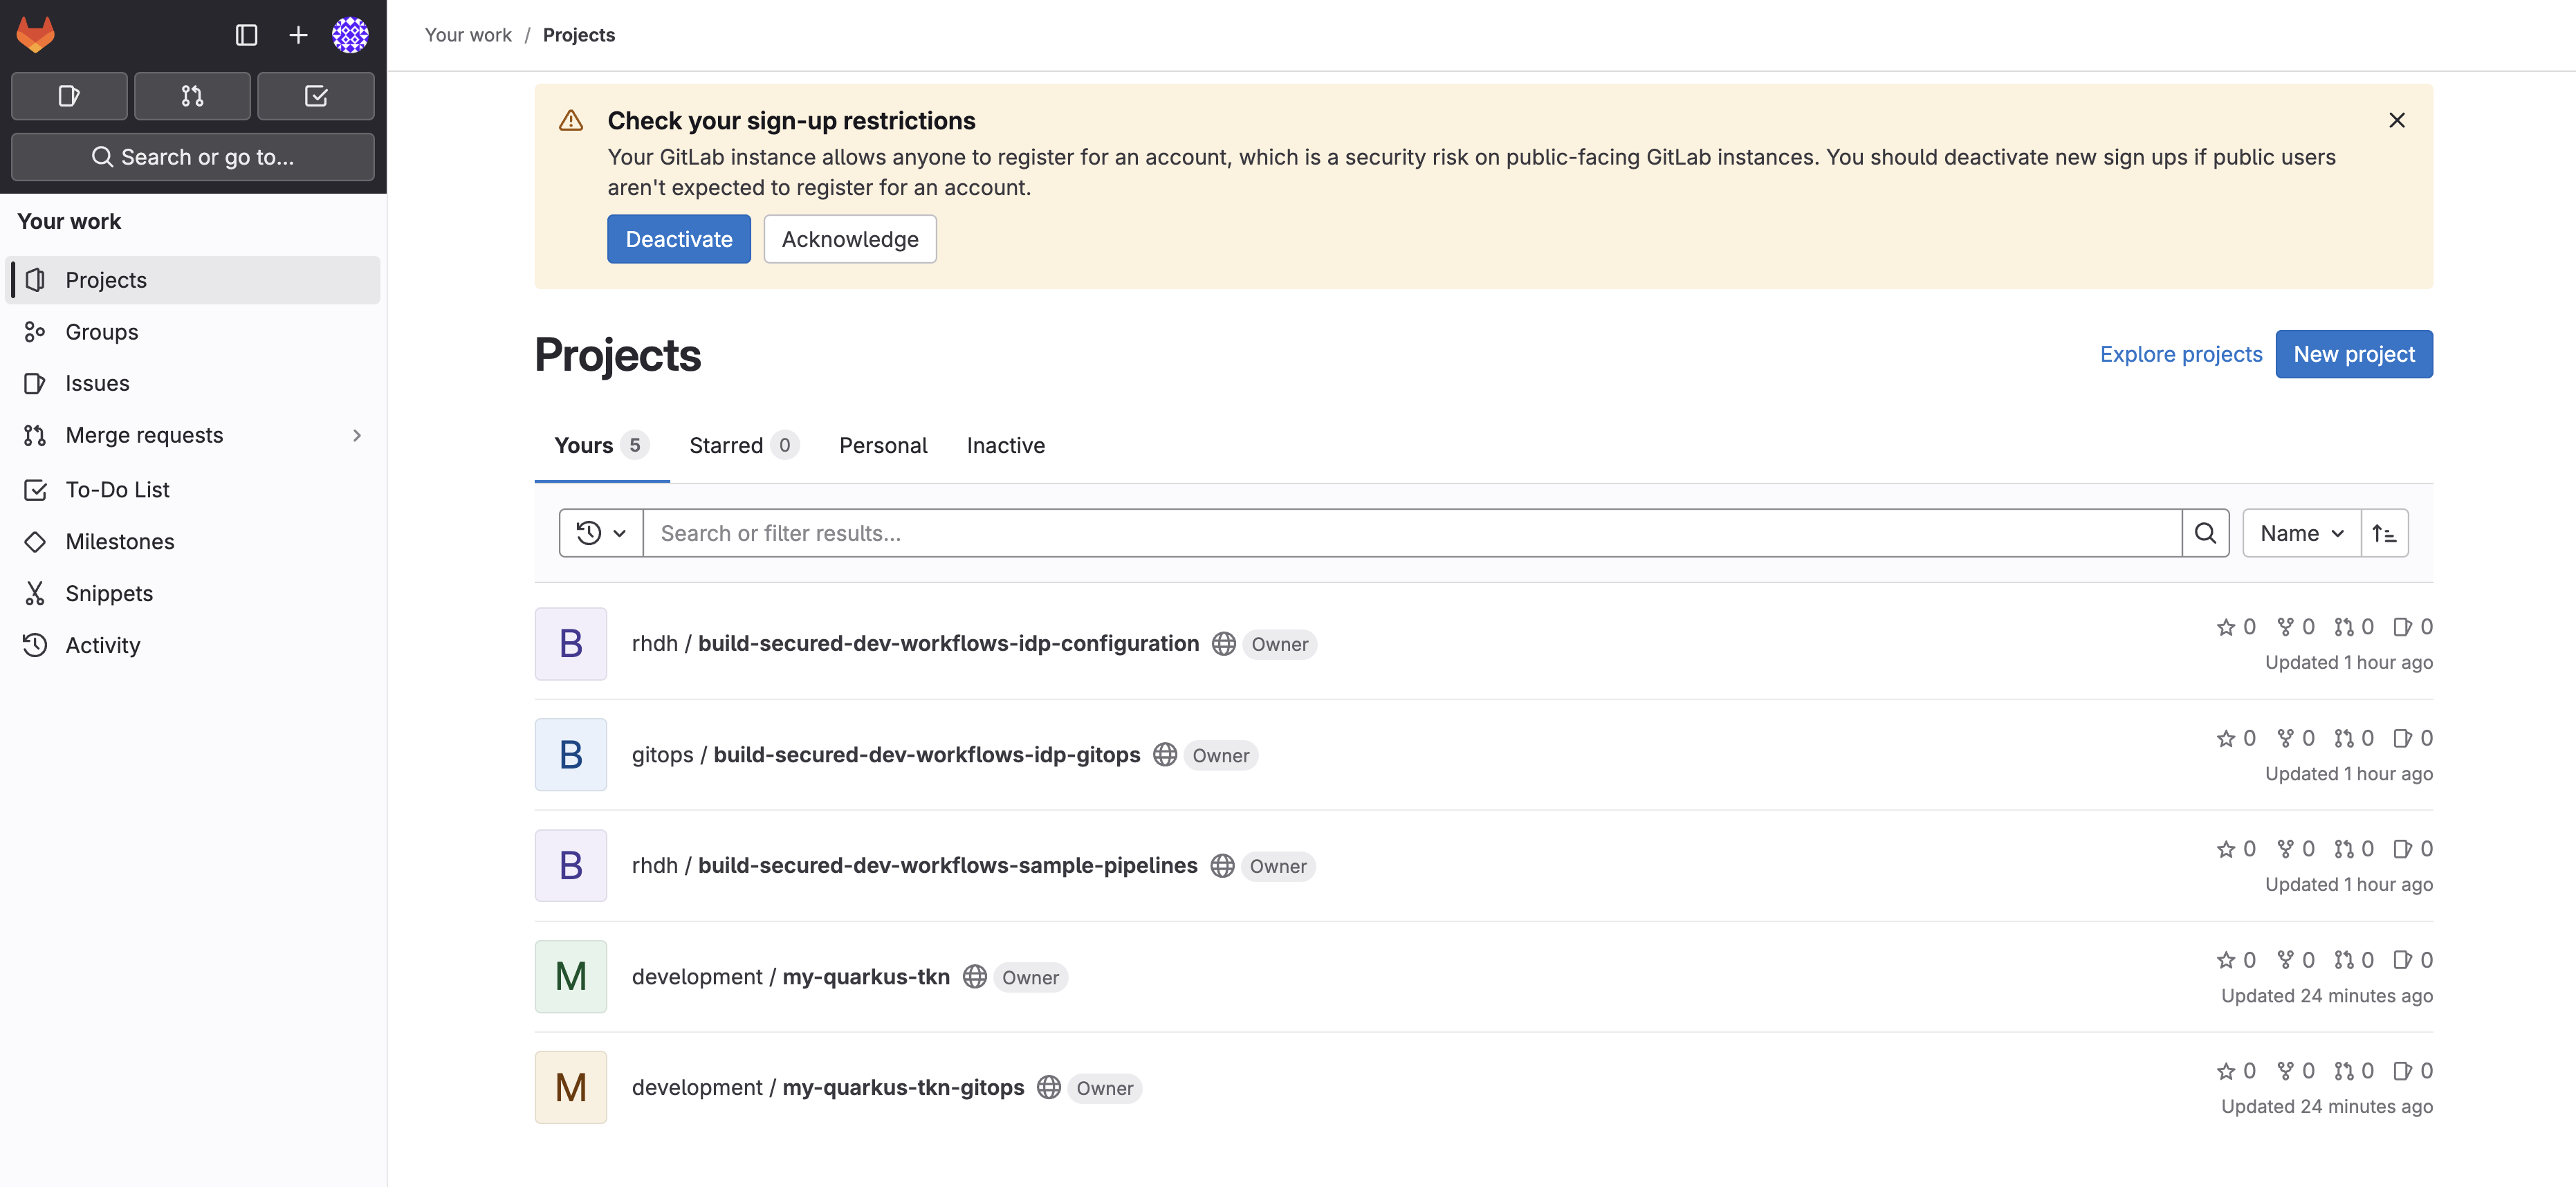
Select the GitLab tab in Showroom.
-
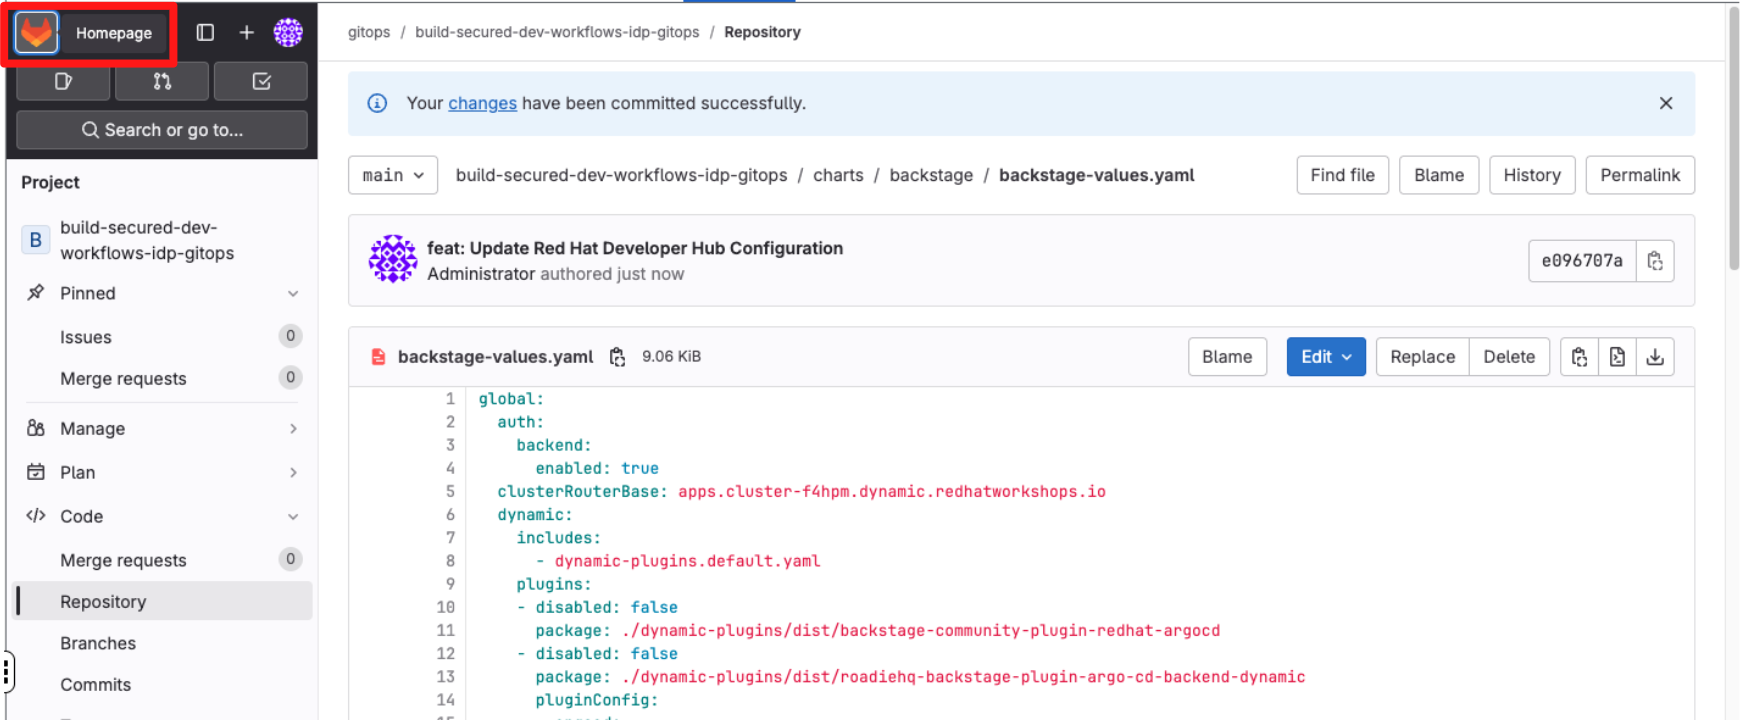
Return to the GitLab homepage.
-
Select the my-quarkus-tkn-gitops repository.
-
Notice that application.yaml? This is used to manage the application deployment using OpenShift GitOps.
-
The app-of-apps folder contains files to manage application environments and the Tekton CI.
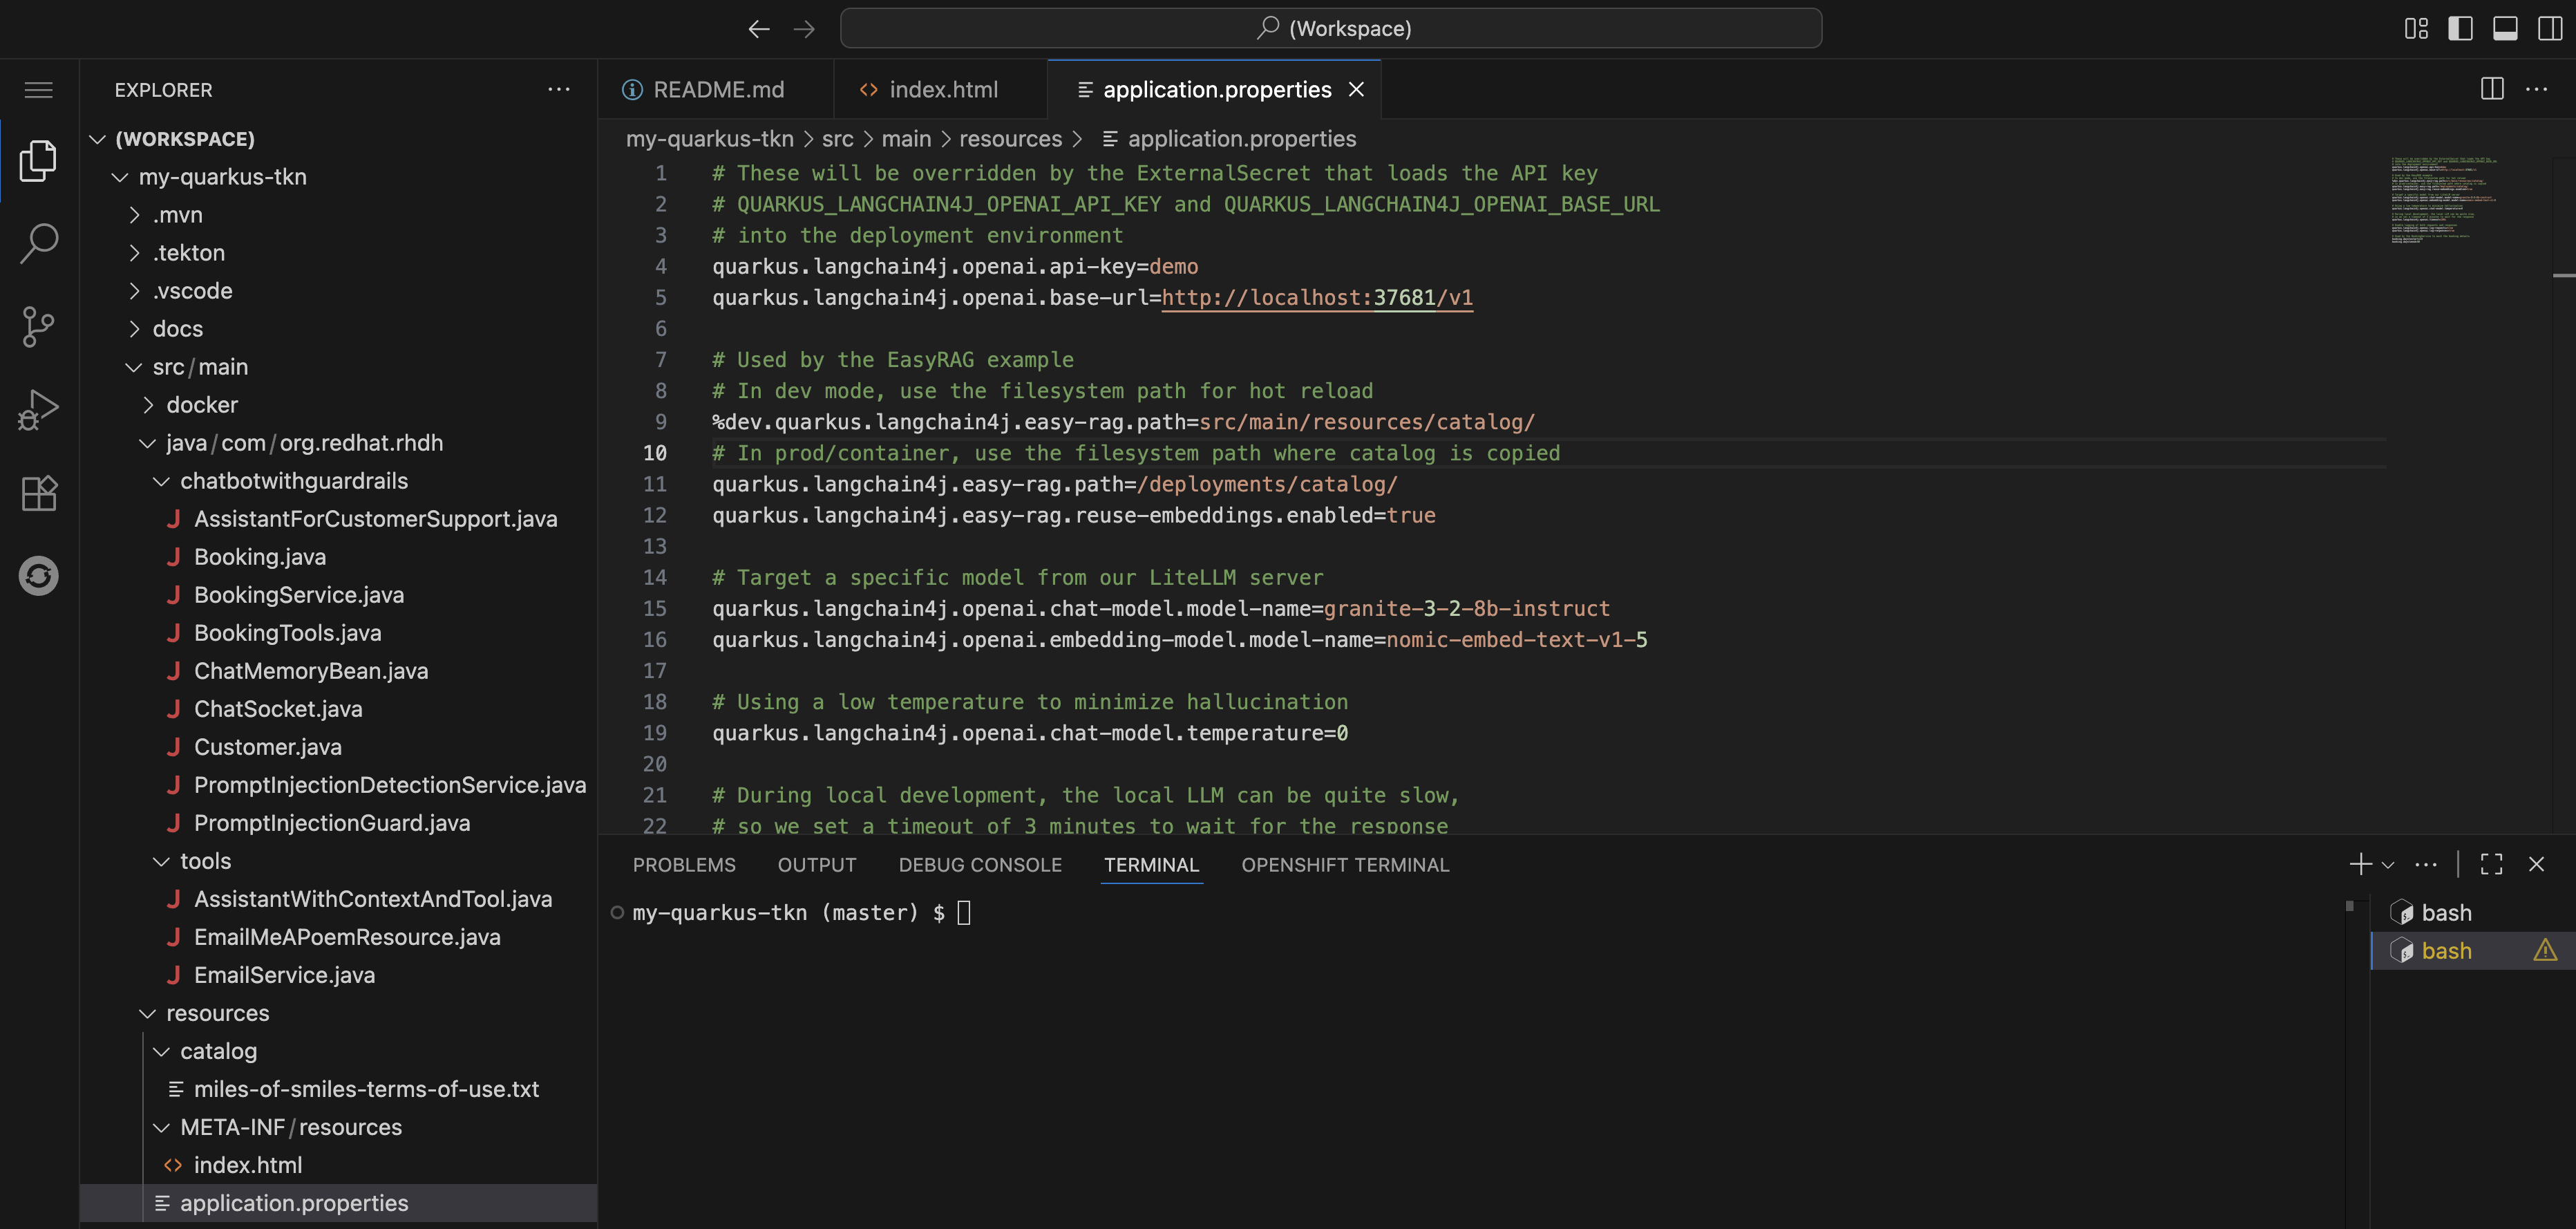
Return to Dev Spaces and explore the source code for the Quarkus application. You’ll quickly notice references to Langchain4j and Chatbot features:
-
Expand the my-quarkus-tkn project, navigate to src → main → resources. .Open the application.properties. Note that various Langchain4j properties are set to connect the application to an LLM.
-
Easy RAG is used to enable the Chatbot to perform Retrieval-Augmented Generation on a terms of service included in the resources folder.
-
Additionally, the
QUARKUS_LANGCHAIN4J_OPENAI_API_KEYandQUARKUS_LANGCHAIN4J_OPENAI_BASE_URLenvironment variables are referenced. You can see that these are securely injected from Vault using an ExternalSecret in the components/my-quarkus-tkn/base/ folder of the my-quarkus-tkn-gitops repository.
| The model serving and inference has been taken care of by the platform engineering and data science teams, all developers need to do is use a template to benefit from approved models and a preconfigured pipeline that enforces secure software supply chain principles. |
Step 4.2: View and Test the Application
Next, return to Red Hat Developer Hub and learn how to access the deployed Quarkus application’s dev environment:
-
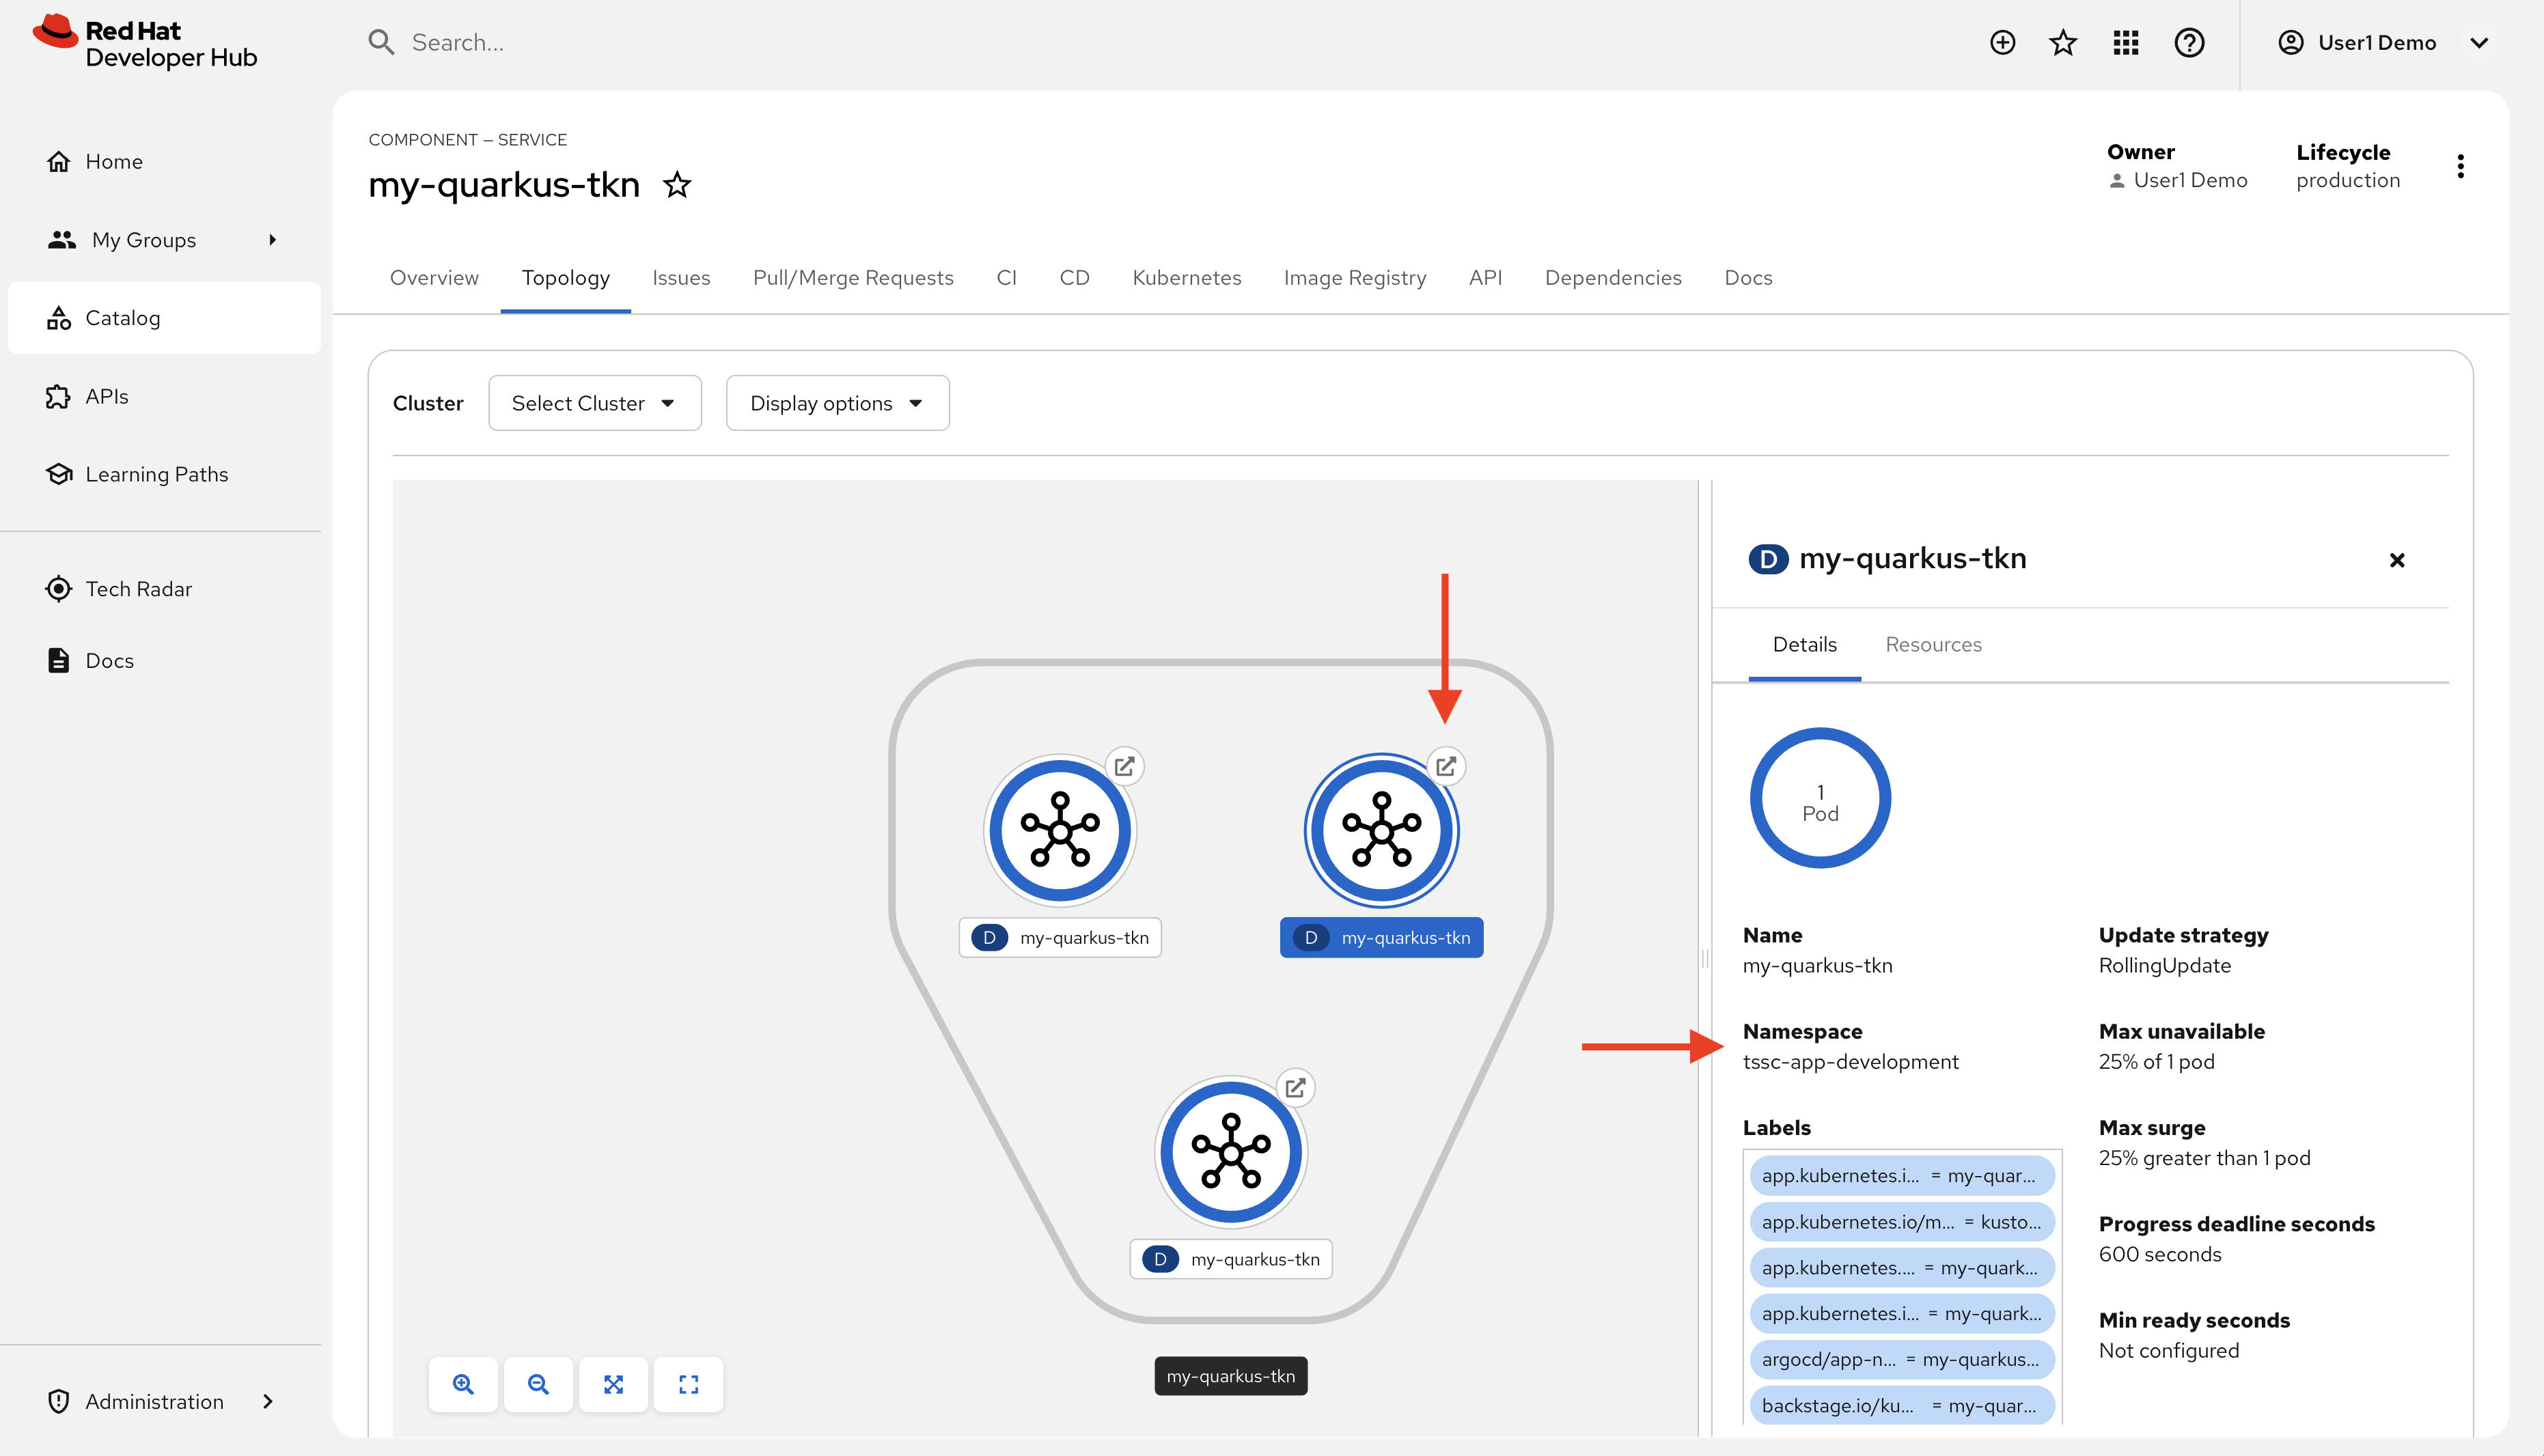
Find open the Topology tab for the my-quarkus-tkn Component. Three Pods will be displayed, one for each of dev, staging, and production.
-
Select the dev Pod. You can confirm it’s the dev Pod by checking the namespace listed when you click each Pod.
-
Click the popout arrow on the Pod to view the development version of your application.
-
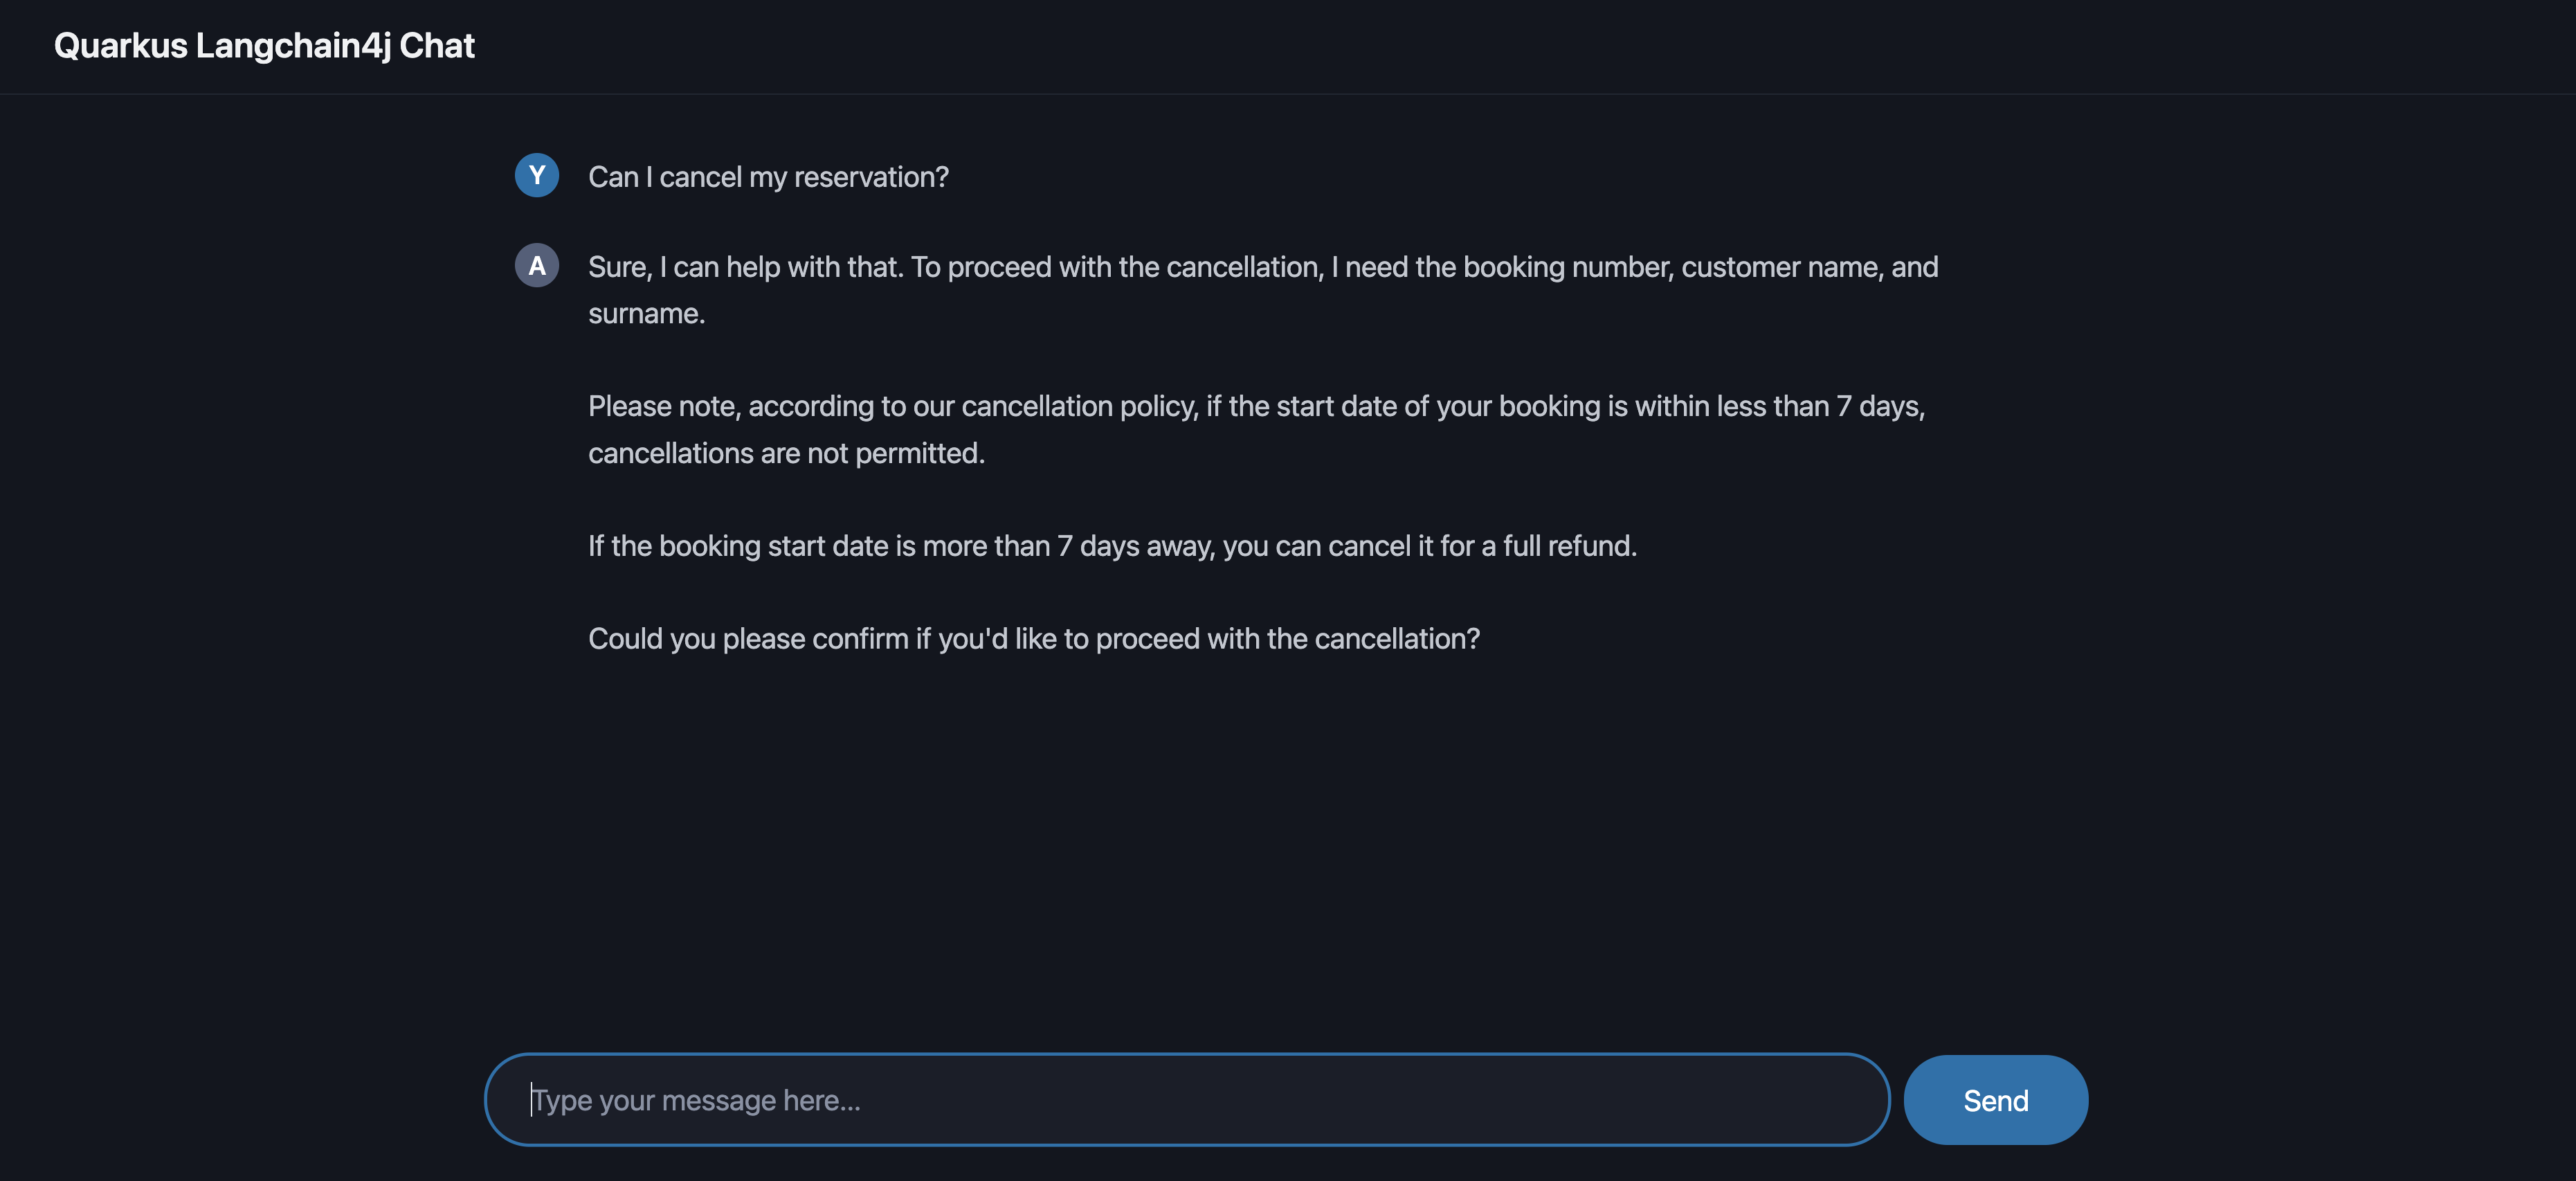
You should see a Chatbot interface. Ask question such as "Can I cancel my reservation?".
-
The Chatbot responds with policy information sourced using RAG.
This template demonstrates the enhanced productivity that Red Hat Developer Hub can provide while enforcing security and compliance.
Step 5: Promote to Staging
In this step you will promote the application to staging by creating this tag, a GitLab webhook triggers the staging pipeline — proving that automation delivers both speed and quality.
5.1 Log in to Gitlab
-
If you are not already logged in to GitLab, click the GitLab Console tab in the Showroom and log in using:
-
Username:
{gitlab_root_user}-
Password:
{gitlab_root_password}5.2 Create a Release Tag
-
At the top left click on Gitlab Home.
-
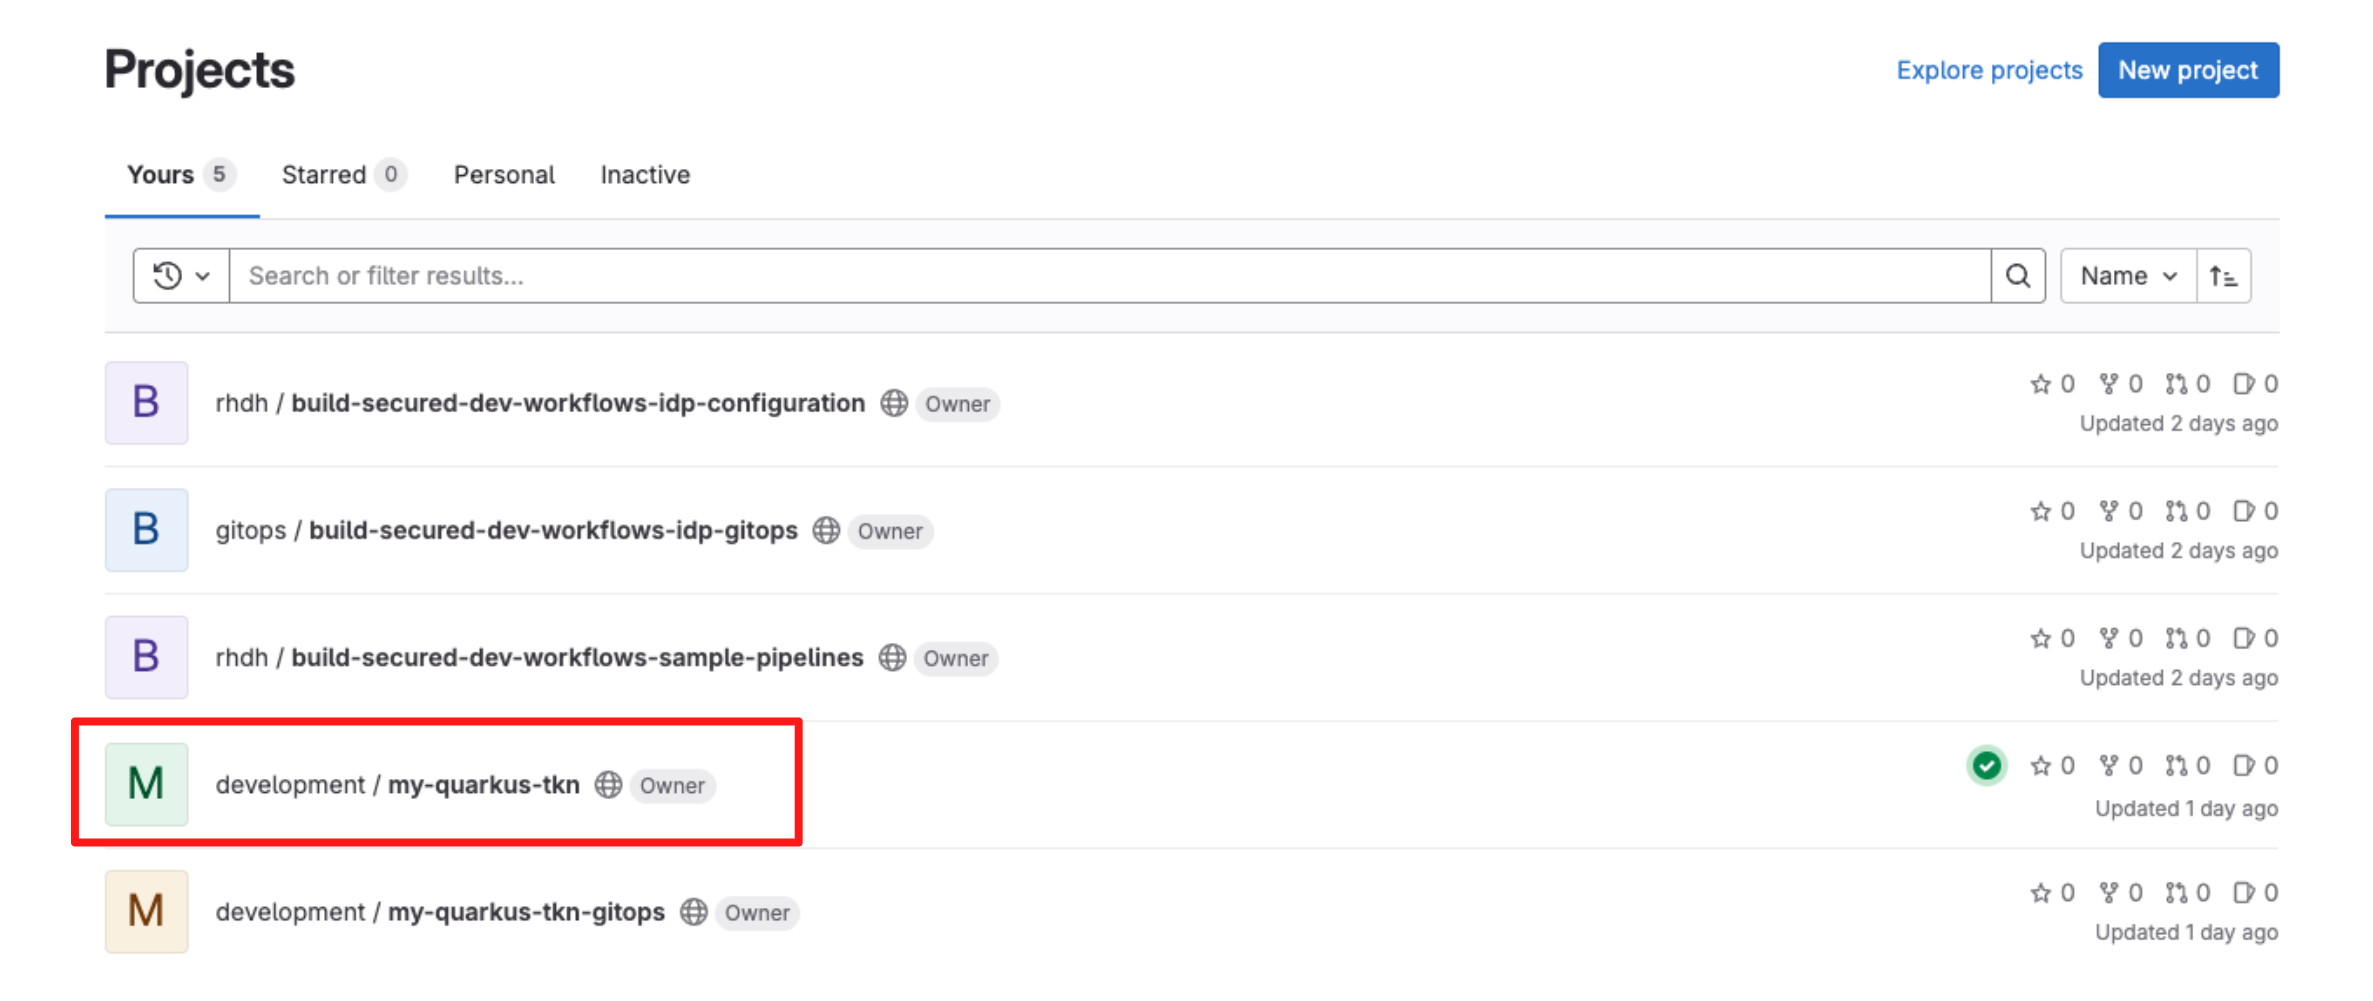
Select the repository my-quarkus-tkn.
-
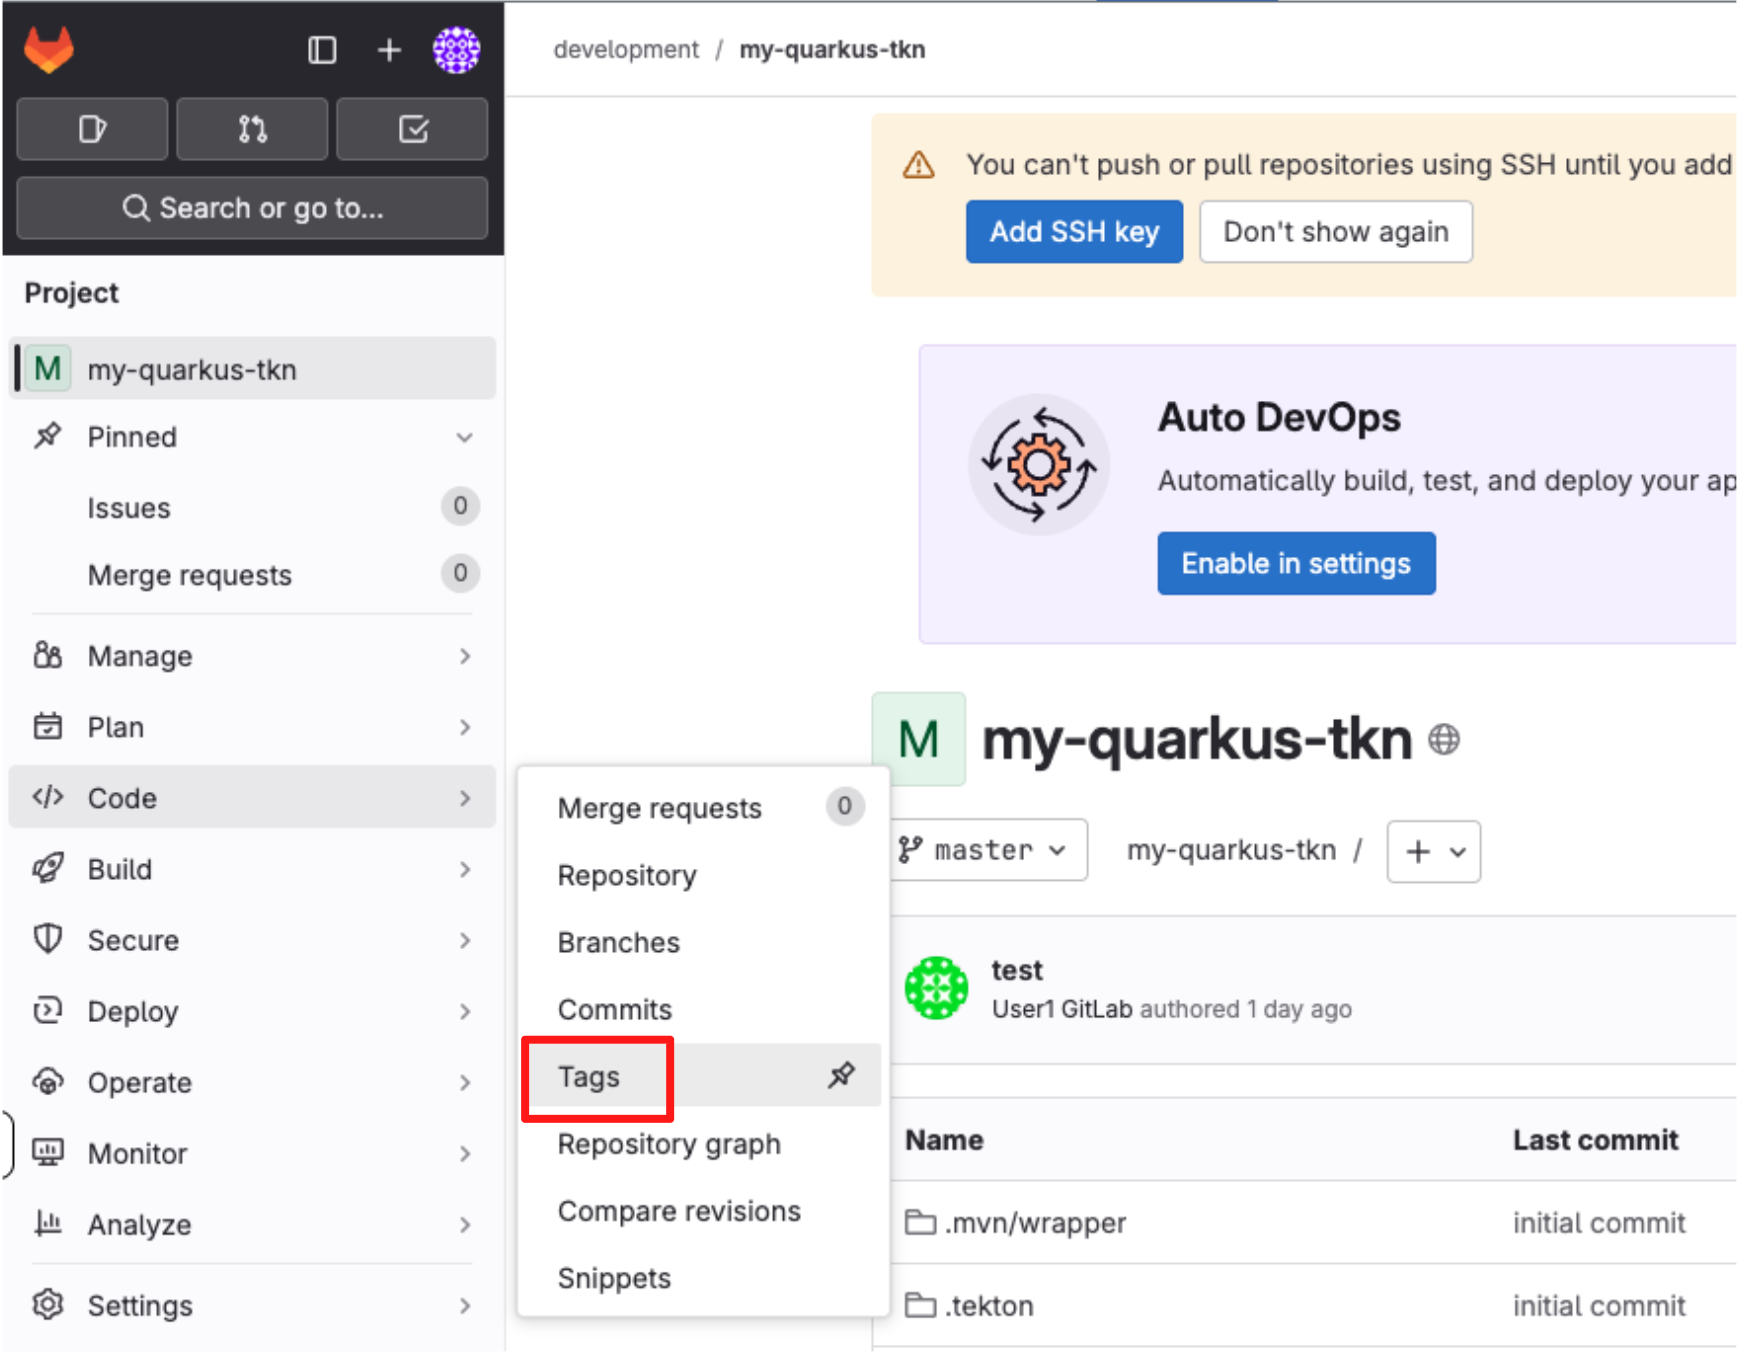
From the left-hand menu, navigate to Code → Tags.
-
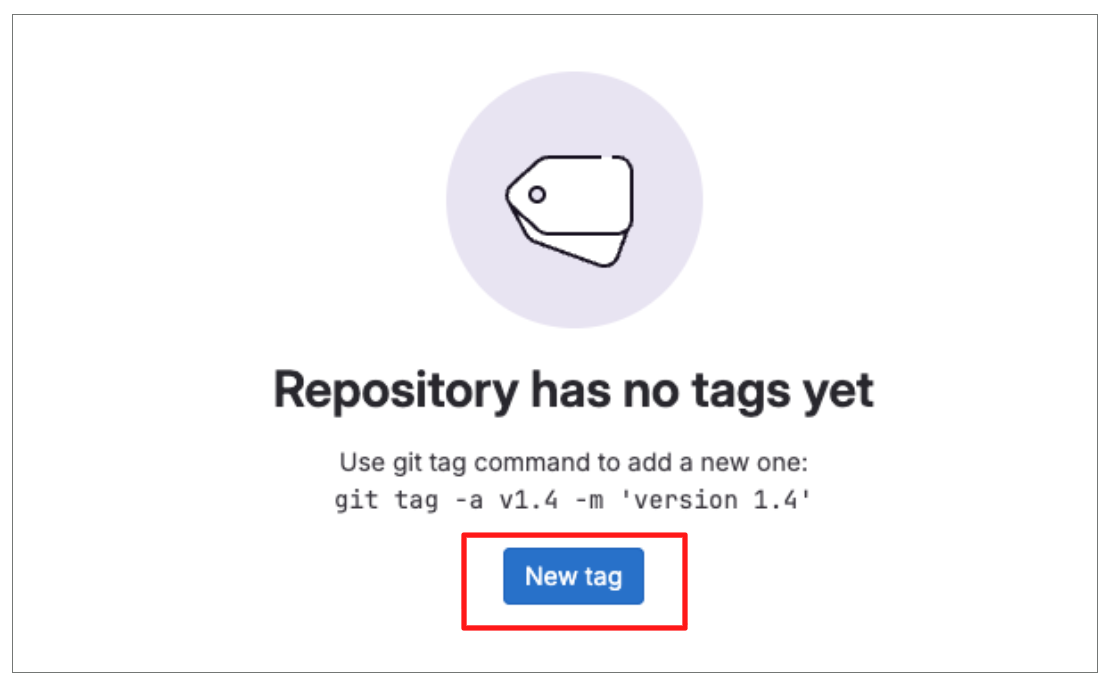
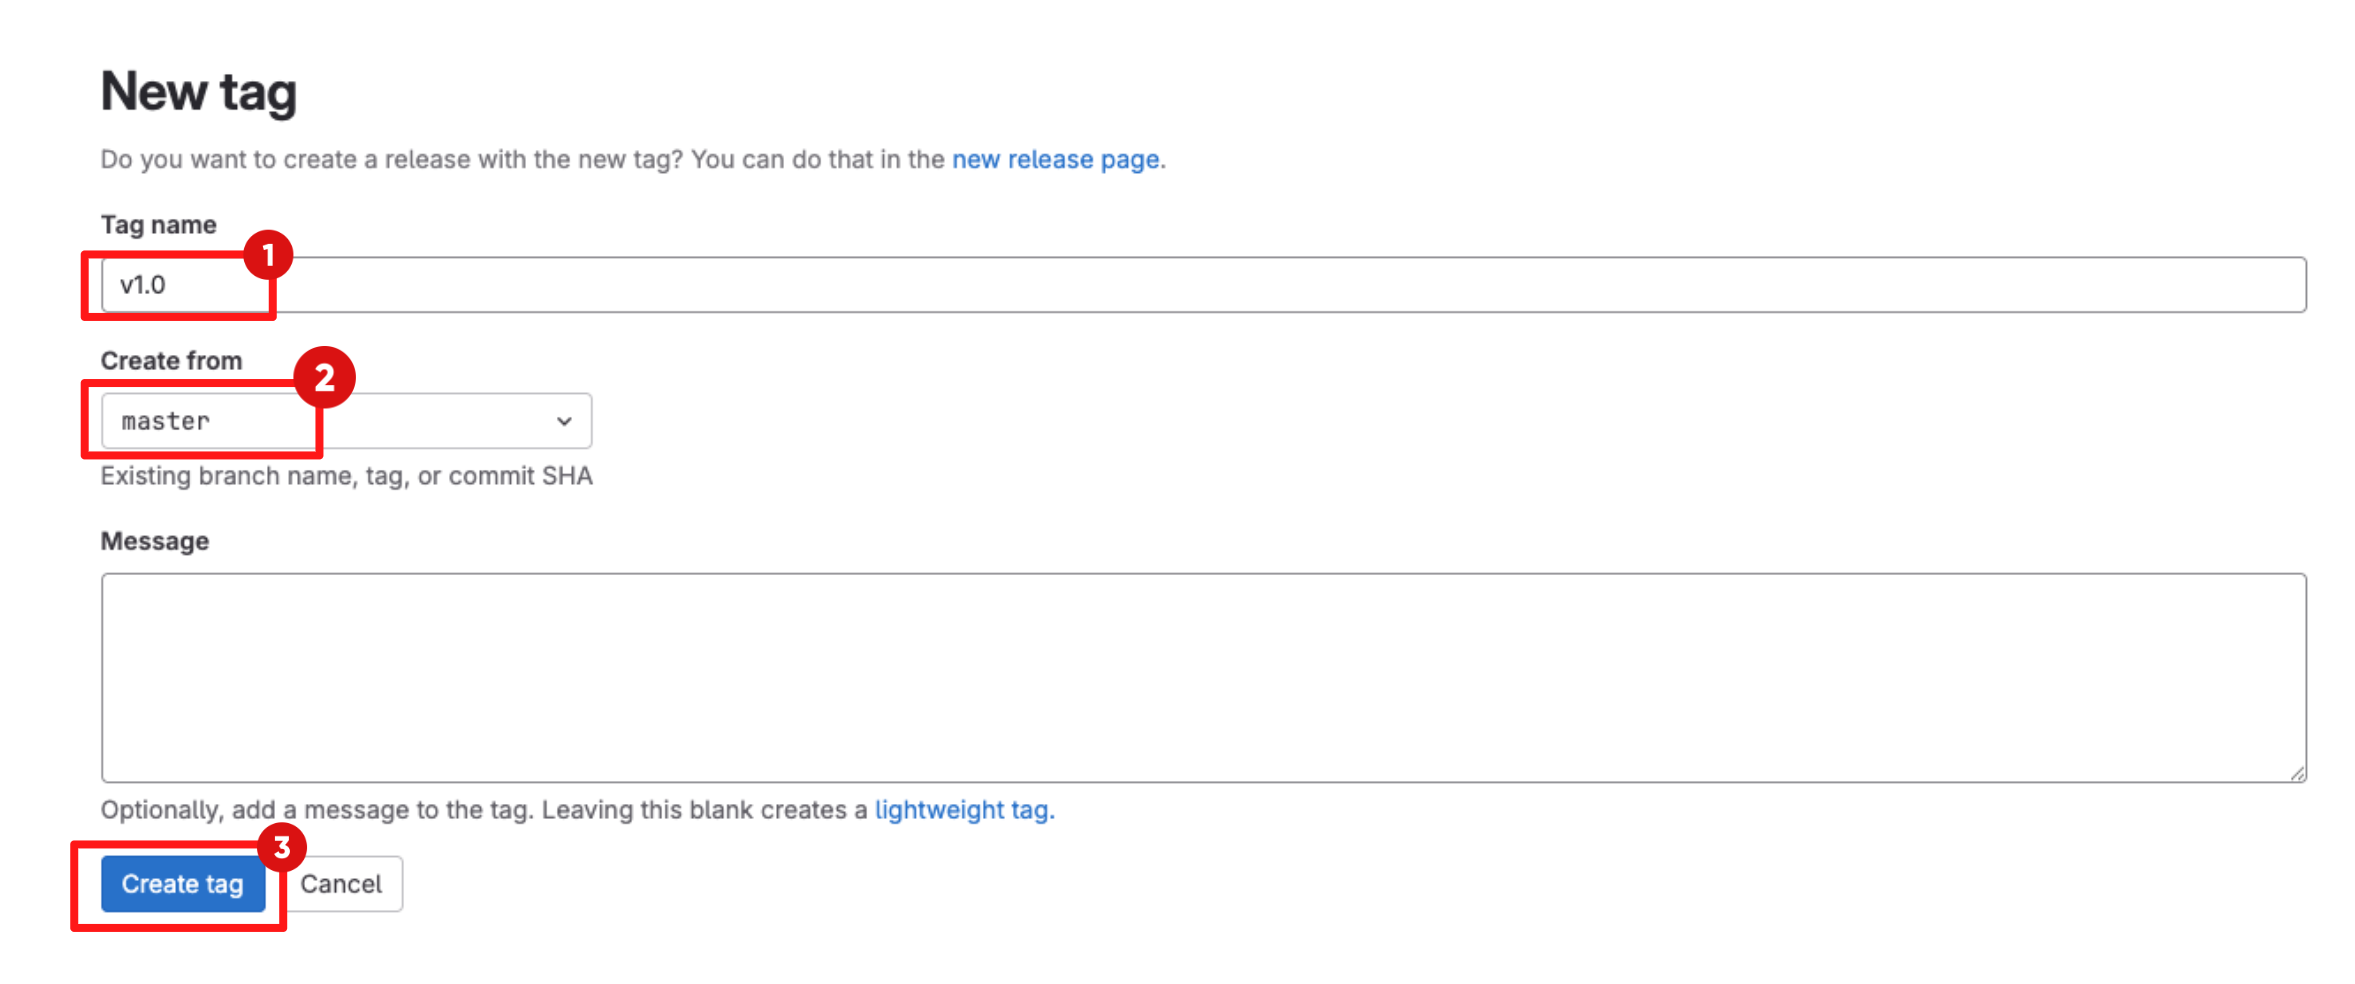
Click New tag.
-
Enter a version tag, for example v1.0.
-
Select master as the target branch. .
-
Click Create tag to create the release tag.
-
The software template configures a webhook that treats Git tags differently from regular commits. Creating a tag triggers a promote to staging pipeline, rather than the standard development pipeline.
-
5.3 Explore the Promote to Staging Pipeline
-
Switch back to the CI tab in Red Hat Developer Hub.
-
Locate and expand the job labeled promote-to-stage to follow the progress of the release pipeline.
Preparing the Release for Promotion
-
The release pipeline begins with the extract-destination-image-tag task, which resolves the destination image tag from the Git release. This ensures the release is explicitly tied to a specific version, rather than a moving branch or commit.
-
Next, the gather-images-to-verify task identifies the container image that was previously built and validated during staging. Using the Git tag, it locates the correct image and generates metadata that links the image back to its source repository and release, establishing clear traceability before promotion.
Verify Enterprise Contract
-
Wait for the verify-enterprise-contract task to reach Succeeded.

-
Click the task and review the logs.
-
In this task, the container image is validated against the Enterprise Contract using the following command:
ec validate image \
  --image quay.tssc-quay/tssc/my-quarkus-tkn:v1.0 \
  --policy git::github.com/org/ec-policies//default \
  --public-key k8s://openshift/trusted-keys \
  --output json
-
-
As part of this validation, Enterprise Contract ensures that:
-
Provenance: the image was built by a trusted pipeline and includes valid build attestations
-
Identity: the image is signed with Cosign and the signature matches the expected OIDC issuer and subject
-
Integrity: the image and its SLSA attestations have not been tampered with
-
Composition: a valid SBOM (for example, SPDX or CycloneDX) is present and attached to the image
-
Risk and Policy: vulnerability data (CVEs) and organisational security policies are evaluated before promotion
-
Promoting and Deploying the Release
-
Once the image has passed all verification and policy checks, the copy-image task promotes it to production.
-
This task retags the previously validated image with a production label (for example, prod-v1.0), clearly identifying it as production-ready.
-
Only images that successfully pass Enterprise Contract validation reach this stage, ensuring that unverified or non-compliant artifacts cannot be promoted.
-
The final task, update-deployment, updates the deployment configuration to reference the newly promoted production image.
-
This integrates seamlessly with GitOps, allowing tools such as Argo CD to automatically deploy the validated image into the production environment.
-
At this point, security validation transitions into customer value, with promotion and deployment handled automatically and consistently.
Release Pipeline Outcome
-
By combining signed commits, SBOMs, provenance, vulnerability scanning, and Enterprise Contract validation, only verified container images are promoted to production. Release promotion becomes automated, auditable, and policy-driven, reducing risk while significantly accelerating delivery.
-
Security is enforced by design, and production readiness is proven, not assumed.
Module 4: Summary
-
In this module, you addressed a critical customer challenge: “Unverified or unsafe images are slipping through to staging and production.”
-
As a participant, you executed an end-to-end trusted software supply chain workflow, observing how Red Hat Advanced Cluster Security (RHACS), Enterprise Contract (EC) policies, and release promotion work together to ensure only verified images are allowed to progress.
-
For customers, this means releases become safer, auditable, and fully governed. Every promotion decision is backed by cryptographic evidence, vulnerability data, and policy enforcement, ensuring confidence at every stage of the delivery process.
-
For consultants, this module provides a reusable pattern for embedding policy enforcement and release governance into real-world CI and CD pipelines, without introducing friction or slowing development teams down.
-
For technical sellers, this completes the workshop story: Red Hat Advanced Developer Suite (RHADS) prevents unsafe releases and turns every deployment into a controlled, compliant, and predictable outcome.
-
The key takeaway is this: with RHADS, developer velocity is preserved because trust is verified automatically, and enterprise risk is reduced because policy-driven guardrails ensure only trusted, compliant artifacts are promoted to production.