Running a migration
The Ansible for OpenShift Virtualization Migration includes capabilities to simplify the process for migrating Virtual Machines into OpenShift.
In the prior exercise, Preparing for Migrations, the supporting set of resources, including NetworkMaps and StorageMaps were created in the Namespace where migration activities will occur. This exercise will showcase how the features of the Ansible for OpenShift Virtualization Migration can be used to migrate Virtual Machines.
Migration Requests
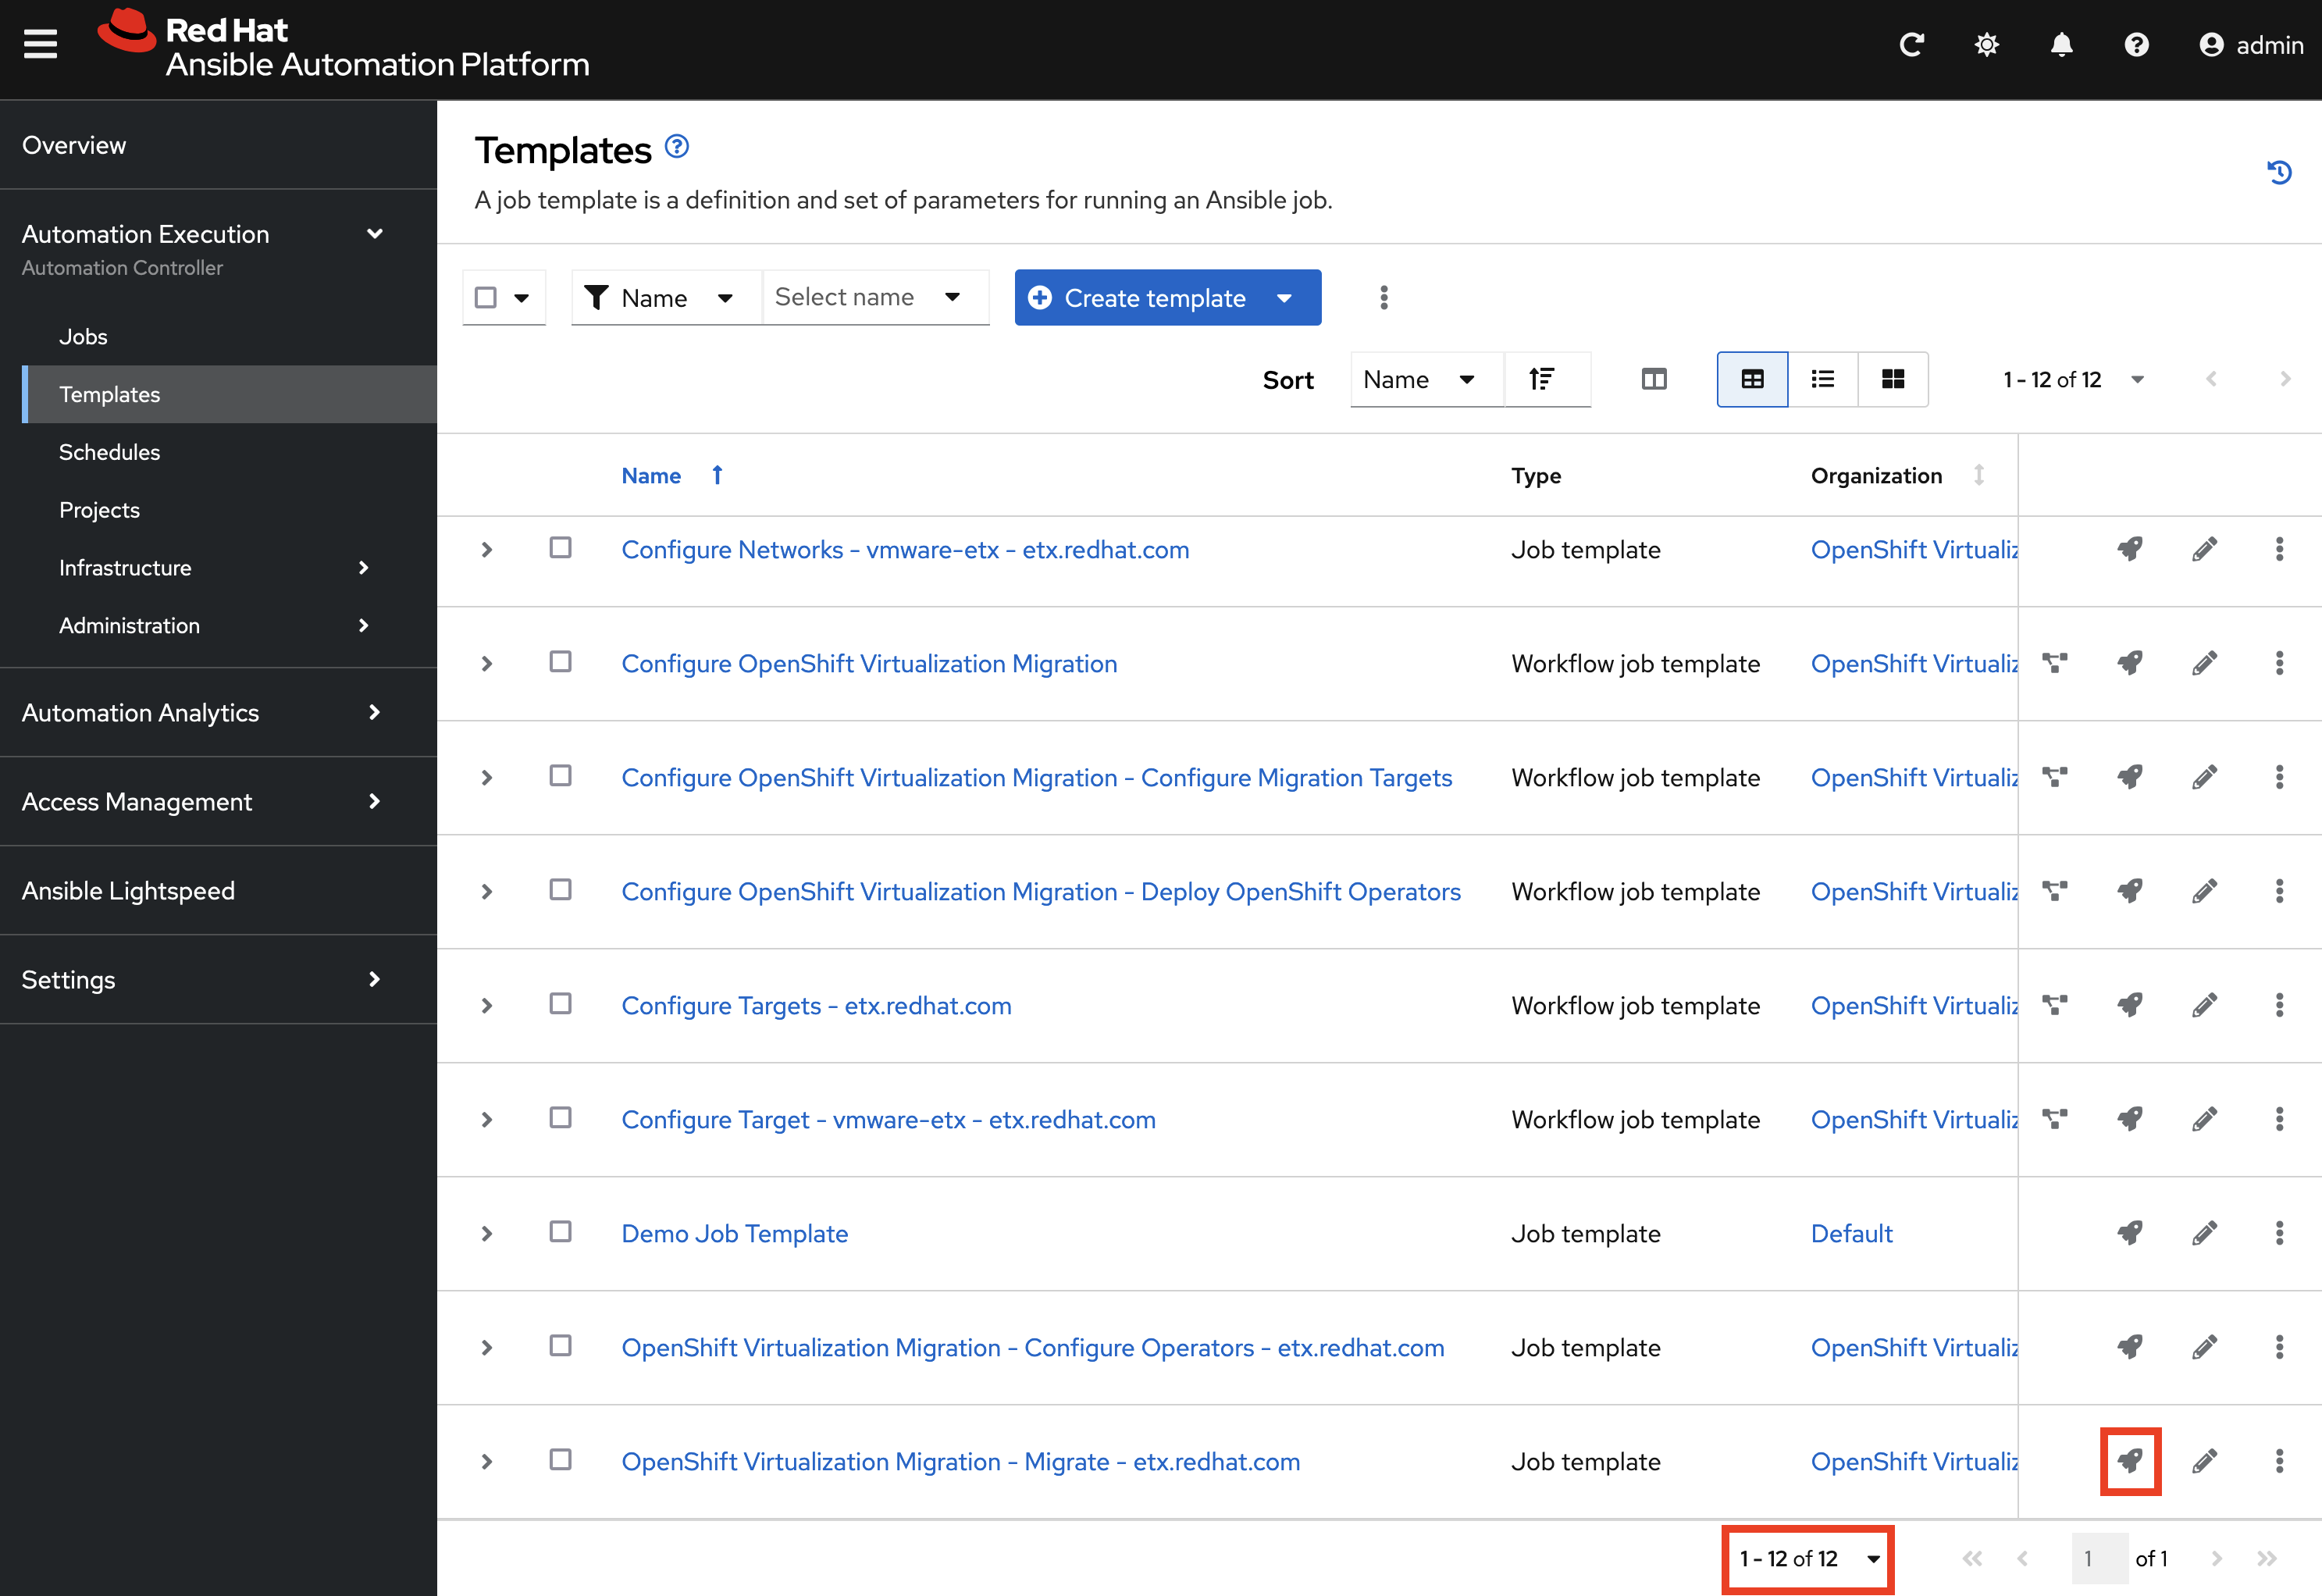
As part of the installation of the Ansible for OpenShift Virtualization Migration, a Job Template was created specifically to manage Virtual Machine migrations. This Job Template can be found by navigating to Ansible Automation Platform and selecting Templates underneath Automation Execution on the left hand navigation bar. The Job Template is named OpenShift Virtualization Migration - Migrate - etx.redhat.com.
|
The |
Since Virtual Machine migrations are a primary activity of any journey into OpenShift, being able to trigger automation for a variety of sources aside from within the Ansible Automation Platform is essential. The Automation Controller API affords external components, like an ITSM (IT Service Management), the ability to invoke migration activities as part of typical business processes. As a result, migrations make use of a variable named mtv_migrate_migration_request that defines the Virtual Machines that should be migrated including any additional information needed to generate MTV Plan and Migration resources.
A mtv_migrate_migration_request includes a variety of properties that incorporates required information to support the generation of MTV Plan resources, including Providers, NetworkMaps and StorageMaps as well as whether a migration should be started or staged for later. Most importantly, a set of VM’s and or folders within VMware can be selected to enable the migration of multiple Virtual Machines with ease.
To demonstrate how to migrate a set of Virtual Machines using the Ansible for OpenShift Virtualization Migration, we will select two Windows machines from VMware and migrate them to OpenShift. These machines are named win2019-1 and win2019-2 and are located in a directory associated with each student ID.
The following mtv_migrate_migration_request can be used to represent how to migrate these Virtual Machines from VMware to OpenShift.
mtv_migrate_migration_request: (1)
  mtv_namespace: vmexamples-automation (2)
  source: vmware-etx (3)
  source_namespace: openshift-mtv (4)
  destination_namespace: openshift-mtv (5)
  network_map: vmware-etx-host (6)
  network_map_namespace: vmexamples-automation (7)
  storage_map: vmware-etx-host (8)
  storage_map_namespace: vmexamples-automation (9)
  plan_name: etx-migration (10)
  start_migration: true (11)
  vms: (12)
    - path: "/RS00/vm/ETX/student-<id>/win2019-1" (13)
- path: "/RS00/vm/ETX/student-<id>/win2019-2"| 1 | Migration Request Variable |
| 2 | Name of the namespace that resources will be created within |
| 3 | Name of the Source Provider |
| 4 | Namespace containing the Source Provider |
| 5 | Namespace containing the destination Provider |
| 6 | Name of the NetworkMap |
| 7 | Namespace containing the NetworkMap |
| 8 | Name of the StorageMap |
| 9 | Namespace containing the StorageMap |
| 10 | Name to be associated with the Plan |
| 11 | Trigger the migration to begin immediately |
| 12 | List of Virtual Machines to include in the migration |
| 13 | Path in VMware containing the Virtual Machine to migrate. Replace <id> with your assigned student ID |
Most of the fields in the request should be fairly straightforward. By default, the generated Plan resources are staged and migrations are not initiated. However, this can be modified to start the migration through automation using the start_migration: true property as included within this request.
The vms field includes a list of Virtual Machines that should be included in this migration wave. Several options are available to select the desired Virtual Machines. In the example above, the VMware path is used to select the specific Virtual Machines as there are several with the same name.
In addition to selecting Virtual Machines using the vms property, folders can also be included within the folders property, enabling multiple Virtual Machines to be included with ease.
The rest of the possible options that can be included in the mtv_migrate_migration_request can be found by inspecting the mtv_migrate role within the Ansible content collection.
Migrate Virtual Machines
Start a migration by selecting the rocket icon next to the OpenShift Virtualization Migration - Migrate - etx.redhat.com_ Job Template. Enter the content of the mtv_migrate_migration_request variable into the Variables textbox.
|
Remember to replace the |
Select Next to review the content of the Job that will be launched including the Variables that you specified on the previous page.
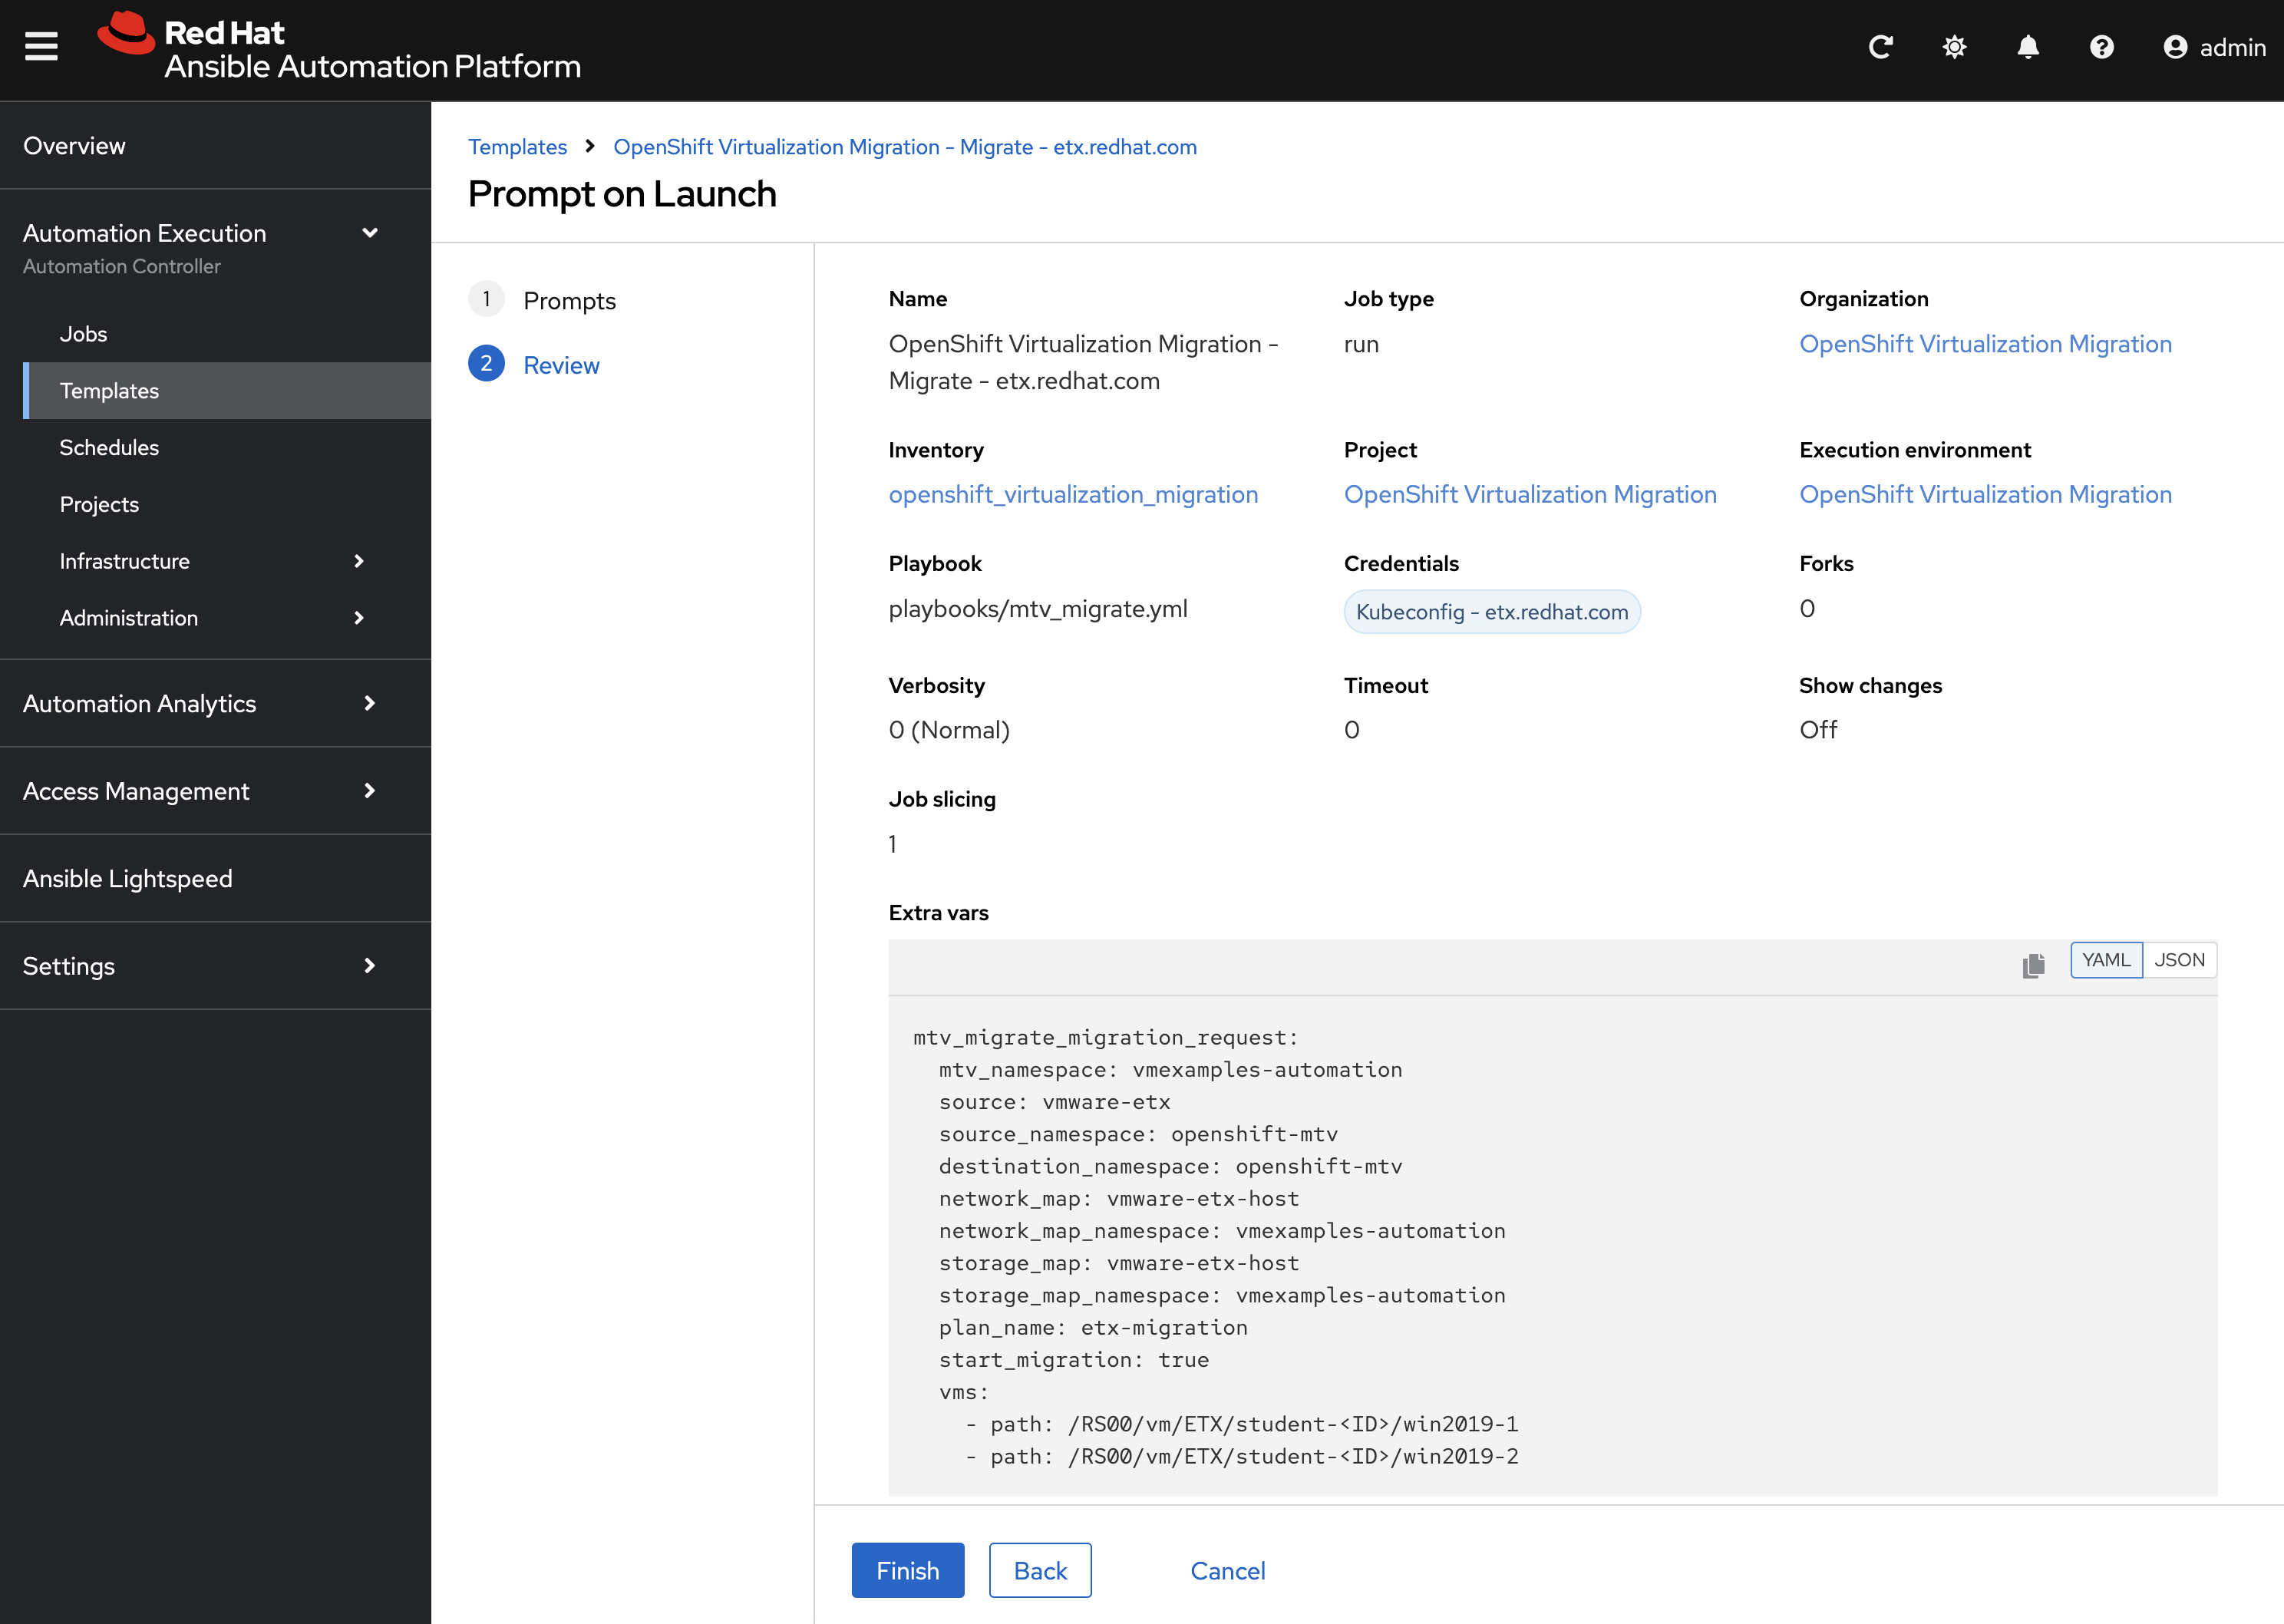
Click Finish to launch the Job.
Wait until the Job completes successfully.
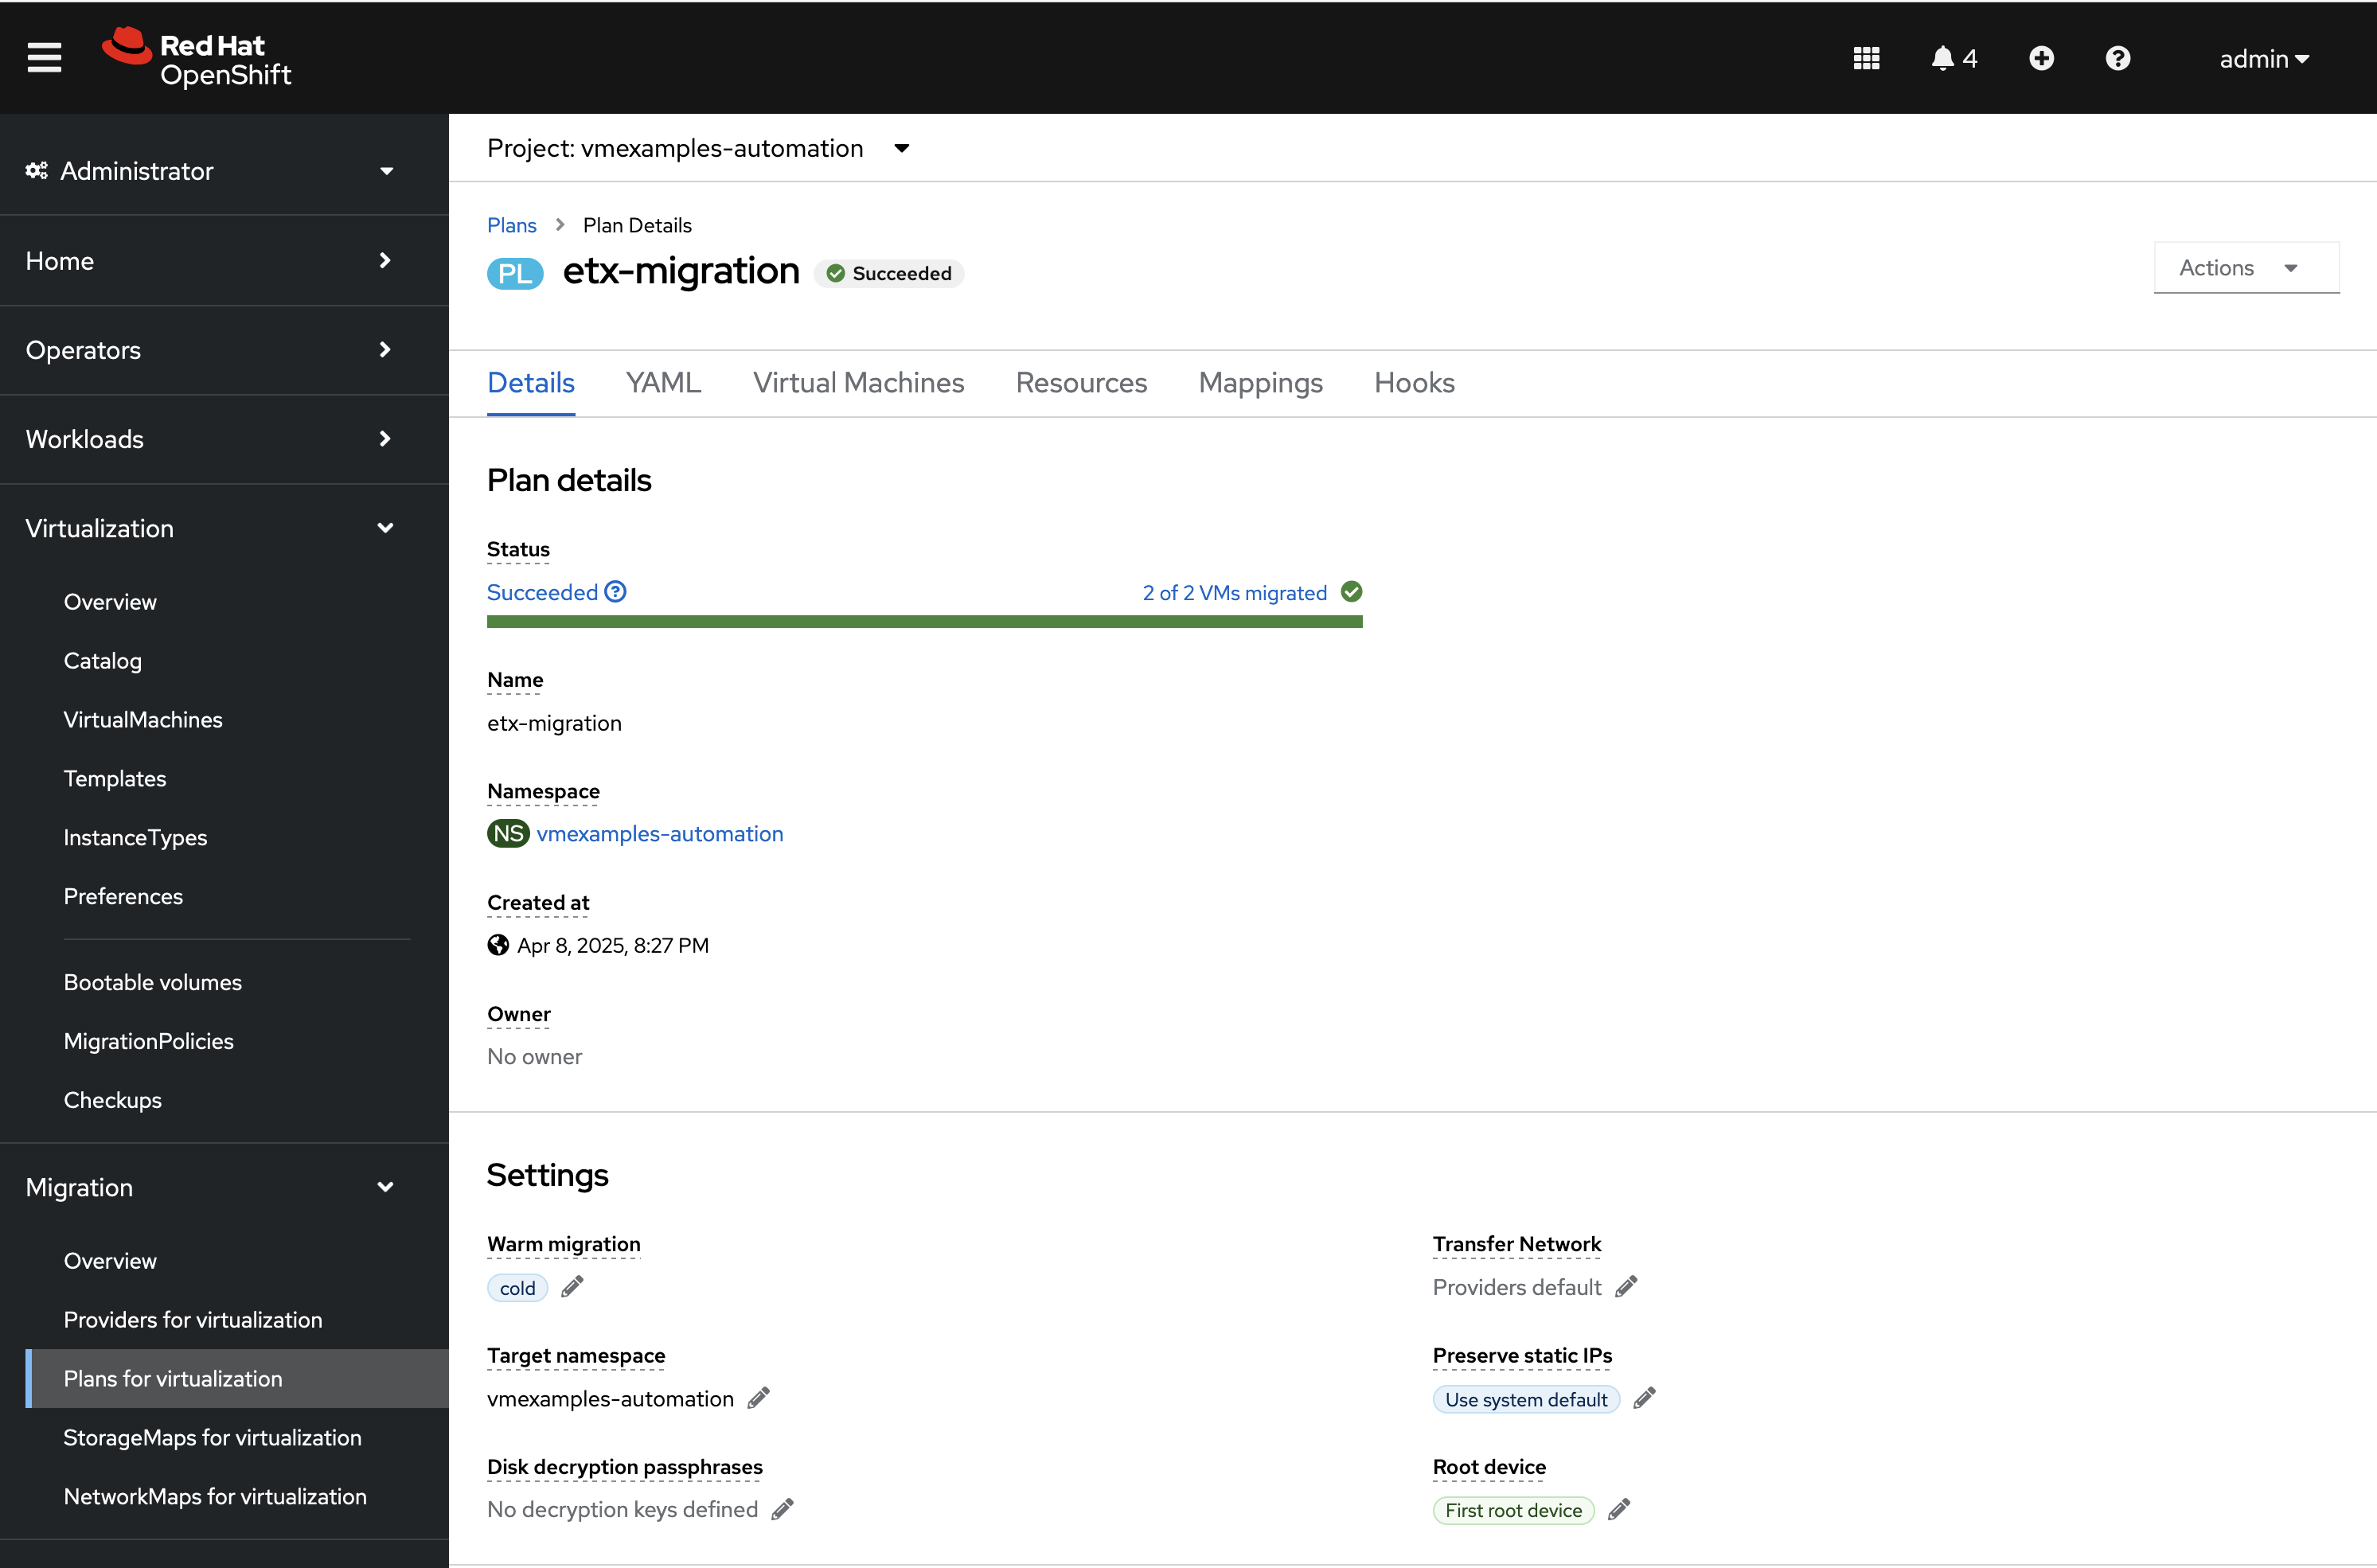
Once complete, navigate back to the OpenShift Console and underneath the Migration section on the left hand navigation bar, select Plans for virtualization. Ensure that you are within the vmexamples-automation Project by selecting the project from the Project dropdown at the top of the screen. Notice the single Plan called etx-migration was created in this namespace and that a Migration will commence once the Plan has been validated.
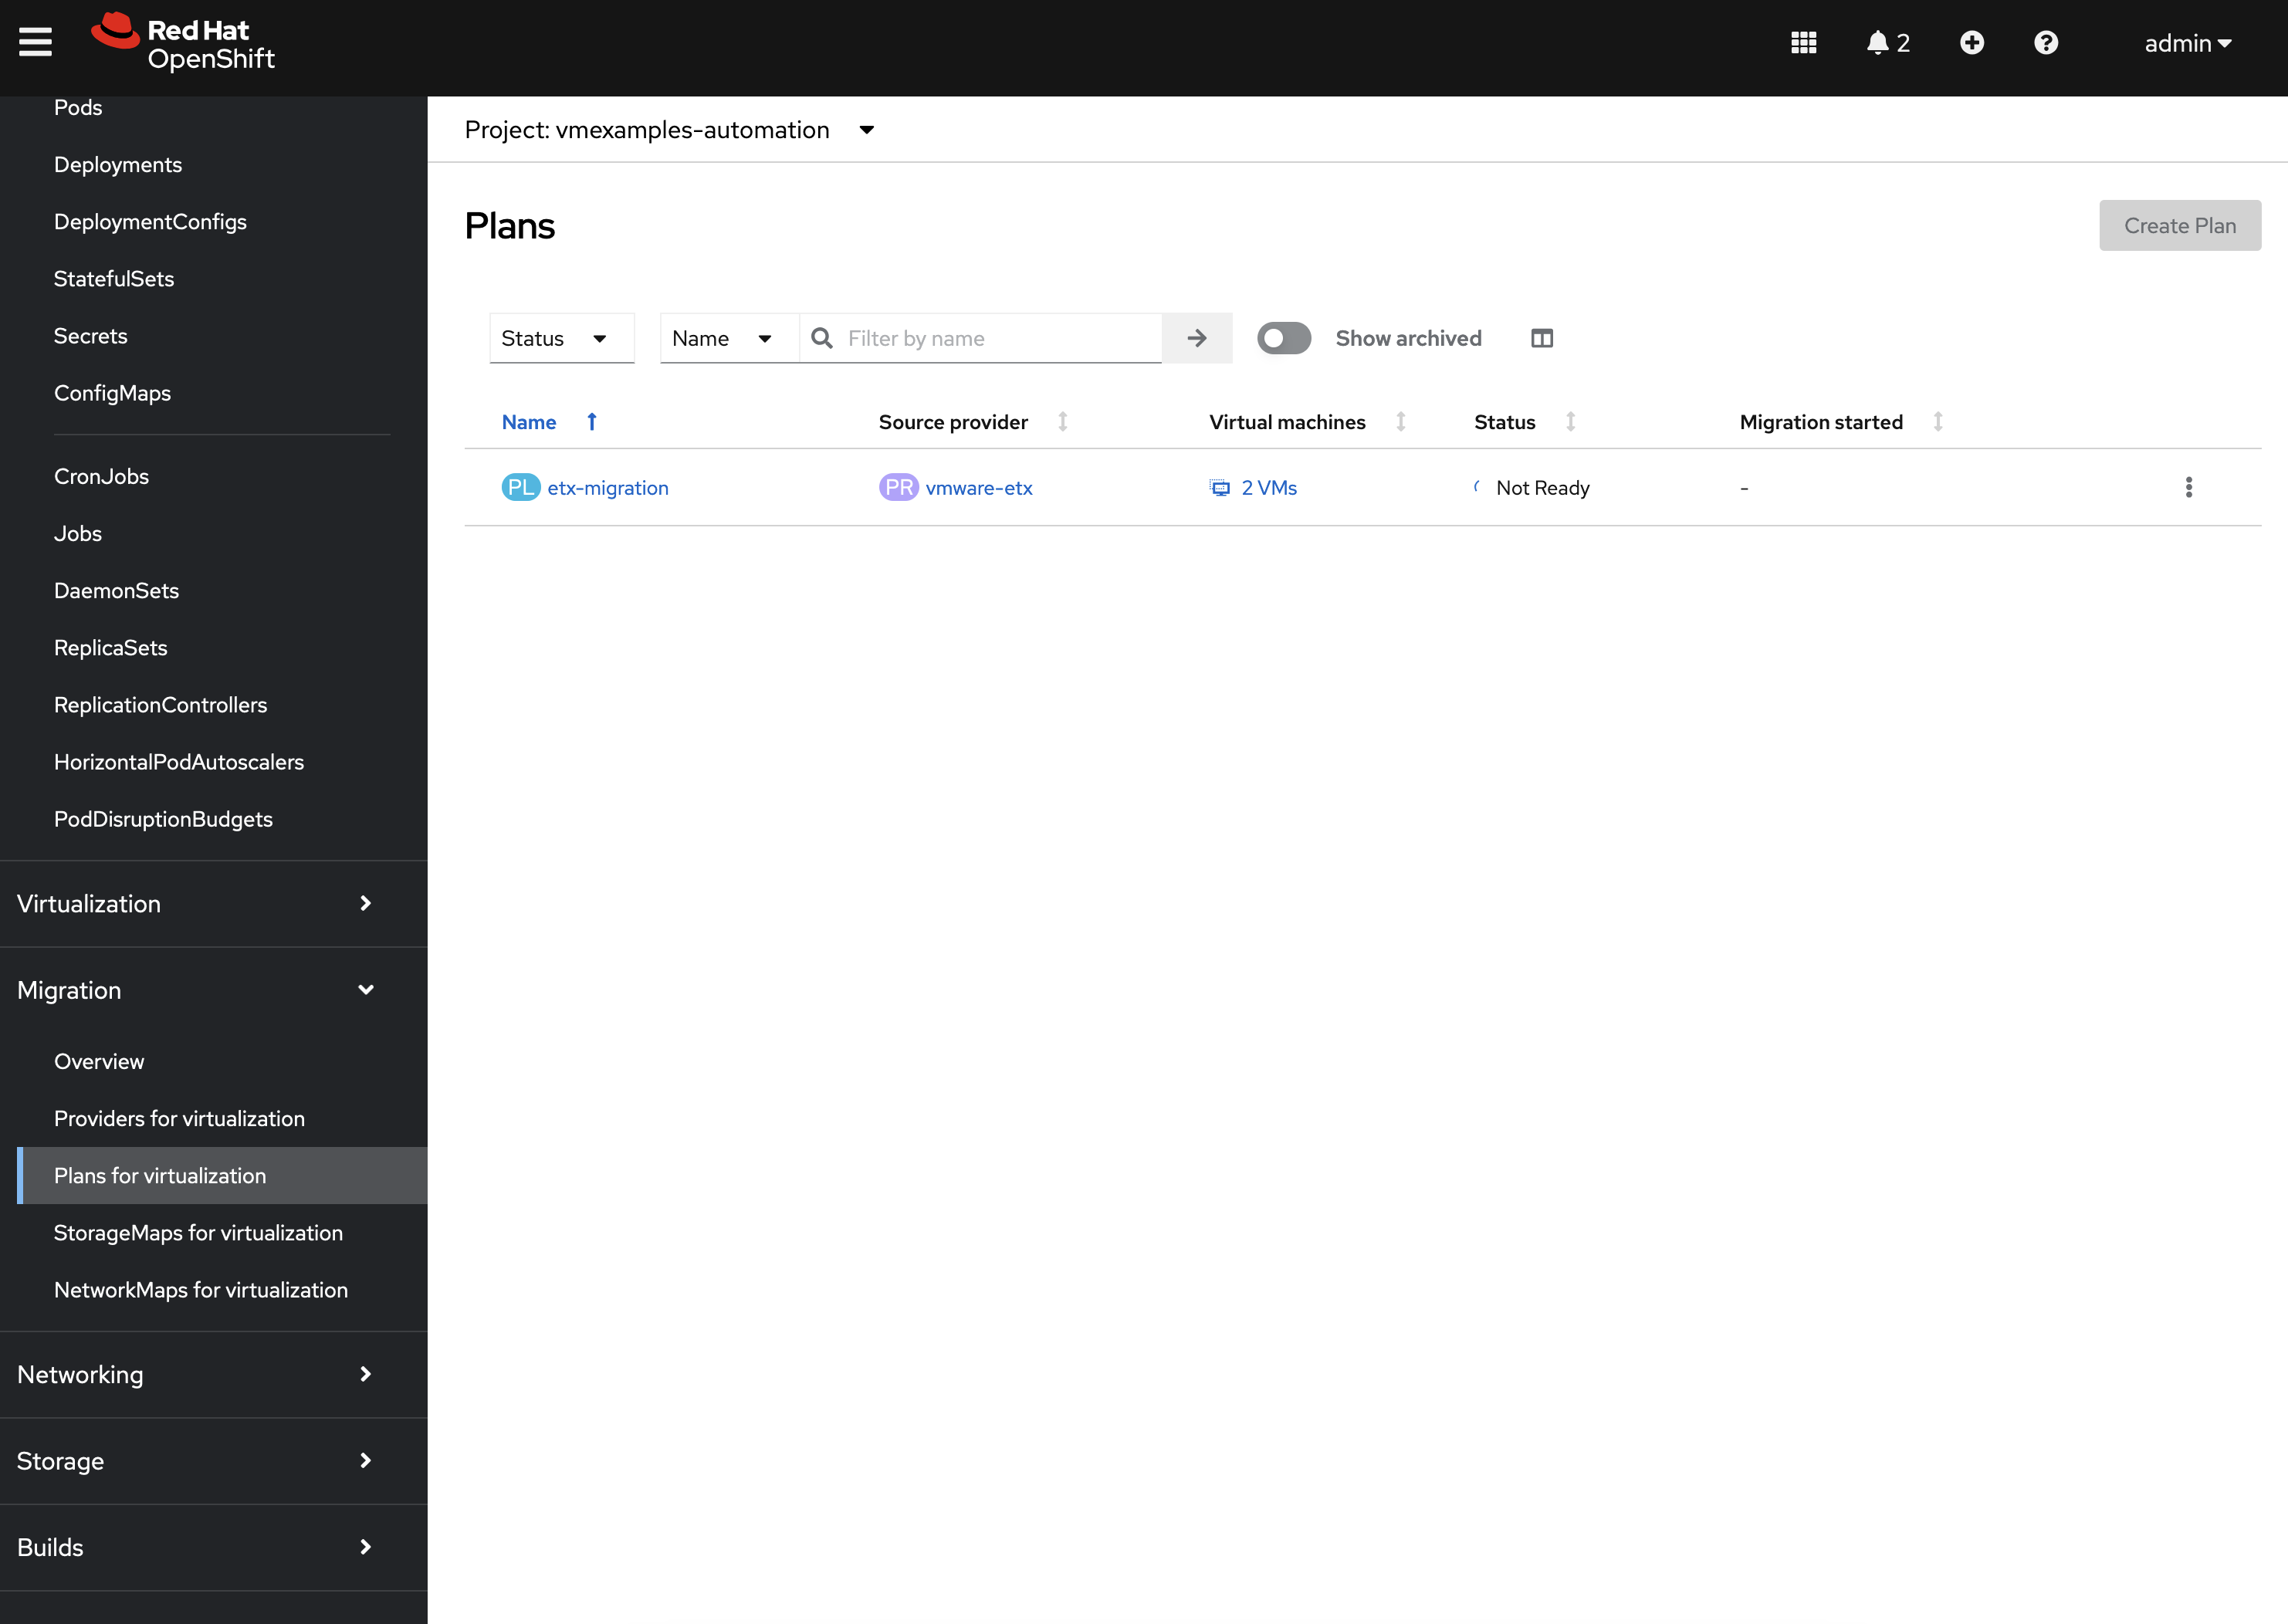
Once the Plan has been validated (which includes verifying the VDDK image), the Migration will start as noted in the Migration started column.
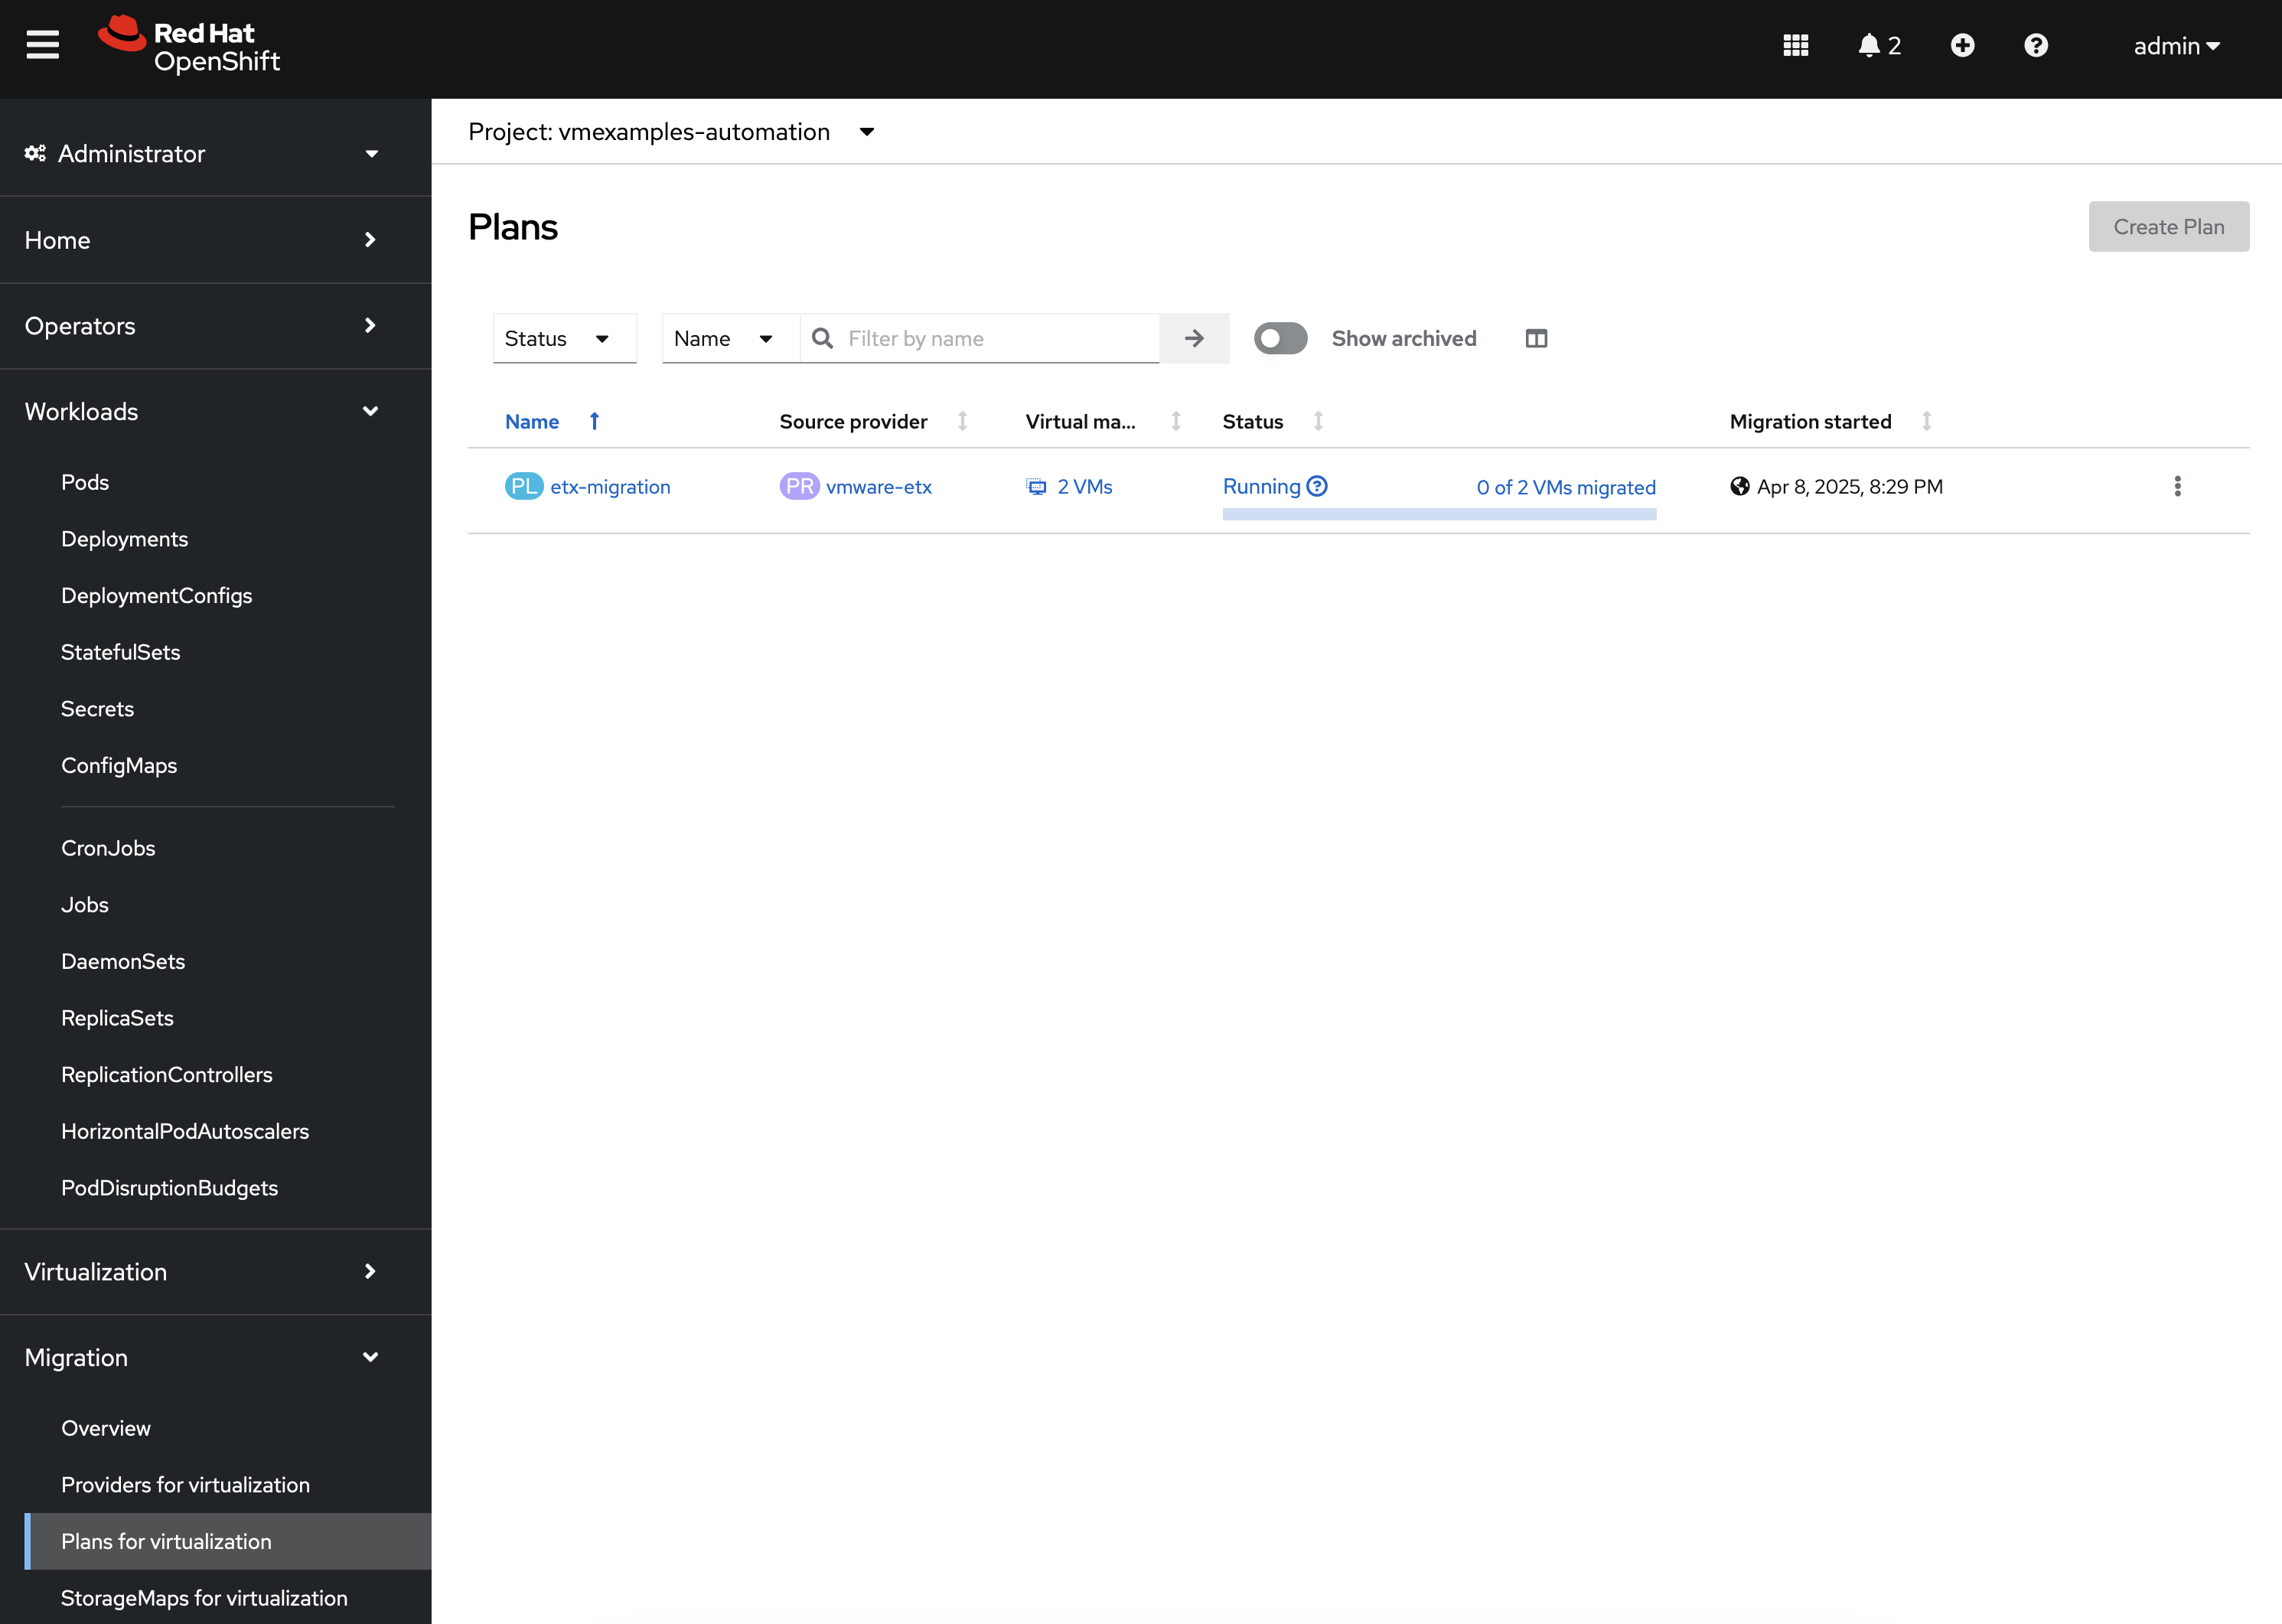
By clicking on the 2 VMs link under the Virtual Machines column, you can review and confirm the machines that are included in this migration.
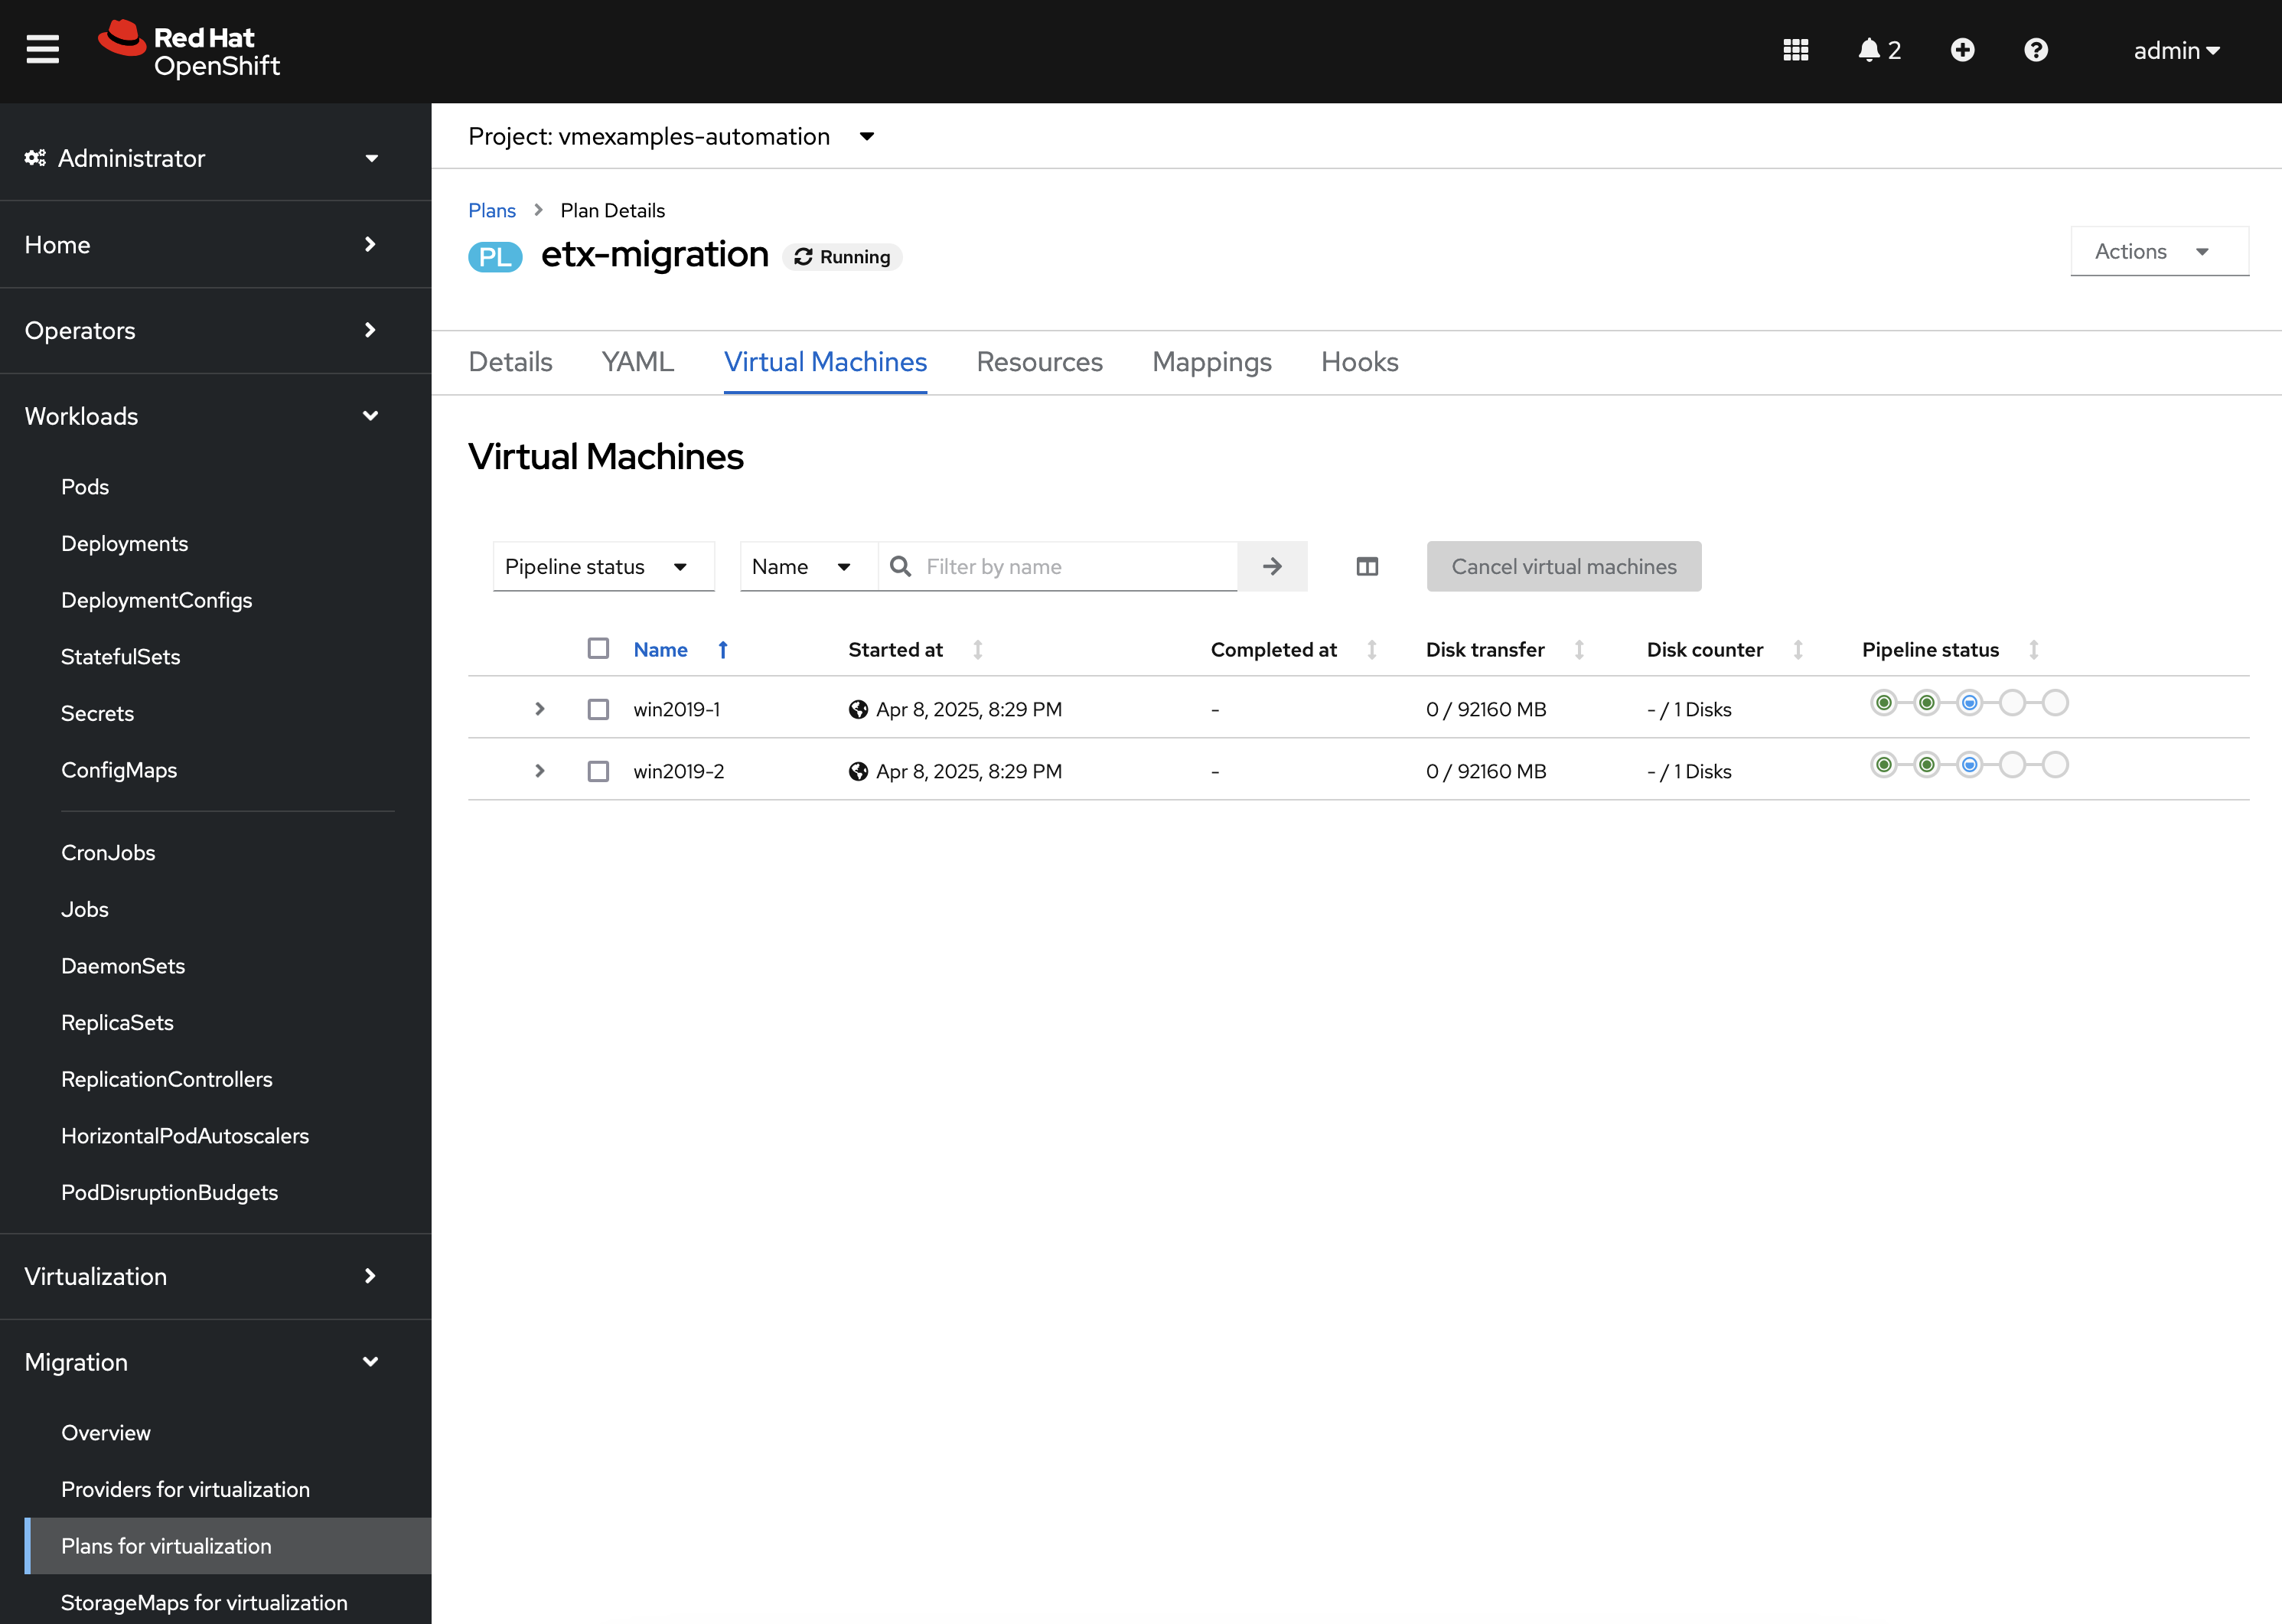
Track the progress of the Migration in the OpenShift Web Console until the migration completes successfully.
|
The Ansible for OpenShift Virtualization Migration Collection includes the capability to track the progress of Migrations. However, this feature was not enabled in this particular example. |
View the migrated Virtual Machines by selecting VirtualMachines under the Virtualization section of the left hand navigation bar. On this page, you will be able to see a list of all Virtual Machines including those that were created as part of this migration.
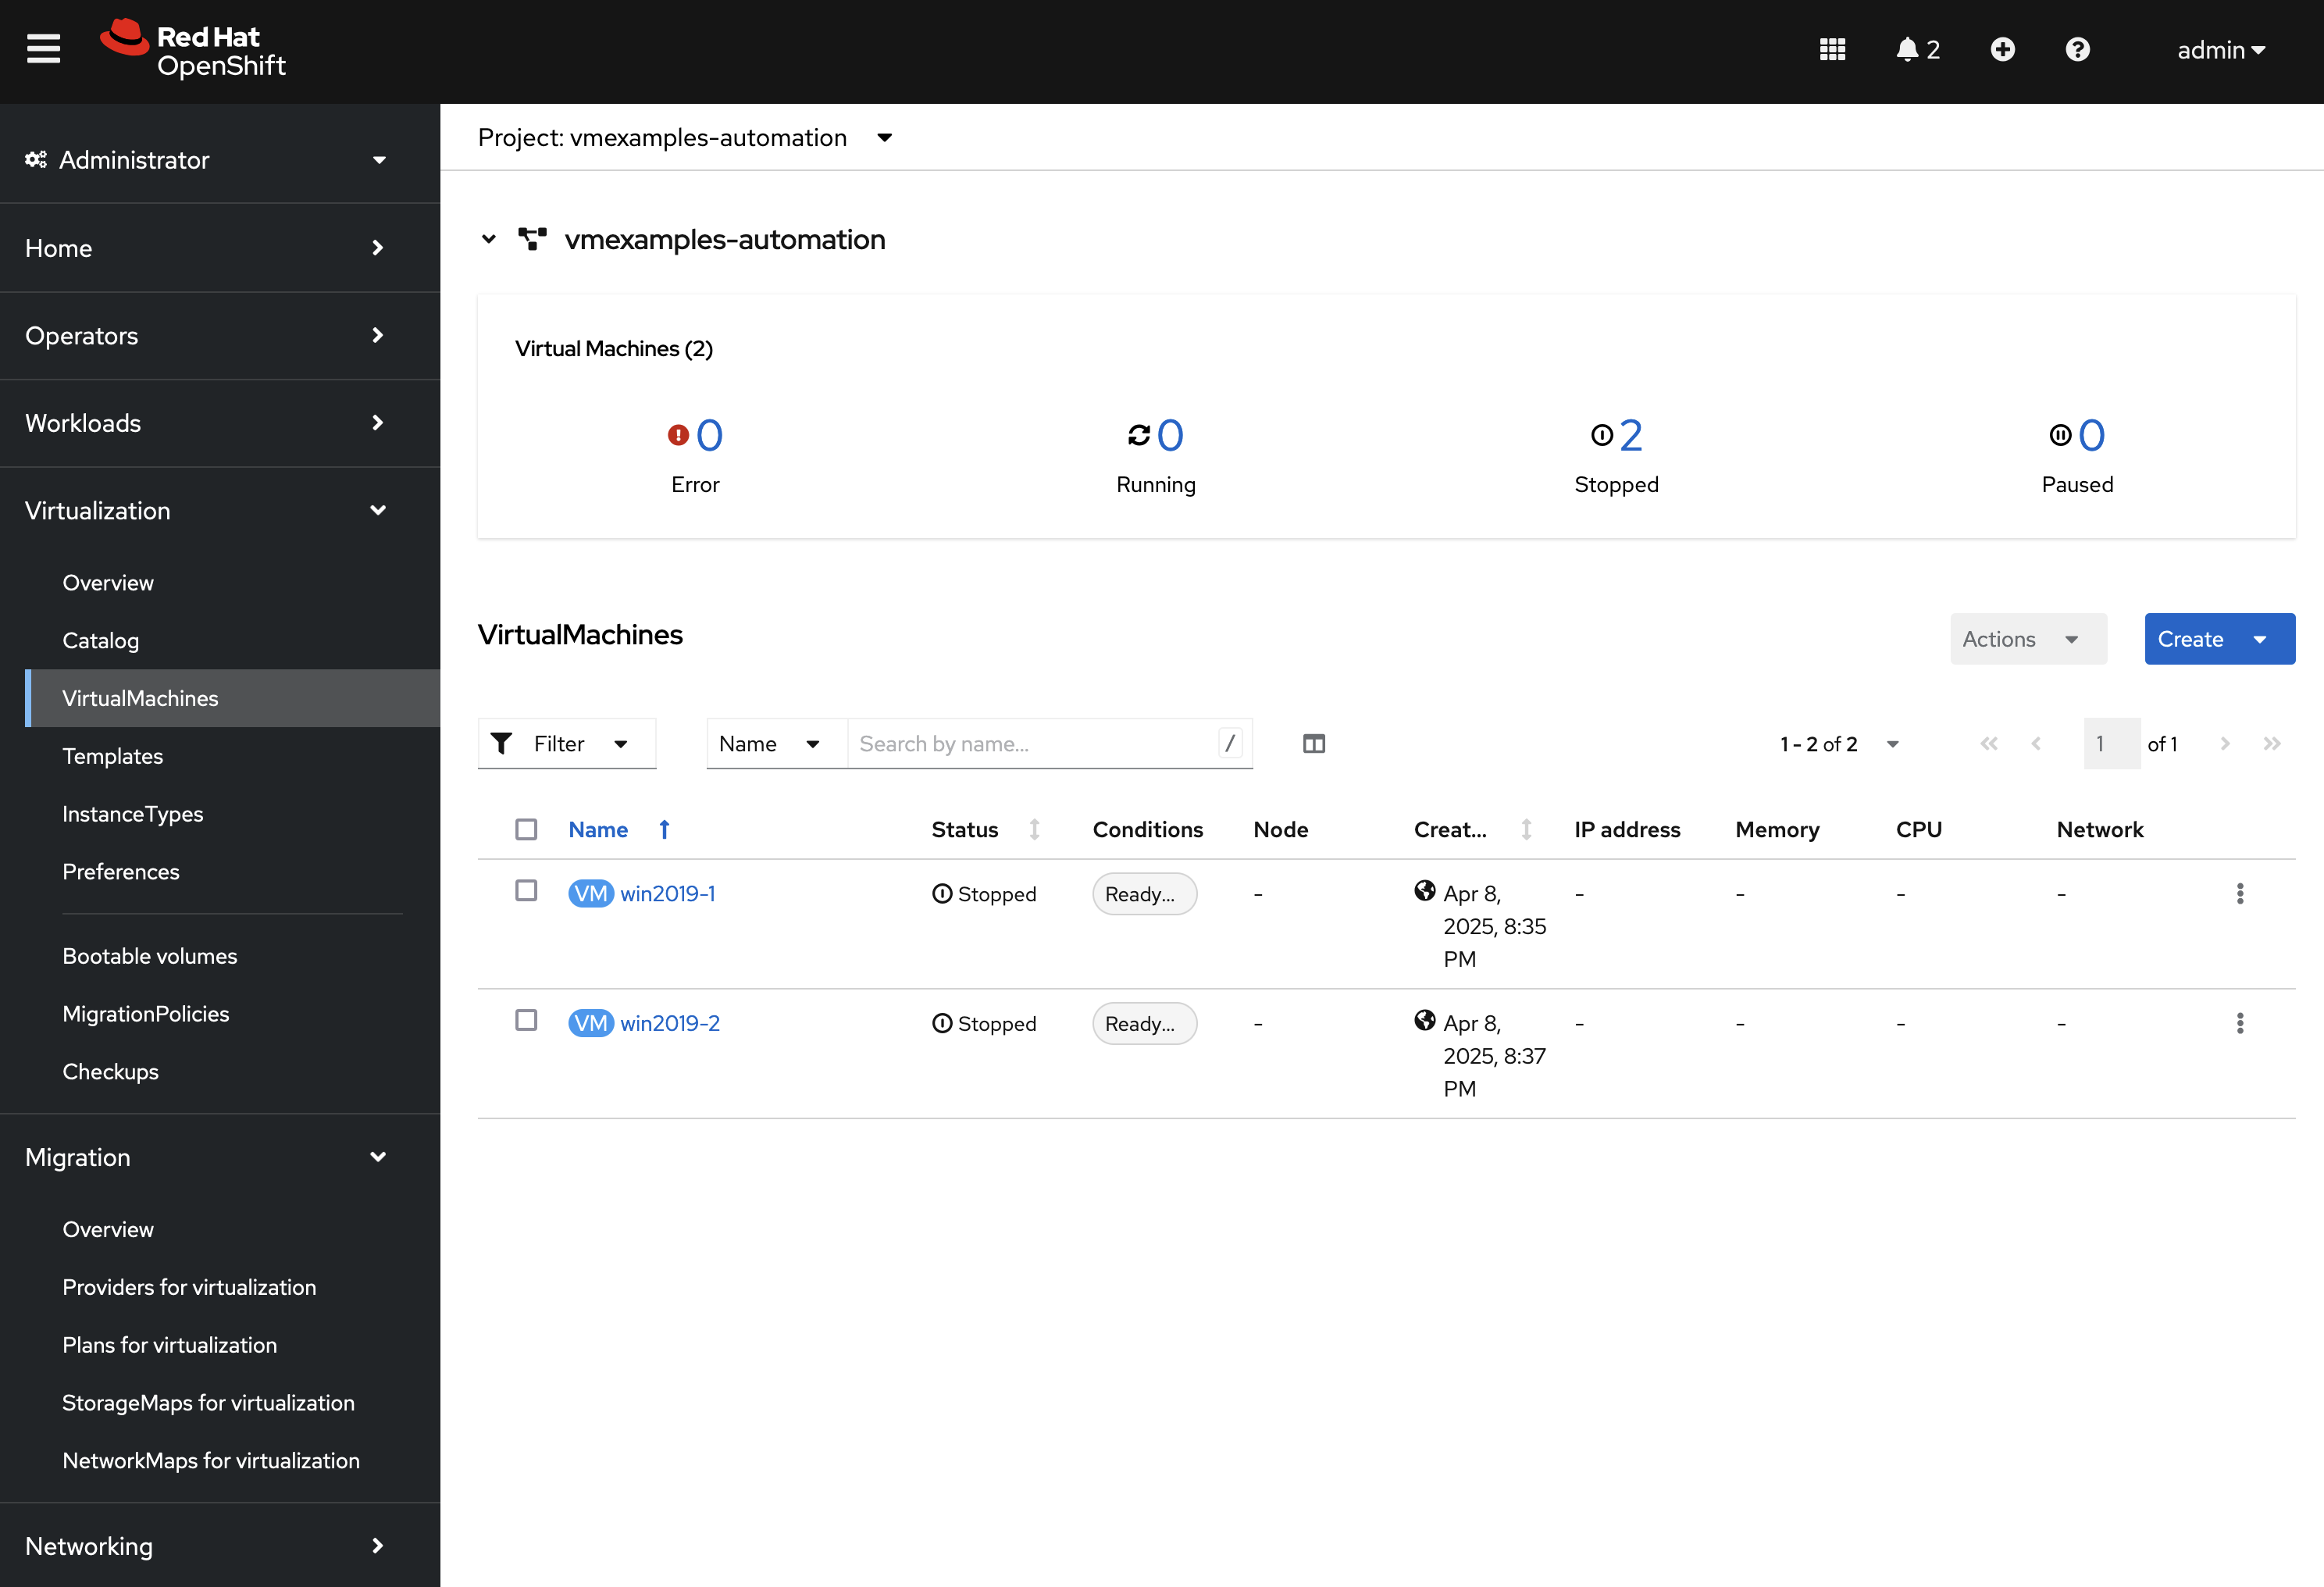
Feel free to interact with these instances, including starting, stopping and restarting and other activities as desired.
While this migration introduced how migrations are handled using the Ansible for OpenShift Virtualization Migration, you were able to see just how easy it was to not only manage a few Virtual Machines now, but how it can be used to migrate a large fleet of Virtual Machines in coordinated migration waves.