Model Deployment and Configuration
In this module, we will quickly review the different OpenShift AI components, and learn how to deploy a model with it.
Getting connected to OpenShift AI
For the purposes of this workshop session, we have provisioned an OpenShift Container Platform cluster for each participant, with Red Hat OpenShift AI deployed on it.
Each person attending this lab has a full admin access (cluster-admin) to their cluster to be able to do the different exercises and check the various configurations.
If you are using this instructions through the workshop, the information below will render properly. If not, you will see placeholder values instead.
-
Your username:
userX -
Your password:
openshift
At any point, you can access the OpenShift Container Platform console by going to the following URL: https://console-openshift-console.apps.cluster-guid.guid.sandbox.opentlc.com/. This link is also available in the Links section in the top right corner of the present instructions.
For now, we are going to use the OpenShift AI Dashboard, which is a web-based interface that allows you to manage and monitor your OpenShift AI environment.
-
Click to open the following URL in a new tab or window and log in:
-
Click on the
Login with OpenShiftbutton: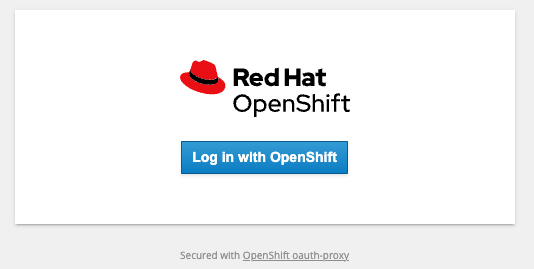
-
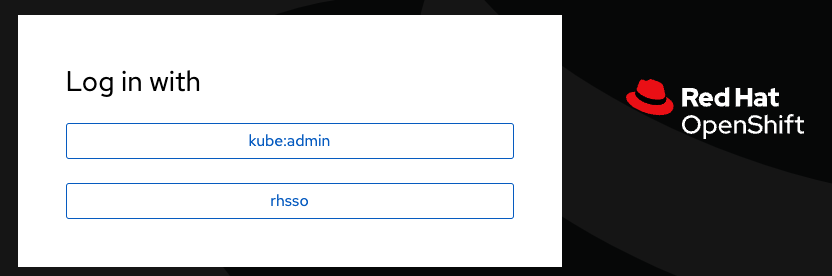
Select rhsso
-
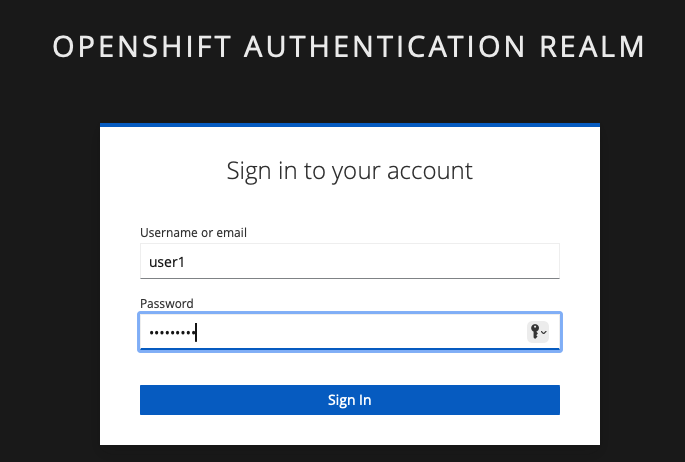
If needed, enter your credentials (as detailed above)
-
Because the password is so simple (
openshift), your browser might display a scary message. It is safe here to ignore this message when it pops up. -
Don’t worry if you do not see this scary message.
-
After you authenticate, your browser window should look like:
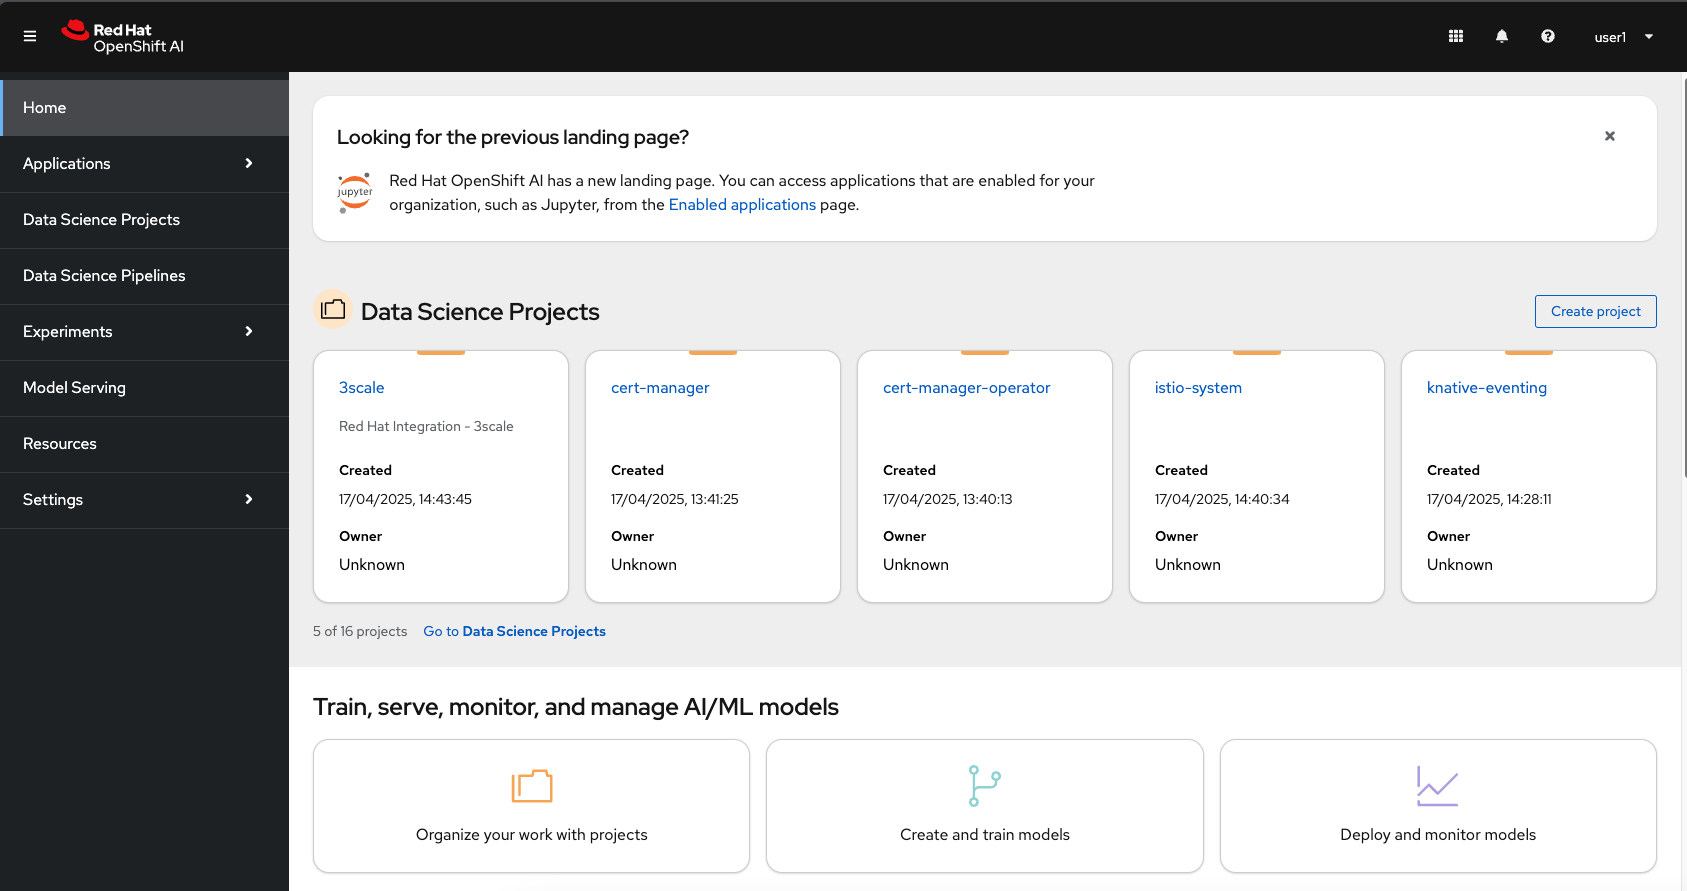
If you got this far and saw all that, congratulations, you properly connected to the Red Hat OpenShift AI Dashboard Application!
We are now ready to start!.
Overview of OpenShift AI Components
In this section, we will review the different OpenShift AI components and discuss their features.
Selecting the LLM Host Project
-
As you are cluster admin, you currently see a lot of projects. The one we will be using in the workshop is the
LLM Hostproject. To access it, click onGo to Data Science Projectsat the bottom of the Data Science Projects sections.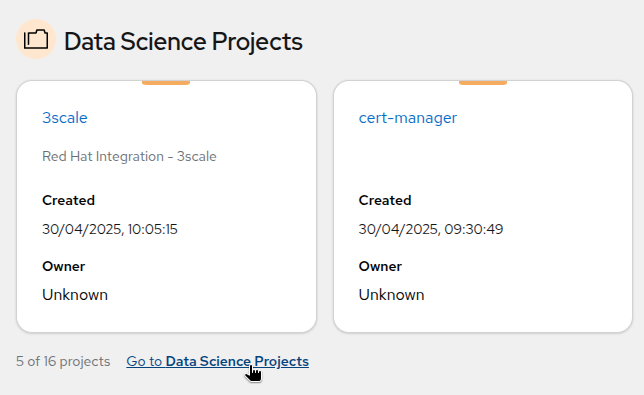
-
In the list of projects, you should see the
LLM Hostproject. Click on it to access the project.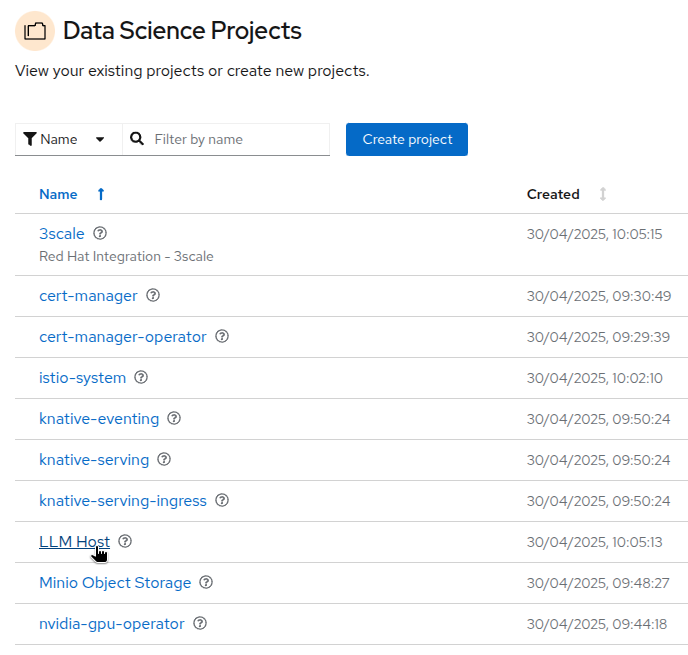
The OpenShift AI Components
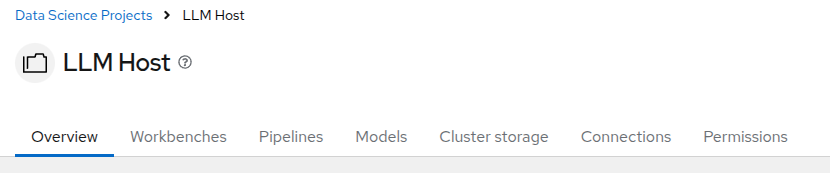
The different components of OpenShift AI that you can access through the different tabs are:
-
Workbench: This is where you can create and manage various development environments like JupyterLab, VSCode, or other custom Workbenches. It provides a user-friendly interface for data scientists to work with notebooks, libraries, and datasets. There is already a Custom Workbench deployed in the project to explore the storage space where our models are. We will come to it later.
-
Pipelines: We won’t use Pipelines in this workshop, but you can use them to automate the process of processing date or training and deploying machine learning models.
-
Models: This is where you can manage and deploy machine learning models. You can create, update, and delete models, as well as monitor their performance and usage. You can see that a model is already deployed as an example. We will come to it later.
-
Cluster storage: This is where you can manage the storage resources used by your models and workbenches. You can create, update, and delete storage resources, as well as monitor their usage. At the moment you can see the storage used by the workbench we deployed.
-
Connections: This is where you can manage the connections between your workbenches or model runtimes and other services, such as storage (S3), databases or APIs. You can create, update, and delete connections, as well as see which environment is using them.
-
Permissions: This is where you can manage the permissions for project. You can create, update, and delete permissions, as well as see which users or groups have access to which resources.
Reviewing and Testing the Deployed Model
Reviewing the Model Configuration
-
As we mentioned before, a model is already deployed in the
LLM Hostproject. To access it, click on theModelstab in the project. The model deployed is theGranite-3.2model. It is designed to generate human-like text and can be used for various natural language processing tasks.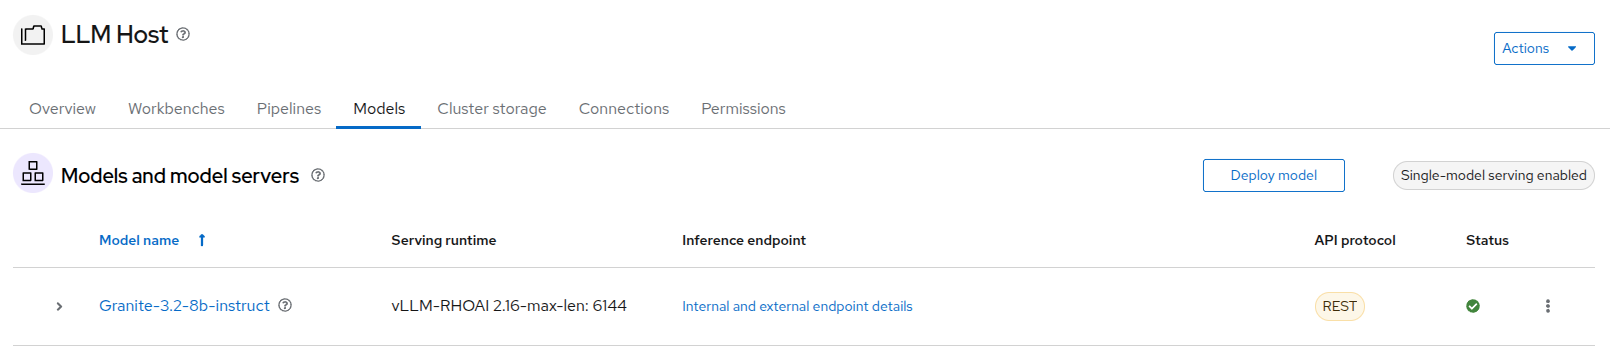
-
If you click on the expand button at the left of the model, you will see more information about its configuration, such as the resources allocated to it.
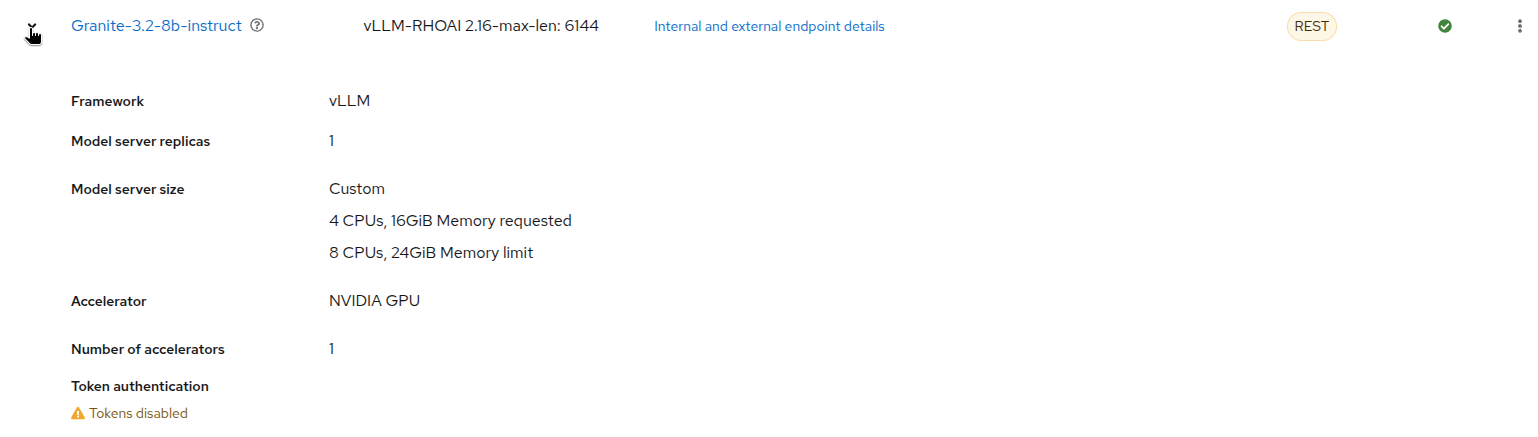
-
If you click on
Internal and external endpoint details, you will see the different endpoints available for the model. TheInternalendpoint is used to access the model from within the OpenShift cluster, while theExternalendpoint is used to access the model from outside the cluster (in this case the model is only accessible internally, so the external endpoint address is a placeholder one).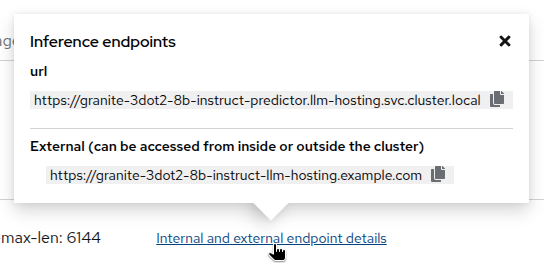
At this point, you can see that the model is running and ready to be used. We won’t go in more details at the moment, as you will be able to deploy your own model later in the workshop.
Reviewing the Connection
-
Switching to the
Connectionstab, you can see there is already a connection calledmodelsconfigured in the project.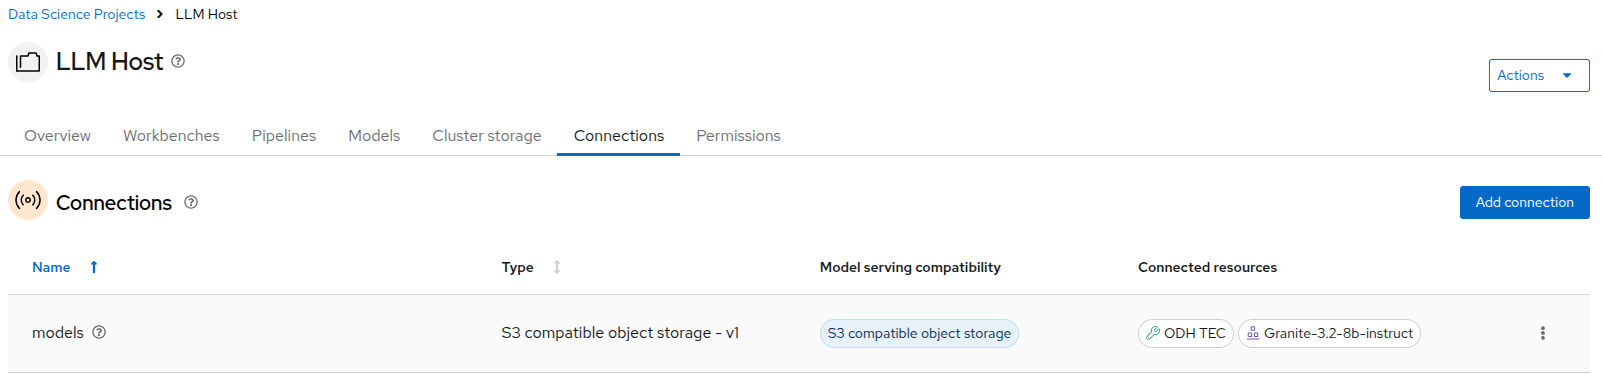
You can see that the Granite model serving is using this connection, as well as the ODH-TEC workbench which we will explore later.
-
As we will reuse the same connection for the model we will deploy later, let’s take a look at its configuration. Click on the three dots on the right of the connection and select
Edit.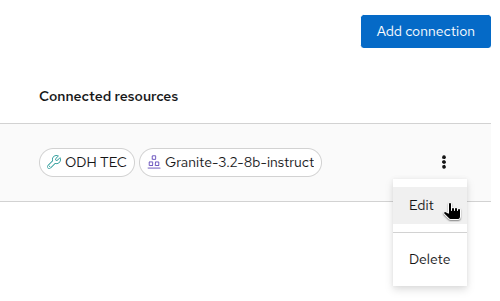
-
You can see that this is an S3 connection to object storage provided by Minio. Scrolling down, you can see the different parameters configured for this connection.
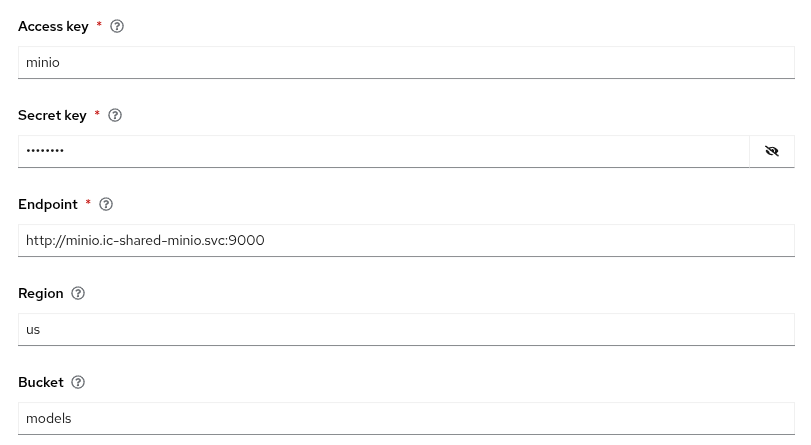
If you are familiar with S3, you will recognize the different parameters. The Access Key and Secret Key are used to authenticate to the Minio server, while the Bucket parameter is used to specify the bucket where the models are stored. The Endpoint parameter is used to specify the Minio server address.
Those information will be automatically injected as environment variables in the model runtime or the workbench that use this connection, so you don’t need to worry about them and have to set those parameters manually every time. That’s both a time saver and a security feature, as you don’t have to expose those credentials in your code.
Reviewing the Model Files
-
As we said, the model is stored in Minio, which is an S3 compatible object storage. To see those files we are going to use the
ODH-TECworkbench that is already deployed in the project. To access it, click on theWorkbenchtab in the project, then onOpen.
-
This will open a new tab. After logging in and accepting the license, you will access
ODH-TEC. It is a simple tool used to manage and view S3 storage.
As you can see, ODH-TEC is already configured to use the models connection we just reviewed. You can see the different buckets available in the Minio server, as well as the files stored in each bucket. You can take some time to look at the different folders and files available. Two models are available: the Granite model we saw, and TinyLlama. We are going to deploy this one in the next section.
You can leave this tab open for now, we will come back to it later.
Testing the Model
To test the model, we are going to use the Granite model endpoint. You can use any HTTP client to test the model, but we will use curl for this workshop.
-
To do so, we will first create a new Workbench based on VSCode. On the
Workbenchtab, click onCreate workbench.
-
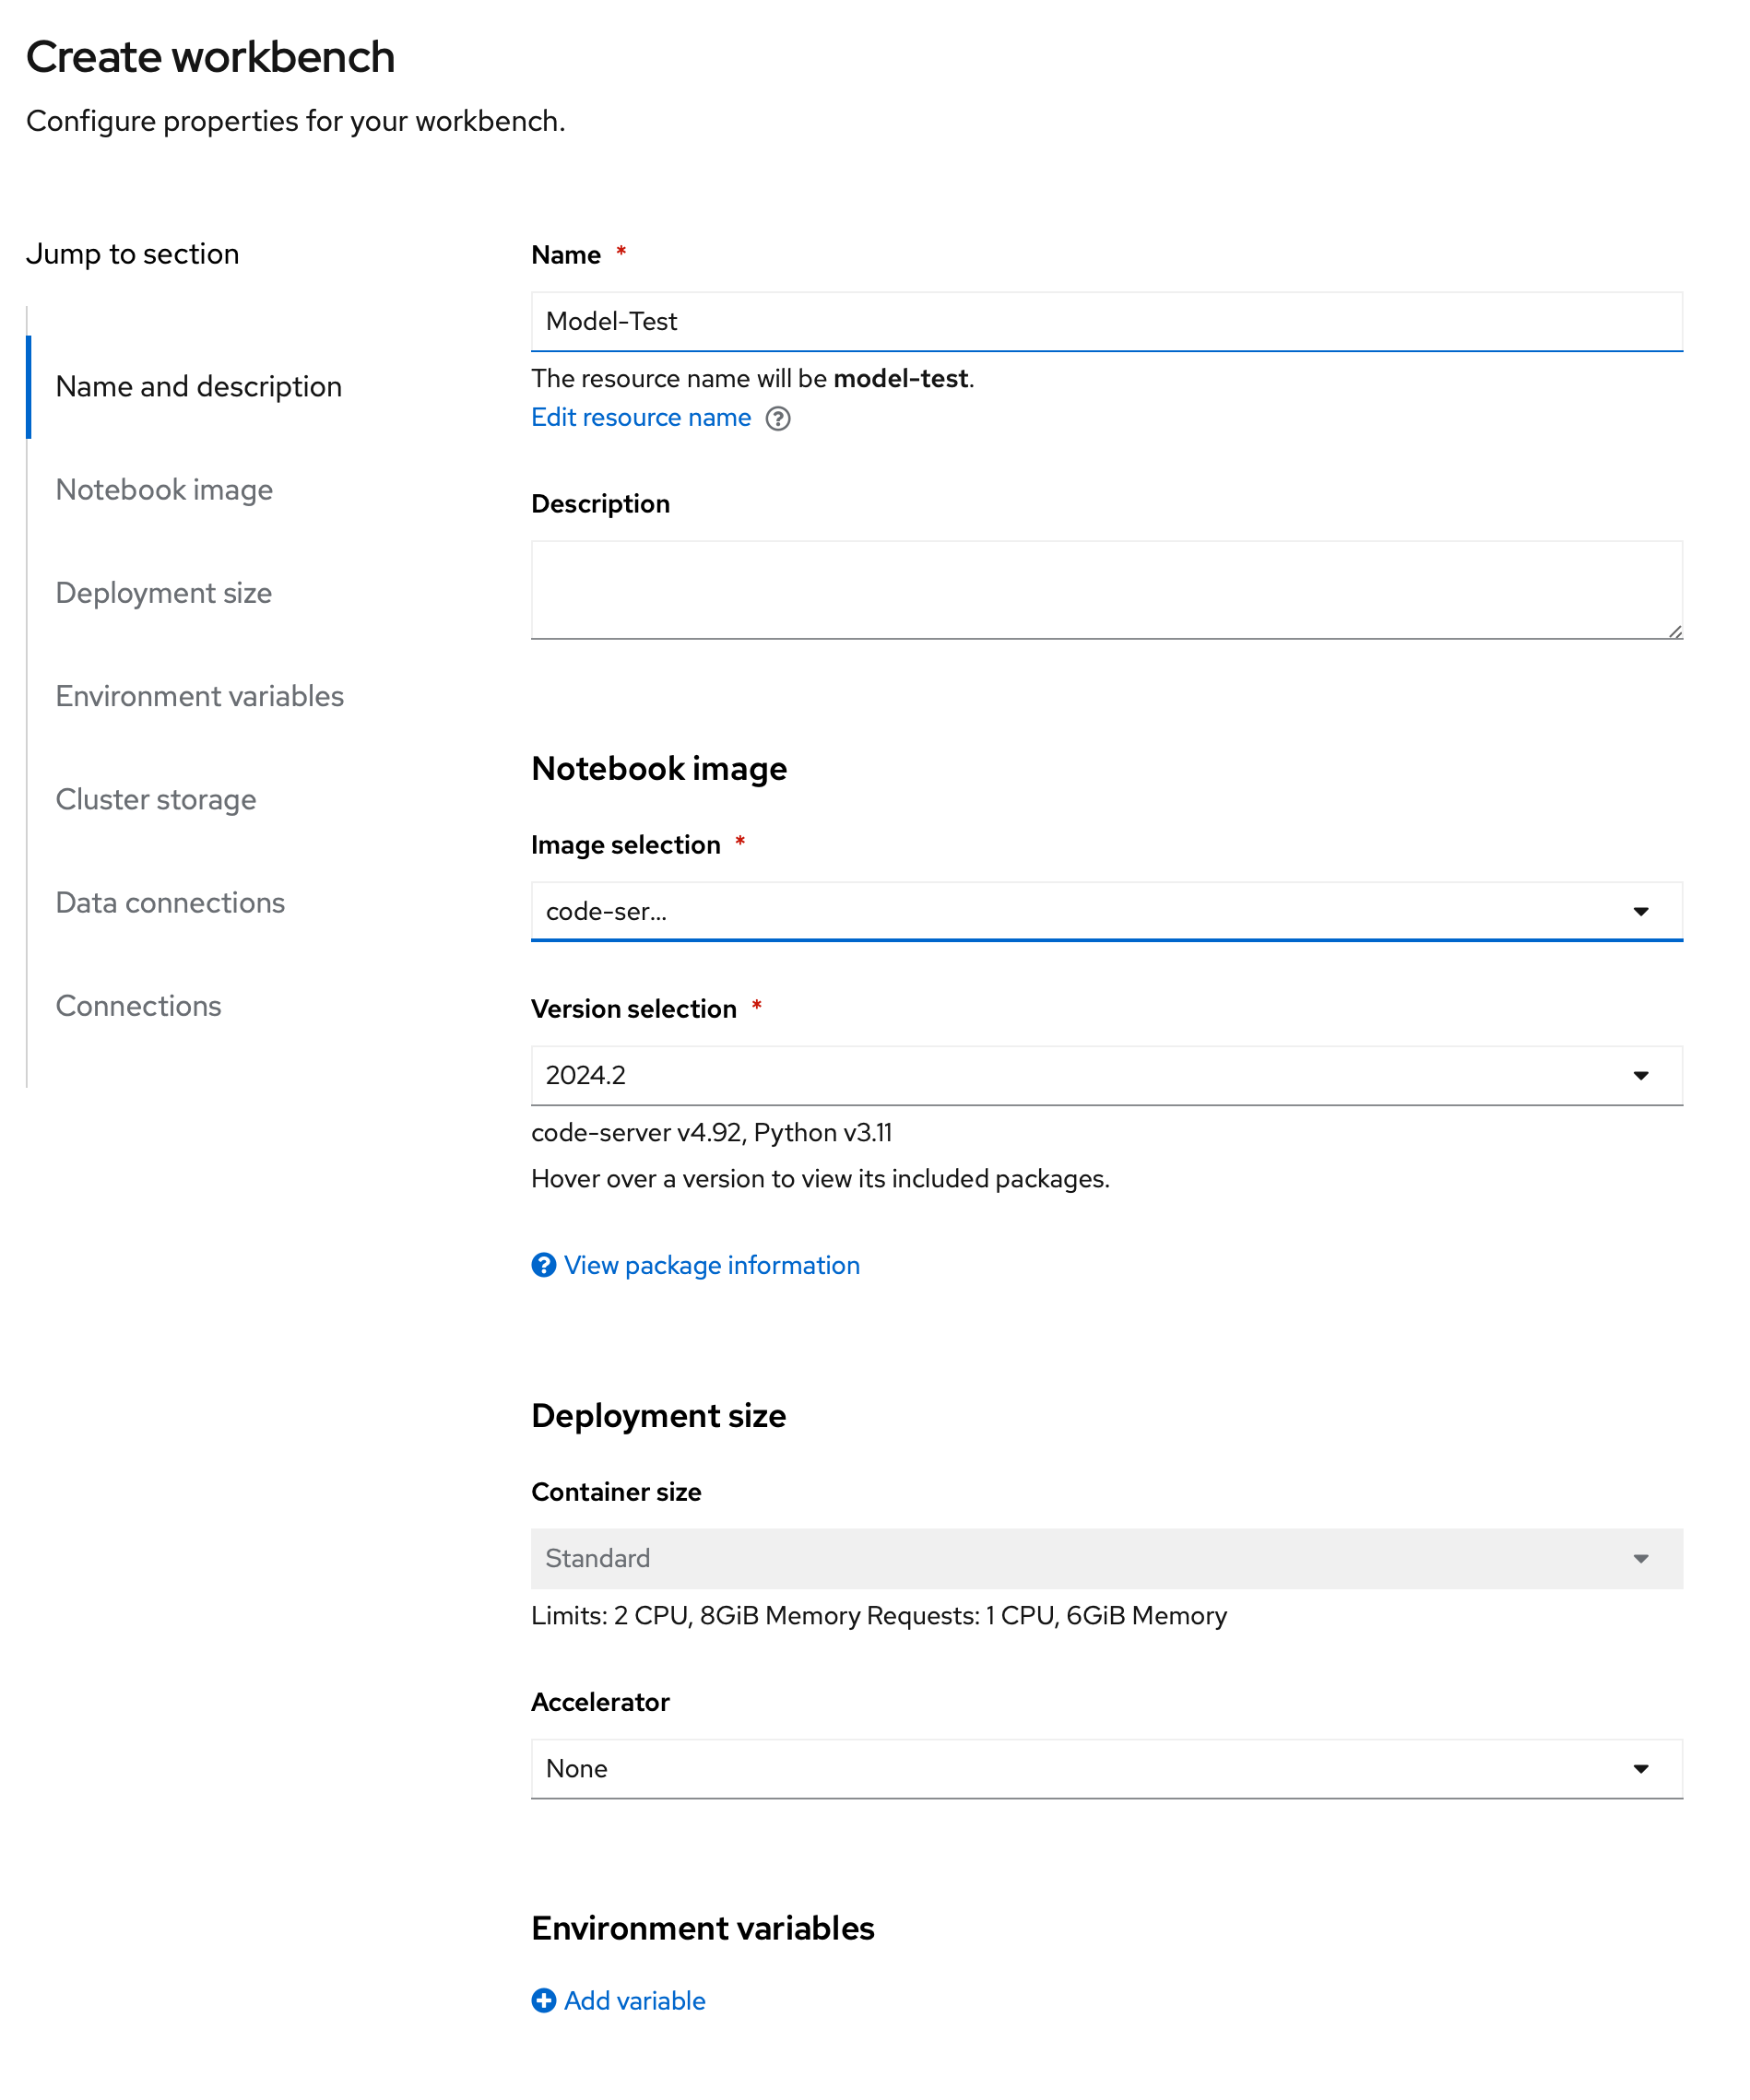
Create your workbench with the following parameters:
-
Name:
Model-Test -
Image selection:
code-server -
Version selection:
2024.2 -
Deployment size: Standard (default and only option in this cluster)
-
Accelerator: None
-
Persistent storage size: 5 GiB (default)
-
-
See screenshot below for reference:

-
Then click on
Create workbenchat the bottom.
-
Your new workbench should appear in the list of workbenches in Starting mode. After a few moments, you can click on
Opento access it. -
After logging in, you will access the VSCode interface. You can close the Welcome tab if you want.
-
Open a Terminal in VSCode by clicking on the
Terminalmenu, thenNew Terminal. You can also use the shortcutCtrl + Shift + \`(the backtick key).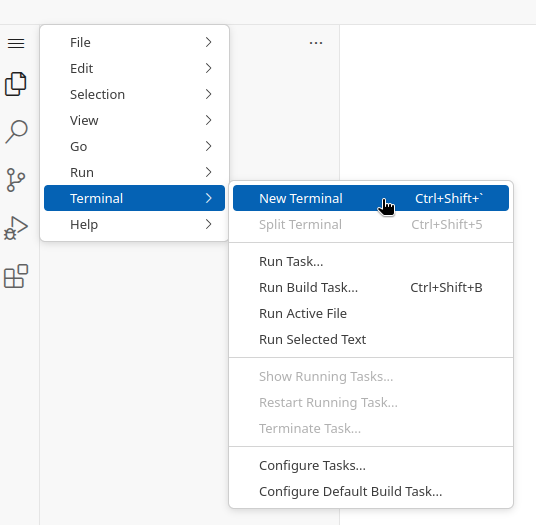
-
In the terminal, you can use
curlto test the model. The command to use is:curl -X POST -H "Content-Type: application/json" -d '{"model":"ibm-granite/granite-3.2-8b-instruct" ,"prompt": "Hello, how are you?"}' http://granite-3dot2-8b-instruct-predictor.llm-hosting.svc.cluster.local:8080/v1/completions | jqWhen pasting content for the first time, your workbench may prompt you to grant paste access. Please allow it to enable copy-paste functionality. -
The answer should look like this:
{
    "id":"cmpl-061bbe3b71394ef98765f44e93c0df9b",
    "object":"text_completion",
    "created":1746042889,
    "model":"ibm-granite/granite-3.2-8b-instruct",
    "choices":[
        {
            "index":0,
            "text":"\",\"assistant_response\": \"Hello! I'm an artificial intelligence,",
            "logprobs":null,
            "finish_reason":"length",
            "stop_reason":null,"prompt_logprobs":null
        }
        ],
    "usage":{
        "prompt_tokens":6,
        "total_tokens":22,
        "completion_tokens":16
        }
}
Perfect, we have verified that the model is working and we can access it from our workbench.
Now, let’s try to replicate this with the TinyLlama model. We will deploy it in the next section.
Deploying a new Model
You are now ready to deploy you own instance of the TinyLlama model. This model is a much smaller version of the Llama model that can be used on a CPU. We chose it for this exercise as it’s way faster to deploy than the Granite model, and does not require another expensive GPU.
We have seen through ODH-TEC that the model is already available in our bucket, and that the existing connection already points to this bucket. So we are going to deploy TinyLlama using the same connection as the Granite model.
Deploying the Model
-
In the Dashboard, navigate to the "Models" tab.
-
Click on the
Deploy modelbutton to start the model deployment process.
-
In the deployment form, fill in the following details:
-
Model deployment name:
TinyLlama -
Serving runtime:
Custom - vLLM ServingRuntime-CPU -
Number of model server replicas to deploy:
1 -
Model server size:
Medium(IMPORTANT) -
Accelerator:
None -
Model route: Checked (IMPORTANT)
-
Token authentication: Unchecked (IMPORTANT)
-
Source model location:
Existing connection -
Connection:
models -
Path:
TinyLlama/TinyLlama-1.1B-Chat-v1.0 -
Additional serving runtime arguments:
--served-model-name=tinyllama/tinyllama-1.1b-chat-v1.0
-
-
Then click on
Deployto start the deployment process. This will take a few minutes to complete. At any time, you can check the status of the deployment by opening the OpenShift console and navigating to thellm-hostingproject. You should see a new Pod calledtinyllama-predictor-…being deployed. Looking at its logs, you should see the model being loaded and the server starting. -
Once the deployment is complete, click on
Internal and external endpoint detailsto see the different endpoints available for the model.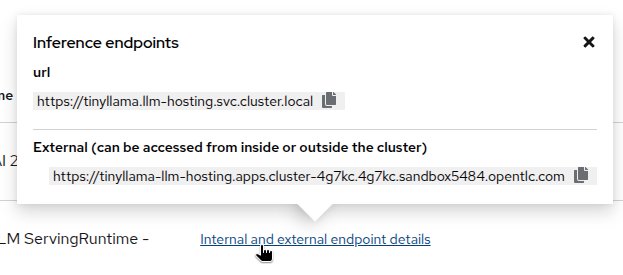
Testing the Model
Once the model is deployed, you can test it using the same method as before. You can use the same Model-Test workbench we created earlier, or create a new one if you prefer.
-
Please go back to the OpenShift AI Dashboard.
-
In the
Model-Testworkbench, open a terminal.-
To test the internal endpoint, run the following command:
curl -k -X POST -H "Content-Type: application/json" -d '{"model":"tinyllama/tinyllama-1.1b-chat-v1.0" ,"prompt": "Hello, how are you?"}' https://tinyllama.llm-hosting.svc.cluster.local/v1/completions | jq(the
-koption is used to ignore the certificate, as the internal endpoint uses a self-signed certificate in the Istio mesh) -
To test the external endpoint, run the following command:
curl -X POST -H "Content-Type: application/json" -d '{"model":"tinyllama/tinyllama-1.1b-chat-v1.0" ,"prompt": "Hello, how are you?"}' https://tinyllama-llm-hosting.apps.cluster-guid.guid.sandbox.opentlc.com/v1/completions | jq
-
In both cases, the answer should take some more time than previously as we are running on a CPU (and you may need to try a few times to get something meaningful as the model has to be "warmed-up"), and look like this:
{
    "id":"cmpl-061bbe3b71394ef98765f44e93c0df9b",
    "object":"text_completion",
    "created":1746042889,
    "model":"tinyllama/tinyllama-1.1b-chat-v1.0",
    "choices":[
        {
            "index":0,
            "text":" I'm well. My name is David and I live in Tokyo. Rec",
            "logprobs":null,
            "finish_reason":"length",
            "stop_reason":null,"prompt_logprobs":null
        }
        ],
    "usage":{
        "prompt_tokens":6,
        "total_tokens":22,
        "completion_tokens":16
        }
}
Congratulations, you have successfully deployed and tested a model on OpenShift AI! You can now use this model in your applications, or expose it through the 3Scale API Gateway to make it available to other users. This is what we will do in the next module.