3Scale API Gateway
In this module, you will learn how to configure 3Scale API Gateway to give access to the models deployed in the previous module.
3Scale Overview
Connection to 3Scale Admin Portal
3Scale is an API management platform that provides a way to manage, secure, and analyze APIs. It allows you to create and manage API keys, set up rate limits, and monitor API usage.
As the deployment of 3Scale itself is not the purpose of this workshop and may take some time, we will use a pre-deployed instance of 3Scale in your environment.
To connect to the 3Scale admin portal, you will need the admin_user and admin_password values. They can be found in the system-seed secret in the 3scale namespace.
-
From a Terminal (in your VSCode workbench) log into OpenShift.
oc login -u userX -p openshift --server=https://api.cluster-guid.guid.sandbox.opentlc.com:6443(approve the certificate when prompted to allow insecure connections)
-
Now that you are logged in, you can get the secret values with the following commands:
oc get secret system-seed -n 3scale -o jsonpath='{.data.ADMIN_USER}' | base64 --decodeoc get secret system-seed -n 3scale -o jsonpath='{.data.ADMIN_PASSWORD}' | base64 --decode -
Want to do it all in one command? Here you go:
oc get secret system-seed -n 3scale -o template='{{range $key, $value := .data}}{{if or (eq $key "ADMIN_USER") (eq $key "ADMIN_PASSWORD")}}{{printf "%s: " $key}}{{ $value | base64decode }}{{"\n"}}{{end}}{{end}}'
Now you can log into the 3Scale admin portal at https://maas-admin.apps.cluster-guid.guid.sandbox.opentlc.com/ using the credentials you just retrieved.
You will be prompted by a wizard window. Close it by clicking on the top right corner of the screen.

3Scale Admin Portal
3Scale admin portal is where you can manage your APIs, create applications, and set up access control. You can also monitor API usage and set up rate limits.
The dashboard is divided into several sections:
-
Audience: this gives you information about the users, registrations, etc.
-
In the APIs section, you have an overview of:
-
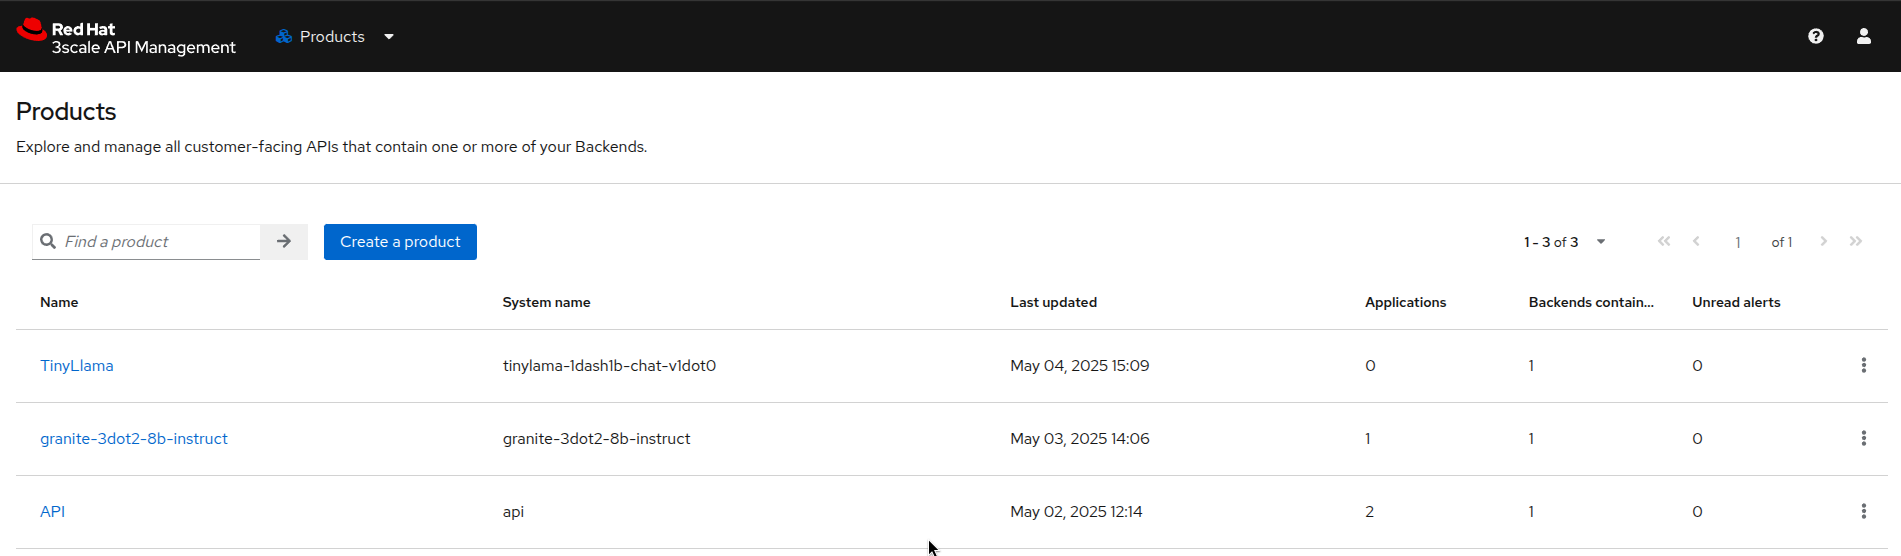
Products: this is where you can create the Products that people will have access to. You can see there are two products already created:
granite-3dot2-8b-instruct, which is connected to the model that was pre-deployed, andAPI, which is a default 3Scale echo API for testing. -
Backends: this is where you can see the backends that can be used by your products. You can see that the
granite-3dot2-8b-instructbackend that is used by the thegranite-3dot2-8b-instructproduct.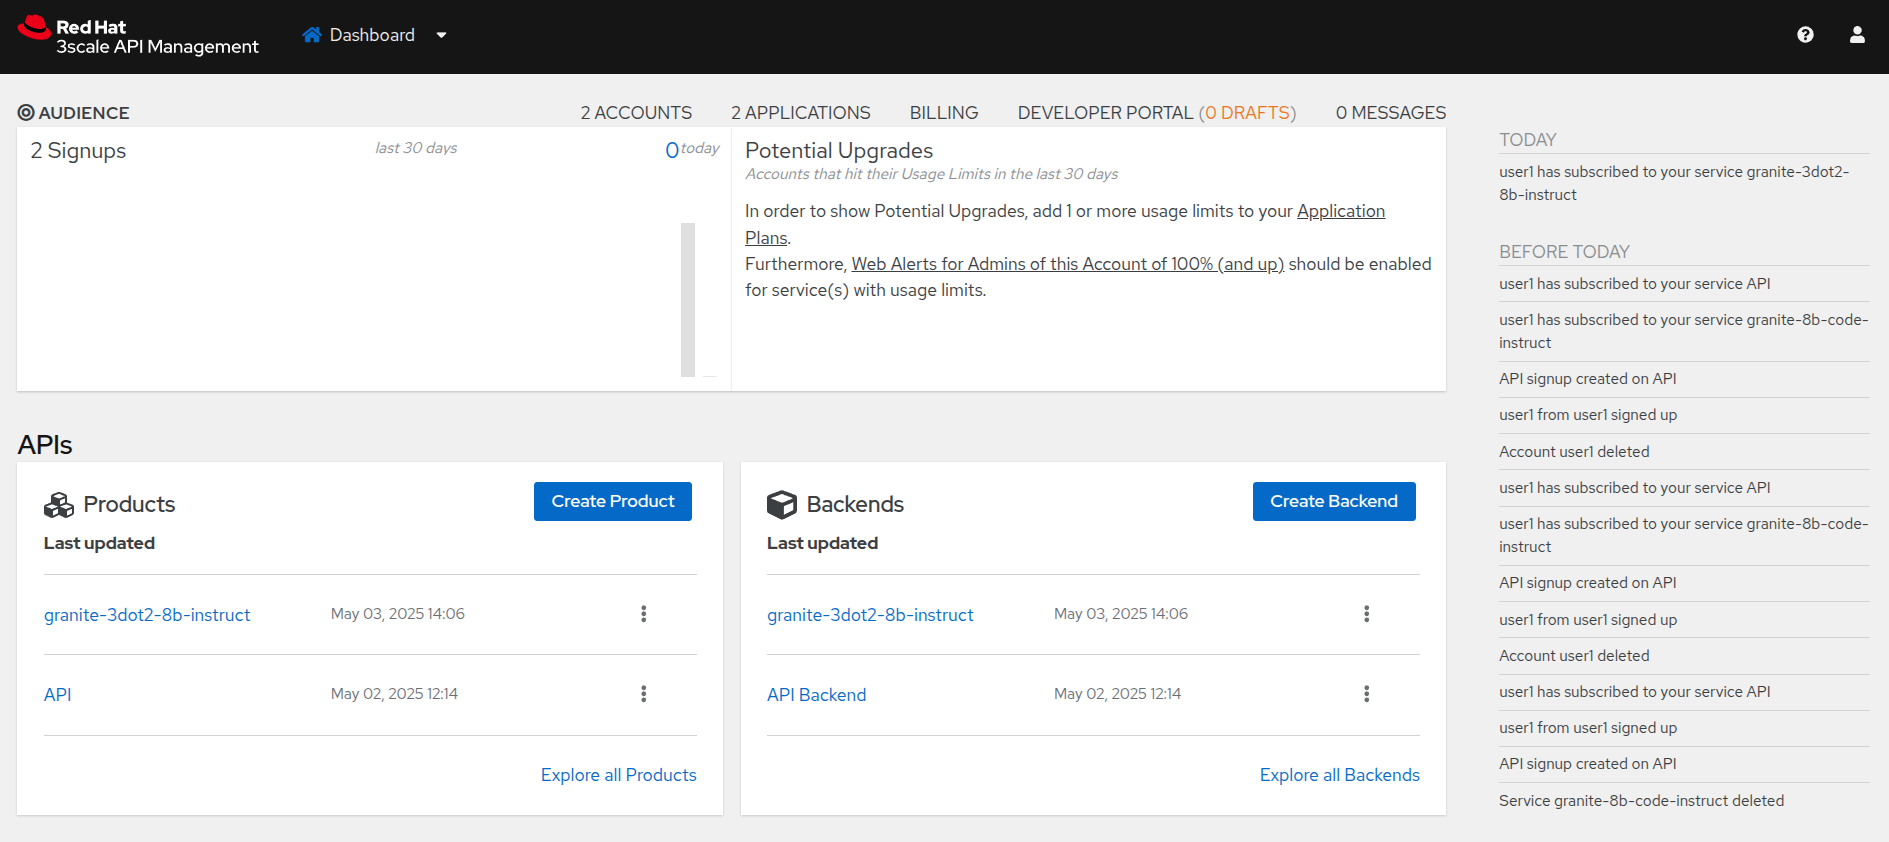
-
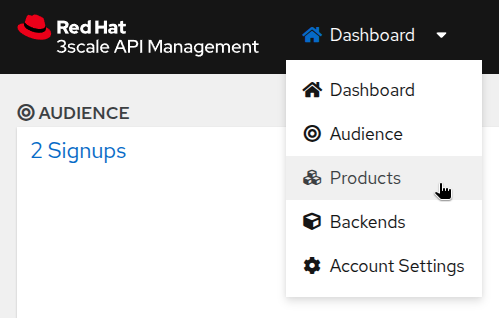
Using the dropdown menu at the top, you can access and explore the different admin sections: Audience, Products, Backends, and Account Settings.
As this workshop is not a full tutorial on 3Scale, we will not go into details about the different sections. You can find more information in the 3Scale documentation.
However, we will come back to certain specific areas when we create a new product and connect it to the model that was deployed in the previous module.
Enabling the Developer Portal
Developer Portal allows API providers to create a customizable, branded interface for onboarding developers, sharing API documentation, and managing access credentials. It supports content management, theming, and integration with backend services to streamline API consumption.
A user was already created for you in 3Scale in (Audience→Accounts→Listing), but you still need to configure the developer portal to allow users to access it.
-
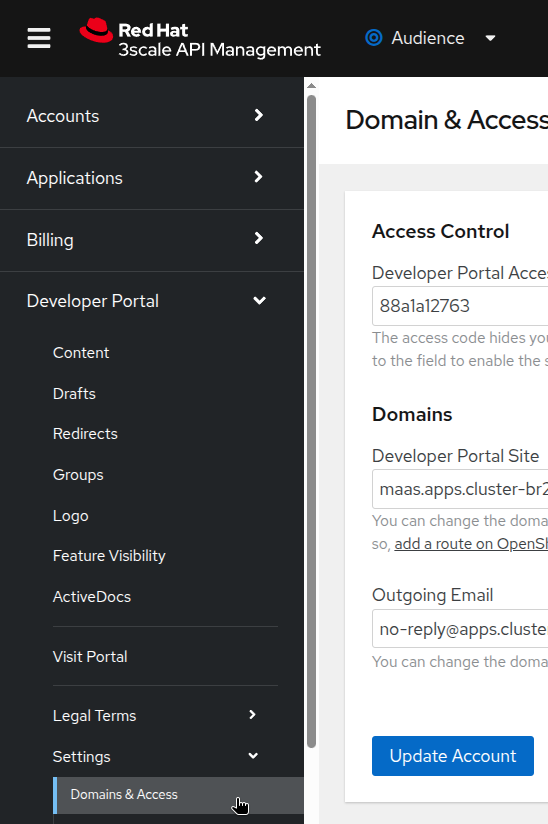
On the Audience section, got to Developer Portal→Settings→Domains & Access.
-
The Developer Portal Access Code is used to control the access the developer portal. You can use the default value in the next section to connect to it, or simply delete it and click on
Update Account. This will remove the access code and allow anyone to access the developer portal, although they will still need to authenticate. This is what we will do in this workshop.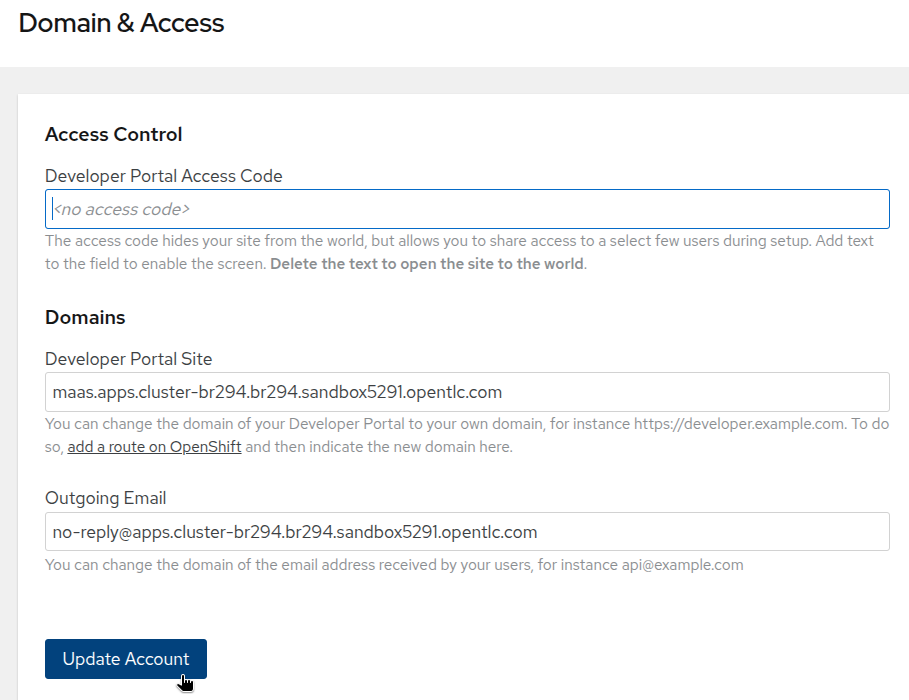
Subscribing a User to a Service
In this configuration, a user is not automatically subscribed to a new service. You need to subscribe them to the service you want them to use.
-
On the Audience section, got to Accounts→Listing and click on
userX.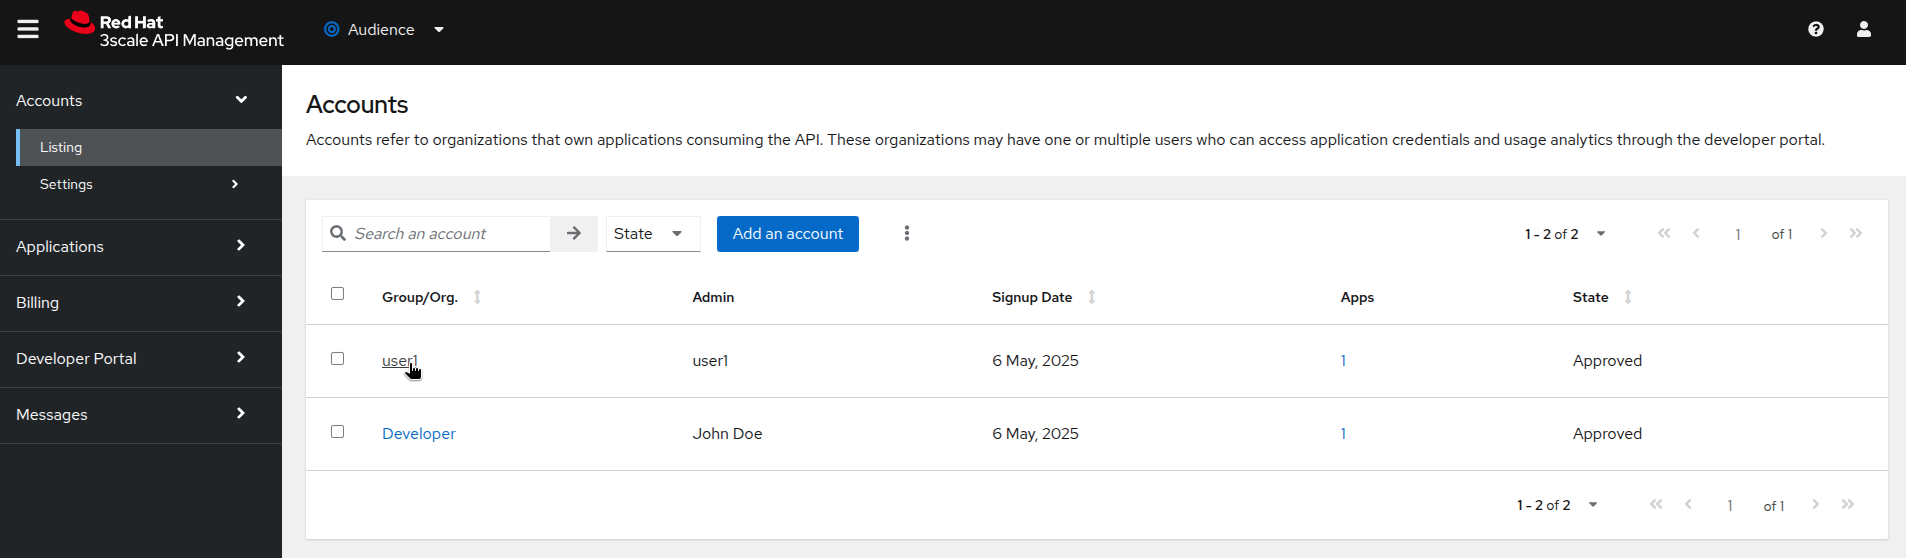
-
In the
Service Subscriptionstab, you can see that the user is not subscribed to thegranite-3dot2-8b-instructservice. Click on theSubscribebutton at the right.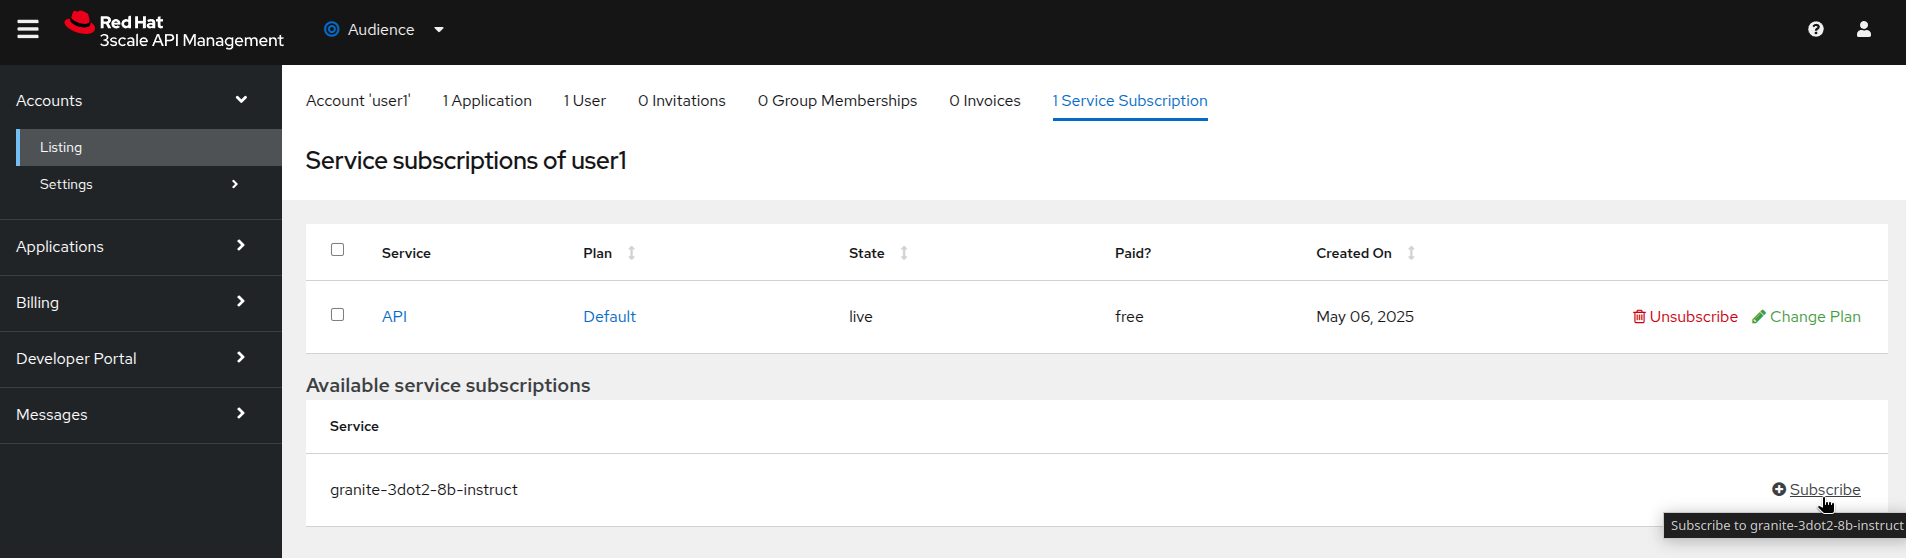
-
On the window that opens, select the
DefaultPlan and click onCreate subscription.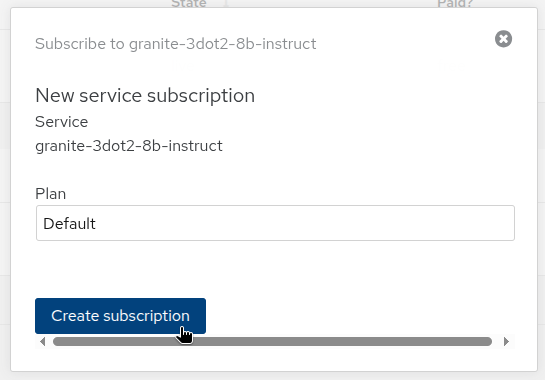
userX is now subscribed to the granite-3dot2-8b-instruct service. You can see that the subscription is active and the plan is set to Default Plan.
In a production environment, you would normally automate this process as part of the deployment of a new product. In this workshop, we do it manually to show you how it works.
Developer Portal
Accessing the Developer Portal
You can now access the developer portal at https://maas.apps.cluster-guid.guid.sandbox.opentlc.com.
You can log in using your workshop credentials, because they are the ones we used to pre-create a user in 3Scale.
Here they are again:
-
Your username:
userX -
Your password:
openshift
Signing in:
-
Click on the
Sign Inbutton in the top right corner of the screen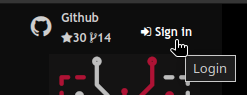
-
Click on
Private loginand enter your credentials.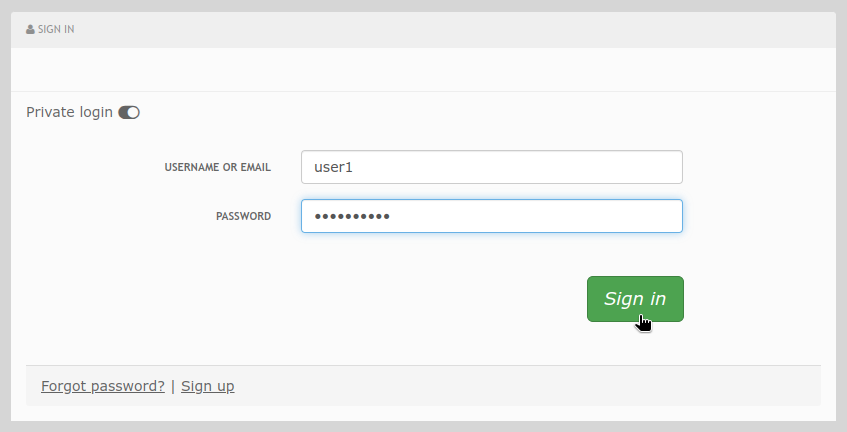
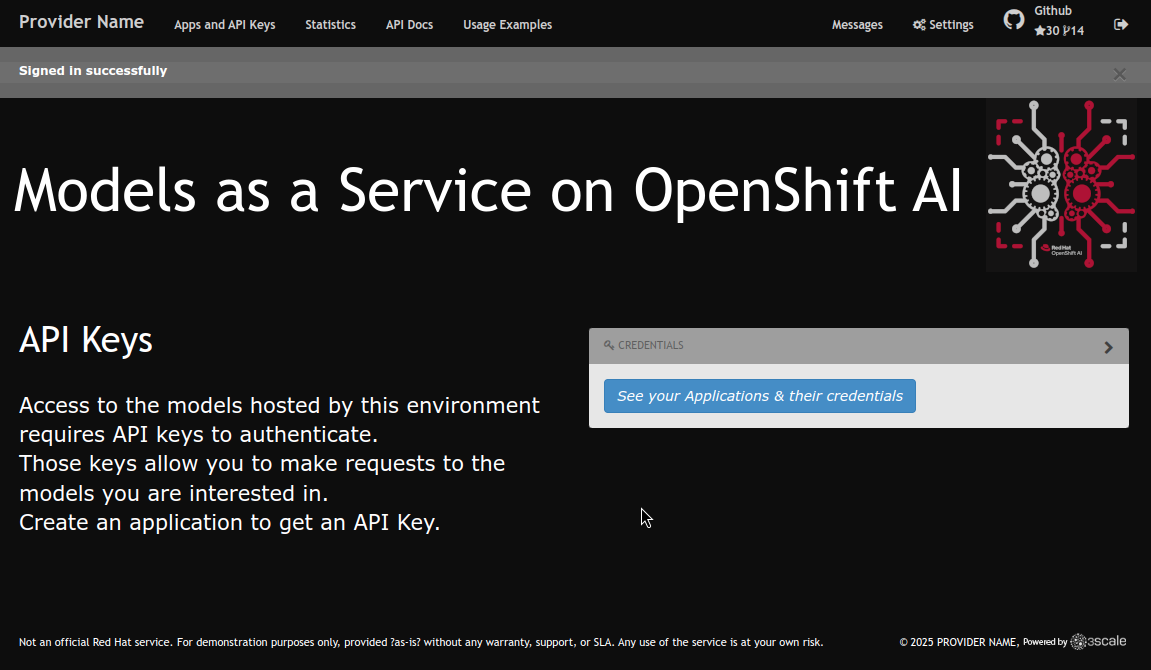
You should now be logged into the developer portal. You will be able to see the APIs that are available to you, and you can also create applications to get API keys.
Creating an Application
Creating an application is the first step to getting an API key.
-
Click on the
See your Applications and their credentialslink on the front page.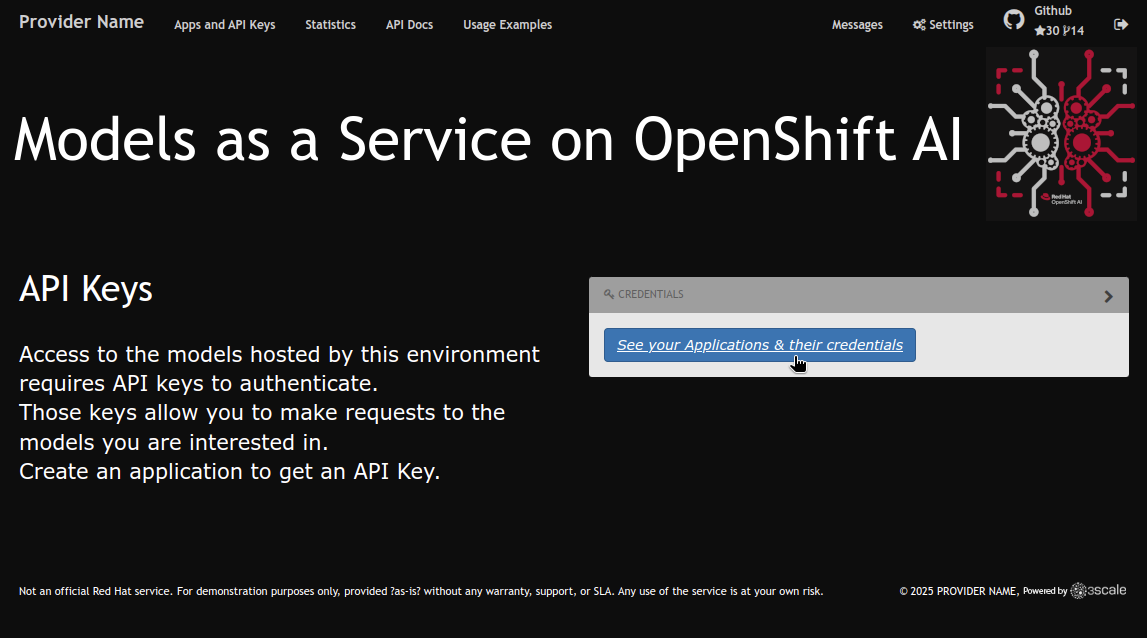
-
You will be taken to the
Apps and API Keyssection, where you can see that there is an application that was already created for you (the 3Scale default Echo API). Start creating a new application by clicking on theCreate new applicationbutton.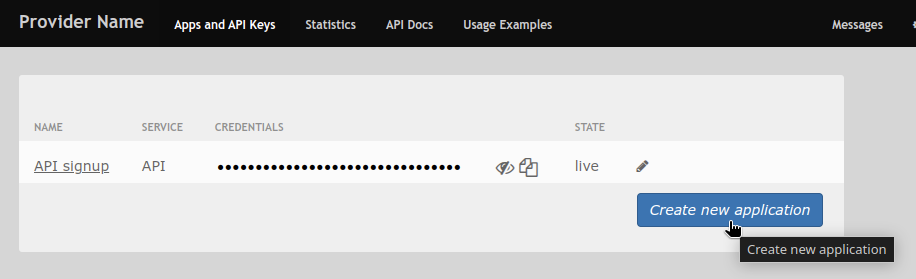
-
Select the Service you want to use. In this case, we will use the
granite-3dot2-8b-instructservice that has been pre-deployed.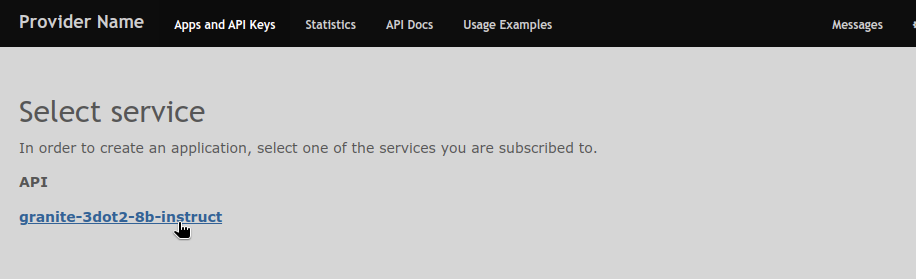
-
Give a name to your application, for example
Granite application. Click onCreate Application.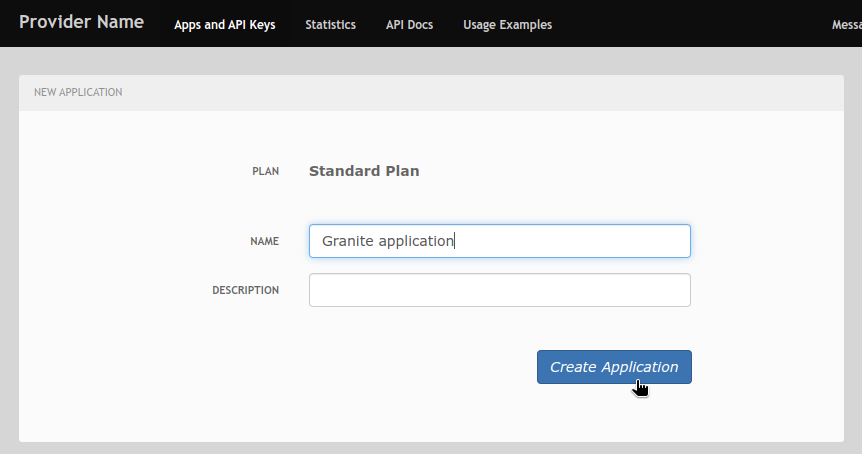
-
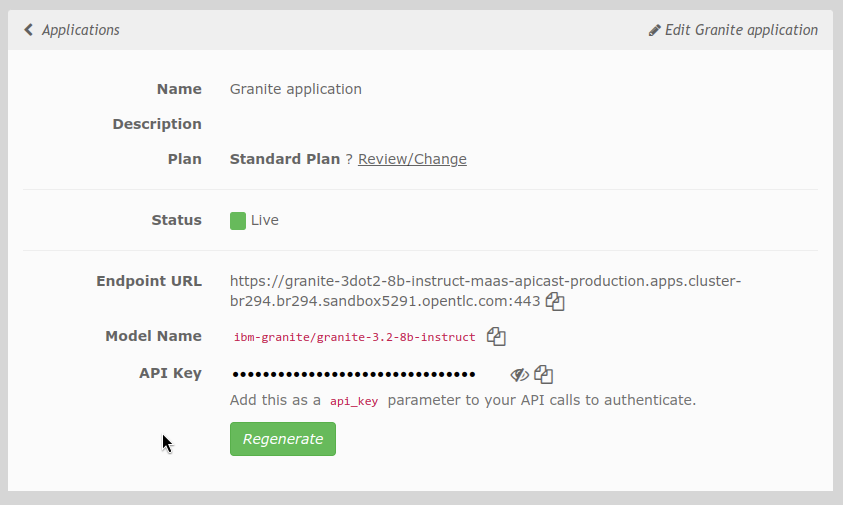
Your application has been created. You can see the Endpoint URL you can use to connect to the API, the name of the model you must use in your requests, and the API key that has been generated for you. You can now use this key to access the API.
Testing the API access
Now that you have created an application, you can test the API. You can do this using the curl command in your terminal.
-
Open a terminal in your VSCode environment and run the following command, replacing the placeholder values with the ones you got from the previous step:
curl -X 'POST' \
    '___Endpoint_URL___/v1/completions' \
    -H 'accept: application/json' \
    -H 'Content-Type: application/json' \
    -H 'Authorization: Bearer ___API_KEY___' \
    -d '{
    "model": "___MODEL_NAME___",
    "prompt": "San Francisco is a",
    "max_tokens": 15,
    "temperature": 0
}'
Example:
curl -X 'POST' \
    'https://granite-3dot2-8b-instruct-maas-apicast-production.apps.cluster-br294.br294.sandbox5291.opentlc.com:443/v1/completions' \
    -H 'accept: application/json' \
    -H 'Content-Type: application/json' \
    -H 'Authorization: Bearer fa111c3b9cc911b982c7ac7bb15201ea' \
    -d '{
    "model": "ibm-granite/granite-3.2-8b-instruct",
    "prompt": "San Francisco is a",
    "max_tokens": 15,
    "temperature": 0
}'
You should get a response similar to this:
{
  "id": "cmpl-7e1a2c3b9cc911b982c7ac7bb15201ea",
  "object": "text_completion",
  "created": 1677858240,
  "model": "ibm-granite/granite-3.2-8b-instruct",
  "choices": [
    {
      "text": " city in California known for its hilly terrain, iconic Golden Gate Bridge, and vibrant culture.",
      "index": 0,
      "logprobs": null,
      "finish_reason": "length"
    }
  ],
  "usage": {
    "prompt_tokens": 4,
    "completion_tokens": 15,
    "total_tokens": 19
  }
}
Perfect! You have successfully tested the API access to the Granite LLM using the API key generated for your application.
Creating a new Product in 3Scale
Now that you have discovered the Admin and the Developer portals from 3Scale and tested the API access, you are ready to create a new Product based on the model you deployed in the previous module. To do that we are going to use the 3Scale operator. This will show you how you can fully automate the deployment of new models in your service.
To work with to the 3Scale operator, you can use the OpenShift Web Console or the OpenShift CLI. In this workshop, we will show you how to use the OpenShift Web Console, but feel free to use the provided YAMLs through the CLI if you prefer.
Navigating to the 3Scale Operator
-
In the OpenShift Web Console, click on the
Operatorsmenu on the left side of the screen, then selectInstalled Operators. On the topProjectdropdown, select the3scaleproject.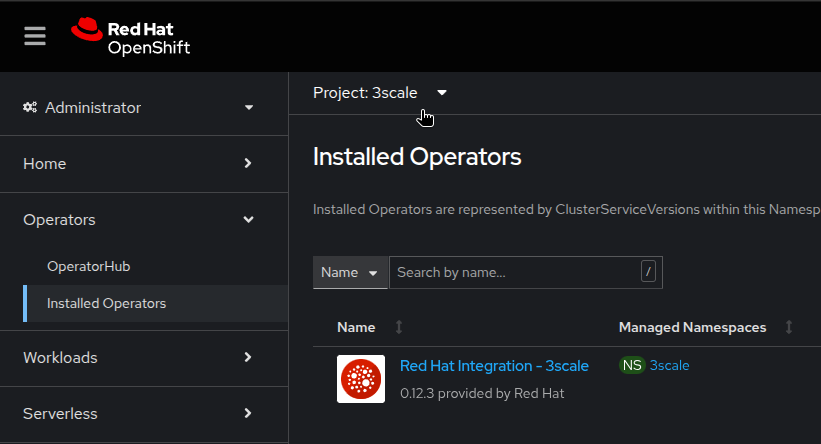
-
Click on
Red Hat Integration - 3scaleoperator from the list.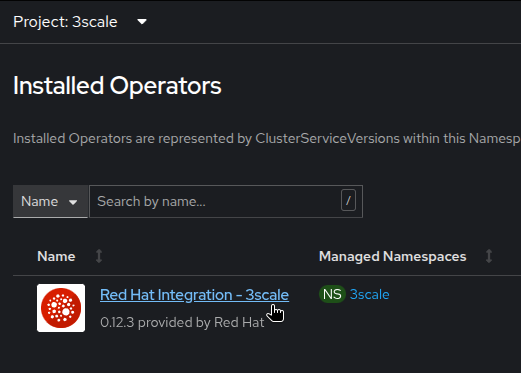
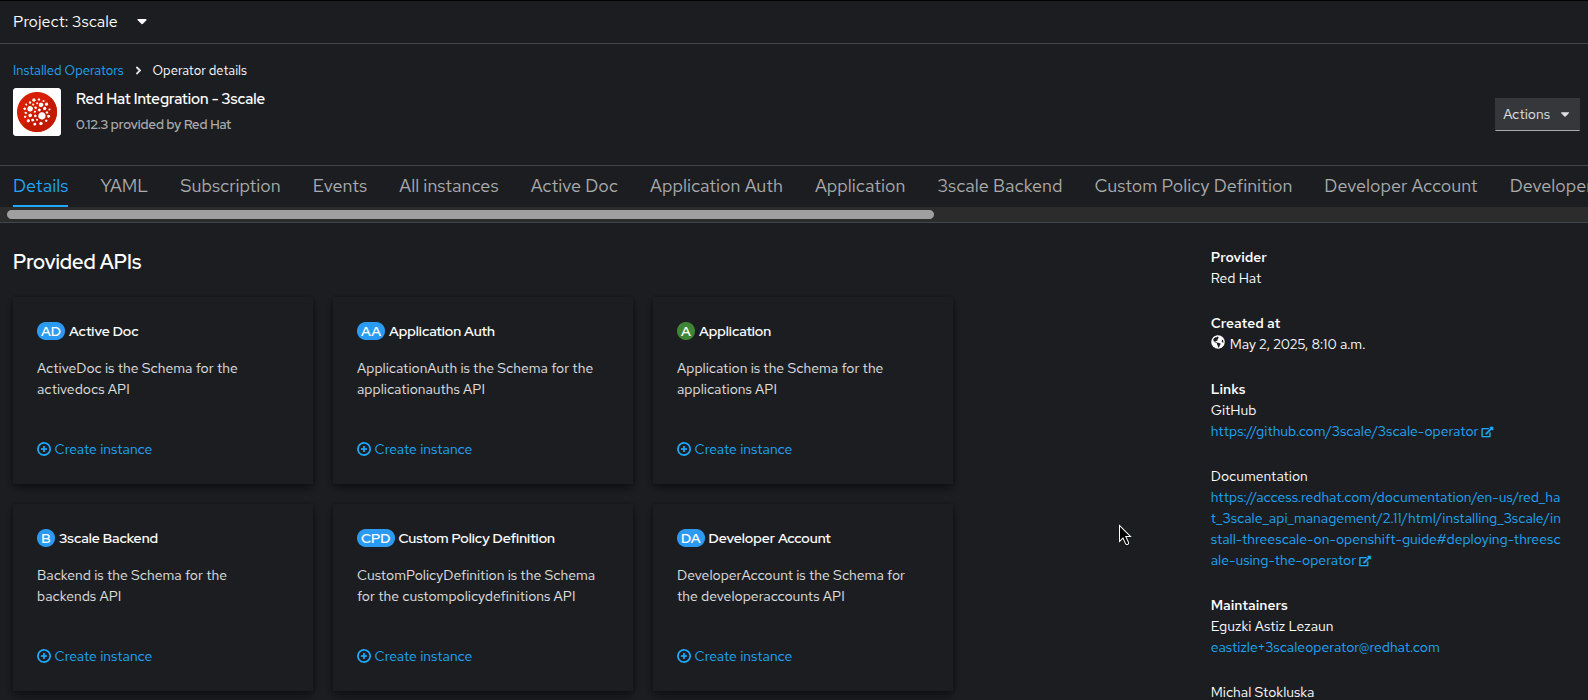
-
You will be taken to the operator details page.
Creating a Backend
The first element you need to create is a Backend. This is the service that will be used by the Product to connect to the model endpoint.
-
Click on the
3scale Backendtab. You will see that there is already a backend created for thegranite-3dot2-8b-instructmodel.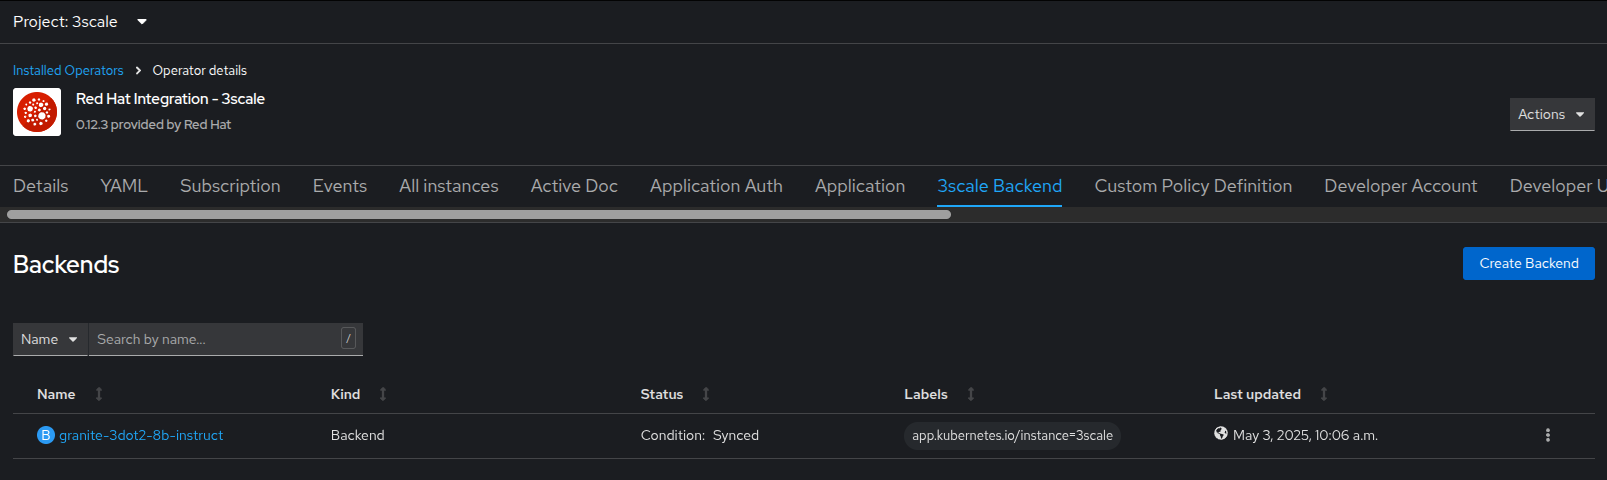
-
To deploy the new backend for TinyLlama, click on the
Create Backendbutton.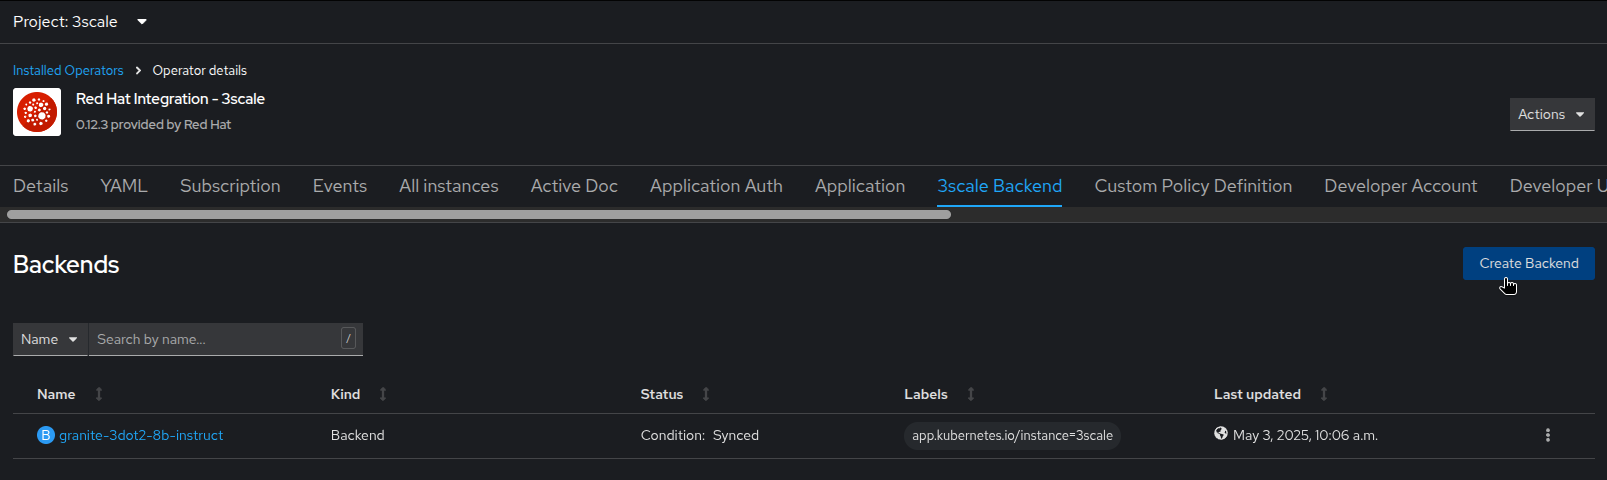
-
In the YAML view, replace the default content with the following YAML and click on create. This will create a new backend for the
TinyLlamamodel.kind: Backend apiVersion: capabilities.3scale.net/v1beta1 metadata: name: tinyllama namespace: 3scale spec: name: TinyLlama privateBaseURL: 'https://tinyllama-llm-hosting.apps.cluster-guid.guid.sandbox.opentlc.com' systemName: tinyllama -
After a few seconds, you should see the new backend in the list of backends.
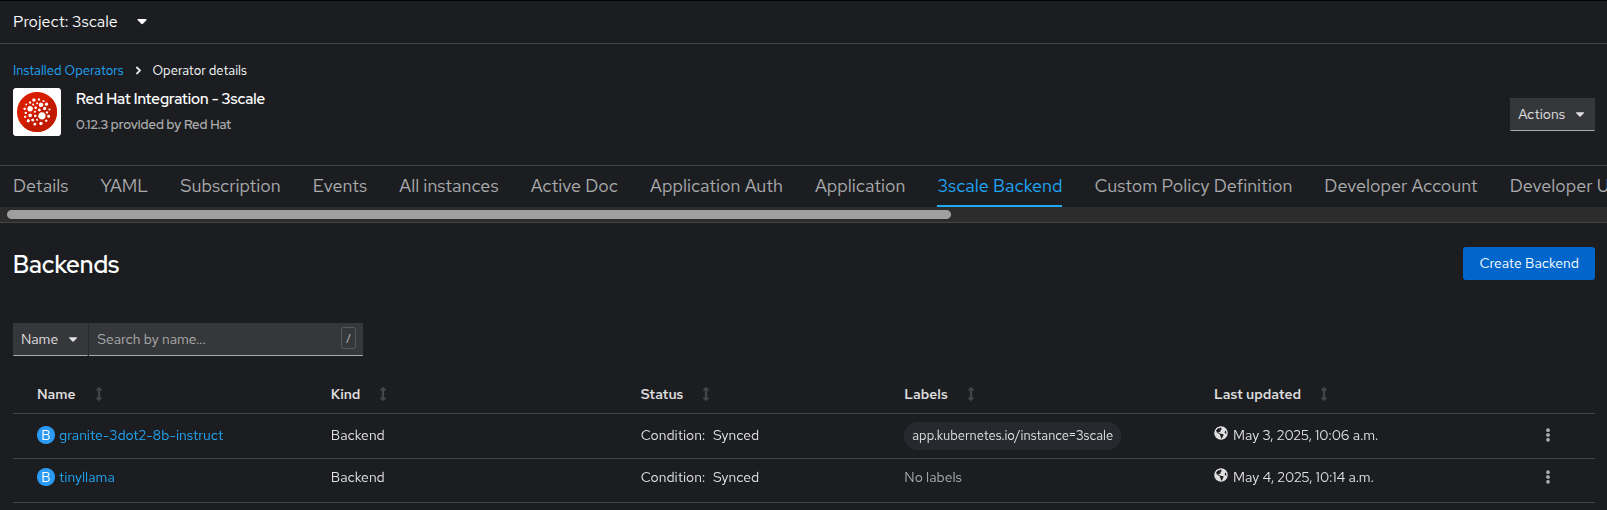
-
You can also switch to the 3Scale Admin Portal and check that the new backend is listed there.

Creating a Product
We are now ready to create the new Product that will use this backend. The Product is the element that will be used by the users to access the model.
-
In the OpenShift Console, on the 3Scale operator, click on the
3scale Producttab. You will see that there is already a product created for thegranite-3dot2-8b-instructmodel.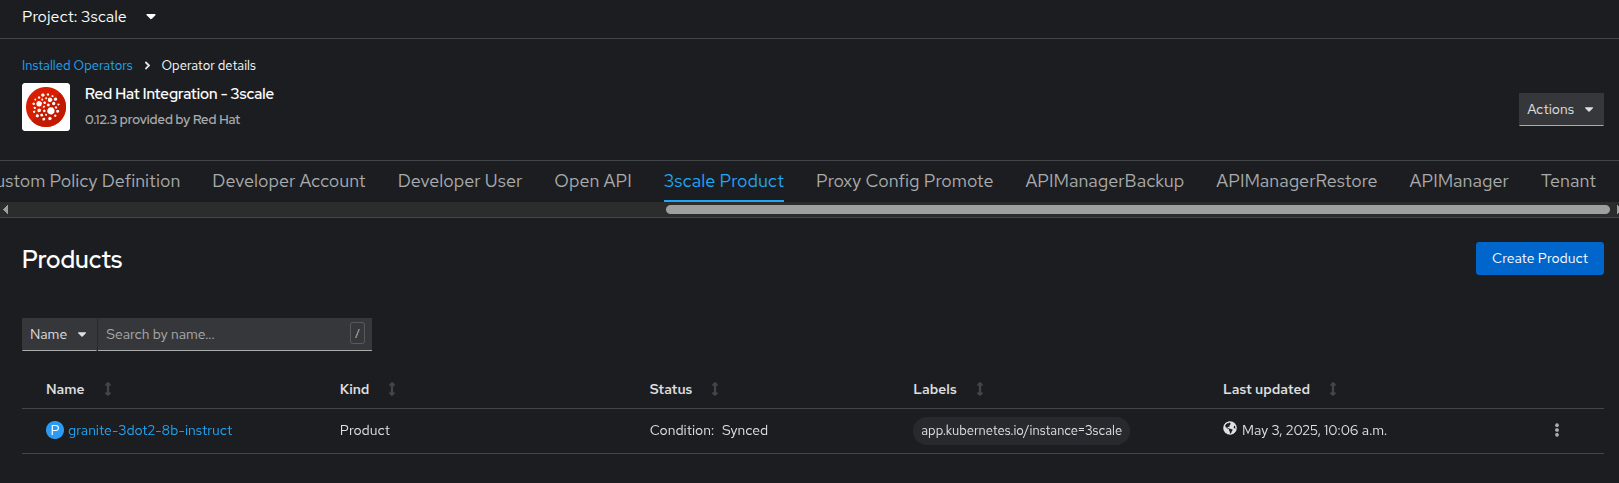
-
To deploy the new product for TinyLlama, click on the
Create Productbutton.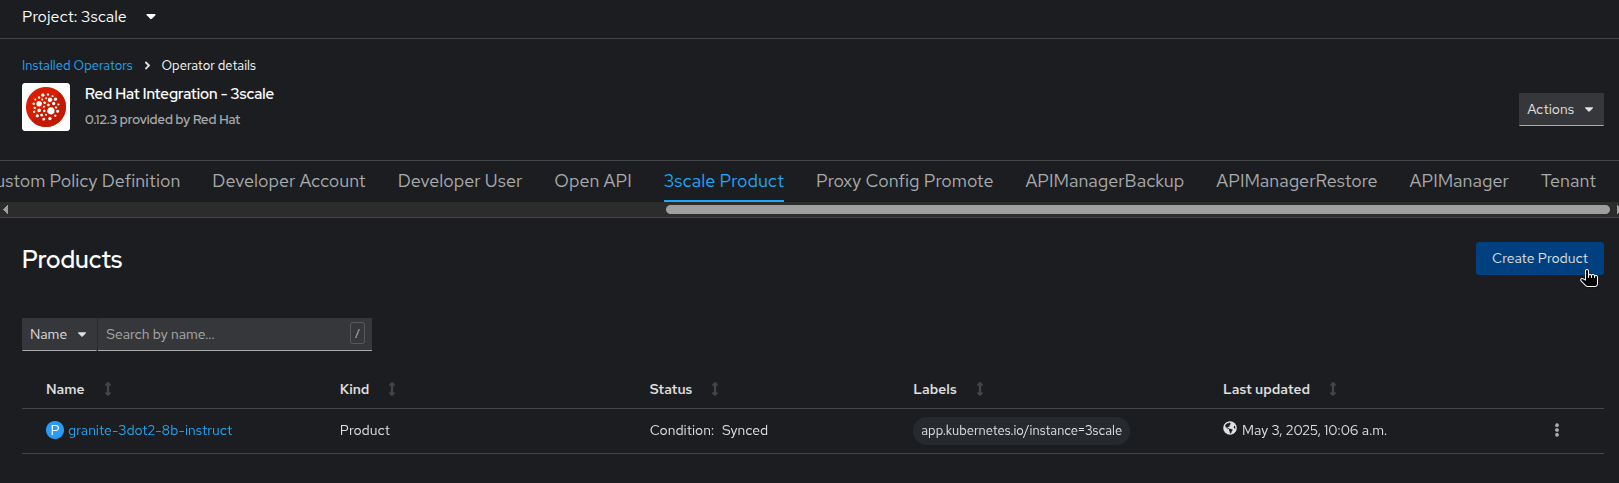
-
In the YAML view, replace the default content with the following YAML and click on create. This will create a new product for the
TinyLlamamodel. You can see that the configuration is more complex than the backend, as it includes the mapping rules, policies, and methods that will be used by the product.apiVersion: capabilities.3scale.net/v1beta1 kind: Product metadata: name: tinyllama namespace: 3scale spec: name: TinyLlama systemName: tinyllama metrics: hits: description: Number of API hits friendlyName: Hits unit: hit deployment: apicastHosted: authentication: userkey: authUserKey: Authorization credentials: headers backendUsages: tinyllama: path: / mappingRules: - httpMethod: GET increment: 1 metricMethodRef: health pattern: /health - httpMethod: POST increment: 1 metricMethodRef: tokenize pattern: /tokenize - httpMethod: POST increment: 1 metricMethodRef: detokenize pattern: /detokenize - httpMethod: GET increment: 1 metricMethodRef: models pattern: /v1/models - httpMethod: GET increment: 1 metricMethodRef: version pattern: /version - httpMethod: POST increment: 1 metricMethodRef: chat/completions pattern: /v1/chat/completions - httpMethod: POST increment: 1 metricMethodRef: completions pattern: /v1/completions - httpMethod: POST increment: 1 metricMethodRef: embeddings pattern: /v1/embeddings policies: - configuration: allow_credentials: true allow_headers: - Authorization - Content-type - Accept allow_methods: [] allow_origin: '*' enabled: true name: cors version: builtin - configuration: {} enabled: true name: remove-bearer version: '0.1' - configuration: {} enabled: true name: apicast version: builtin - configuration: connect_timeout: 180 read_timeout: 180 send_timeout: 180 enabled: true name: upstream_connection version: builtin methods: chat/completions: friendlyName: Chat Completions completions: friendlyName: Completions detokenize: friendlyName: Detokenize embeddings: friendlyName: Embeddings health: friendlyName: Health models: friendlyName: Models tokenize: friendlyName: Tokenize version: friendlyName: Version applicationPlans: standard: appsRequireApproval: false name: Standard Plan published: true -
After a few seconds, you should see the new product in the list of products.
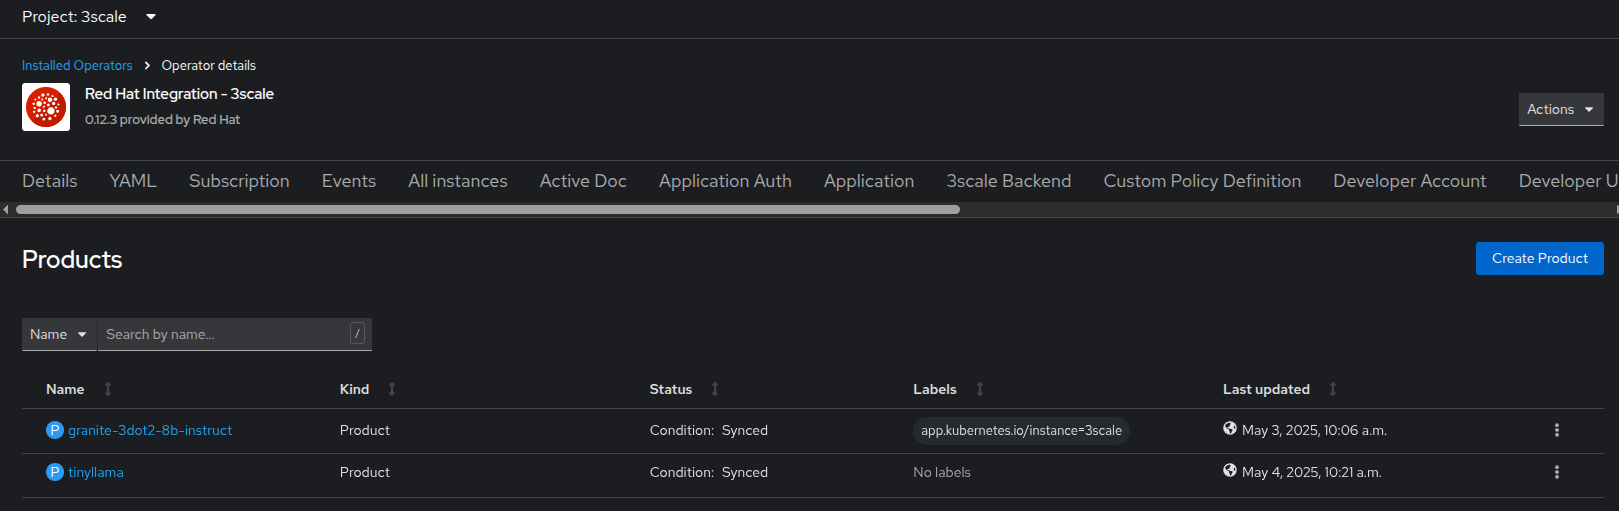
-
You can also switch to the 3Scale Admin Portal and check that the new product is listed there.
-
When a new Product is created, it is only available in a "staging" environment. This means that it is not yet available to the users. You need to publish it to make it available. This can be done in the 3Scale Admin Portal, or using the operator. In the operator view, click on the
ProxyConfig Promotetab.
-
Click on the
Create ProxyConfigPromotebutton.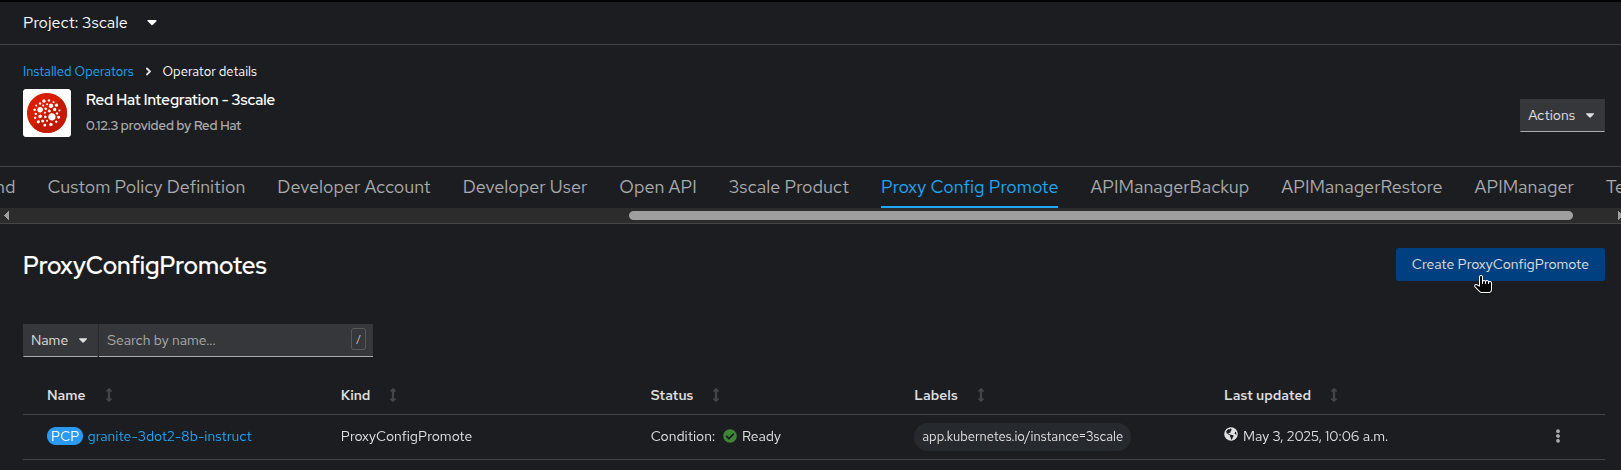
-
In the YAML view, replace the default content with the following YAML and click on create. This will publish the product to the production environment.
kind: ProxyConfigPromote apiVersion: capabilities.3scale.net/v1beta1 metadata: name: tinyllama namespace: 3scale spec: productCRName: tinyllama production: true -
In the 3Scale Admin Portal, you can see that the product is now published to production. Got to
Products, select theTinyLlamaproduct and go toIntegration→Configuration. You can see that theProduction APIcastenvironment is now available.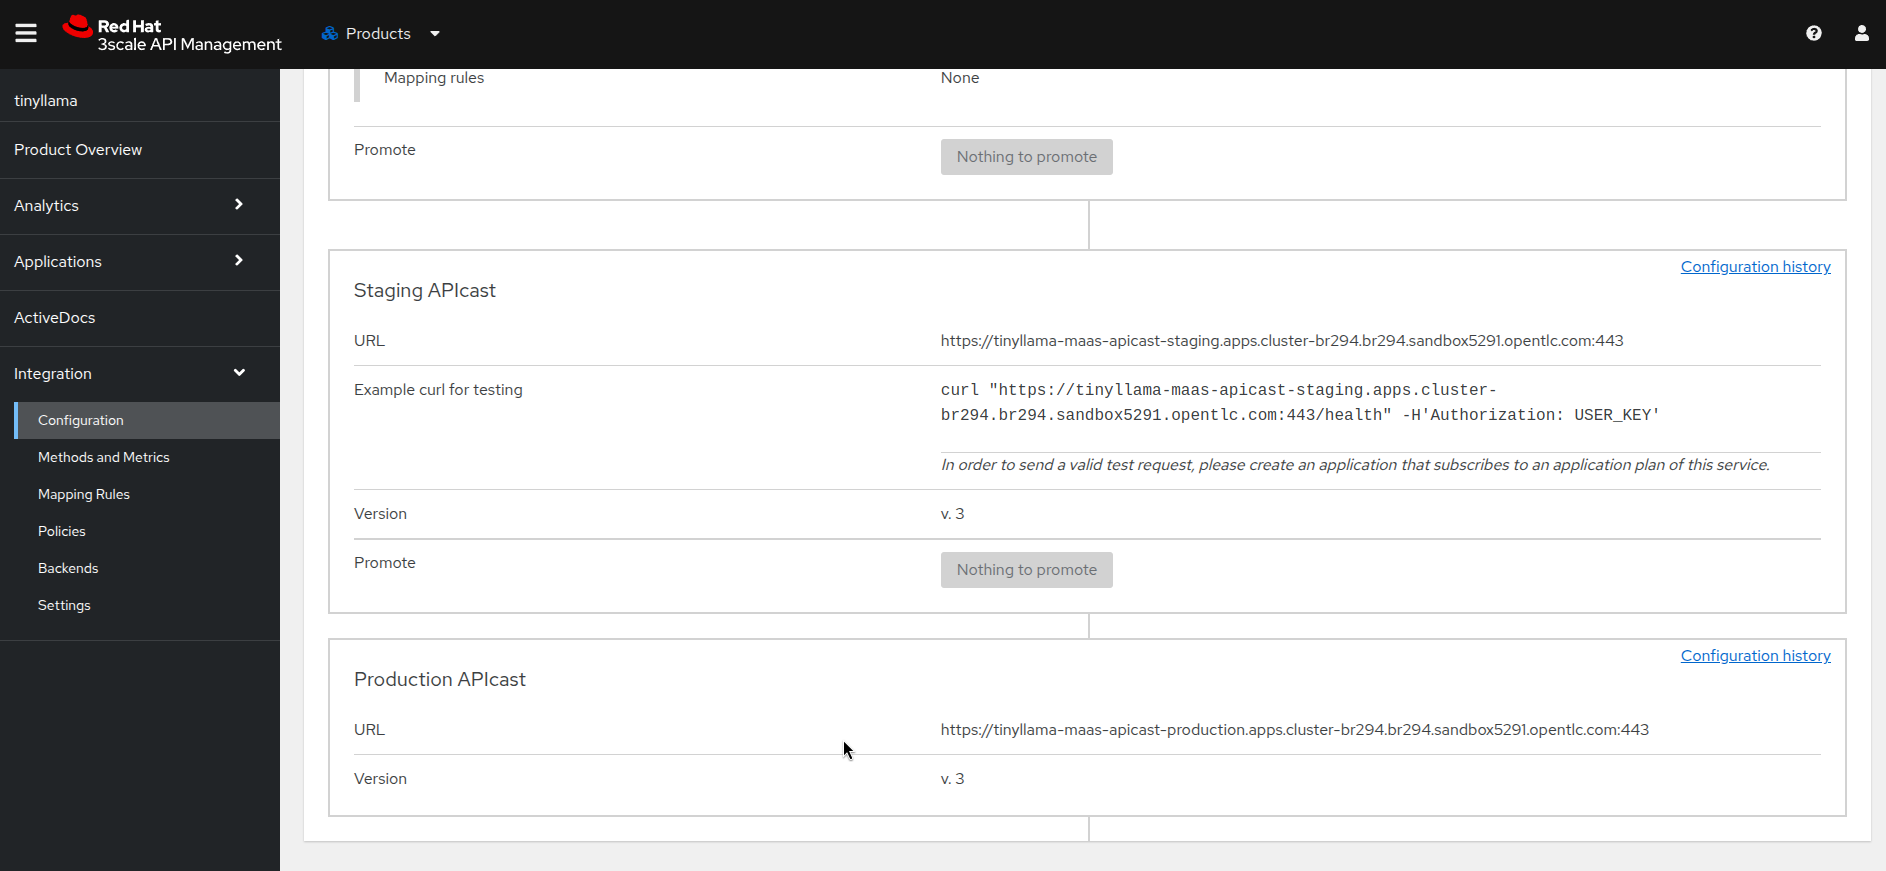
-
We must now create the API Documentation for the new product. We will again use the 3Scale operator to do this. Click on the
ActiveDoctab and click on theCreate ActiveDocbutton.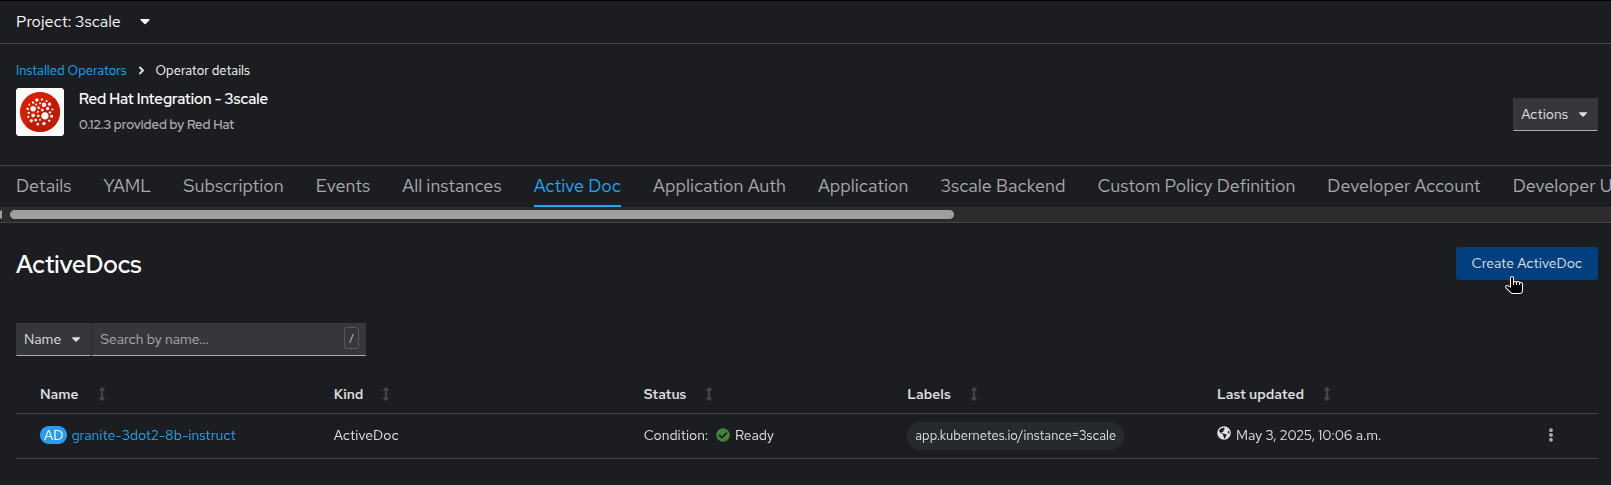
-
In the YAML view, replace the default content with the following YAML and click on
Create. This will create the API documentation for the product. As the APIDoc can be complex, we already created a JSON file that contains the API documentation for theTinyLlamamodel and we will only need to reference it in the YAML.apiVersion: capabilities.3scale.net/v1beta1 kind: ActiveDoc metadata: name: tinyllama namespace: 3scale labels: app.kubernetes.io/instance: 3scale spec: activeDocOpenAPIRef: url: 'https://raw.githubusercontent.com/redhat-gpte-devopsautomation/lb1816-summit-llm-aas/refs/heads/main/bootstrap/3scale/api_definitions/tinyllama-1dash1b-chat-v1dot0.json' name: tinyllama productSystemName: tinyllama published: true skipSwaggerValidations: true systemName: tinyllama -
Finally, we must subscribe our user to this new product, as we did previously for Granite. Again, this is normally something you would automate as part of a deployment of a new product, but here we are going to do it in the 3Scale Admin Portal. Go to
Audience→Listing, selectuser1account.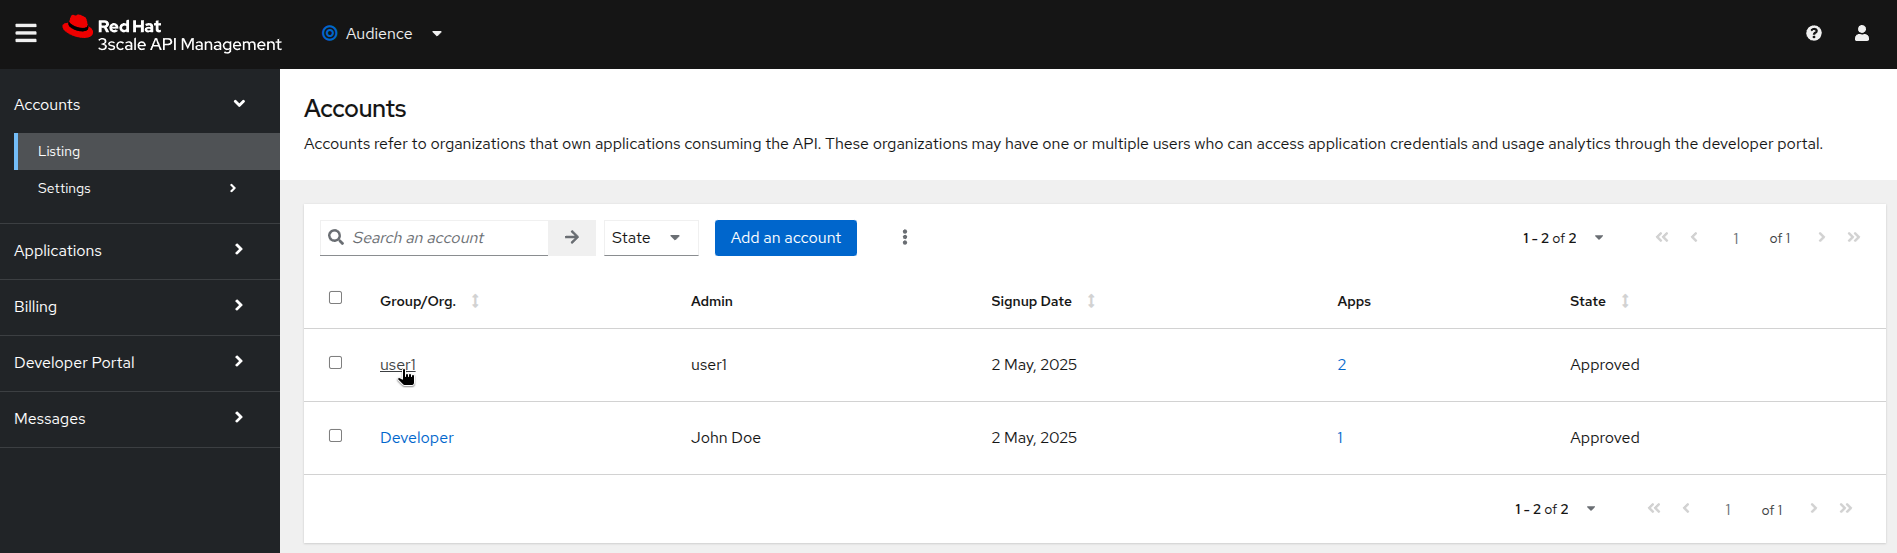
-
In the account section, select the
Service Subscriptionstab at the right.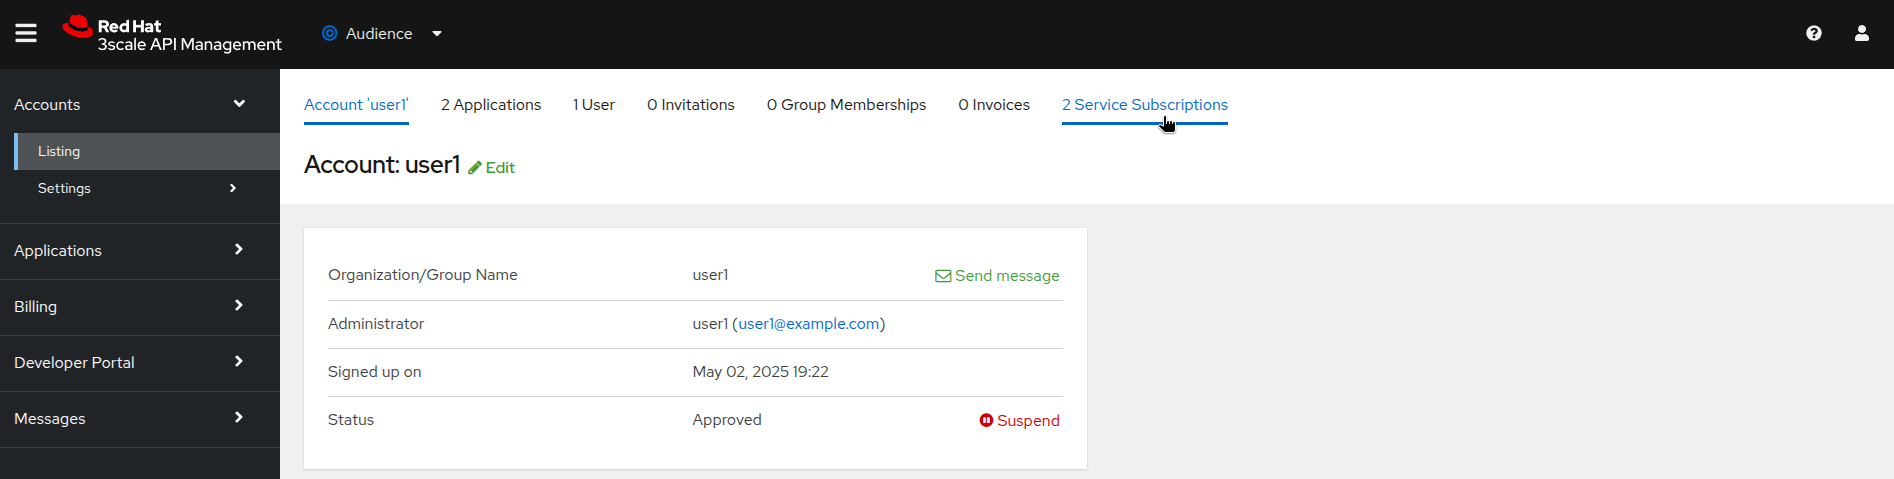
-
At the bottom right of the page, click on the
Subscribebutton on thetinyLlamaitem.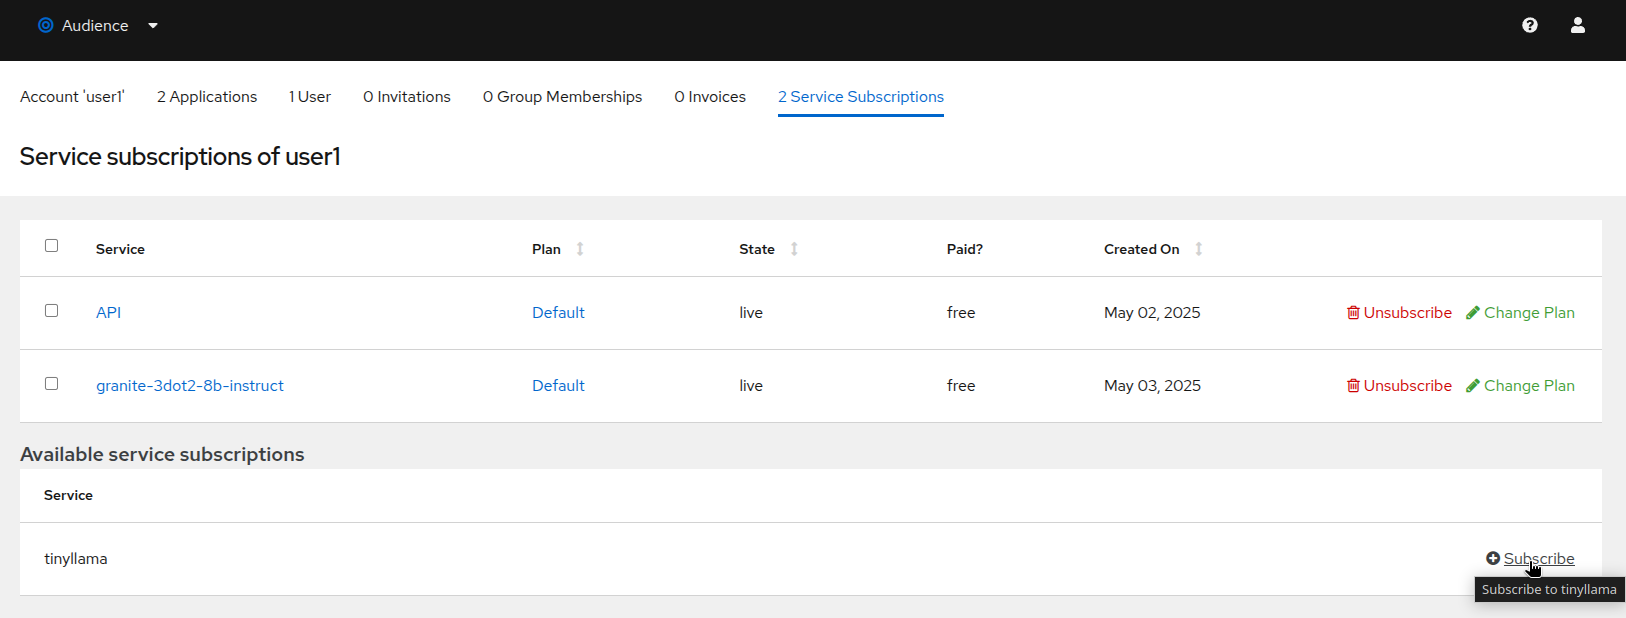
-
Select the
DefaultPlan and click onCreate subscription.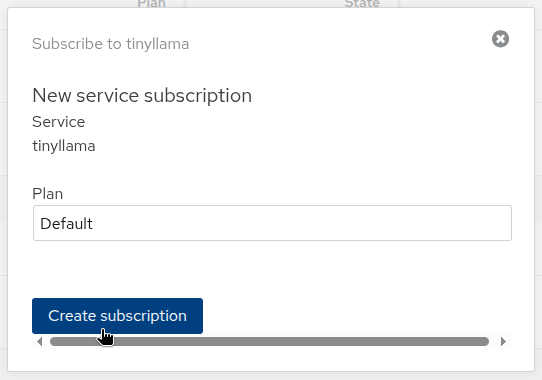
-
user1is now subscribed to theTinyLlamaproduct. You can see that the subscription is active and the plan is set toDefaultPlan.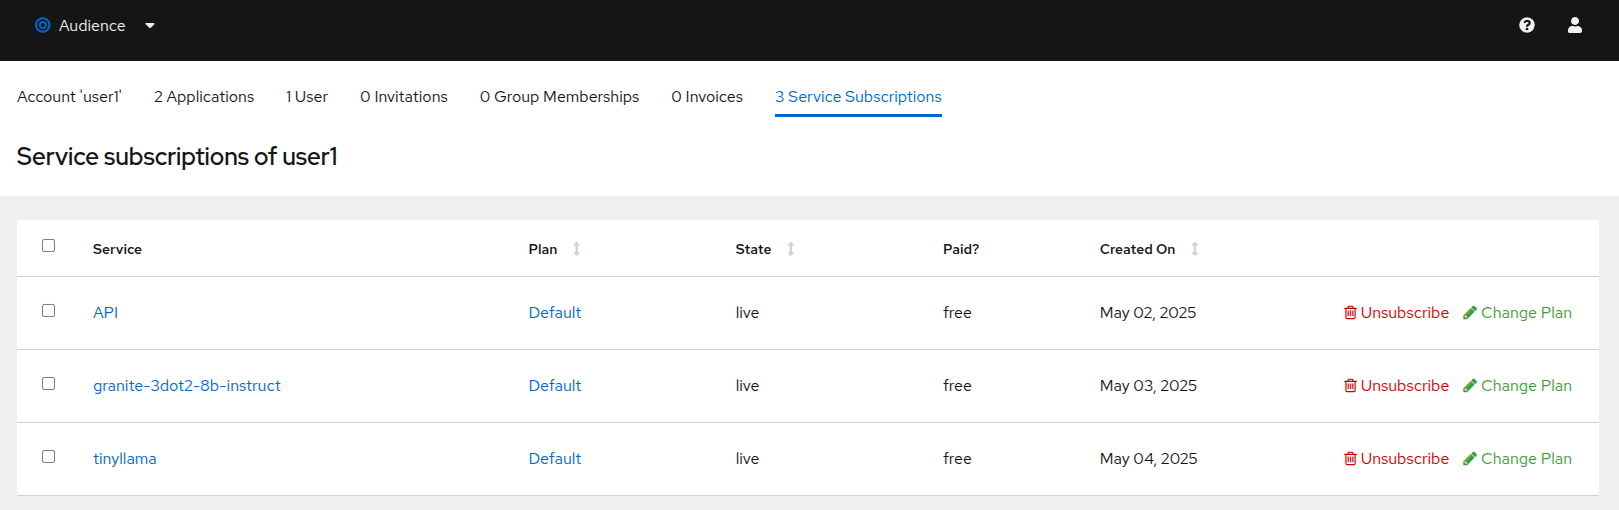
Testing the Product
You can now test this new Product in the same way you did for Granite in the previous module.
-
Connect to the Developer Portal at
https://maas.apps.cluster-guid.guid.sandbox.opentlc.comand log in using your credentials. -
Click on the
See your Applications and their credentialslink on the front page. -
Click on the
Create new applicationbutton. -
Select the
TinyLlamaservice. -
Enter a name for your application, for example
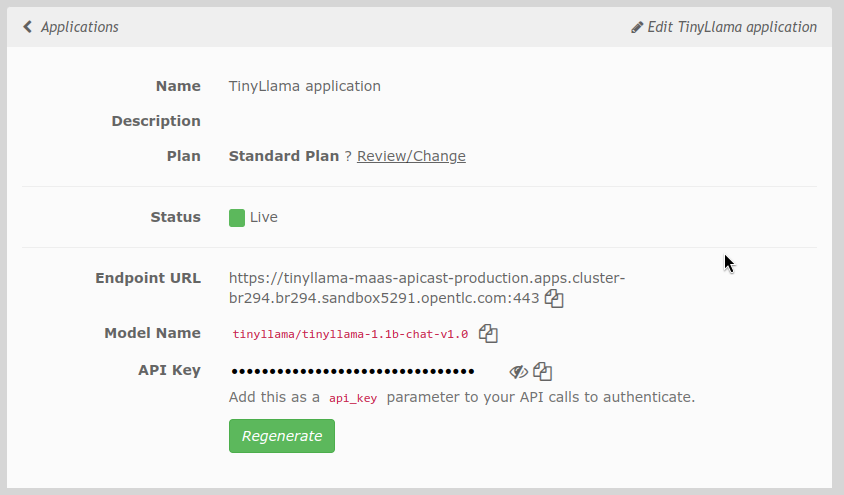
TinyLlama application. Click onCreate Application. -
Your application has been created. You can see the Endpoint URL you can use to connect to the API, the name of the model you must use in your requests, and the API key that has been generated for you. You can now use this key to access the API.
-
You can now test the API using the
curlcommand in your terminal. Open a terminal in your VSCode environment (or on your laptop) and run the following command, replacing the placeholder values with the ones you got from the previous step:curl -X 'POST' \ '___ENDPOINT_URL___/v1/completions' \ -H 'accept: application/json' \ -H 'Content-Type: application/json' \ -H 'Authorization: Bearer ___API_KEY___' \ -d '{ "model": "___MODEL_NAME___", "prompt": "San Francisco is a", "max_tokens": 15, "temperature": 0 }'
Example:
curl -X 'POST' \
    'https://tinyllama-maas-apicast-production.apps.cluster-br294.br294.sandbox5291.opentlc.com:443/v1/completions' \
    -H 'accept: application/json' \
    -H 'Content-Type: application/json' \
    -H 'Authorization: Bearer 5924457cf136e9906c5c98cc5924ab7a' \
    -d '{
    "model": "tinyllama/tinyllama-1.1b-chat-v1.0",
    "prompt": "San Francisco is a",
    "max_tokens": 15,
    "temperature": 0
}'
Congratulations! You have successfully created a new Product in 3Scale and connected it to the TinyLlama model.