Module 01: VM foundations with OpenShift Lightspeed
OpenShift Virtualization introduction and feature review
OpenShift Virtualization provides scalable, enterprise-grade virtualization functionality as a feature in Red Hat OpenShift. You can use it to manage virtual machines (VMs) exclusively or alongside container workloads.
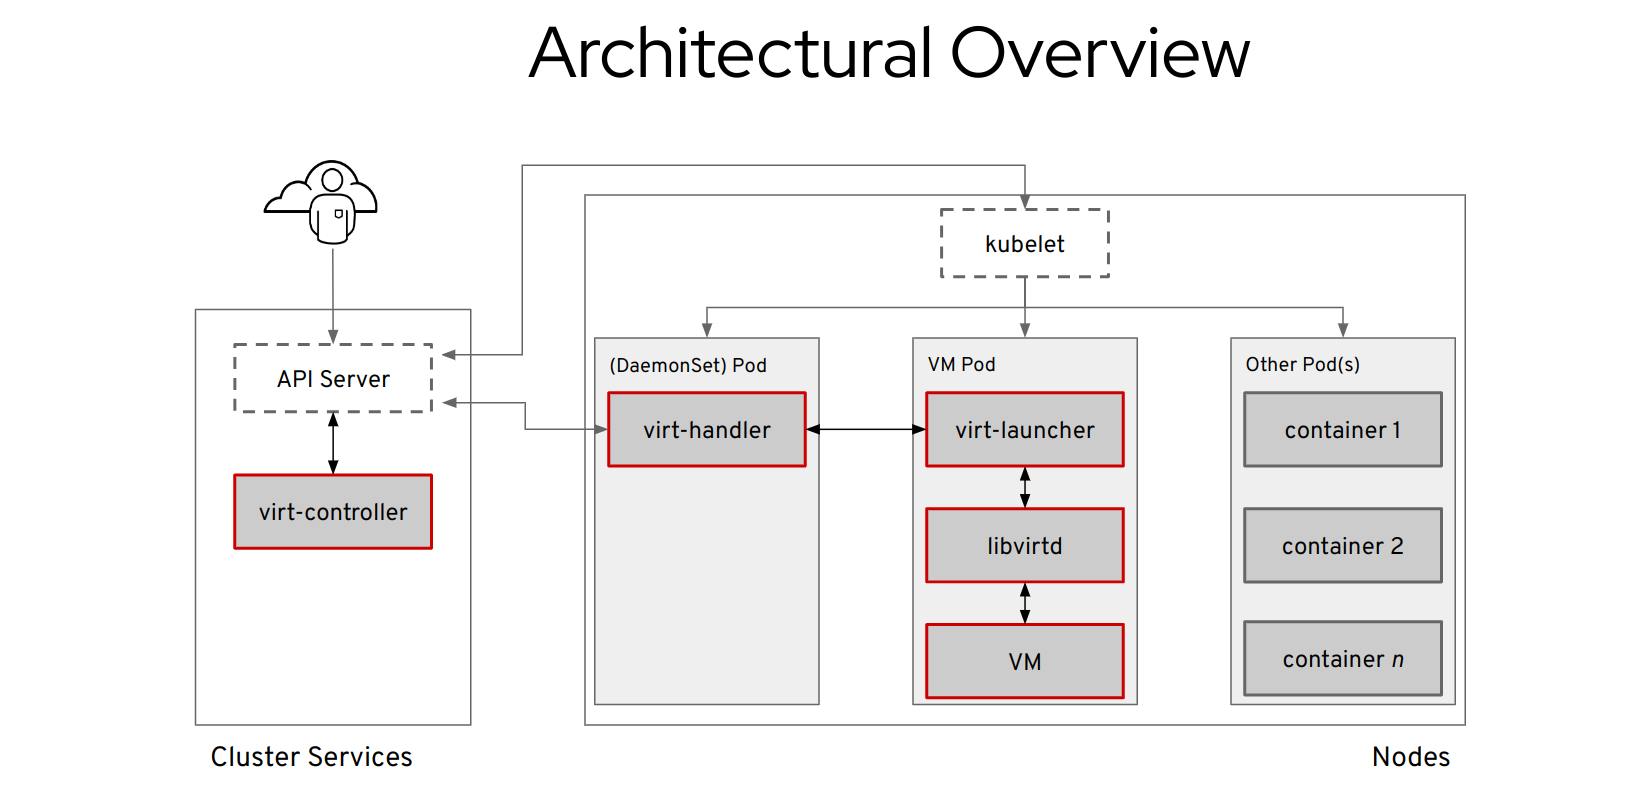
OpenShift Virtualization adds new objects into your OpenShift Container Platform cluster by using Kubernetes custom resources to enable virtualization tasks. These tasks include:
-
Creating and managing Linux and Windows VMs
-
Running pod and VM workloads alongside each other in a cluster
-
Connecting to VMs through a variety of consoles and command-line interface (CLI) tools
-
Importing and cloning existing VMs
-
Managing network interface controllers and storage disks attached to VMs
-
Live migrating VMs between nodes
Objectives
-
The attendee will participate in a brief review of OpenShift Virtualization features.
-
The attendee will create a simple VM by reviewing provisioning options available in OpenShift Virtualization.
-
The attendee will create a custom VM by providing instructions to OpenShift Lightspeed for assistance.
-
The attendee will troubleshoot a VM deployment failure using OpenShift Lightspeed.
Getting started with OpenShift Virtualization
Log into your console with the username and password provided in the introduction section.
You will be welcomed to the new OpenShift UI, please click on Skip tour on this window.
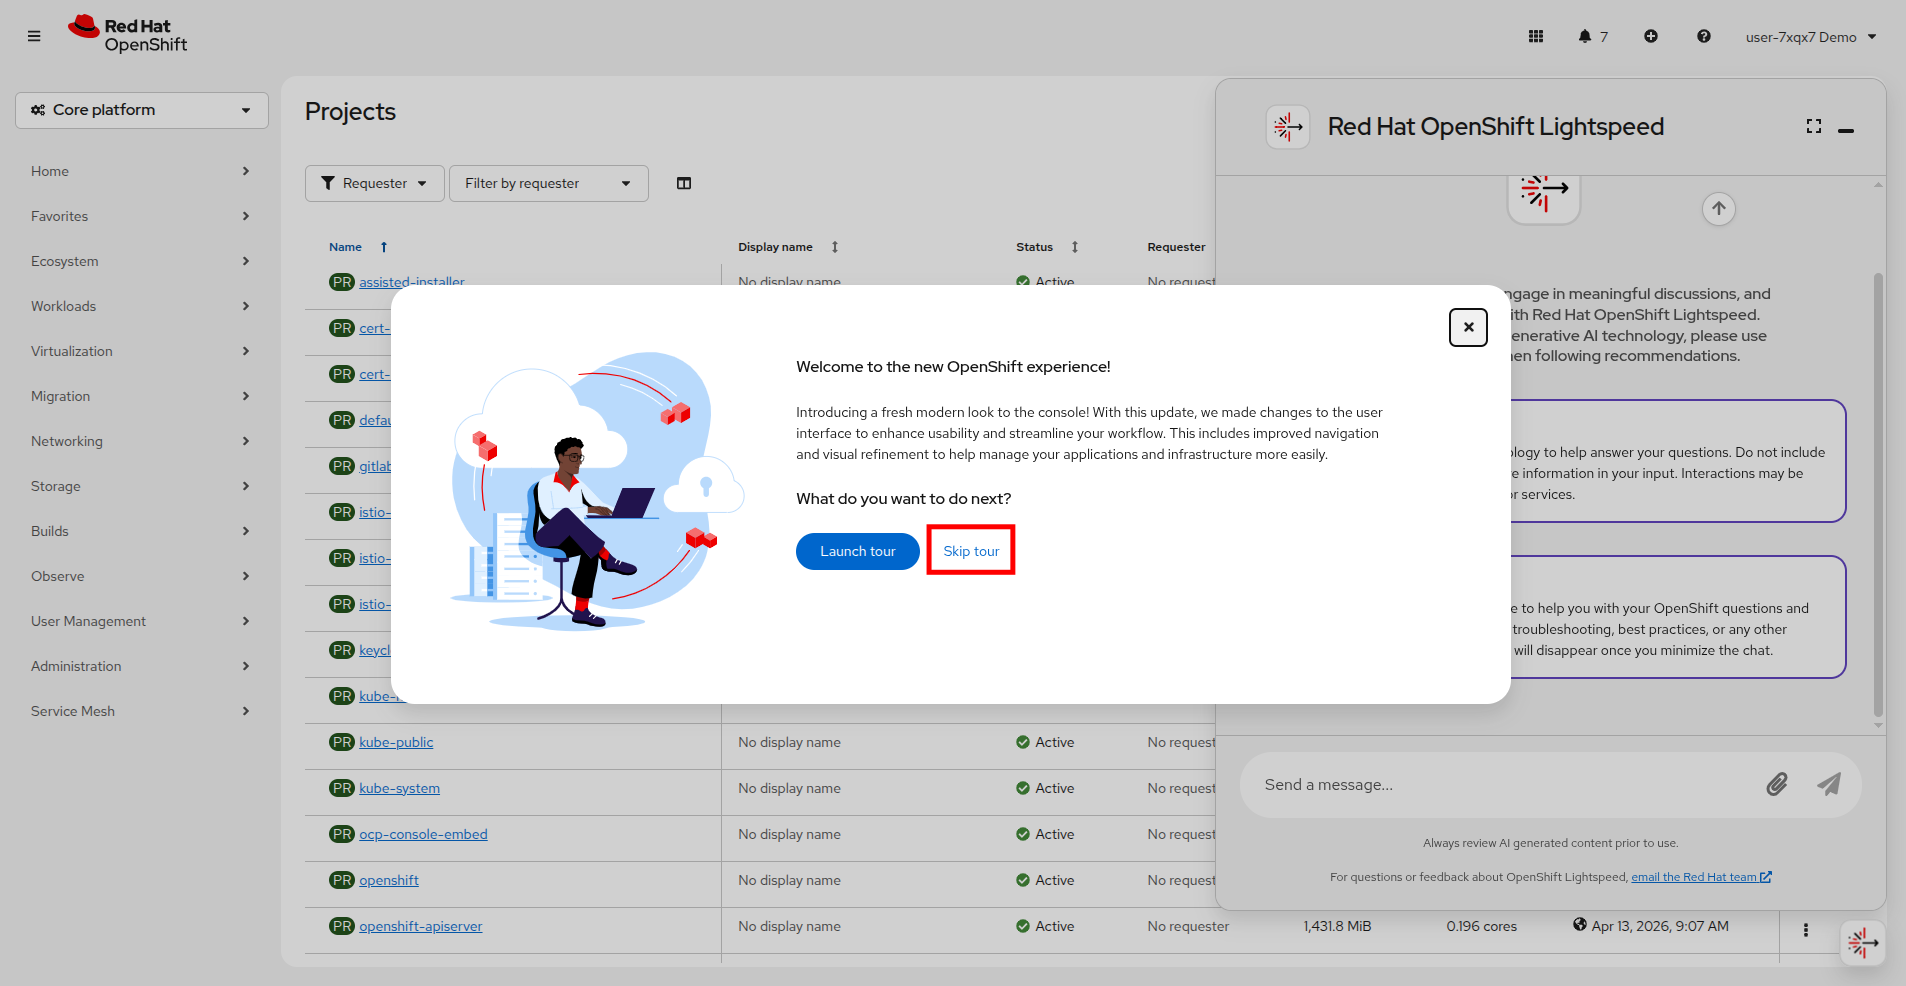
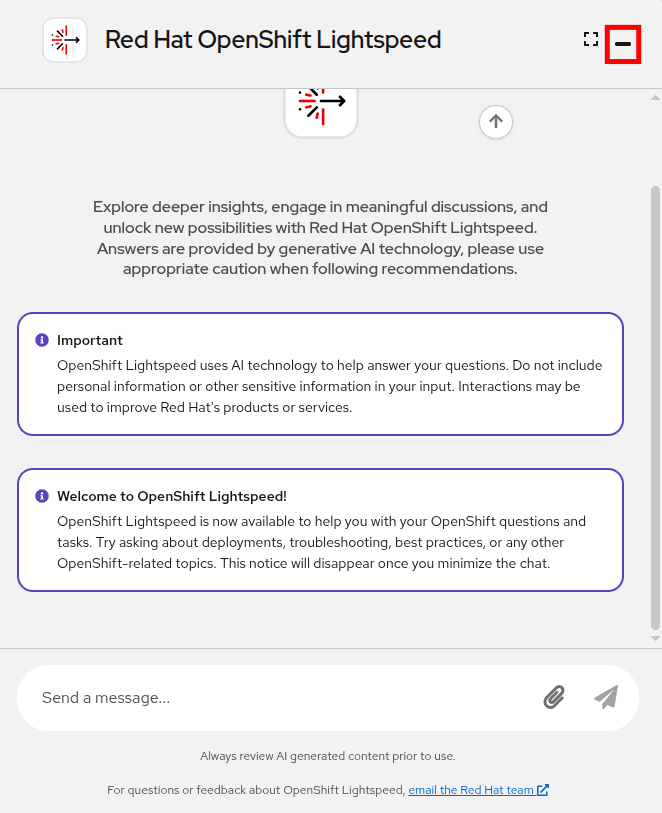
Also, you may notice that the OpenShift Lightspeed window is taking up a significant amount of console real estate on initial launch, please minimize this window for now until we are ready to use it.
Please note that you have a dedicated set of projects for your user account to make use of during this lab. You can use the filter button to streamline the view of these projects by your user name: userX
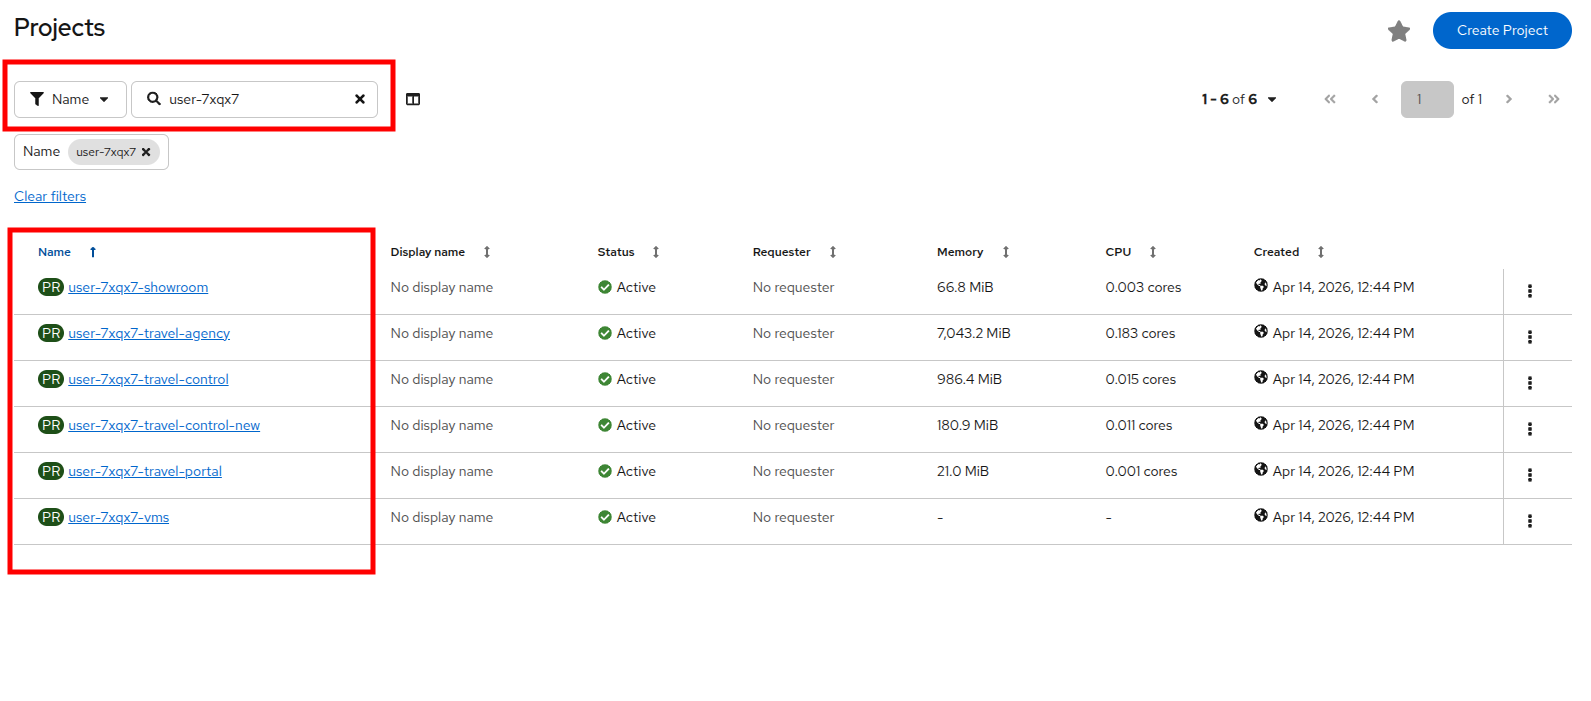
| While the lab guide is designed to be dynamically updated to show your user name correctly, the screenshots are all static images showing the user: user-7xqx7. Please make sure that you are performing actions in the projects assigned to the user that is reflected in your lab guide text. |
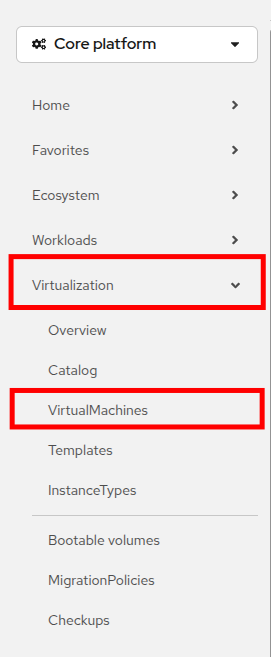
Navigate to the OpenShift Virtualization console by clicking on Virtualization → VirtualMachines in the left-side navigation menu.
Click on the userX-travel-agency namespace in the center column to see that there are already a number of virtual machines running in the cluster.
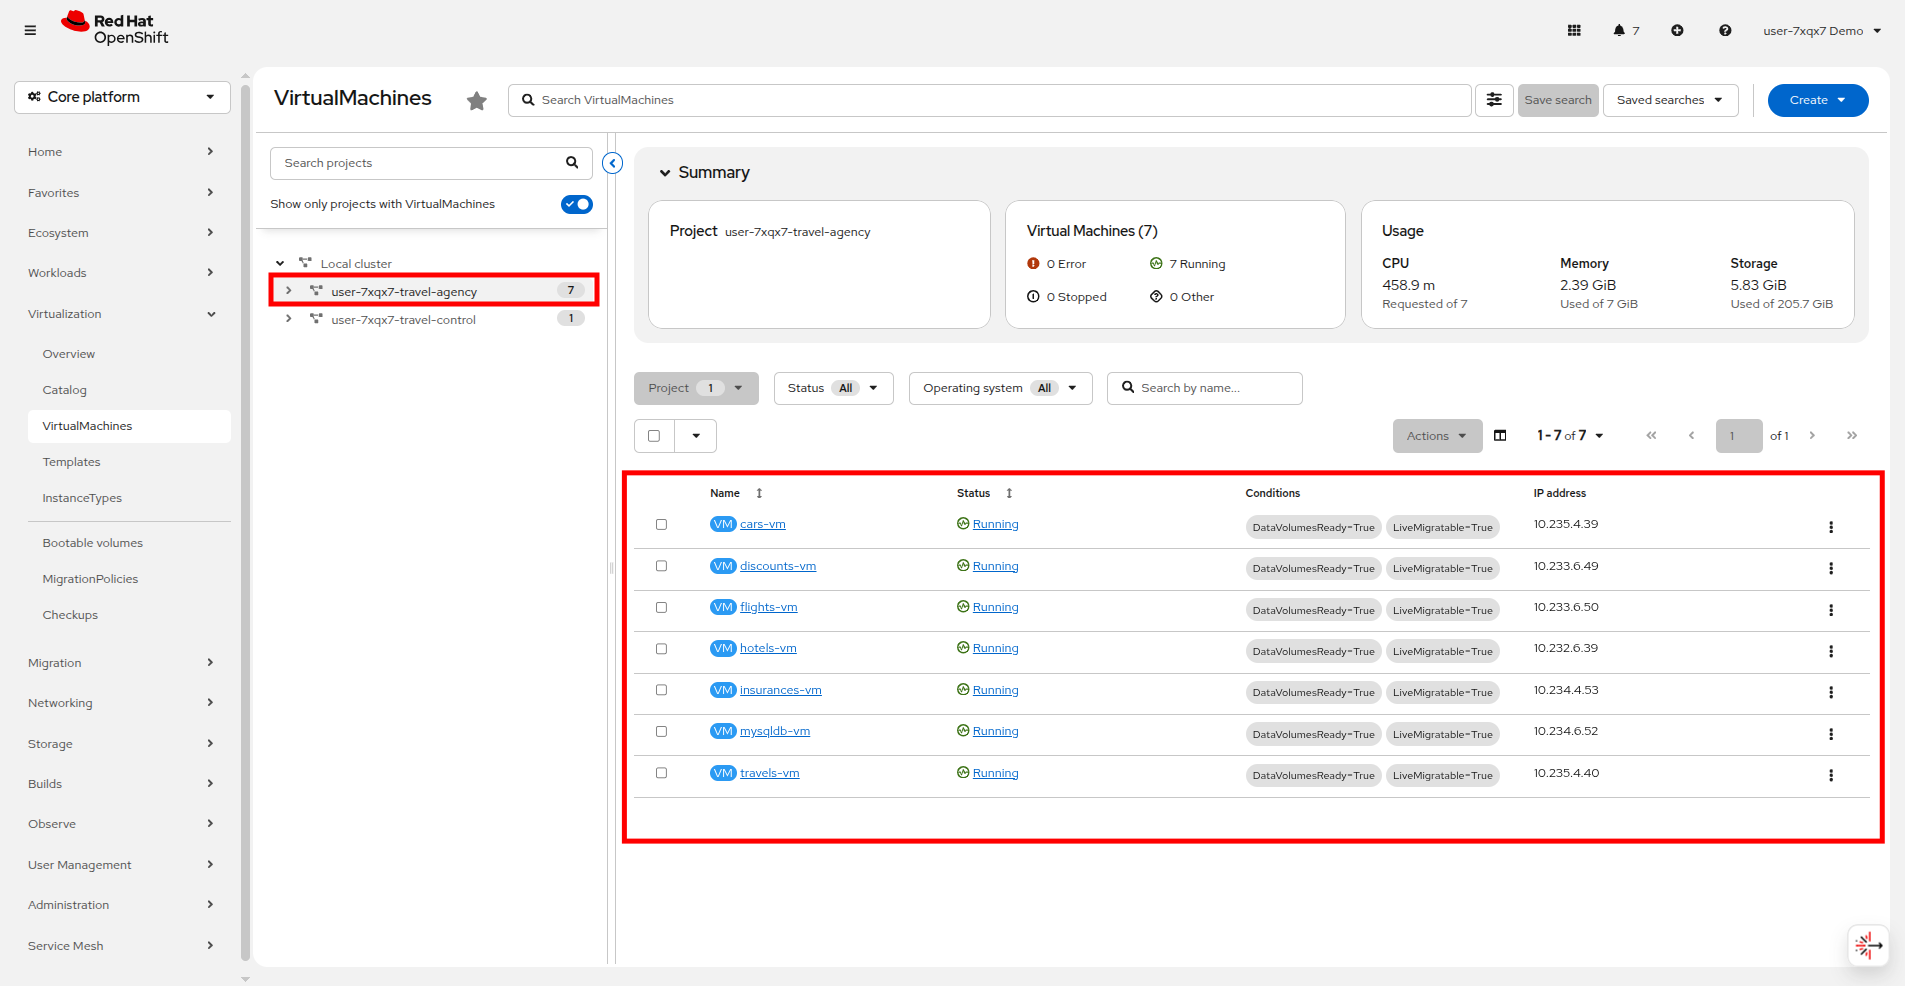
We will now explore some default configurations and metrics from a running VM.
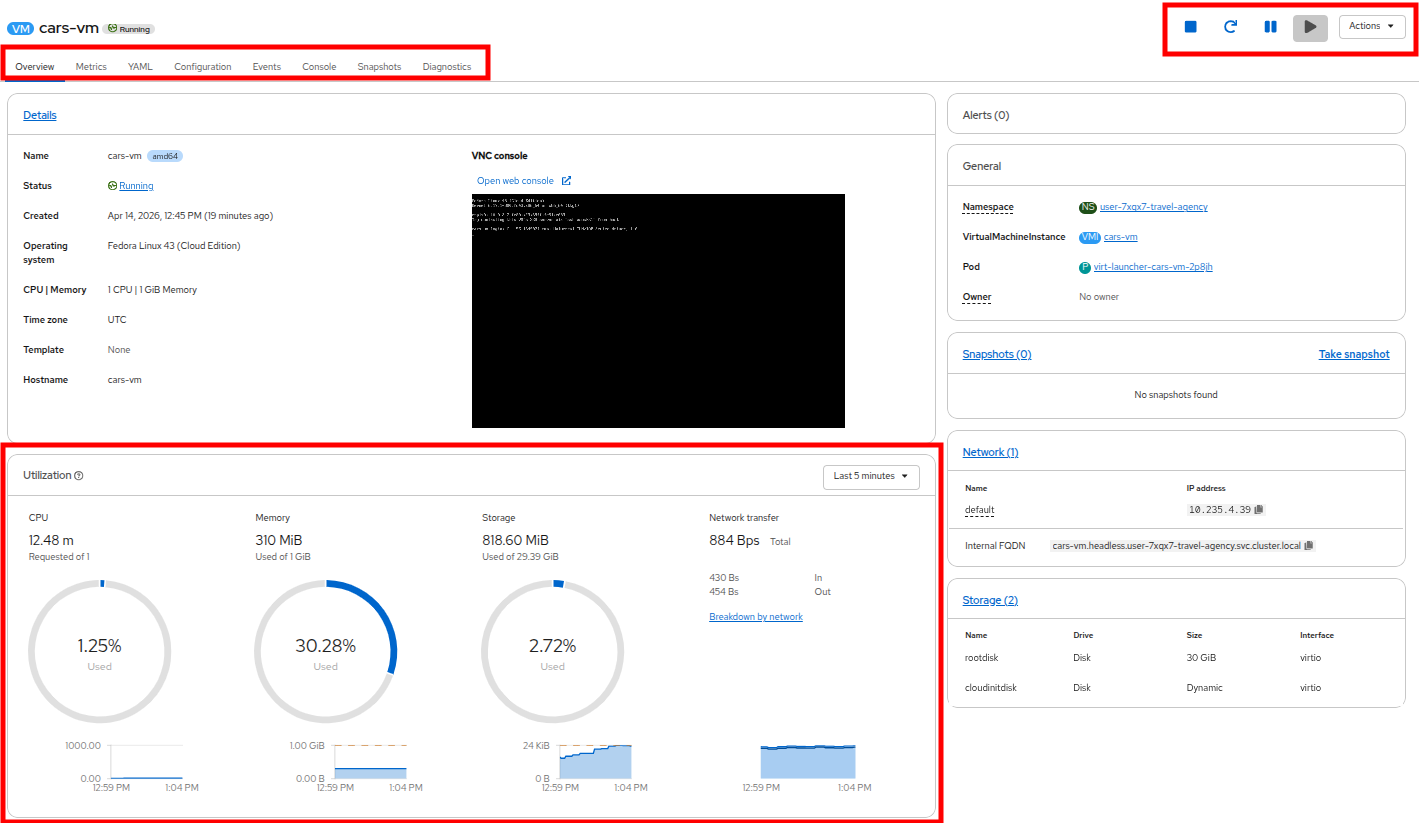
Click on the VM named cars-vm, this directs you to the VM Overview page.
On this page you will find:
-
Other tabs dedicated to Metrics, Configuration, Events, and other useful tools in tabs near the top.
-
State management buttons and the dropdown Actions menu in the top-right.
-
Basic utilization information metrics in the bottom-center.
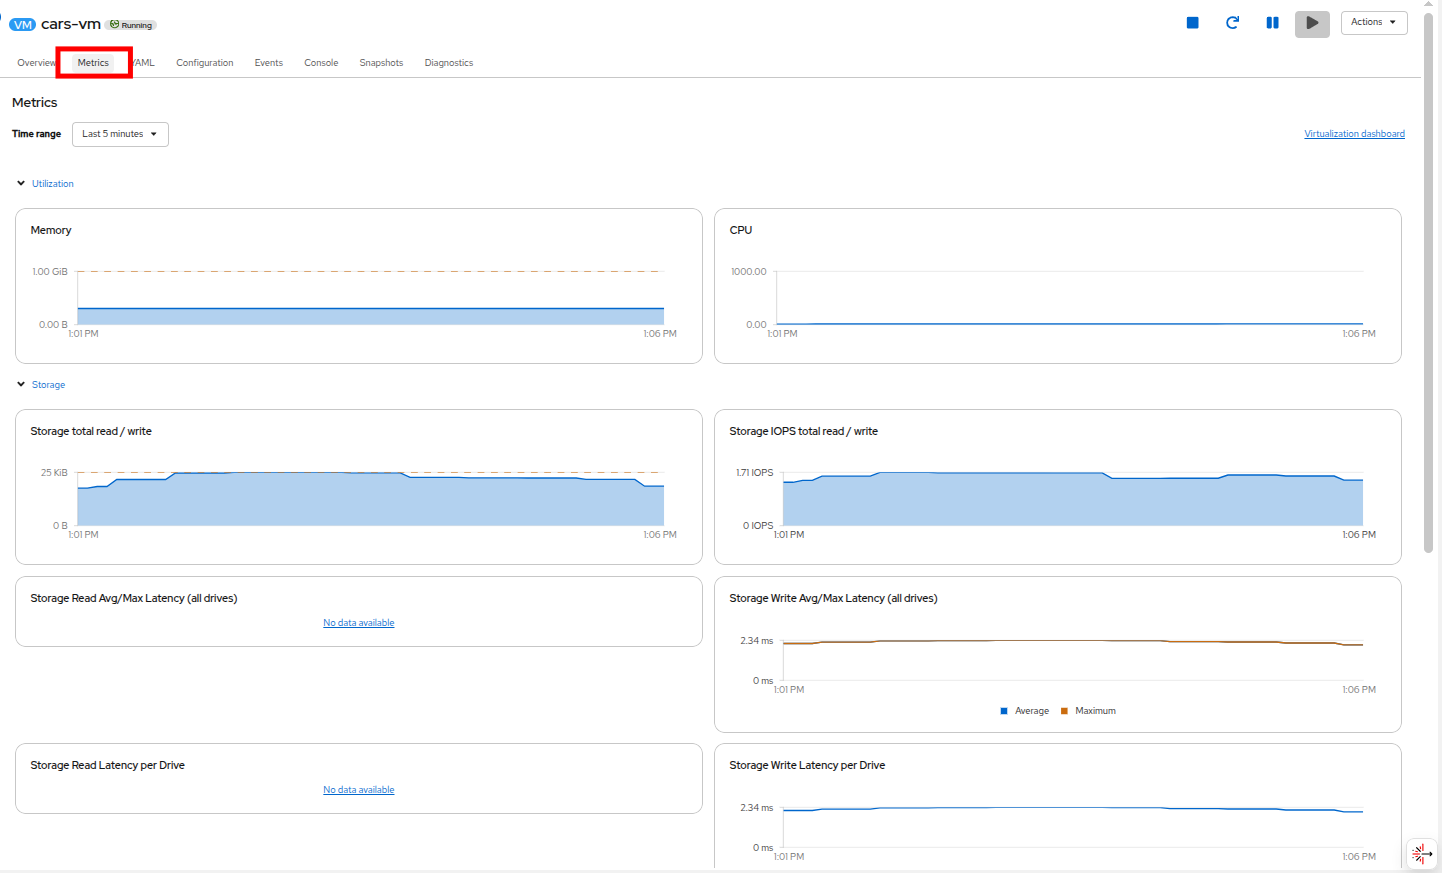
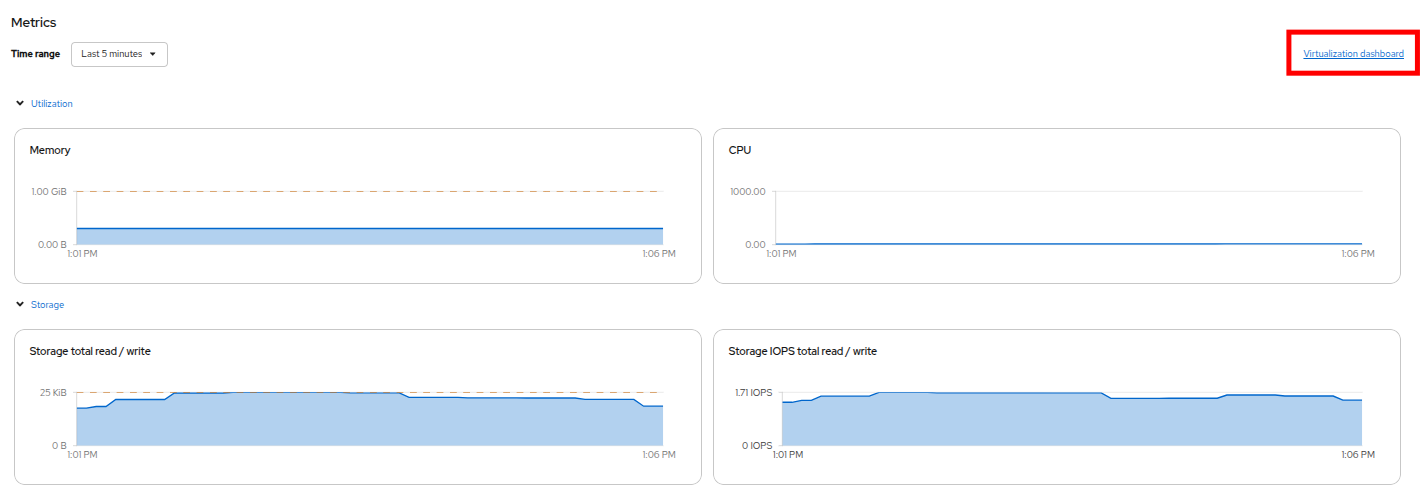
For a deeper look at metrics, click on the Metrics tab.
This gives you an overview of the VM metrics like memory and CPU consumption, storage and networking performance data if you scroll down the page.
From this page we can even dig a bit deeper by using a default Grafana dashboard that has been configured for us to view virtual machine metrics.
Access it by clicking on the Virtualization dashboard link in the top right corner.
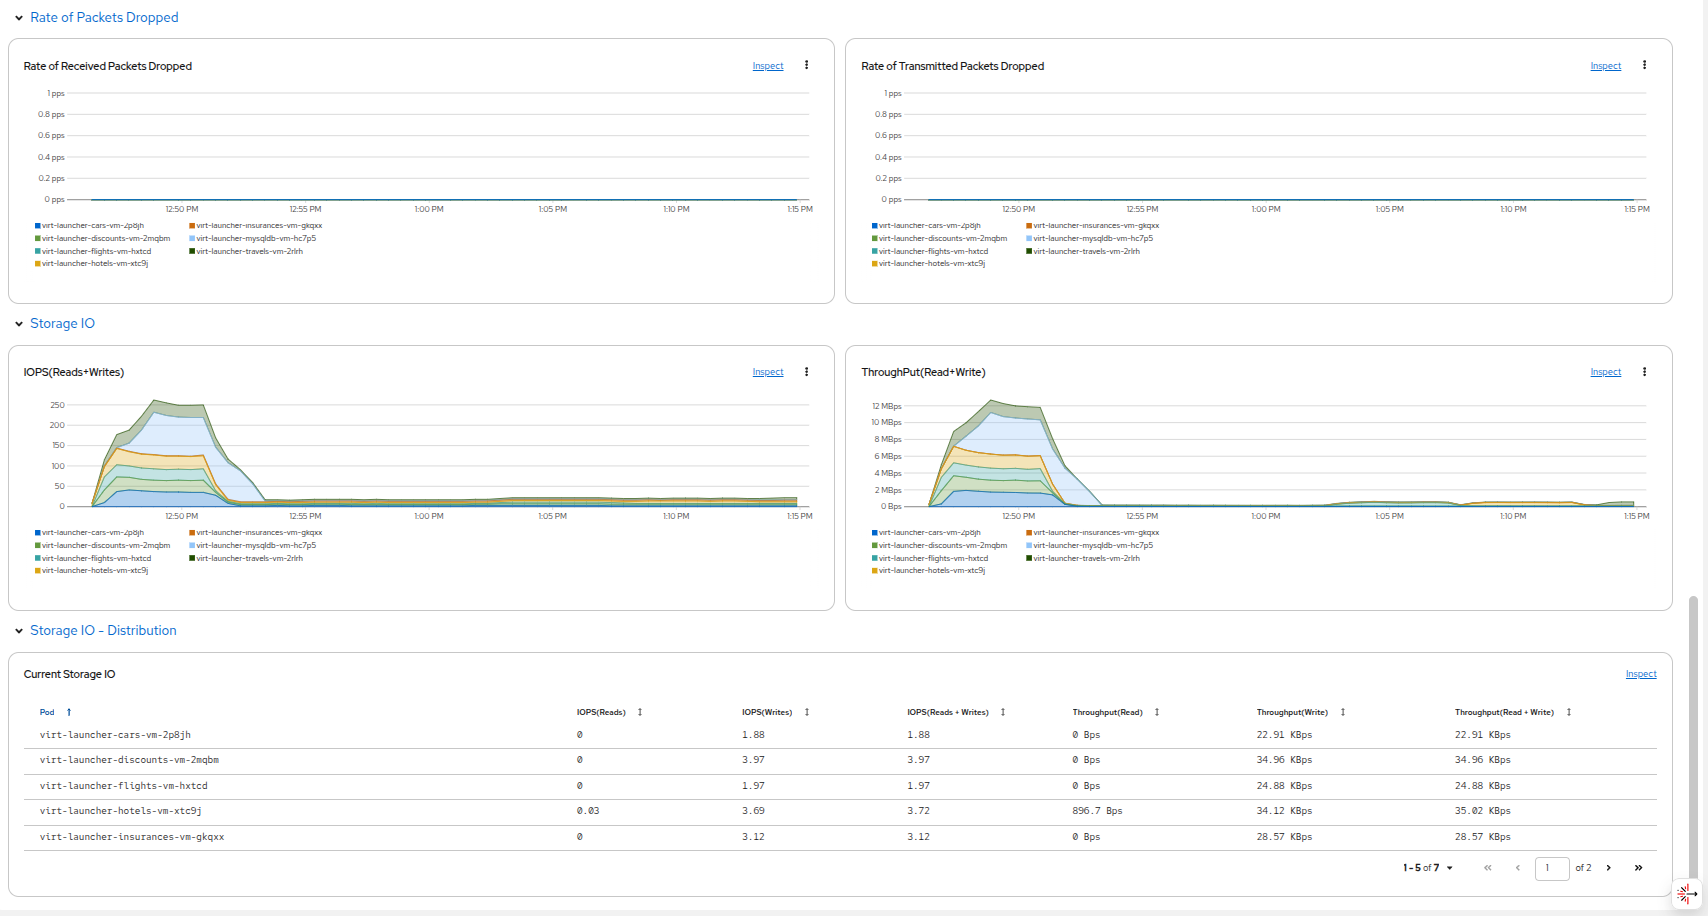
This will provide us with a dashboards page that shows various fields of curated information such as CPU Usage, Memory Usage and other information commonly sought after in graphic formats like Storage IOPS, Network Throughput and Packets Dropped over time.
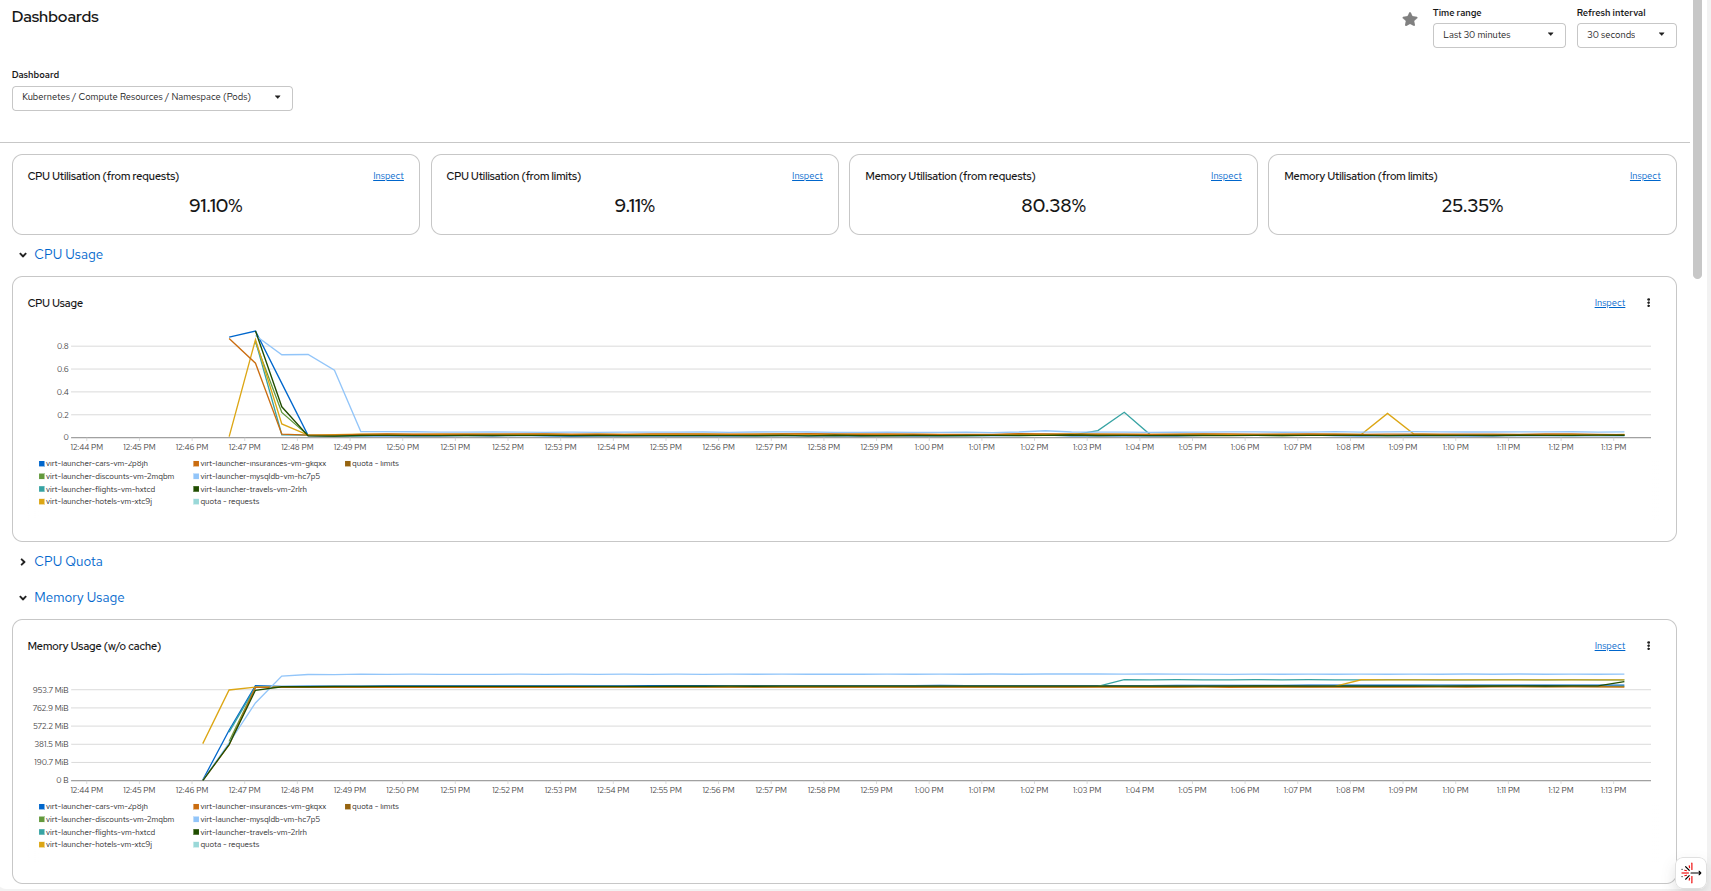
| The dashboards visible may be collapsed or expanded, and there are a number of other curated dashboards available in Grafana should you want to explore at your leisure. |
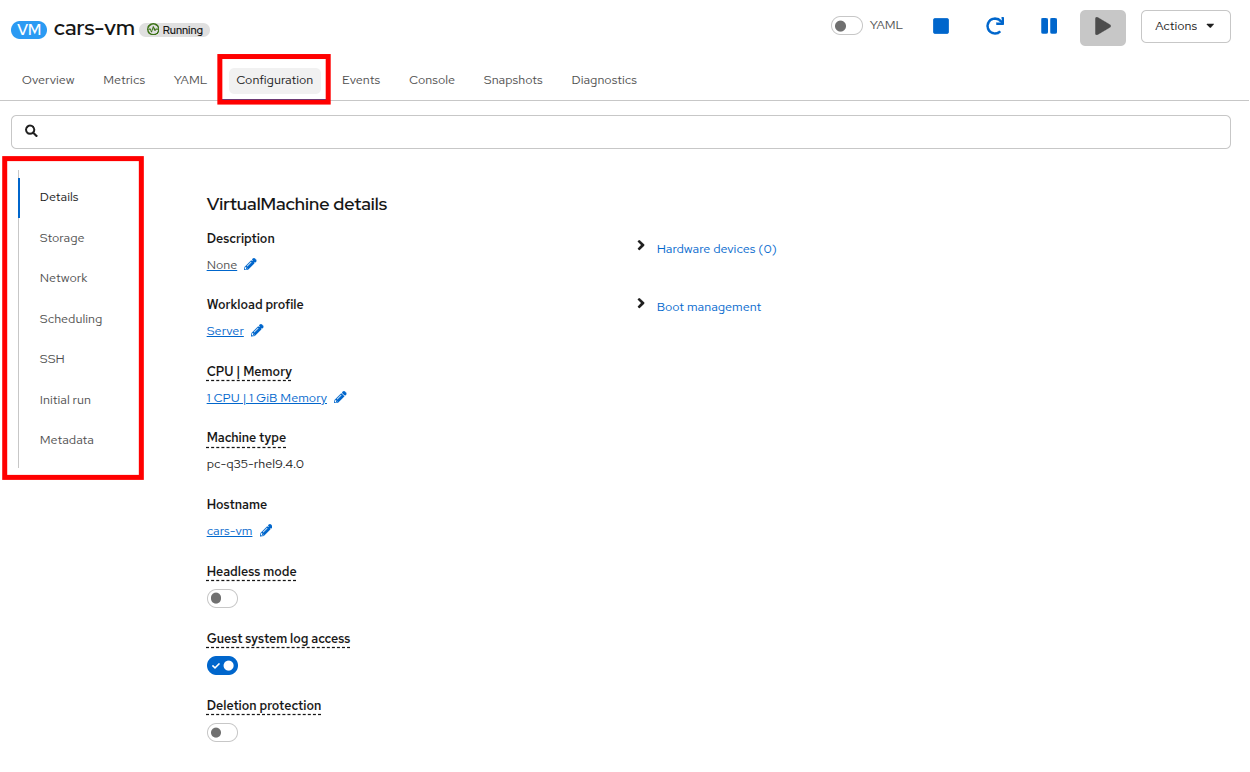
If we return to our virtual machine overview by clicking on Virtualization → VirtualMachines, and click back on our cars-vm we can take a deeper look at the configuration options that can be modified on the VM, by clicking on the Configuration tab.
This gives you an overview of the VM configuration options that can be modified including CPU and Memory, as well as Storage, Networking, and Scheduling options that are available in the sub menus. Feel free to click through these menus to see the tunable options that are available to you.
In this introduction section we have explored the Virtualization Dashboard in the OpenShift console and the sub-tabs for Metrics, default Dashboards, and virtual machine Configuration. Now we will proceed with additional tasks in OpenShift to create and work with a virtual machine.
Quick create a virtual machine
We have spent bit of time exploring virtual machines that were provided with our lab, in the next few sections we are going to create some virtual machines of our own. To get started we are going to quick create a virtual machine from a provided template.
In order to do so we need to be in a project where we have permissions to create virtual machines. For this lab you have been provided a working project named userX-vms to create these virtual machines in.
Please note that if you look in the center column this project is not currently listed. This is because the Show only projects with VirtualMachines toggle is turned on. Click the toggle to turn this option off.
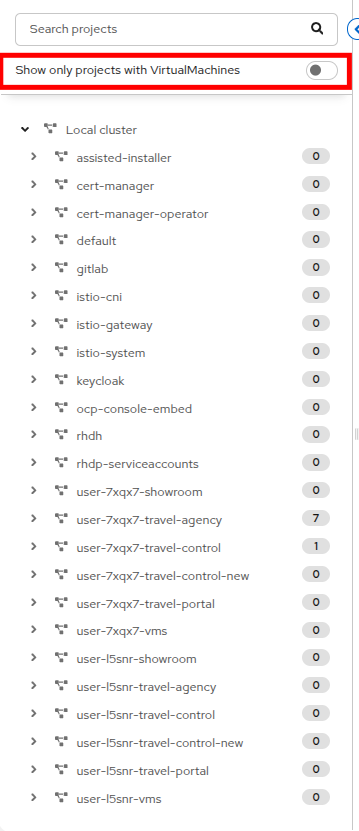
With the toggle turned off you now can see every project in the cluster, including OpenShift system projects, and the projects that are assigned to others attending this lab. Type your username userX into the Search projects bar to limit your view to only your projects.
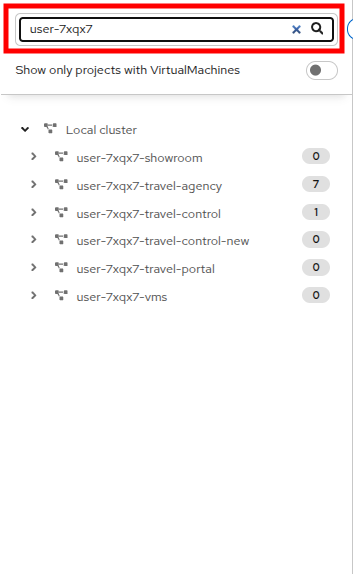
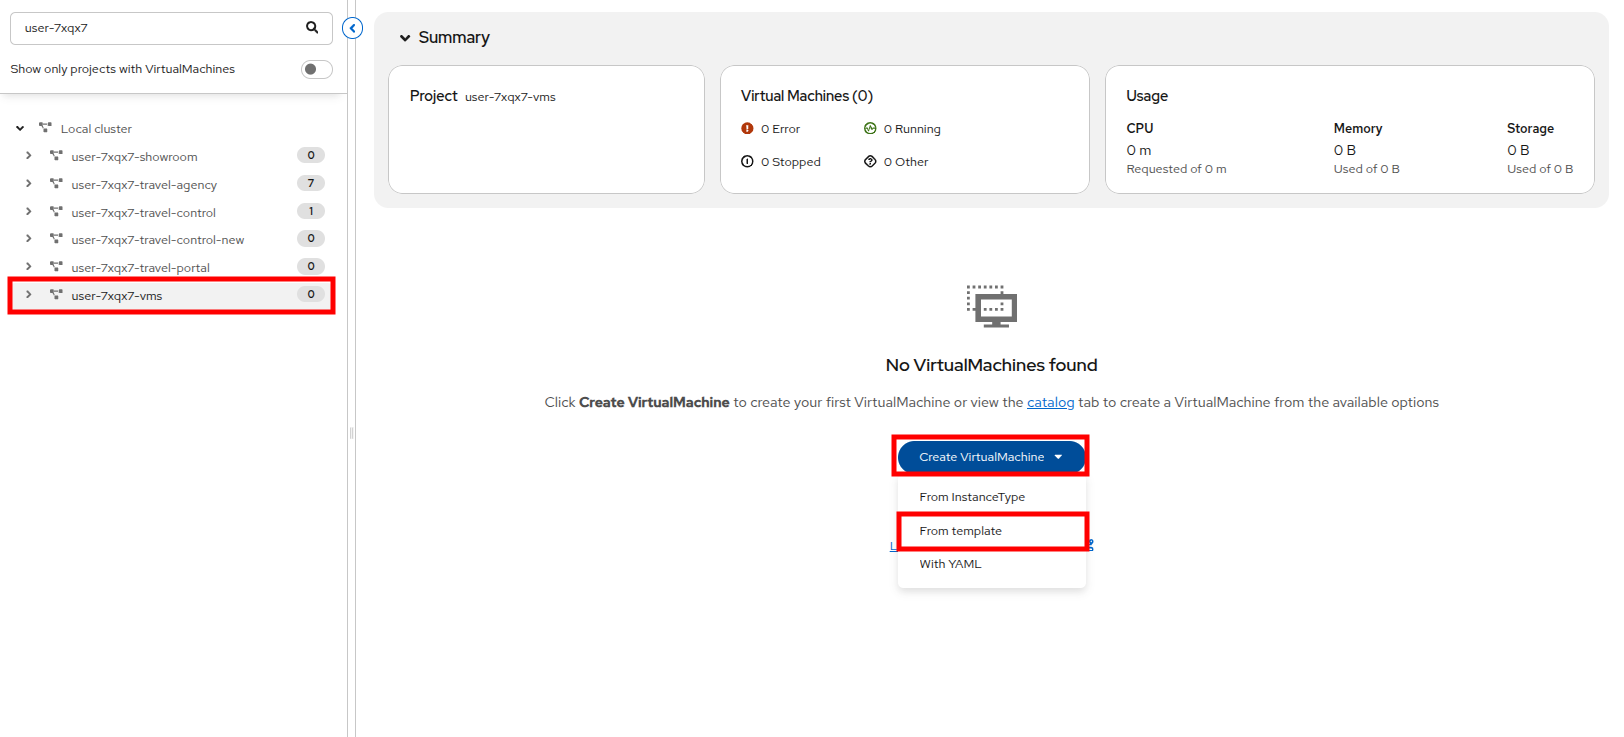
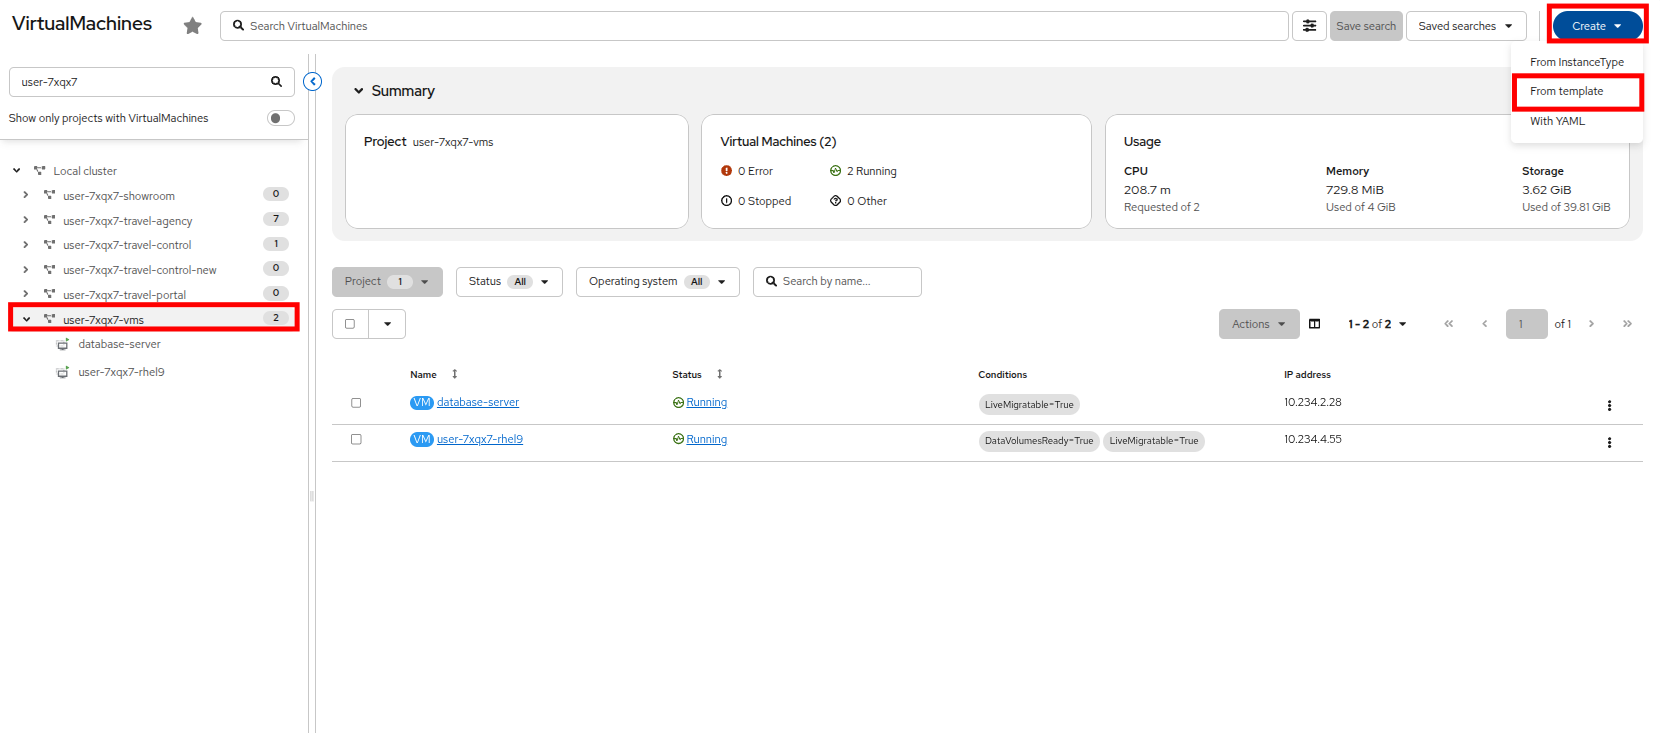
With the list filtered you should be able to find your userX-vms project. Click on it, and then click the Create VirtualMachine button in the middle, and select From template from the dropdown menu to create your first virtual machine.
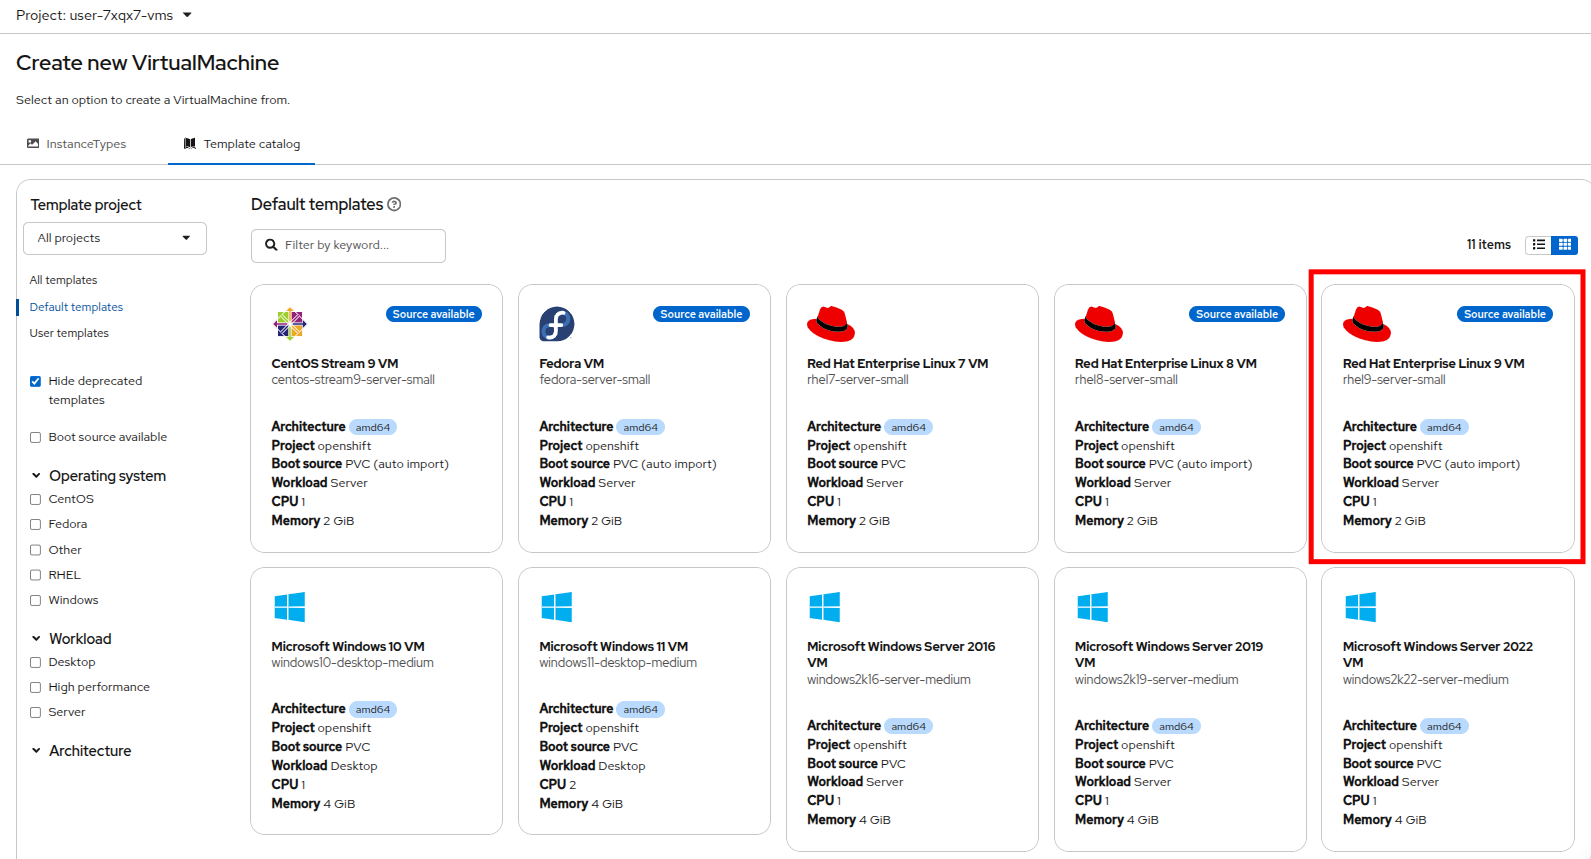
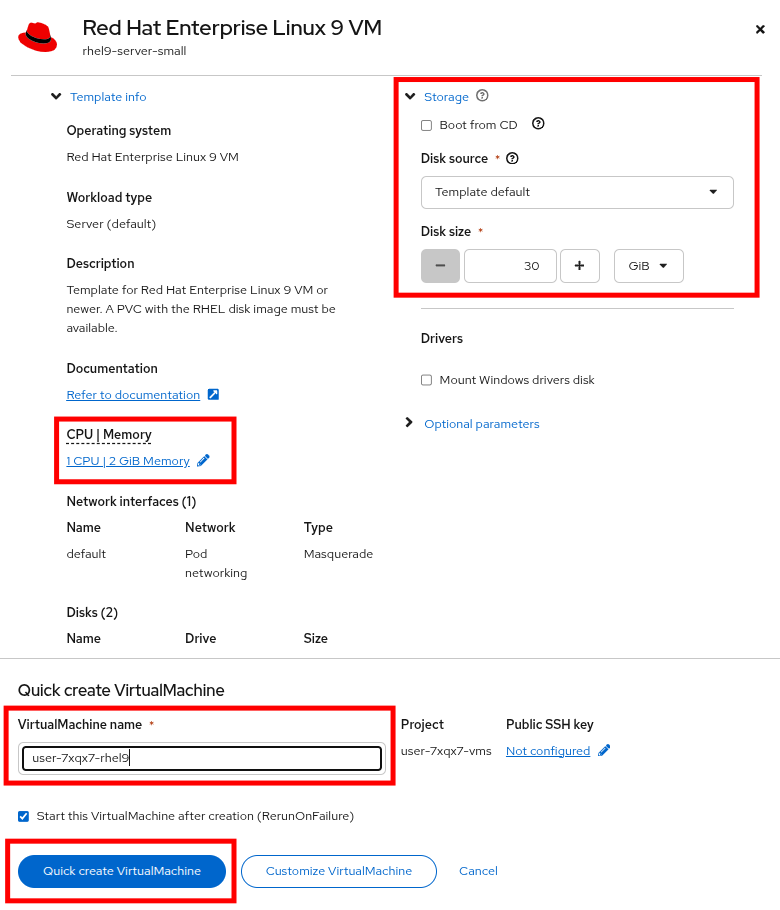
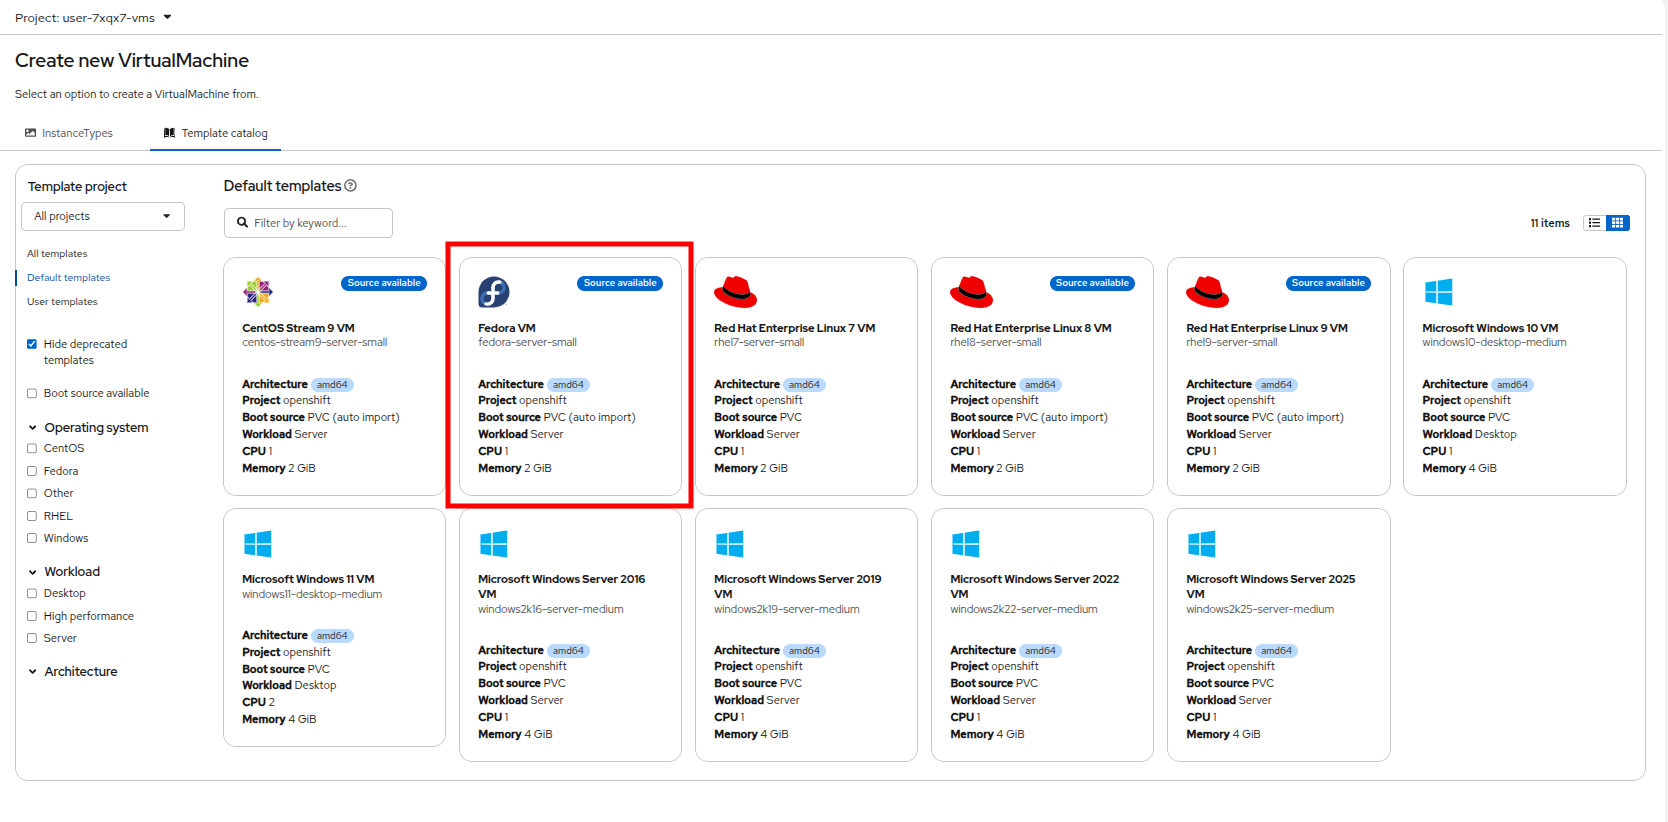
You will see the templates for both Linux and Windows VMs that are available to you arranged in a number of tiles. Click on the Red Hat Enterprise Linux 9 VM tile to create a RHEL9 VM.
A new window will appear allowing you to configure things like a bootable CD image, modify the disk size of the VM, and configure its CPU and Memory resources as well as name the VM. For the purpose of this exercise, just name the virtual machine userX-rhel9 and click the Quick create VirtualMachine button at the bottom.
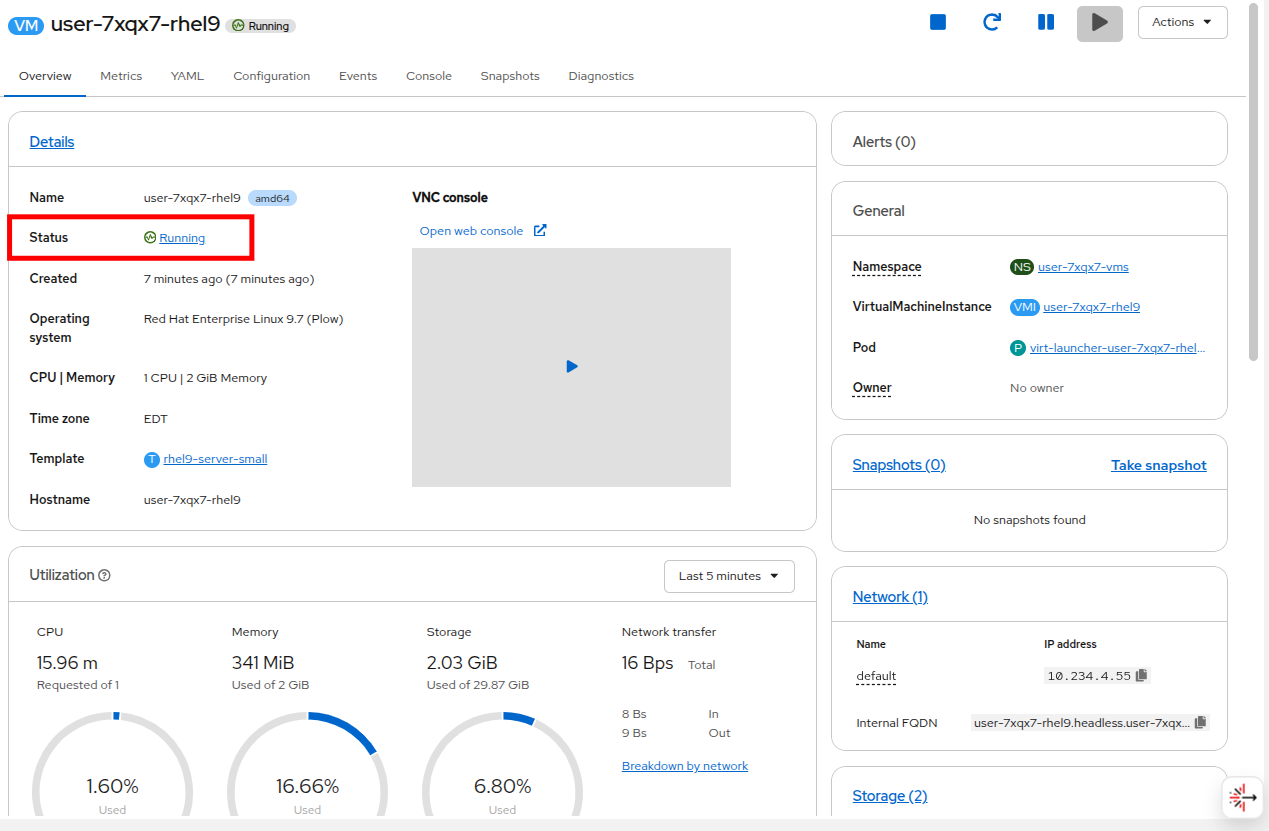
You will be taken to the VirtualMachine details page with the Overview tab just as before where you will see the VM enter the Provisioning stage, followed by the Starting and finally the Running stage when it is up and ready.
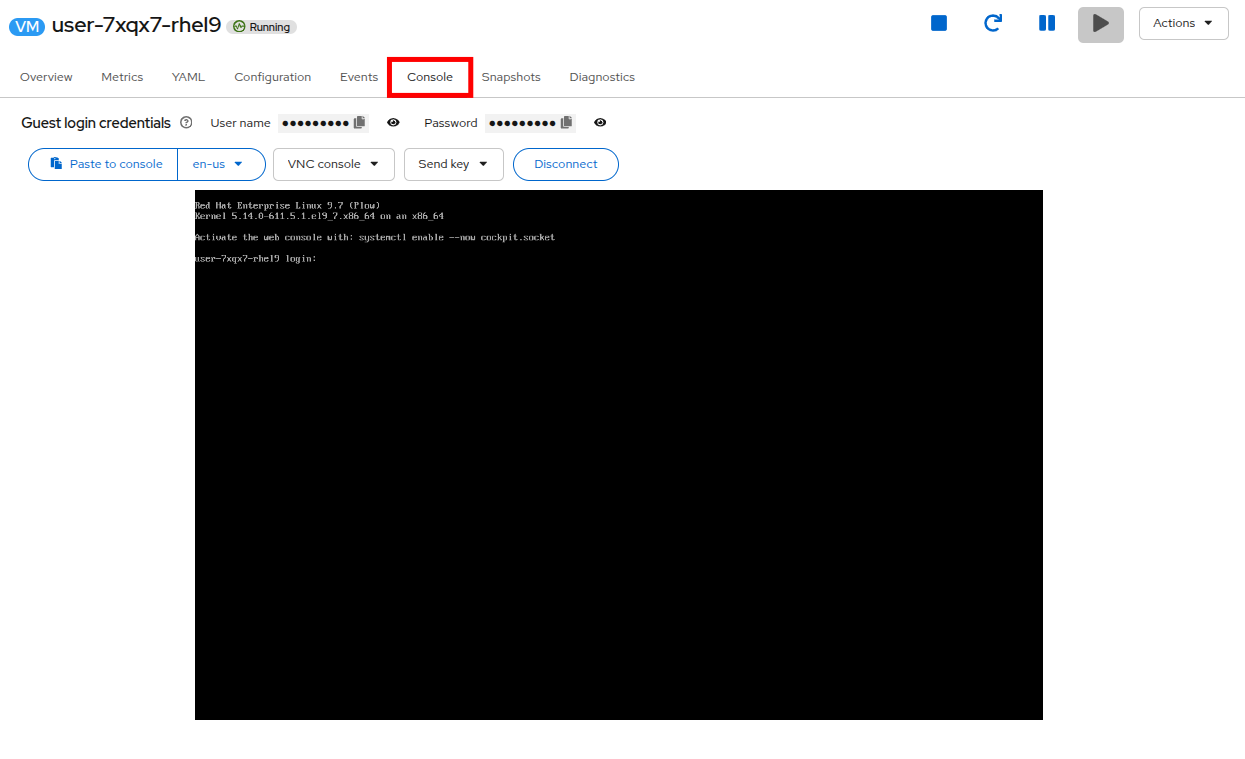
You can click on Console tab to confirm that the machine is running.
Introduction to OpenShift Lightspeed
For those unfamiliar, OpenShift Lightspeed is a generative AI-powered assistant integrated directly into the Red Hat OpenShift web console that can help users troubleshoot, understand, and manage OpenShift clusters by answering questions, suggesting commands, and analyzing YAML configurations through natural language, connecting with various large language models (LLMs) for tailored assistance.
For the rest of this module, we are going to make use of OpenShift Lightspeed, to help us perform several tasks in our cluster, from information gathering, to the creation and troubleshooting of resources. Doing so helps us to modernize our approach to the management of virtual machines by using the power of AI.
Getting started with OpenShift Lightspeed
Continuing from where we left off, you may recall that we minimized the OpenShift Lightspeed menu when we started the previous section. You can re-open its console by clicking on the icon in the bottom right corner of the screen.
The lightspeed window will re-appear. And you can start by asking it basic informative questions about your cluster and the workloads running in it.
Start by performing a copy/paste action on the following question, and click the Send button when ready.
How many virtual machines are running in the userX-vms project?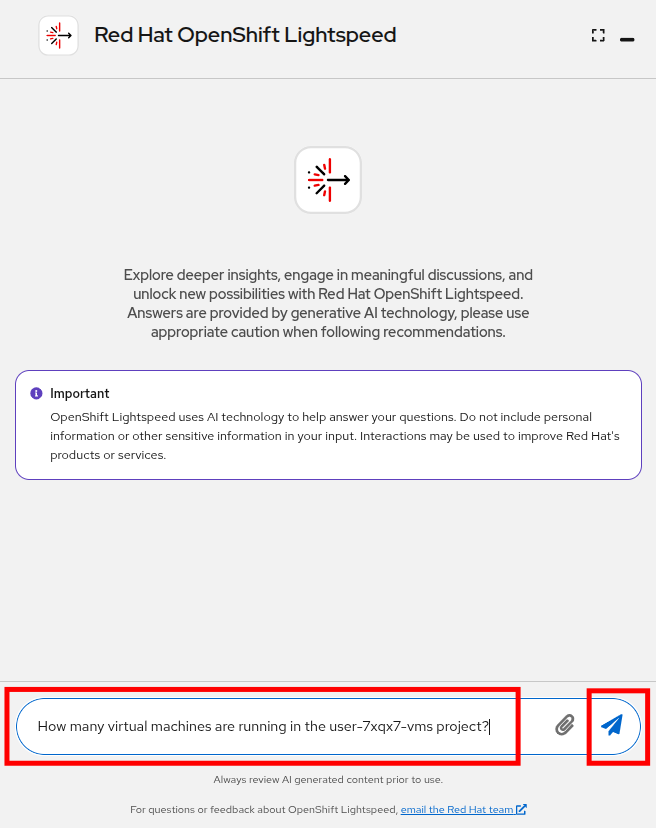
After a few moments, OpenShift Lightspeed should report that there is 1 VM running in that project, which is the one we quick created a moment ago.
It can also tell you where it got this information from, and gives you the opportunity to rate its reply.
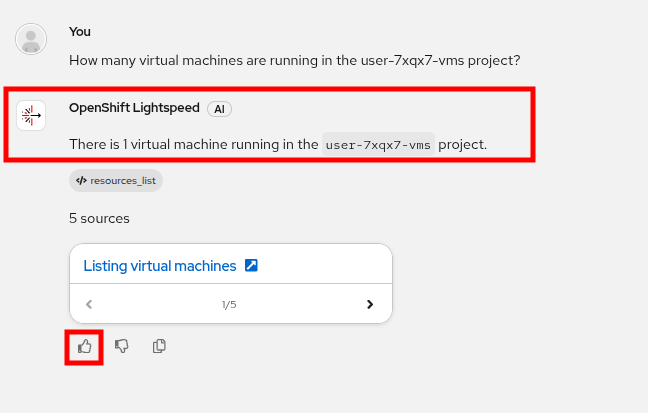
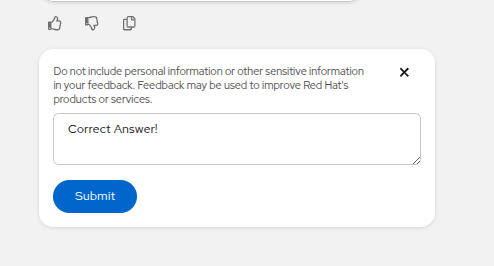
Go ahead and give it a thumbs up if you are happy with the response, it will also give you the opportunity to provide additional feedback. Click the Submit button. This feedback can be used to help train the model for its responses in the future.
Now let us ask it a follow-up question, copy/paste the following question, and click the Send button when ready.
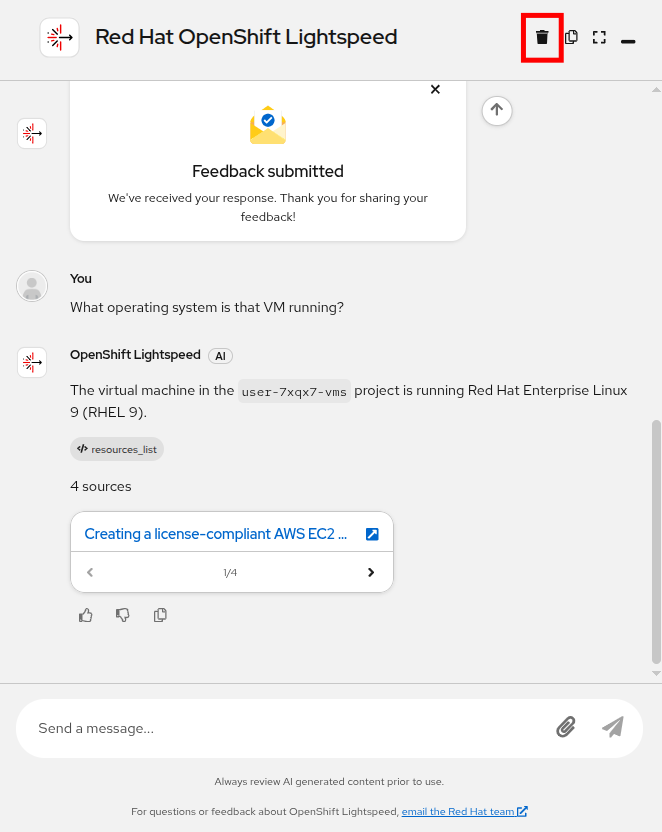
What operating system is that VM running?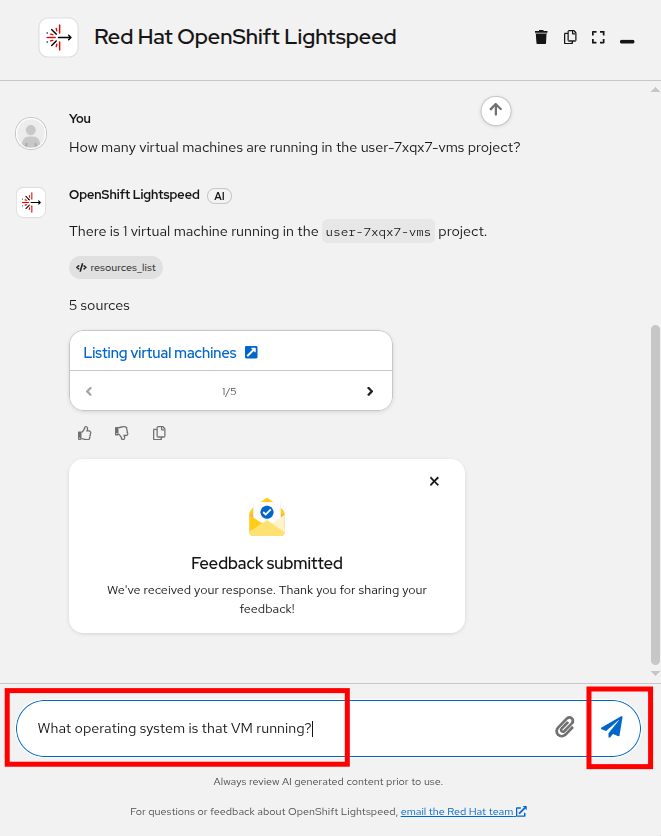
After a few moments, OpenShift Lightspeed will correctly answer that the VM in question is a RHEL9 VM.
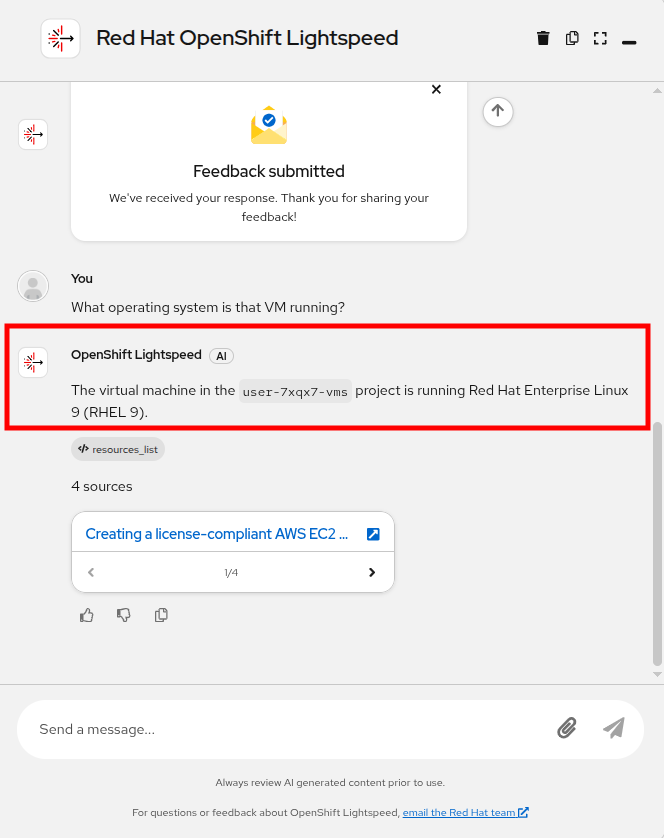
| Notice that OpenShift Lightspeed can continue a series of questions by inferring information from those previously asked. In this example, we did not have to restate the project, or tell it specifically which VM we were referring to in the second prompt. |
Feel free to play with OpenShift Lightspeed at your leisure, by asking it other questions. Note that some information about the overall cluster may not be available to your userX account and the permissions granted to it.
When you are finished, click the trash-bin icon in the top right corner to clear the OpenShift Lightspeed prompt history.
Click the Erase and start new chat button to be ready to move along to the next task in this module with a fresh conversation.

Create a VM from an OpenShift Lightspeed prompt
Quick creating a VM as we did earlier in this module is one thing; it shows customers that OpenShift Virtualization essentially "works", and it demonstrates that we can answer their most basic questions often concerning ease of use, or how the user experience differs from what they are used to from their current hypervisor.
A real use case for a VM often involves customization and configuration of not just the virtual machine itself but of the workloads that it hosts, or essentially the purpose of the VM. This is where a tool like OpenShift Lightspeed can assist by enabling those unfamiliar with the platform to perform actions in an accelerated fashion.
In addition to answering questions about your OpenShift cluster and the workloads running there, OpenShift Lightspeed can also be used to help create resources. While it currently does not have the capability of performing cluster management operations on its own, it can provide example configurations that can be used to perform those actions.
In this task we will provide a prompt to OpenShift Lightspeed to ask it to help us create a virtual machine for a specific purpose. Once it responds, we will use what it provides to create the virtual machine that we need.
Create a prompt for the VM
Our task is to create a virtual machine that serves as a database server by default without additional configuration by the end user.
Copy and paste the following prompt into OpenShift Lightspeed and click the Send button when you are ready.
Create a YAML manifest that creates a VM in the userX-vms project that has CentOS Stream 9 as its operating system, to be used as a database-server. Configure it with a username and password through cloudinit, and automatically install mariadb and configure it to run on startup.
OpenShift Lightspeed will respond with with a YAML manifest that can be used to create the VM we have requested and its rationale for providing its answer.
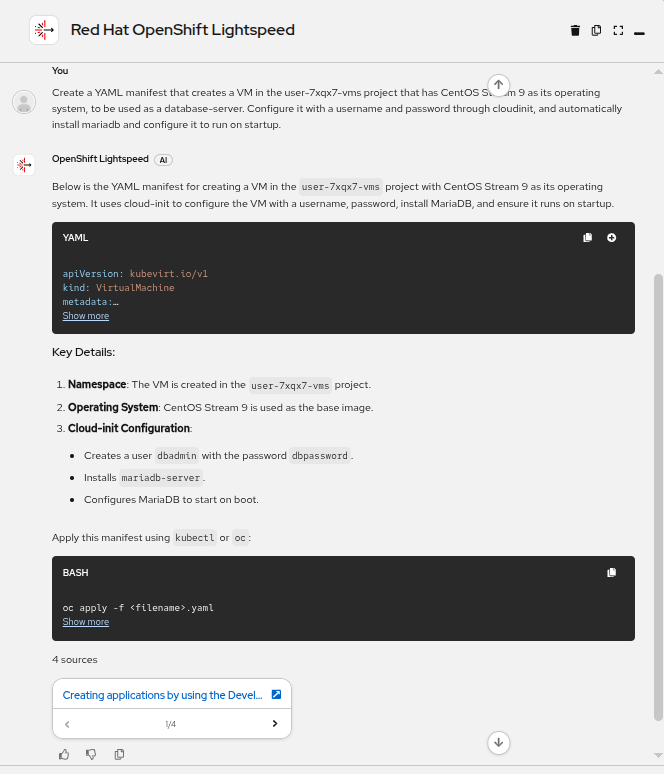
| Due to the nature of generative AI, there is a chance that your response does not look exactly like that provided in the screenshot above and may not work if copied and pasted directly. Compare it to the example below. |
The YAML provided should look similar to the following, use it to provision the VM requested:
apiVersion: kubevirt.io/v1
kind: VirtualMachine
metadata:
name: database-server
namespace: userX-vms
spec:
running: true
template:
metadata:
labels:
kubevirt.io/vm: database-server
spec:
domain:
cpu:
cores: 1
devices:
disks:
- name: rootdisk
disk:
bus: virtio
- name: cloudinitdisk
disk:
bus: virtio
resources:
requests:
memory: 2Gi
volumes:
- name: rootdisk
containerDisk:
image: quay.io/containerdisks/centos-stream:9
- name: cloudinitdisk
cloudInitNoCloud:
userData: |-
#cloud-config
user: dbadmin
password: dbpassword
chpasswd: { expire: False}
packages:
- mariadb-server
runcmd:
- systemctl enable mariadb
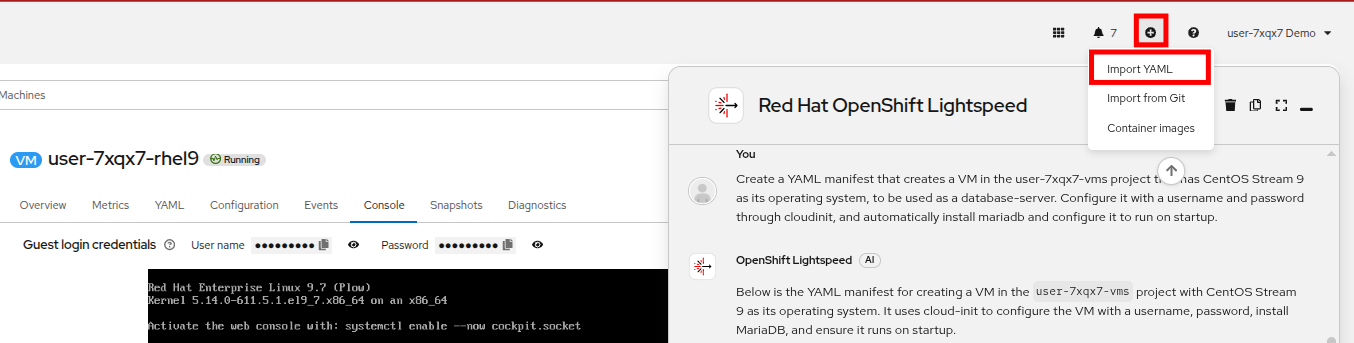
- systemctl start mariadbAfter copying the YAML above, you can use the OpenShift Quick Create button to deploy the VM.
Click on the Quick Create button at the top of the console, and select Import YAML from the dropdown menu.
Paste the YAML manifest provided and click the Create button at the bottom.
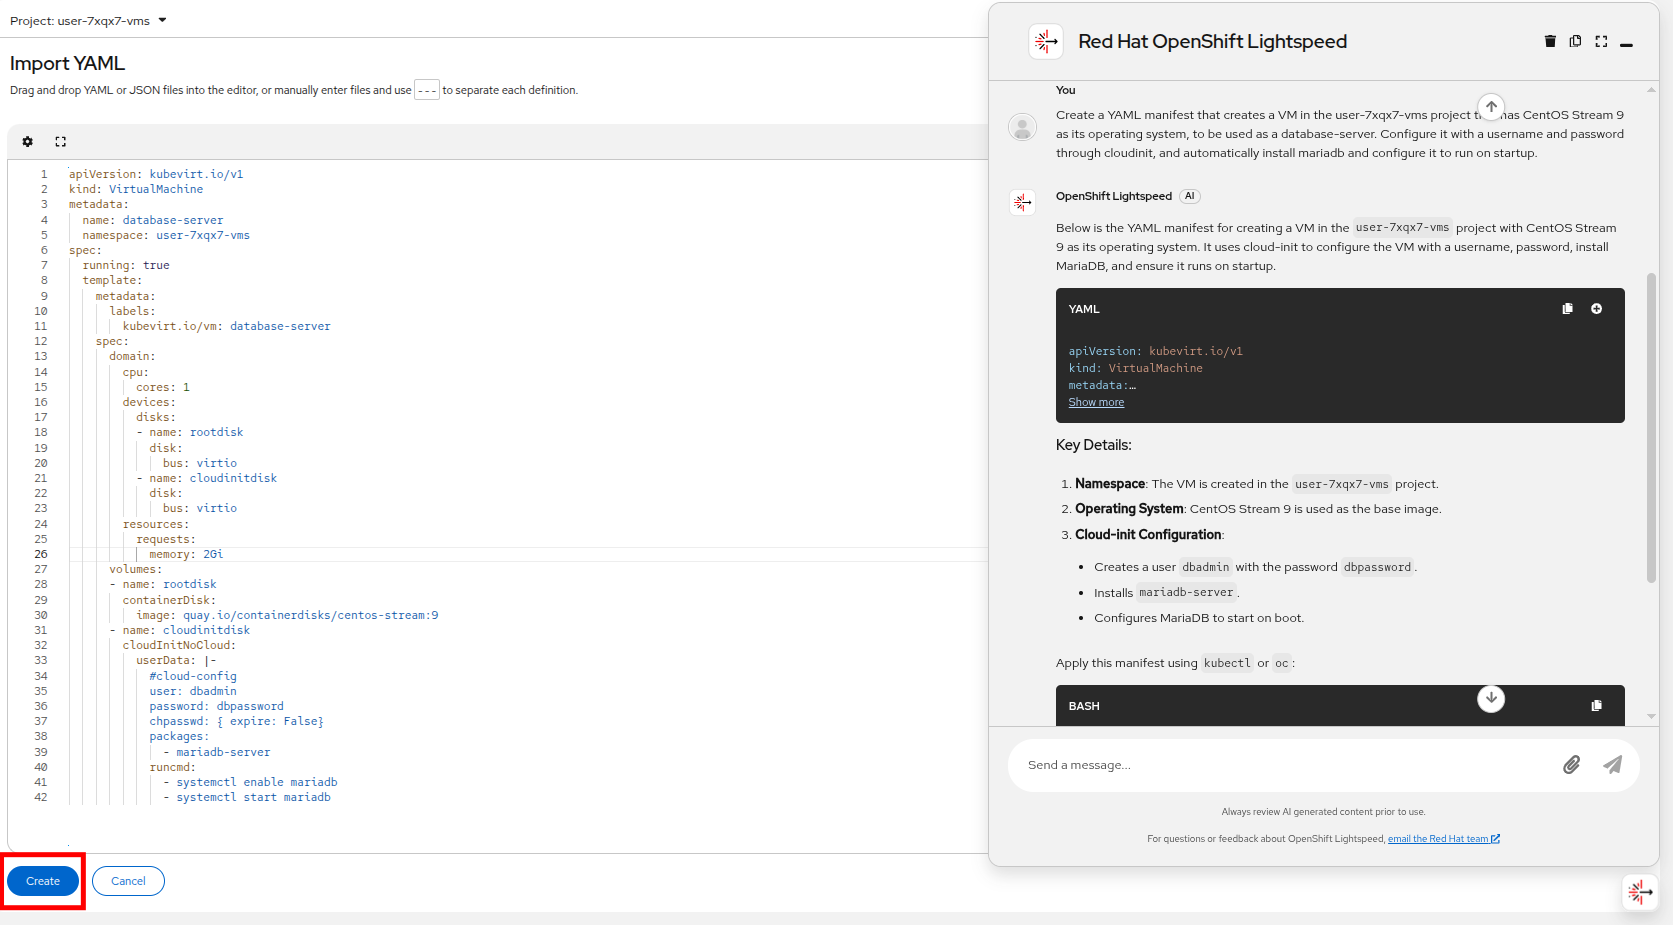
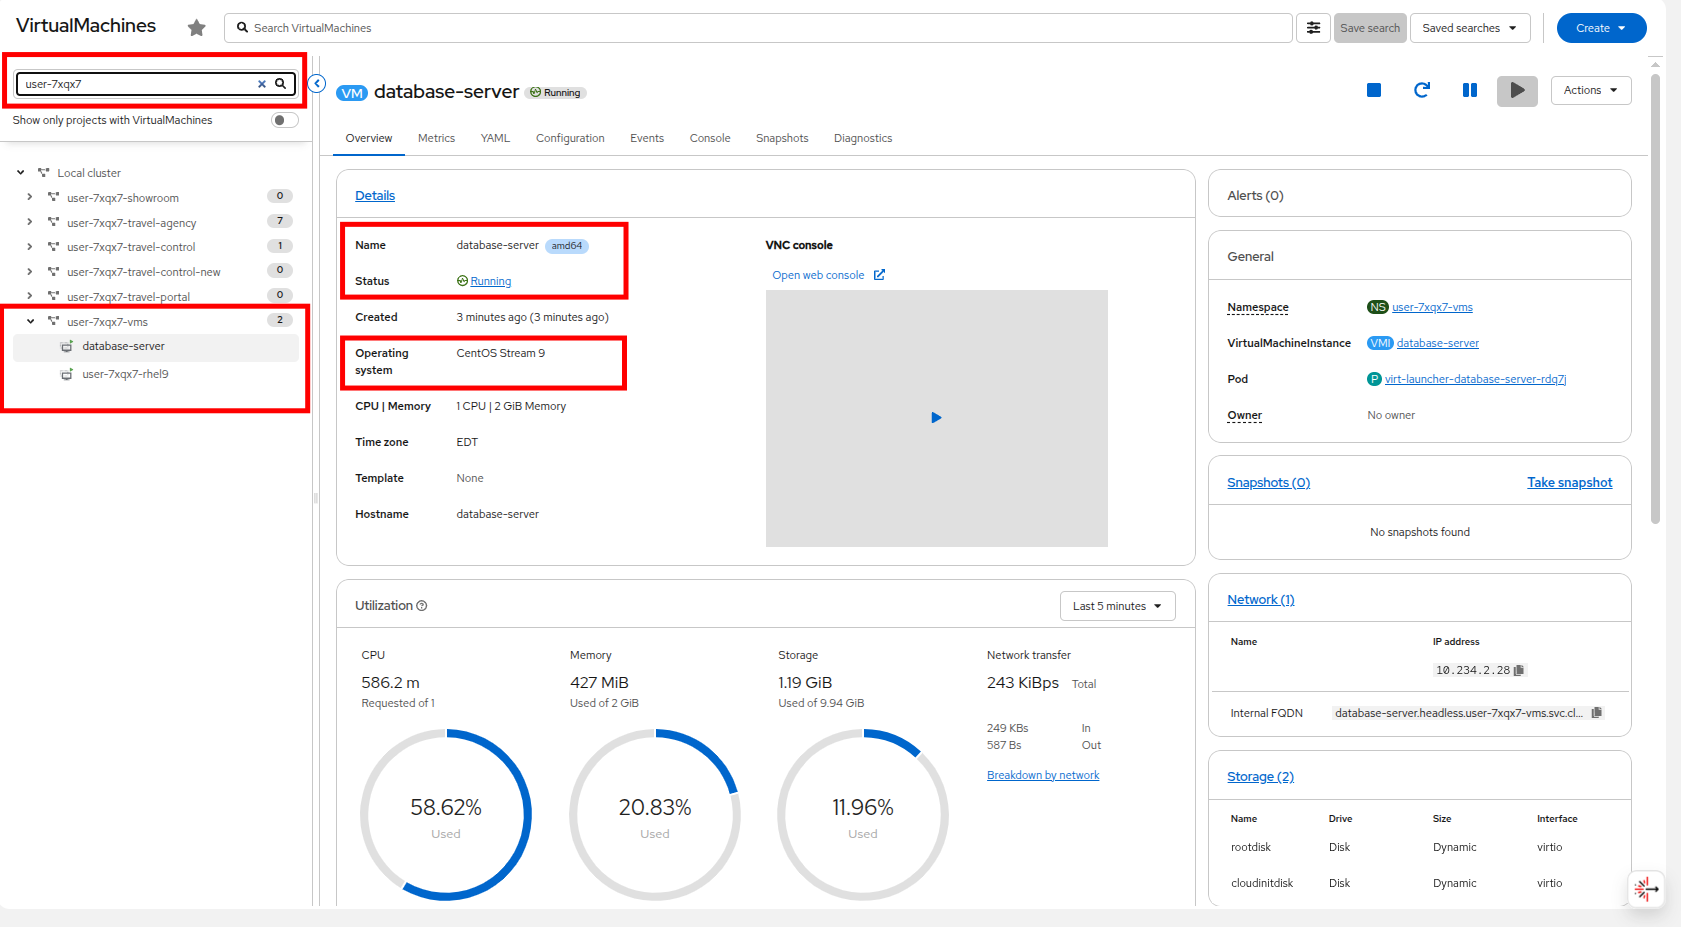
The VM should start provisioning and after a few moments it will enter the Running state. You can see that it was placed in the userX-vms namespace as directed, and is called database-server, and is running the CentOS Stream 9 operating system.
Click on the Console tab, and use the credentials to login, and verify that mariadb is installed, and running by using the following command:
sudo mysql -u root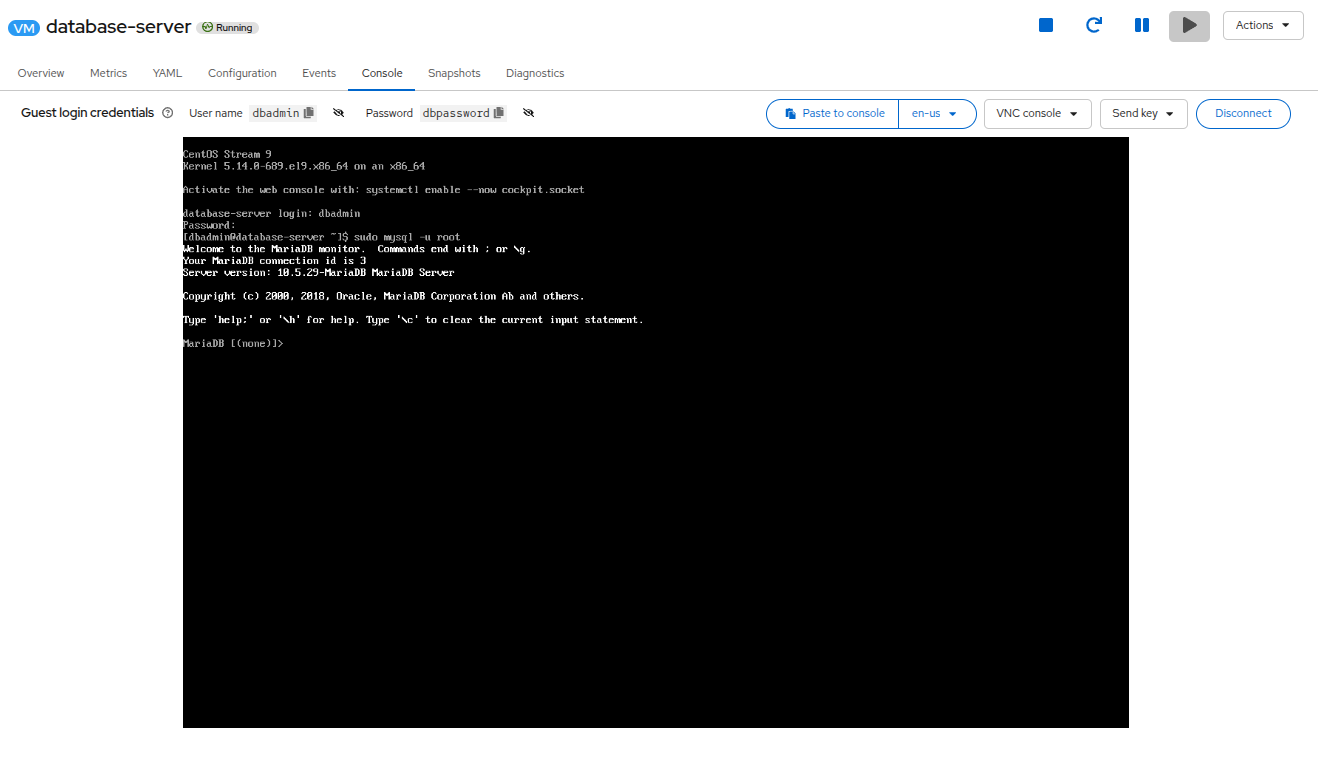
Troubleshoot a VM with OpenShift Lightspeed
In addition to answering basic questions about the platform, and generating configurations that can be used to deploy VMs or create other resources, OpenShift Lightspeed can also be used to troubleshoot issues with the platform and applications.
In this task we will configure a VM to fail on purpose, and then ask OpenShift Lightspeed if it can diagnose our issue to see what it says.
Ensure that you are in your userX-vms project and click the Create button in the upper right corner and select the From template option from the dropdown menu.
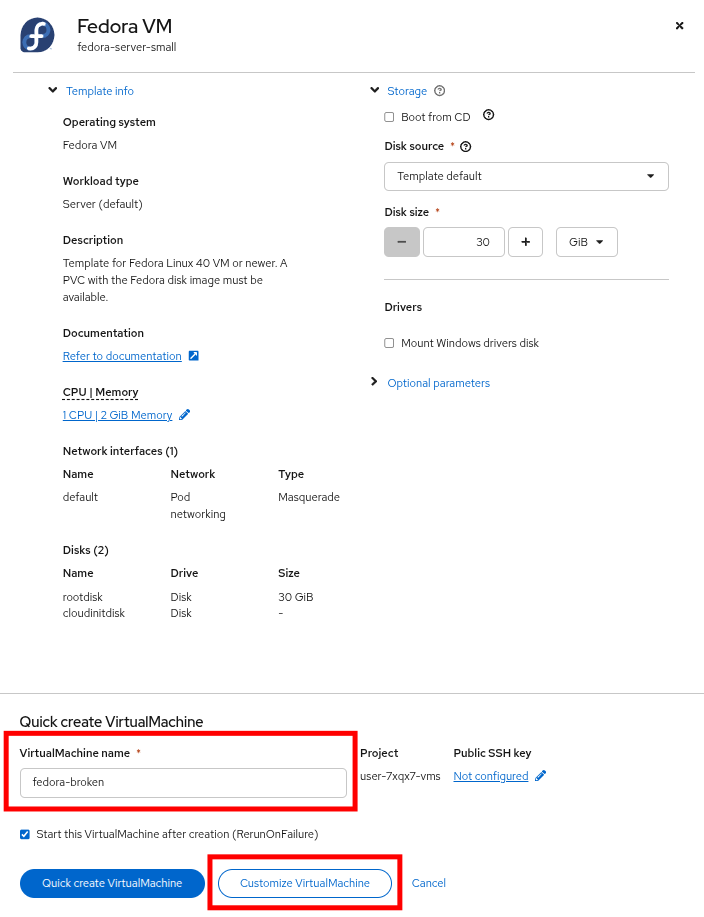
On the Create new VirtualMachine page select the tile for the Fedora VM.
When the Fedora VM dialog appears, name your virtual machine fedora-broken and click the button to Customize VirtualMachine.
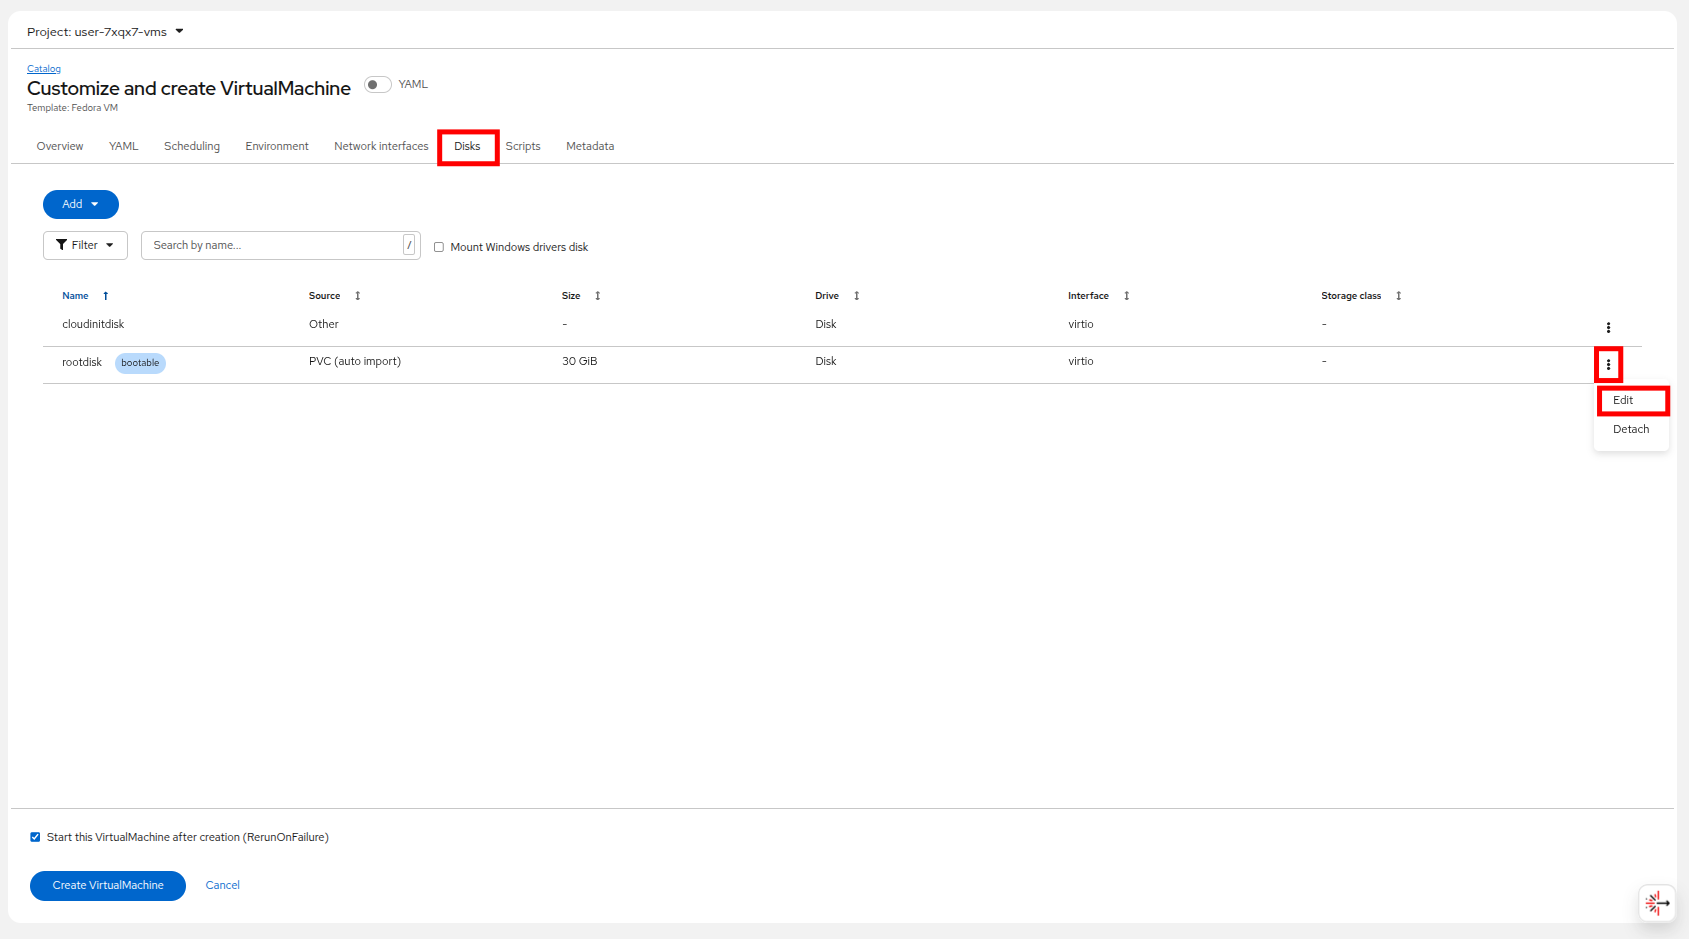
On the Customize and create VirtualMachine page, click on the tab for Disks and next to the default rootdisk click on the three-dot menu and select the Edit option.
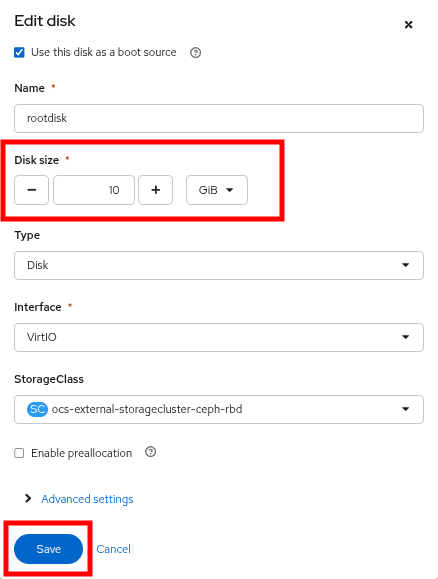
When the Edit disk dialog appears, change the disk size to 10GB, which is too small to provision the VM correctly.
Click the Save button on the dialog, and when returned to the main screen, click the Create VirtualMachine button.
| At this point it’s likely to assume that a person unfamiliar with how boot images work in OpenShift Virtualization thinks that they have created a VM with a small hard disk to conserve storage space. They may be confused as to why the VM won’t successfully boot. |
What happens in this scenario is that the VM will stay in the Provisioning state and will fail to progress to the Starting or Running states that we have seen in the past.
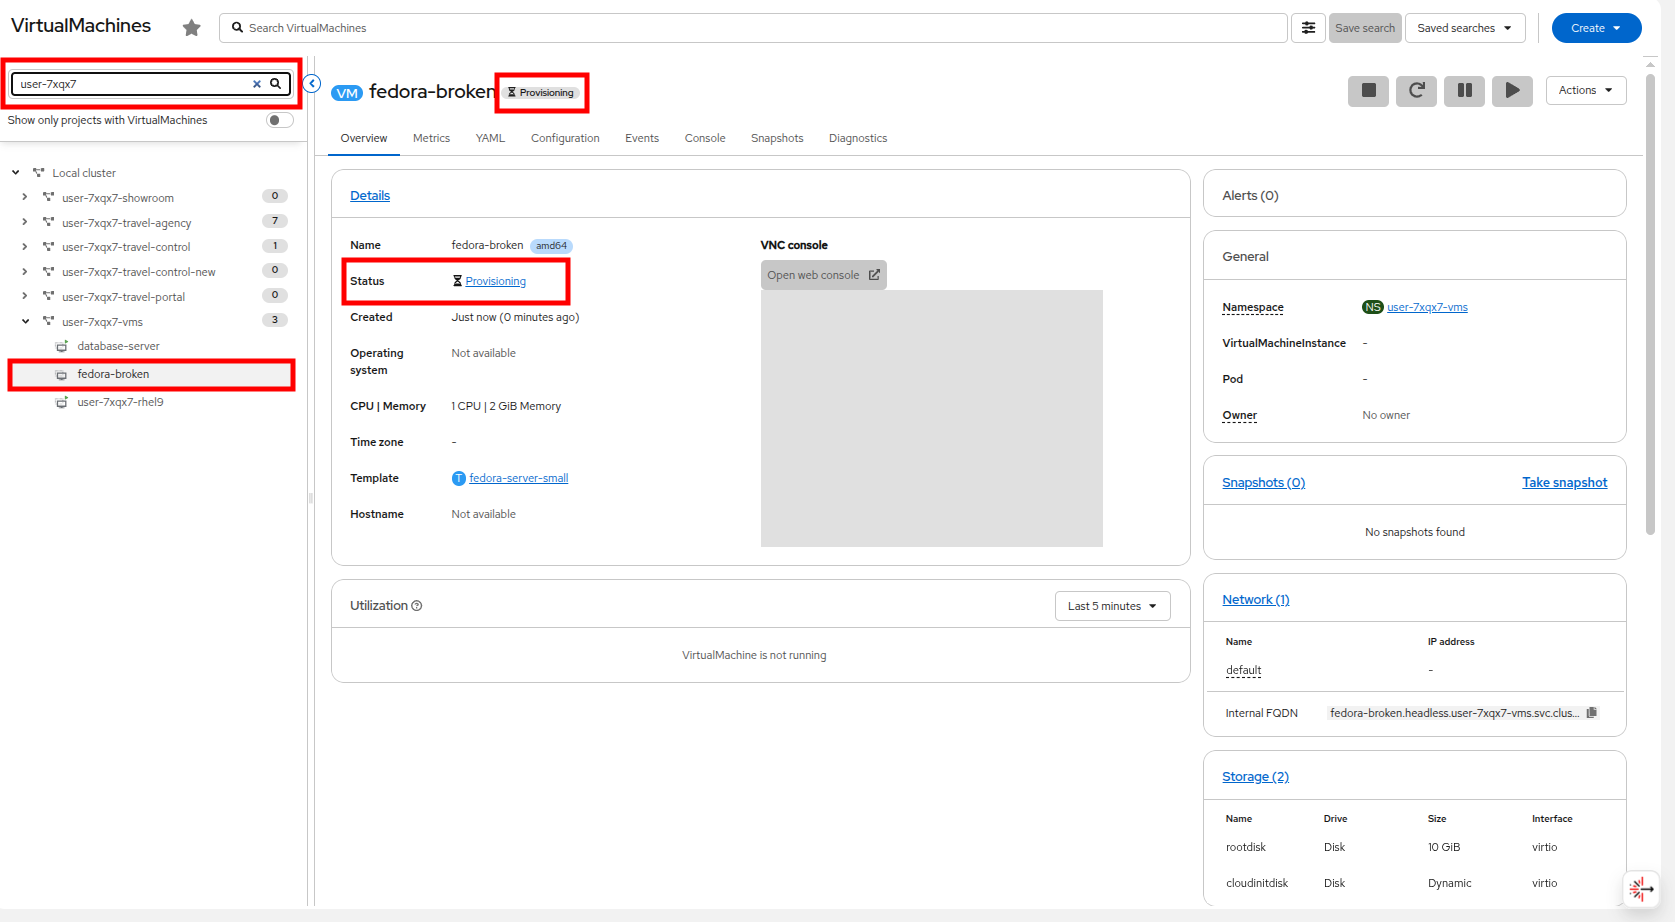
Clicking on the Events tab shows us that the DataVolume was created, and no additional information.

Putting ourselves in the shoes of our unfamiliar virtualization admin, this is where we ask OpenShift Lightspeed for help.
Click on the OpenShift Lightspeed icon in the bottom right corner, and ask it why the VM is unable to boot, and click the Send button.
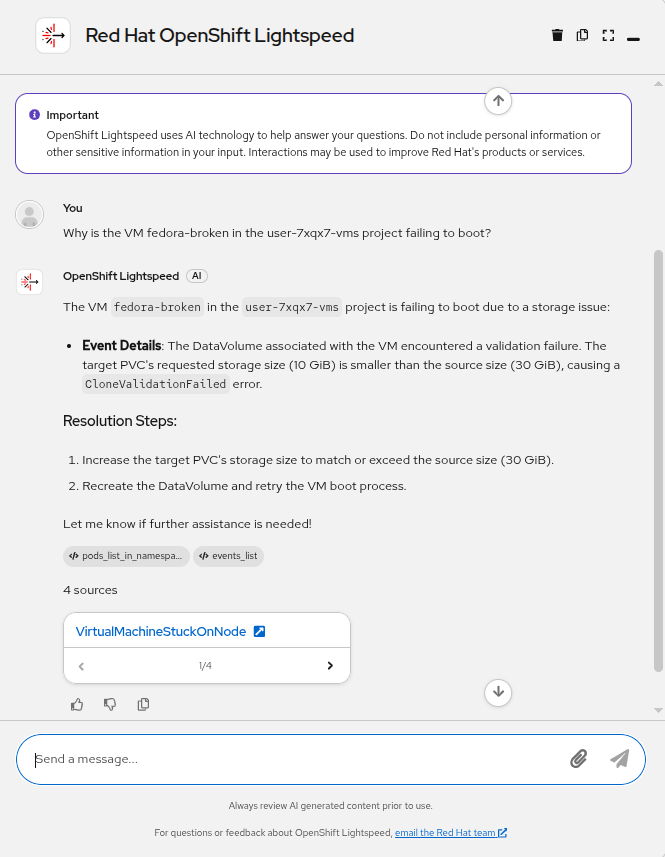
Why is the VM fedora-broken in the userX-vms project failing to boot?
OpenShift Lightspeed is able to diagnose the issue as storage-related, providing an error message about the DataVolume being smaller than necessary, and providing a potential resolution.
| Due to the nature of generative AI, there is a chance that your response does not look exactly like that provided in the screenshot above. |
| Prior to moving on to the next section, to conserve resources and ensure a smooth lab experience, make sure that any of the VMs created in the userX-vms project as a part of this module are shut down, and deleted. We will not be making use of them again. |