Module 03: Declarative management and automation of VMs with DevHub and GitOps
GitOps is a modern approach to infrastructure and application management that uses Git as the single source of truth for declarative system configurations.
By using Git repositories to define and manage infrastructure, GitOps enables automated deployment, version control, and continuous delivery. Changes are made through pull requests, ensuring consistency, auditability, and rollback capabilities. This approach improves collaboration among teams while reducing human errors.
Furthermore you can make use of a tool like Red Hat Developer Hub, to define your virtual machines and other application workloads in a declarative manner that makes it easy for GitOps to deploy and manage.
This module will give you a brief look into how you can declaratively manage virtual machines, and then how virtual machines can be deployed and managed in a more modernized manner by using GitOps.

Objectives
-
Introduction to Red Hat Developer Hub
-
Declarative definitions of virtual machines
-
Advanced operations with Red Hat Developer Hub
-
Introduction to Red Hat OpenShift GitOps
-
Understanding OpenShift GitOps for Virtual Machines
-
Configure and manage the
travel-controldomain with GitOps
Introduction to Red Hat Developer Hub
Red Hat Developer Hub (RHDH) is an enterprise-grade internal developer portal designed to simplify and streamline software development processes. Combined with Red Hat OpenShift Container Platform, RHDH empowers platform engineering teams to create customized portals that improve developer productivity, accelerate onboarding, and enable faster application delivery.
By reducing friction and complexity, RHDH allows developers to focus on writing high-quality code while adhering to enterprise-class best practices.
RHDH integrates software templates, pre-designed solutions, and dynamic plugins into a centralized platform, providing tailored solutions for operations and development teams in a unified environment.
Key features
Centralized Dashboard Provides a single interface for accessing developer tools, CI/CD pipelines, APIs, monitoring tools, and documentation. Integrated with systems like Git, OpenShift, Kubernetes, and JIRA.
Dynamic Plugins Add, update, or remove plugins dynamically without downtime. Popular plugins like Tekton, GitOps, Nexus Repository, and JFrog Artifactory are supported and verified by Red Hat.
Software Templates Simplify development processes by automating tasks such as repository setup, variable insertion, and production pipeline creation.
Role-Based Access Control (RBAC) Manage user access with granular security permissions tailored to organizational needs.
Scalability Support growing teams and applications while maintaining access to the same tools and services.
Configuration Management Centralized repositories ensure synchronized updates, improving version control and environment configuration.
Declarative definitions of virtual machines
For this section of the lab we are going to show how Red Hat Developer Hub can be used to define the definition of a virtual machine in a declarative form, which allows it to be easily self-provisioned on-demand, or to be incorporated into a GitOps based workflow that deploys and managed the lifecycle of the VM.
To get started click on the Developer Hub tab on the right side of your showroom console, and click on the Sign In button.

A new window will pop up and give you the option to login with your cluster credentials again.
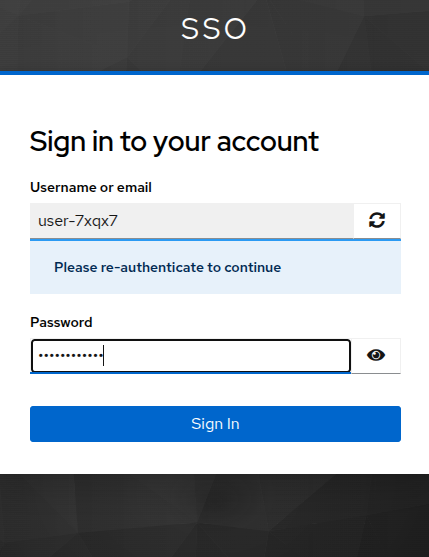
As a reminder, you may use the following details to reauthenticate to your Red Hat OpenShift environment:
-
Username: userX
-
Password: password
When you authenticate you will be presented with the Red Hat Developer Hub home screen with options to Get started, Explore, and Learn.

Get Started - This section provides easily accessible links to documentation to learn more about developer hub. Explore - This is a link to the Catalog of APIs and Templates that are defined for your developer-centric projects. Learn - This is a link to various Learning Paths curated training courses developed by Red Hat personnel to help you to make the most out of your new application platform and its versatile tools.
The right hand side shows you were you can configure Red Hat Developer Hub by configuring Authentication and RBAC for users as to what projects and tools they can access, set up Git repositories, and manage plugins.
Now that we’ve seen the home screen, lets make use of Developer Hub to create a virtual machine.
Click on the Catalog item on the left.
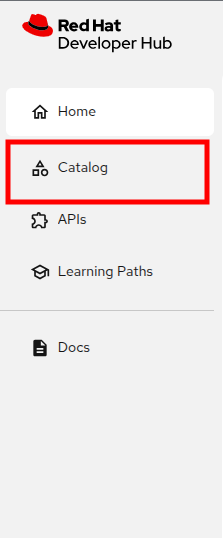
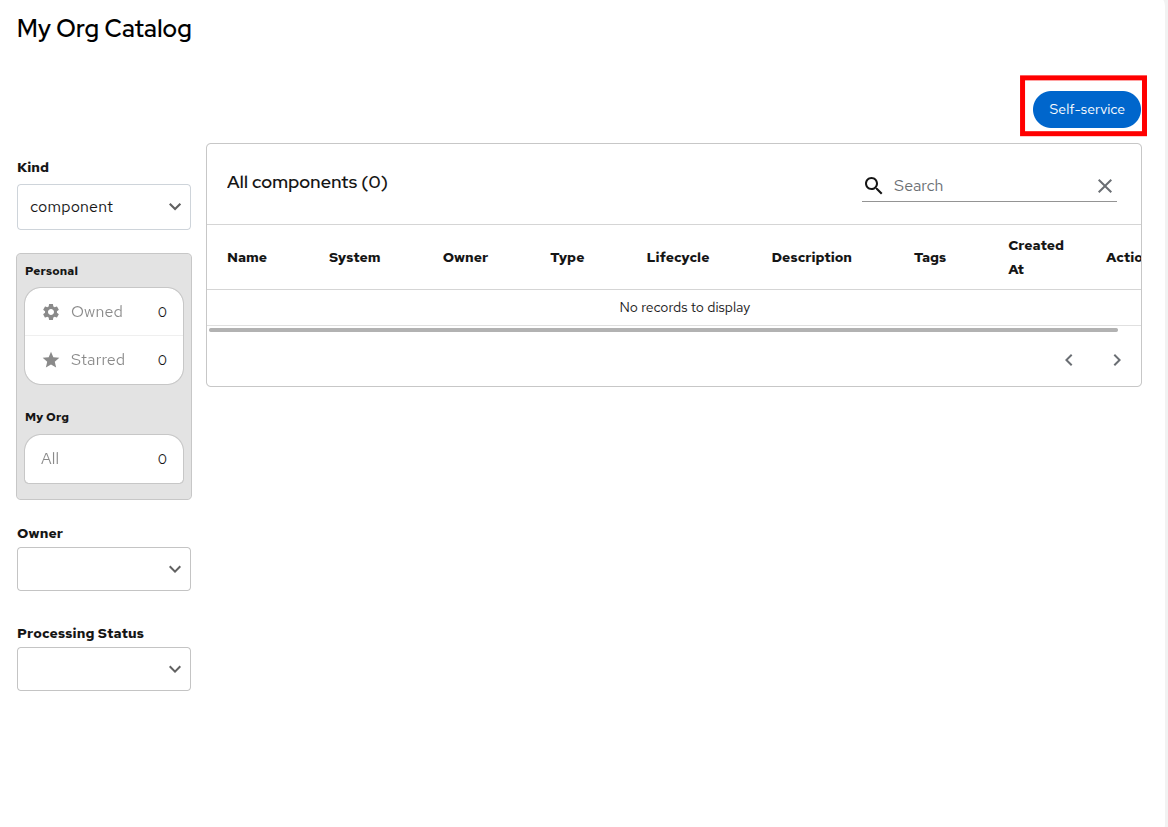
In the My Org Catalog screen you will see that there is nothing currently defined. Click the Self-service button to get started.
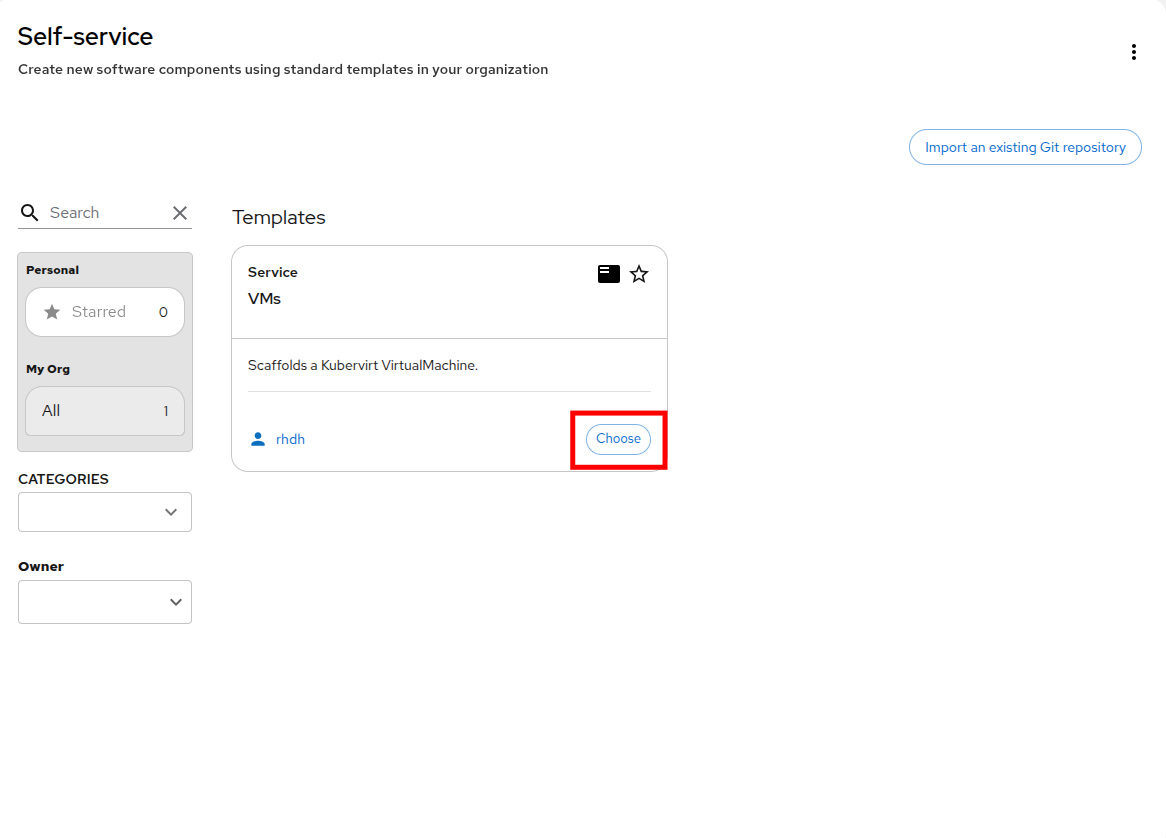
When you reach the Self-service screen you will notice that a Template has been loaded which uses a Git repository to scaffold a virtual machine. You may also notice there is a button that allows you to import your own Git repositories if you would like to work on other projects.
Click the Choose button on the VMs template to move to the next step.
The next screen on the Self-service wizard shows us the template has been loaded and you just need to enter a name for the application name.
Enter your username in the Application Name field, and then click the Review button to proceed.
userX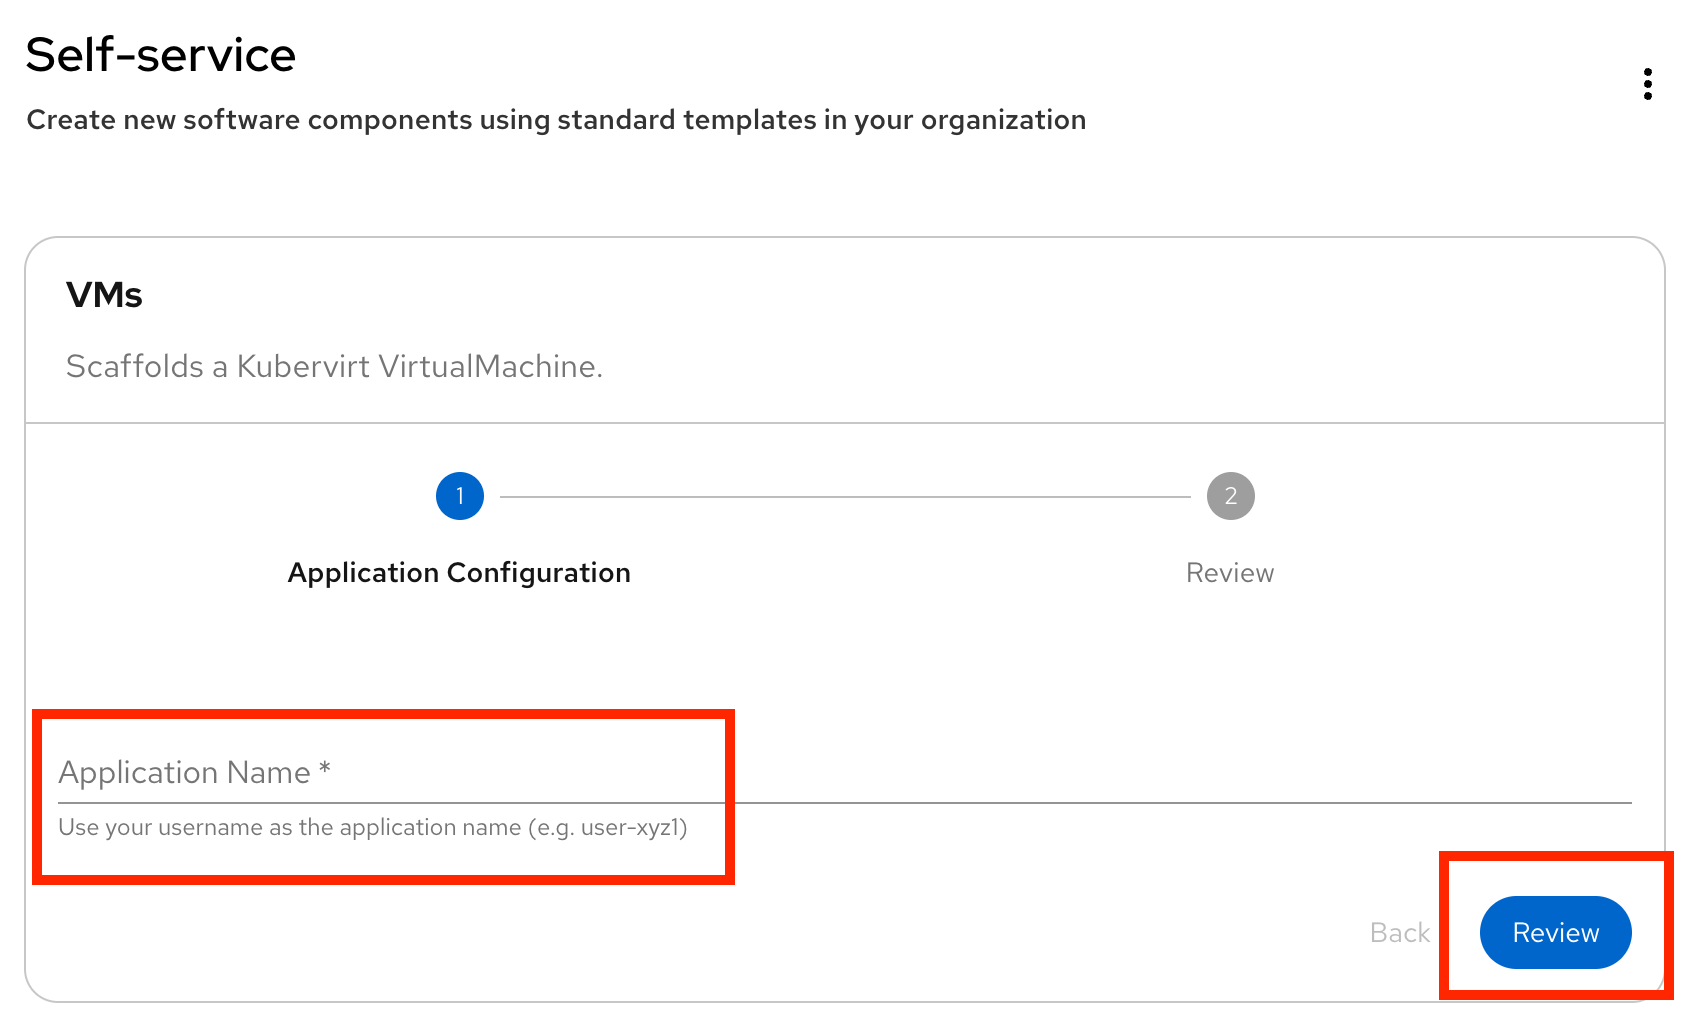
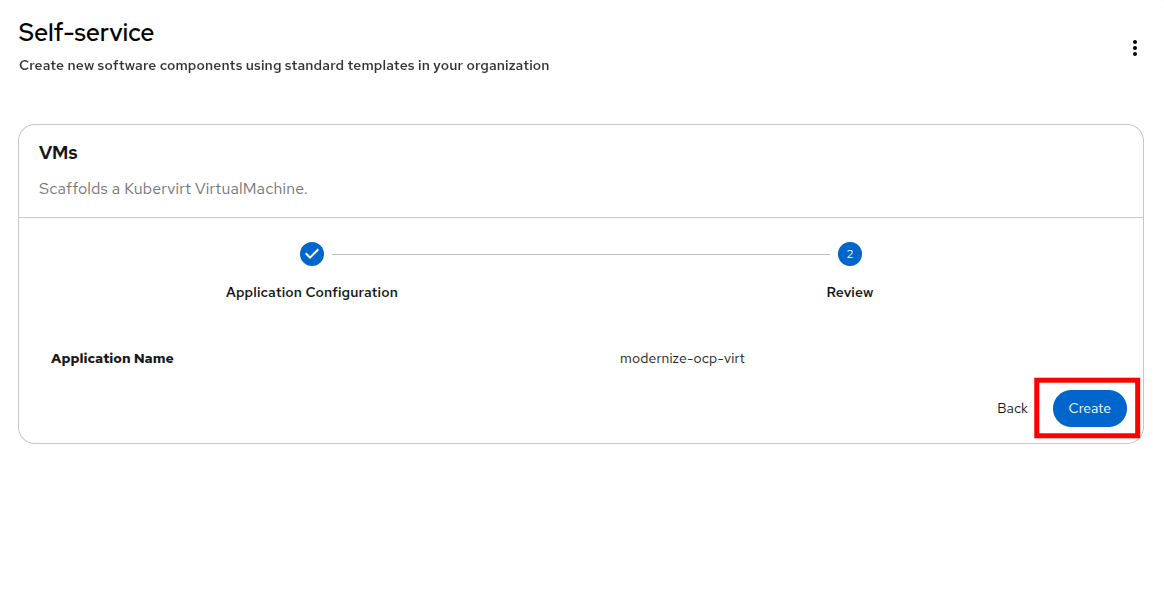
On the next page click the Create button.
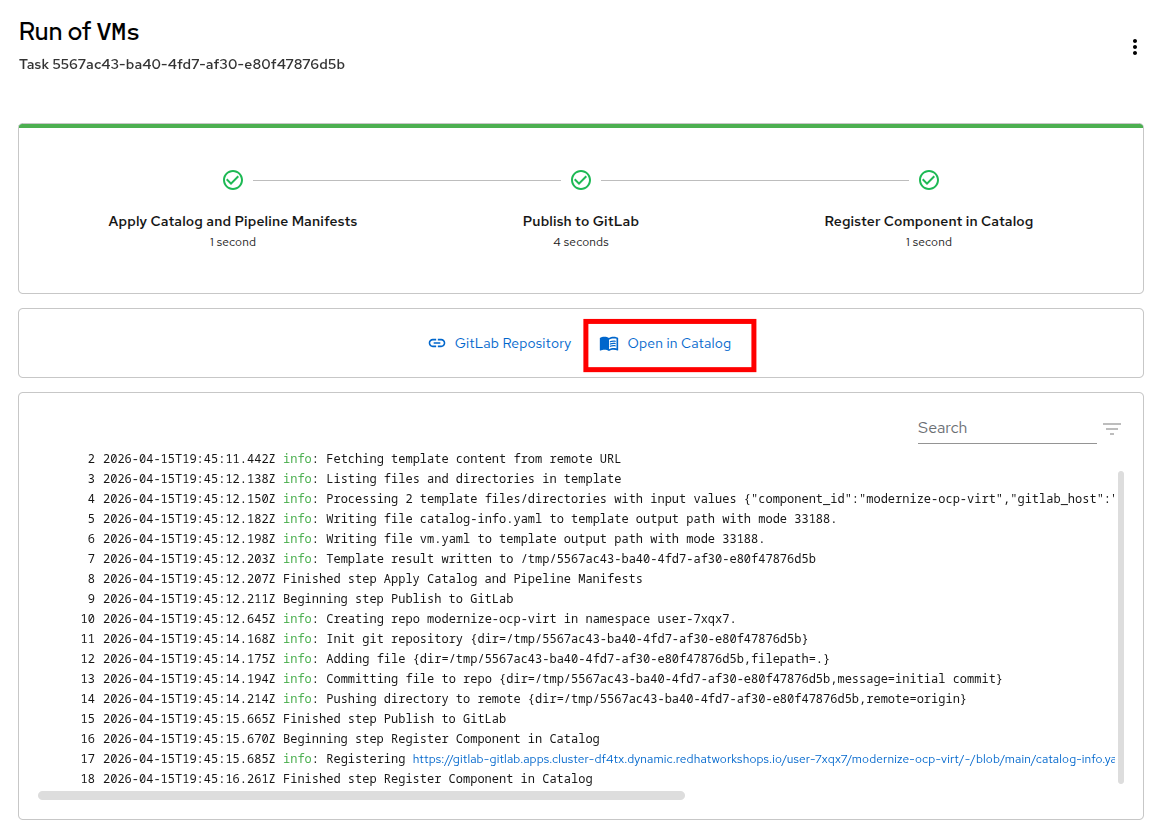
Red Hat Developer Hub will load the code from the GitLab repository that was configured for use and use that to declaratively create the definition of a Virtual Machine. You will see as it completes the process successfully.
When you have looked over the output from the build, click the Open in Catalog button.
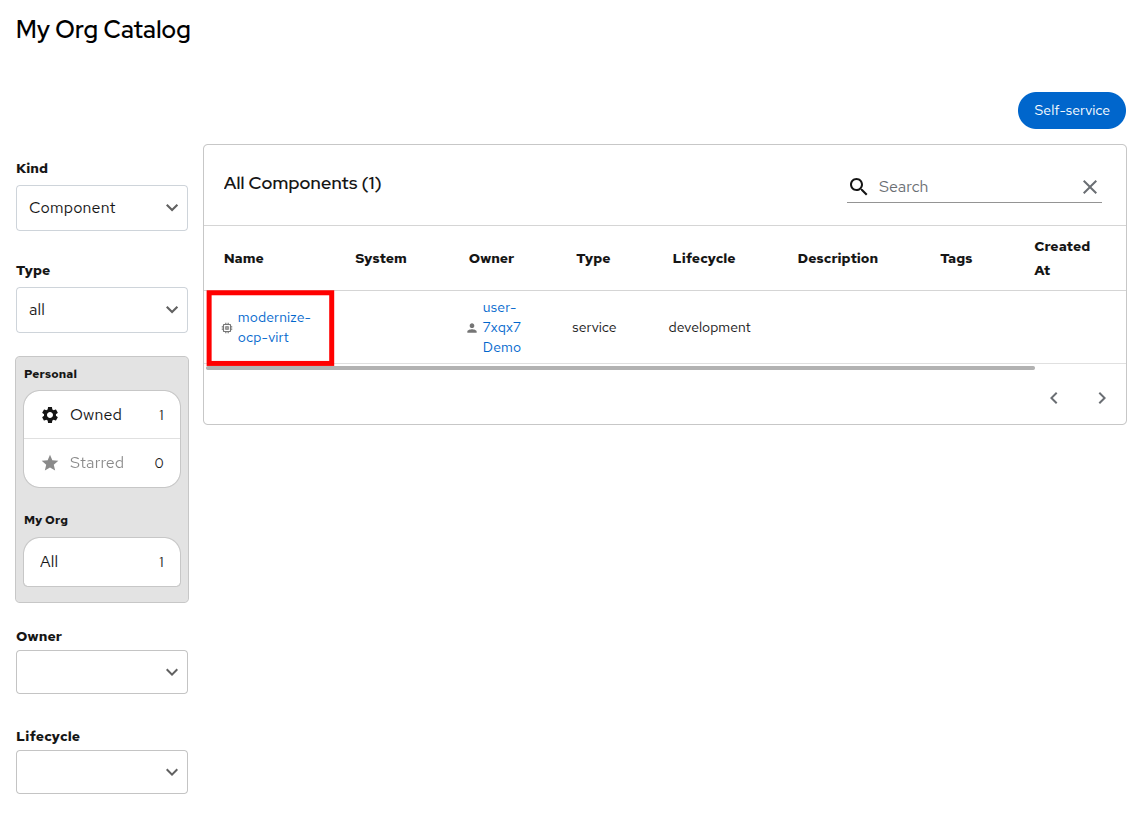
You will be taken back to the My Org Catalog screen which now lists a built component with the name of userX. Click on that.
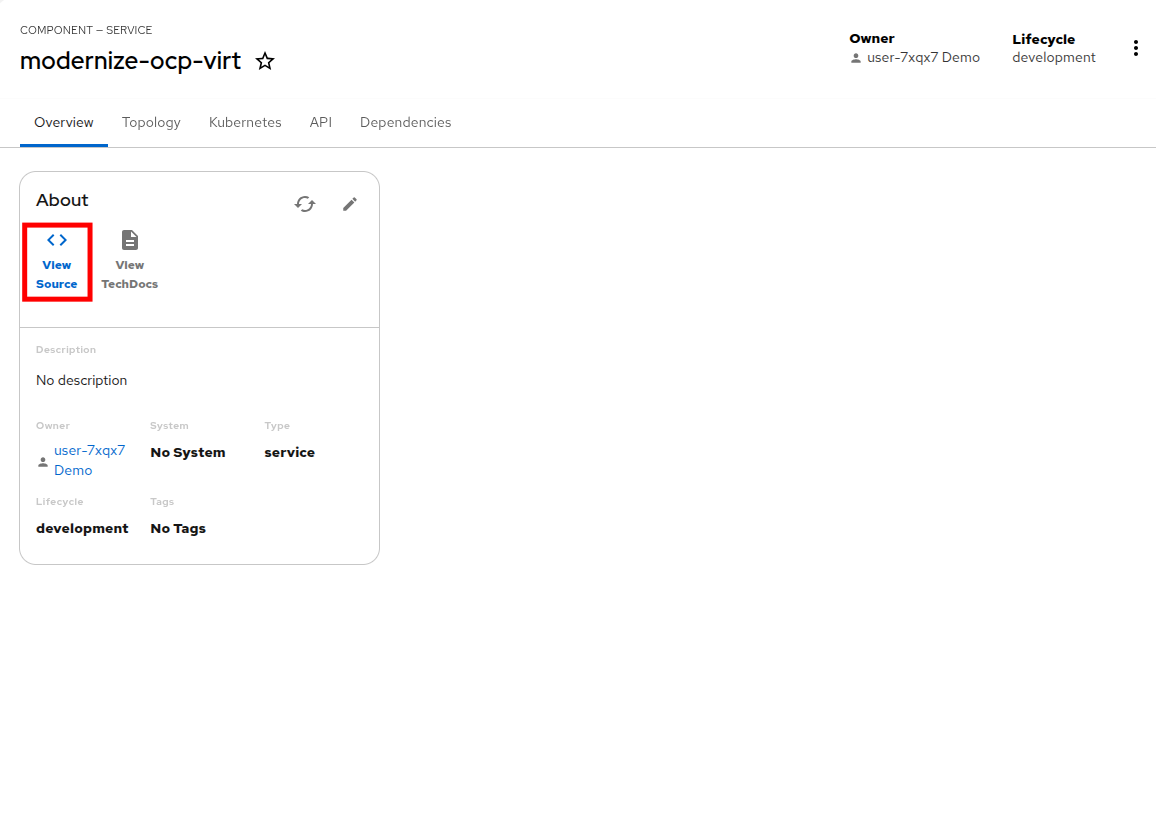
You will be taken to the component view of the userX application that was just built from the Git repository, and will we be given an option to view the source that was created. Click the View Source icon.
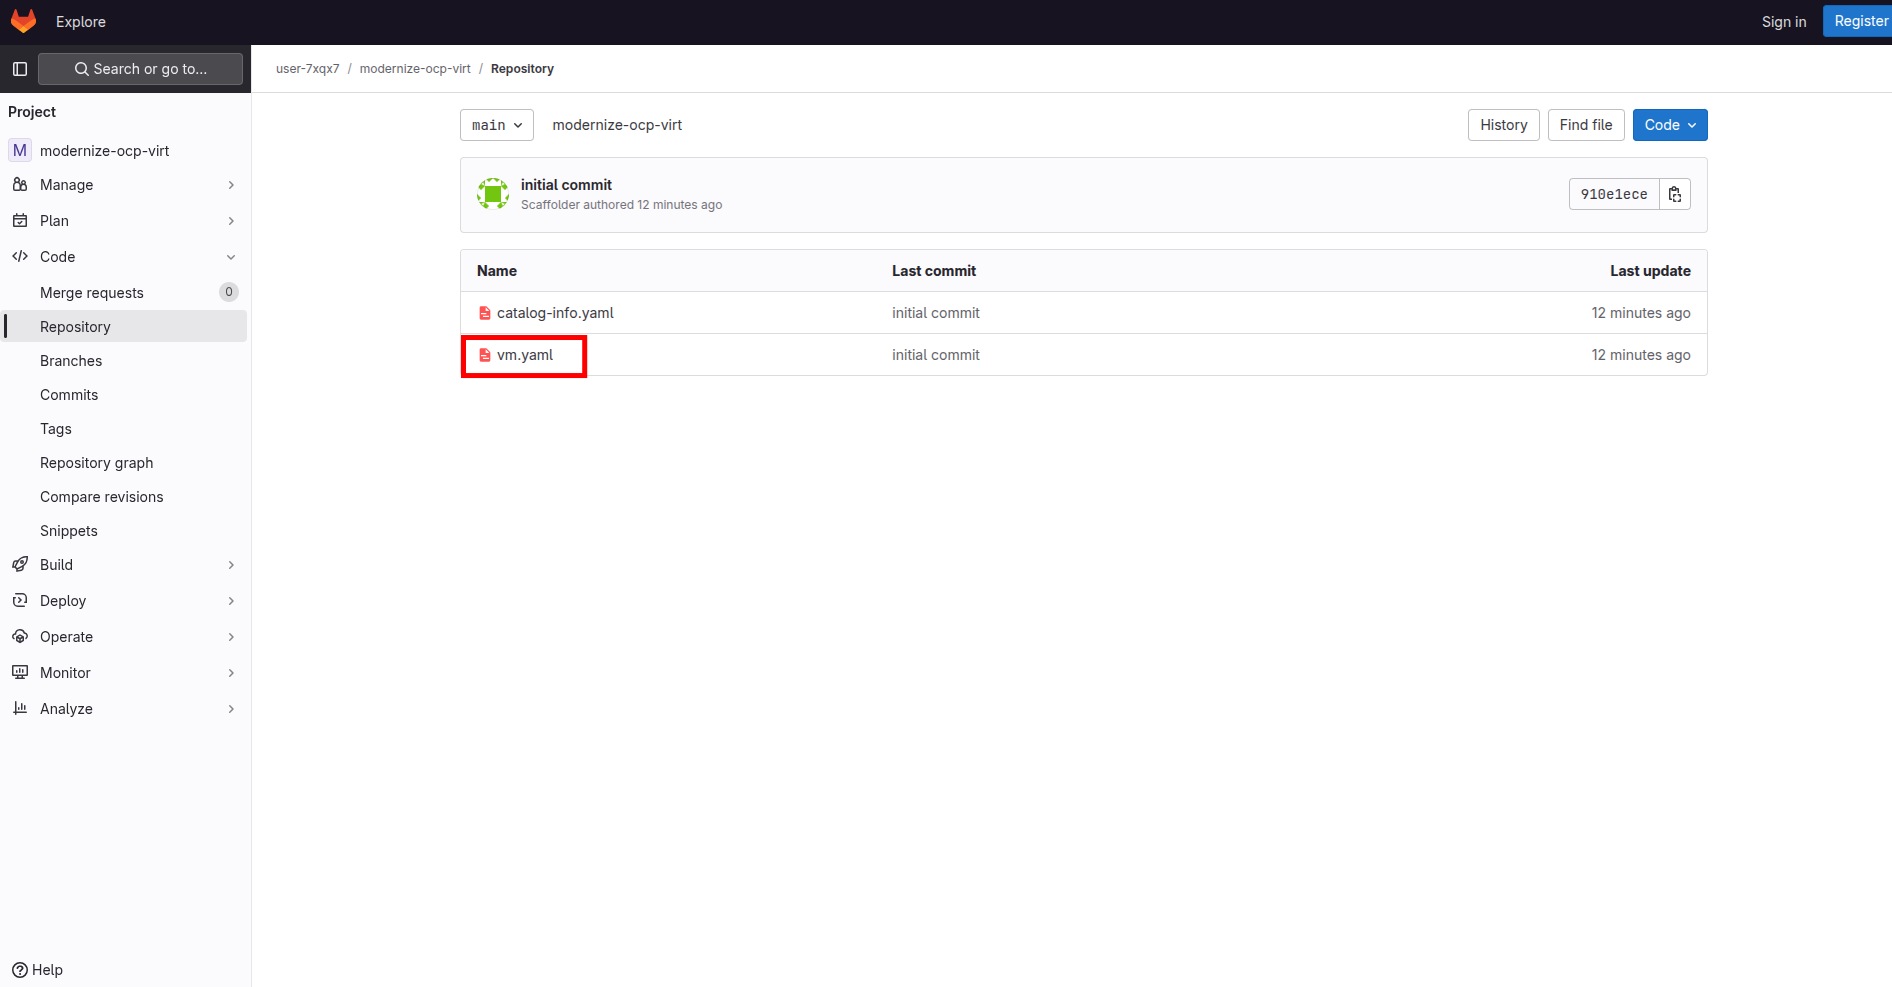
A new tab will load that opens the GitLab repository, and you will see two YAML files that have been created, the catalog-info.yaml and the vm.yaml which defines our virtual machine. Click on the vm.yaml file to see its contents.
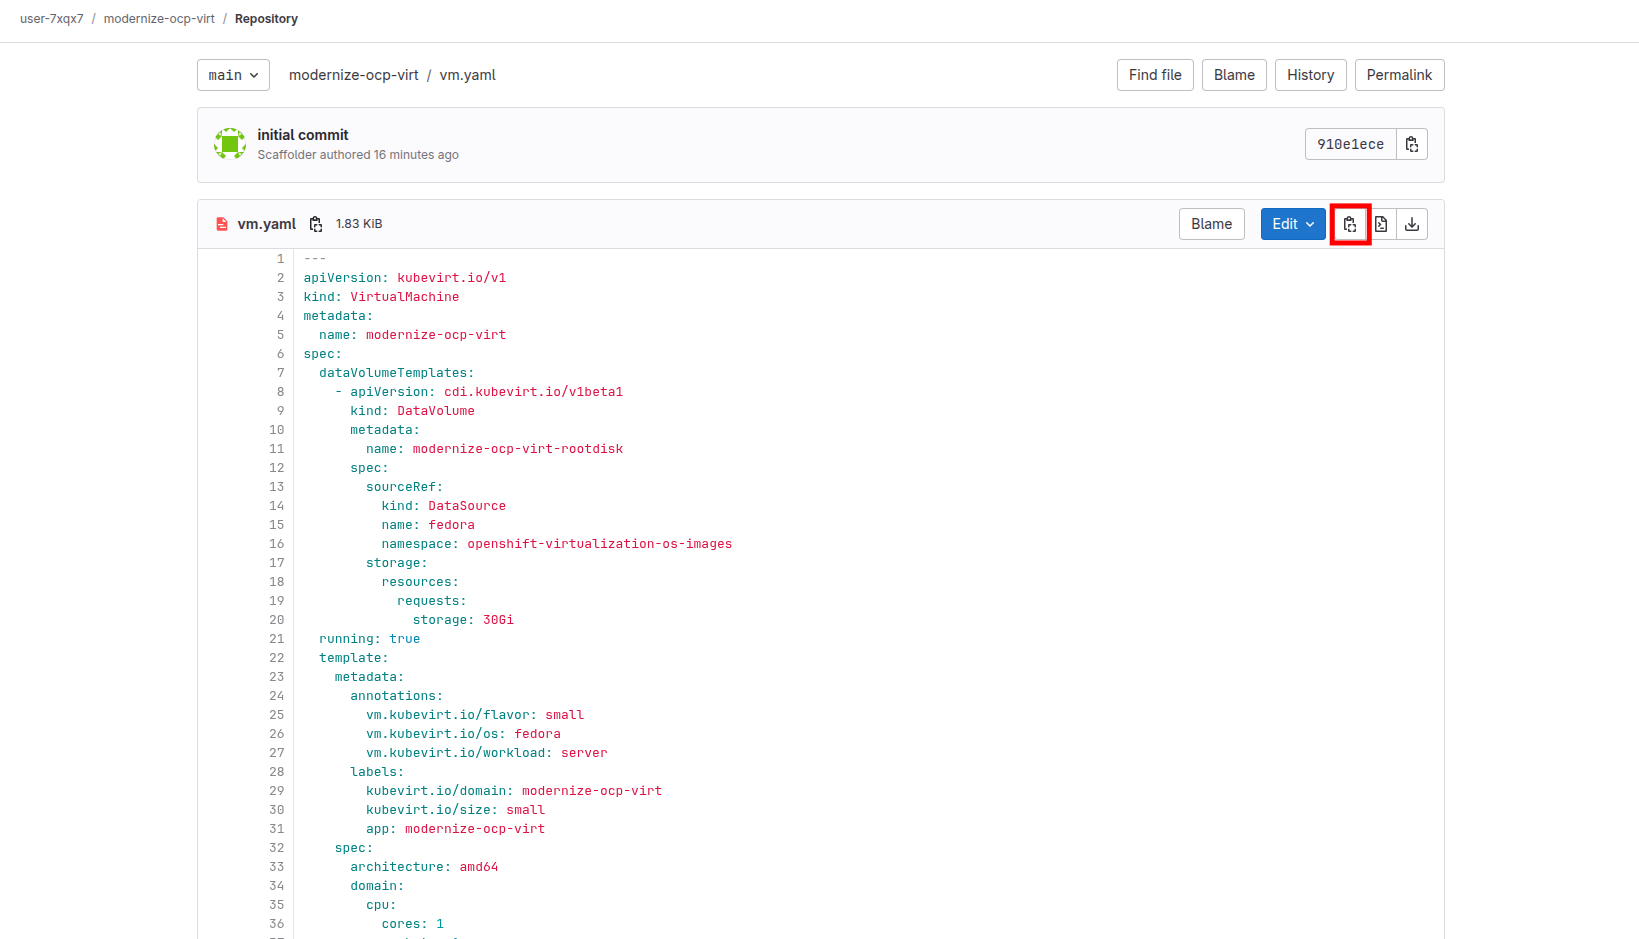
You will be presented with the YAML definition of the virtual machine that you created through the self-service catalog. We can use this definition to declaratively create a virtual machine, in the same manner we did using the YAML provided by OpenShift Lightspeed in the first module.
Click the 'Copy to clipboard' icon in the corner.
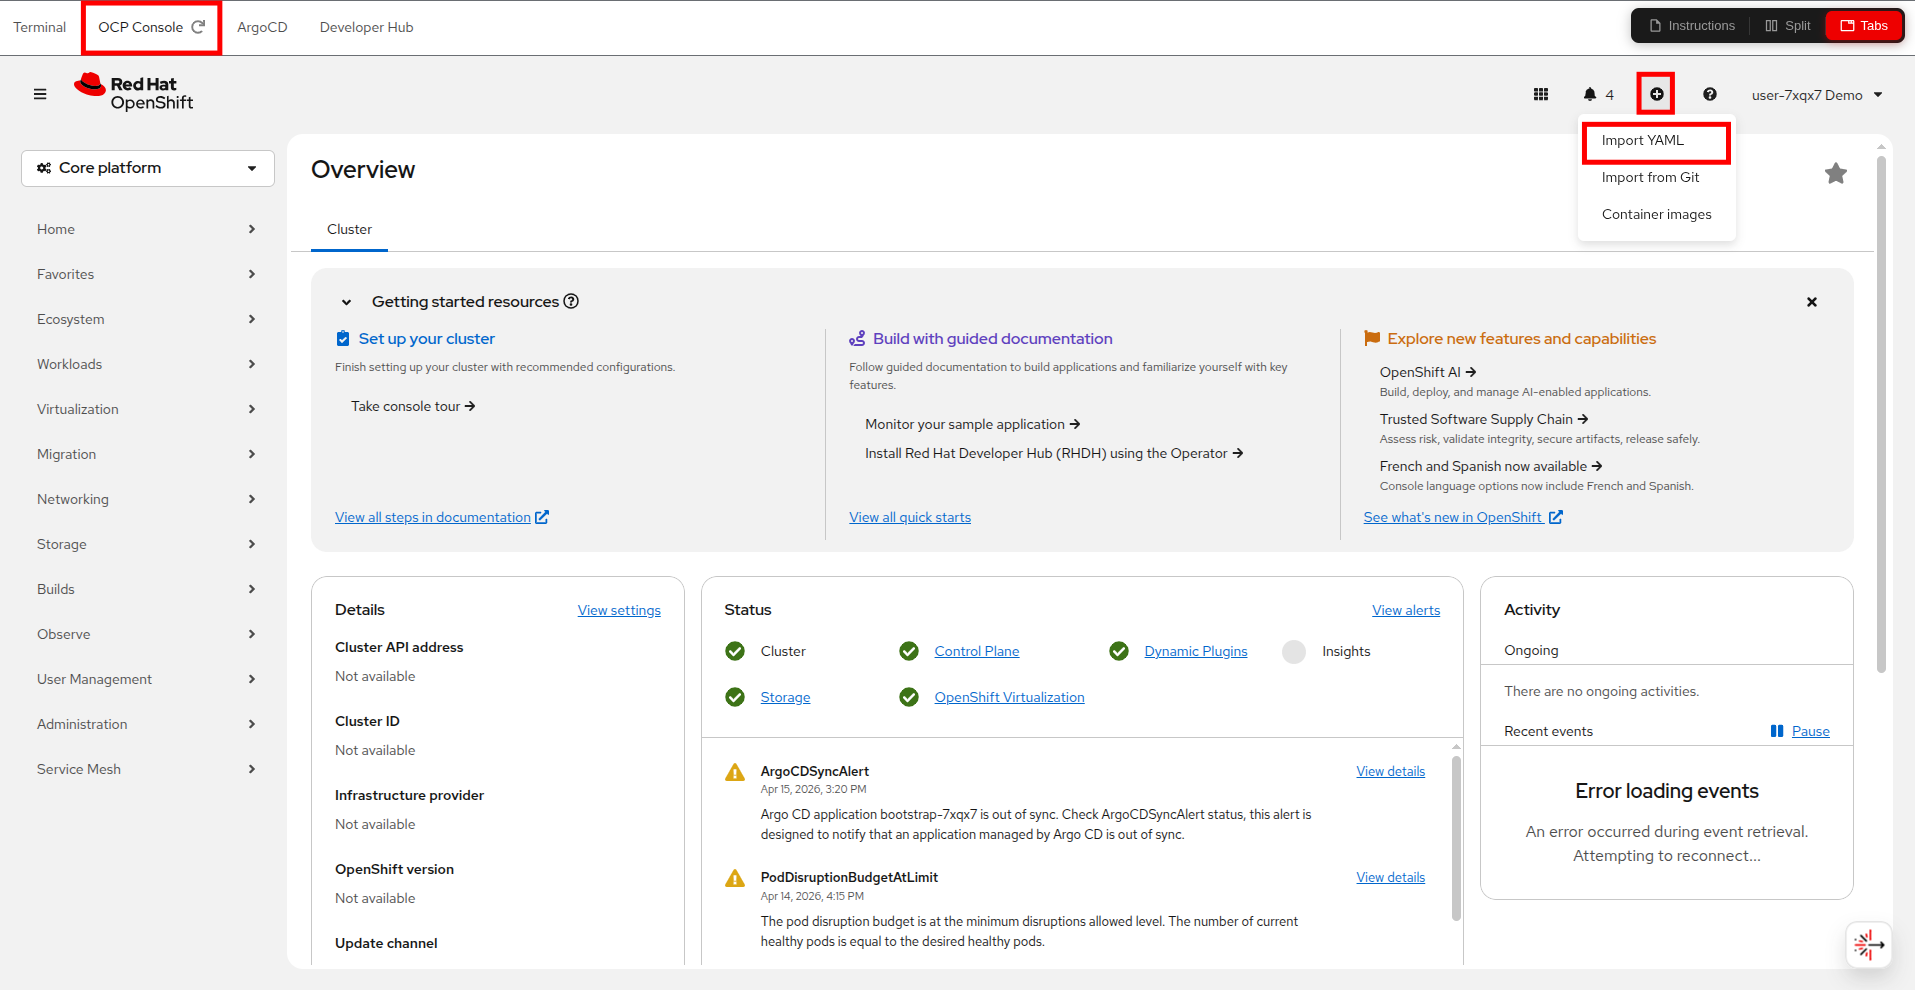
Return to your Red Hat OpenShift console, either through the embedded tab, or another window you have had open, and click on the 'plus sign' and click on Import YAML from the drop-down menu.
Make sure you select your userX-vms project from the Project list, then paste in the YAML definition for the virtual machine you created in Red Hat Developer Hub, and click the Create button.
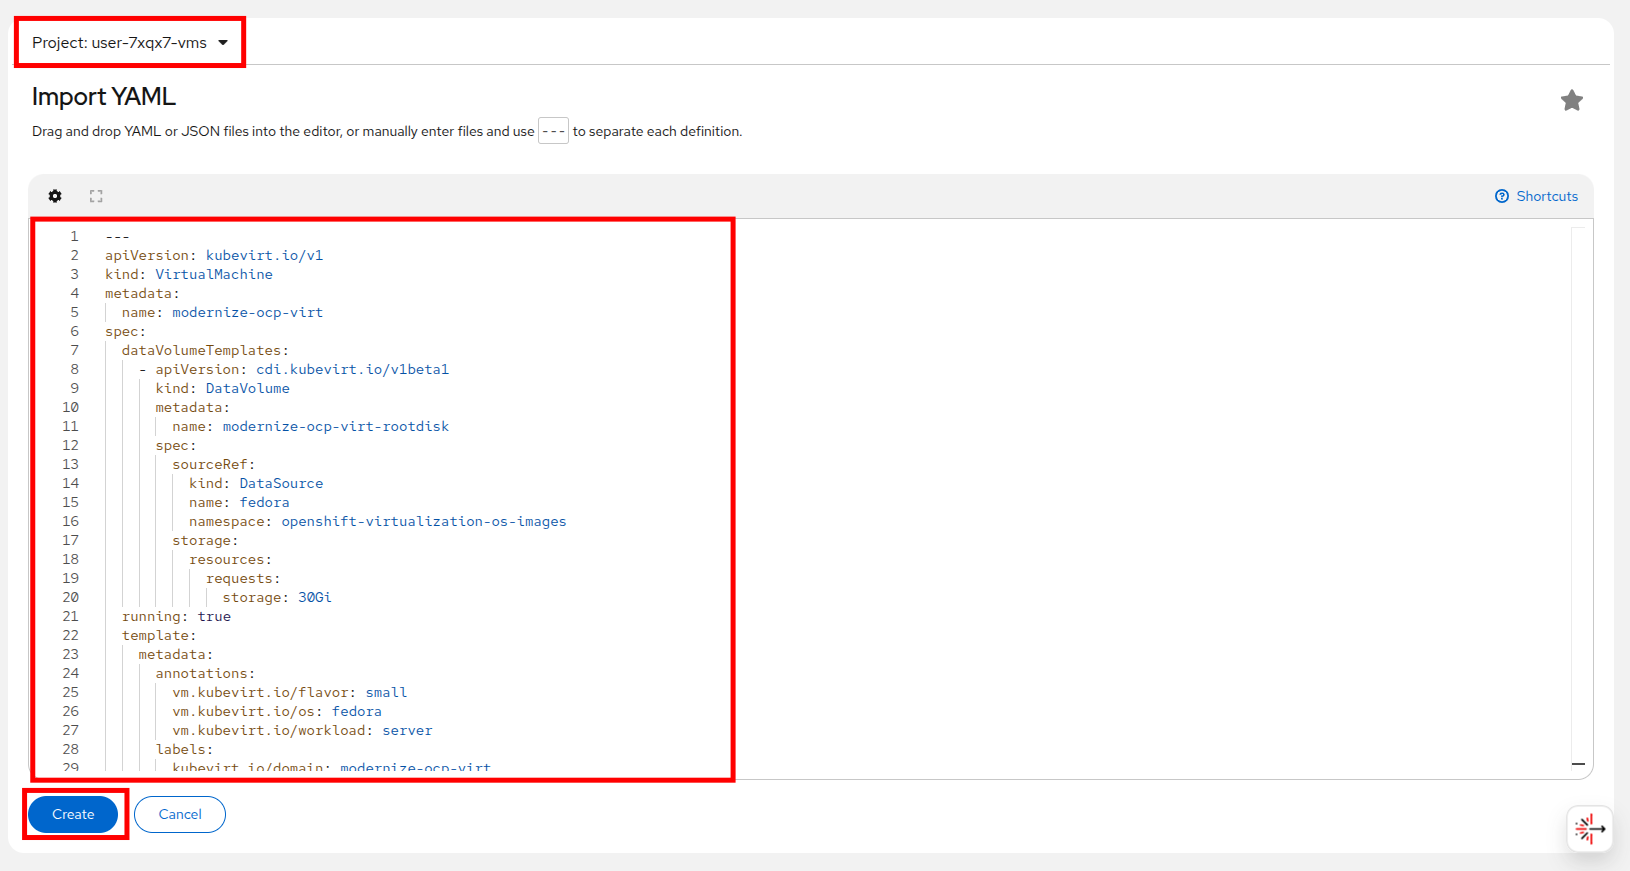
You will be taken to the VirtualMachines view where you should see your VM shortly enter the Running state.
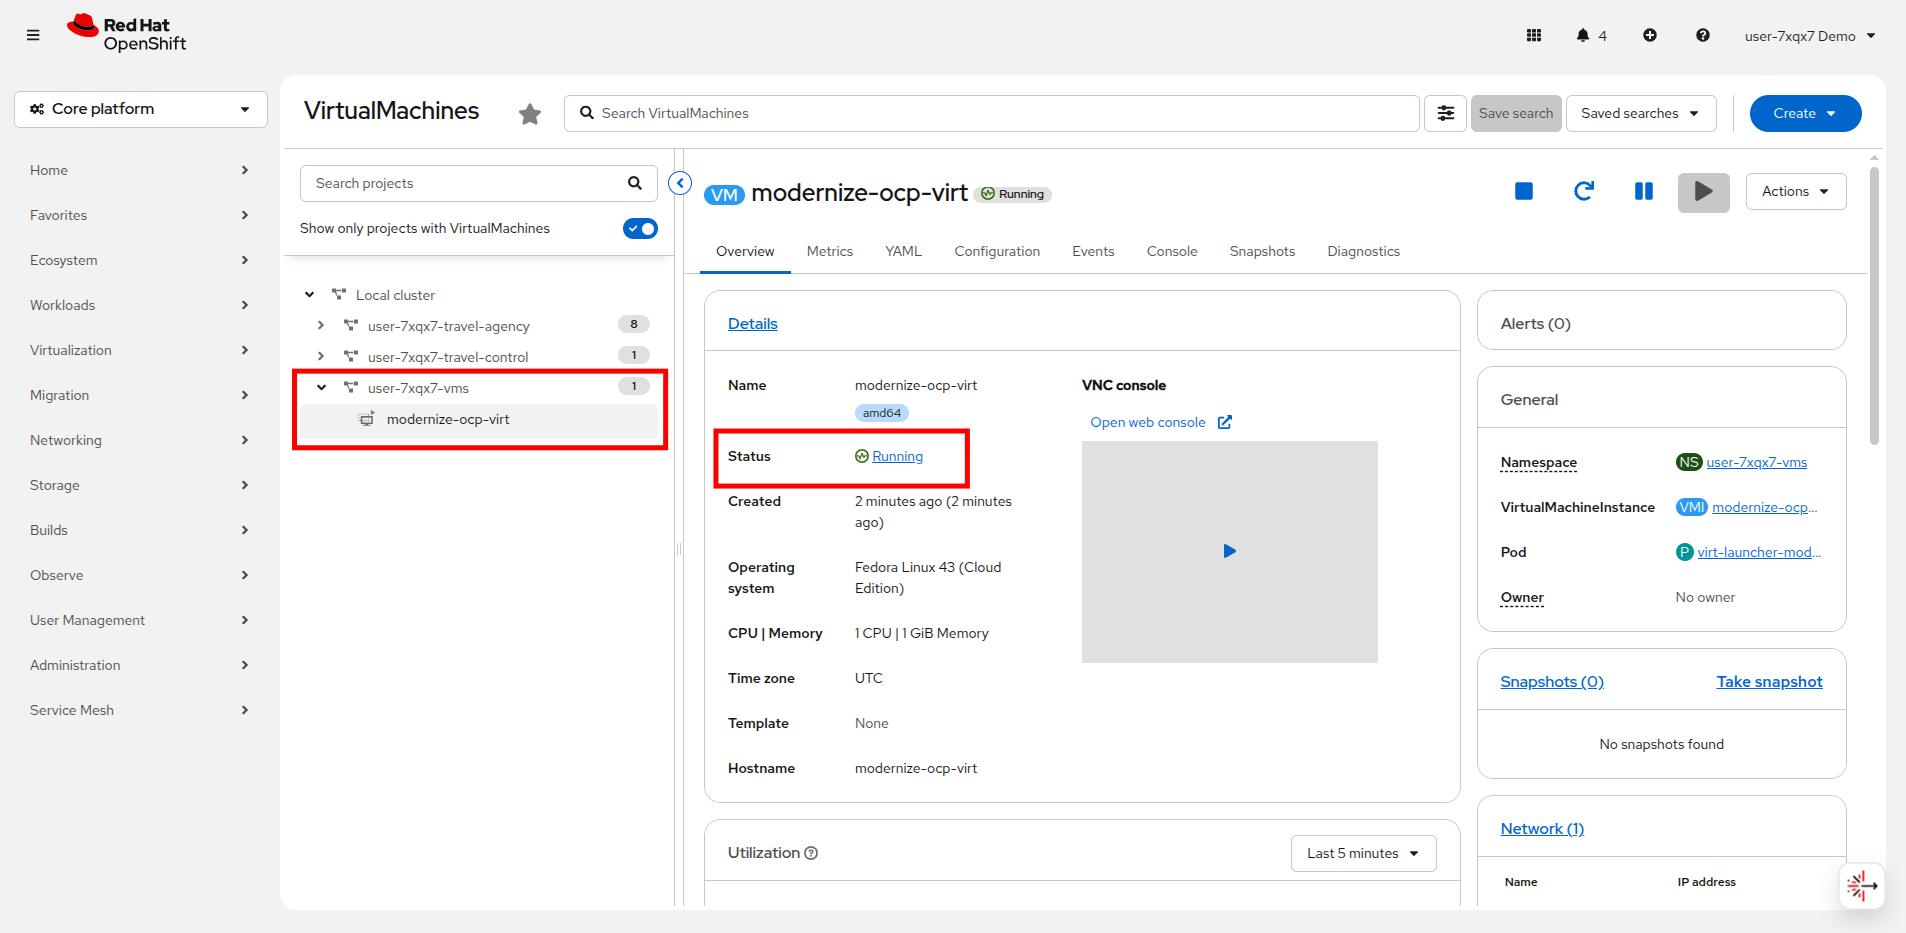
Success, you have used Red Hat Developer Hub to successfully provision a virtual machine through a declarative definition.
While this was a very simple example, it allows you to begin to imagine the possibilities. Virtual machines with pre-defined software catalogs, or development suites which are defined as templates and all available in a self-service portal for your end users to provision as needed.
Also, imagine what you could do if instead of manually deploying a single VM by definition as we just did, if we had the ability to scale those operations with the power of GitOps! The possibilities are endless.
Advanced operations with Red Hat Developer Hub
For an advanced example of how Red Hat Developer Hub can be used to modernize your approach to working with virtual machines, please view this interactive demonstration which shows how the features of developer hub can be used to create a self-service portal for end users to provision VMs upon request without having to involve their infrastructure teams.
Introduction to OpenShift GitOps
OpenShift GitOps, based on Argo CD, extends GitOps principles to Red Hat OpenShift environments, offering a comprehensive solution for managing Kubernetes-native applications and virtualized workloads.
Red Hat OpenShift GitOps is an operator that provides a workflow that integrates git repositories, continuous integration/continuous delivery (CI/CD) tools, and Kubernetes to realize faster, more secure, scalable software development, without compromising quality.
OpenShift GitOps enables customers to build and integrate declarative git driven CD workflows directly into their application development platform.
There’s no single tool that converts a development pipeline to "DevOps". By implementing a GitOps framework, updates and changes are pushed through declarative code, automating infrastructure and deployment requirements, and CI/CD.
Benefits of OpenShift GitOps for virtual machines (VMs)
While GitOps is typically associated with containerized applications, OpenShift GitOps also supports managing Virtual Machines (VMs) using OpenShift Virtualization. This provides several key advantages:
-
Consistent Infrastructure as Code (IaC): By managing VM configurations and lifecycle in Git, teams can apply the same declarative workflows used for Kubernetes applications, ensuring consistency and repeatability.
-
Automated Deployments and Rollbacks: OpenShift GitOps continuously monitors the desired state in Git and automatically reconciles deviations. This ensures VMs are always deployed correctly and allows quick rollbacks if needed.
-
Improved Security and Compliance: Git-based workflows enable auditable change management, allowing teams to track and review all modifications to VM configurations while enforcing policies and compliance standards.
-
Scalability and Hybrid Cloud Support: OpenShift GitOps facilitates deploying and managing VMs across on-premises and cloud environments, providing a unified approach to infrastructure automation.
By integrating GitOps principles with OpenShift Virtualization, organizations can streamline VM management, enhance security, and improve operational efficiency in hybrid cloud environments.
Getting started
In this module we want to deploy everything declaratively and let it be managed by OpenShift GitOps.
This is a very different approach than in earlier modules where we created a VM manually using either the console or a simple YAML manifest and can help you modernize your virtual machine deployments providing many additional benefits.
Did you know that all of the different lab tenants in this room, even person that you are sitting alongside is performing their tasks in a virtual OpenShift cluster, deployed and managed by GitOps?
Lets take a quick look at a how a complex application deployed and managed in via GitOps looks.
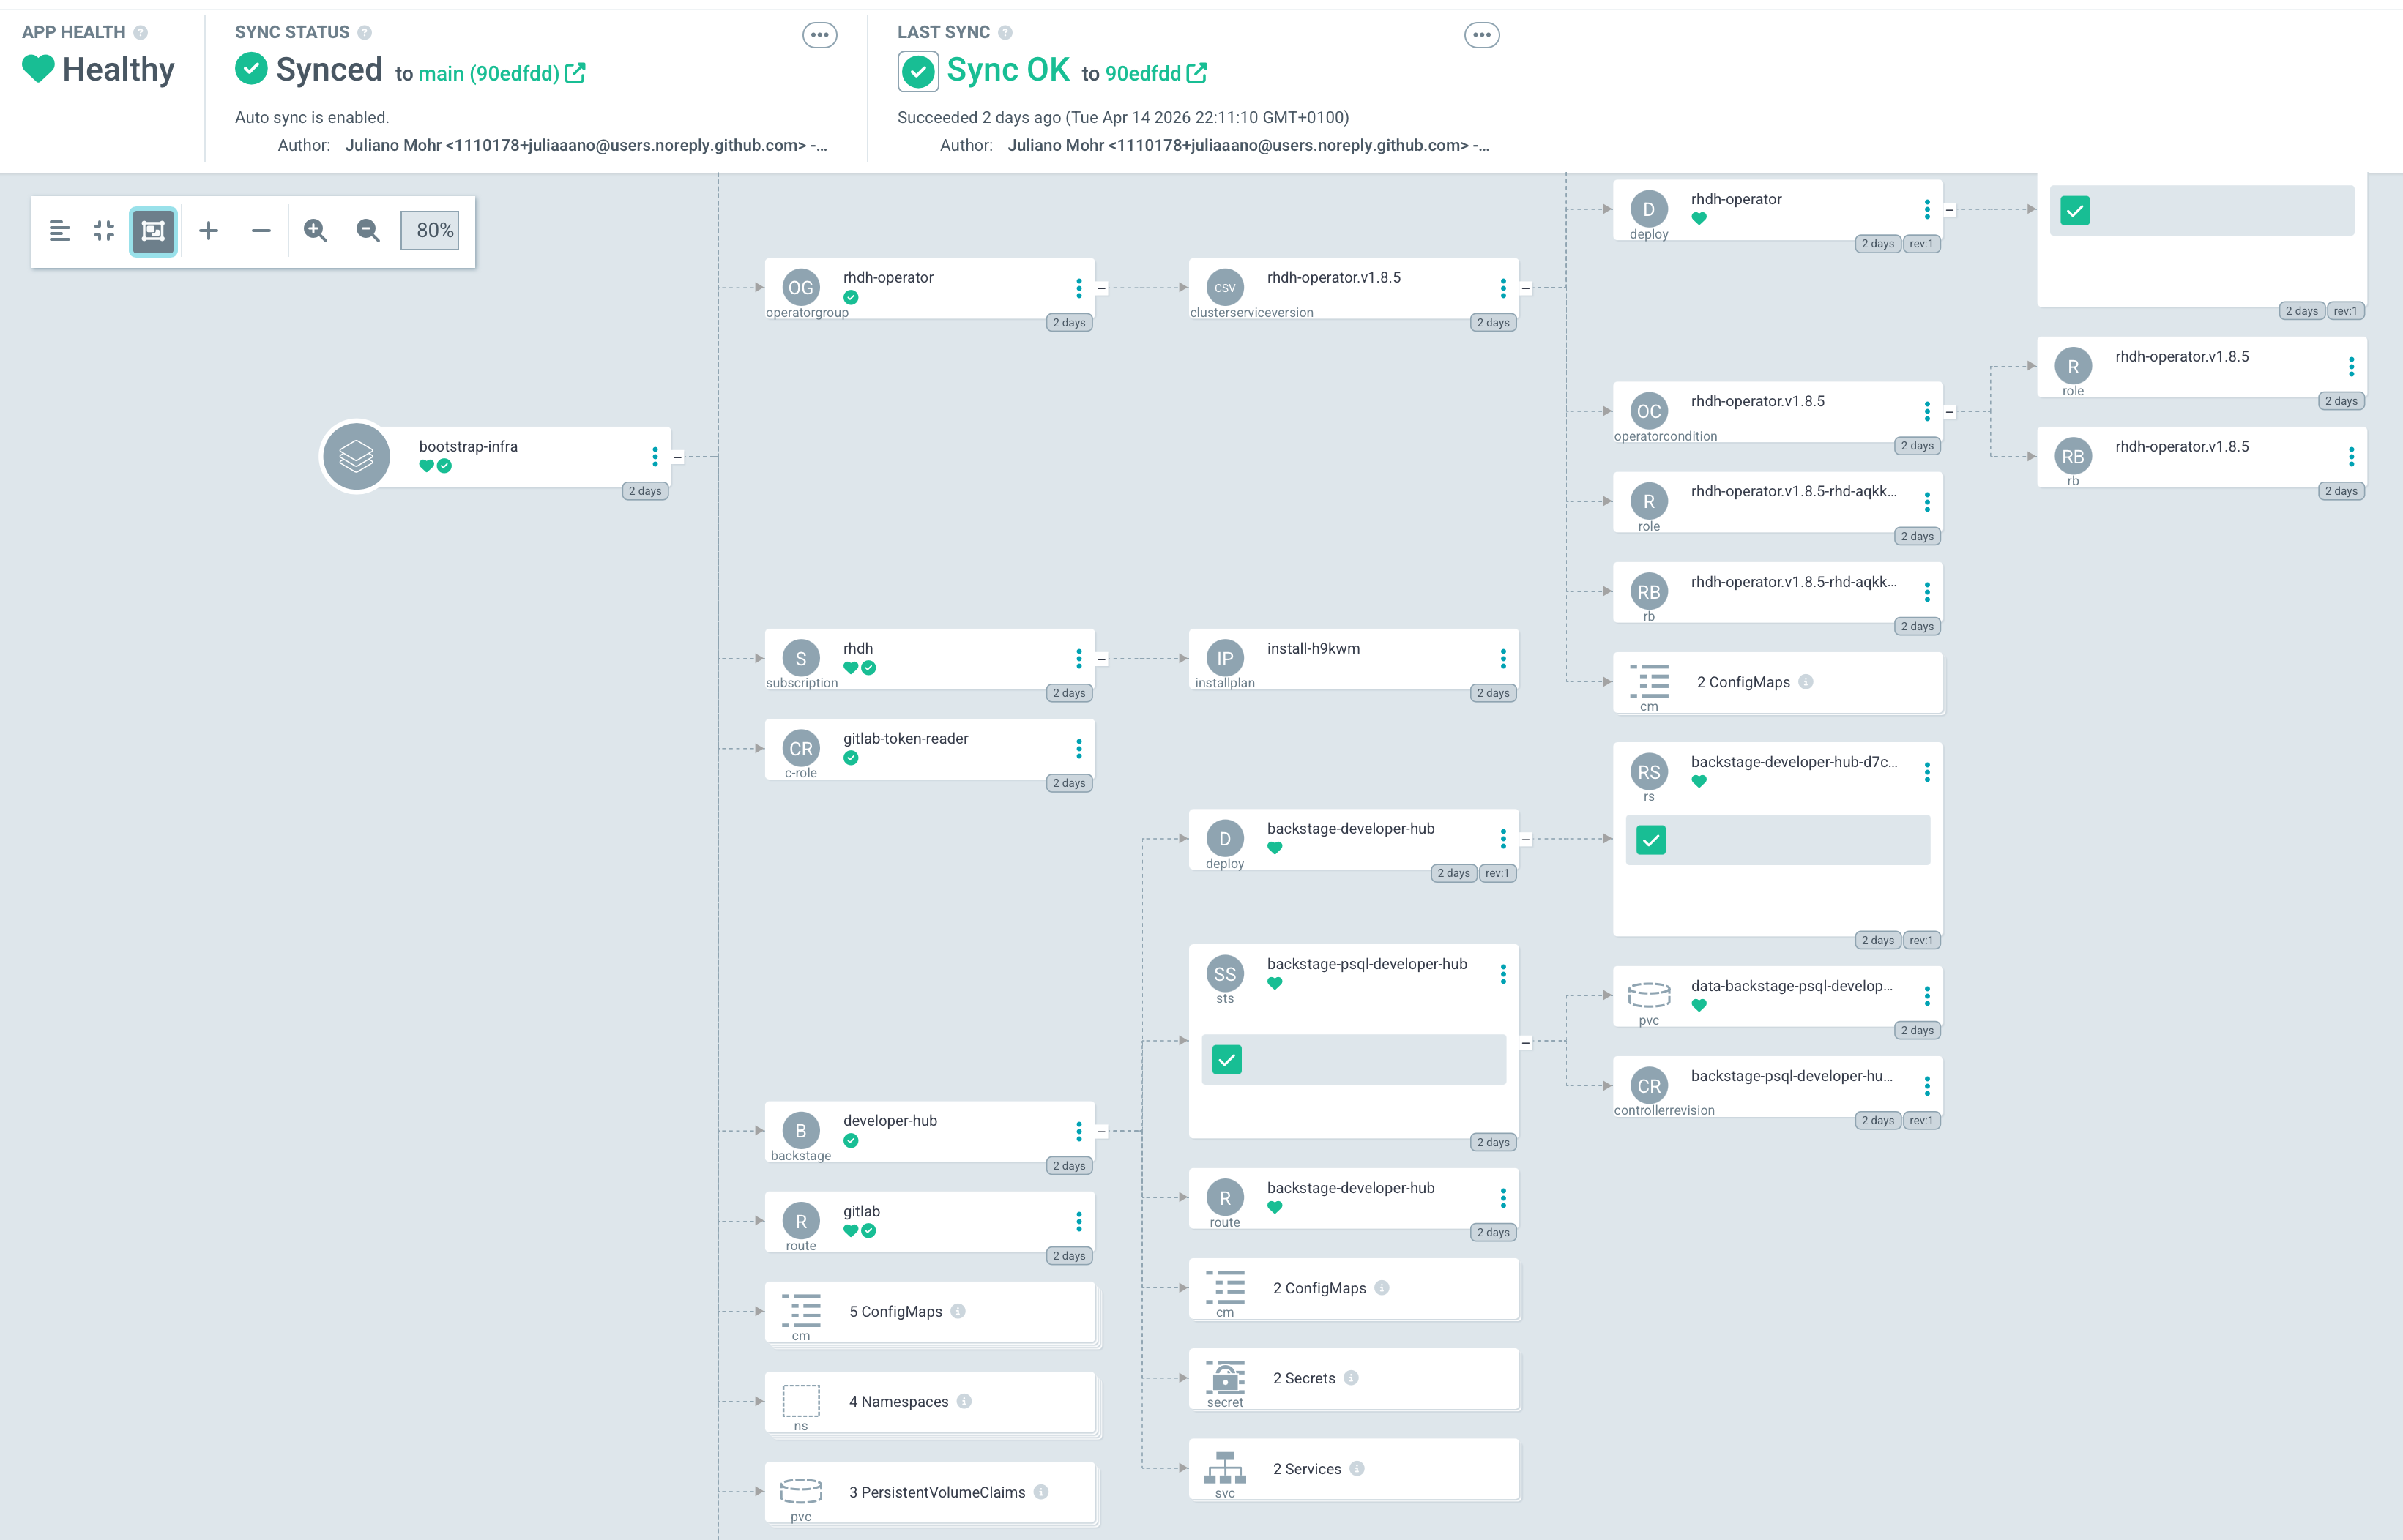
The Argo CD application we deploy in this lab will not be on the scale of the one in this image, but it allows you to imagine the possibilities.
Log into the user’s Argo CD deployment
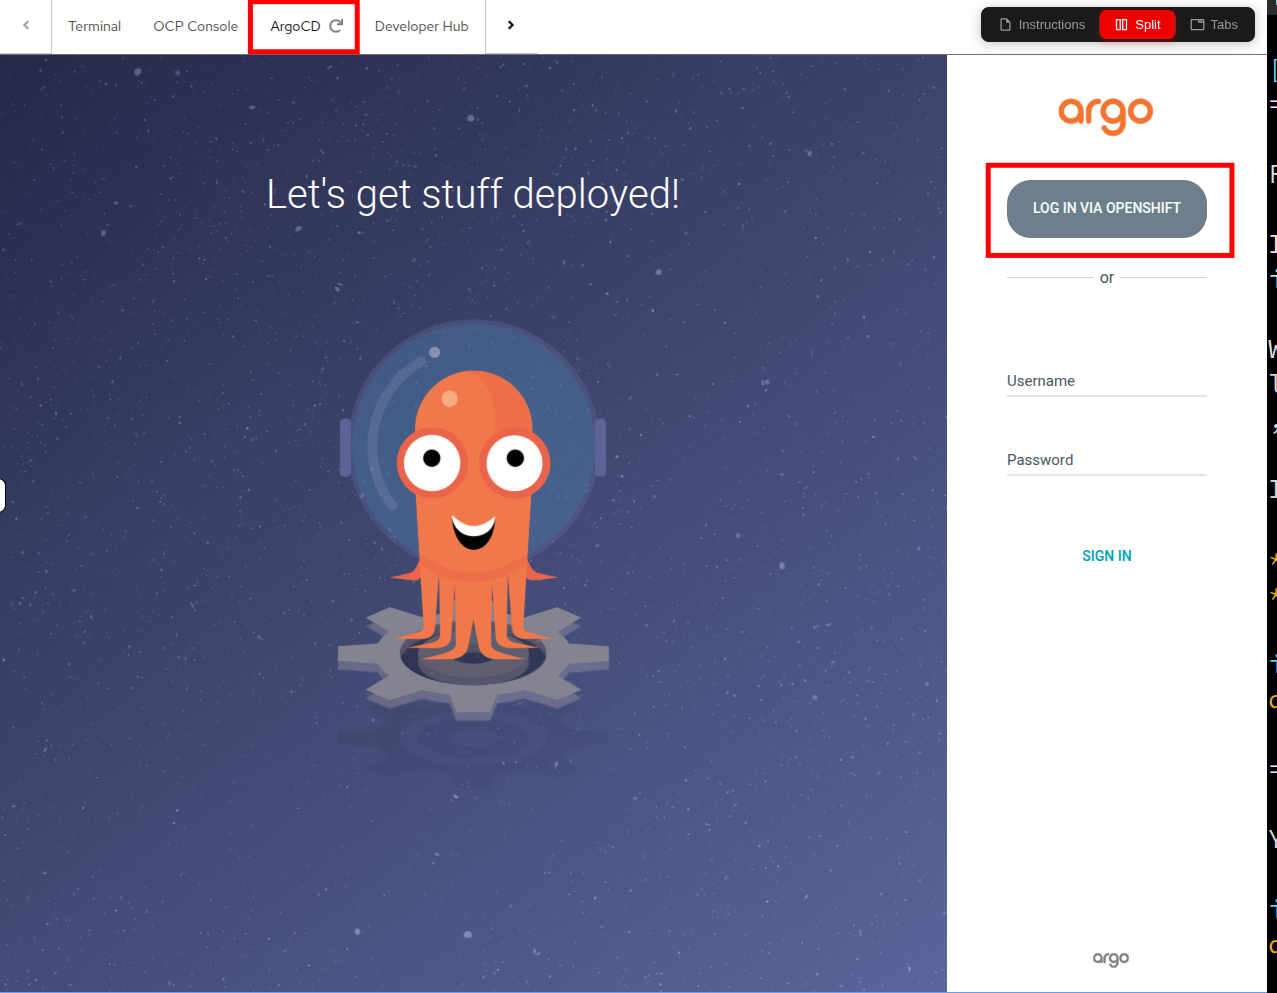
First, we are going to open the OpenShift GitOps Dashboard.
To access that, click the ArgoCD tab on the right side of your showroom console, and click on the LOG IN VIA OPENSHIFT button, it should automatically log you in.
If it doesn’t automatically log you in, just make use of your current user credentials:
-
Username: userX
-
Password: password
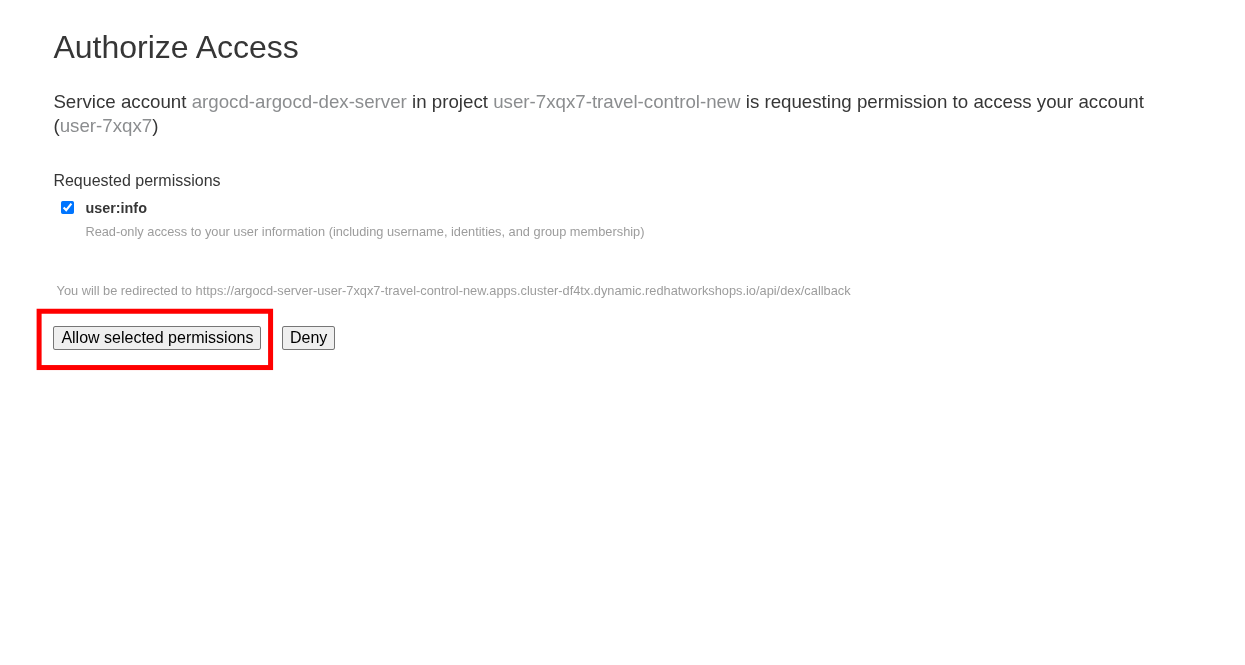
You will be presented with a page to Authorize Access on the first login attempt. Click the Allow selected permissions button to proceed.
Create an Argo CD application
Now that we’ve logged into Argo CD, let us create an app for the travel-control components.
An Argo CD application is a Kubernetes resource that defines and manages the deployment of workloads based on a Git repository. It continuously syncs the desired application state from Git to the cluster, ensuring consistency and enabling automated rollbacks if deviations occur.
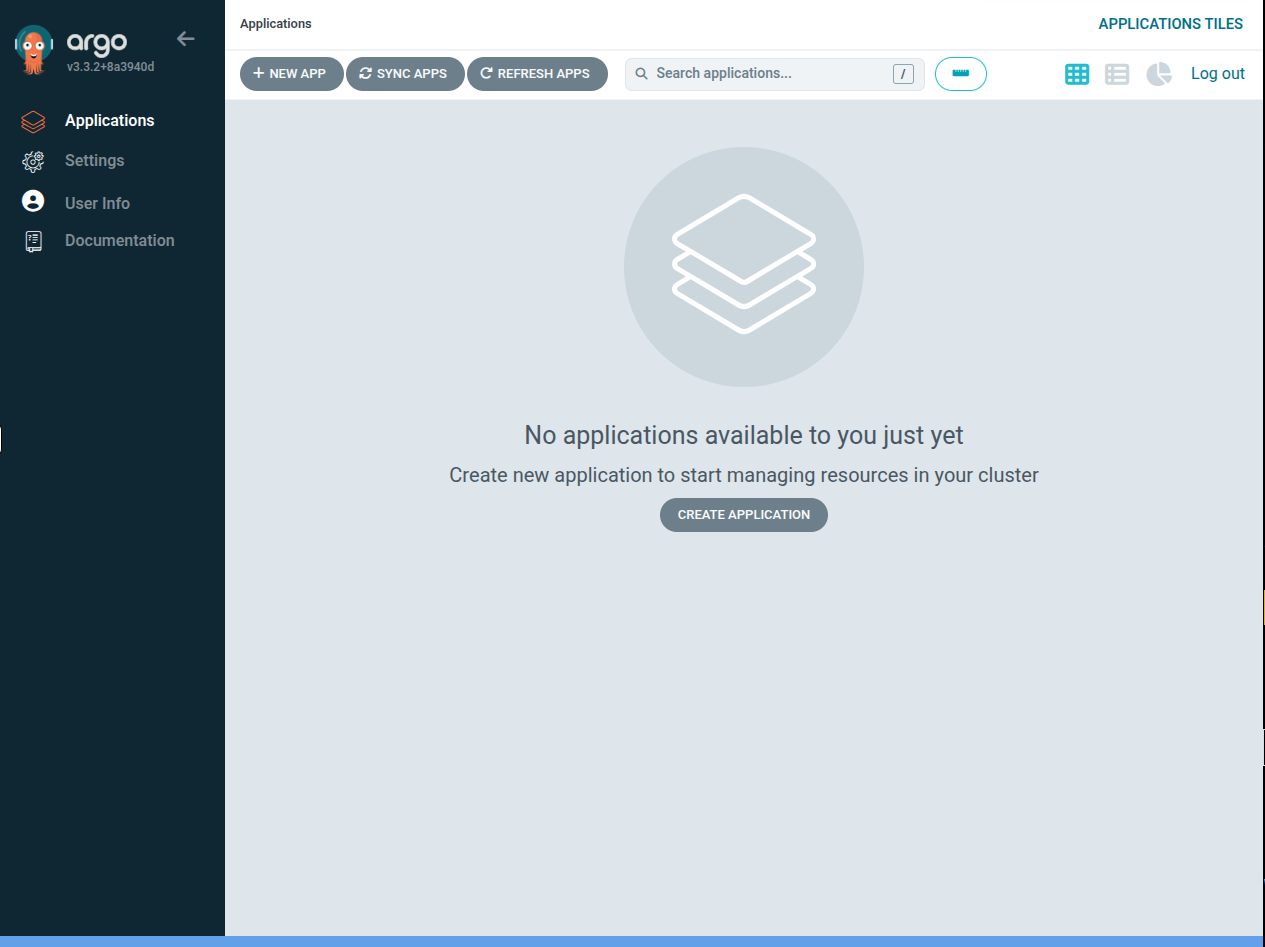
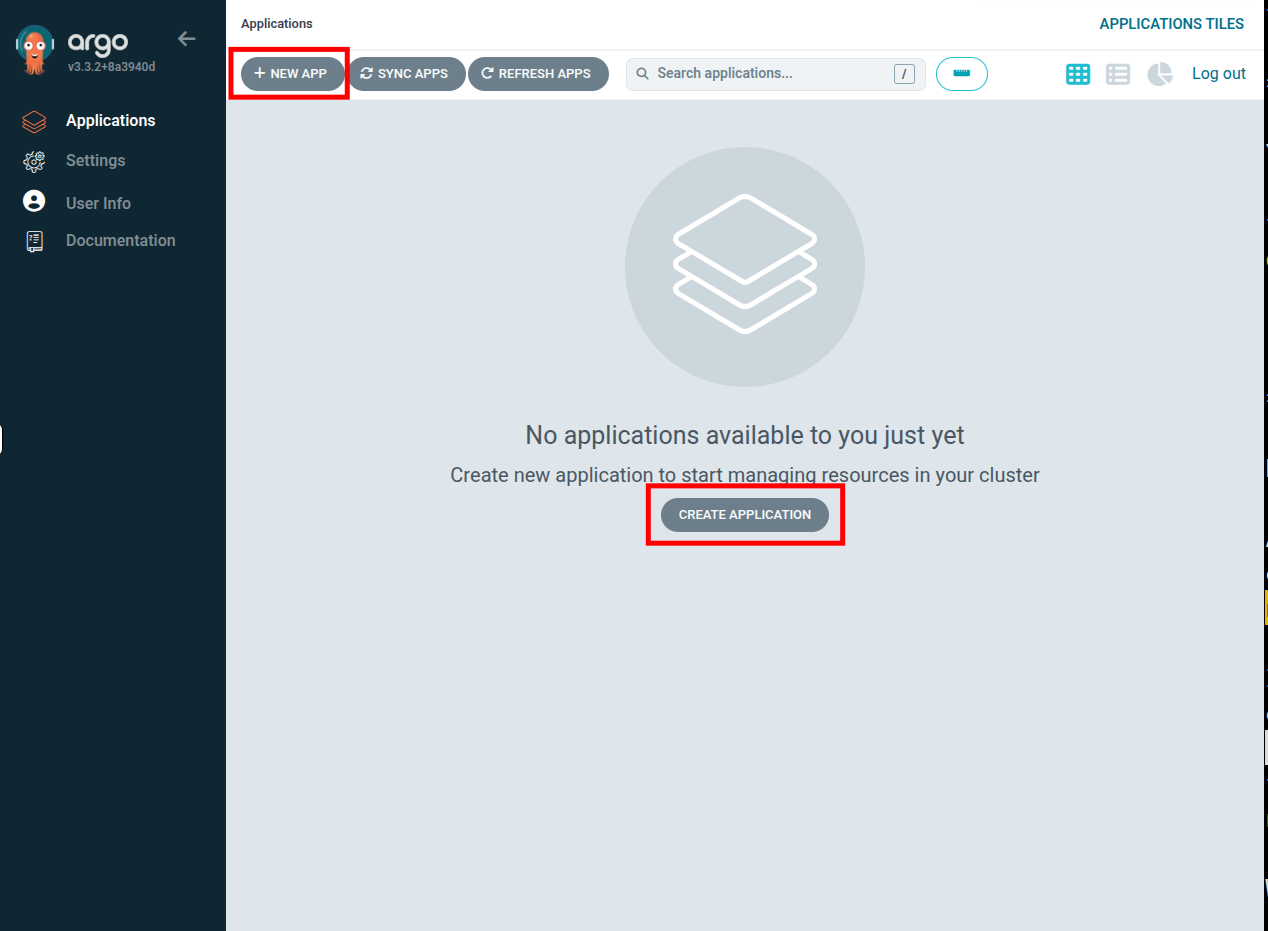
In the Argo console we can create a new application by either clicking on the + New App button on the top left, or the Create Application button in the middle:
When we do this the Create App wizard slides out.
| The wizard has a number of fields to fill out, so we are going to step through the screenshots one at a time. |
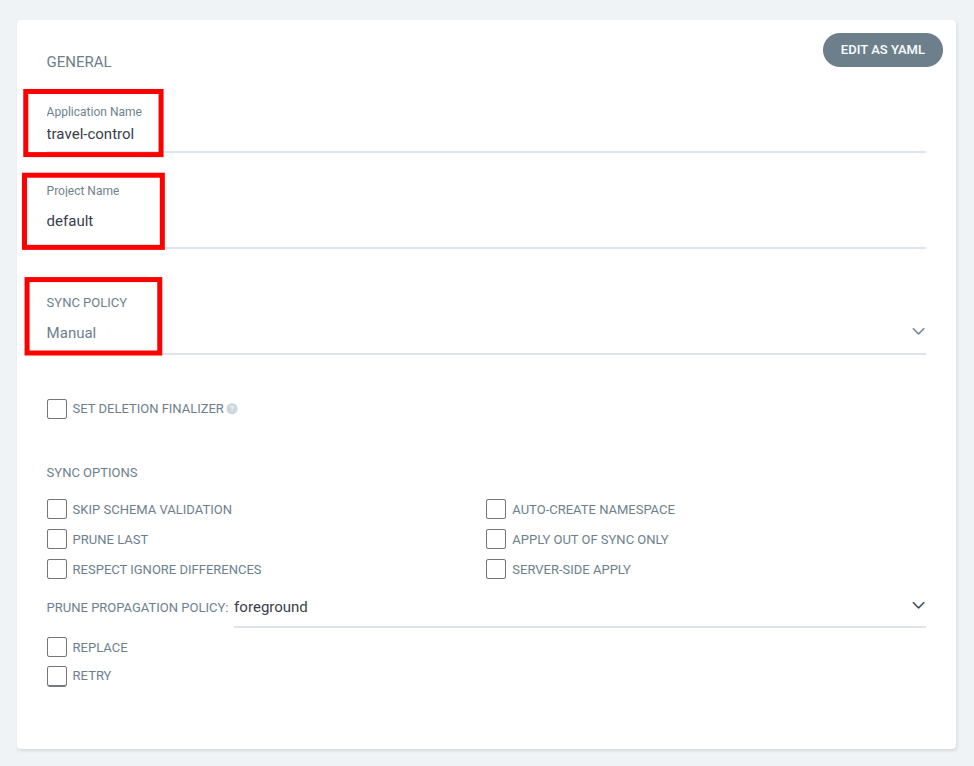
In the General section, give your app the name travel-control, use the argo project default, and leave the sync policy as Manual:
In the SOURCE section, copy and paste the repo to Argo CD by setting repository url to the github repo url, leave revision as HEAD, and set the path to module-03/travel-control:
https://github.com/rhpds/modernize-ocp-virt-workspace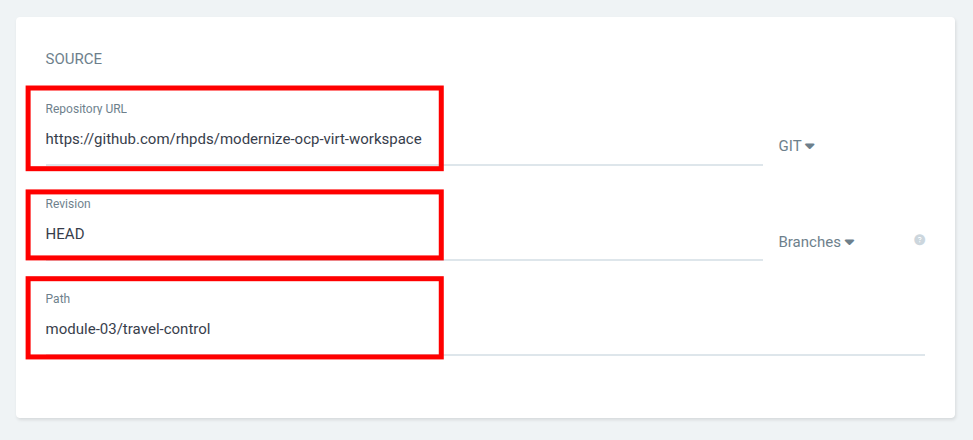
We have already provided all necessary Kubernetes manifests in this repository and path. Feel free to explore this Helm Chart if you like.
|
In the Destination section, set cluster URL to https://kubernetes.default.svc by copying and pasting the value below, and leave the namespace empty:
https://kubernetes.default.svc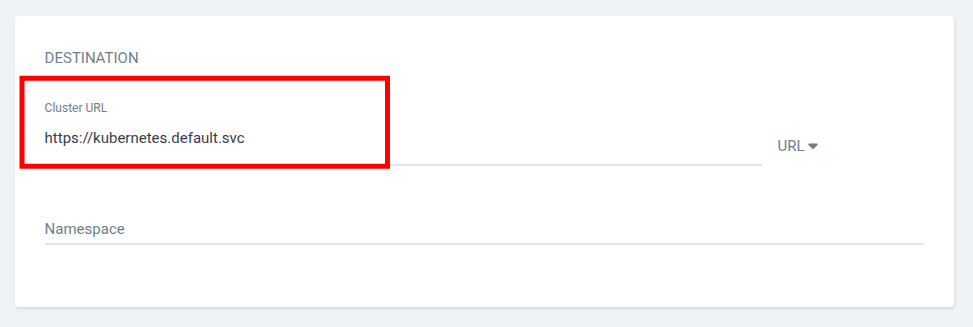
In the Helm section, provide the username and URL of the Service Mesh ingress gateway by overwriting the username and ossm_ingress parameters:
userX-ingress-istio-gateway.apps.cluster.example.com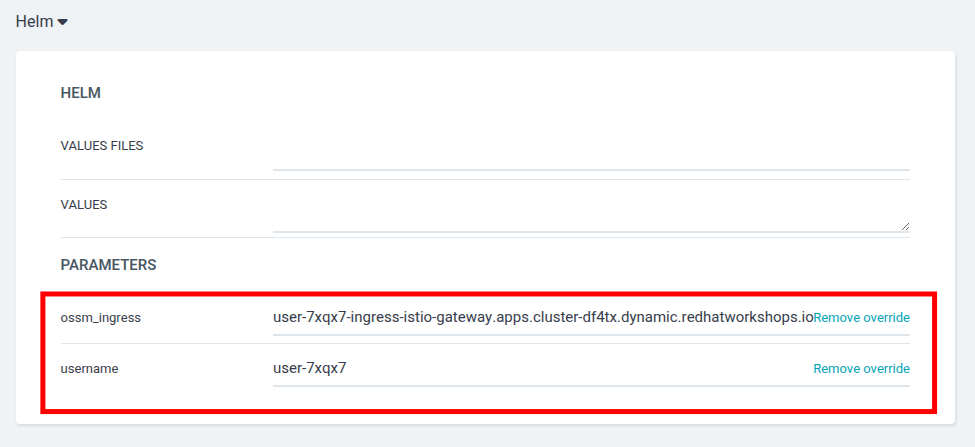
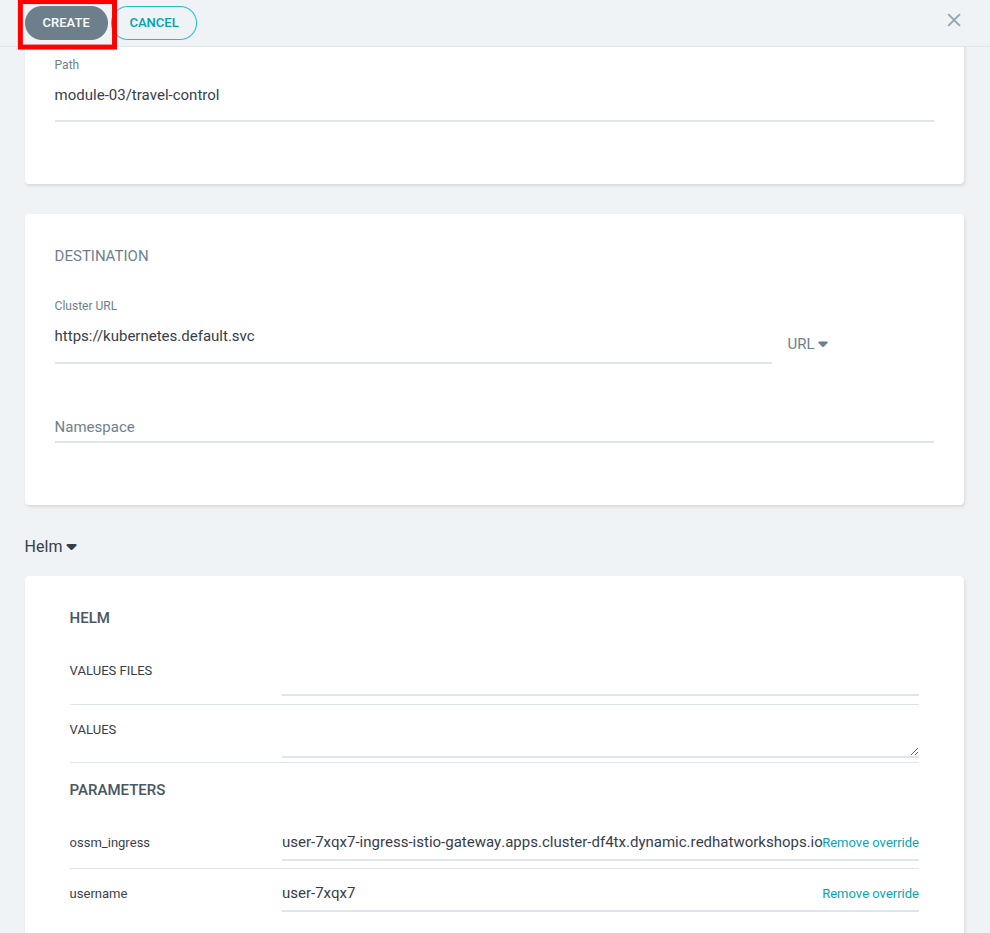
After filling out the information above, click Create at the top of the UI to create the travel-control application:
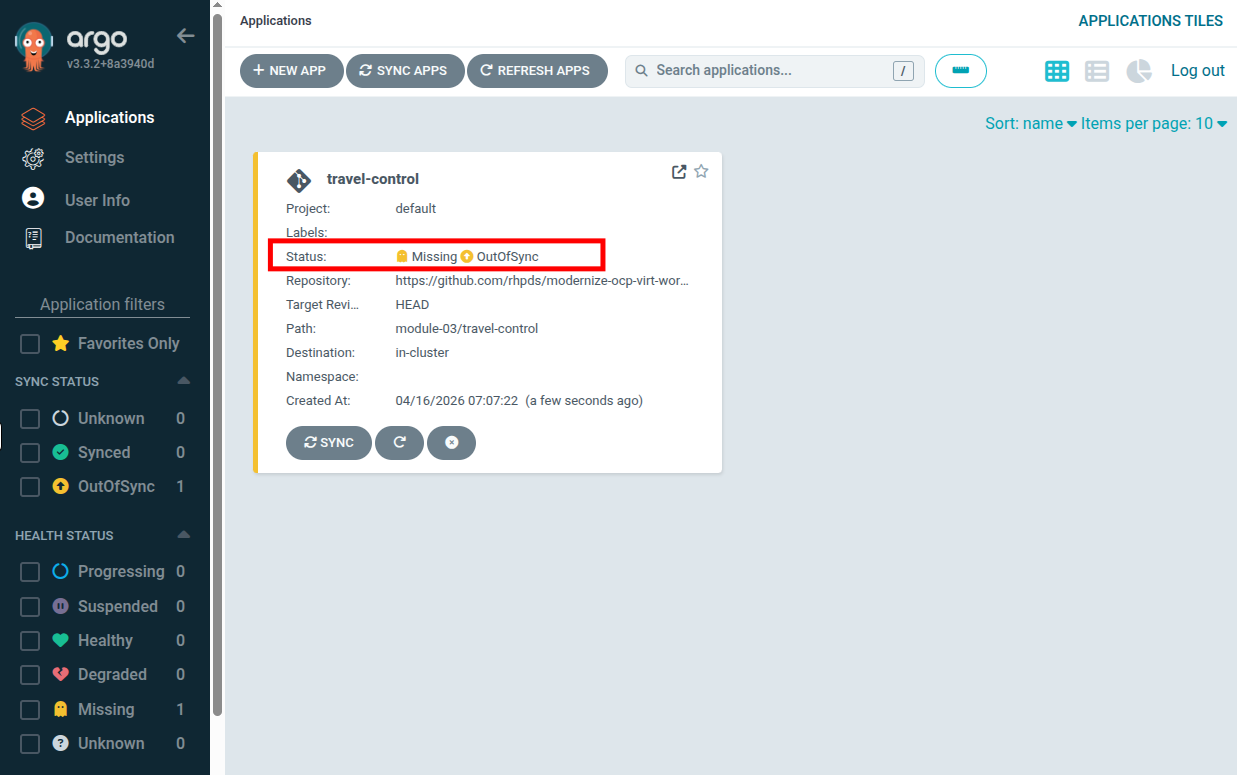
You will return to the main Argo dashboard, where you can see that the travel-control argo application is created, and you can now view its status, which notably is in an OutOfSync state since the application is staged, but has yet to be deployed, and no resources have been created as of yet in our OpenShift cluster.
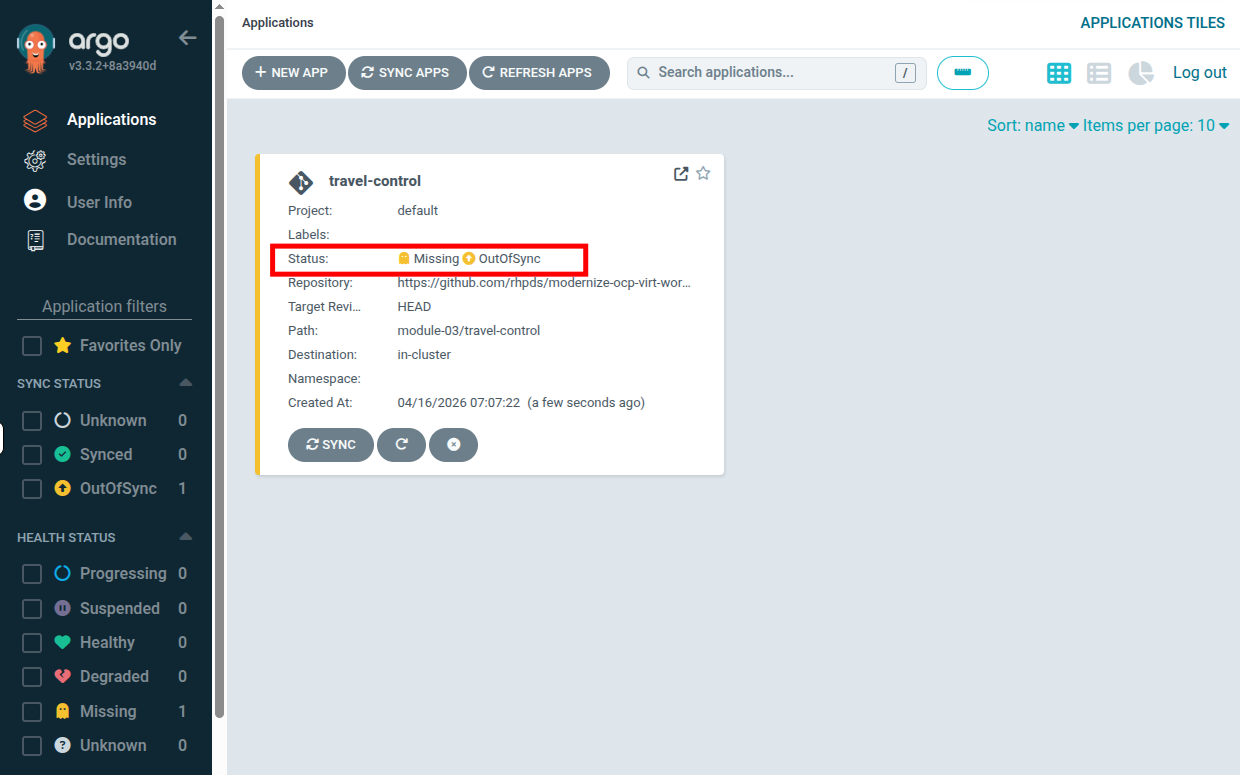
To sync (deploy) the application, you simply have to click on the SYNC button of the travel-control application
A new panel will be opened and then, click on SYNCHRONIZE button.
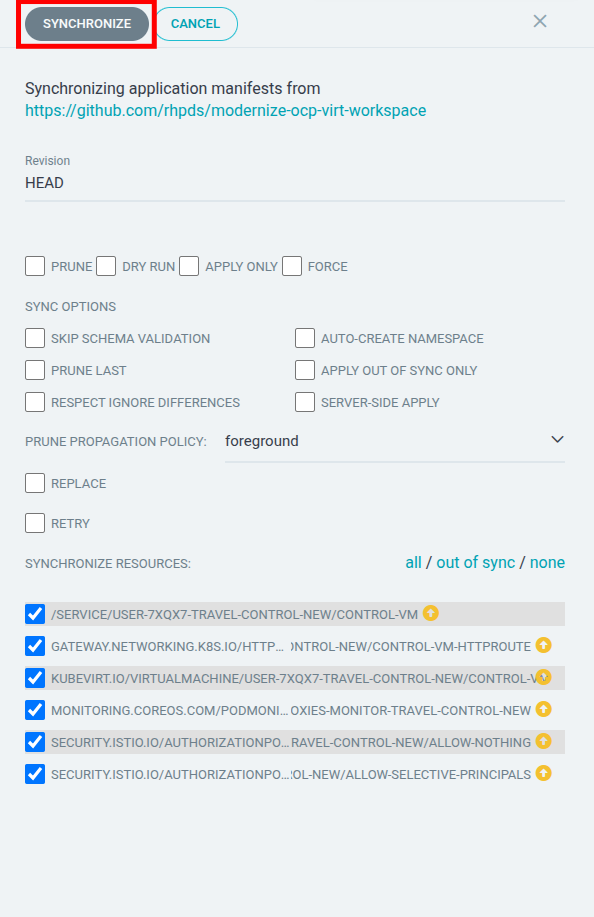
The panel will close and you will see the travel-control application begin to deploy and apply configuration changes.
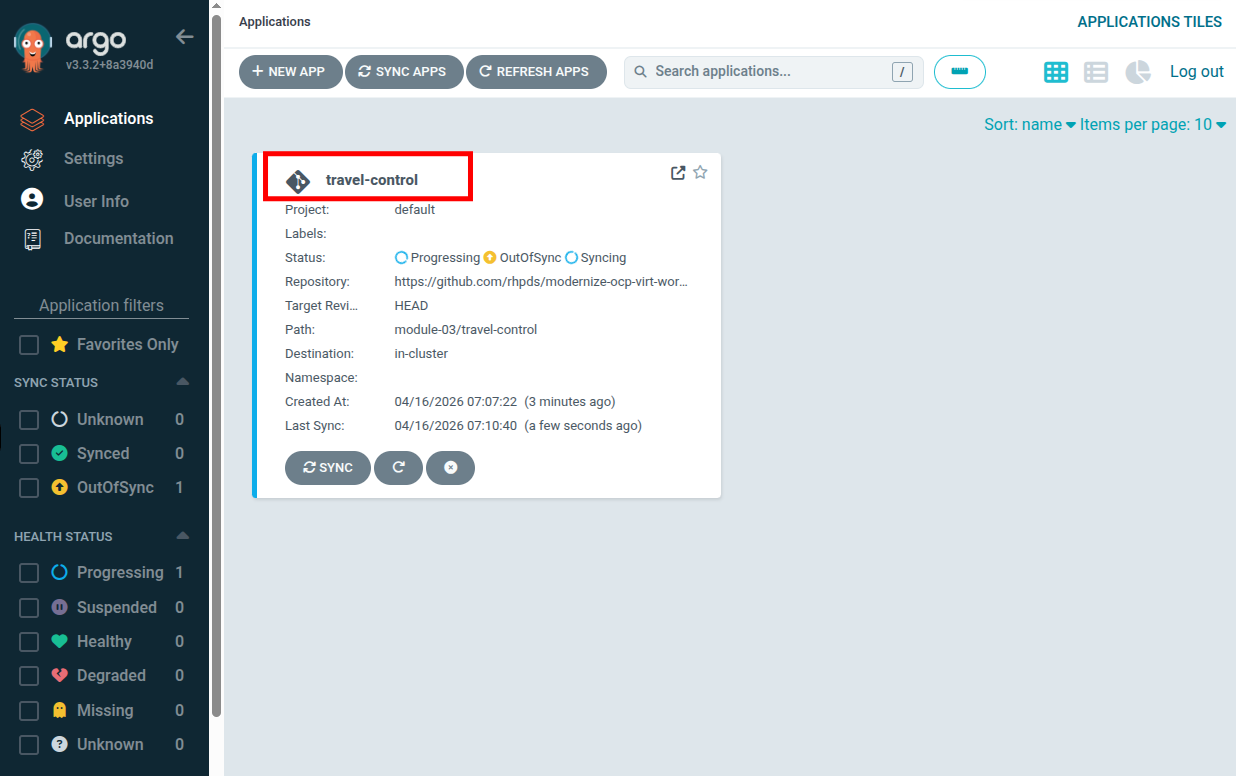
By clicking on the travel-control application you open the details of the app, and you’ll see which resources have been applied, as well as the Sync status, last sync and application health.
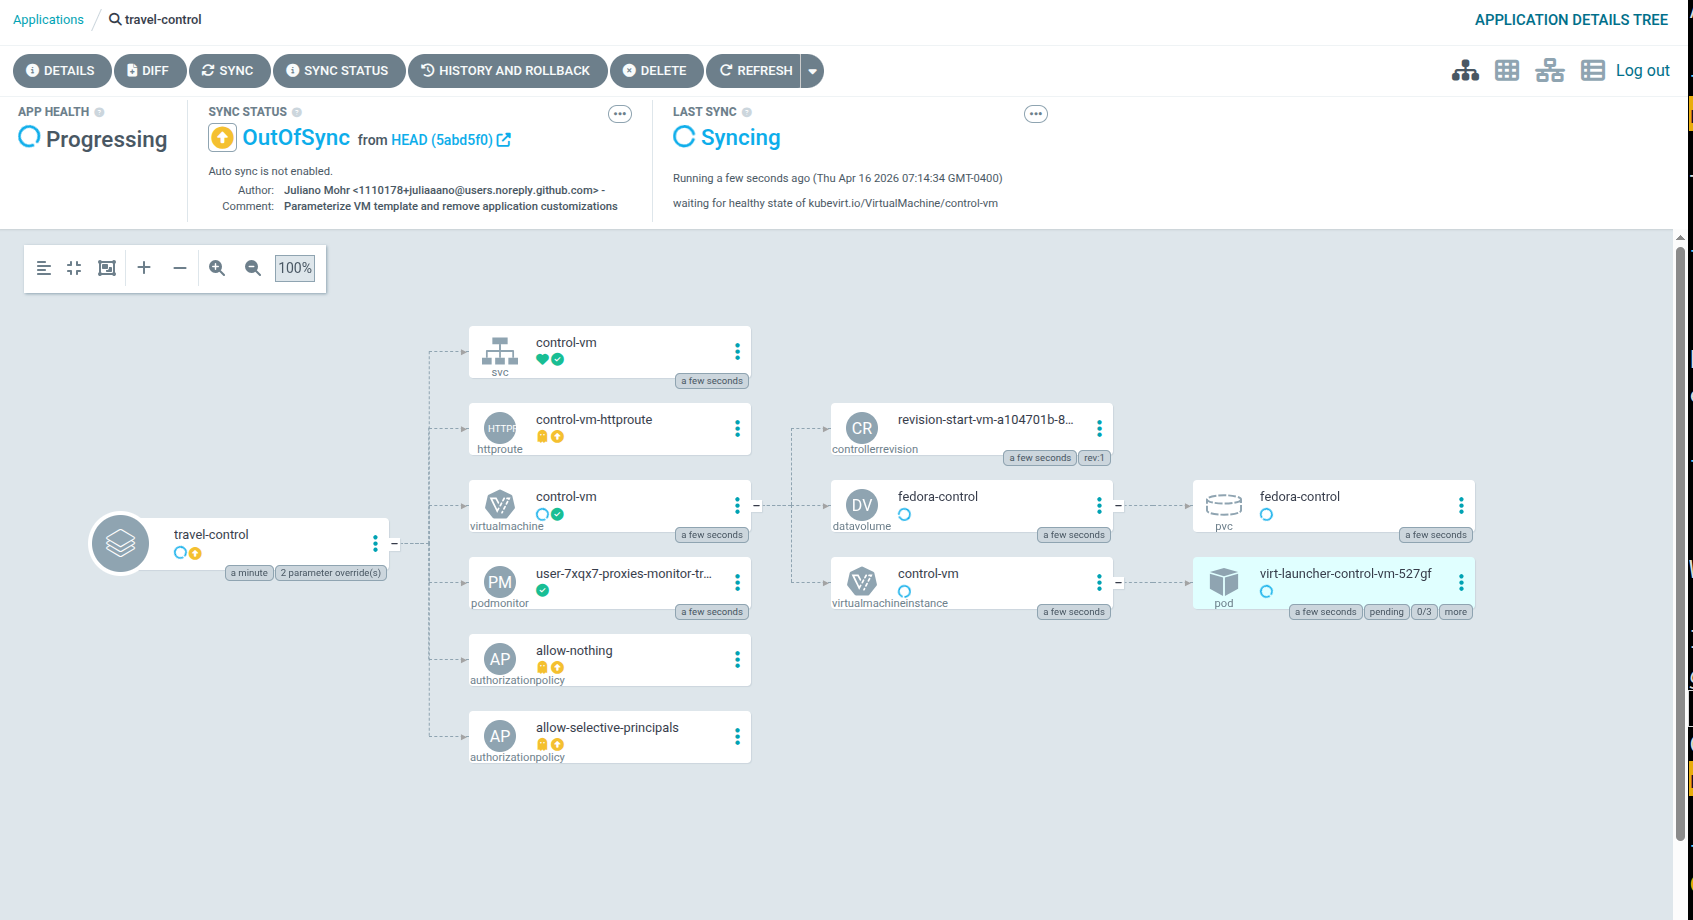
Wait for a few minutes until everything is up and running.
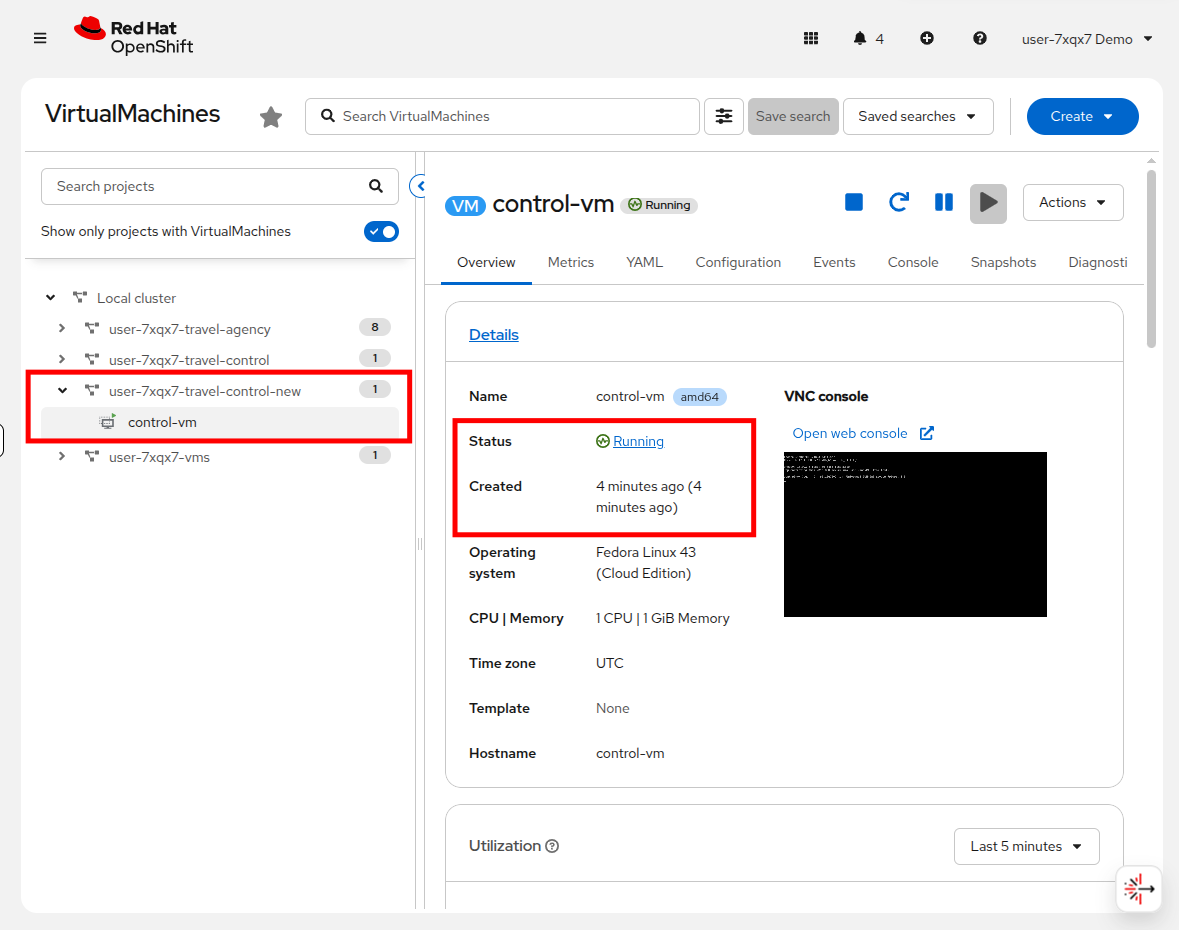
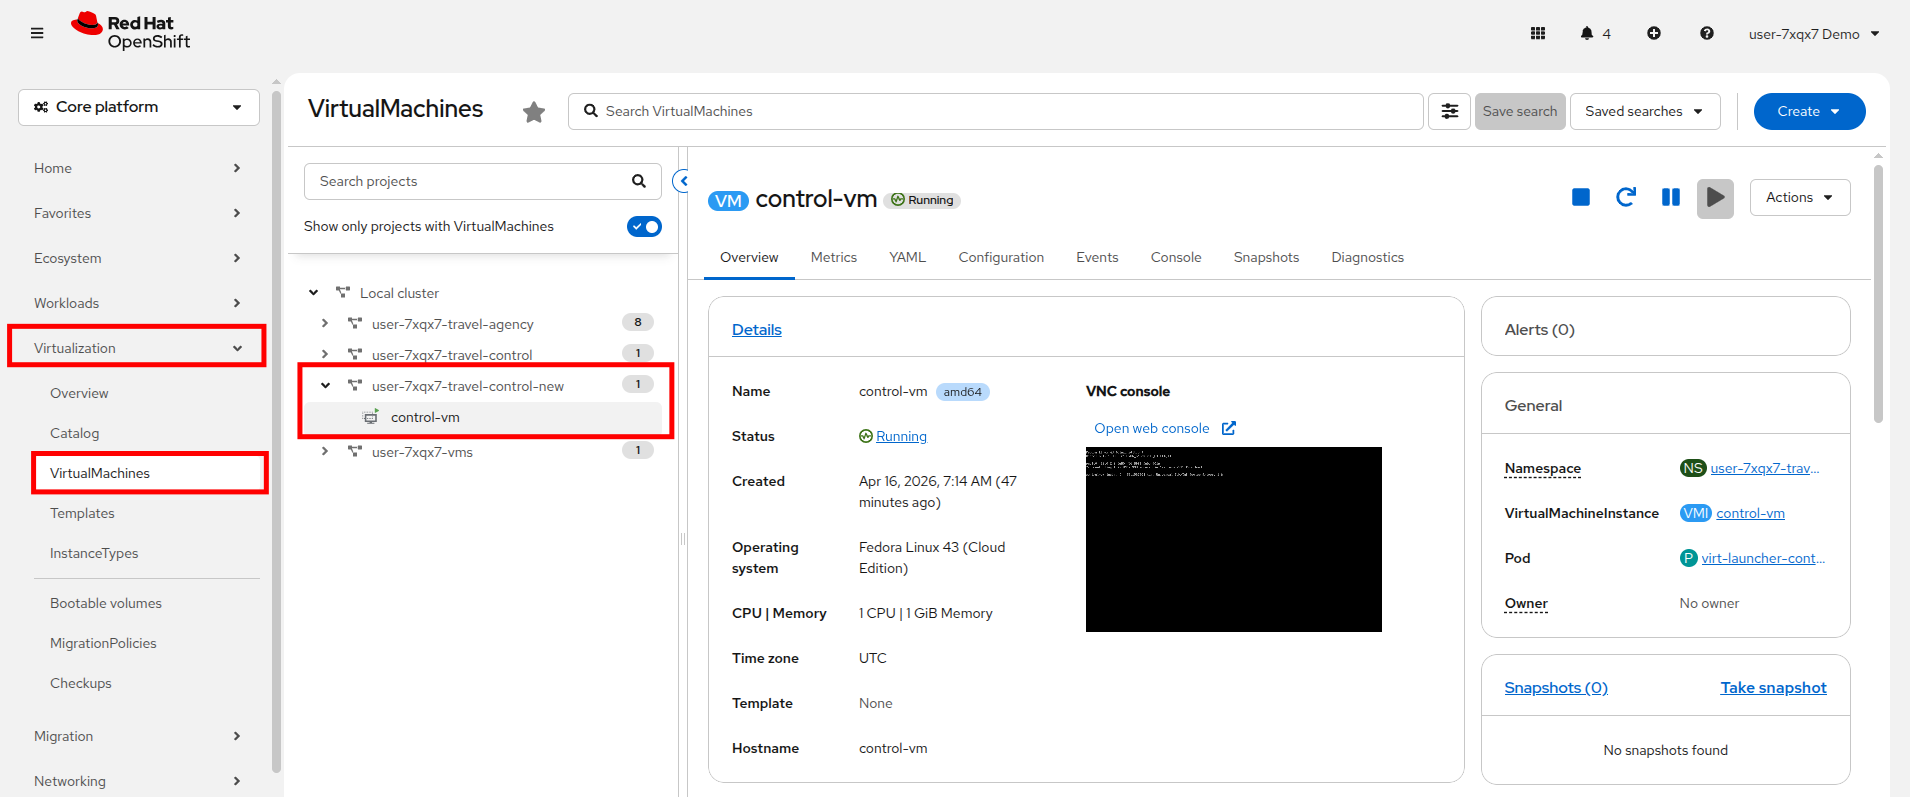
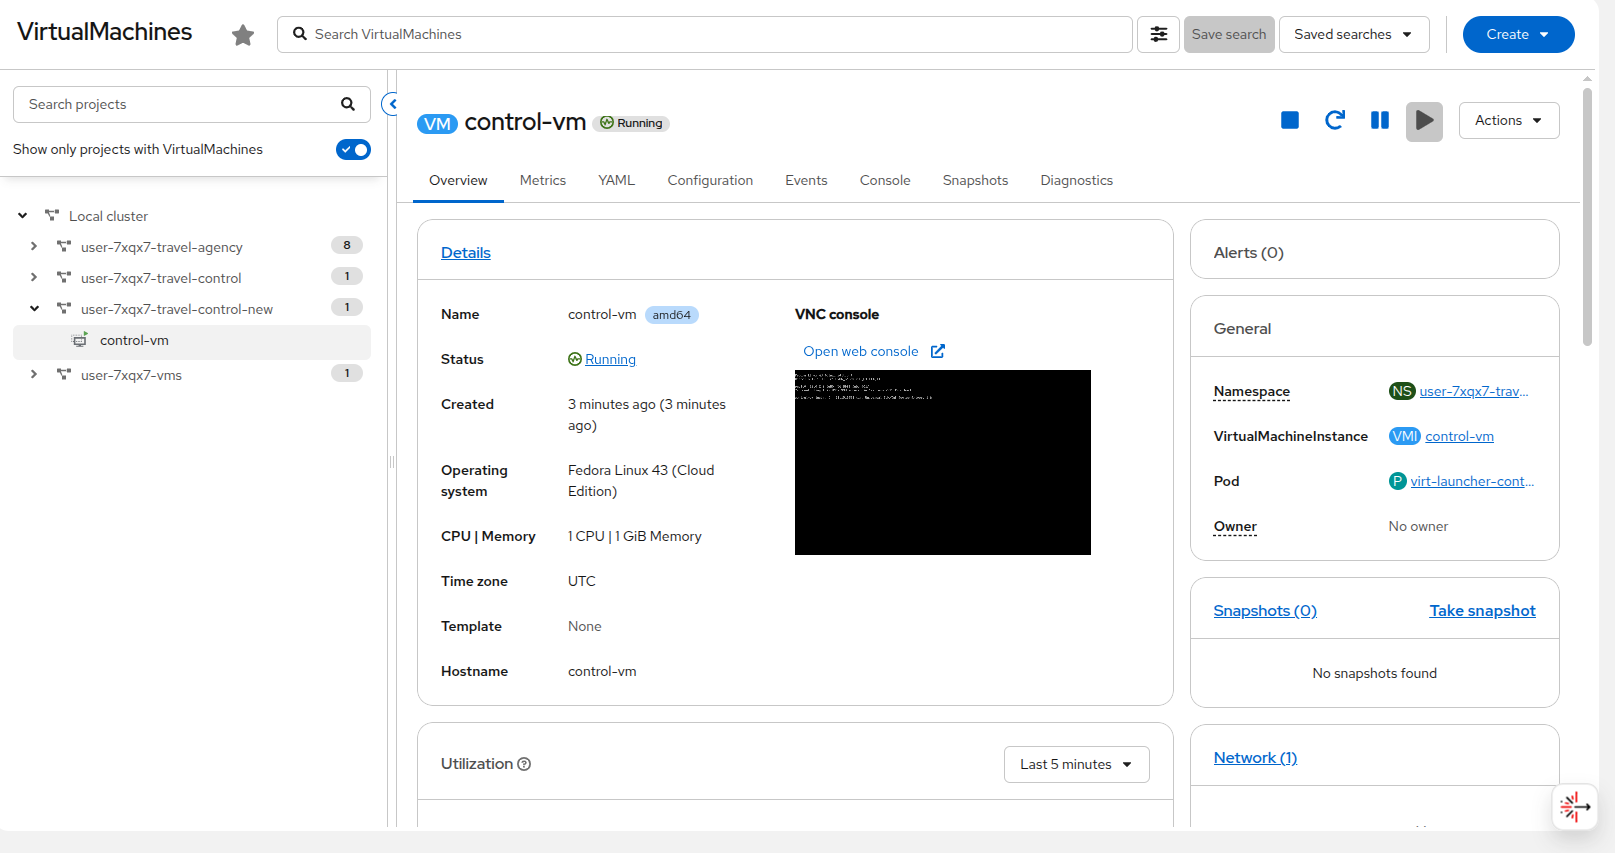
To validate that our virtual machine has been successfully provisioned, return to the OpenShift console. Click on Virtualization → VirtualMachines and expand the project userX-travel-control-new to see a new virtual machine called control-vm deployed.
While this is a very simple example deploying just one virtual machine, the power of GitOps automation can fully integrate both virtual machines and containers into fully complex production applications.
Validate Argo CD self-healing
One amazing feature of having an application managed by Argo CD, which helps it stand apart from the manual creation of a declarative VM that we performed earlier in this module, is its ability to monitor an application’s health should something go awry. It can then resynchronize from the application’s definition, effectively healing them when they are in a broken state.
To test Argo CD’s self-healing capability, you can manually delete a Kubernetes resource managed by Argo CD. With Automated Sync and Self-Heal enabled, Argo CD will detect the drift from the desired Git state and automatically recreate the deleted resource, confirming that self-healing is working as expected.
Enable self-healing
First, we need to enable Auto-Sync and Self-Healing for the travel-control application.
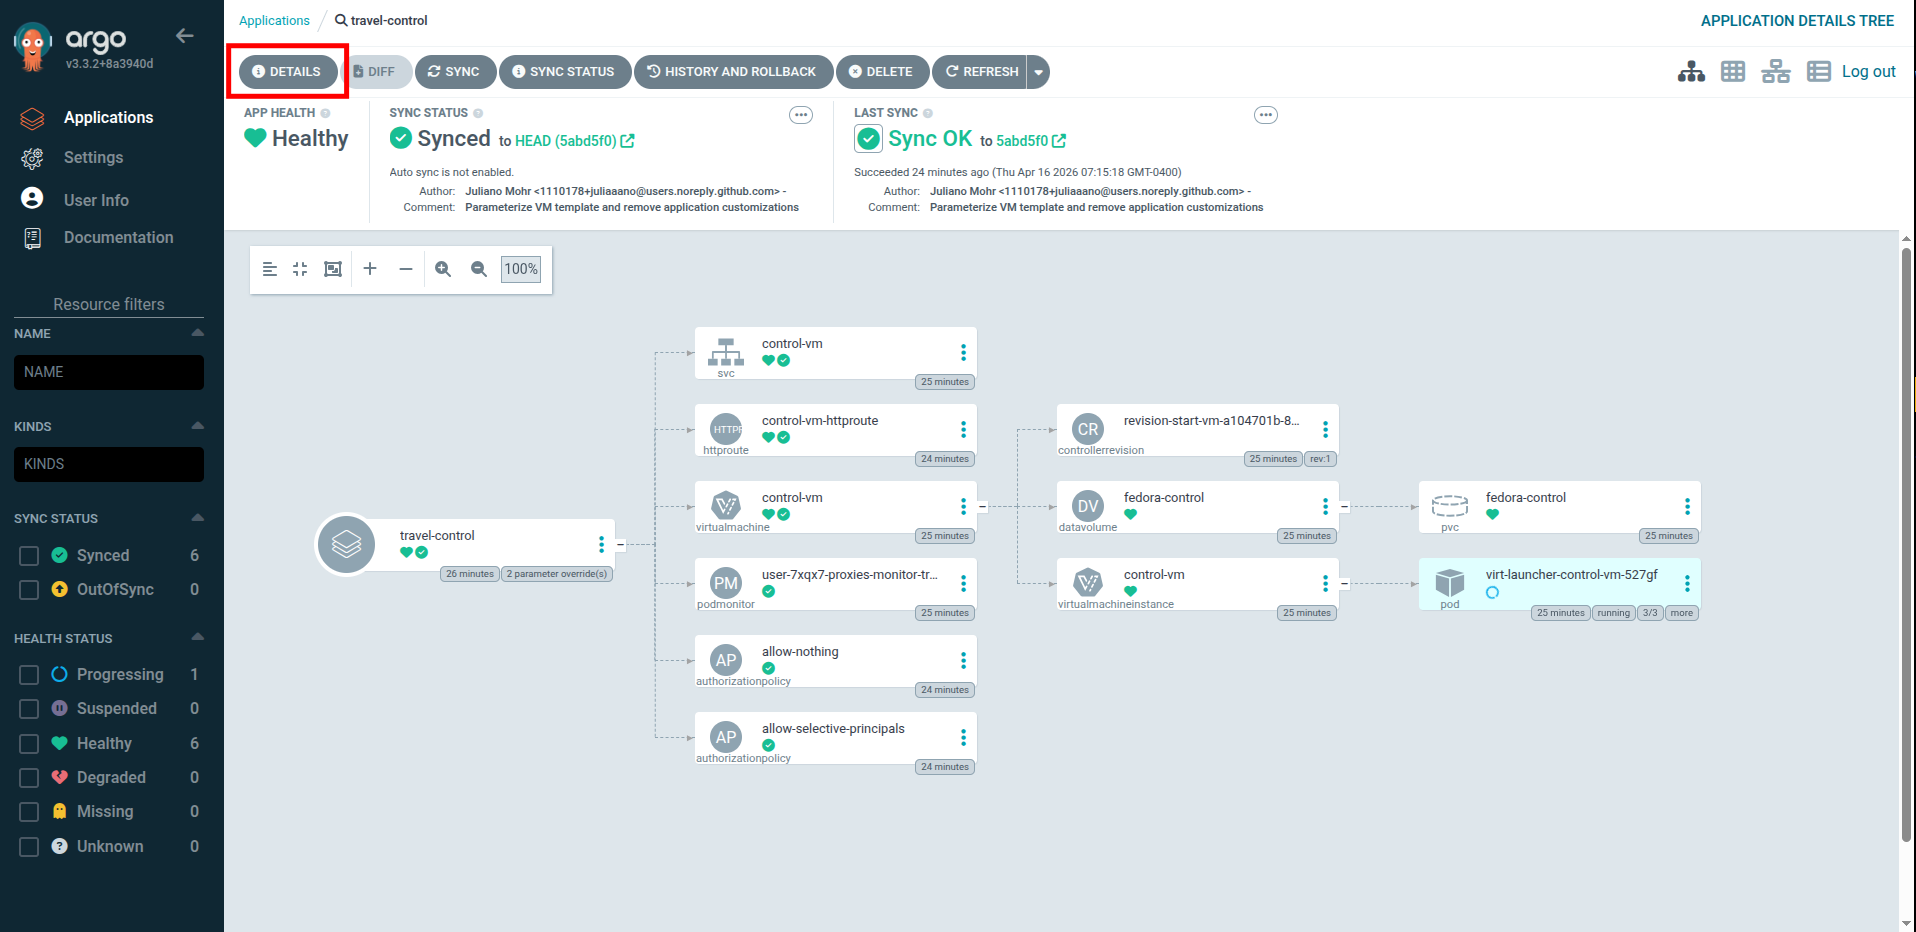
Return to your Argo CD tab at the top of the console.
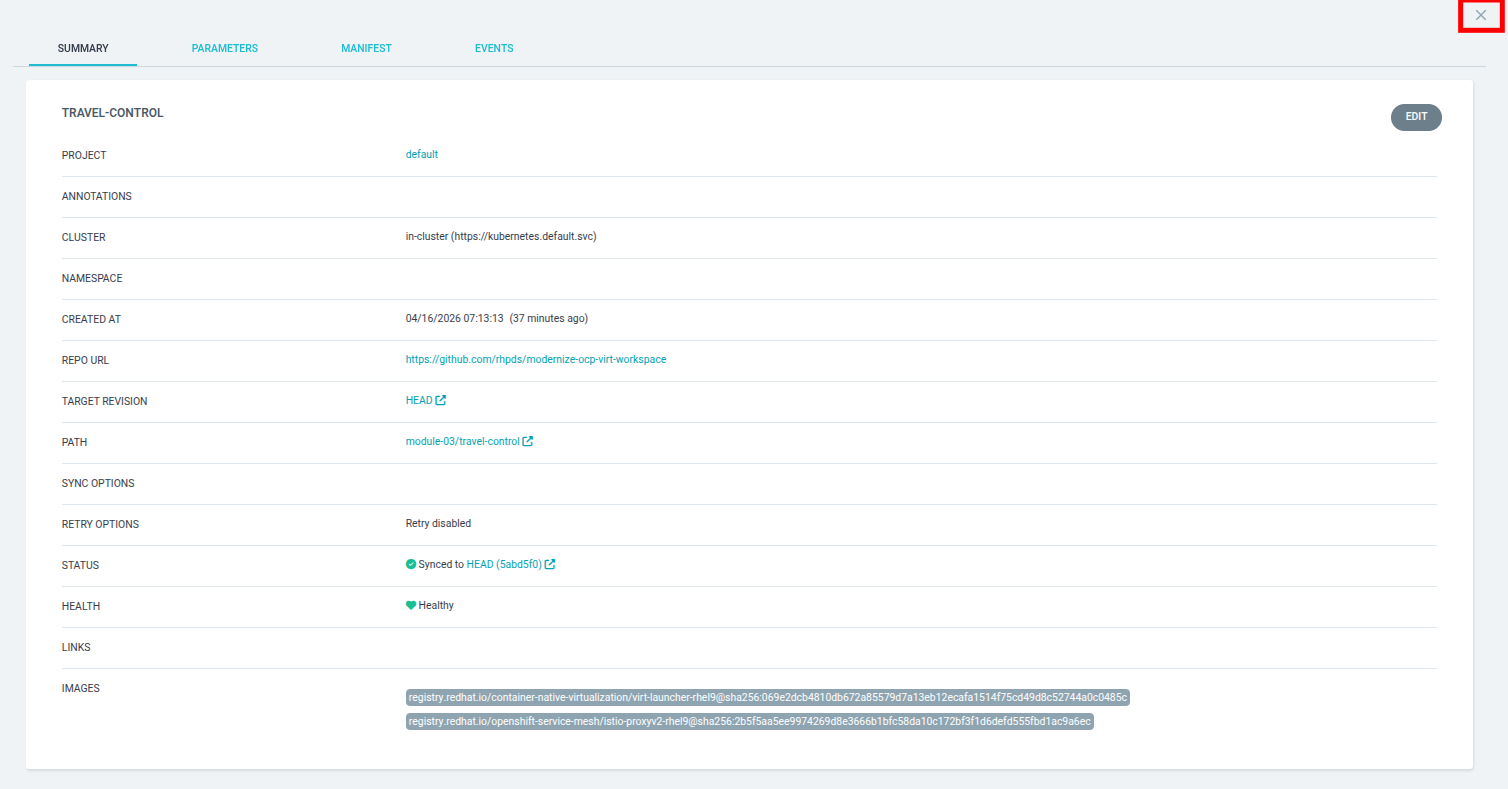
Click on the DETAILS button at the top of the travel-control application.
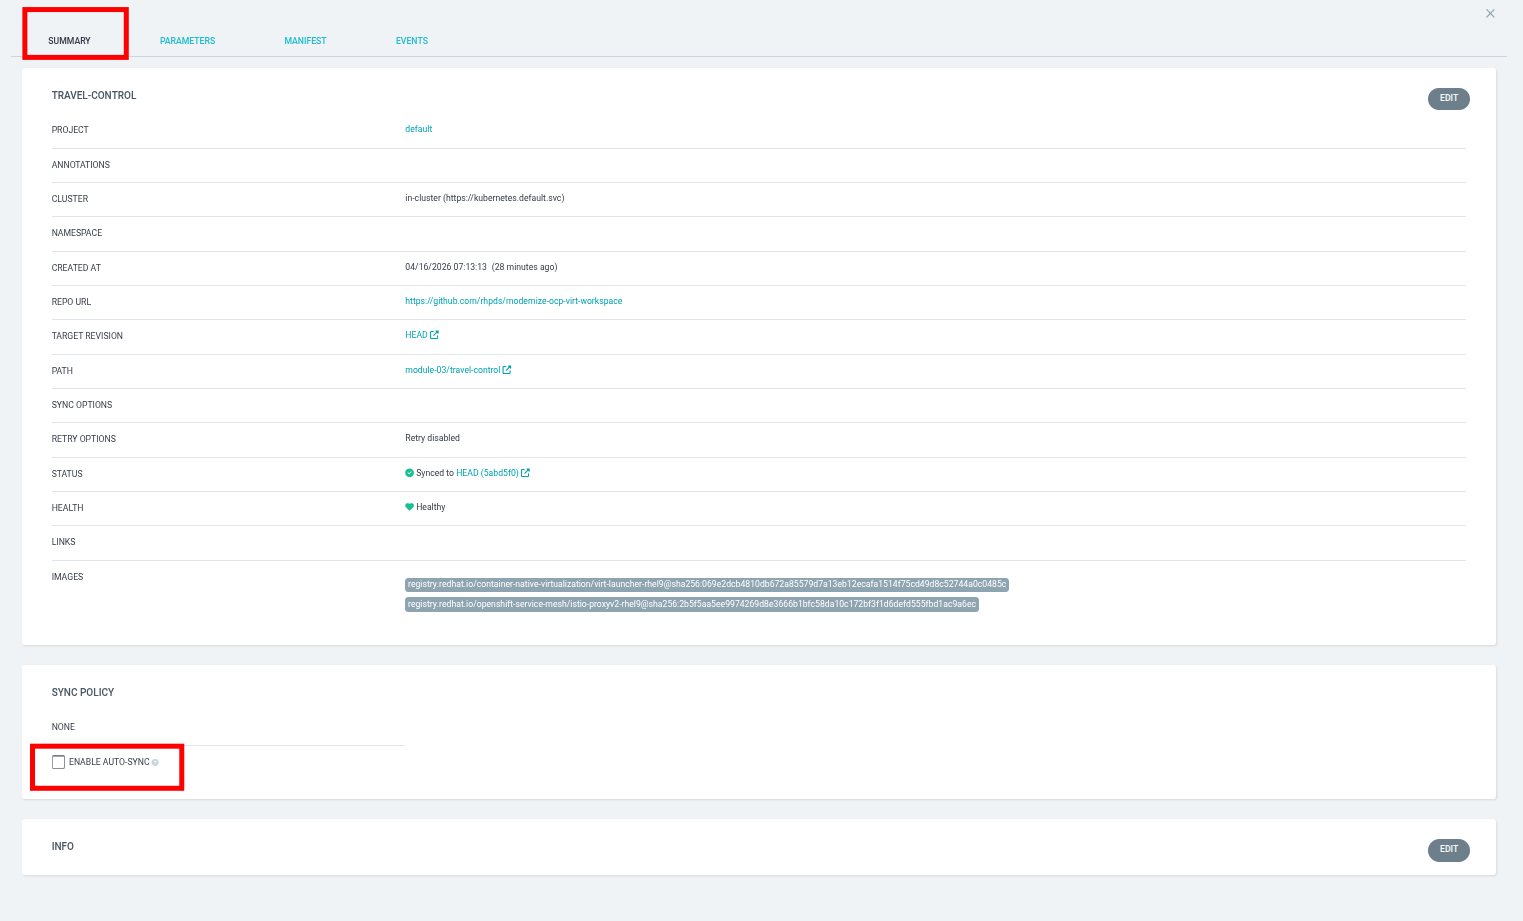
A panel will slide out, and you will find yourself on the Summary tab. Scroll down to the Sync Policy section, and click on the ENABLE AUTO-SYNC check box.
A new window will appear for Enable Auto-Sync, click on the OK button.

With Auto-Sync enabled, the Sync Policy section changes to include an option for Self Heal with a check box next to it. Go ahead and enable it.

A new window will appear for Enable Self Heal, click on the OK button.

Close the panel by clicking on the X in the upper right corner.
Test self-healing
In order to test out the self-healing feature, we are going to "accidentally" delete our control-vm from our userX-travel-control-new project.
Return to your Red Hat OpenShift Console, and click on Virtualization → VirtualMachines in the left side navigation menu, followed by the userX-travel-control-new project in the center column, and the virtual machine named control-vm.
| You will need to perform these next few tasks fairly quickly, or the VM may automatically restart due to Argo CD protecting the VM’s desired running state. |
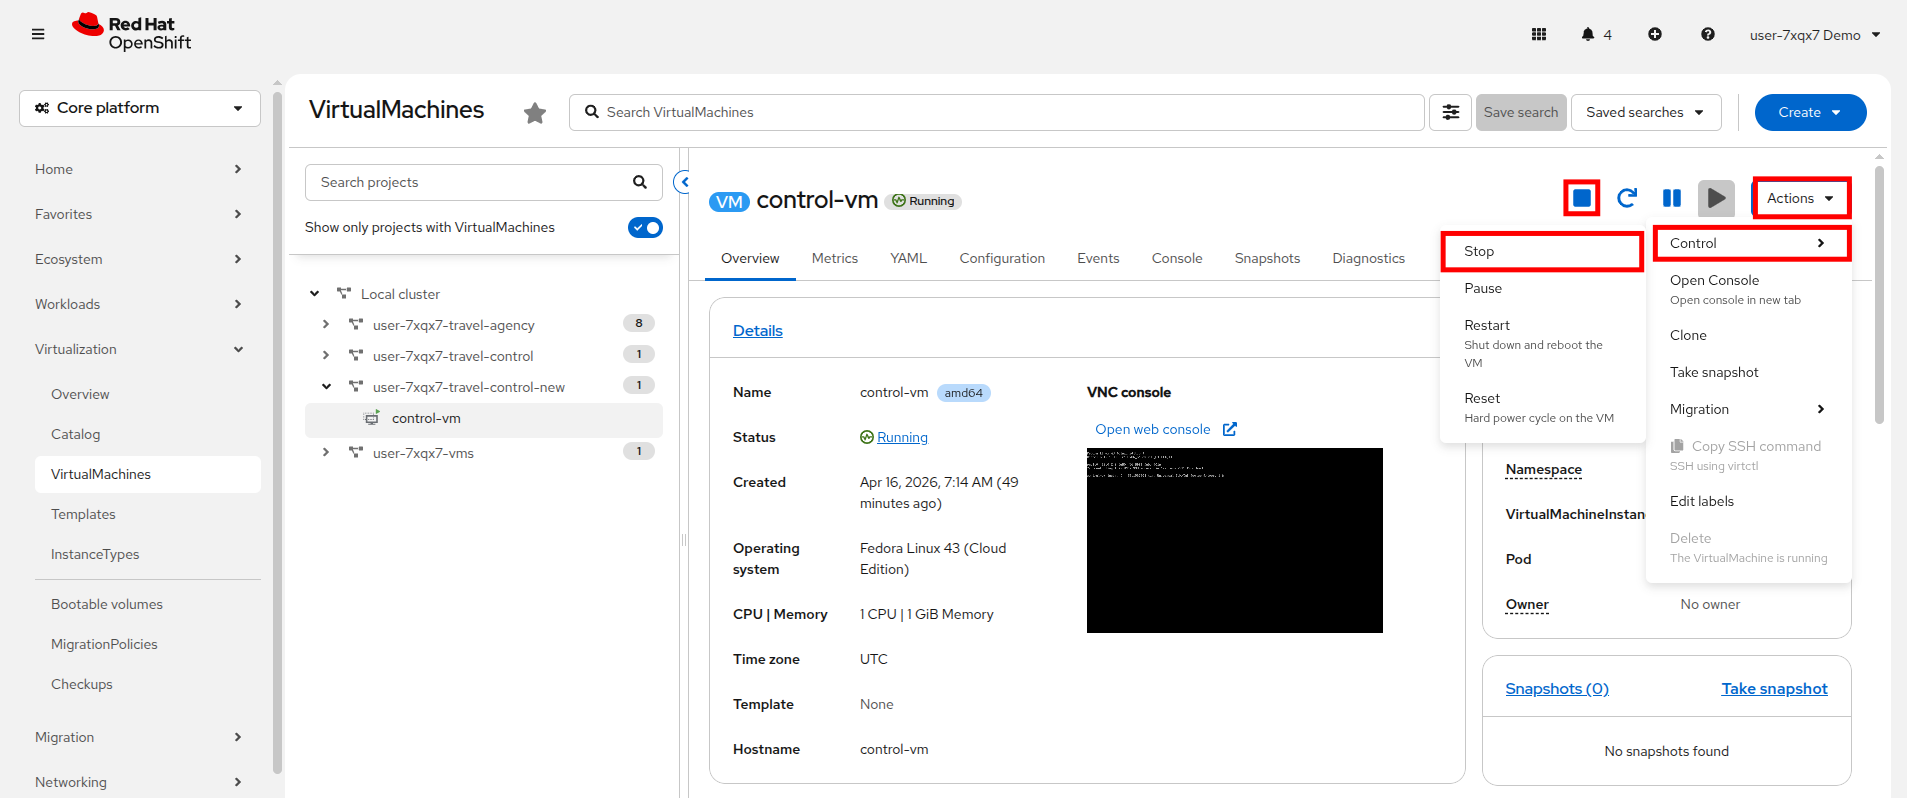
On this screen use either the Stop button, or select the option for Stop from the Actions → Control drop down menu.
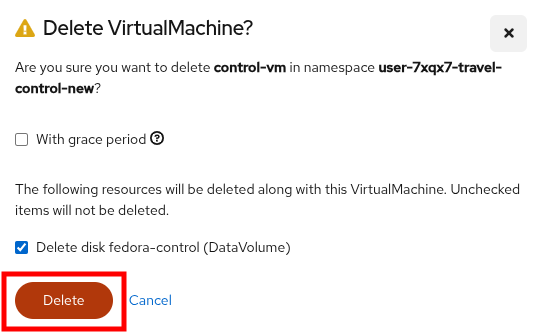
With the virtual machine stopped, you now have the option to Delete the VM available in the Actions drop down menu.
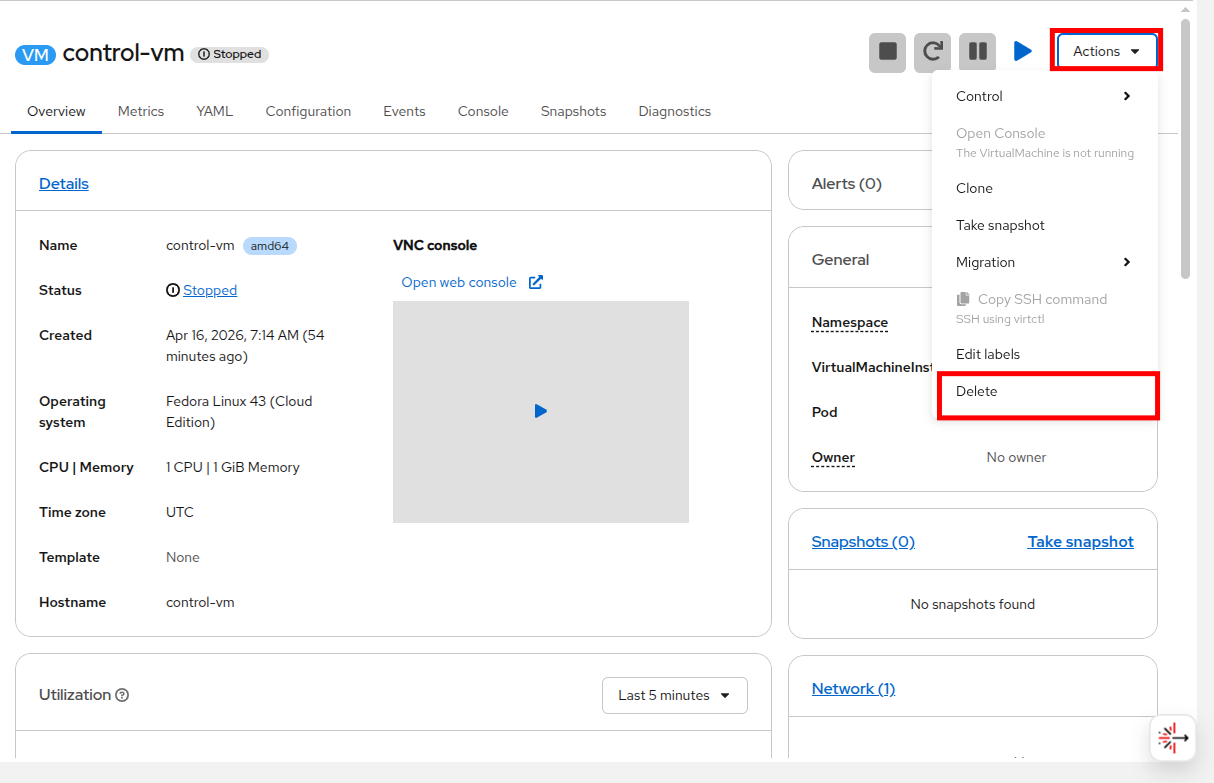
There will be one additional prompt to confirm deleting the virtual machine, click the Delete button.
Once deleted, return to the argo dashboard where you will see that the application is OutOfSync.
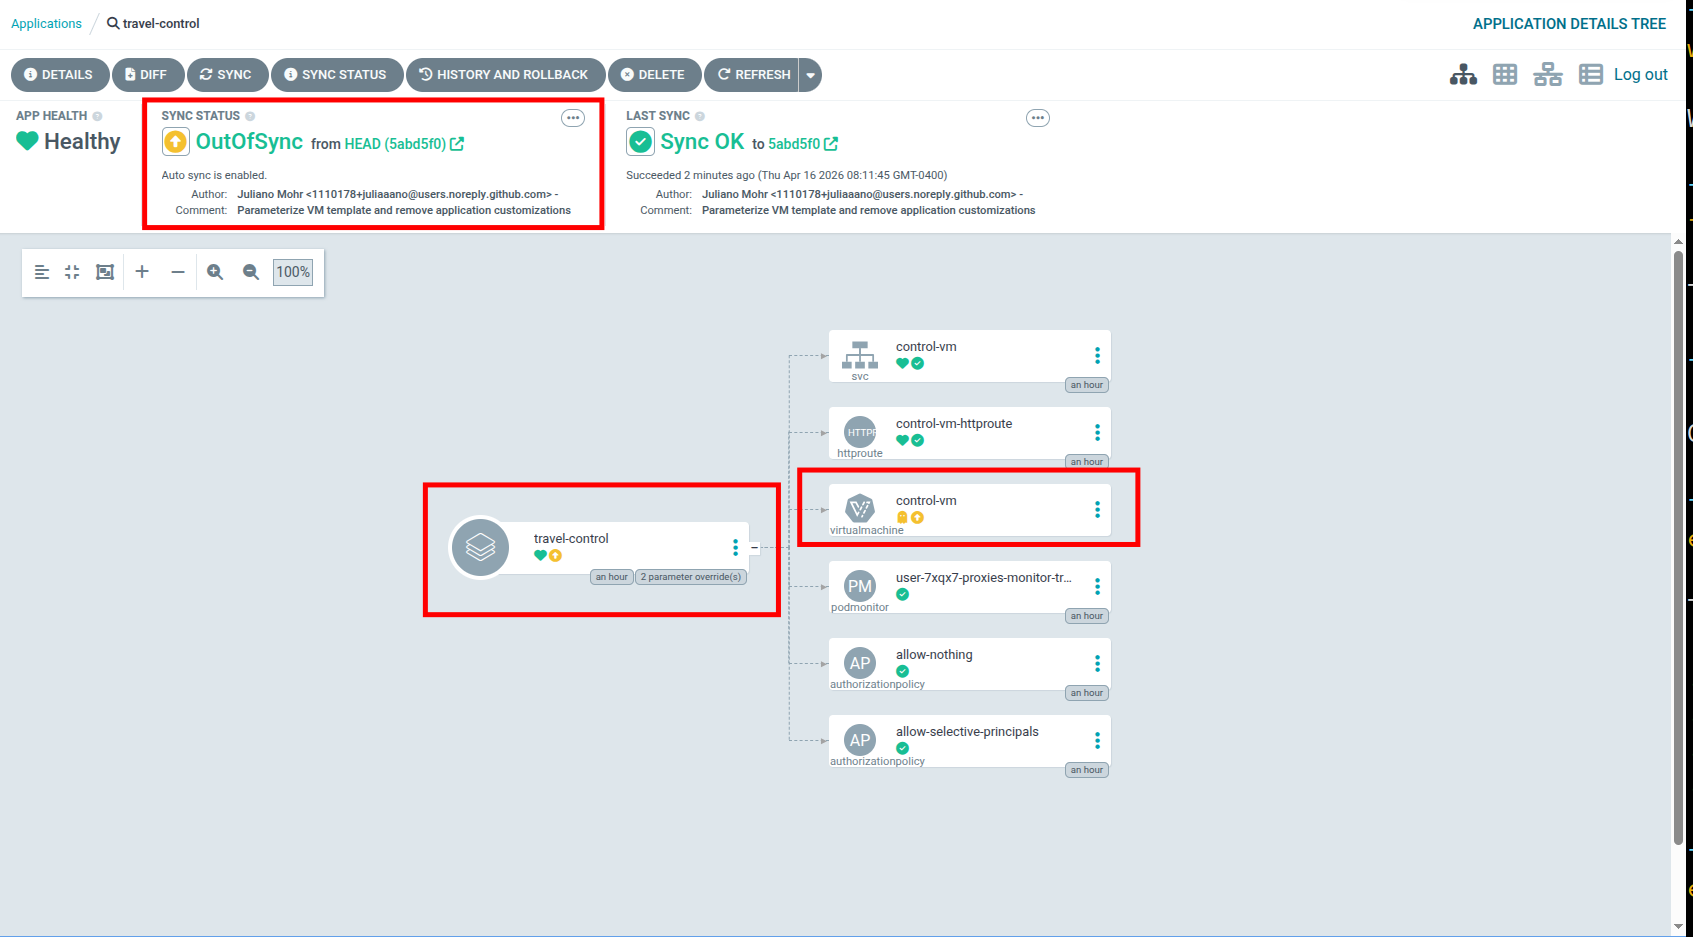
The Argo CD dashboard will step through an automated process where it will briefly show the following:
-
Application status as "OutOfSync" – indicating that the live cluster state no longer matches the Git source.
-
The deleted resource will disappear from the resource tree temporarily.
-
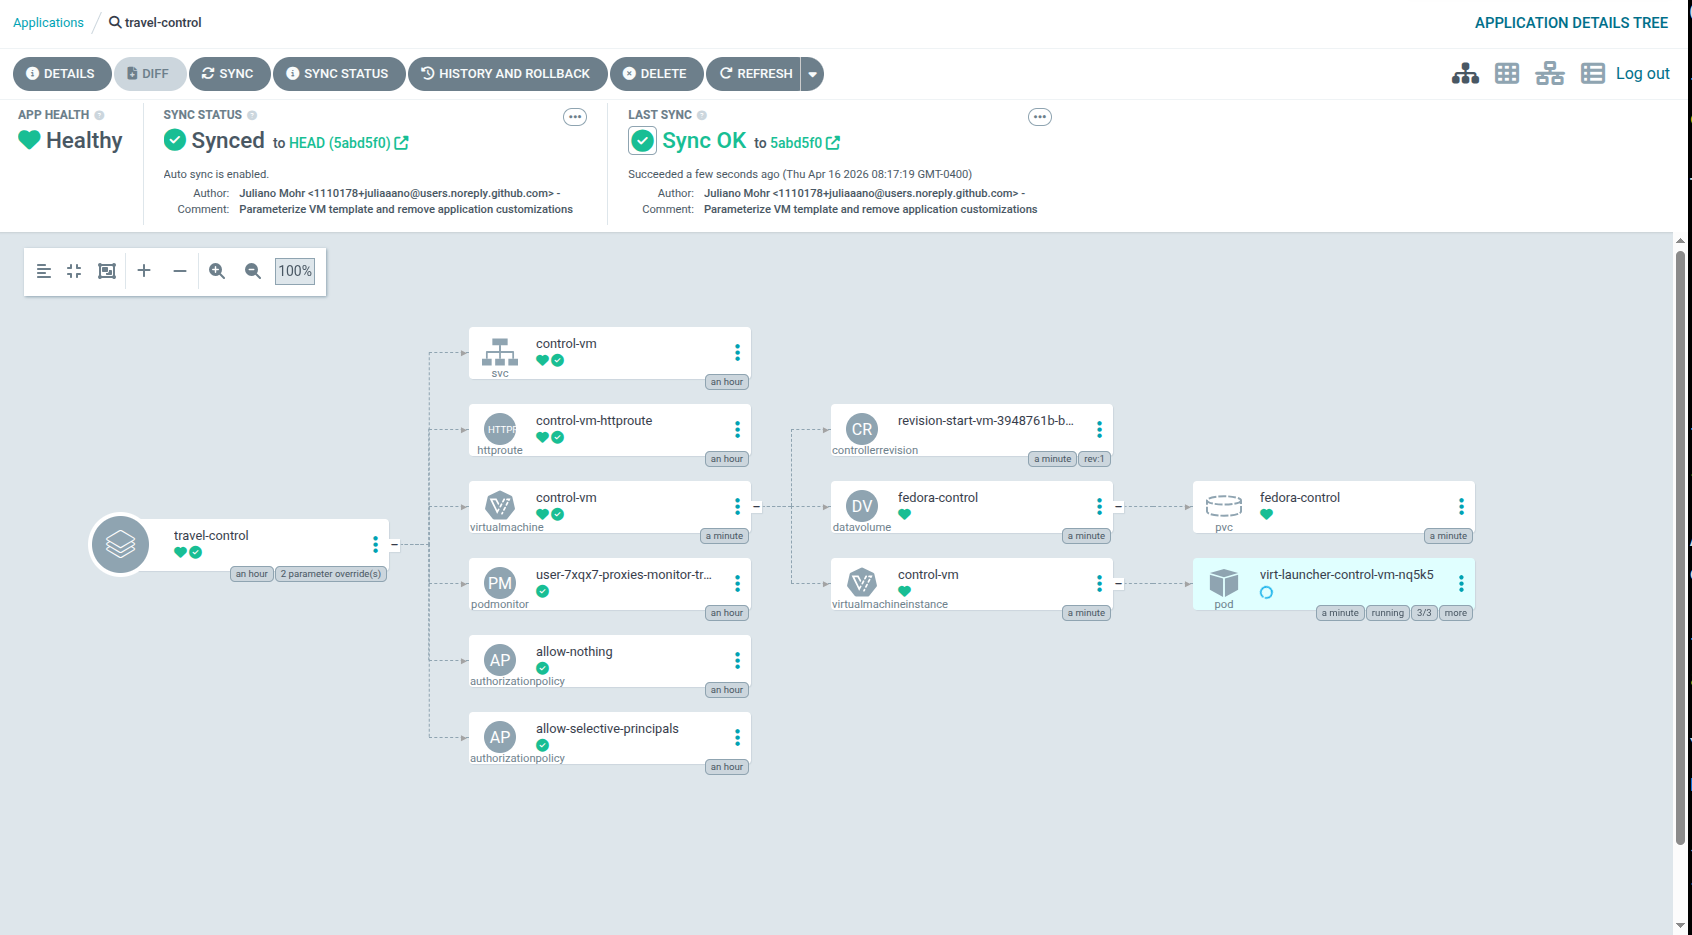
Within moments, Argo CD will auto-sync, and the deleted resource will reappear, restoring the desired state.
-
The status will return to "Synced" and "Healthy", confirming self-healing has taken place.

After it has completed all of this tasks, it will return to the previous healthy state with all of the application components deployed as desired.
Return to the OpenShift console where you will see that the virtual machine that you accidentally deleted has been restored to working order.
Congratulations! You helped the Travel Agency company to automate their whole solution now through Red Hat OpenShift GitOps.
Summary
In this module we learned about Red Hat OpenShift GitOps, and how it can be used to deploy an application or a VM in a declarative fashion. We learned about Red Hat Developer Hub, and how it can be used to create and manage those Git repositories used to host VMs. We also demonstrated how once an application or virtual machine are managed by GitOps, it can be used to self-heal applications that have been affected by user error or other unforeseen circumstances by restoring resources to known good desired state.