Module 3: Building intelligent applications
In Module 1 you saw that the Parasol Insurance inbox uses simple keyword matching to classify emails. Ambiguous emails that the keywords cannot confidently classify are flagged as REVIEW REQUIRED, requiring manual triage by a claims administrator. In this module you will replace that keyword matching with a Large Language Model (LLM)-powered classification service that intelligently routes every email, promote it to production, and observe how OpenShift automatically scales the application under load.
OpenShift provides multiple autoscaling capabilities. The Horizontal Pod Autoscaler (HPA) scales workloads based on CPU or memory utilization, which you will use in this module. For event-driven or scale-to-zero workloads, OpenShift Serverless (based on Knative) offers more advanced scaling options, though it is not used in this lab.
Learning objectives
By the end of this module, you will be able to:
-
Integrate an LLM-powered classification service into an existing Quarkus application using Langchain4j
-
Explain how platform-managed credentials (
LLM_BASE_URL,LLM_API_KEY) flow from Vault through ExternalSecrets into both Dev Spaces and deployed environments -
Test LLM-powered features locally using Quarkus dev mode
-
Promote a feature to production using a tag-based GitOps workflow through GitLab
-
Inspect container images in Quay after a pipeline build
-
Verify a production deployment using Argo CD
-
Observe Horizontal Pod Autoscaler (HPA) behavior under load
Exercise 1: Add LLM classification to the application
To save time and reduce errors, the LLM classification code has been prepared on a branch in your repository. You will overlay it onto your current working branch, review the key changes, and test the new classification locally.
Overlay the LLM classification code
-
Return to your Dev Spaces workspace (reopen it from the Topology view if needed)
-
If Quarkus dev mode is still running, stop it by pressing
Ctrl+Cin the terminal where it is running -
Open a new terminal (top-left menu Terminal > New Terminal) and run the following command to overlay the LLM classification code:
git checkout origin/llm-classification -- .This pulls the LLM classification files onto your current branch without switching branches. The changed files can be seen in the Source Control view on the left.
 Figure 1. Source Control showing the overlaid LLM classification files
Review the changes
Take a few minutes to review the key files that were added or modified:
-
Open
src/main/java/com/parasol/EmailClassifier.javaThis is the LLM classification service. Notice the
@RegisterAiServiceannotation from Langchain4j and the@SystemMessagethat defines the classification rules. The system message tells the LLM how to categorize each email, including what qualifies as a claim, a follow-up, a new customer inquiry, and so on. -
Open
src/main/java/com/parasol/EmailRouter.javaPreviously this file contained the keyword matching logic. Now it delegates classification to the
EmailClassifier. The router sends each email’s content to the LLM and uses the response to route the email to the appropriate category. -
Open
src/main/resources/application.propertiesLook for the LLM configuration properties:
%dev.quarkus.langchain4j.openai.base-url=${LLM_BASE_URL}
%dev.quarkus.langchain4j.openai.api-key=${LLM_API_KEY}
%dev.quarkus.langchain4j.openai.chat-model.model-name=qwen3-14b
The
%devprefix means these properties apply when running in Quarkus dev mode. TheLLM_BASE_URL,LLM_API_KEY, andqwen3-14bmodel are variables that the platform administrator configured specifically for adding agentic features to applications. These credentials are pre-loaded into your Dev Spaces workspace so that developers can test LLM-powered features locally without any manual setup.In the deployed environments (dev and prod namespaces), valid vLLM credentials are injected by the ExternalSecrets you saw in Module 1. The platform engineer stored the LLM endpoint and API key in Vault, and the ExternalSecrets Operator syncs them into your namespaces as Kubernetes Secrets. This means credentials flow seamlessly from local development in Dev Spaces to deployed workloads on the cluster, all managed by the platform team.
Test the LLM classification
-
Start the application in dev mode again using Terminal > Run Task… > devfile > Start Development mode
-
Wait for Quarkus to start and open the application preview
-
Navigate to the Inbox page
-
Notice the difference: there are no REVIEW REQUIRED emails. Every email has been intelligently classified with a specific category and a detailed routing reason from the LLM.
Compare this to what you saw in Module 1 where several emails were flagged for manual review. The LLM understands the content and context of each email, making nuanced classification decisions that keyword matching cannot.
 Figure 2. Inbox with LLM-classified emails and no REVIEW REQUIRED entries
 -
Return to OpenShift Dev Spaces and view the logs printed by the Quarkus application. You’ll notice the LLM’s reasoning is printed in the logs.
 Figure 3. Quarkus dev mode logs with LLM classification reasoning
 -
Return to the application preview and click an email in the Inbox. The LLM’s reasoning is displayed.
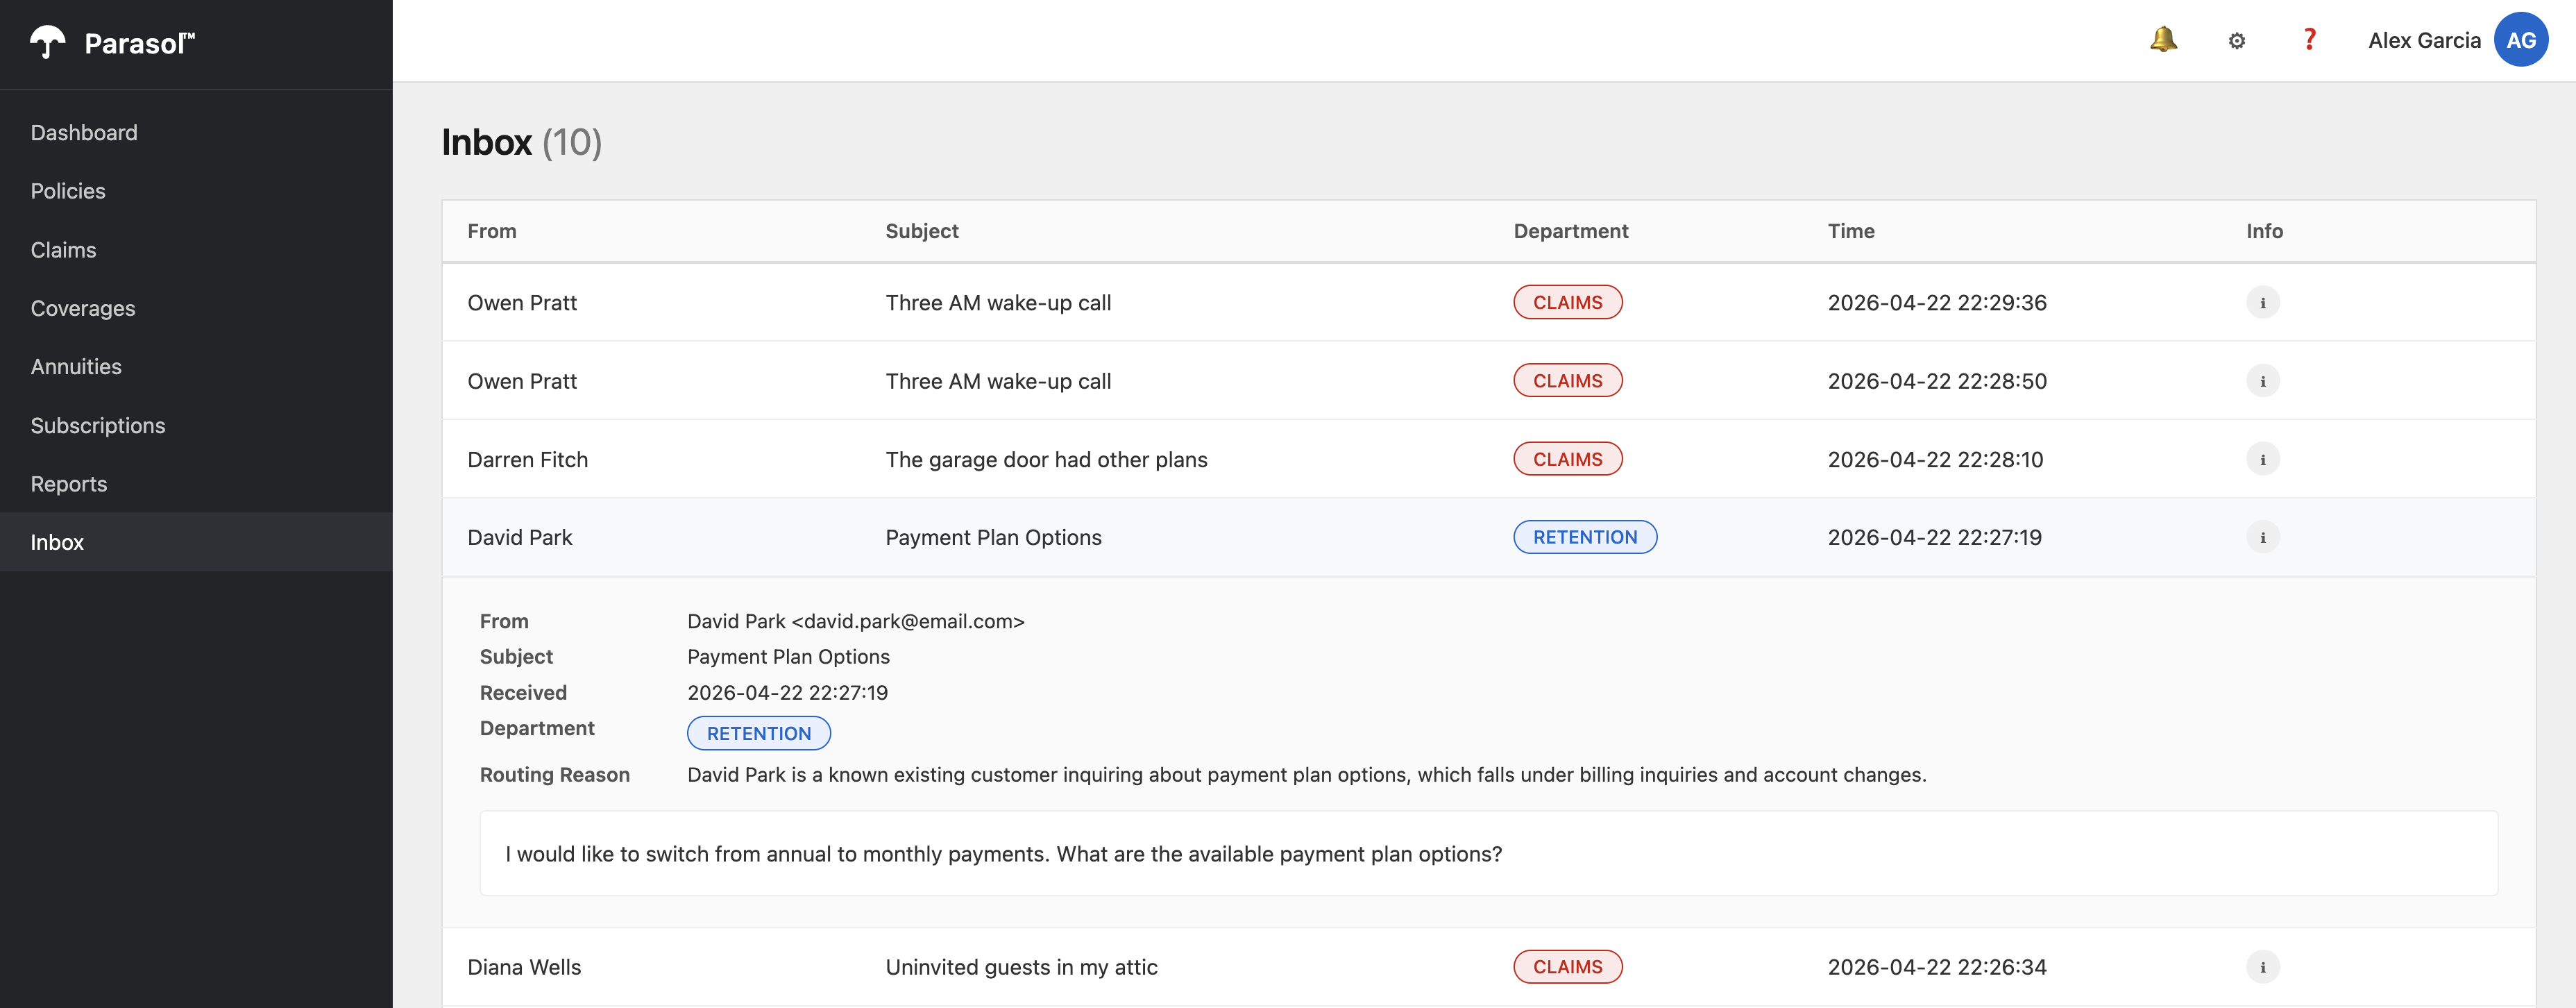 Figure 4. Email detail view showing the LLM classification reasoning
Verify
Confirm the following before moving on:
-
The
EmailClassifier.javafile contains the@RegisterAiServiceannotation and a@SystemMessage -
The
application.propertiesfile referencesLLM_BASE_URL,LLM_API_KEY, and theqwen3-14bmodel -
The Inbox page shows every email classified with a category and reason, with no REVIEW REQUIRED entries
Exercise 2: Deploy to development and check the container image
Now that the LLM classification works locally, push the changes through the same CI/CD pipeline you used in Module 2.
Commit and push
-
Stop Quarkus dev mode by pressing
Ctrl+Cin the terminal -
In the Dev Spaces left sidebar, click the Source Control icon (the branch icon)
-
Review the changed files in the Changes section
-
Enter a commit message:
feat: replace keyword matching with LLM classification -
Click the down arrow on the Commit button and click Commit & Push
-
Switch to the OpenShift Console and navigate to the
{user_name}-buildnamespace -
Select Pipelines > Pipelines from the left menu. Watch the new
pushPipelineRun in progress. The same pipeline Tasks run as before: clone, maven-build, sonar-scan, build-and-push, rollout-restart. -
Wait for the pipeline to complete.
Check the container image in Quay
The pipeline built a new container image and pushed it to the Quay registry. Let’s verify it.
-
Open the Quay tab on the right side of this page
-
Log in with your credentials:
-
Username:
{user_name} -
Password:
{user_password}
-
-
You should see the
parasol-insurancerepository.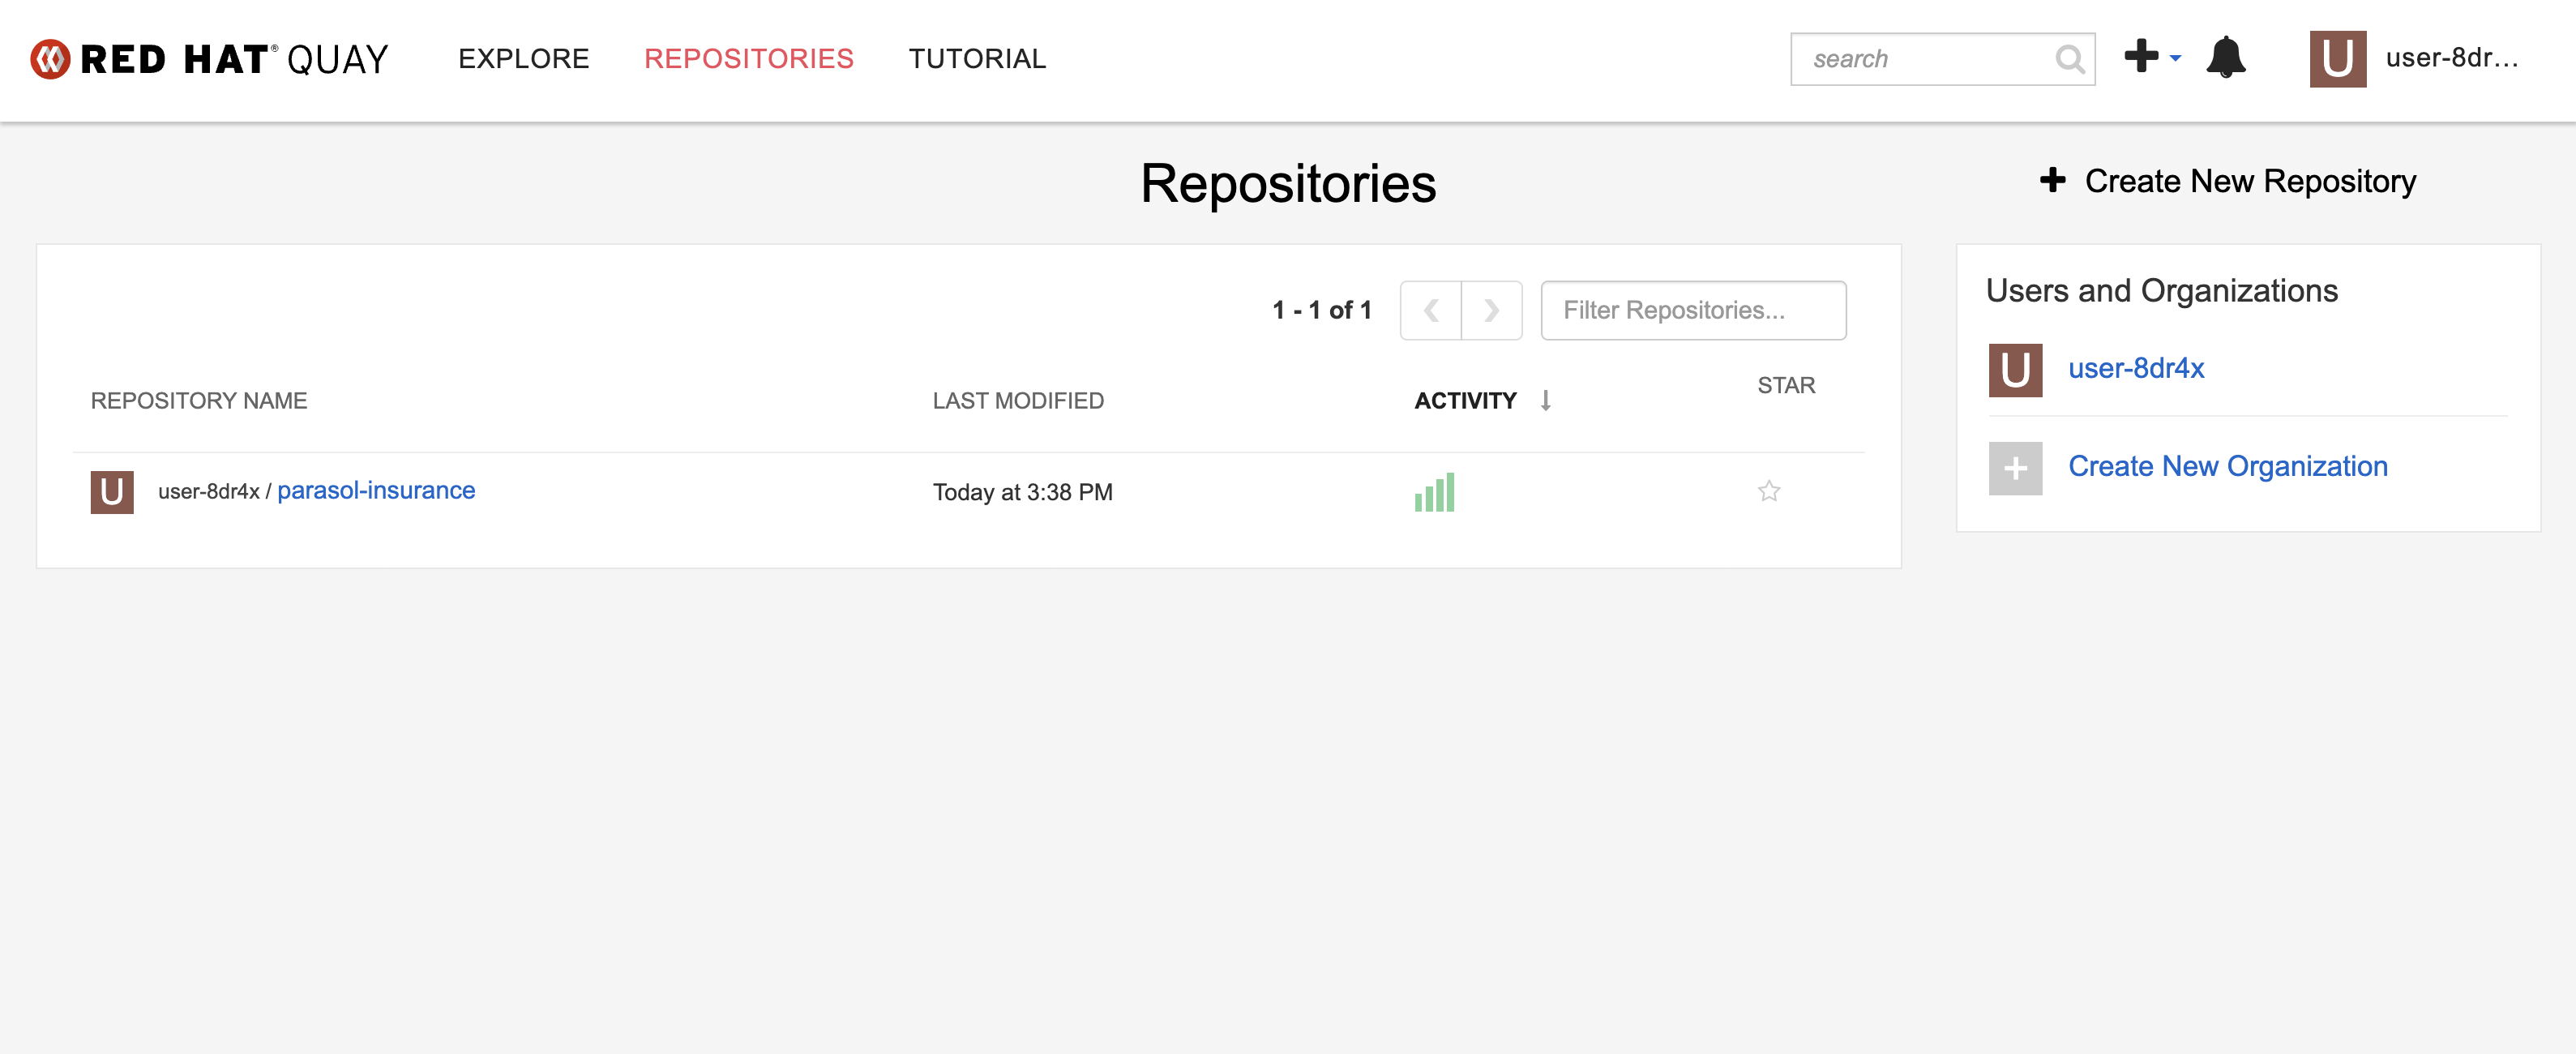 Figure 5. Parasol Insurance repository in Quay
 -
Click and check that it has a
latestcontainer image that was just built by the pipeline. Note thelatesttag and the timestamp confirming it was pushed moments ago.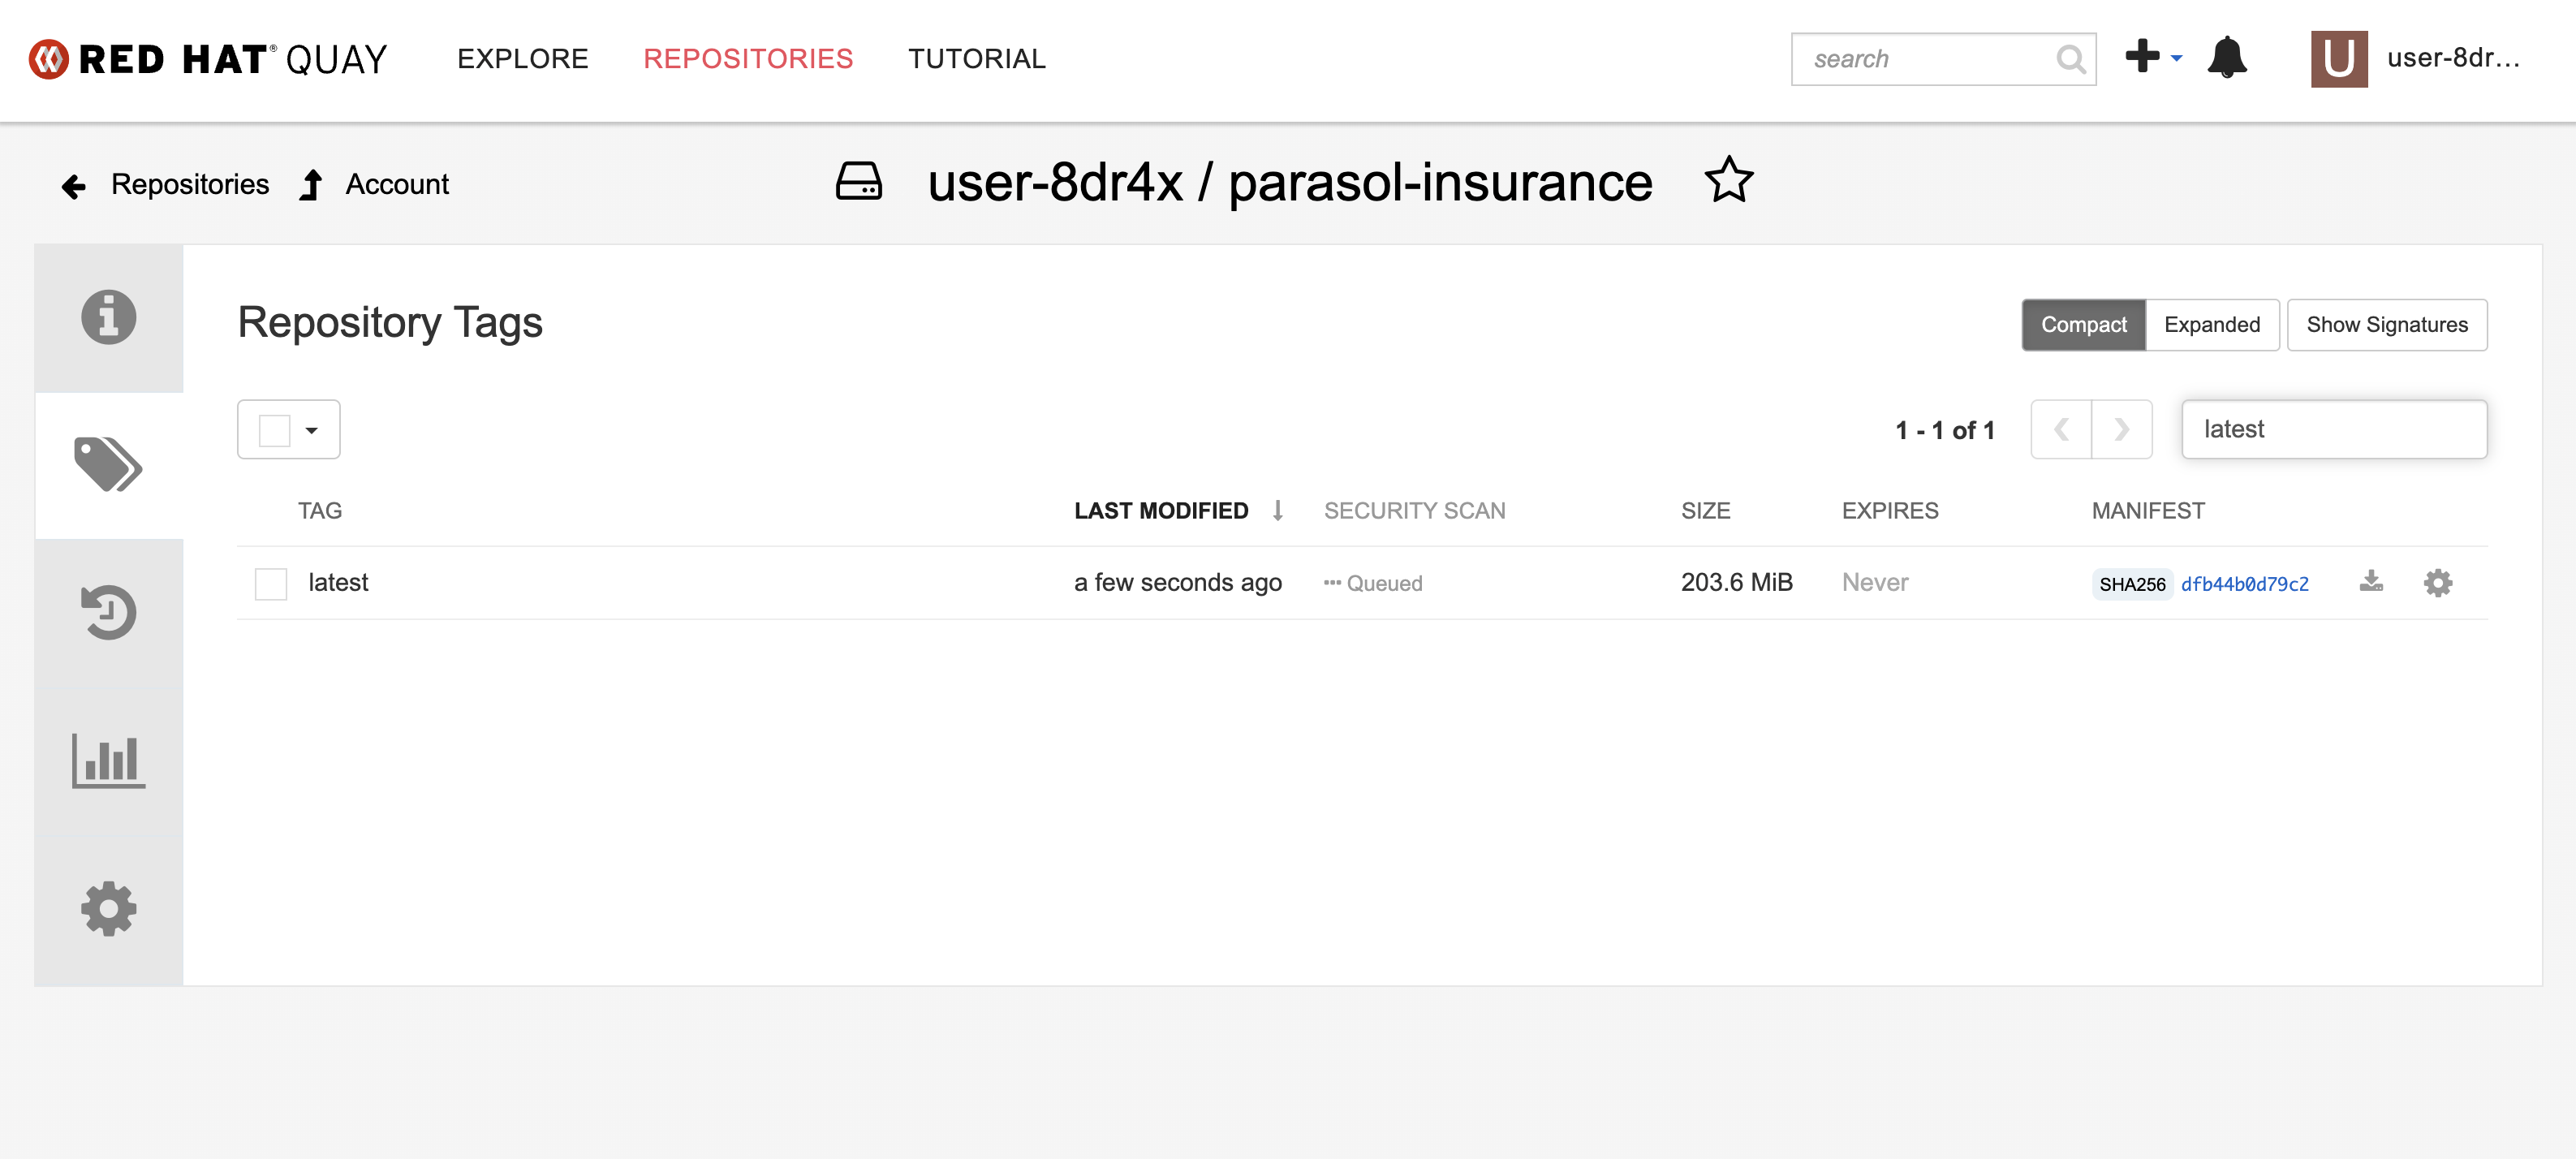 Figure 6. Container image with latest tag in Quay
Exercise 3: Promote to production
So far, all your changes have deployed to the dev environment. Now you will promote the LLM classification feature to production using a tag-based GitOps workflow.
Create a release tag in GitLab
-
Open the GitLab tab on the right side of this page, or navigate to https://gitlab-gitlab.{openshift_cluster_ingress_domain}/
-
Navigate to your parasol-insurance repository
-
In the left sidebar, click Code > Tags
-
Click New tag
-
Enter
v1.0as the tag name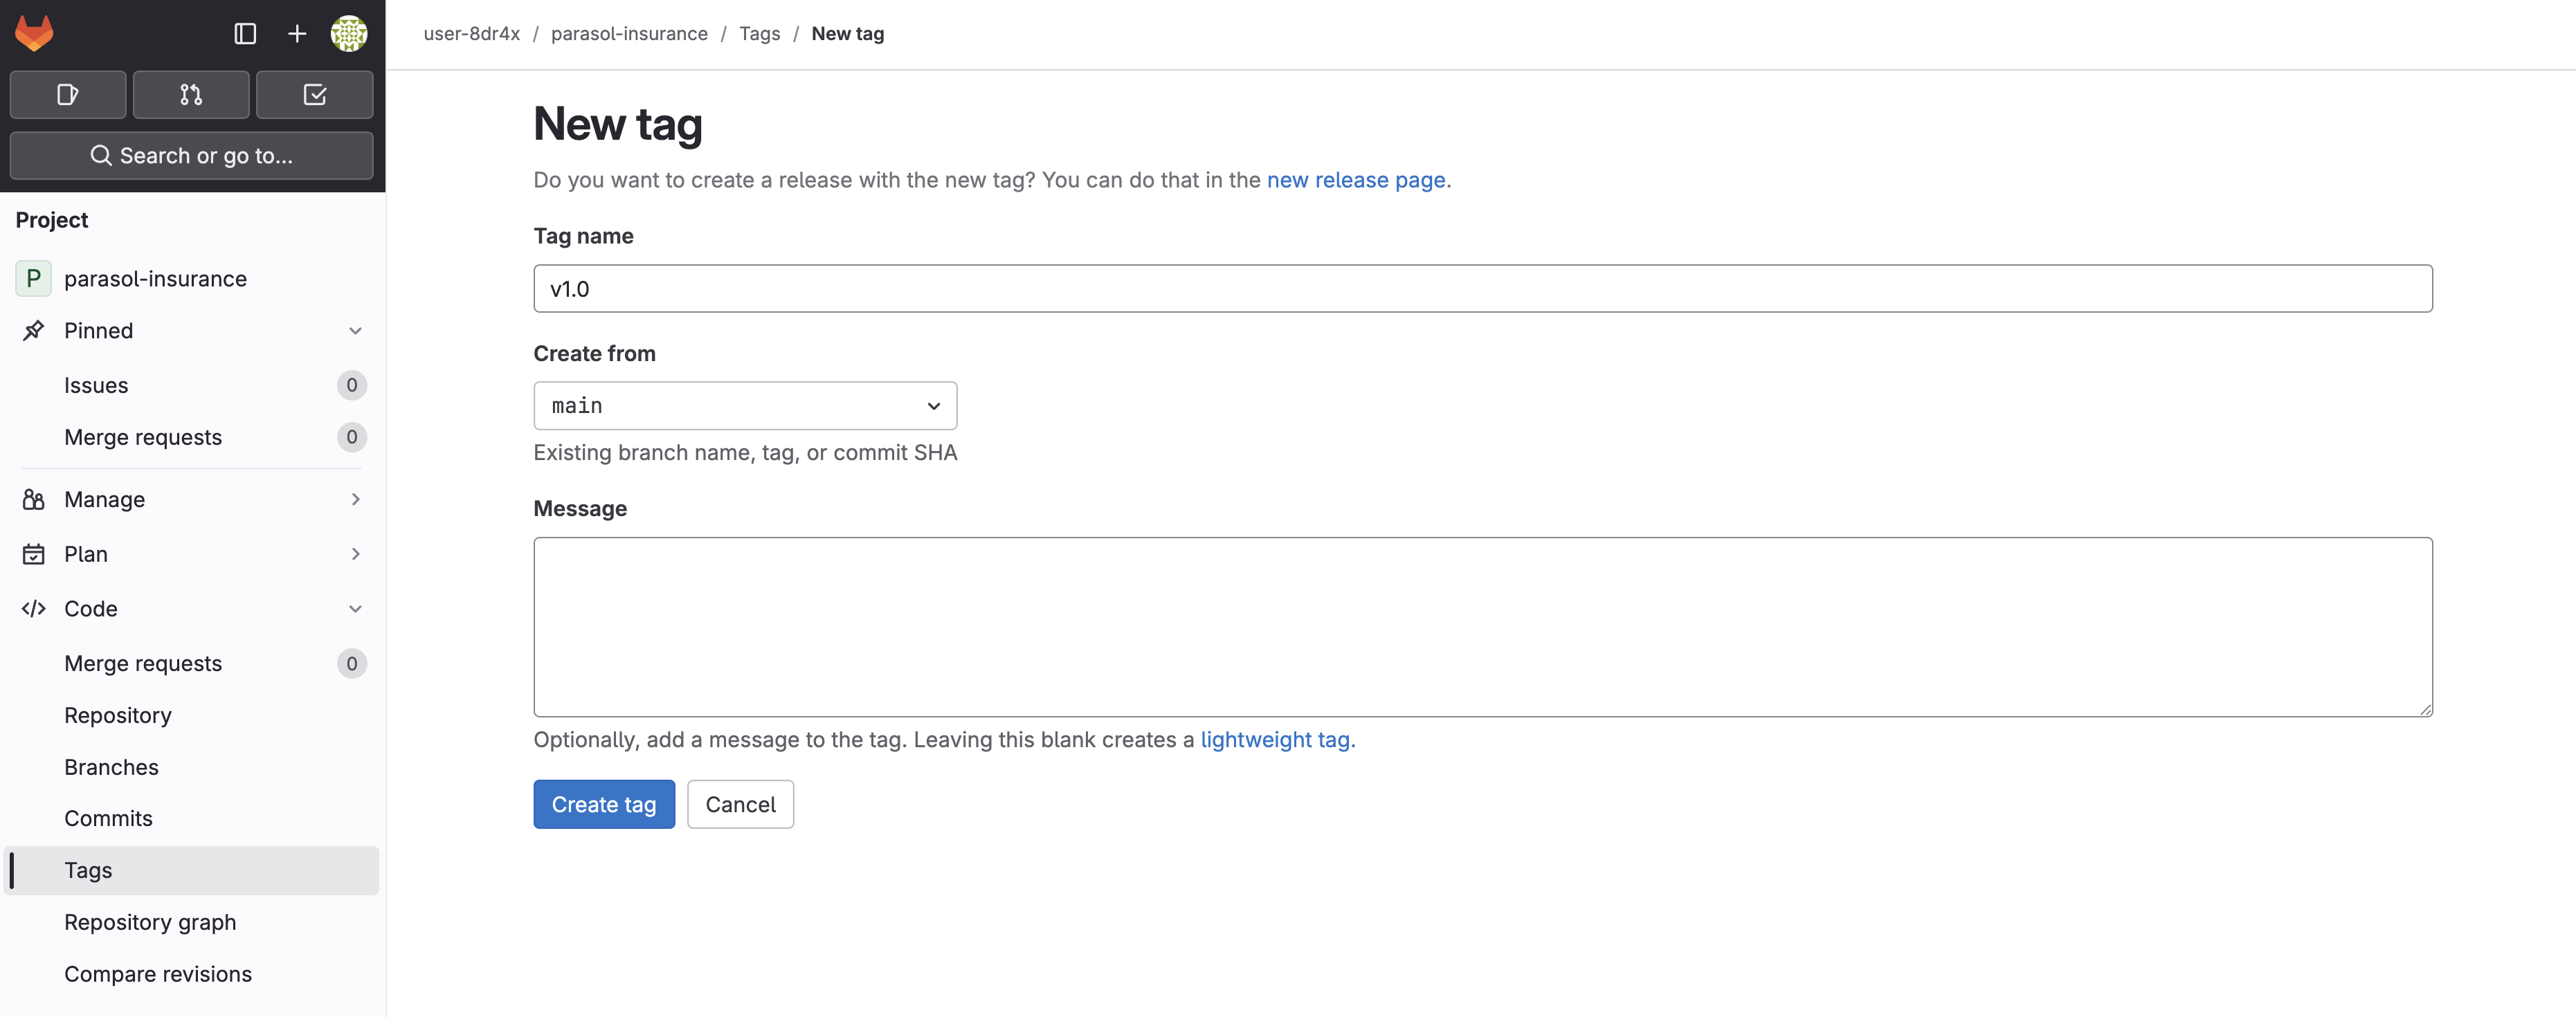 Figure 7. Creating the v1.0 tag in GitLab
 -
Click Create tag
Watch the tag-promote pipeline
-
Switch to the OpenShift Console and navigate to the
{user_name}-buildnamespace -
Select Pipelines > Pipelines from the left menu
-
A new PipelineRun starts for the
tag-promotepipeline. Click on it to watch the stages.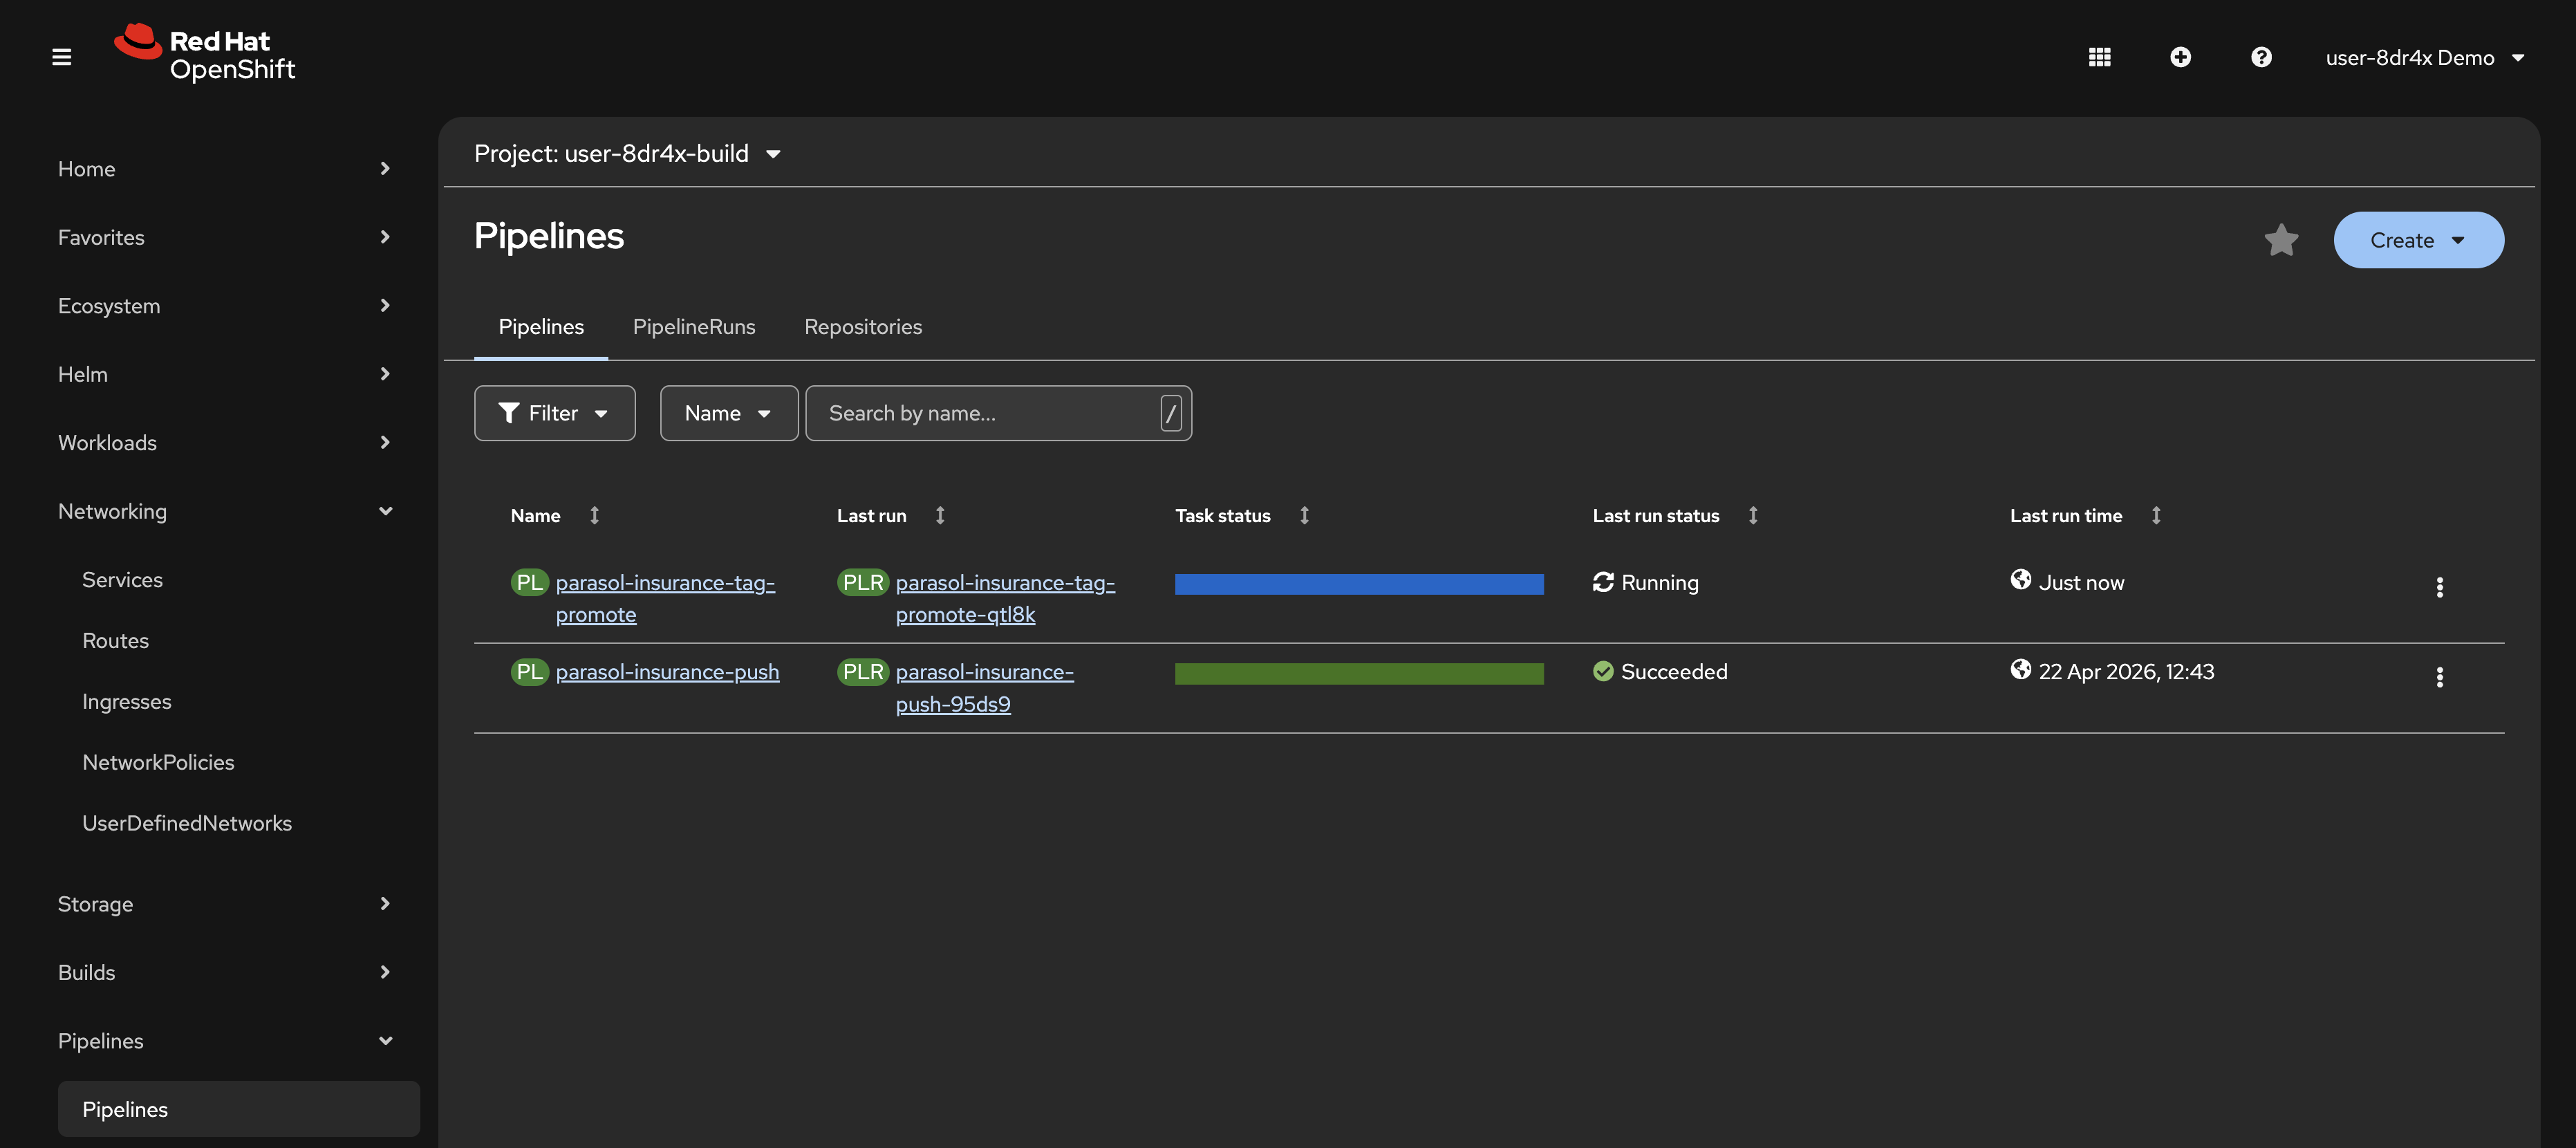 Figure 8. The tag-promote PipelineRun in progress
 -
Note the open-prod-pr task. This task automatically creates a merge request in your
parasol-insurance-manifestsrepository to updatevalues-prod.yamlwith thev1.0image tag.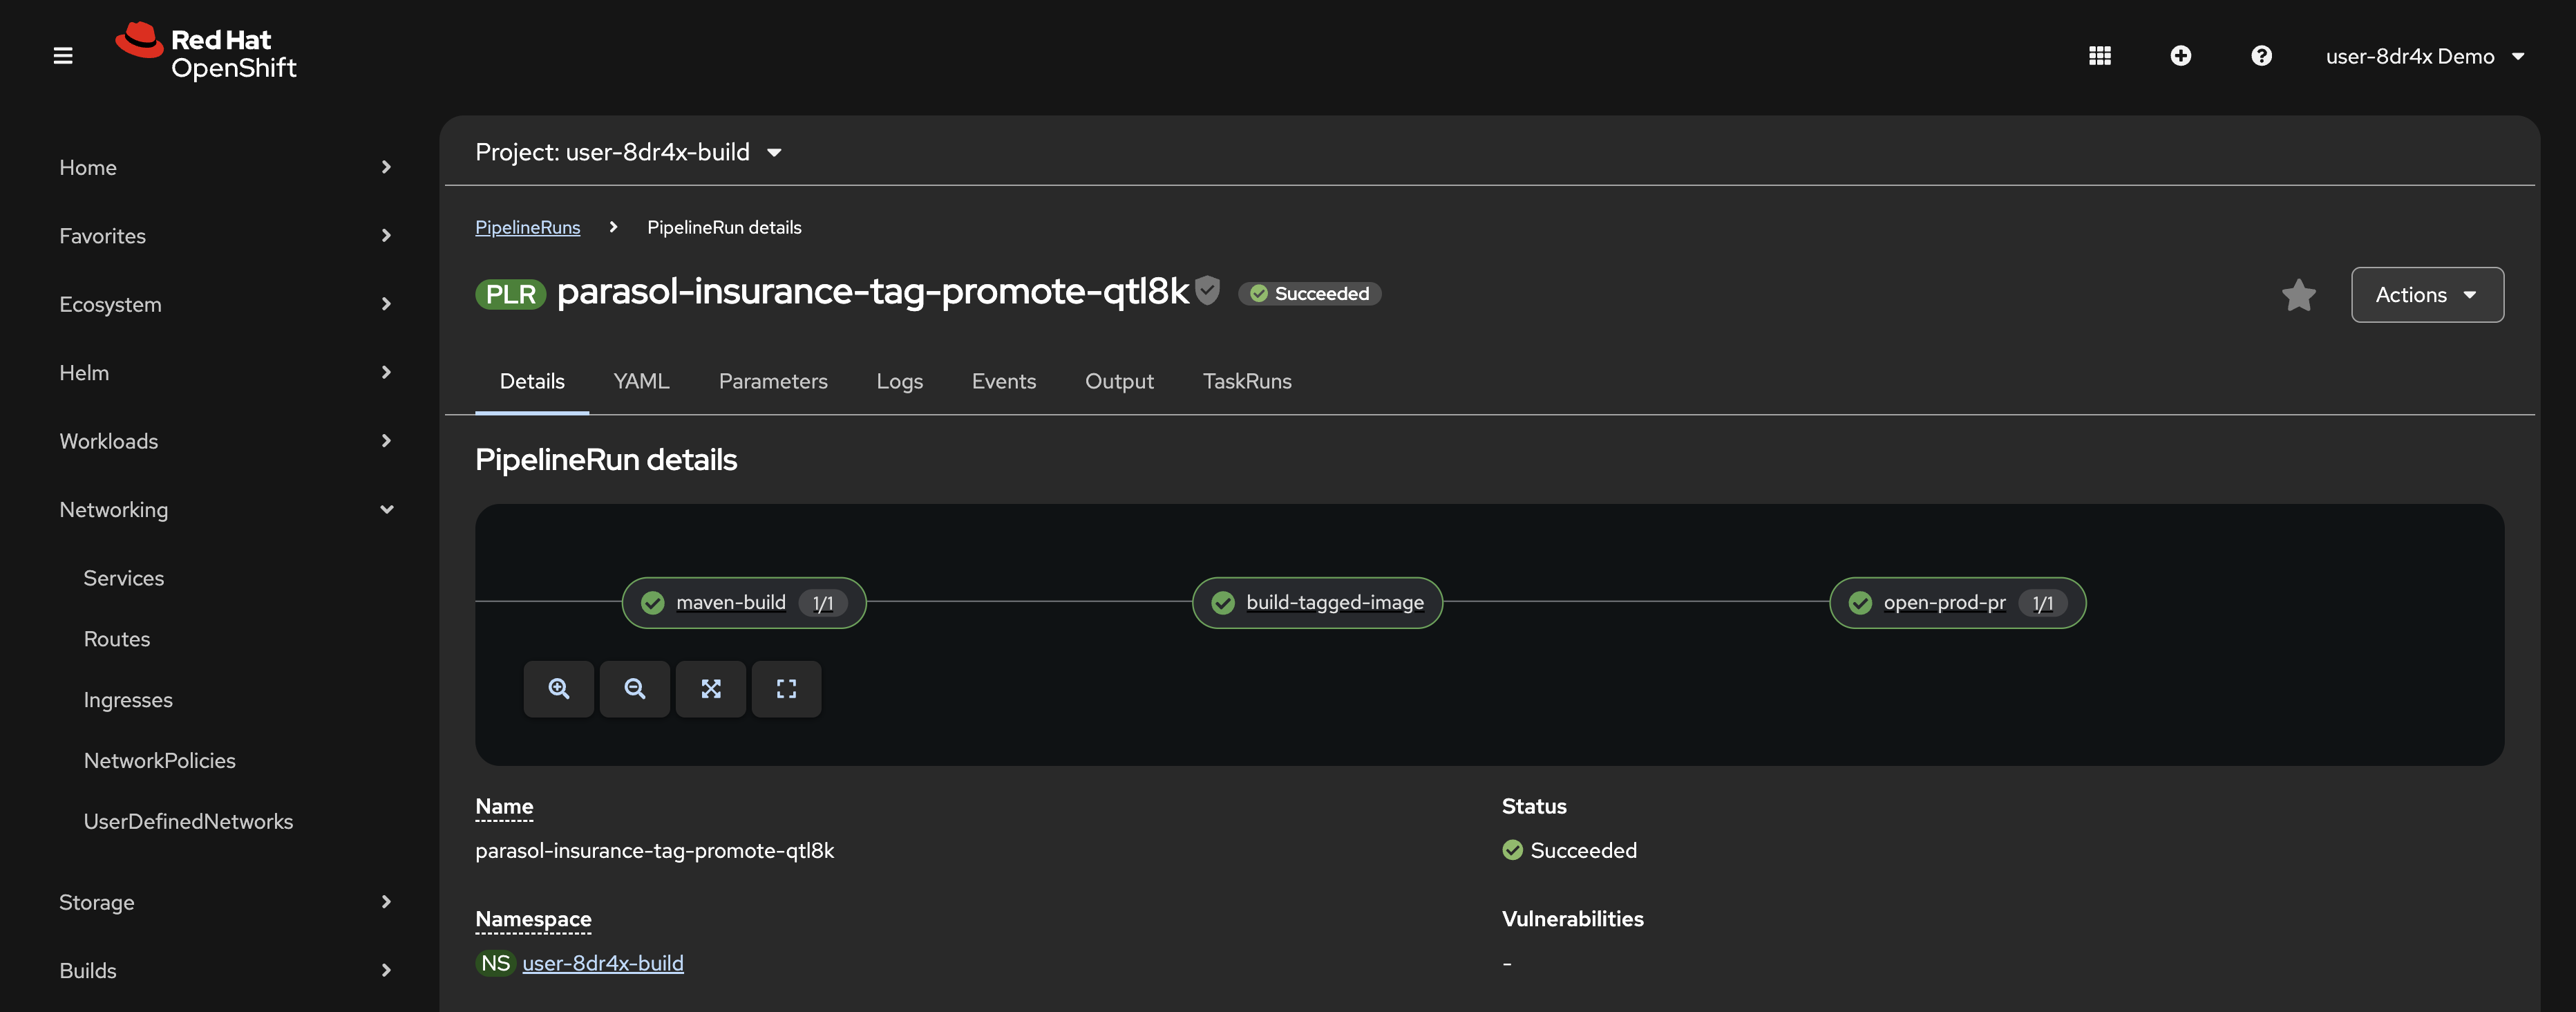 Figure 9. Tag-promote pipeline stages with the open-prod-pr task
 -
Wait for the tag-promote pipeline to complete.
Merge the production promotion
-
Return to GitLab and navigate to your
parasol-insurance-manifestsrepository -
Click Merge Requests in the left sidebar
-
Open the merge request created by the tag-promote pipeline. Review the Changes tab. It updates
image.tagtov1.0invalues-prod.yaml.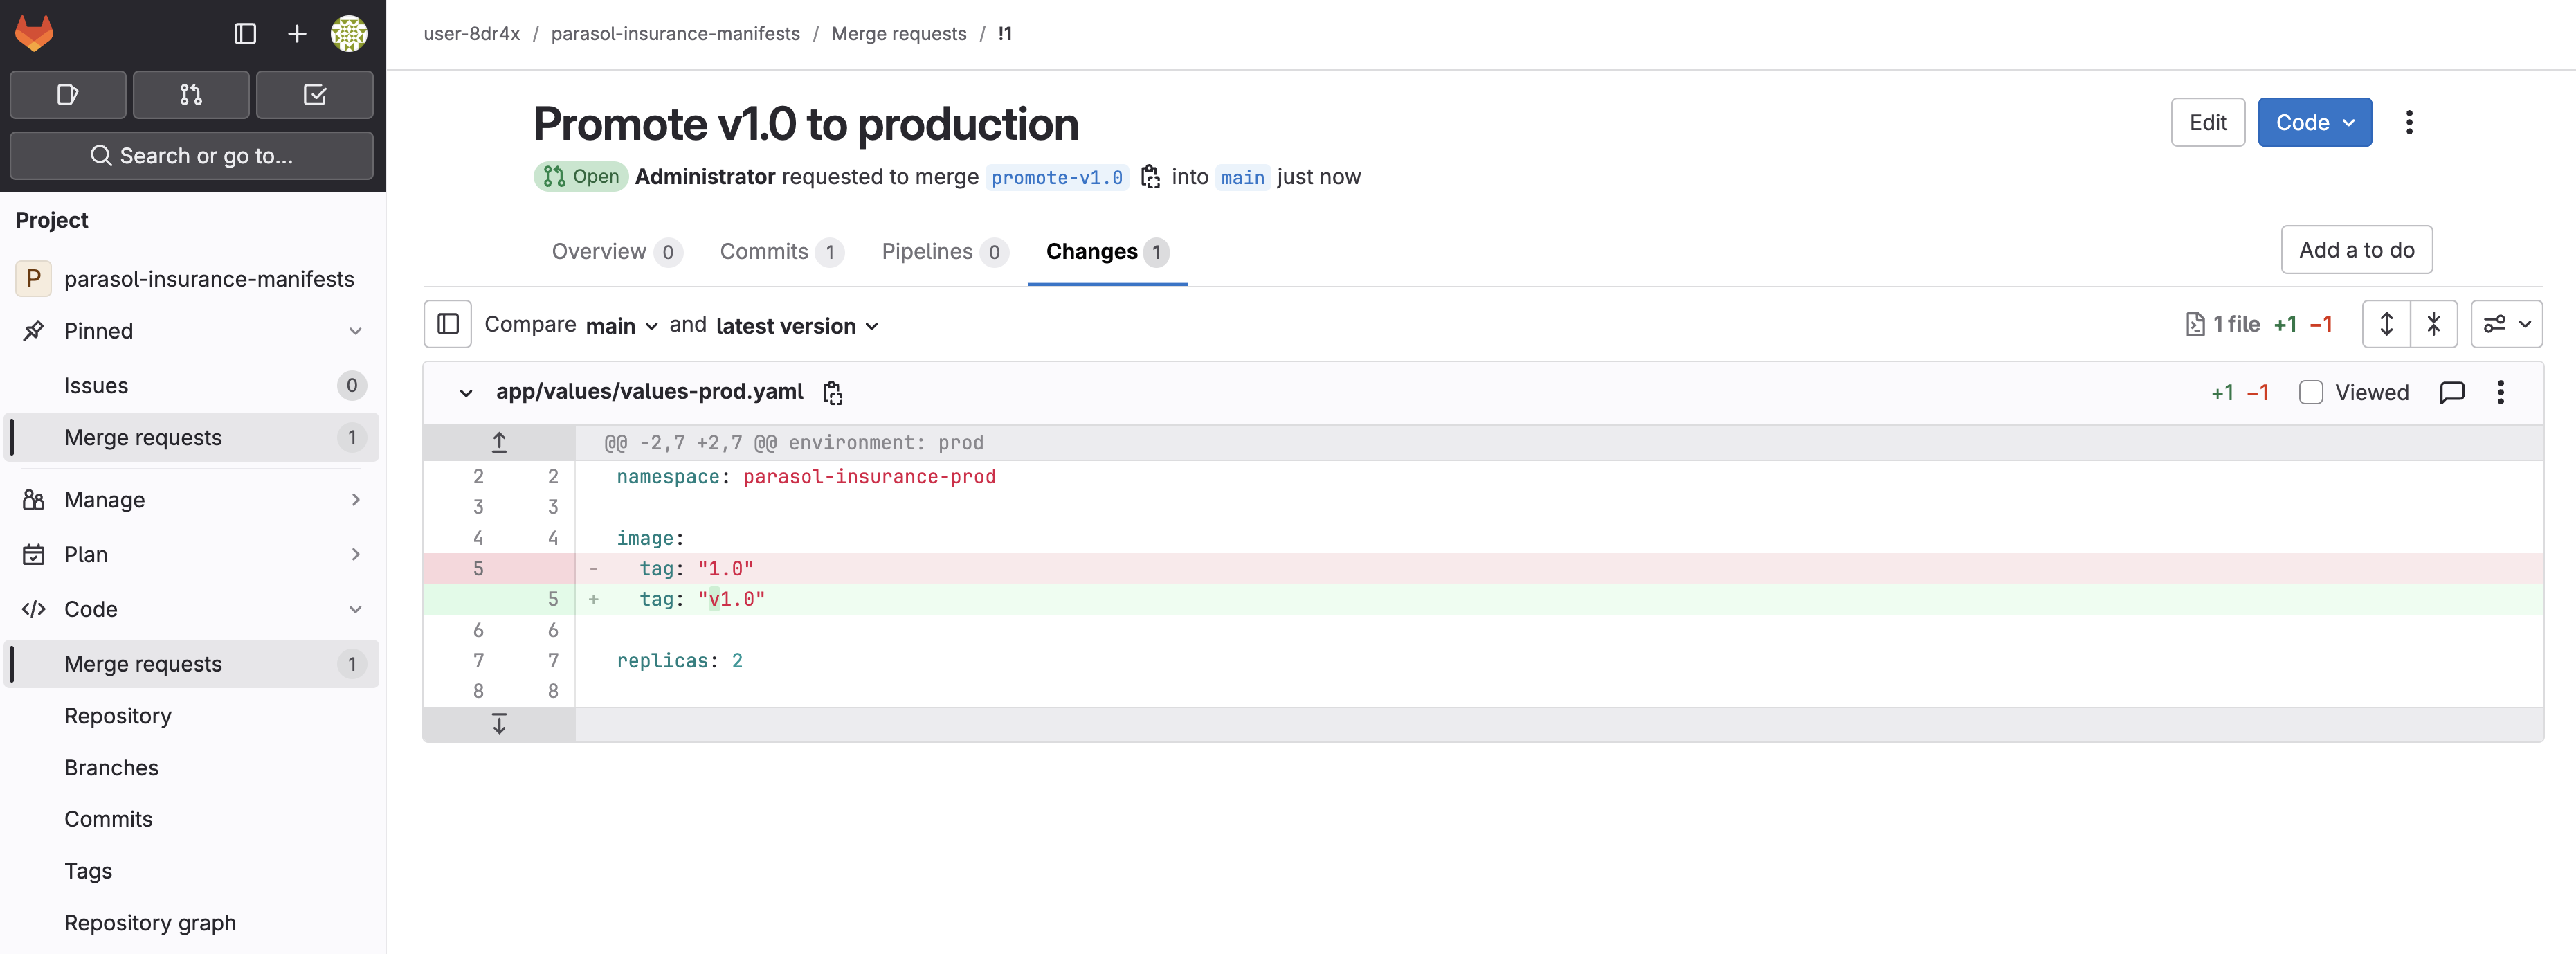 Figure 10. Merge request updating the production image tag to v1.0
 -
Click Merge to merge the changes
-
Open the Argo CD tab on the right side of this page, or navigate to https://openshift-gitops-server-openshift-gitops.{openshift_cluster_ingress_domain}/
-
Find the
{user_name}-prodApplication and click Refresh. You should briefly see the application flash OutOfSync as Argo CD detects the manifest change, then transition to Syncing as it reconciles the new image tag.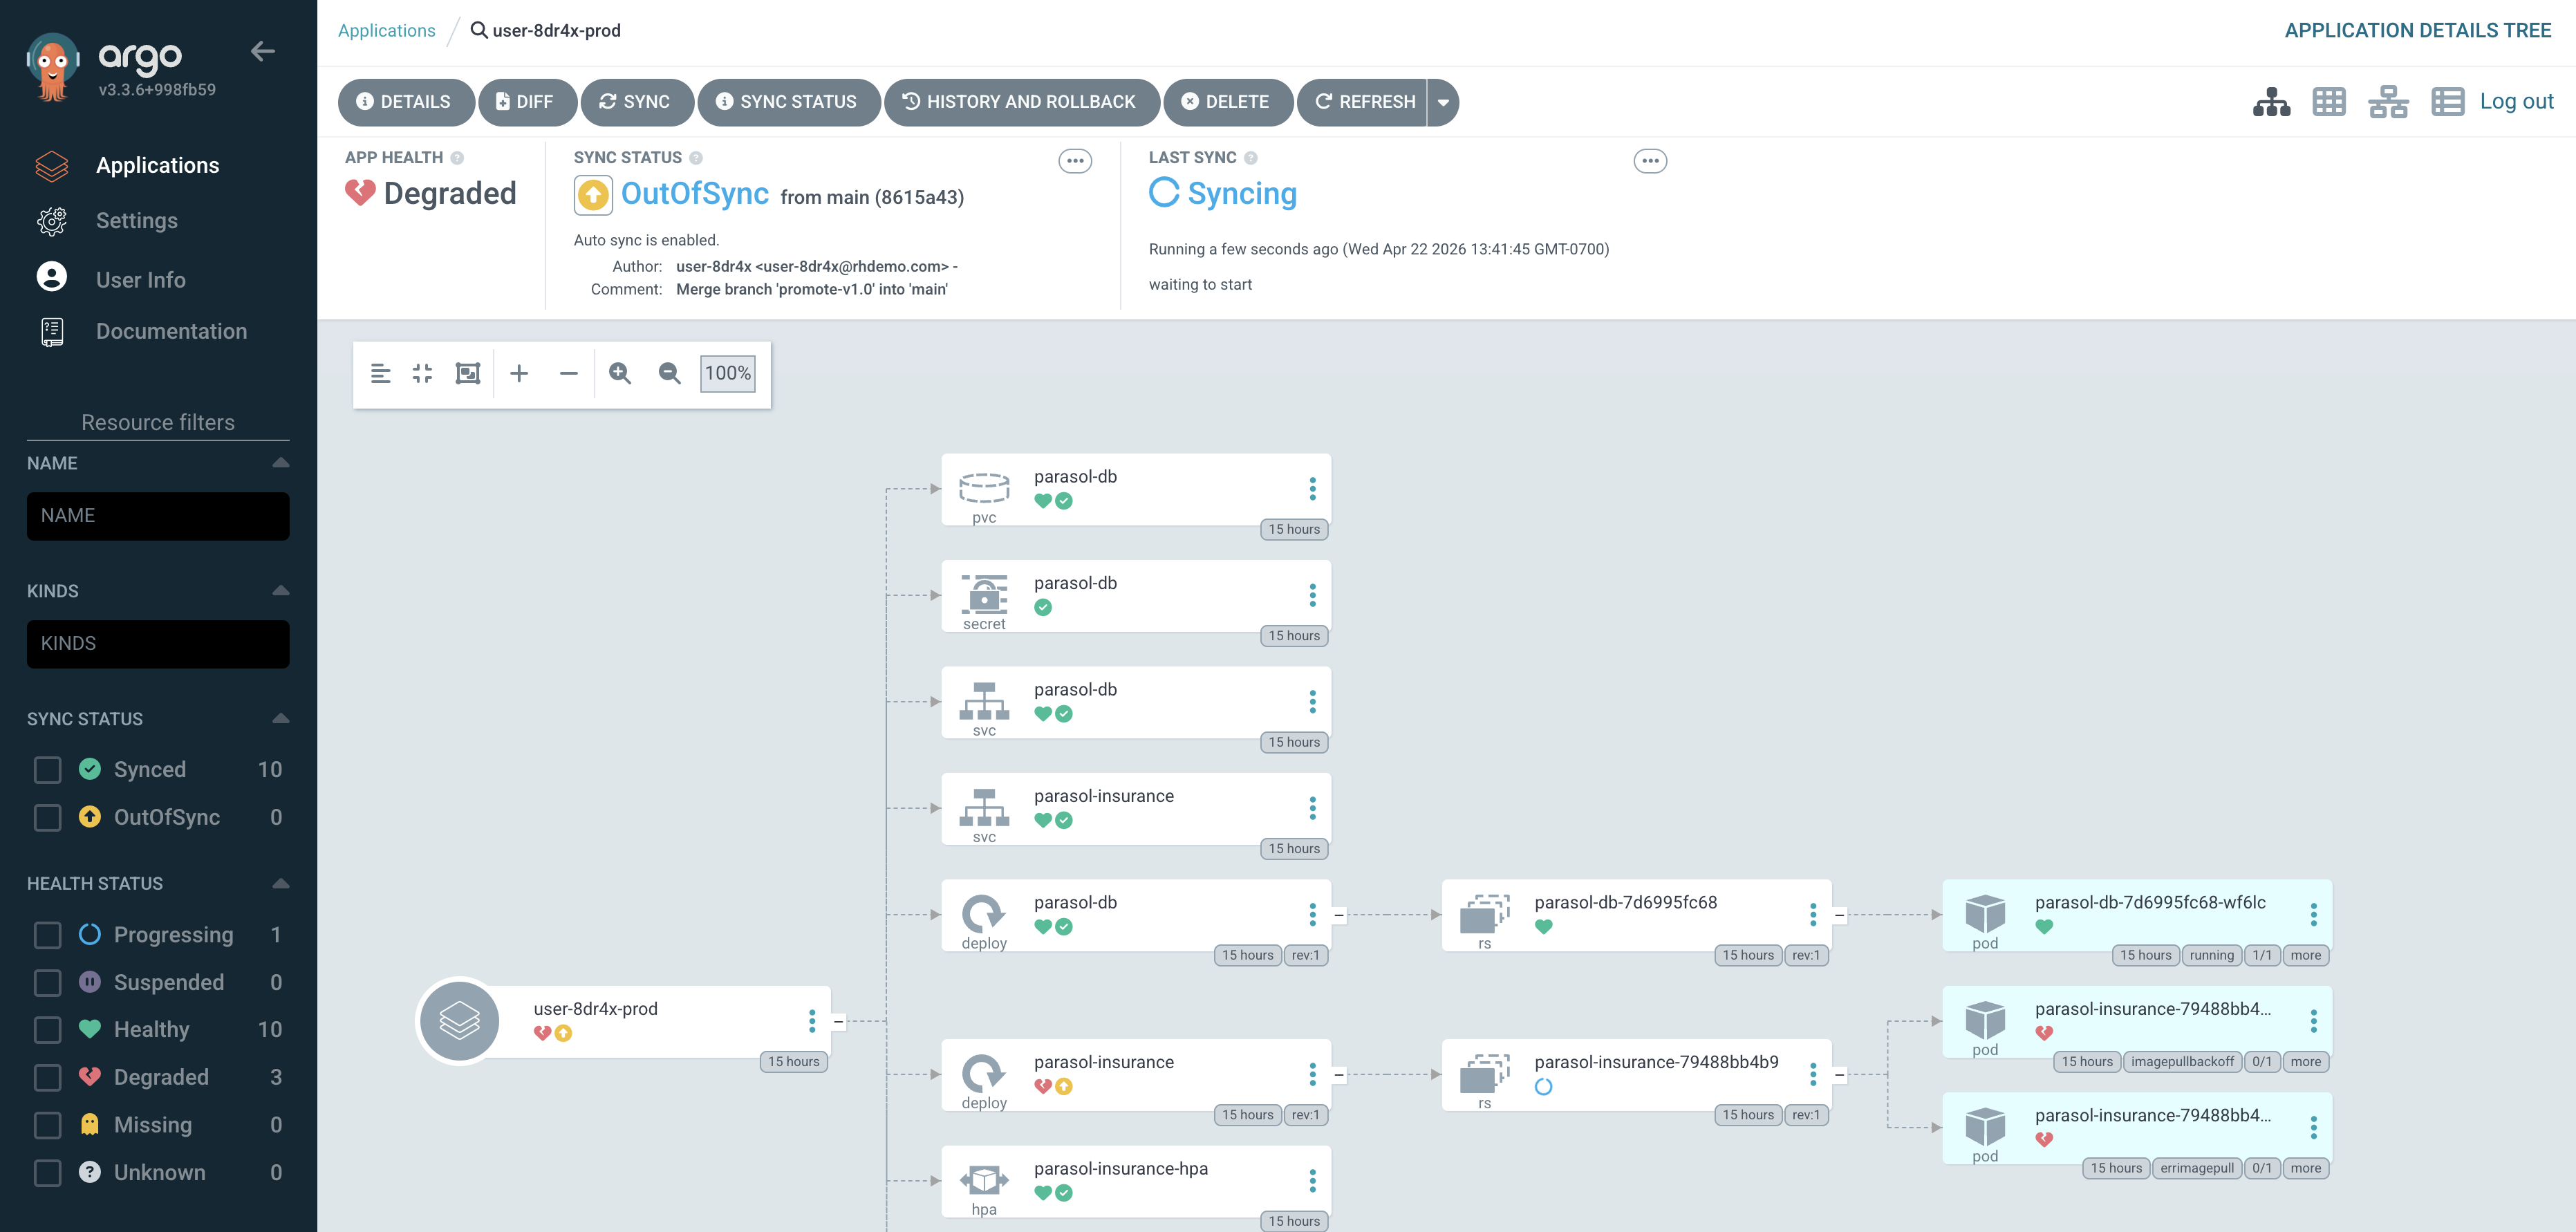 Figure 11. Argo CD showing OutOfSync status before reconciling
Depending on your timing, the application may already be syncing or synced. Argo CD polls for changes every 3 minutes by default, so if you merged a moment ago the sync may have started automatically before you clicked Refresh.
-
Once the Application shows Synced, note the commit SHA and message. They match the merge you just performed in GitLab. This is GitOps in action: the cluster state is driven by what is in Git.
Verify
Confirm the following before moving on:
-
A
v1.0tag exists in your parasol-insurance repository in GitLab -
The
tag-promotePipelineRun completed successfully, including the open-prod-pr task -
The merge request in
parasol-insurance-manifestshas been merged -
The Argo CD
{user_name}-prodApplication shows Synced status and the commit SHA matches the merge
Exercise 4: Verify the production deployment
Argo CD has synced your production namespace with the updated manifests. Let’s confirm the application is running with LLM classification.
-
In the OpenShift Console, navigate to the
{user_name}-prodnamespace -
Navigate to Workloads > Pods
-
The
parasol-insurancePod should have updated with the new production image. This is seen as a new Pod with a recent Created time.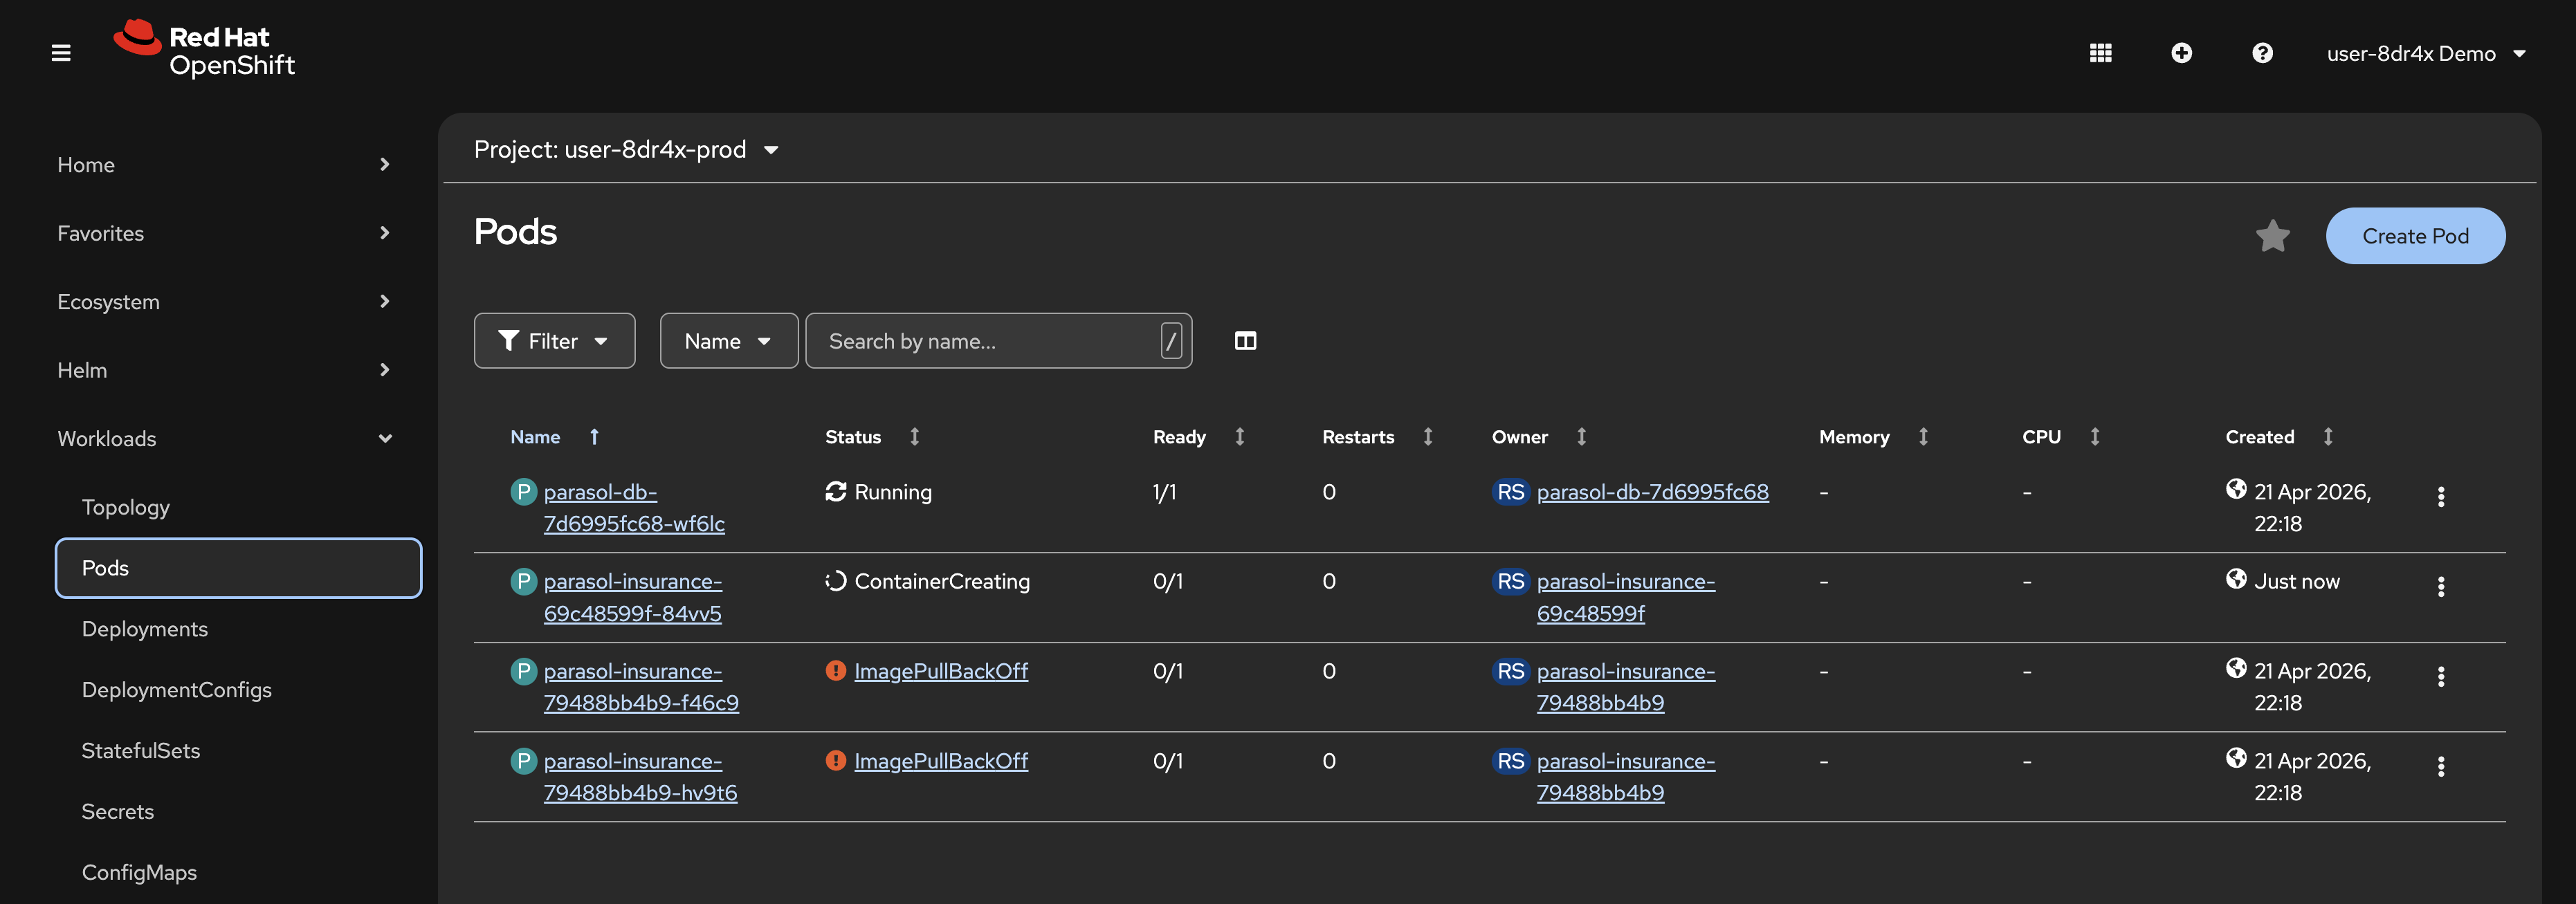 Figure 12. New production Pod after Argo CD sync
 -
Once the rollout completes, click Networking > Routes from the left menu
-
Click the URL in the Location column to view the production Parasol Insurance application
-
Navigate to the Inbox page and confirm the LLM classification is working. Every email should be classified with a category and reason, with no REVIEW REQUIRED entries.
Exercise 5: Autoscaling under load
The production deployment includes a Horizontal Pod Autoscaler (HPA) that automatically scales the Parasol Insurance application based on CPU utilization. Let’s generate some load and watch it scale.
Take a look in your app/values/values-prod.yaml and app/templates/hpa.yaml files in the parasol-insurance-manifests repository to view the HPA configuration. The Pod CPU utilization target is set low, at just 10%. This is deliberate so we can demonstrate autoscaling.
|
Generate load
-
Return to your Dev Spaces workspace
-
Open a new terminal and run the following command to start a load generator Pod in your production namespace:
oc run load-generator --image=quay.io/curl/curl:latest -n {prod_ns} \
--restart=Never \
-- /bin/sh -c "while true; do curl -s -o /dev/null http://parasol-insurance.{prod_ns}.svc:8080/api/claims; done"
This creates a Pod that continuously sends requests to the Parasol Insurance claims API. These are load balanced across all available Pods. If any Pod reports CPU utilization above 10%, the HPA creates a new Pod assuming it has not reached the configured max Pods number.
Watch the HPA scale
-
In the OpenShift Console, navigate to the
{user_name}-prodnamespace -
Select Workloads > HorizontalPodAutoscalers from the left menu. Your HPA will be listed, showing min and max replica counts
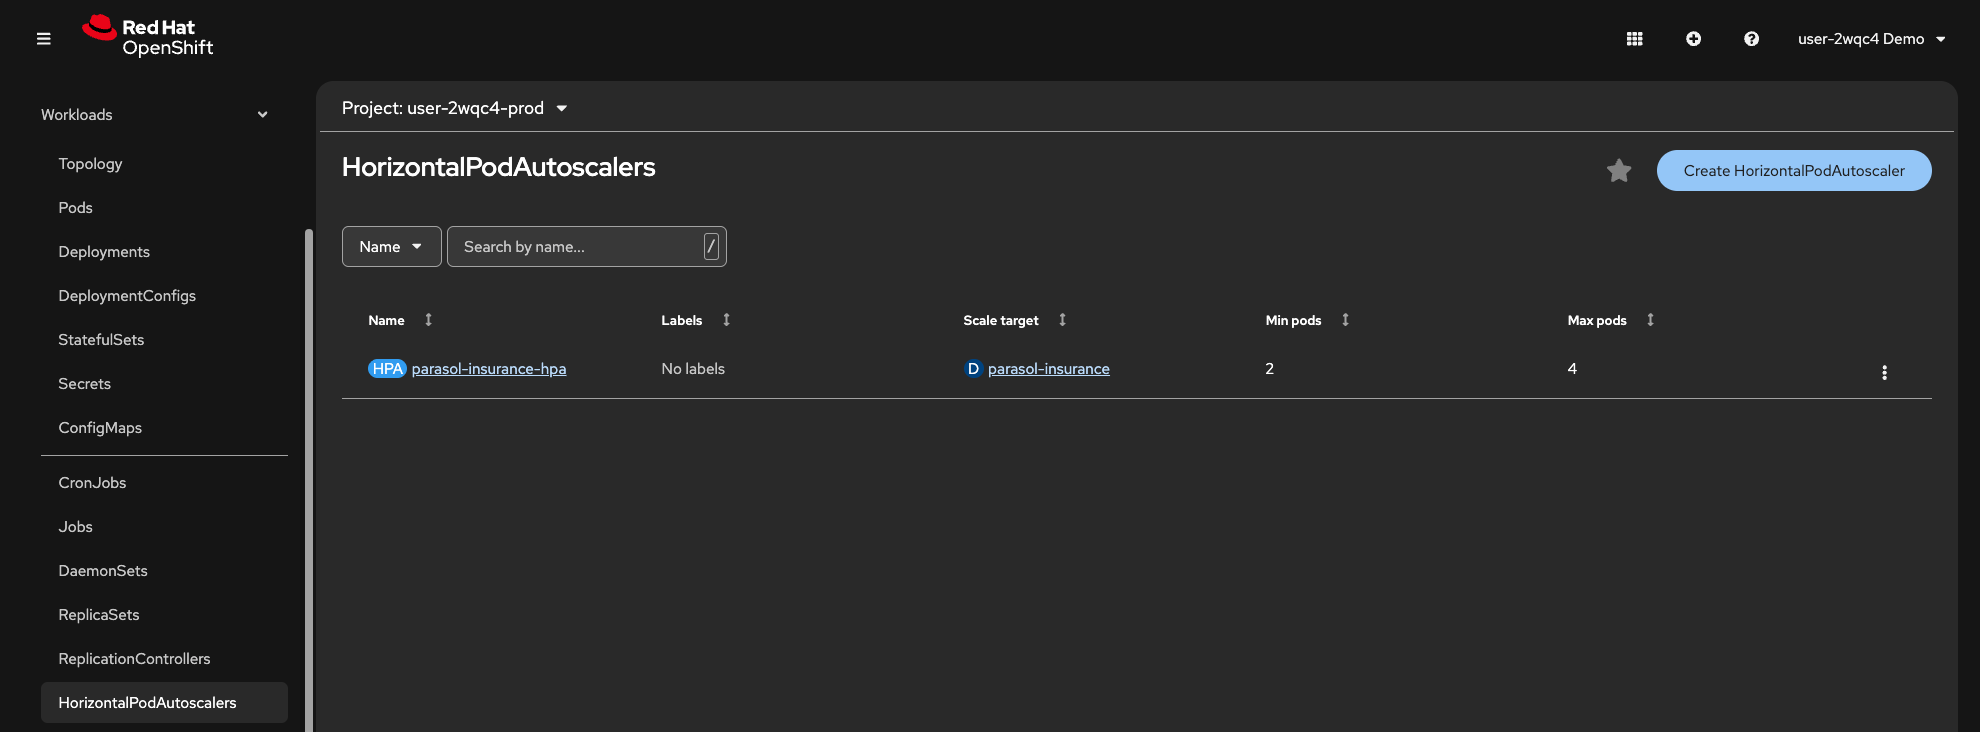 Figure 13. HorizontalPodAutoscaler in the production namespace
 -
Click on the
parasol-insurance-hpaHPA. Note the HPA’s current CPU utilization and replica count. As the load increases, the HPA will scale the Deployment beyond the minimum of 2 replicas. -
Click the Events tab. You should notice that scaling events are reported
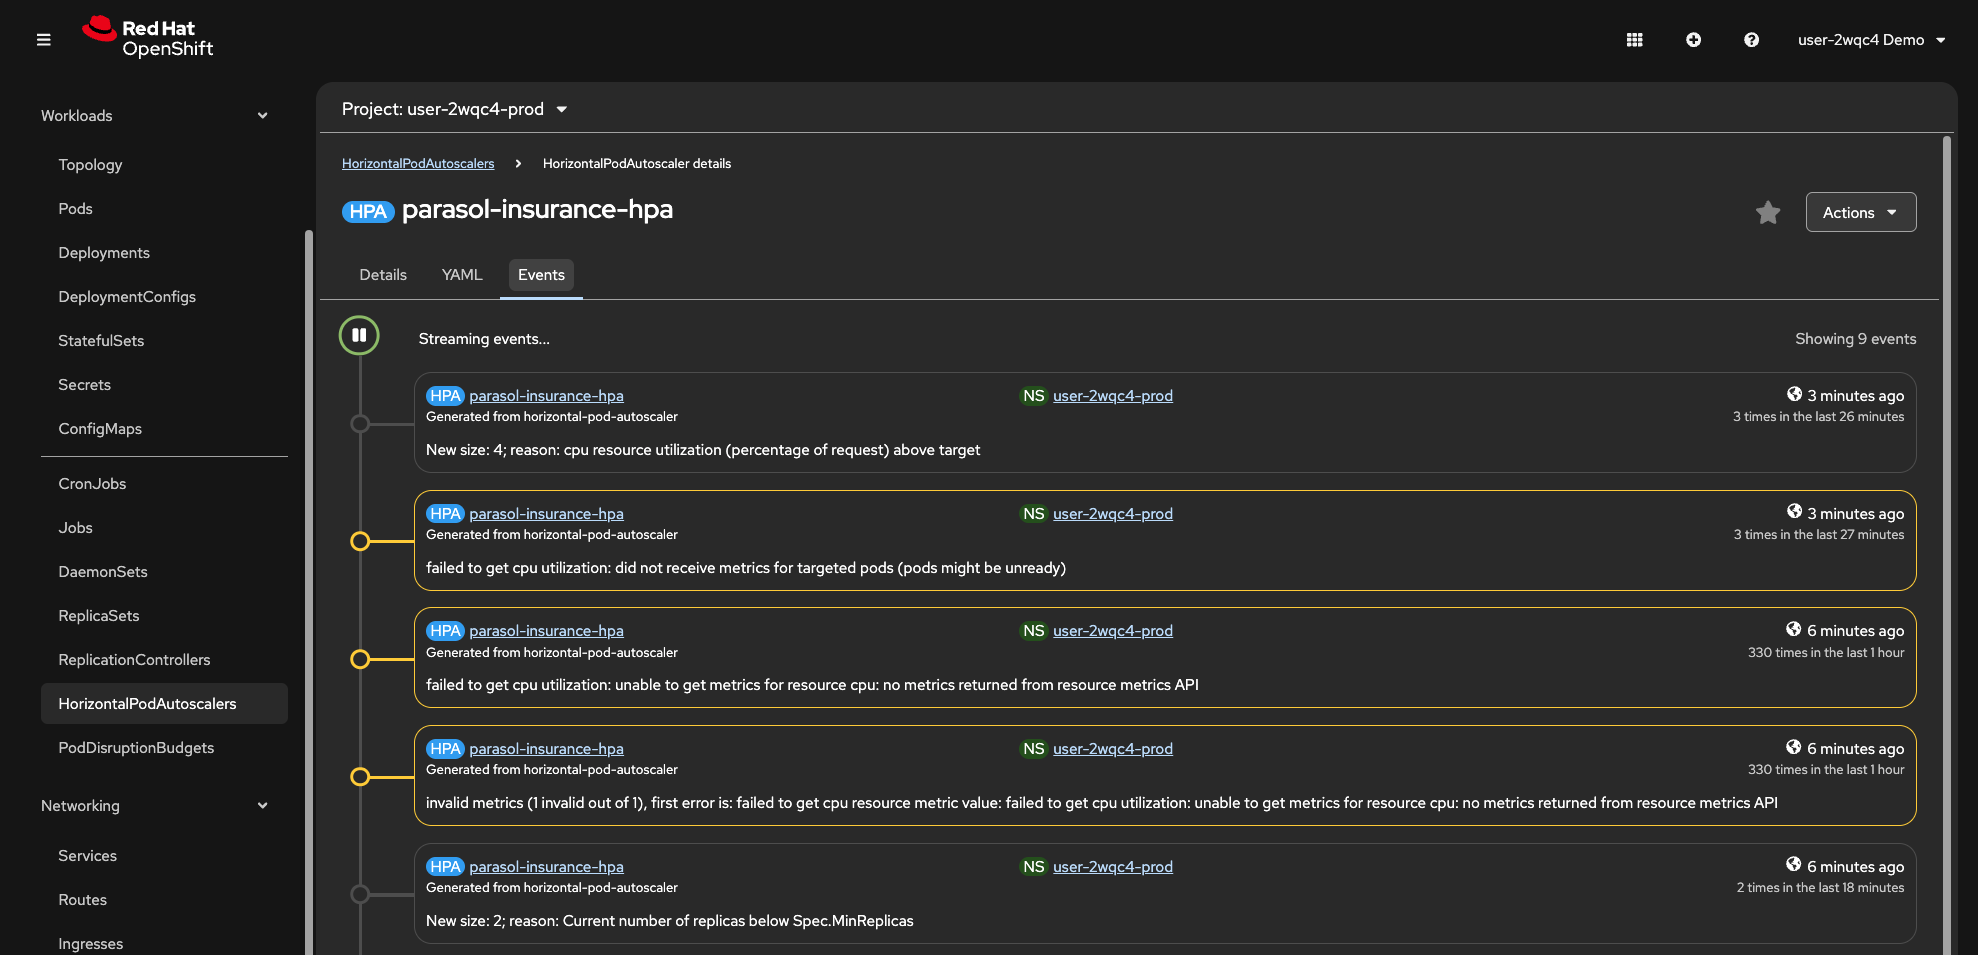 Figure 14. HPA scaling events
 -
Select Workloads > Pods and observe new Pods being created as the HPA scales up.
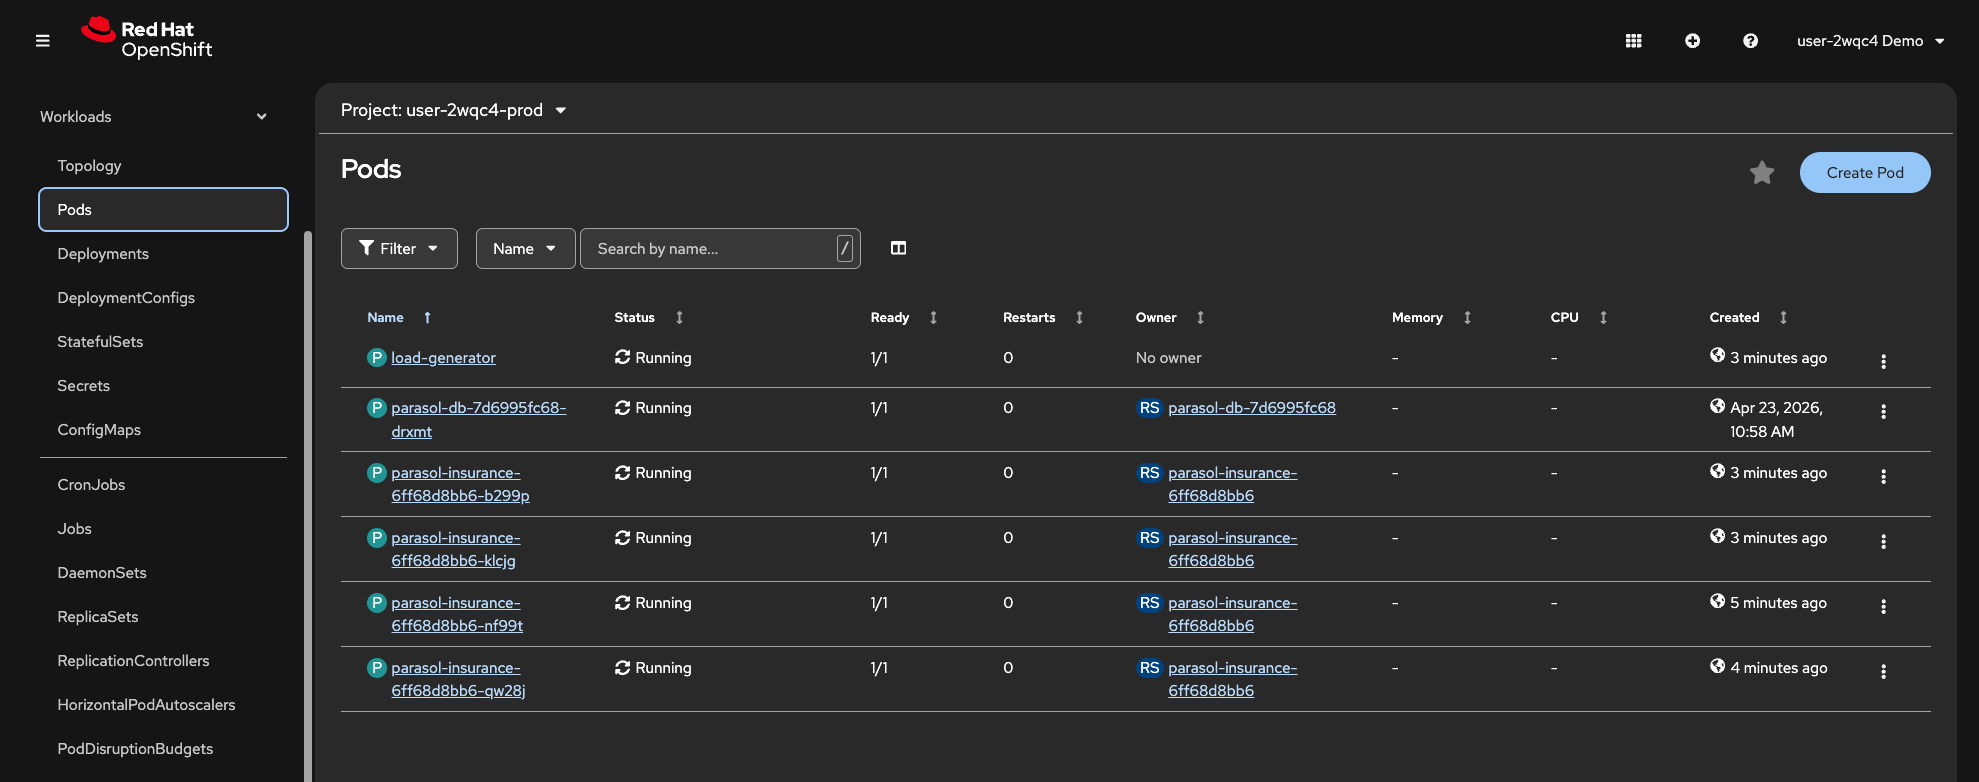 Figure 15. Additional Pods created by the HPA
Clean up the load generator
-
Once you have observed the scaling behavior, return to the Dev Spaces terminal and delete the load generator:
oc delete pod load-generator -n {prod_ns} -
Return to Workloads > HorizontalPodAutoscalers in the OpenShift Console. After a few minutes, the CPU utilization will drop and the HPA will scale the Deployment back down to the minimum replica count.
Learning outcomes
By completing this module, you should now understand:
-
How Langchain4j and Quarkus make it straightforward to integrate LLM-powered features into existing Java applications
-
How platform-managed credentials (
LLM_BASE_URL,LLM_API_KEY) flow from Vault through ExternalSecrets into both Dev Spaces workspaces and deployed environments, without developers managing secrets -
How the same CI/CD pipeline and security controls apply whether you are changing a date format or integrating an LLM
-
How a tag-based GitOps workflow enables controlled production promotions through merge requests
-
How Argo CD continuously reconciles the cluster state with Git, ensuring production matches the approved manifests
-
How the Horizontal Pod Autoscaler automatically scales applications based on CPU utilization
Module summary
You replaced a naive keyword classifier with an LLM-powered classification service, deployed it through the same trusted CI/CD pipeline, and promoted it to production using a tag-based GitOps workflow.
What you accomplished:
-
Overlaid the LLM classification code from a prepared branch
-
Reviewed the
EmailClassifierservice and understood howLLM_BASE_URL,LLM_API_KEY, and theqwen3-14bmodel are configured by the platform administrator -
Tested the LLM classification locally in Quarkus dev mode
-
Pushed the changes through the automated CI/CD pipeline
-
Inspected the container image in Quay
-
Created a
v1.0release tag in GitLab to trigger the tag-promote pipeline -
Merged the production promotion merge request
-
Verified the production deployment and confirmed GitOps reconciliation in Argo CD
-
Generated load and observed the HPA automatically scaling the production application
The same pipeline, the same security controls, the same GitOps delivery. Whether you are changing a date format or integrating an LLM, the platform handles the complexity so you can focus on the code.