Module 4: Deploying to OpenShift (Optional)
Congratulations! If you are at this module then you have most likely experienced firsthand the power of Developer Lightspeed for MTA as an important migration tool through the use of focused context aware GenAI code fixes.
You have also worked through a scenario showing how internal company specific policy and tribal knowledge can be infused into hints via Solution Server, as fronted by an MCP server, to further improve the generated code fixes created by the underlying LLM. These ACME best practices and policy compliant fixes will now be generated into code fixes across all migration waves.
Now its time to take a fully migrated codebase, and build/deploy it to OpenShift to show the full effect of using this tooling.
Let’s step back into our ACME Corp storyline for the last time to see our migrated application run on OpenShift…
You’ve demonstrated the complete AI-assisted modernization workflow to your manager at ACME Corp. They are impressed: "This looks promising, but we need to see it actually running in OpenShift. Can you deploy the modernized application and prove the end-to-end process works?"
ACME needs confidence that AI-modernized applications successfully deploy and run on OpenShift. The final validation is seeing the containerized application running in production.
In this module, you’ll experience the complete deployment workflow from containerized application to running on OpenShift.
Learning objectives
By the end of this module, you’ll be able to:
-
Containerize modernized applications using best practices
-
Create Kubernetes manifests for OpenShift deployment
-
Deploy applications to OpenShift cluster
-
Verify application functionality in the container environment
-
Demonstrate complete legacy-to-cloud transformation
|
This module takes a very direct "inner loop" developer sandbox approach to building and deploying a fully migrated coolstore application that you helped migrate in the previous modules. It uses a Quarkus extension to enable a command-line driven maven approach to seamlessly build and deploy the application to an OpenShift cluster. Configurable environment variables allow for lots of application use case and infrastructure specfic scenarios. In general, Quarkus is an advanced Java framework and provides many ways to build and deploy applications:
Please talk with your lab instructors about these various approaches and also how OpenShift GitOps, and various packaging approaches such as helm can be added into your CI/CD pipeline implementation for enterprise level support. |
Exercise 1: Setup the Sandbox
This exercise focuses on using concise command line statements in the DevSpaces workspace to configure your environment, load the correct git branch, and connect to the OpenShift cluster.
-
Confirm access to DevSpaces workspace
There are two different browser tabs related to DevSpaces. One is the DevSpaces tab/window that lists all the active DevSpaces workspaces. The other one is the actual opened workspace, which is the VSCode IDE hosted in a browser window/tab.
If you completed Module 2 and Module 3 you probably still have an active DevSpaces workspace browser tab window, or separate browser window open.
If so, navigate to it
If you don’t, then click on the following linked instructions to initially open or reset your workspace browser window.
Initially login or reestablish DevSpaces workspace -
Switch to the Module 4 Git branch
-
Create a new terminal window (unless you already have one open from the previous module)
-
Click on the hamburger icon on the left sidebar, Click on the Terminal menu item, click on New Terminal
-
A new terminal window will open at the bottom of the screen
-
-
Enter the following into the terminal prompt and hit Enter:
# Do a save of uncommitted work from the previous module git stash # Switch to branch for this module git checkout module4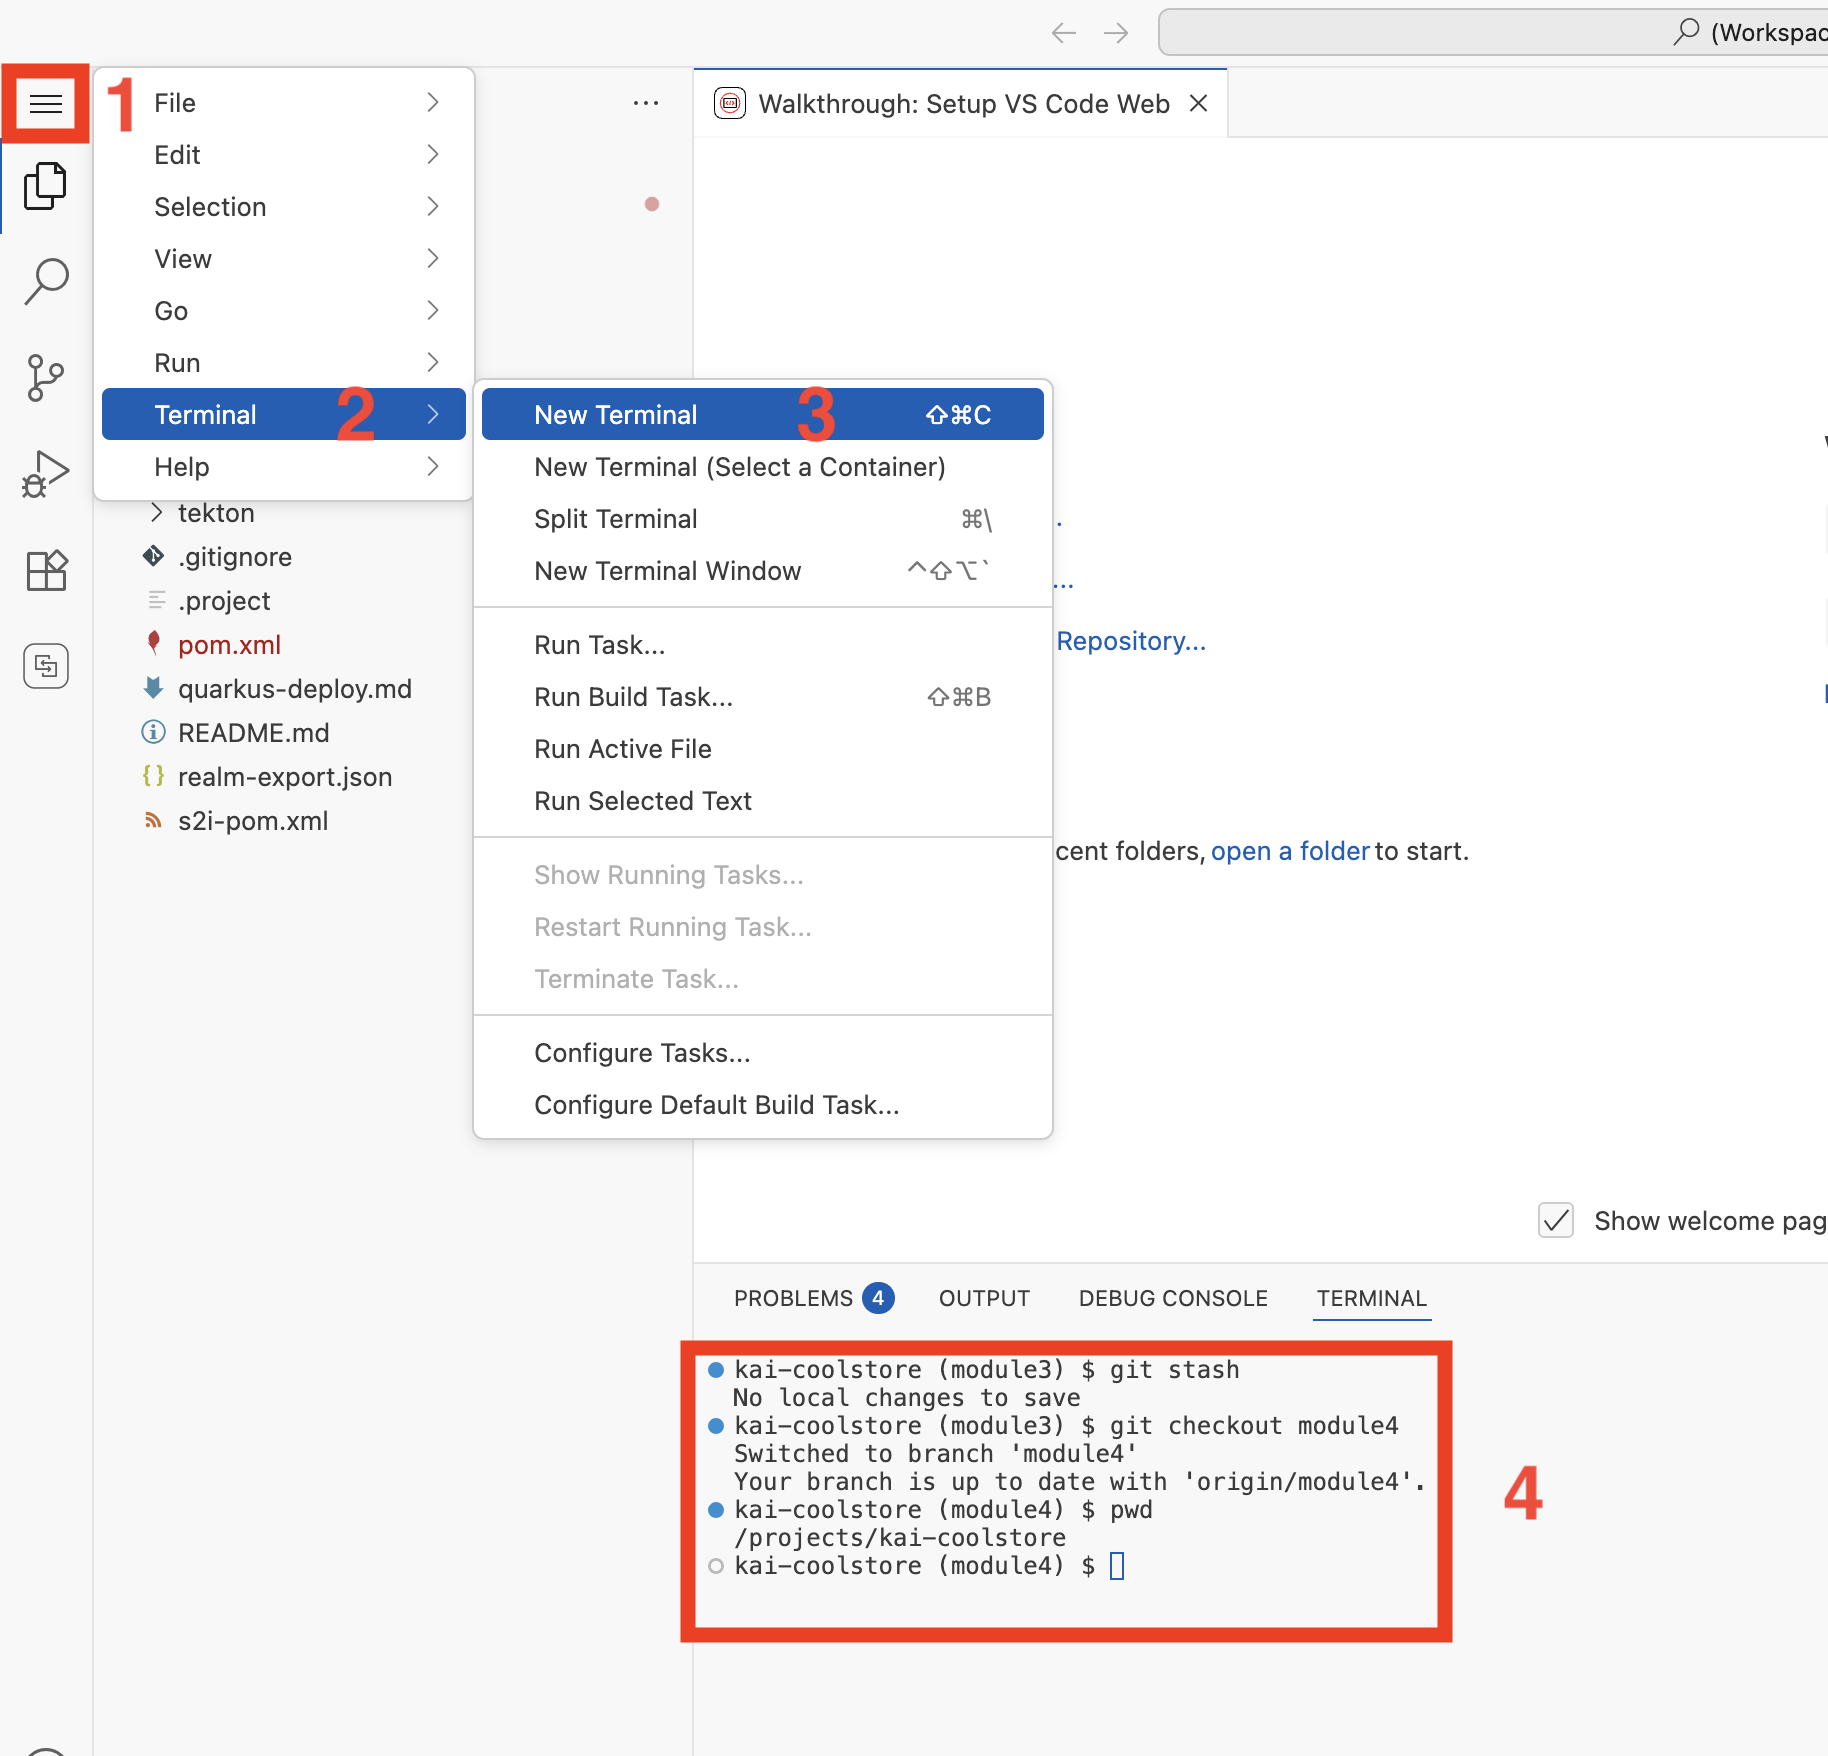 Figure 1. Checkout Module 4
-
-
Log into your OpenShift Cluster from the terminal:
-
Enter the following into the terminal prompt and hit Enter/Return:
# Login to OpenShift cluster
oc login --server=https://api.apps.cluster-abc123.ocpv00.rhdp.net:6443 \
  --username=user1 \
  --password=openshift \
  --insecure-skip-tls-verify=true
-
-
Switch to the Coolstore project
This OpenShift namespace is where the application will be built and deployed
# Switch to the new application project namespace oc project user1-coolstore # Verify you're in the correct project oc project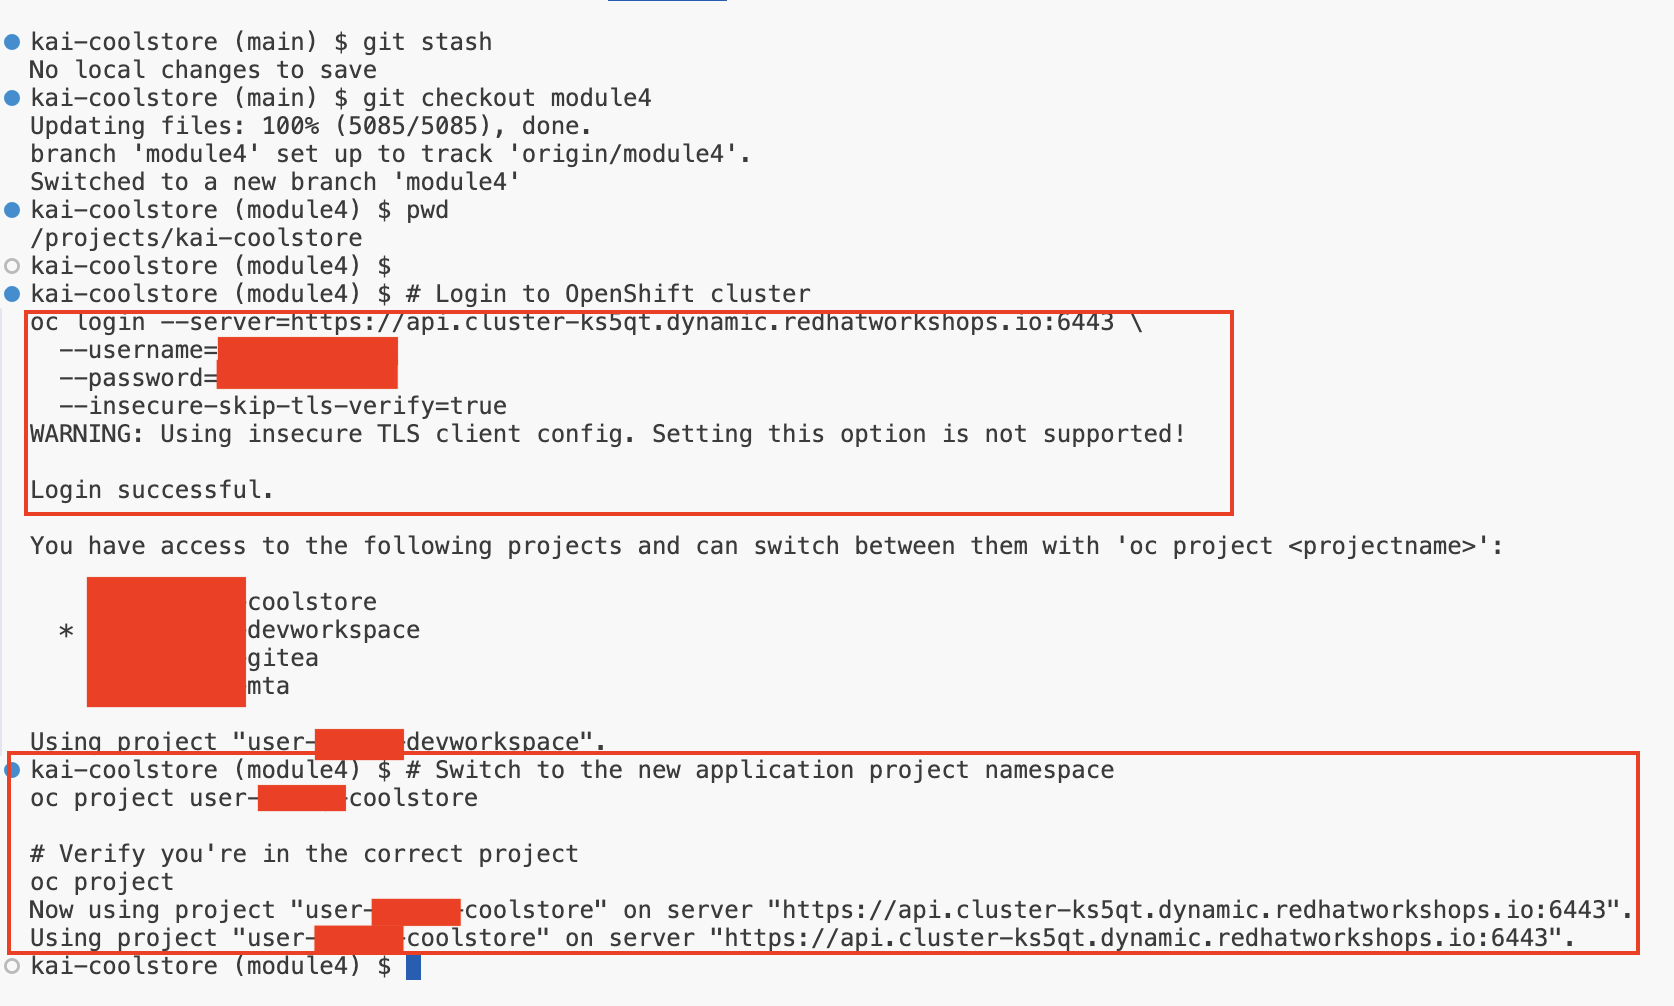 Figure 2. Cluster Login and Set Project
 -
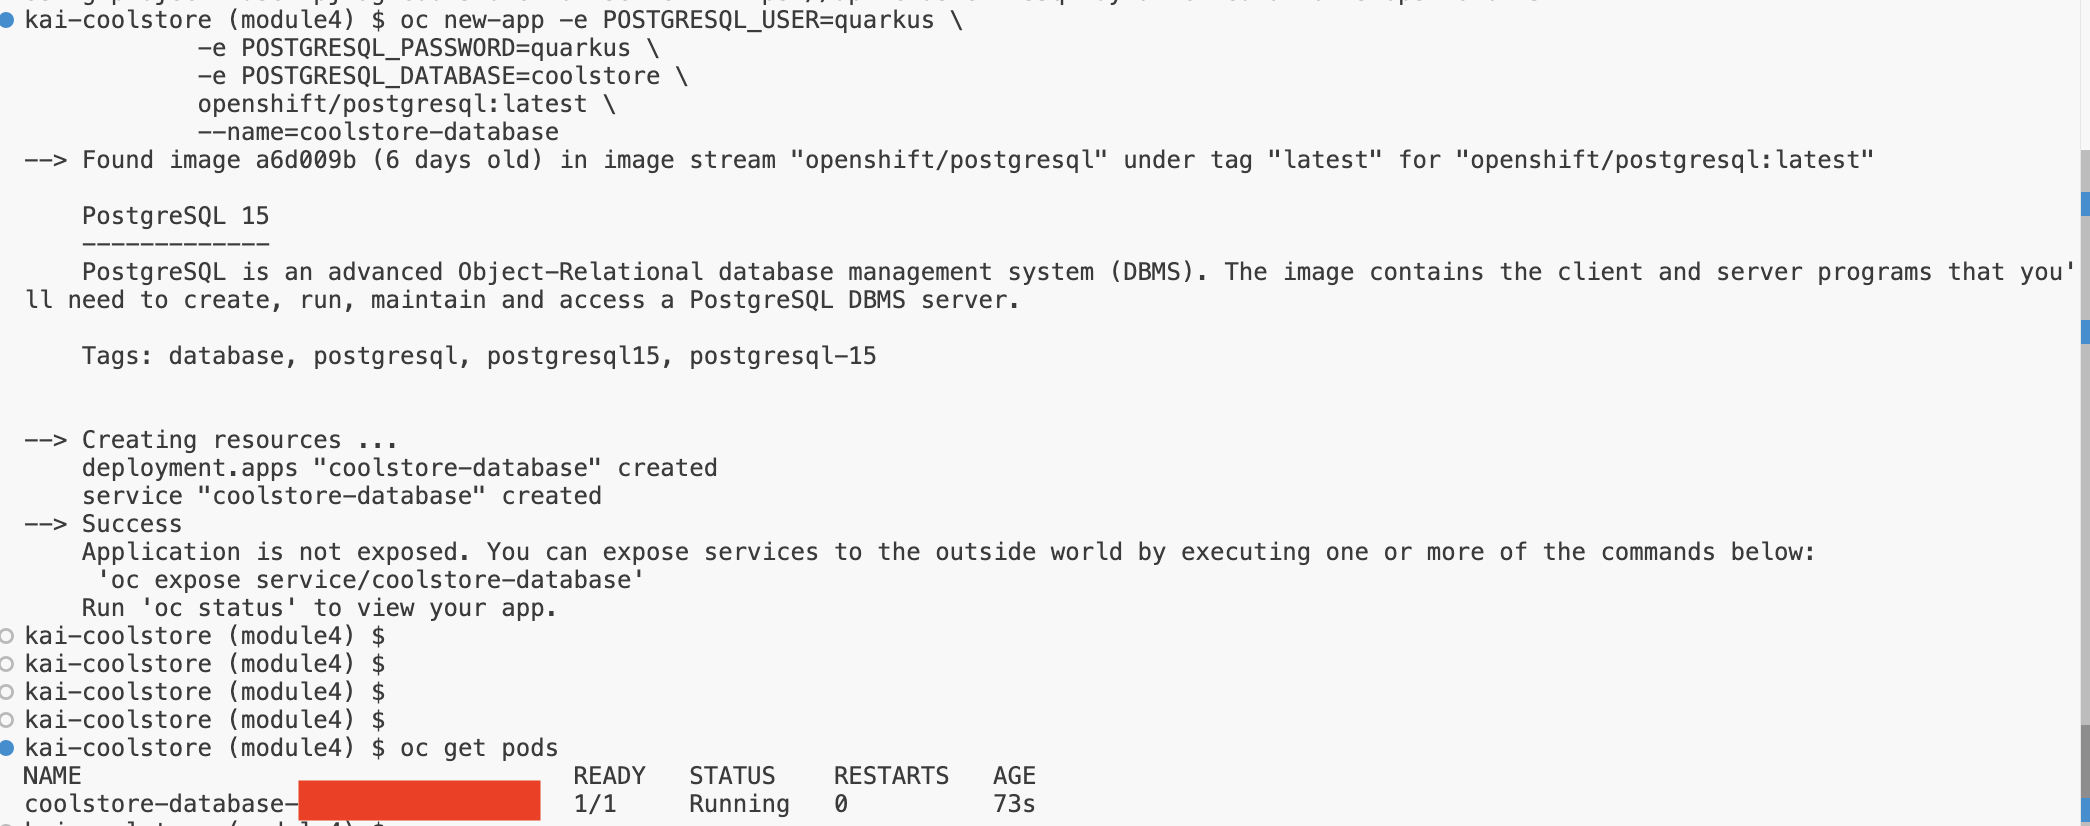
Deploy a Postgres Database
The Coolstore application needs a database to connect to for managing shopping cart choices
-
Enter the following in the terminal window and hit Enter/Return
oc new-app -e POSTGRESQL_USER=quarkus \ -e POSTGRESQL_PASSWORD=quarkus \ -e POSTGRESQL_DATABASE=coolstore \ openshift/postgresql:latest \ --name=coolstore-database -
It may take a minute for the database to install, start up, and run
-
Exercise 2: Build, Containerize, and Deploy the modernized application
You need to create a container image from the AI-modernized application code. This proves the modernization work actually produces deployable artifacts.
As explained above we take a rapid developer environment approach for this that uses Quarkus’s extension approaches to simplify build and deployment to Openshift
-
Build and Deploy the Coolstore Application
-
Enter the following in the terminal window and hit Enter/Return
mvn clean compile package -Dquarkus.kubernetes.deploy=true -
Build and deploy will take a couple minutes, wait till it finishes
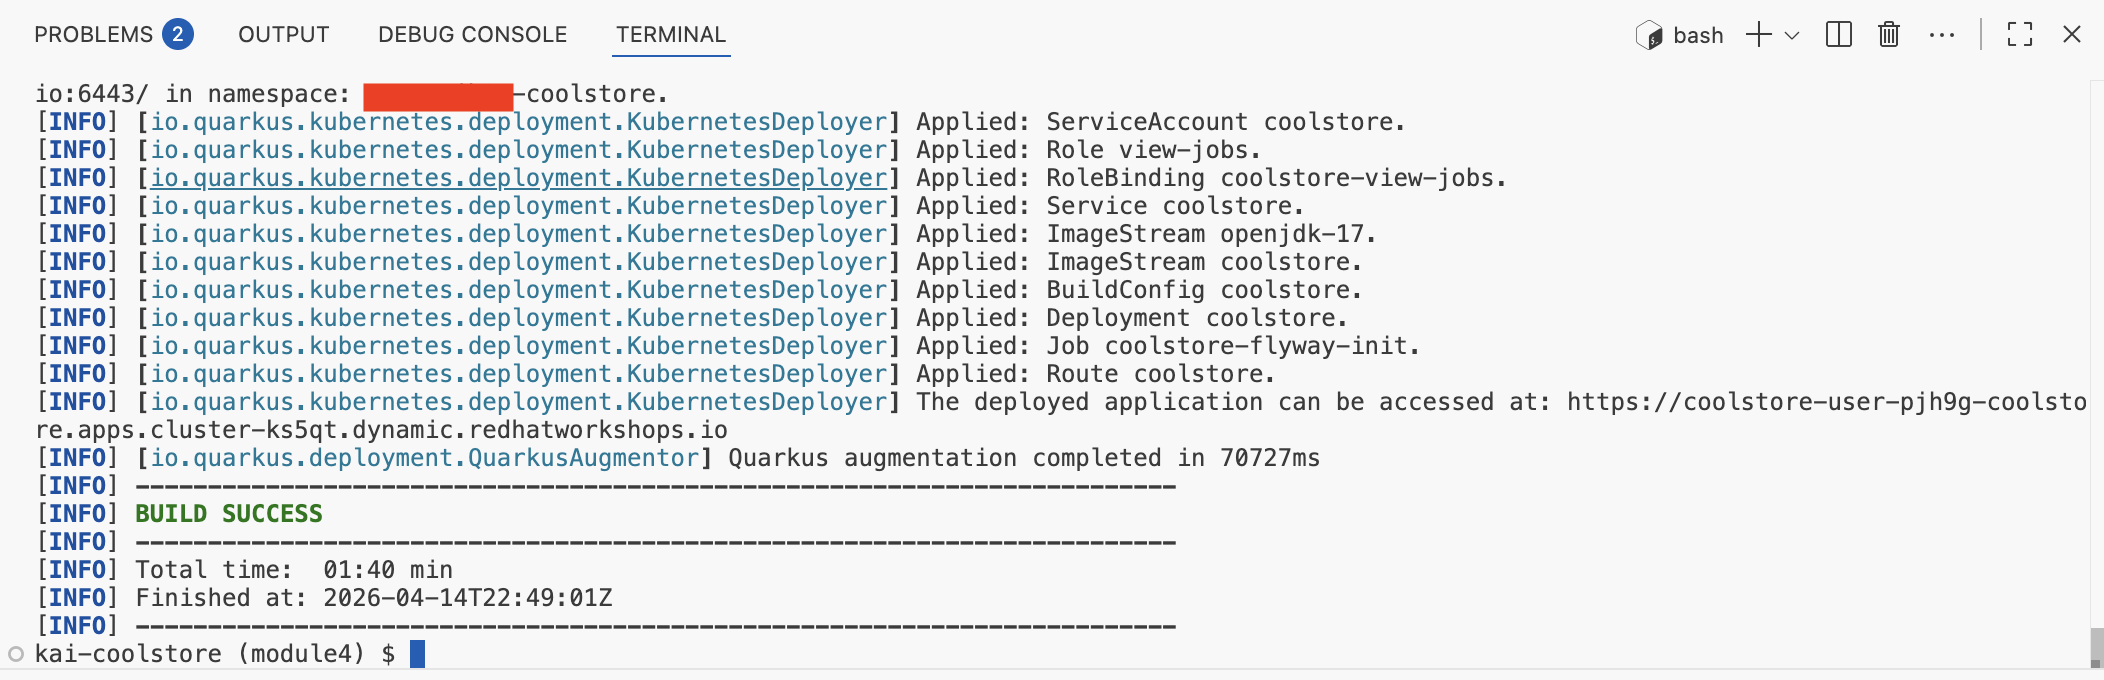 Figure 4. Build and Deploy Coolstore
 -
Switch to the OpenShift Console Tab and see the user1 projects used in this lab
-
Click on the user1-coolstore project link
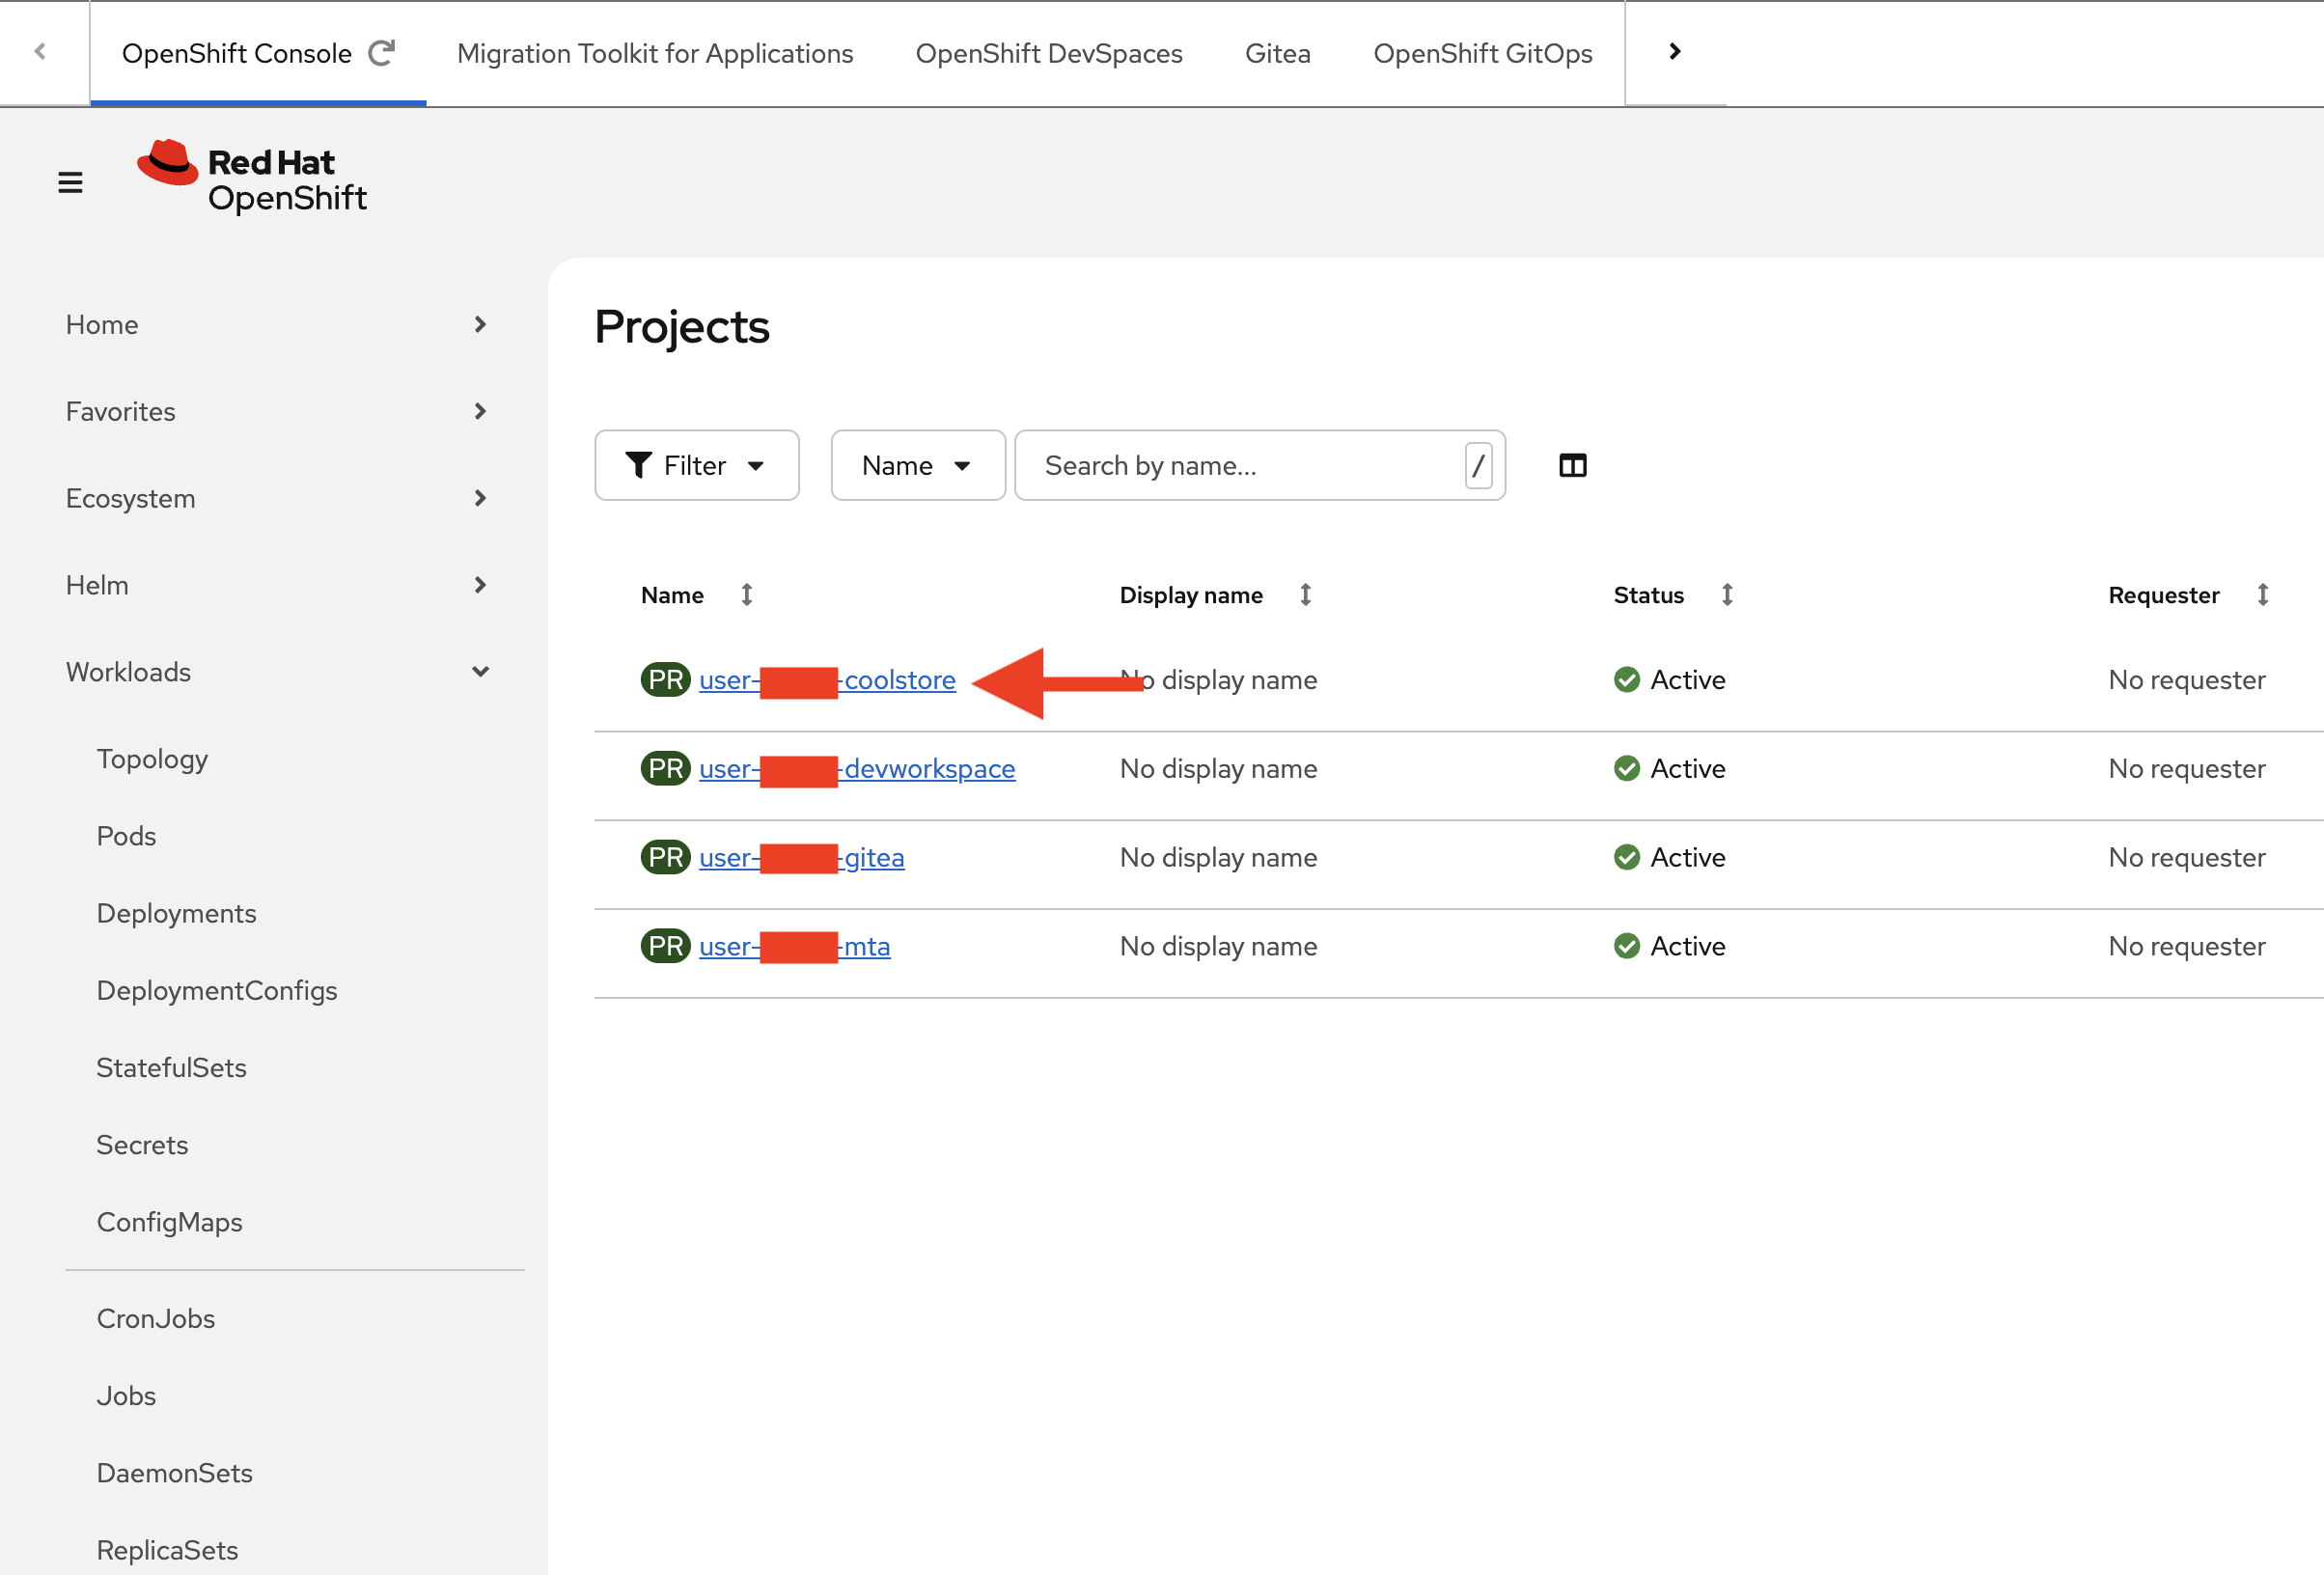 Figure 5. User Projects
 -
View the user1-coolstore Project details page
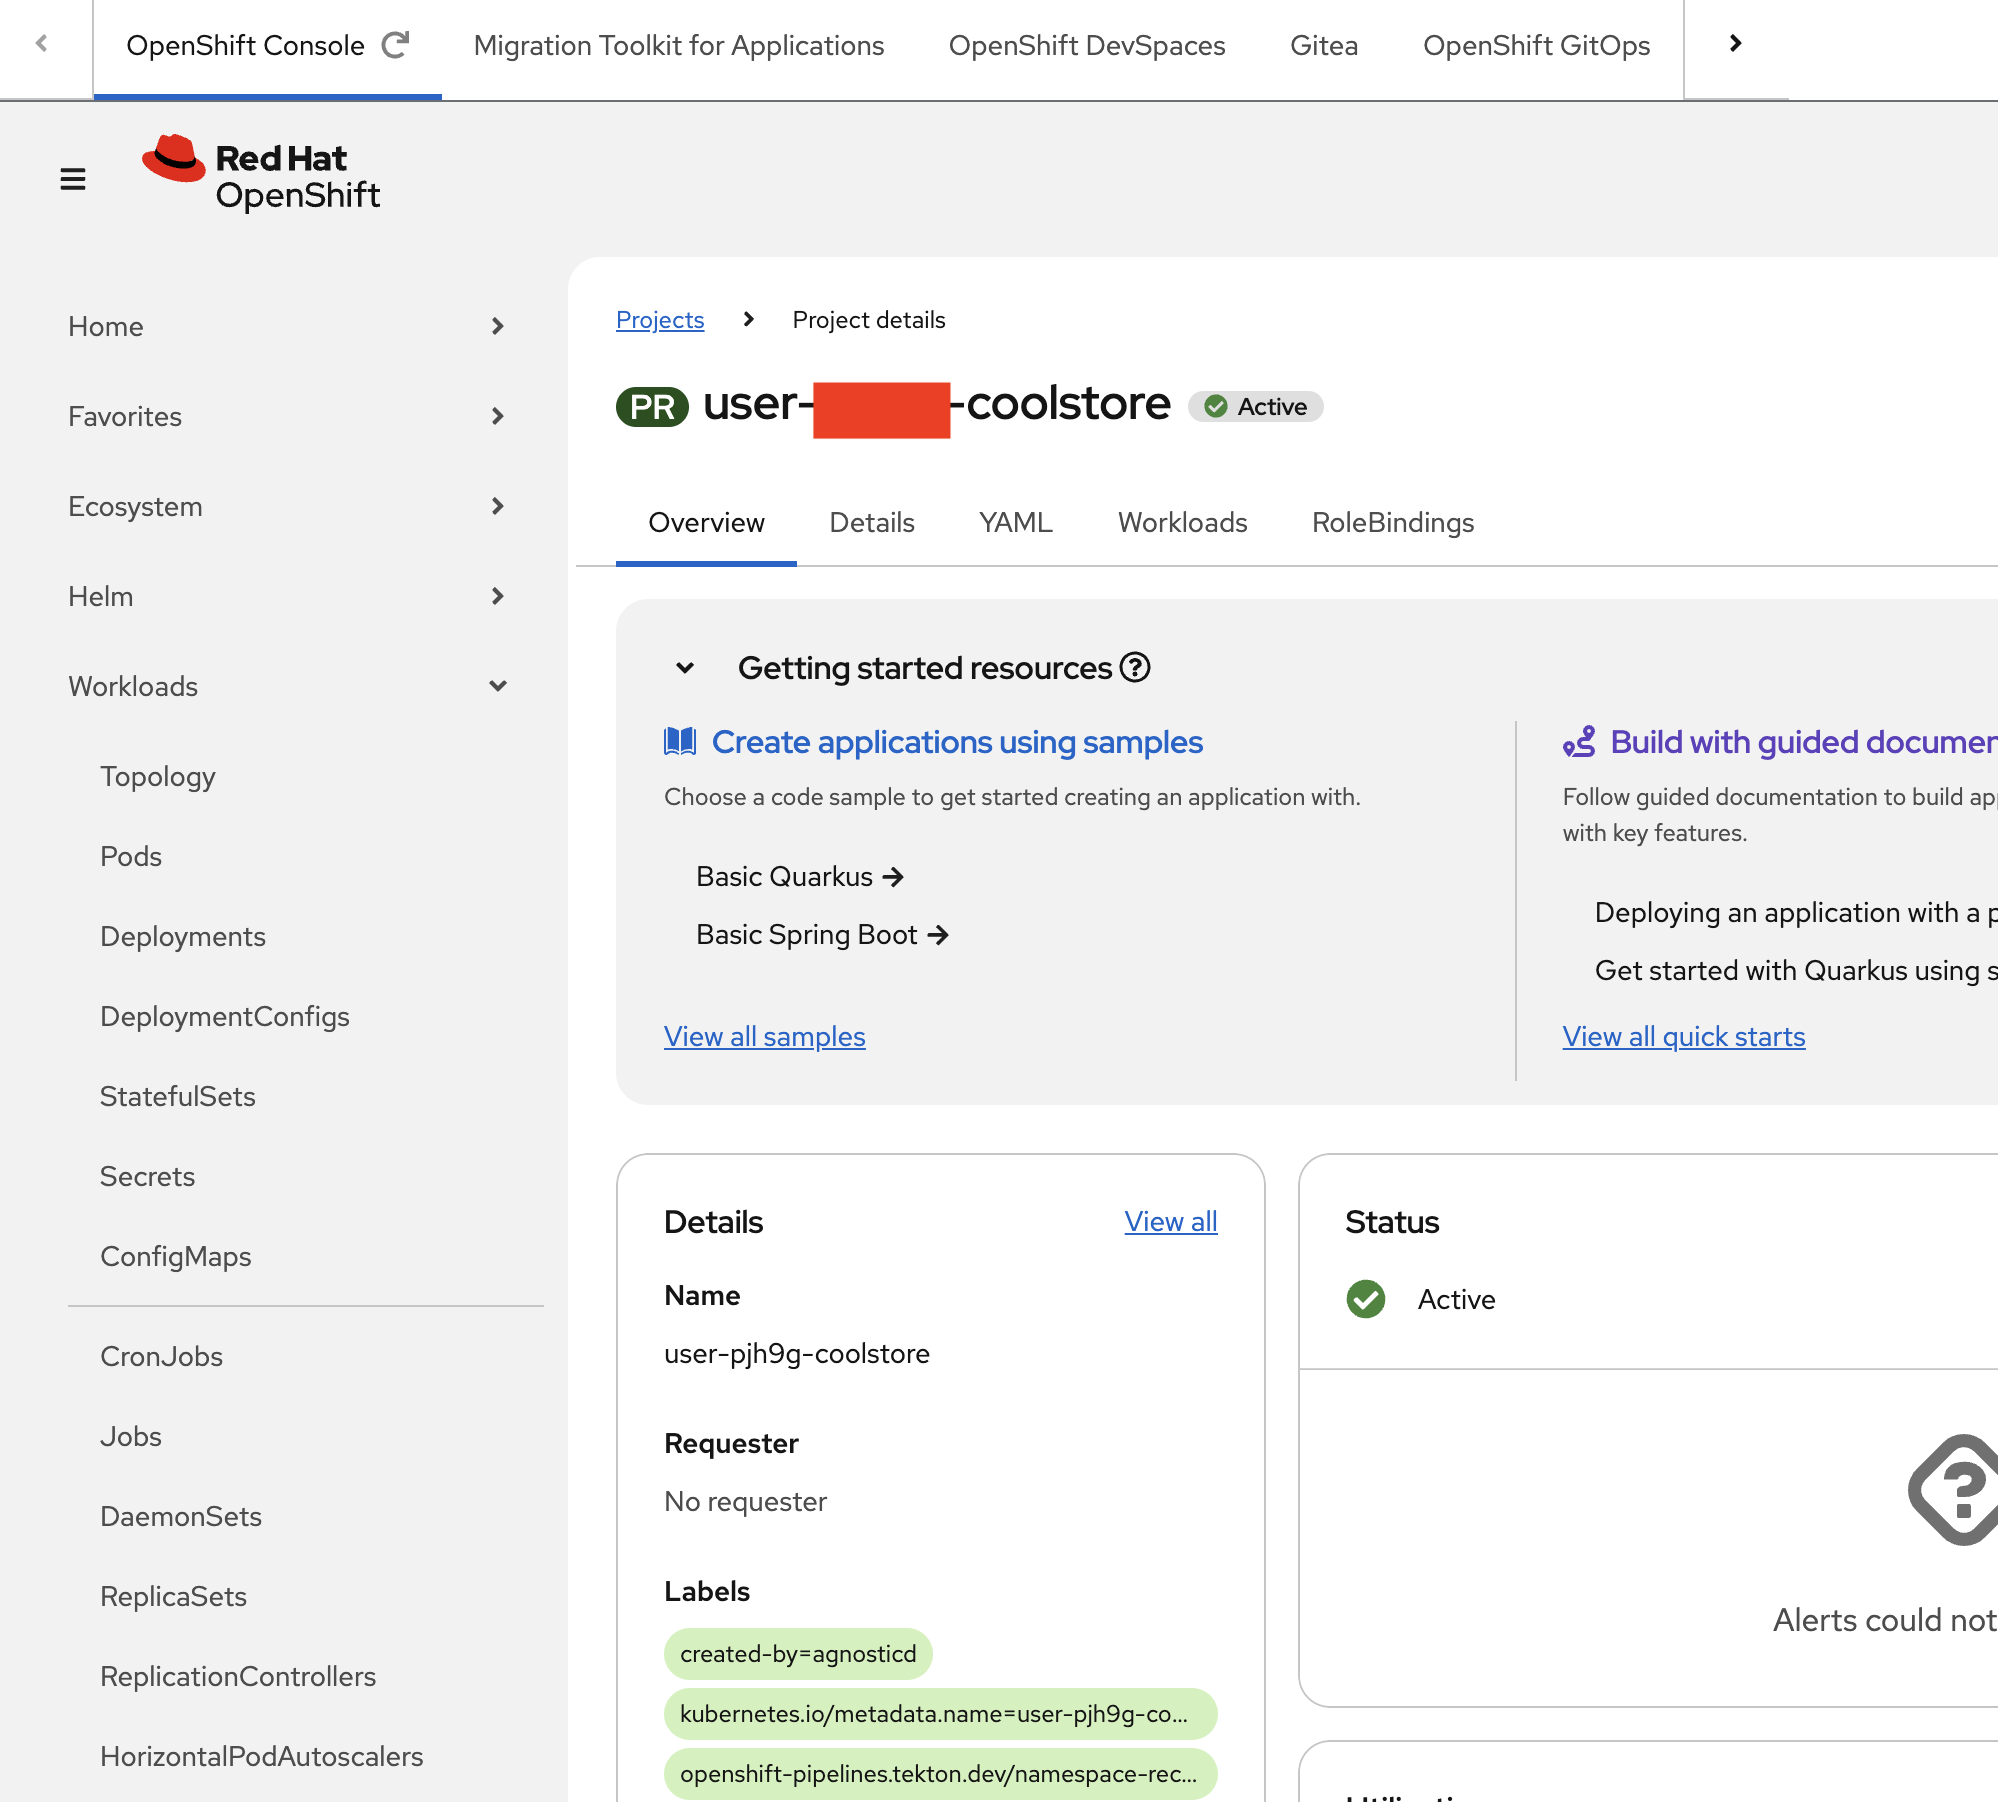 Figure 6. User Coolstore Project
 -
Click the down arrow > next to Workloads and click on Topology
-
If you are in split view and the menu is collapsed you can open via the following approach

-
-
View the project layout of the deployed database, coolstore application, and a helper task to load the initial database
 Figure 7. Topology
 -
Hover over the Coolstore Deployment and click where indicated by the Open URL pop up
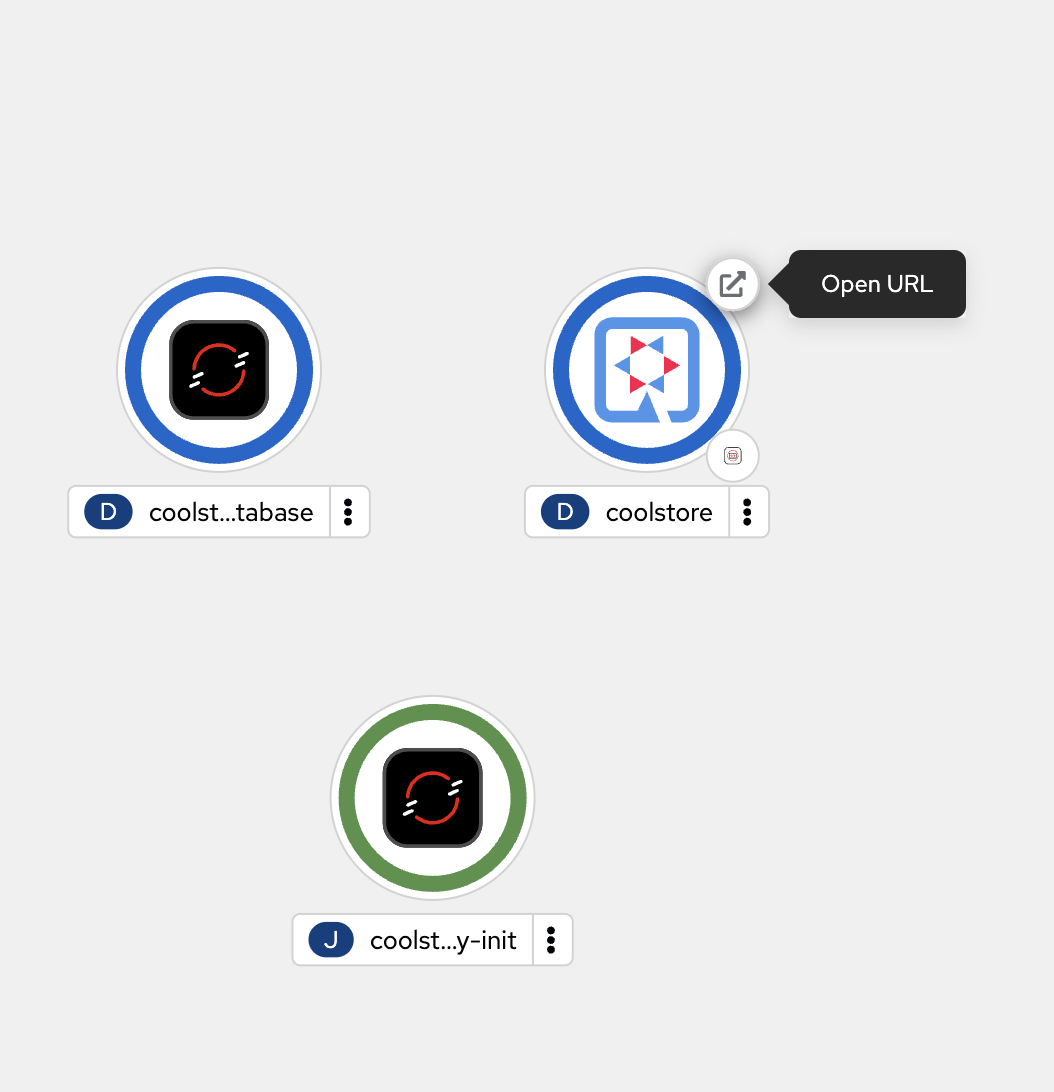 Figure 8. Deployed Services
 -
View the Coolstore website
-
It will take a minute for the data to load in the background and for the Cool Store to show.
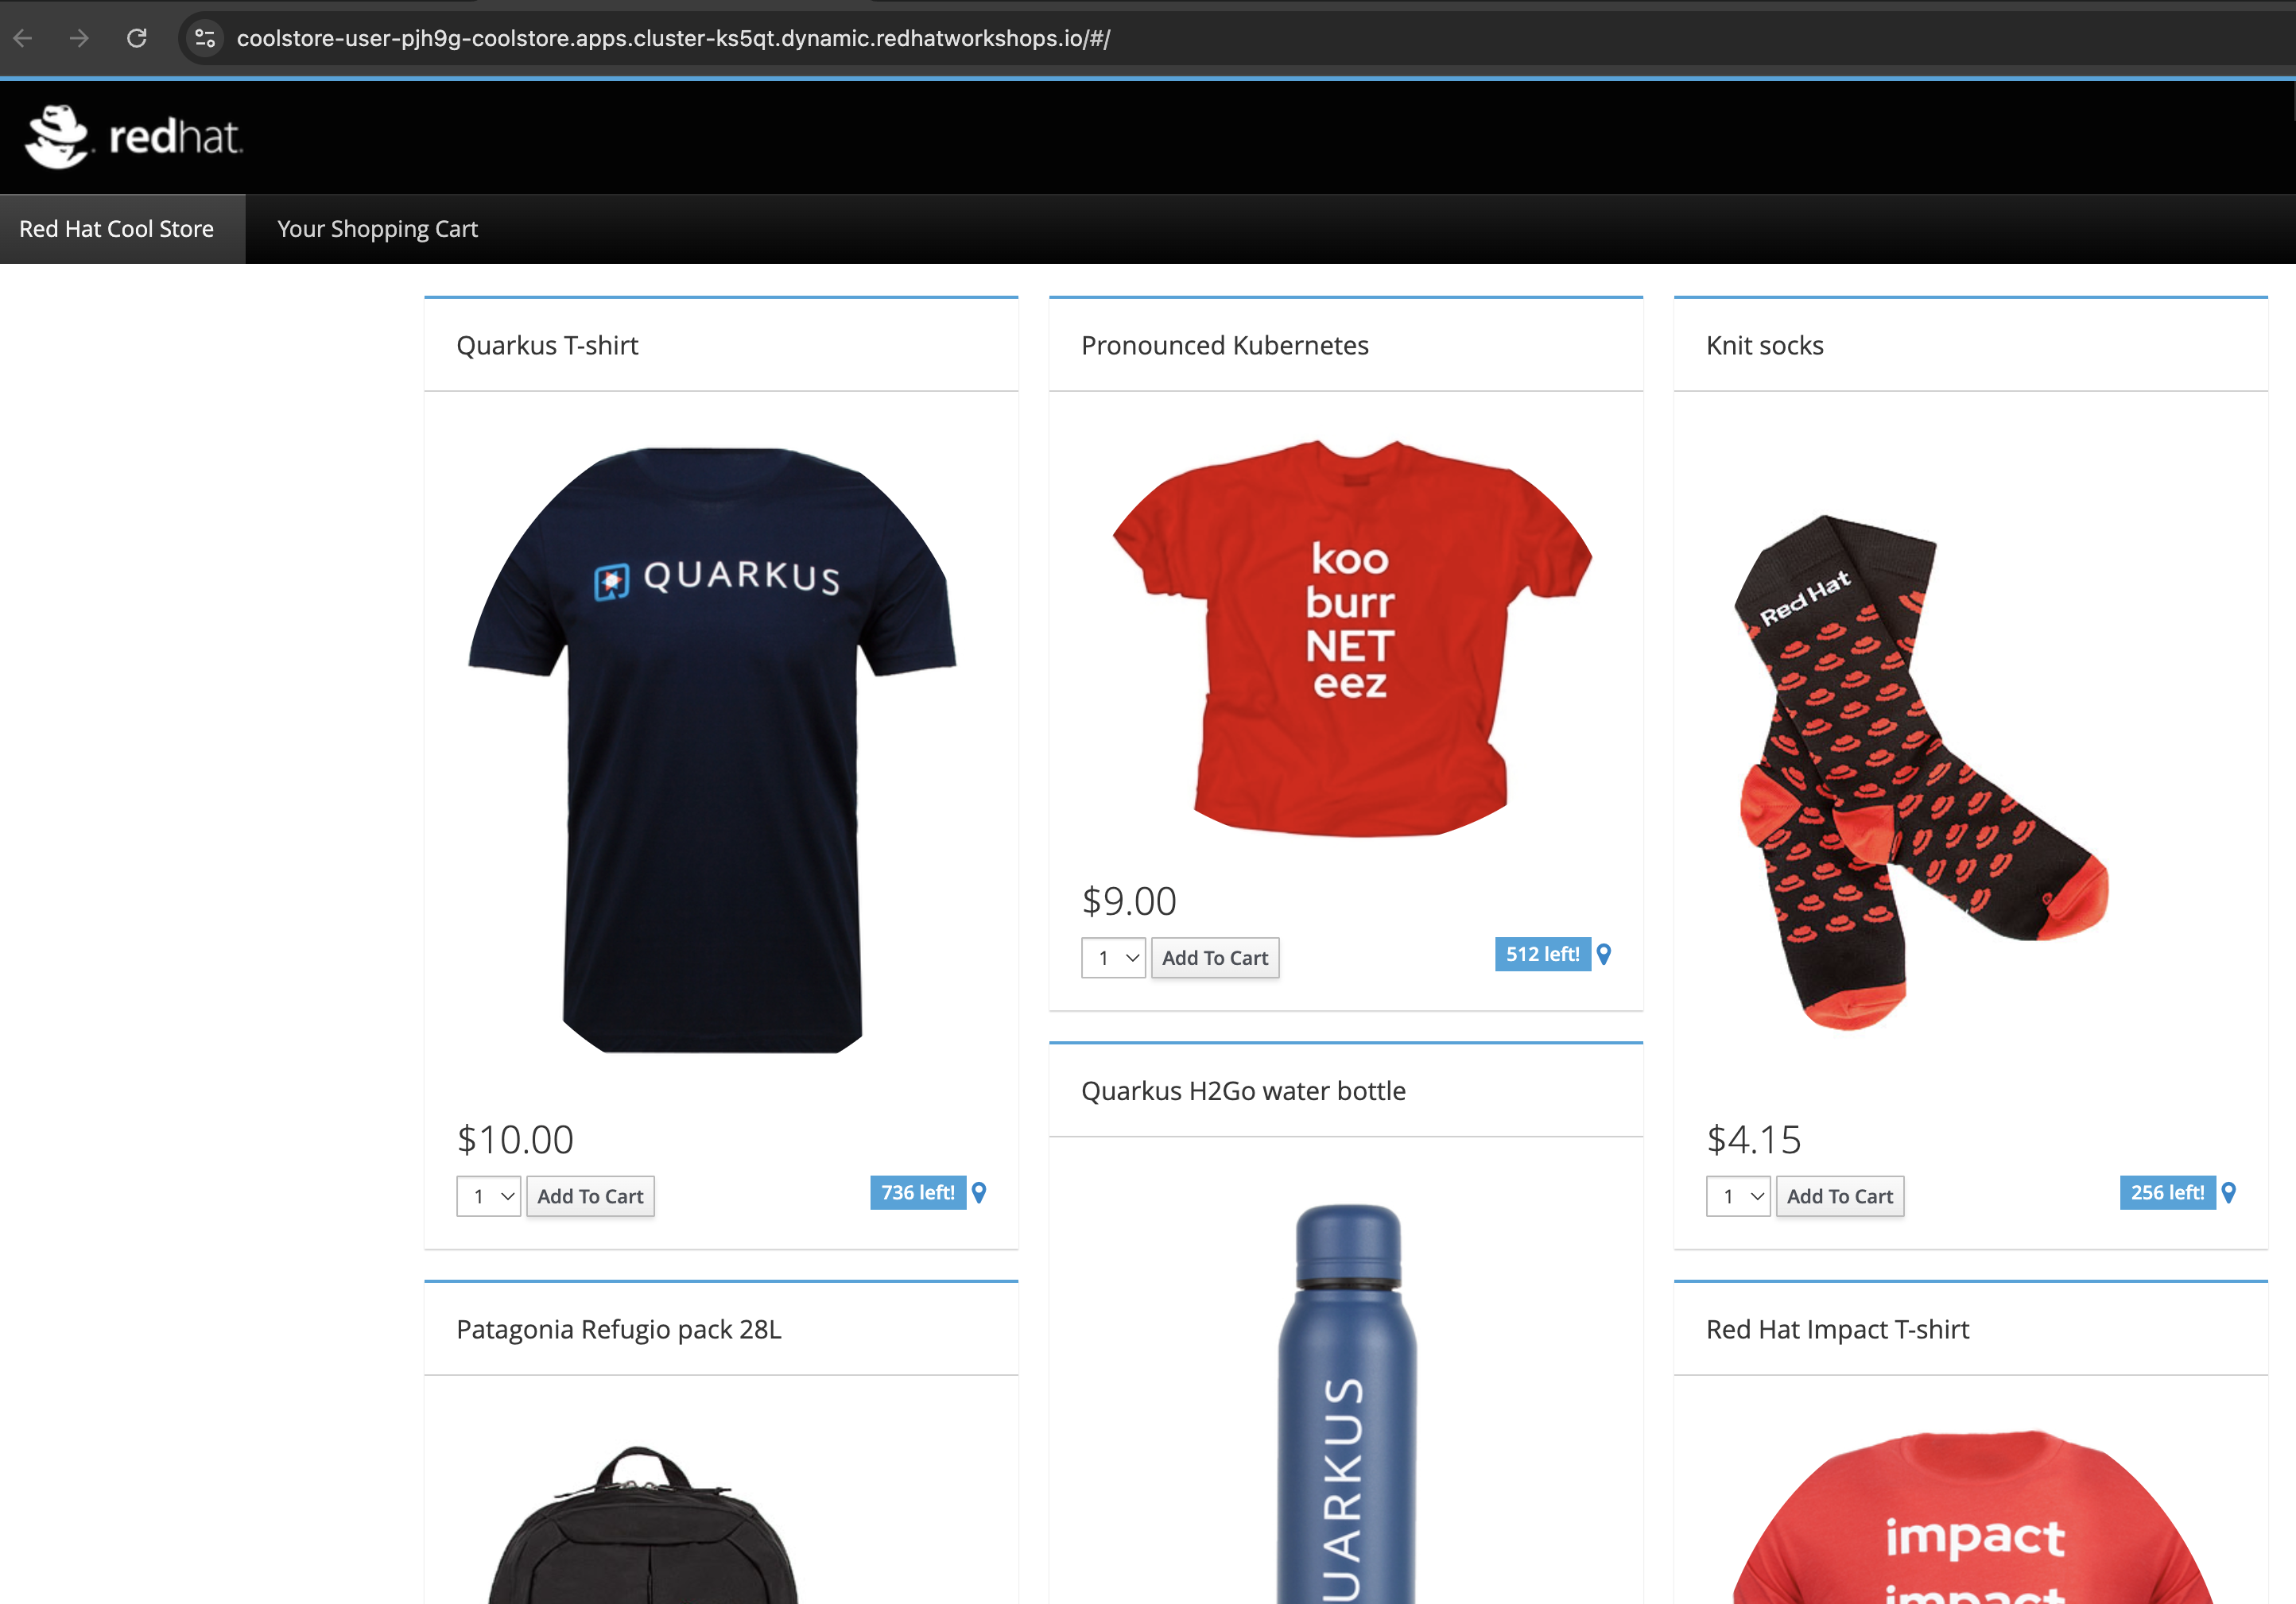 Figure 9. Coolstore Webpage
-
-
-
Test application functionality:
-
Navigate through the Coolstore interface
-
Test different features (Products, Descriptions, Ordering etc.)
-
Verify all functionality works in the containerized environment Congratulations you just built and deployed a Quarkus application and it’s supporting database!
-
-
Overall…
-
You just used the command line to load the migrated application code, which is now implemented as a Quarkus Java, and you built and deployed it.
-
You also deployed a backend database used by the application.
-
You then walked through the OpenShift Console screens to get a better perspective of how the deployed application sits in OpenShift
-
Finally you opened up and viewed the applications main webpage
-
Verify
Many times users of OpenShift may want to confirm the application is running successfully on OpenShift through mostly cli calls.
Here are some examples.
-
Get the application URL:
# Get the external route URL oc get route coolstore -o jsonpath='{.spec.host}' # Store URL in variable APP_URL=$(oc get route coolstore -o jsonpath='{.spec.host}') echo "Application URL: https://$APP_URL" -
Access the application:
Open the URL in your browser or test via curl:
# Test the application endpoint curl -k https://$APP_URL/q/health # Test the main application page curl -k https://$APP_URL/ -
View application logs:
# Get logs from the application pods
oc logs -l app.kubernetes.io/name=coolstore --tail=50
# Check pod health oc get pods -l app=coolstore + # Verify readiness and liveness probes oc describe pod -l app=coolstore | grep -A 5 "Liveness\|Readiness" + # Test health endpoint curl -k https://$APP_URL/q/health | jq .
✓ Deployment shows replicas ready ✓ Pods are in "Running" status ✓ Health checks pass successfully ✓ Application is accessible via HTTPS route ✓ Application functionality works correctly
Exercise 3: Additional Checks (Optional Exercise)
Steps
-
Verify the image is in the registry:
# List images in OpenShift registry oc get imagestream -
Confirm the image is available in OpenShift:
# Check imagestream details
oc describe imagestream coolstore
Expected output:
Name:               coolstore
Namespace:          user-{user}-coolstore
...
latest
  tagged from ...coolstore:1.0.0-SNAPSHOT
✓ Image successfully pushed to OpenShift registry ✓ ImageStream created in project namespace ✓ Image is accessible for deployment
Learning outcomes checkpoint
Before completing the workshop, confirm you can:
-
Containerize modernized applications using best practices
-
Build container images with Red Hat UBI base images
-
Push images to OpenShift internal registry
-
Create Kubernetes deployment manifests with health checks
-
Deploy applications to OpenShift successfully
-
Configure services and routes for application access
-
Verify application functionality in containerized environment
-
Quantify business value of AI-accelerated modernization
If you can check all these boxes, congratulations! If not, review the exercises where you need more practice.
Module summary
You’ve successfully completed the entire AI-accelerated application modernization journey for ACME Corp.
What you accomplished for ACME: * Containerized the AI-modernized application with cloud-native best practices * Deployed successfully to OpenShift with automated health monitoring * Proved end-to-end workflow from legacy code to production container * Quantified 5-6x acceleration and 65-85% cost reduction for full portfolio
Business impact realized: * Deployment success: Application runs successfully on OpenShift * Workflow validation: Complete legacy-to-cloud process proven * Business case: Documented ROI for leadership decision-making * Portfolio scalability: Approach ready for 50-application migration
Your journey progress: You’ve demonstrated mastery of AI-assisted application modernization using Red Hat Developer Lightspeed, MTA, and OpenShift. You can now present a complete, validated solution to ACME’s leadership.
Final accomplishments: * Module 1: Analyzed applications with AI-powered MTA risk assessment * Module 2: Generated modernized code with Developer Lightspeed * Module 3: Captured organizational knowledge with Solution Server * Module 4: Deployed successfully to OpenShift
Next steps for ACME: * Present business case to leadership * Secure budget for full portfolio migration * Begin Wave 1 migrations using proven workflow * Expand Solution Server with additional company policies * Train development team on AI-assisted modernization tools
Continue your learning: * Explore advanced MTA custom rules * Investigate Developer Lightspeed custom models * Learn OpenShift GitOps for automated deployments * Study OpenShift Pipelines for CI/CD integration