Getting Started
Imagine: You’re the network engineer on call for a production network that hundreds of users rely on every day. It’s 3AM, and a routine router change just broke something important. Your phone won’t stop going off.
In the middle of fixing the issue, you have a thought: Wouldn’t it be nice if this were the last time you ever had to wake up for something like this?
In this lab, you’ll start building toward that outcome by replacing manual fixes with automated, event-driven responses that reduce downtime and make recovery more consistent.
Accessing VS Code
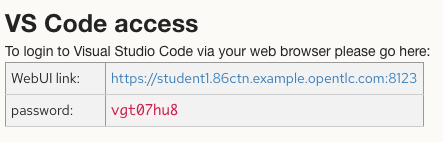
When you get assigned your student workbench, you will have a couple links available to you. For now, we are only interested in the “VS Code access” section, similar to below (your details will be different from what’s shown here):
Visual Studio Code (commonly referred to as VS Code) is a free development environment from Microsoft. In this lab you’re actually using code-server (so that you can use it in a web browser) but we’ll still refer to it as VS Code in these instructions. Red Hat recommends using VS Code for developing with Ansible, and publishes a supported extension for it.
|
Click on the WebUI link to access the VS Code environment. You will be prompted for a password; use the one displayed on your assignment page.
Once you are in:
-
Go to File > Open Folder… and select
/home/student/telemetry/(the default is/home/student/so be sure to click ontelemetryat the bottom of the center pop-up to fill in the rest), click OK. -
The page reloads. You can select “Yes, I trust the authors”.
-
Go to Terminal > New Terminal
|
If you don’t see a "File" or "Terminal" option at the top of the screen, it may be cut off due to limited screen space. If you see File, Edit, etc. but no Terminal: You can access the Terminal menu by clicking the 3 dots If you don’t see File, Edit, etc. at all: You can access these menus by clicking the 3 lines in the upper left. |
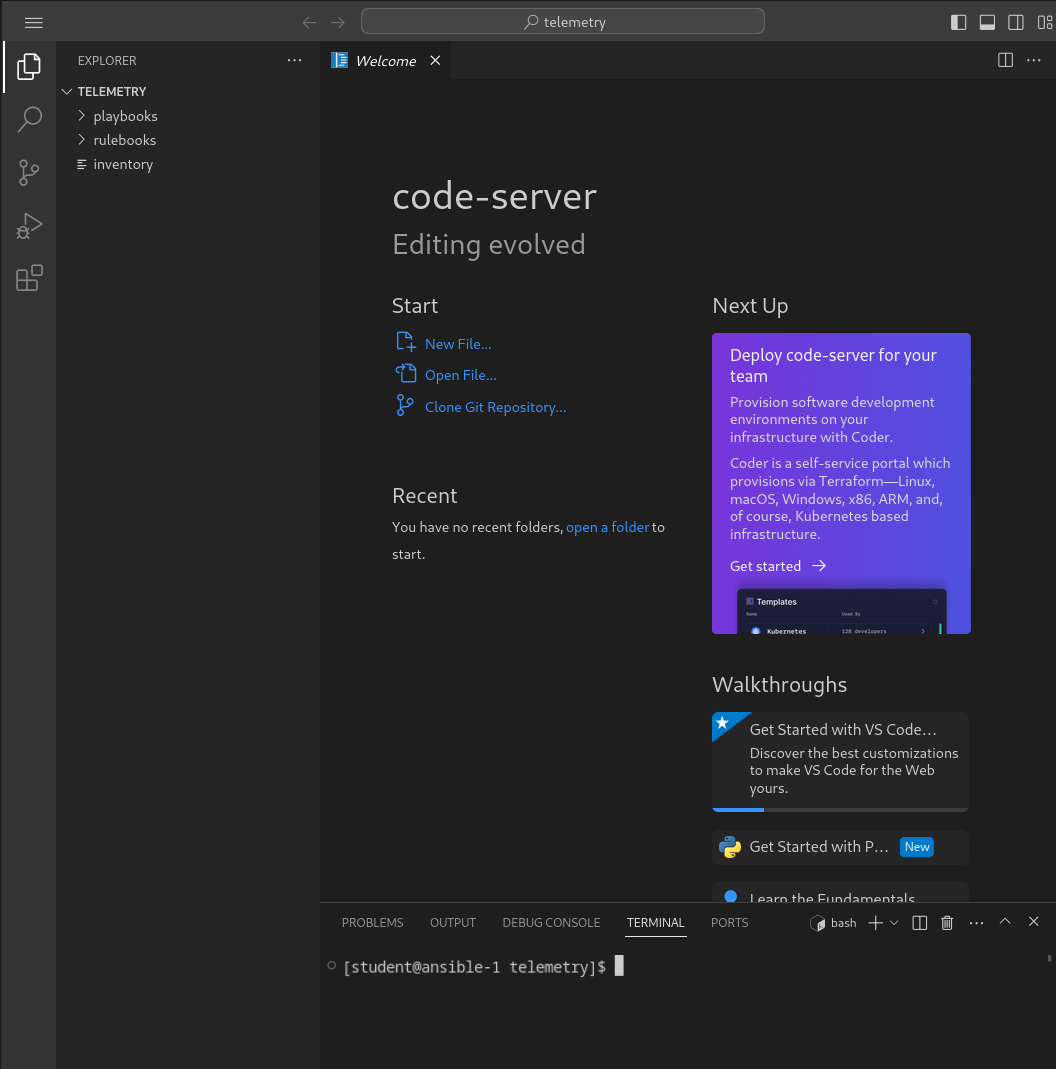
You should now have a screen that looks like this:
Router connectivity and existing configurations
In your terminal at the bottom of the screen, test that you can SSH to rtr1. You should not be prompted for a password as SSH keys have been set up ahead of time.
| In this lab, you will be issuing many terminal commands. Be sure to use the copy button on the right side of each command block, which will copy the command(s) for you to paste into your terminal. |
ssh rtr1show version| Press [Space] a few times to get through all the output. |
There are a couple of lines in this output worth noting:
Cisco IOS XE Software, Version 17.14.01a
[...]
cisco C8000V (VXE) processor (revision VXE) with 1955292K/3075K bytes of memory.
[...]
We can see that we are working with a virtual Cisco 8000V router running IOS-XE 17.14.01a.
We’ll also look at some existing configuration.
Run the following command:
show running-config interface Tunnel0You should see:
rtr1#show running-config interface Tunnel0
Building configuration...

Current configuration : 184 bytes
!
interface Tunnel0
 ip address 10.100.100.1 255.255.255.0
 ip mtu 1476
 ip tcp adjust-mss 1360
 ip ospf 1 area 0
[truncated]
This shows us that there is an interface on rtr1 called Tunnel0 that is involved in OSPF.
Next, run:
show running-config | section router bgpYou should see:
rtr1#show running-config | section router bgp
router bgp 65000
 bgp router-id 192.168.1.1
 bgp log-neighbor-changes
 timers bgp 5 15
 neighbor 10.200.200.2 remote-as 65001
 neighbor 10.200.200.2 ebgp-multihop 255
[truncated]
This shows us that there is existing BGP configuration on rtr1.
We’ll work with these brownfield configurations later.
Exit your SSH session before moving on.
exitIf desired, repeat these steps on rtr2. You should see similar, but slightly different, configurations applied there.