Build and use an execution environment
Learning objectives
By the end of this module, you’ll be able to:
-
Describe why teams need purpose-built execution environments (EEs)
-
Use Automation Portal’s Execution Environment Builder as a network automation developer to build and publish a cutsom EE
-
Assign the new EE to a job template in AAP and run automation with it
In Module 4 you unlocked content discovery for portal-users and explored collections and Git content.
In this module the network team needs new automation that depends on collections you can now see in the portal.
A network automation developer has already written the playbook, but they still need a matching EE before operators can run it reliably.
You will:
-
Join the lab GitHub org/team as
networkuser1 -
Build the EE in the portal as the network automation developer
-
Review the GitHub pull request and Actions build
-
Switch to the platform admin to attach the EE to a Network job template in AAP
-
Launch the job from the portal catalog so end users can consume the result
| When switching users, log out of both Ansible Automation Platform and Automation Portal before signing in as the next user. |
Scenario: Network automation needs a new EE
Your network operations team wants new device-onboarding automation.
A network automation developer built the playbook for Network/Onboard Network device and needs an EE that includes the collections and packages that automation depends on:
-
cisco.iosandansible.netcommonfrom Private Automation Hubrh-certified(Red Hat certified) -
network.aclsfrom Private Automation Hubvalidated(Ansible validated content) -
community.generalfrom Private Automation Hubcommunity -
parasol.networkfrom GitHubAAP-Automation-Portal-Lab(Parasol custom collection you discovered in Module 4) -
System package
gitand Python packageparamiko
With AAP 2.7, Automation Portal provides a visual Execution Environment Builder that lets you choose collections and options through a guided point-and-click experience, then generate the definition into Git and kick off the build pipeline.
Join the lab GitHub organization
EE Builder authenticates to GitHub with your GitHub identity. Before you can complete that OAuth step, your GitHub user must be a member of the lab organization and team.
Log in to the Automation Portal as networkuser1 with password {aap_admin_password}.
-
Open
GitHub Join Lab Teamfrom the catalog and click Start. -
In the survey, enter your GitHub username (login name, not email).
-
Launch the job and wait for it to succeed.
-
Accept the organization / team invite for
AAP-Automation-Portal-Labbefore continuing. Until you accept, GitHub OAuth from the portal can fail even if the join job succeeded.-
Check your email inbox for the GitHub account you used and click Join @AAP-Automation-Portal-Lab.
-
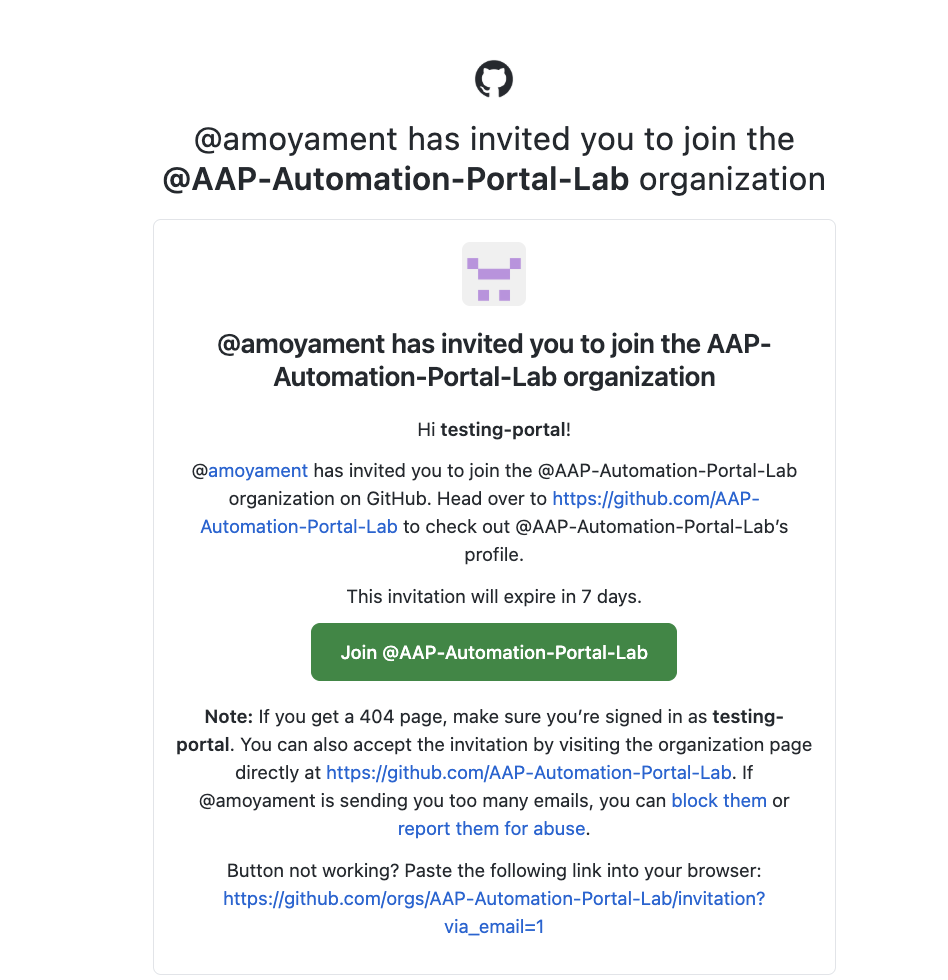
-
Or open GitHub Settings → Organizations, find the pending invite for
AAP-Automation-Portal-Lab, and click Accept.
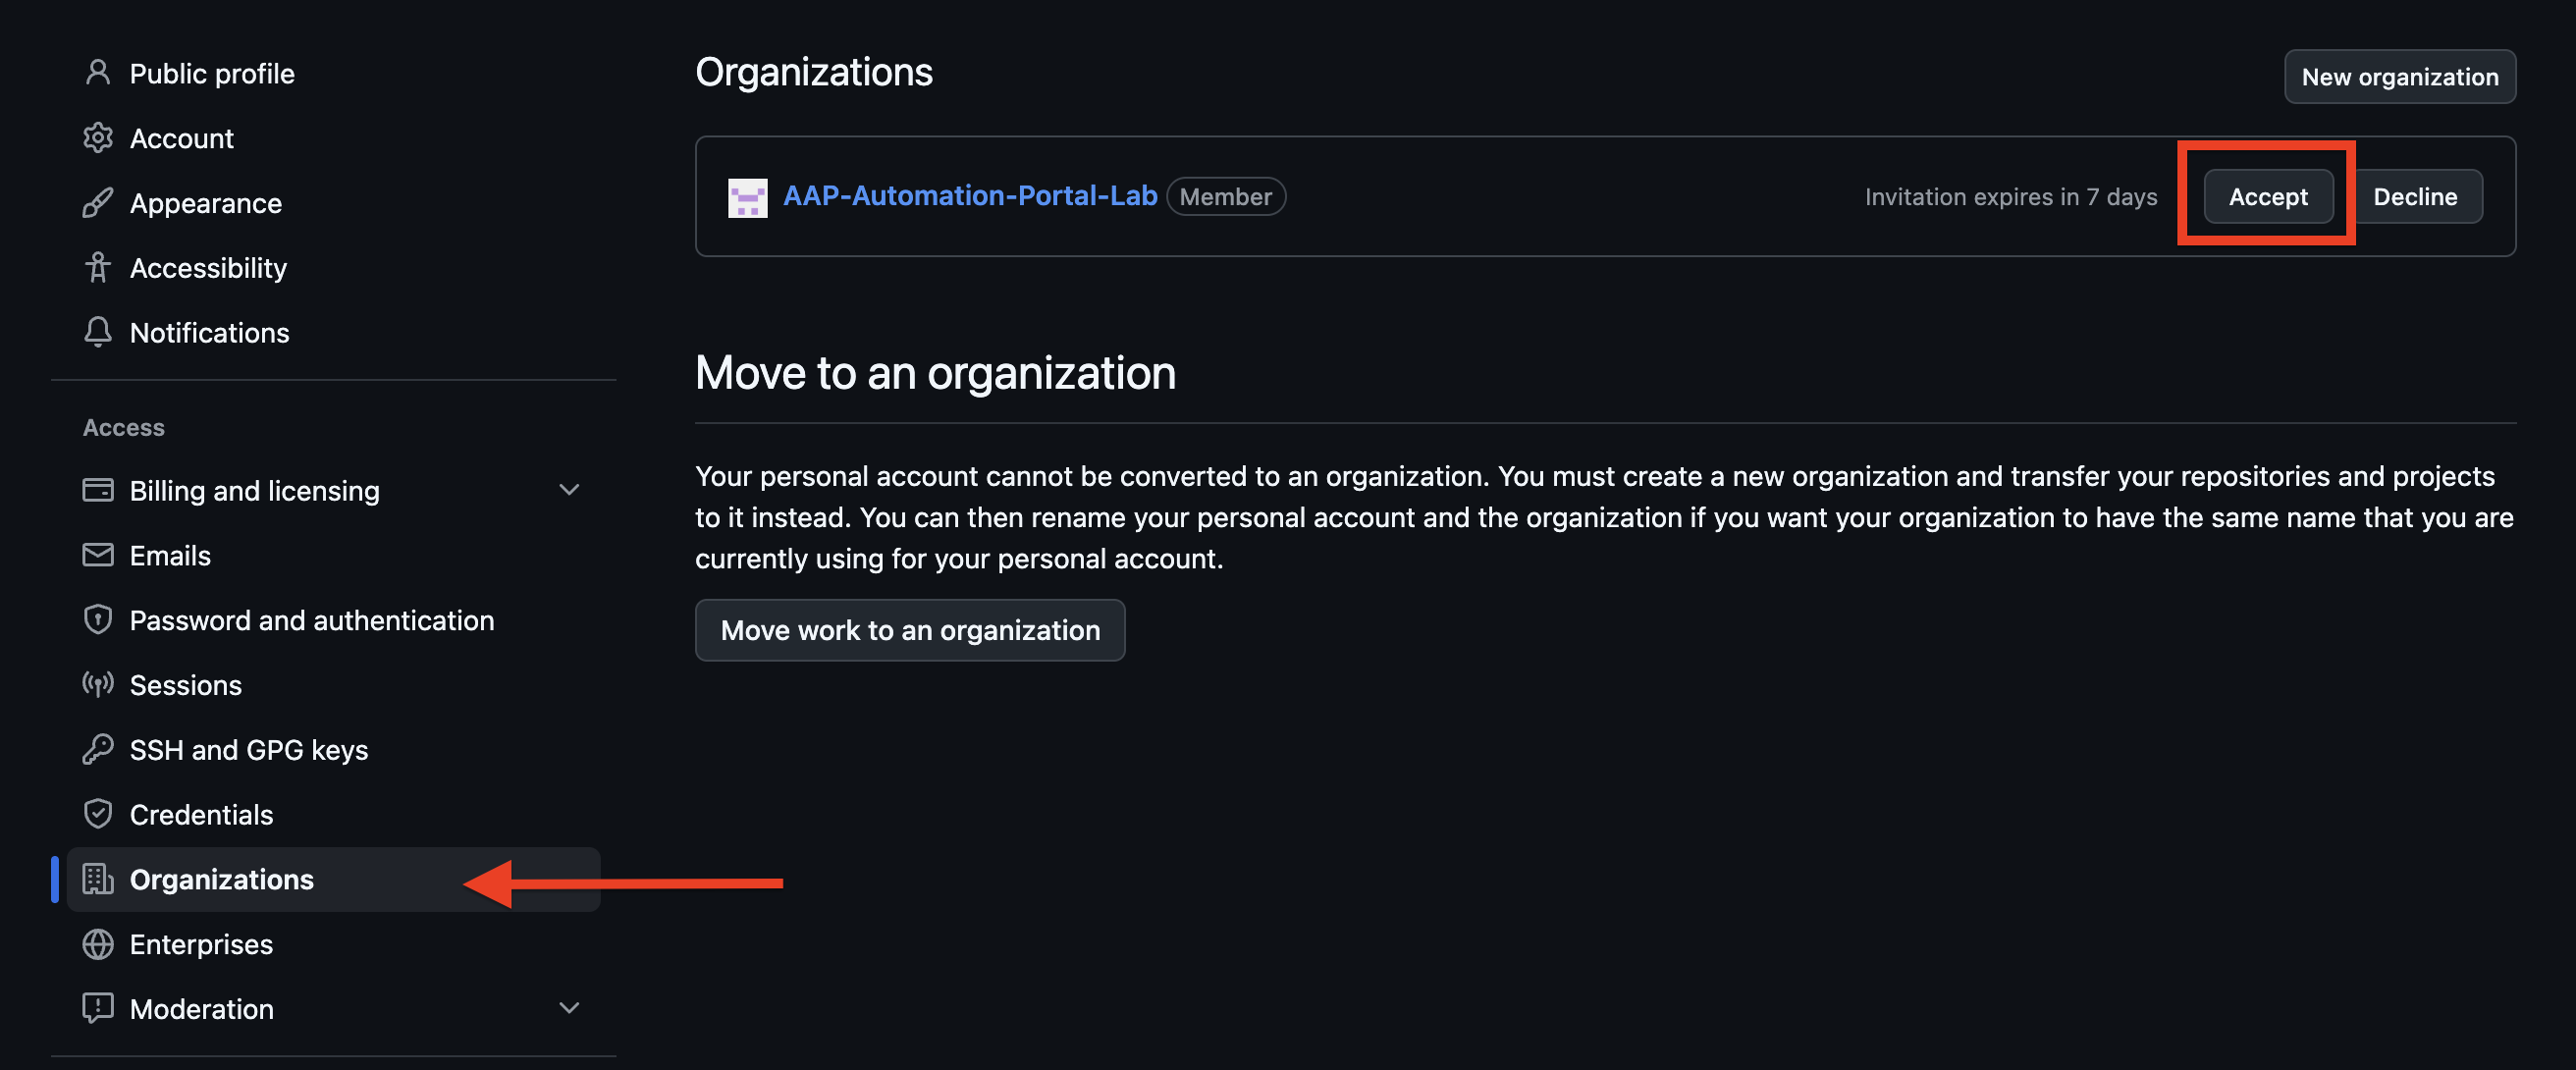
✅ Expected result: The join job succeeds, and you have accepted the GitHub org invite.
Create the execution environment definition
Open the Automation Portal.
Because Module 4 granted content discovery permissions to portal-users, you should see Execution Environments in the sidebar.
Open the EE catalog, then Create
-
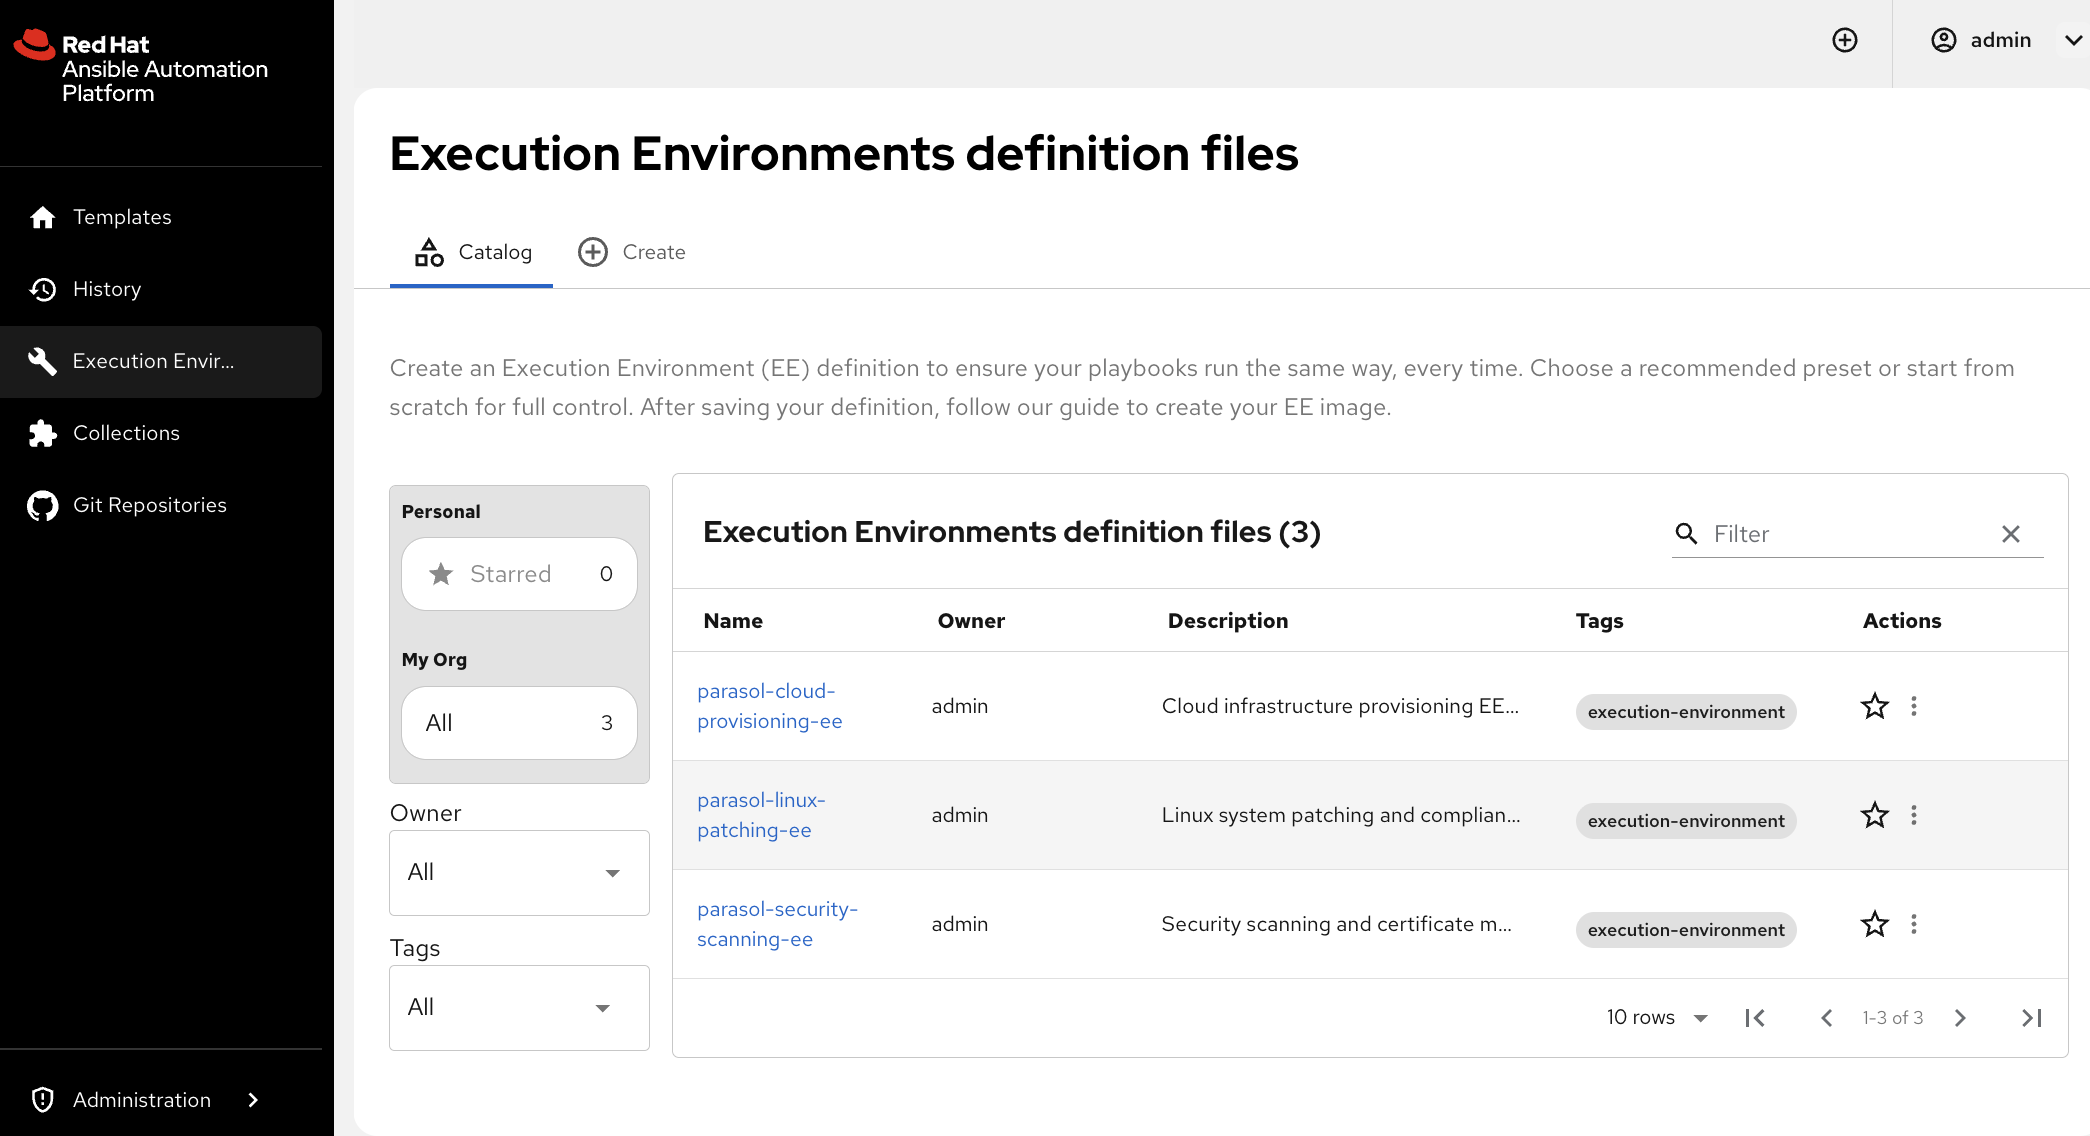
In the portal sidebar, open Execution Environments.
-
The Catalog tab lists EE definition files already registered for your organization. You should see the sample Parasol EEs (
parasol-cloud-provisioning-ee,parasol-linux-patching-ee, andparasol-security-scanning-ee). Your Module 5 build is for Hub and Controller; it does not need a new Catalog entry.
-
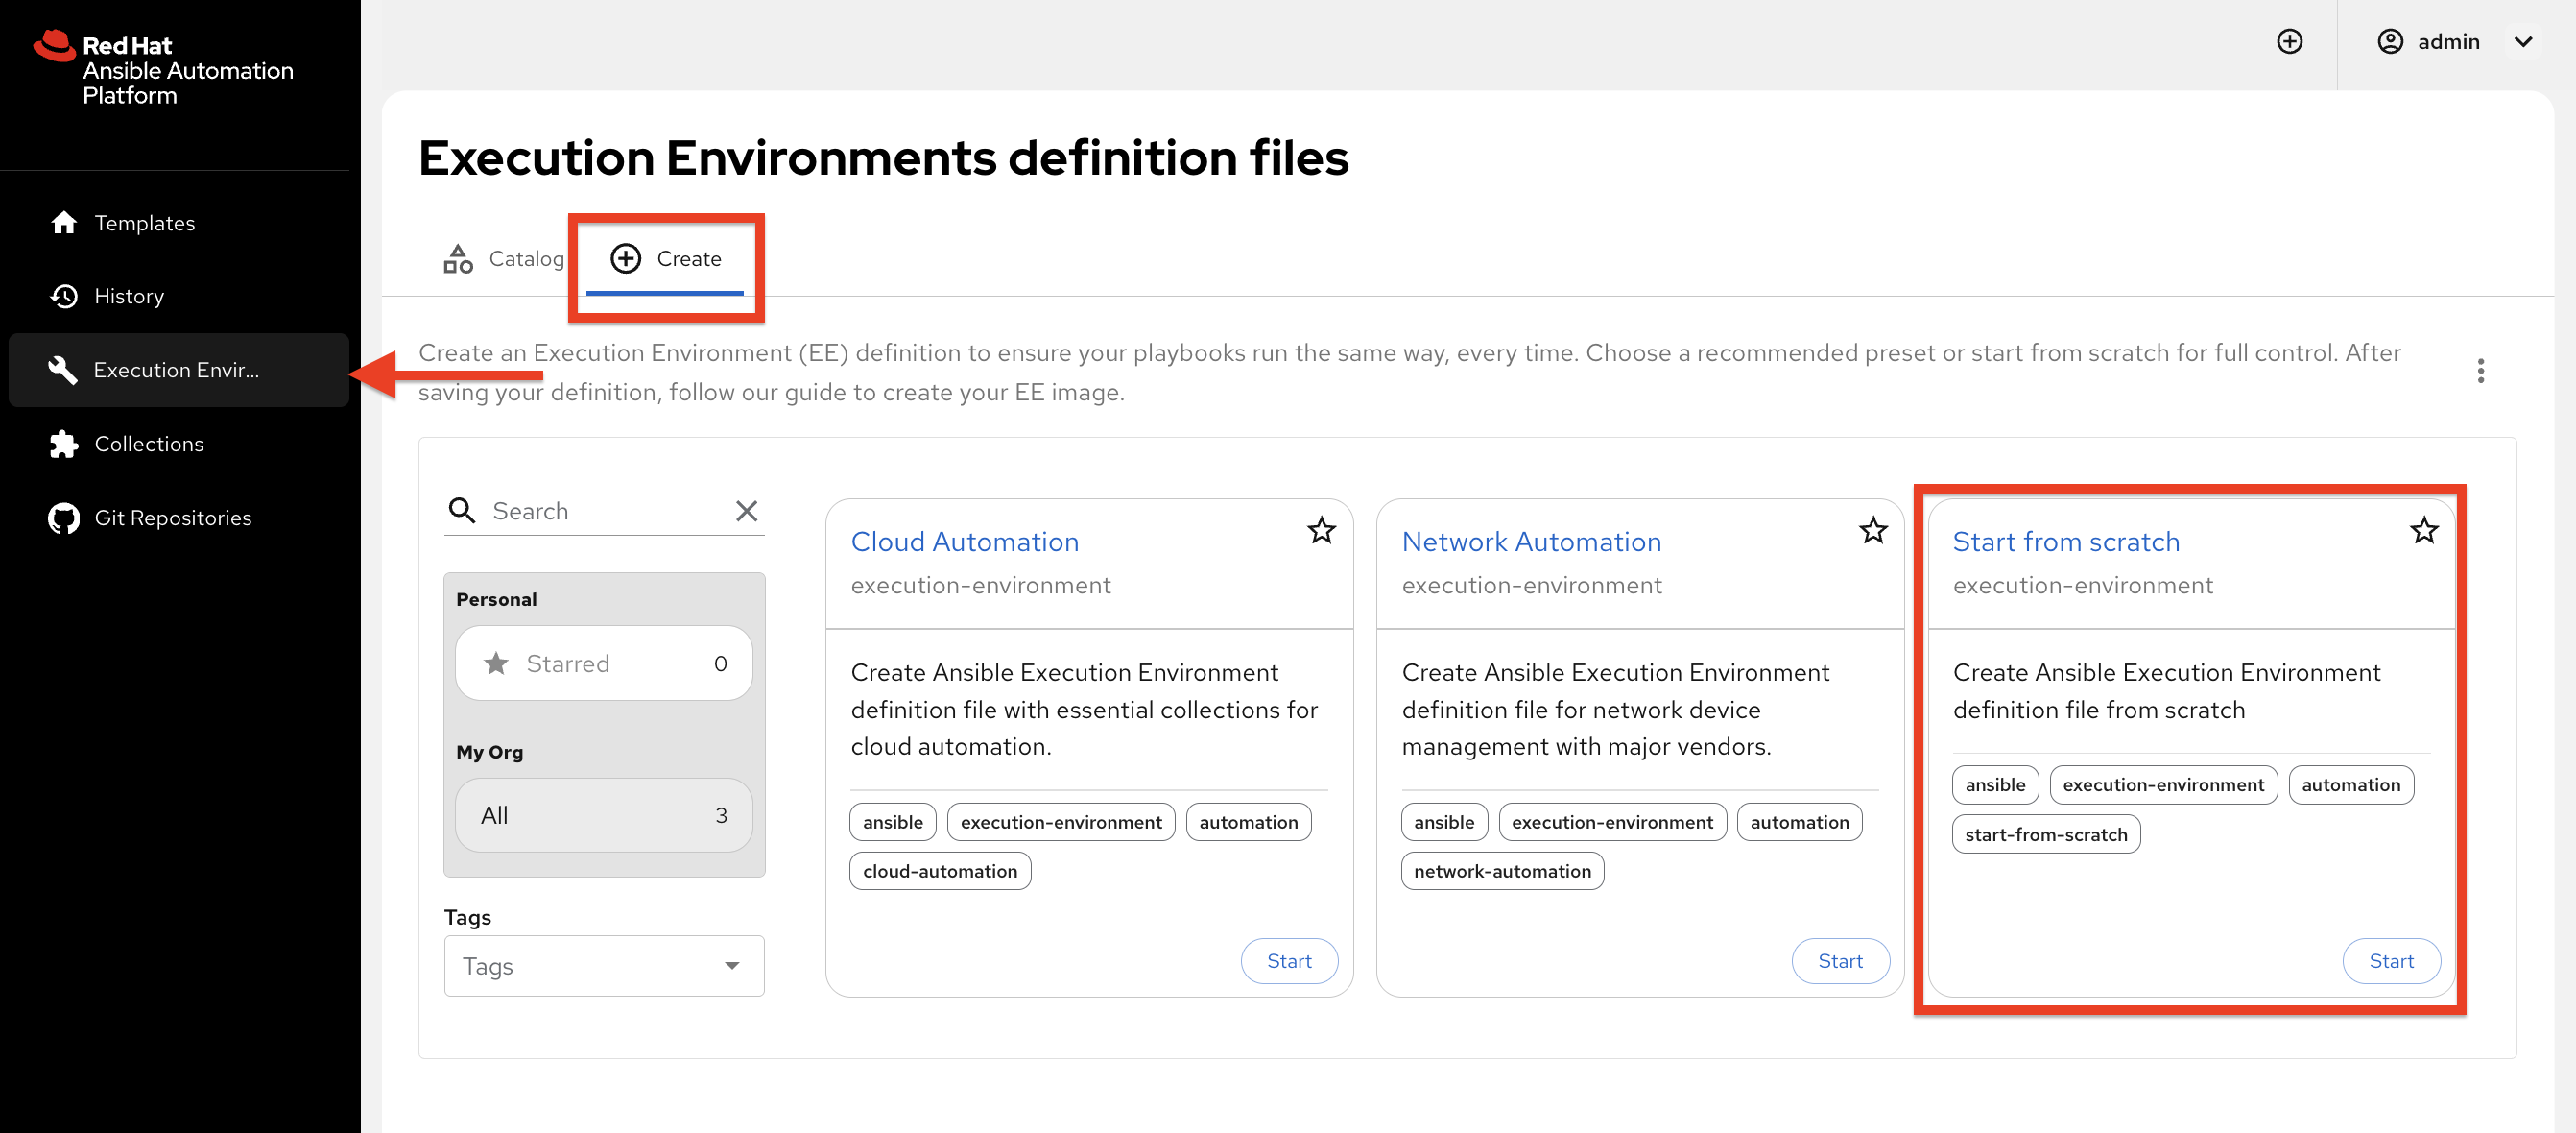
Open the Create tab.
-
On the Start from scratch card, click Start.
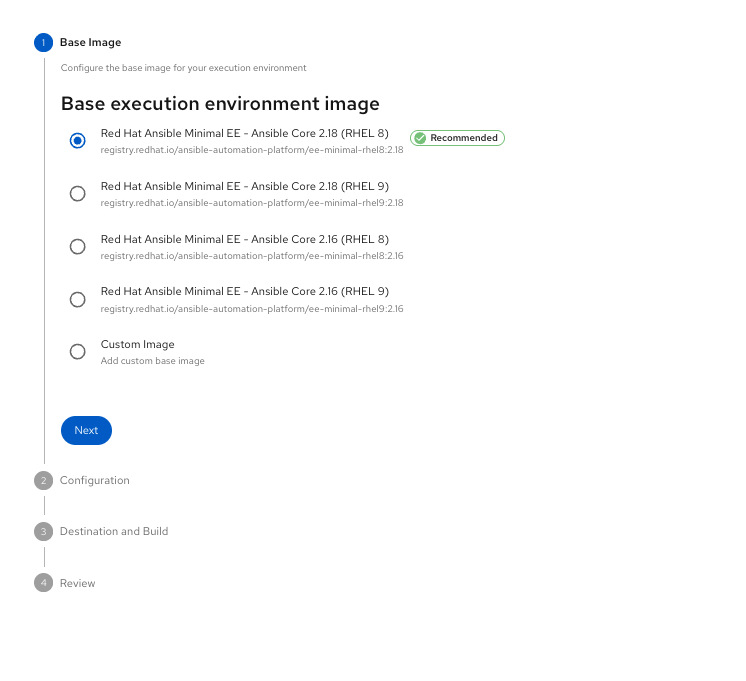
Step 1: Base image
-
Keep the Recommended base image selected: Red Hat Ansible Minimal EE – Ansible Core 2.18 (RHEL 8) (
registry.redhat.io/ansible-automation-platform/ee-minimal-rhel8:2.18). -
Click Next.
Step 2: Add collections
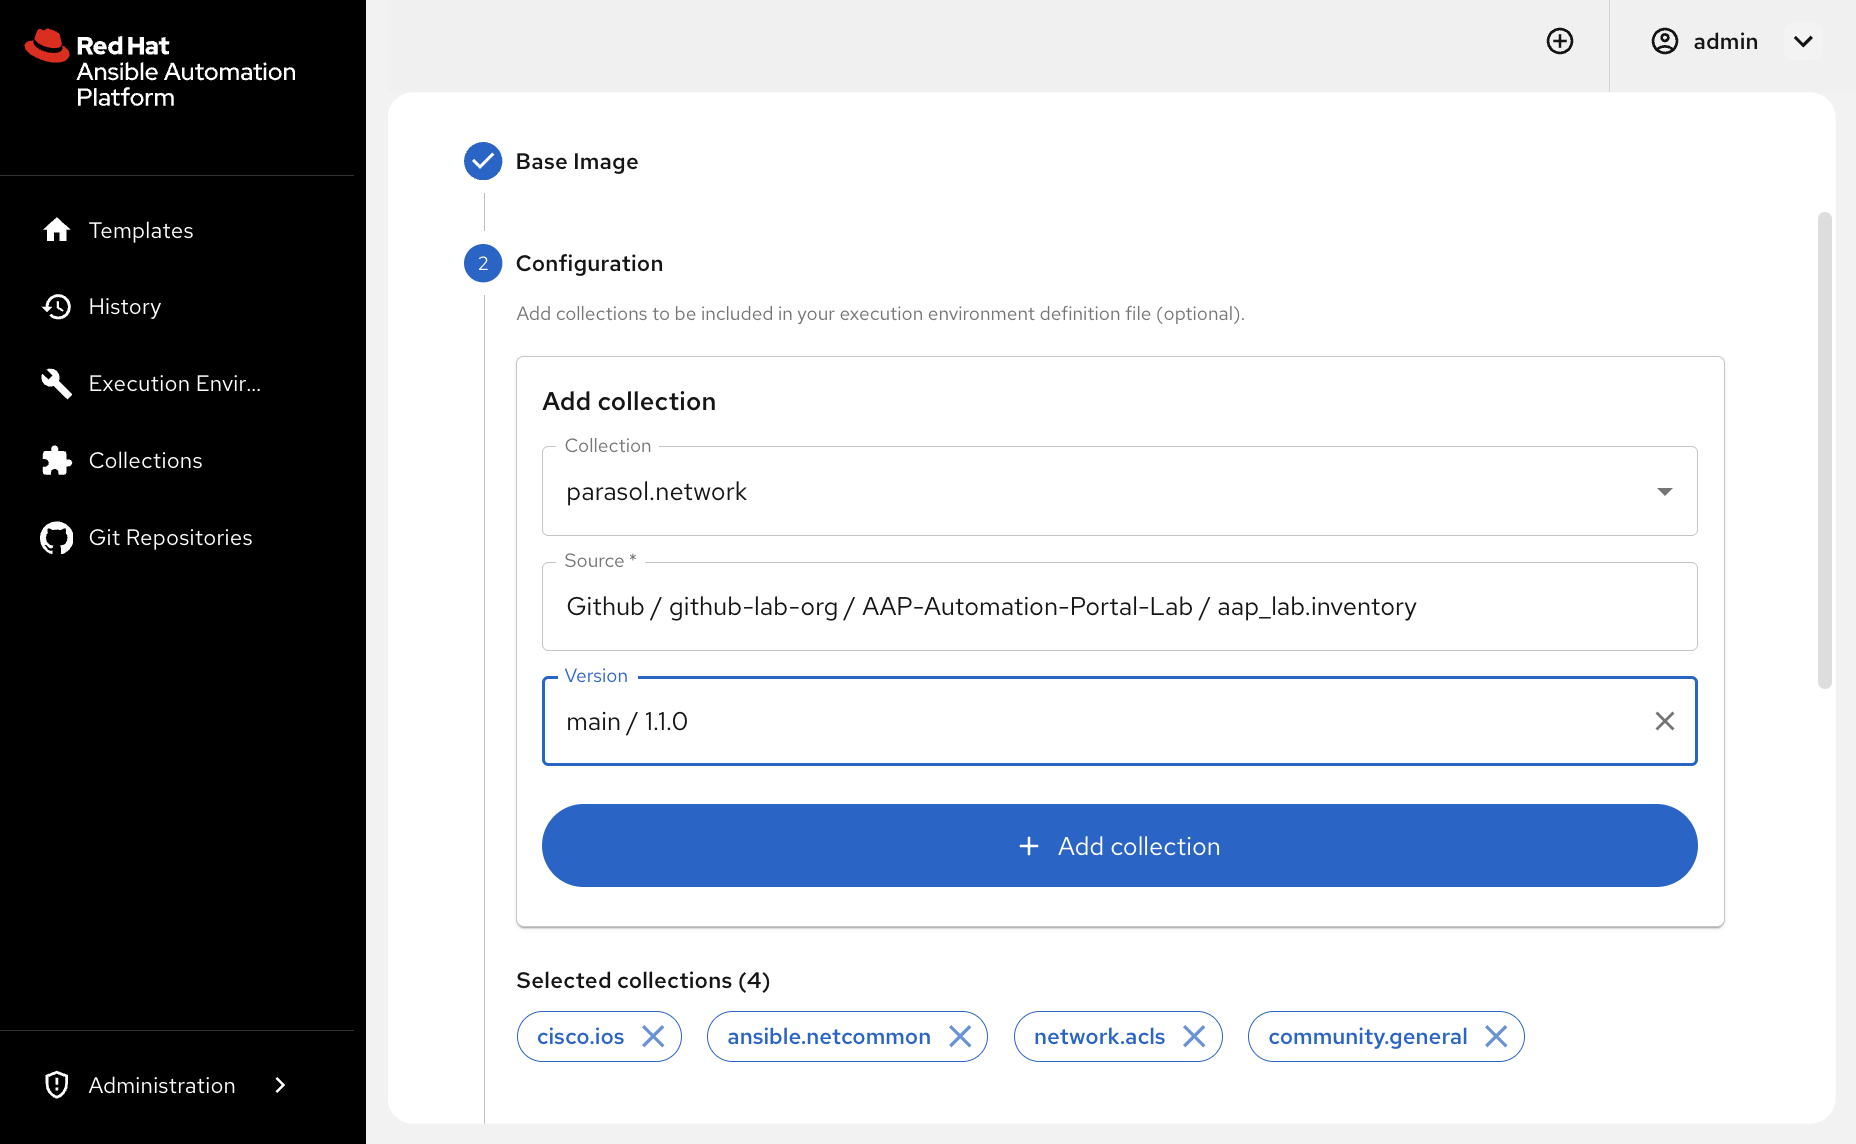
The collection picker searches across your organization’s configured content sources, including Private Automation Hub.
For each collection below:
-
Search by collection name.
-
Select the collection.
-
Set Source to the source listed for that collection in the table below (Hub or GitHub).
-
For Version, select the latest version shown, or leave the version blank so the build uses the latest available.
-
Click + Add collection.
| Collection | Source | Kind |
|---|---|---|
|
|
Certified |
|
|
Certified |
|
|
Validated |
|
|
Community |
|
|
custom / published |
Step 2 continued: Advanced packages
-
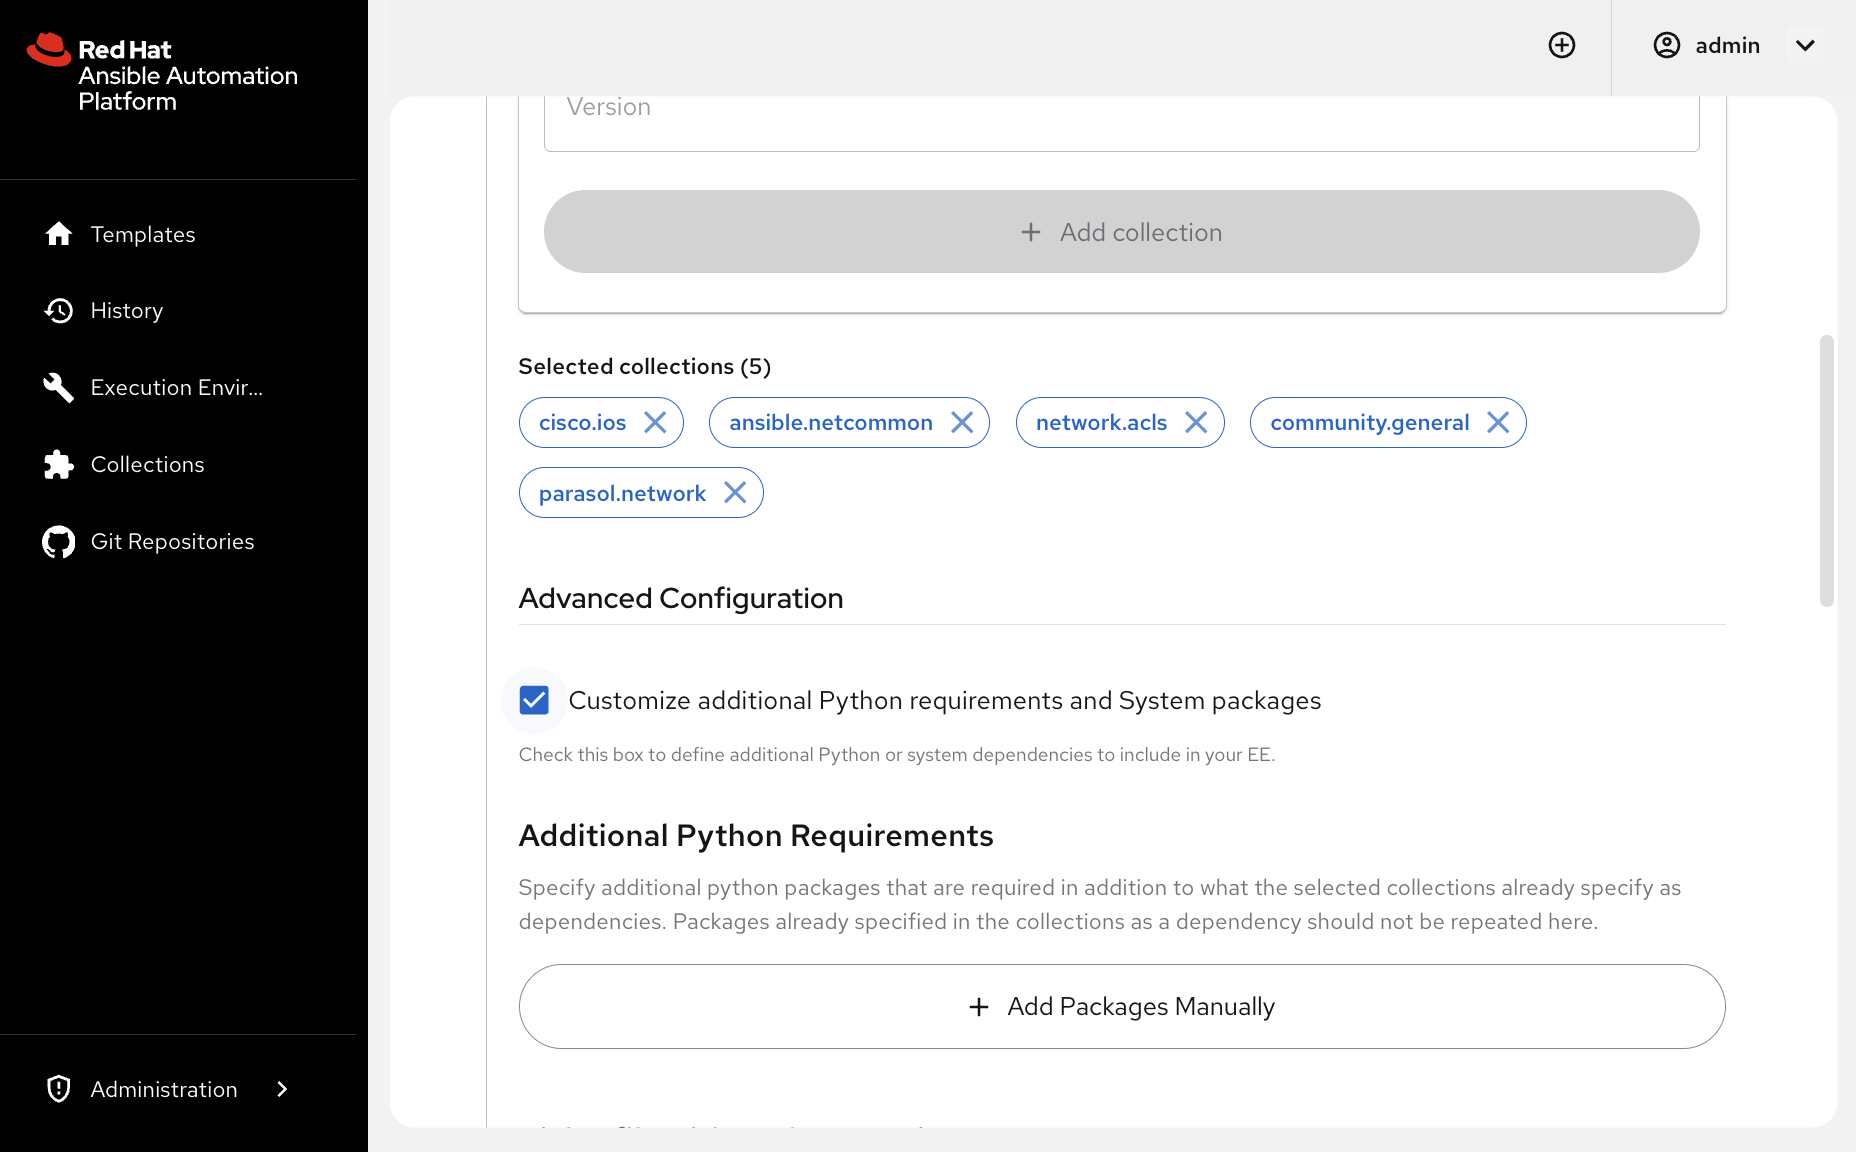
Expand Advanced Configuration.
-
Check Customize additional Python requirements and System packages.
-
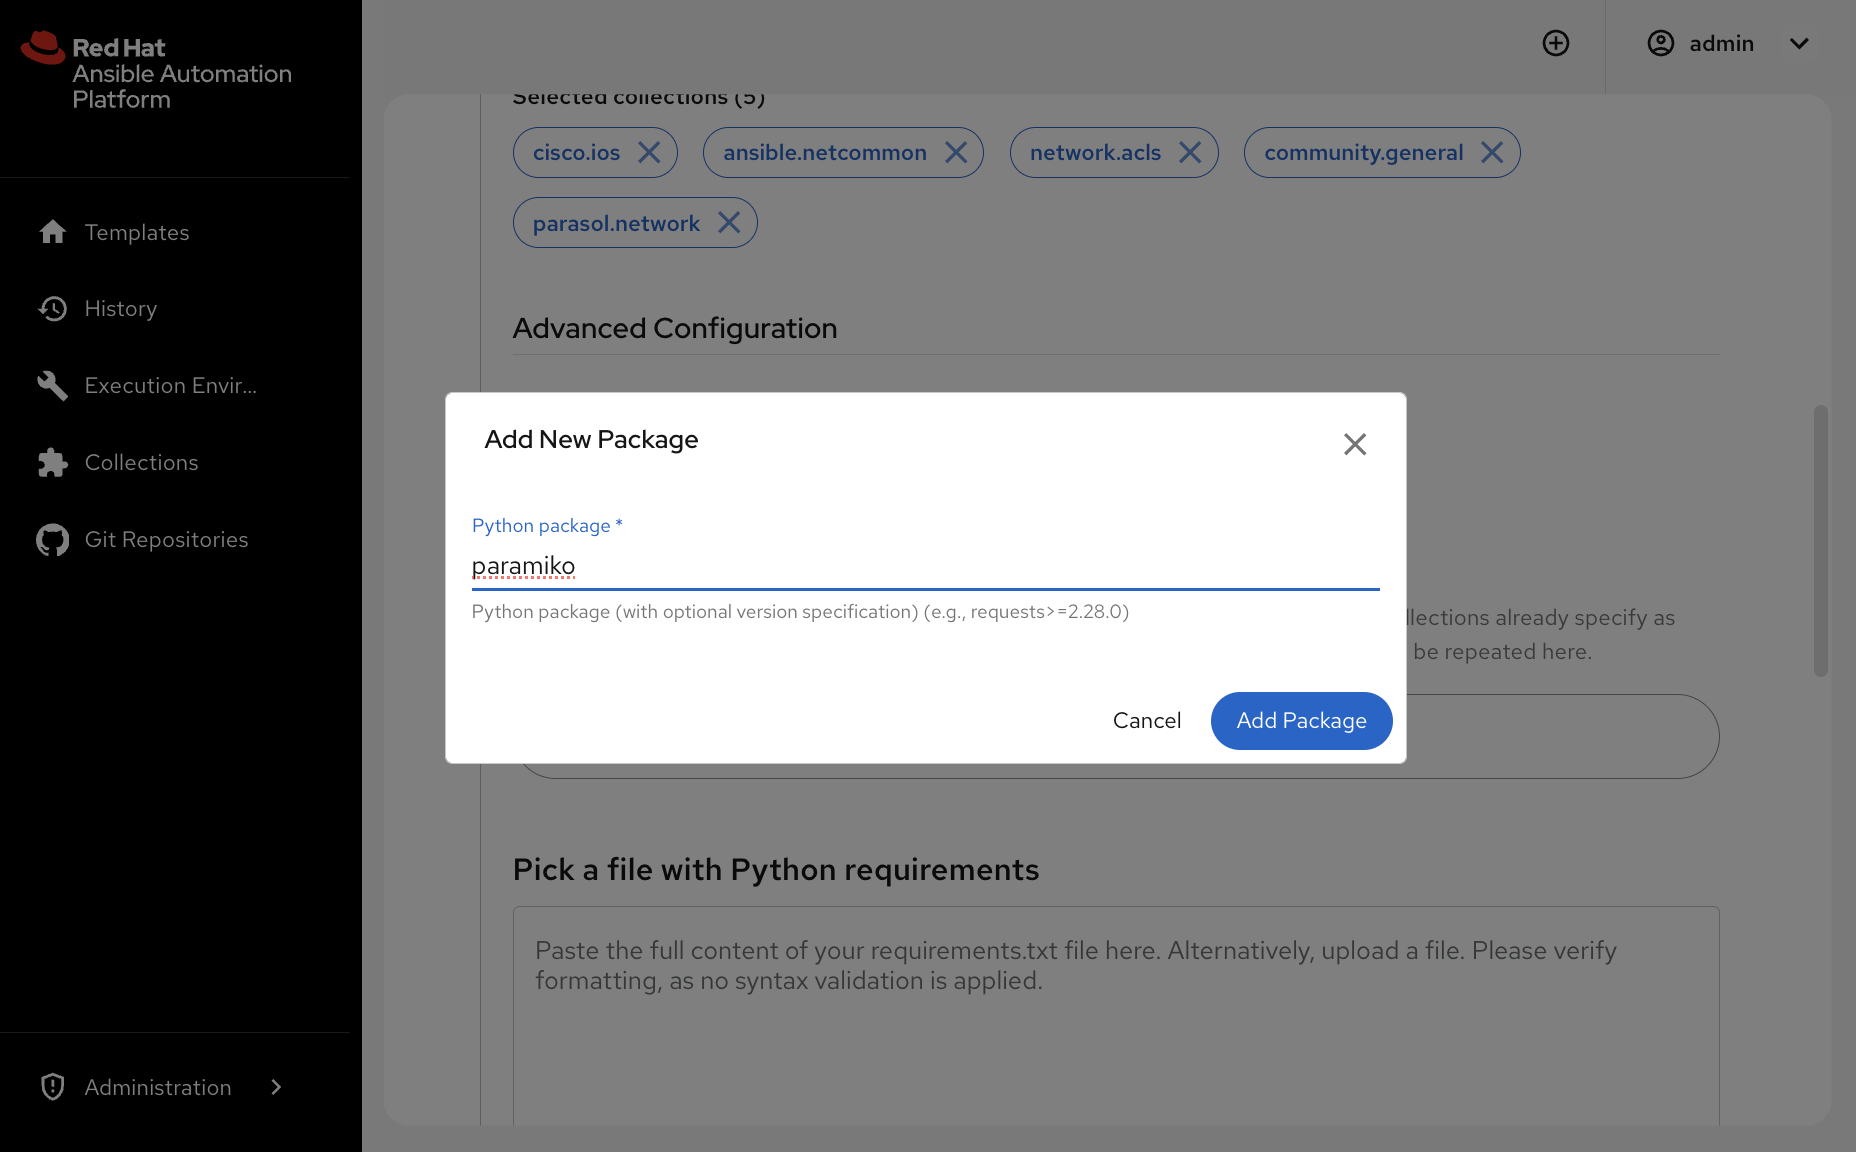
Under Additional Python Requirements, click + Add Packages Manually, enter
paramiko, and add the package.
-
Under System Packages, click + Add Packages Manually, enter
git, and add the package. -
Check Include additional build steps.
-
Click Add Build Step
-
Add a build step with:
-
Step Type:
Prepend Final - Before final image steps -
Commands:
RUN echo "Built by network dev with Automation Portal"
-
-
Click Next.
Step 3: Name, destination, and build
-
Enter Name:
network-ops-ee -
Enter Description:
Network ops EE for Parasol device onboarding -
Choose GitHub as the Git provider and complete GitHub sign-in.
-
For Namespace select the GitHub organization
AAP-Automation-Portal-Lab.
|
EEs not created under the lab organization |
-
Enter the Repository Name:
my-guid-user1-ee.
|
A warning that the repository already exists is expected. The lab pre-creates these repositories with the necessary build secrets that would usually be stored in your organization. |
-
Enable Build Execution Environment so the portal starts the automated image build and push after it publishes the definition.
-
Select Private Automation Hub (PAH) for Registry.
-
Enter Image Name:
parasol/network-ops-ee -
Enter Image Tag:
latest -
Leave Verify TLS certificates checked
-
Select Next
-
Review the full configuration, then select Create to kick off the build process.
✅ Expected result: The portal shows a progress view for scaffolding, publishing the pull request, and starting the EE build workflow.
Review the pull request and build from the portal
Stay on the progress page after you submit. When the GitHub steps finish, use the action buttons at the bottom of that page.
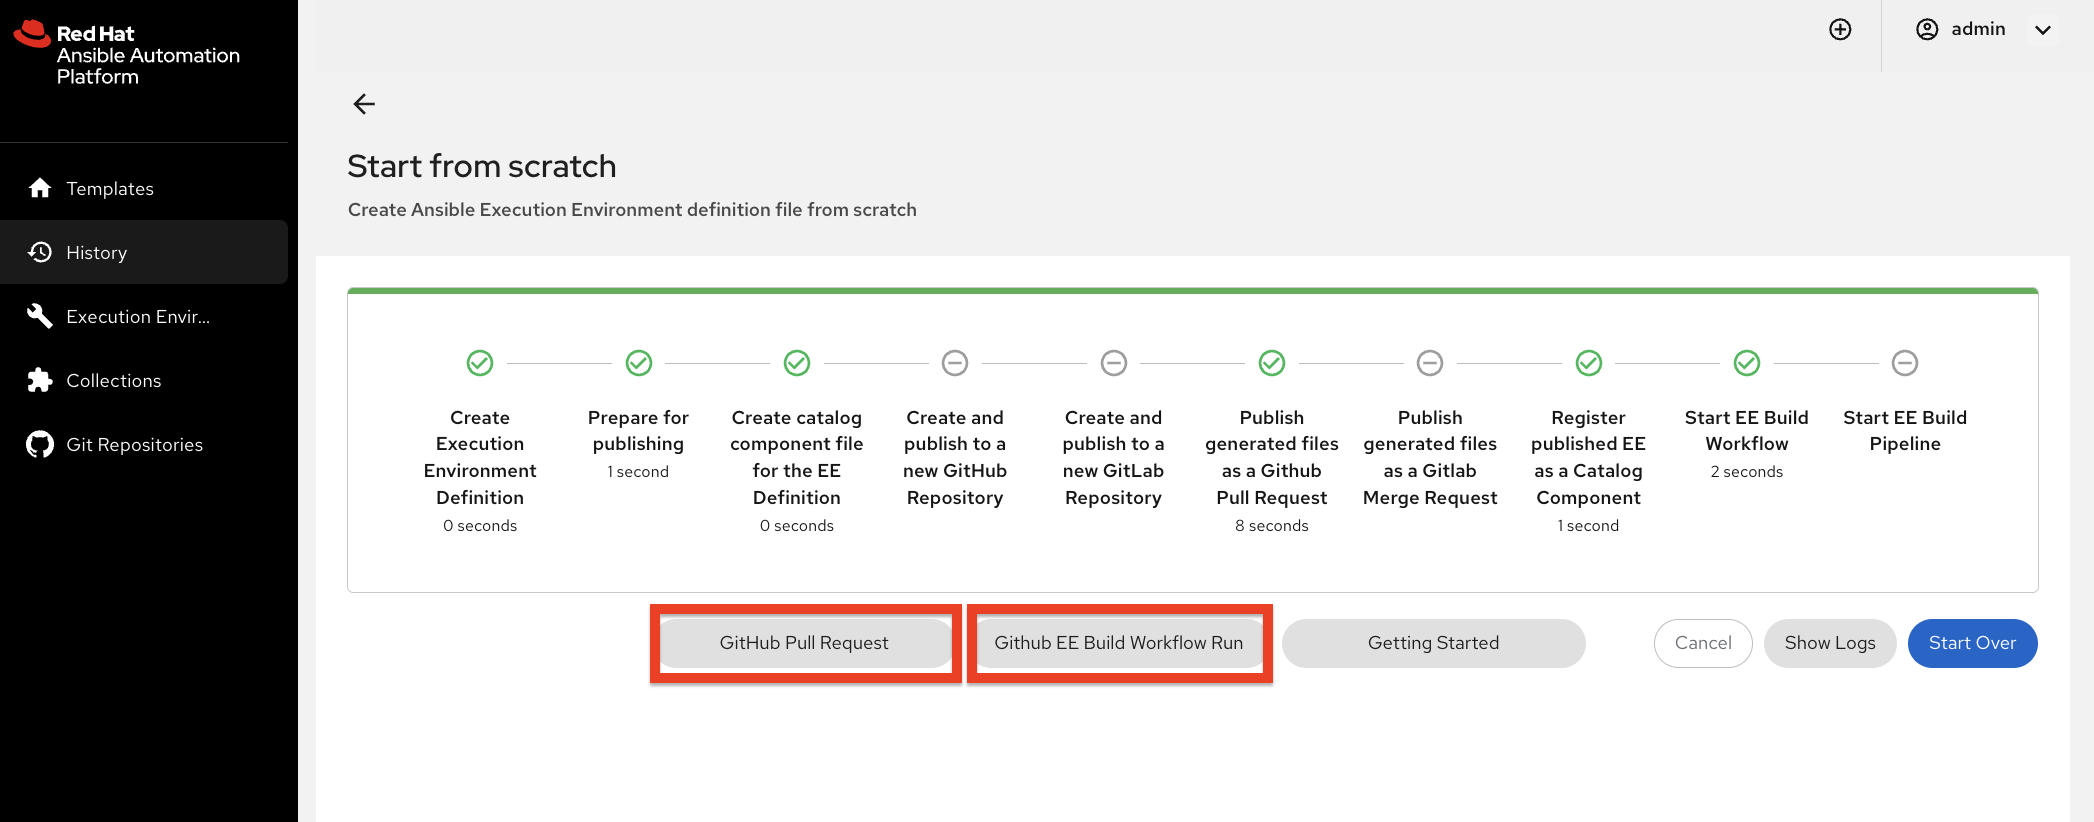
Pull request and definition files
-
Click GitHub Pull Request.
-
Review the changed files. You should see a directory named after your EE (for example
network-ops-ee/) that includes:-
network-ops-ee.yml(the EE definition; it is named after the EE, notexecution-environment.yml) -
catalog-info.yaml(Backstage entity metadata for the EE) -
README.md -
updates under
.github/workflows/ee-build.yml
-
✅ Expected result: The PR shows the EE definition content you configured. The main branch still looks nearly empty until you merge.
-
Merge the pull request into
mainso the EE definition andcatalog-info.yamlland on the default branch.
GitHub Actions build
-
Return to the portal progress page and click Github EE Build Workflow Run.
-
Or open the repository Actions tab and select the Execution Environment Build run.
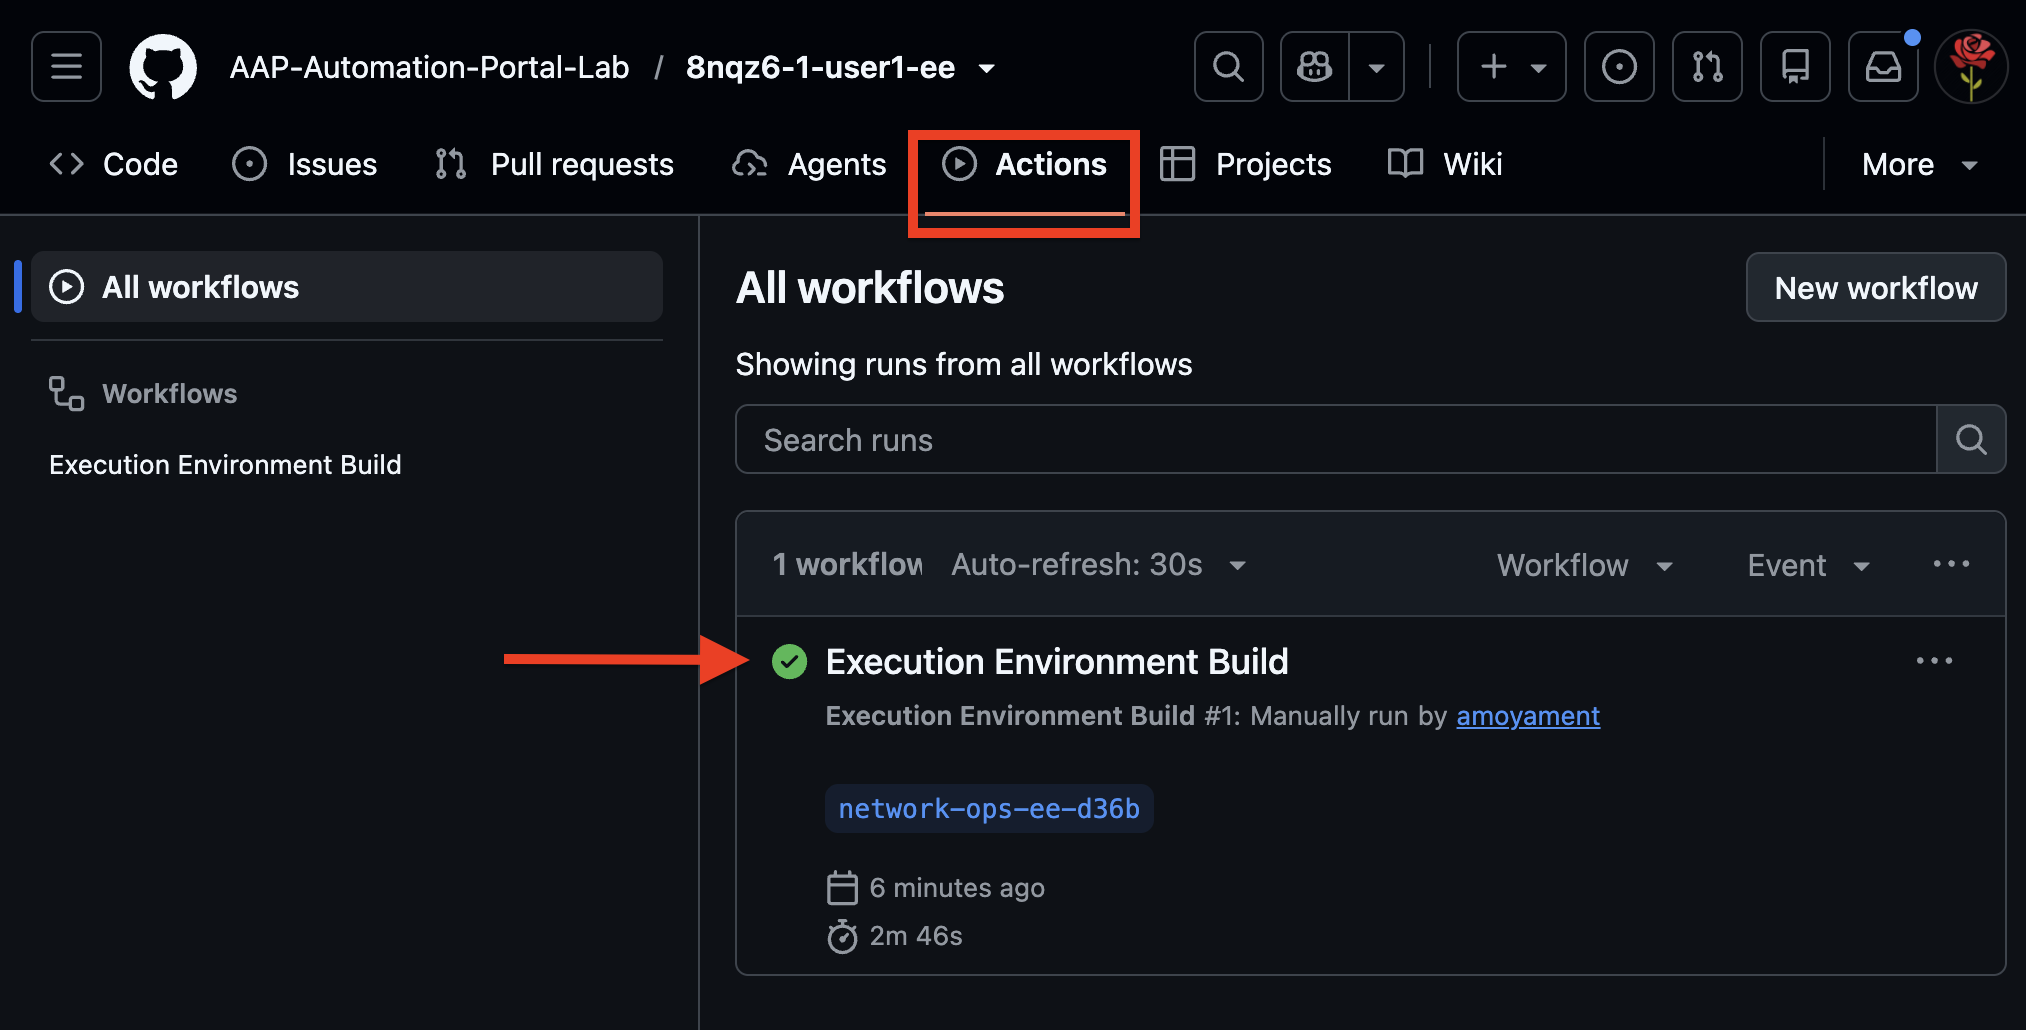
-
Open the run and watch the job steps as GitHub Actions builds the image, runs its checks, and publishes the EE to Private Automation Hub.
|
This can take several minutes. Stay on the run page and expand failing steps if anything turns red. Ask your facilitator before inventing new registry passwords. |
✅ Success indicator: The workflow concludes successfully (green).
How the image reaches Private Automation Hub (brief)
You do not need to configure secrets in this exercise. They were set when the lab was provisioned, but you should understand the pattern:
-
The GitHub repo stores Actions secrets / variables used by
ee-build.yml -
Galaxy / Hub tokens allow the build to pull collections from Private Automation Hub during the image build
-
Registry username / password allow the workflow to push the finished EE image to the Hub registry
-
Organizations can point the same style of workflow at other registries (Quay, mirrored registries, etc.) by changing registry URL and credentials. Hub is the default target in this workshop
|
Key learning: EE Builder generates the definition and kicks the build; GitHub Actions + Hub credentials perform the actual image build and publish. The network developer can drive that path from the portal; platform teams still own registry and secret hygiene. |
Optionally confirm in AAP Automation Hub that a new execution environment image or EE entry appeared for your build (name/tag from the template). Refresh if needed. Indexing can lag slightly behind a green Actions run.
Platform admin: attach the EE to a job template in AAP
Log out of Automation Portal if you are still signed in as networkuser1.
Log in to the Ansible Automation Platform as {aap_admin_username} with password {aap_admin_password}.
Add the Hub EE to Controller
-
Go to Automation Content → Execution Environments.
-
Find
network-ops-ee. -
Open the kebab menu and select Use in Controller.
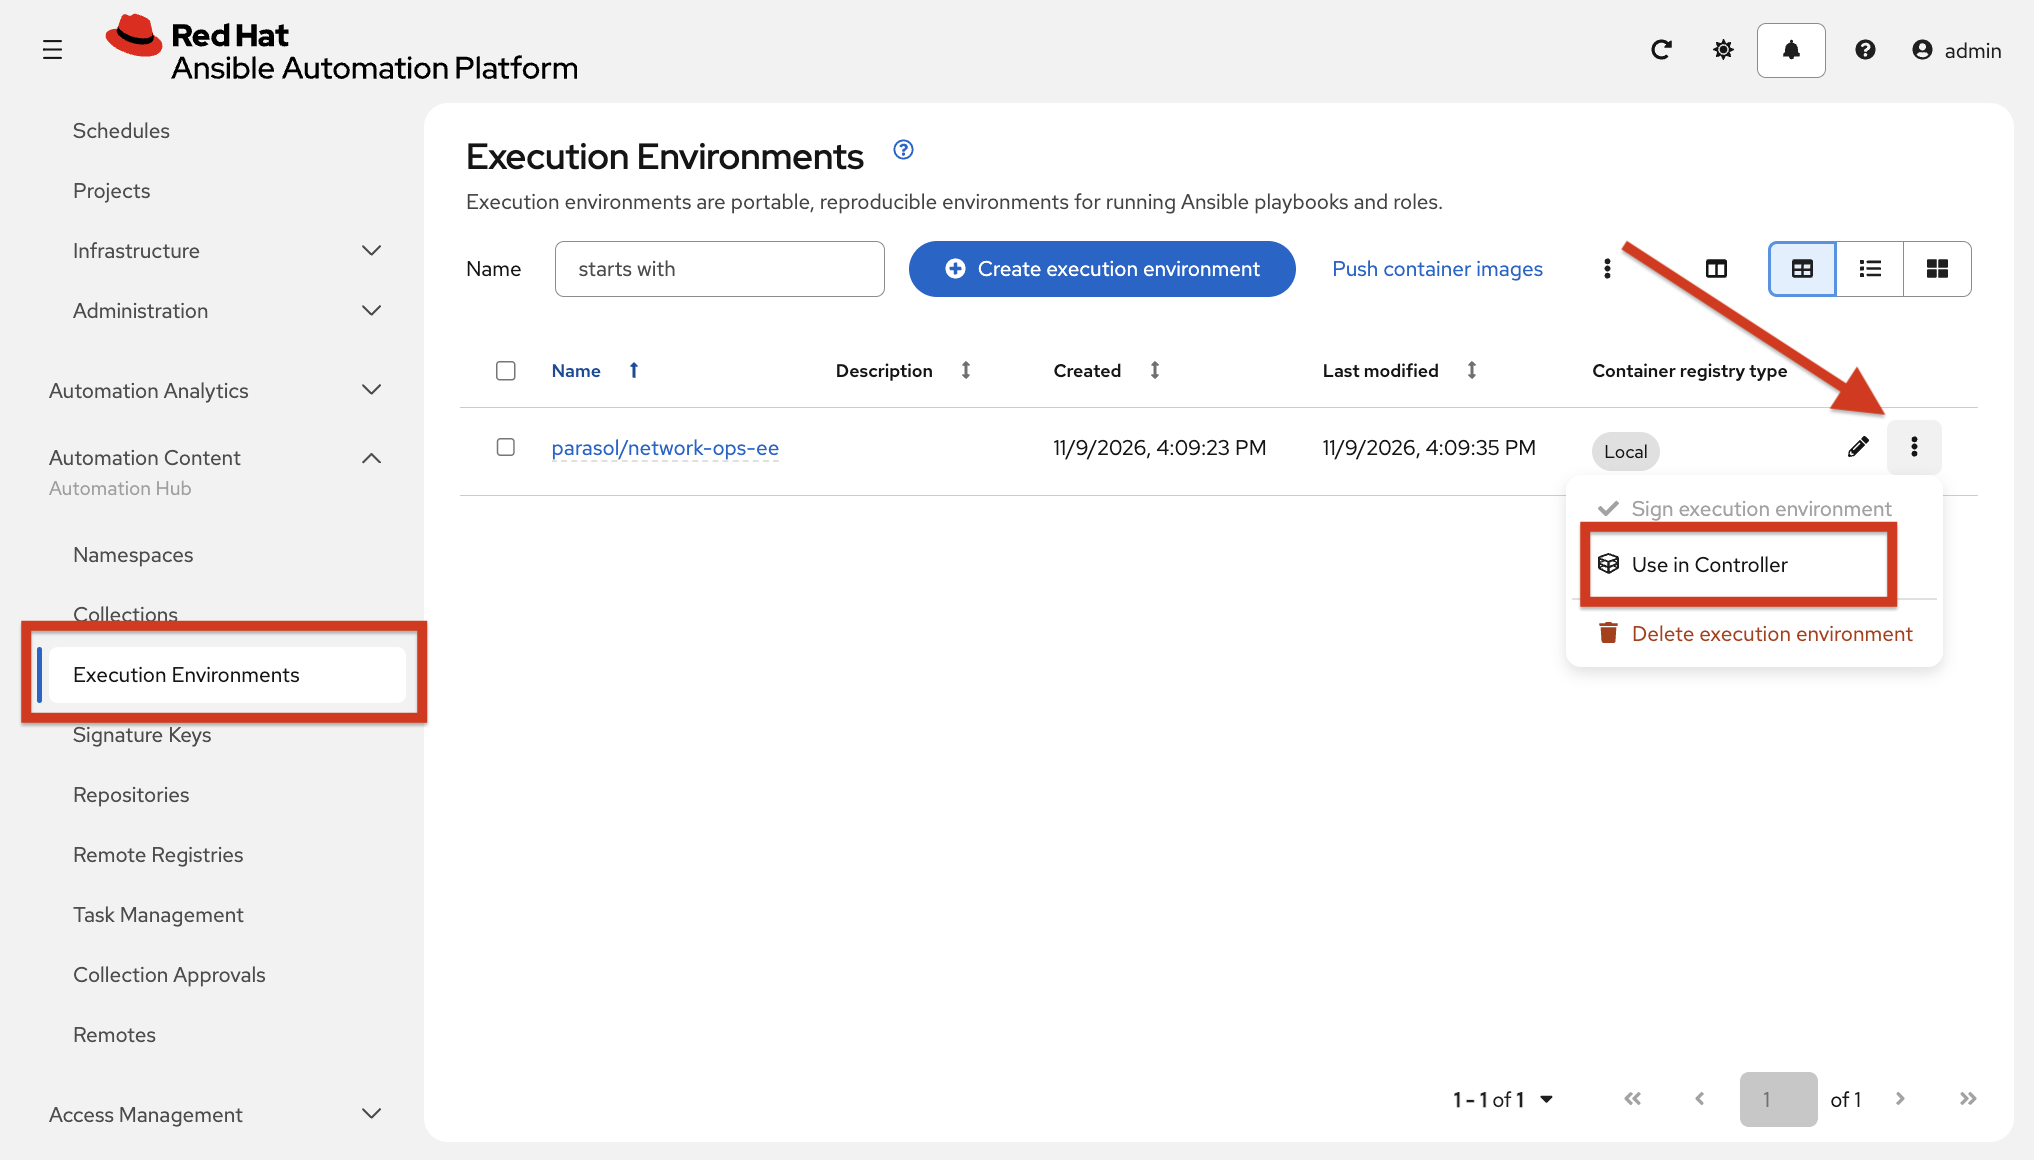
-
On Create execution environment, keep the pre-filled Image URL and enter
network-ops-eefor the Name. -
Select Always pull container before running for Pull.
-
Set Registry credential to
Private Automation Hub Registry. -
Click create / save.
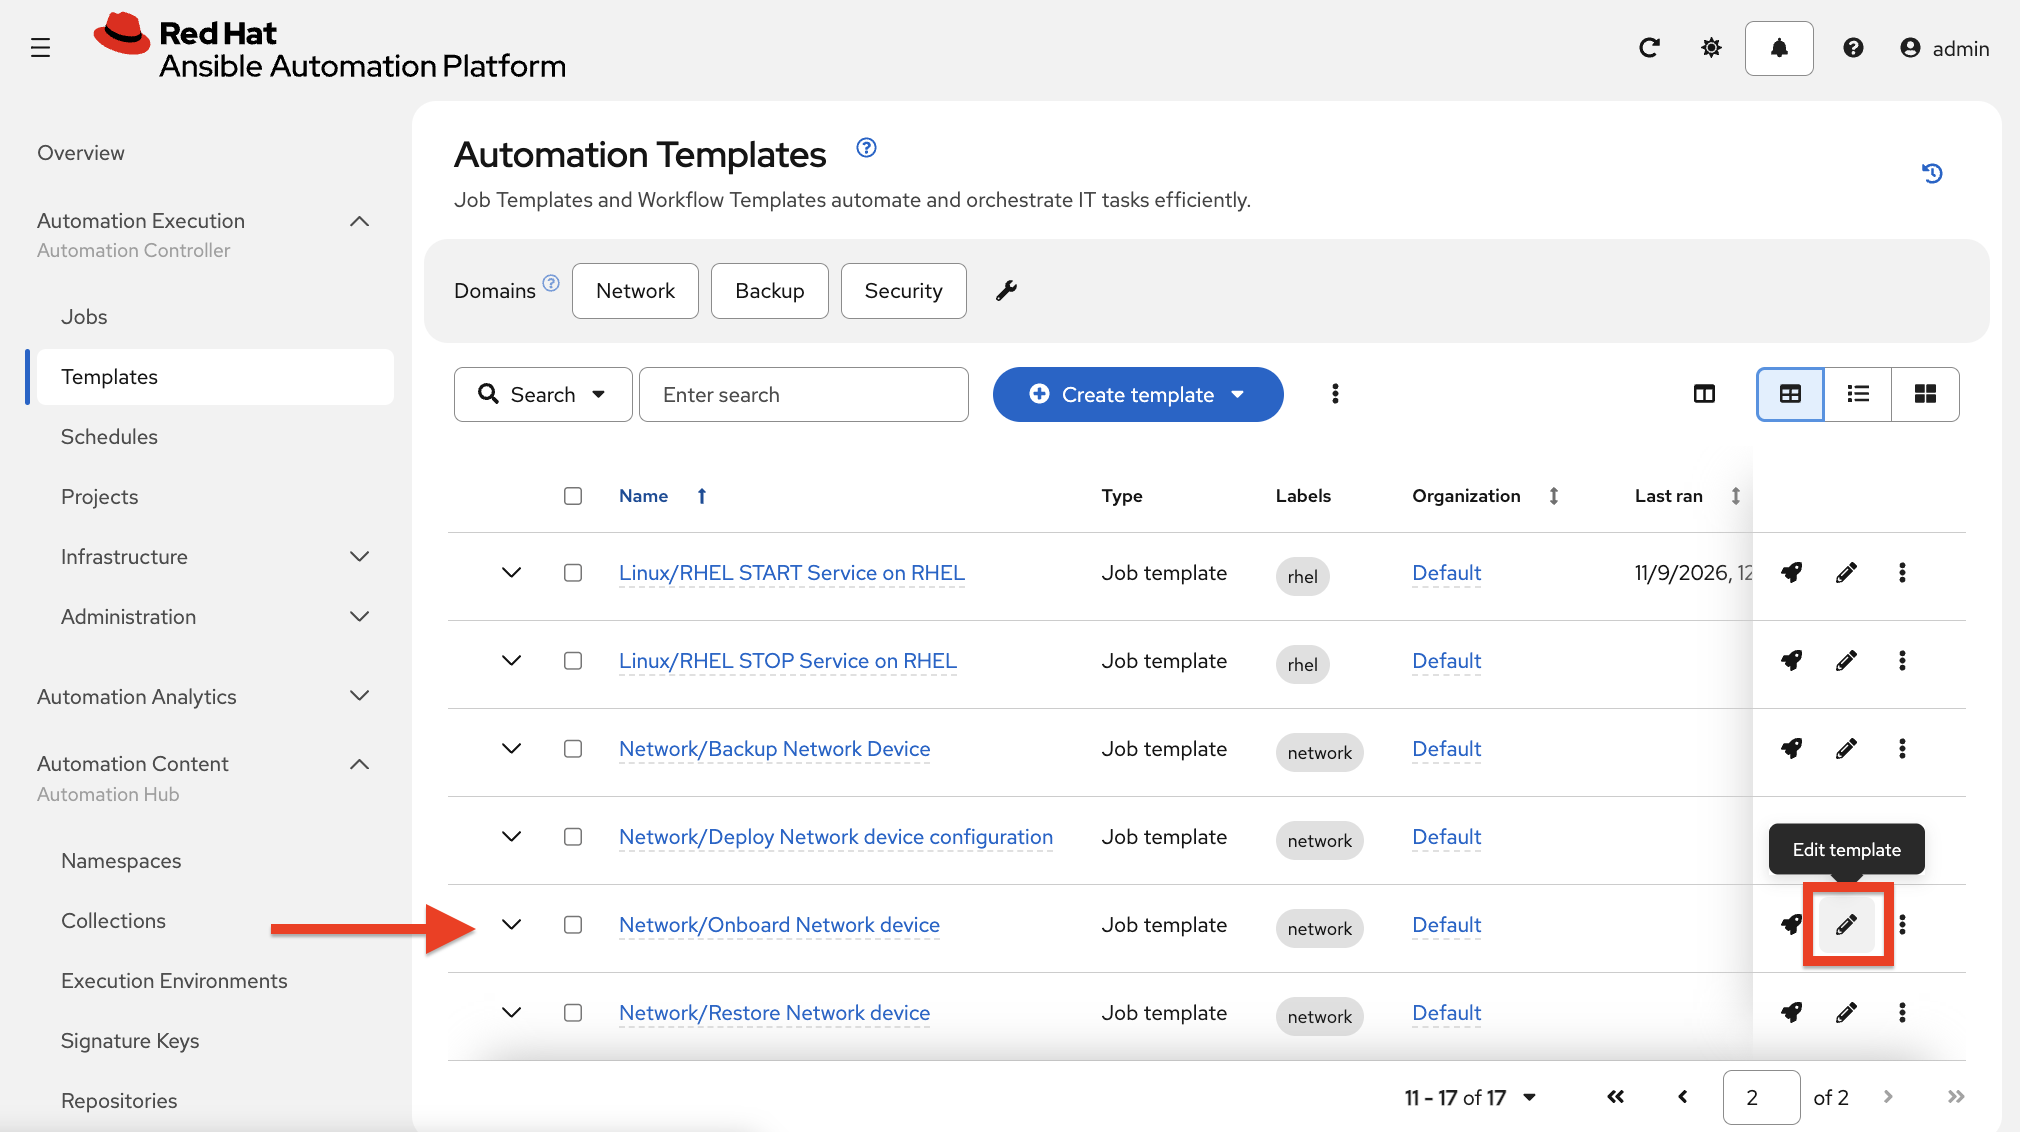
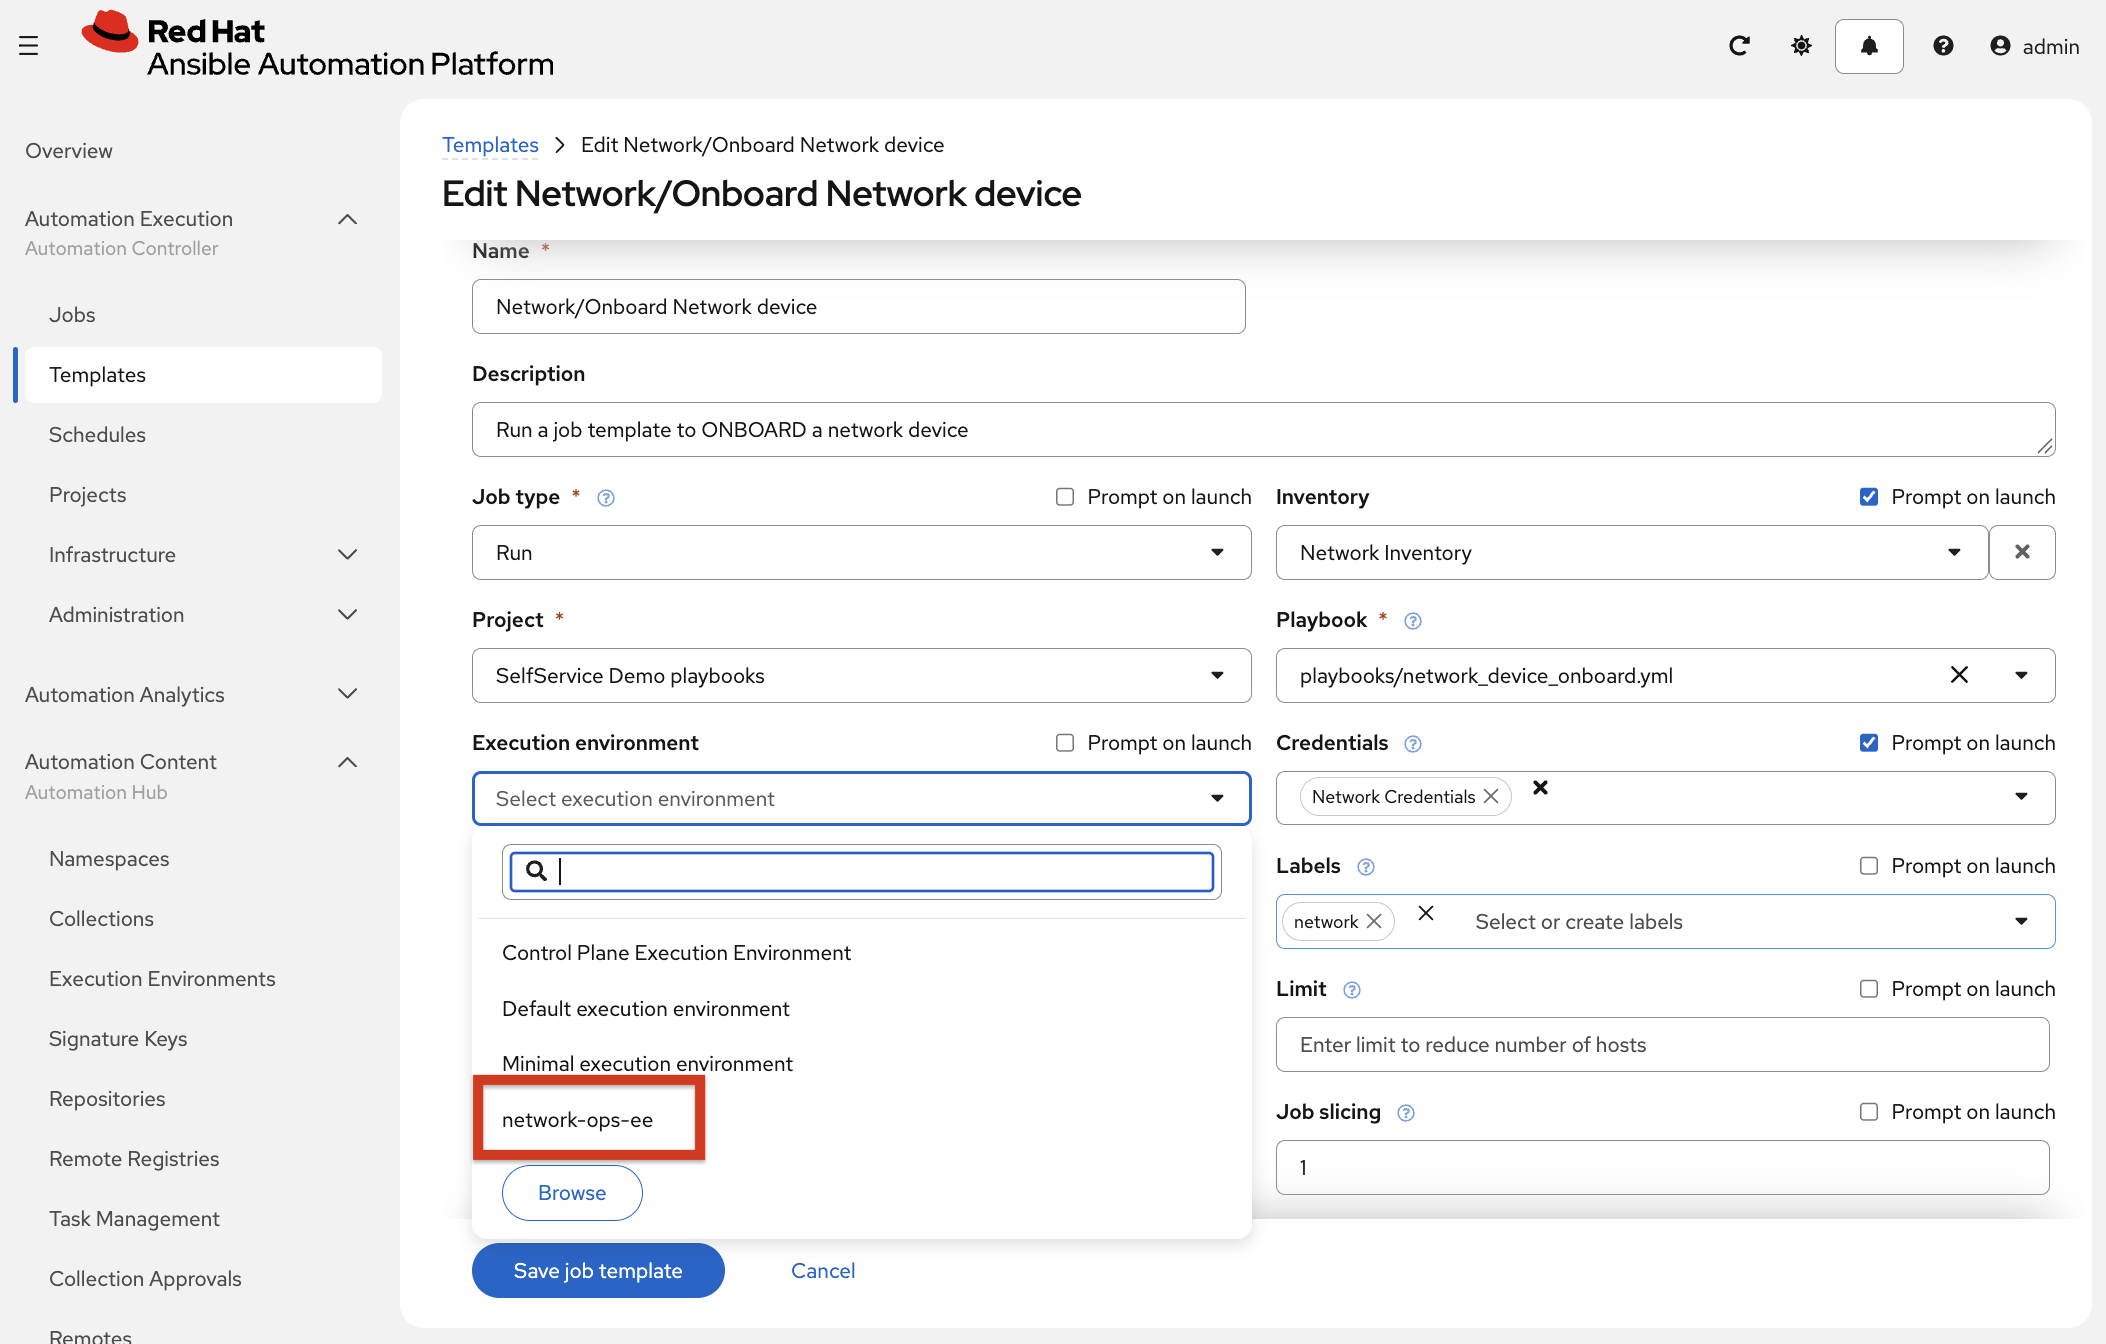
Run the job from the portal catalog
-
Log in to the Automation Portal as
networkuser1with password{aap_admin_password}. -
Launch
Network/Onboard Network devicefrom the catalog. -
Choose the Network inventory / credentials you already used in Module 2 if prompted.
-
Wait for the job to finish.
✅ Success indicator: Job status is Successful, and the job details show it ran using your new execution environment.
|
Key learning: Content discovery helped the network developer choose collections. They built the EE in the portal. The platform admin attached it to the job template. Catalog users then run the automation with the improved runtime underneath. |
Learning outcomes
By completing this module, you should now understand:
-
Why purpose-built EEs matter - Automation often needs a predictable runtime with the right collections and packages
-
How EE Builder works in the portal - Guided selection of base image, collections, and packages publishes a definition to Git and starts a build
-
How Hub and Controller fit together - Built images land in Private Automation Hub, then get attached to job templates in Controller before jobs can use them
-
How Catalog EE definitions work - Shared EE metadata (
catalog-info.yaml) can appear in the portal Catalog for discovery alongside templates and other assets
You discovered content in Module 4 and used it in Module 5 to close the loop from discover → create → attach → sync → run for execution environments in Automation Portal.