Section 2.1 - Splunk for Network Observability
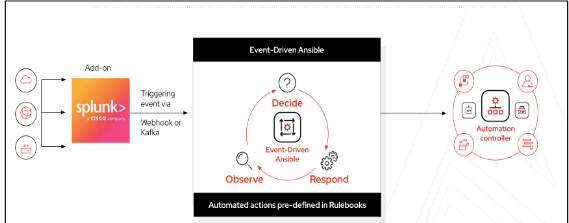
Part 2: AIOps with Network Automation - Welcome to Part 2! In Part 1, you learned how Red Hat AI and Automation coding assistant work together to create self-healing infrastructure for Apache services. Now you’ll apply those same AIOps concepts to network infrastructure, using Splunk for observability, Event-Driven Ansible for automation triggers, and Automation coding assistant to generate network remediation playbooks automatically.
Learning Objectives
After completing this module, you will be able to:
-
Configure Splunk data inputs to receive network syslog messages
-
Create Splunk alerts for OSPF neighbor state changes
-
Set up webhook integration between Splunk and Event-Driven Ansible
-
Configure Cisco routers to forward syslog messages to Splunk
-
Verify network observability data flow from routers to Splunk
What is Splunk?
In this lab environment, we use Splunk to send events into Ansible Automation Platform using Event-Driven Ansible. Splunk collects and indexes log data from network sources in real time, enabling fast and flexible searching and analysis. Based on a Splunk search for OSPF-related events, we configure a Splunk alert that sends a webhook to Event-Driven Ansible to trigger automation.
Think of Splunk as an observability tool.
Observability tools, such as Splunk, Prometheus, Grafana, Dynatrace, and others, provide deep insights into the health and performance of IT systems. They excel at collecting metrics, logs, and traces to identify when something is wrong. However, they traditionally rely on human intervention to interpret the alerts and take corrective action. This is where Ansible EDA steps in, creating effective integration between observability and automation.
Splunk Setup and Router Configuration
Red Hat + Splunk
The integration between Red Hat Ansible Automation Platform and Splunk creates a two-way bridge that transforms IT operations by connecting Splunk’s deep data analysis and observability with Ansible’s automation capabilities. This is achieved through an add-on that allows for a seamless flow of information.
Accessing Splunk
| Component | Value |
|---|---|
Splunk URL |
|
Username |
|
Password |
|
-
Open Splunk using the above details ( use incognito window if needed )
-
Login using the credentials provided
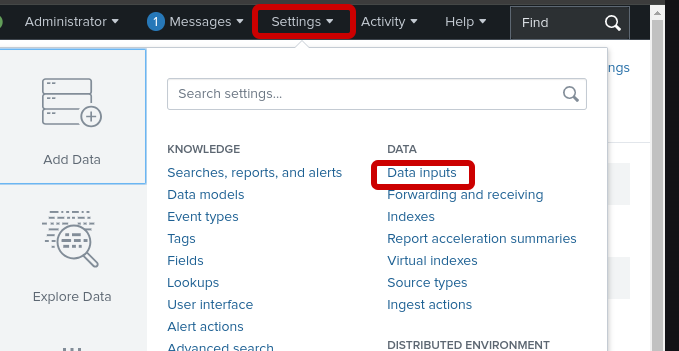
Data Inputs
In Splunk, "data inputs" are the various methods and sources from which the platform can ingest data for indexing, searching, and analysis. They are the pathways that feed raw machine data into the Splunk system.
Once logged into Splunk, click on the settings at the top of the screen and data inputs
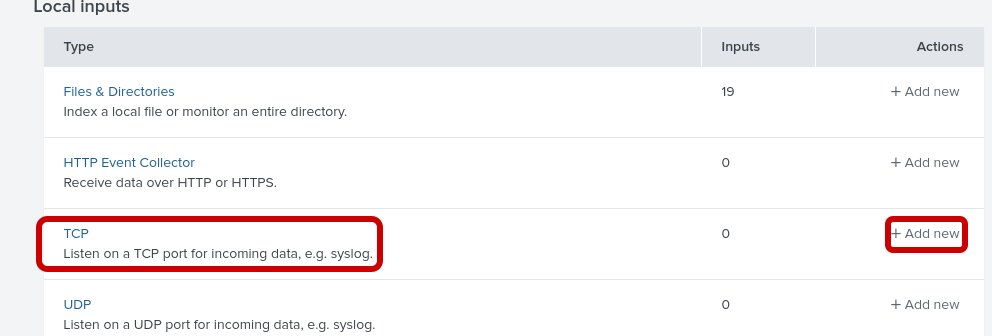
TCP Port 5514
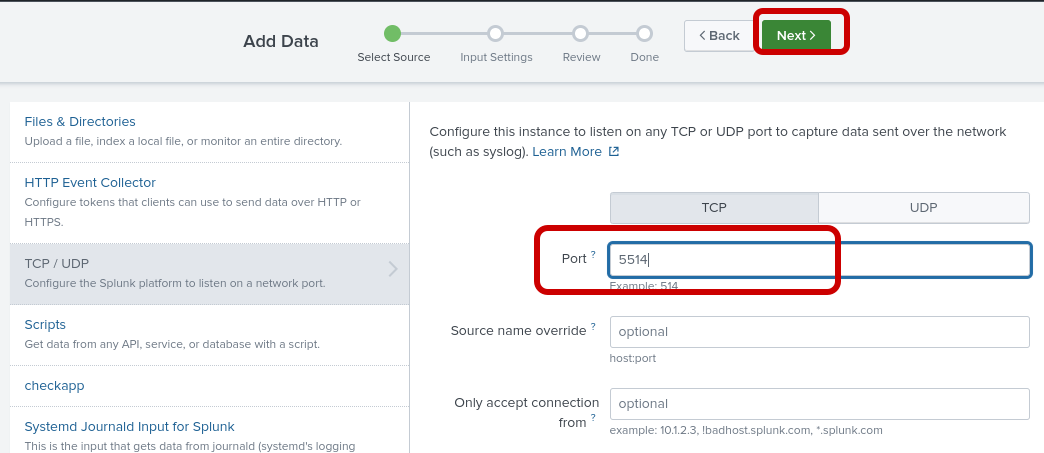
Splunk has been pre-loaded to open TCP port 5514. We simply need to add a data input to receive Cisco IOS syslogs using this port.
Step 1: Add a new TCP input
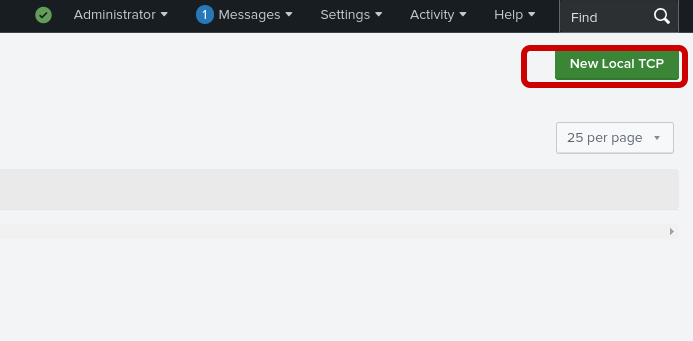
Step 2: Click on "New Local TCP"
Step 3: Select TCP, port 5514, and click "next"
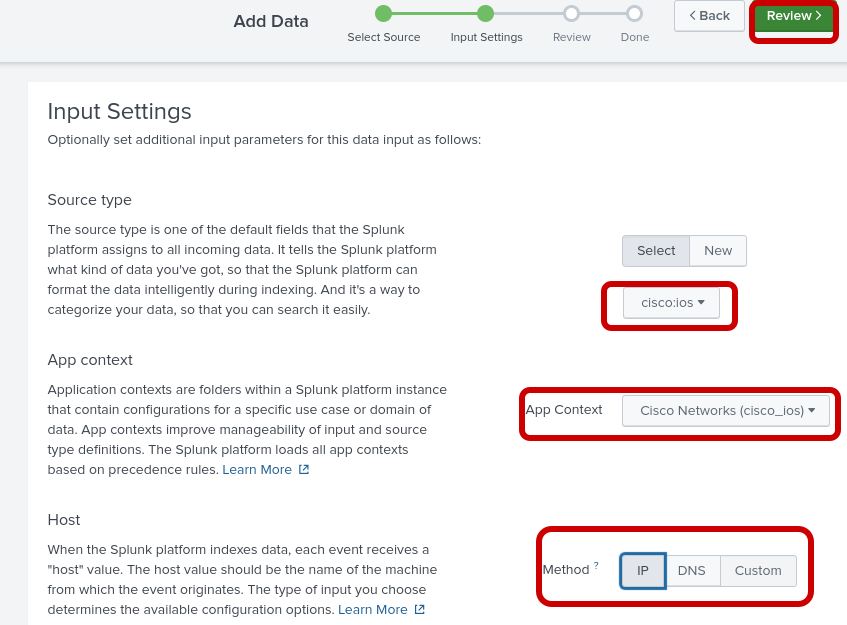
Step 4: Configure the following input settings
Input Settings
| Component | Value |
|---|---|
Source Type |
cisco:ios |
App Context |
Cisco Networks (cisco:ios) |
Host |
IP |
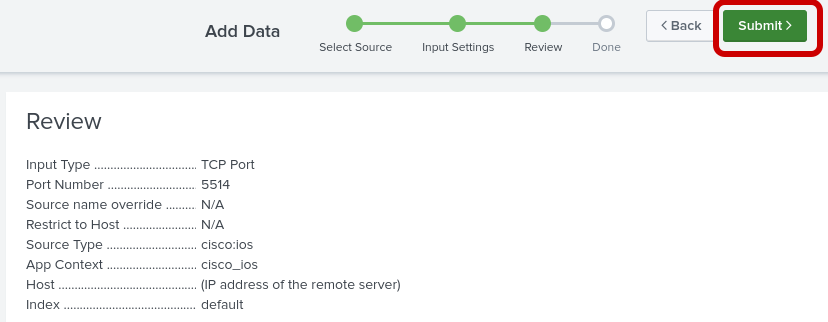
Step 5: Validate your configuration and submit
Cisco Routers
This lab includes two Cisco Cat8000v routers. Both routers use interface tunnel0 for the OPSF connection.
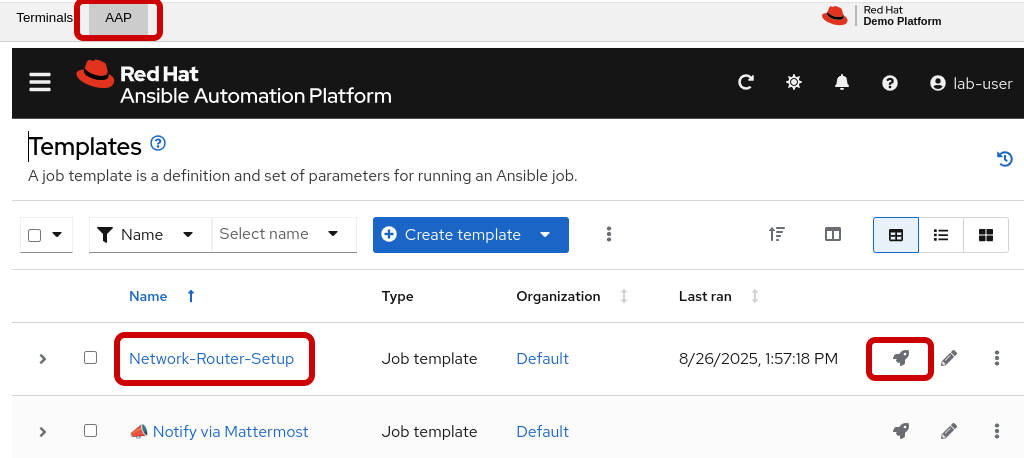
Router setup playbook
This job template, "Network-Router-Setup," automates the initial configuration of network routers.
In addition to establishing OSPF routing, this playbook now configures the target device (e.g., cisco-rtr1) to send all syslog messages to Splunk over TCP port 5514 for centralized logging and monitoring.
Access AAP and run the job-template
Verify Syslogs
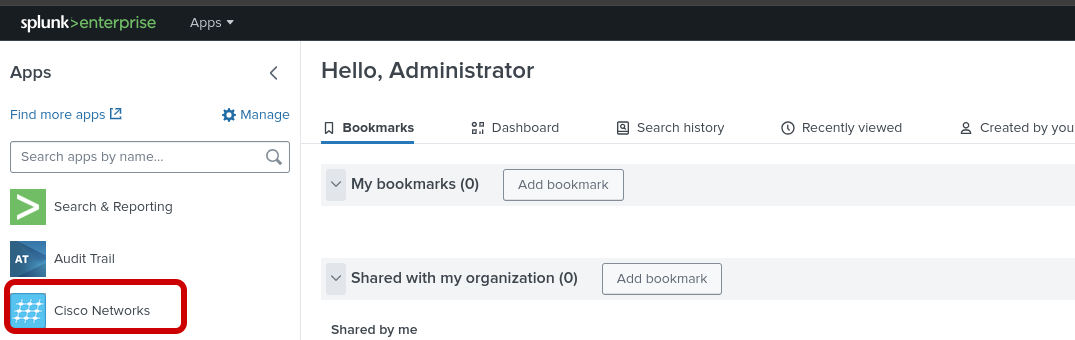
Step 1: After the Cisco router setup completes, return to splunk and click on the Cisco Networks App
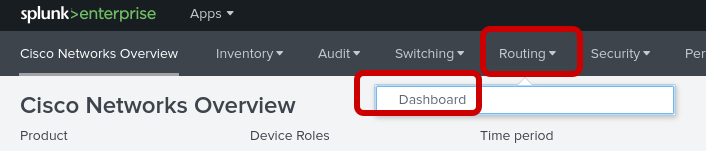
Step 2: Enter the routing dashboard
Step 3: Verify that there is an entry of an OSPF event with a full adjacency

Configure an Alert
In splunk we can create an alert from a search. A Splunk search is when you manually run a query to find and analyze information in your data.
An alert is simply that search saved to run automatically. When the search results meet a trigger condition you set (like %OSPF-5-ADJCHG: Process 1, Nbr 192.168.2.2 on Tunnel0 from FULL to DOWN), Splunk automatically performs an action, such as sending a webhook to EDA.
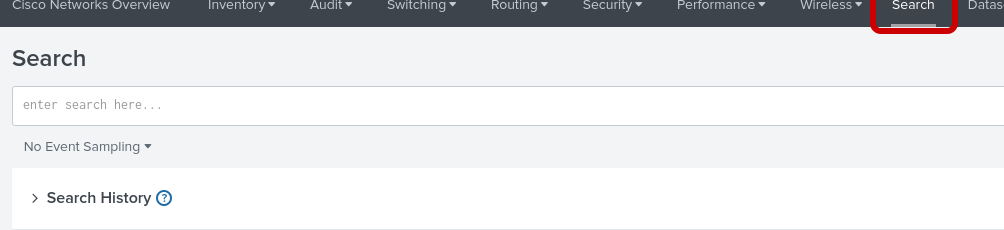
Step 1: Access the Splunk search field
Note: You will return to this browser tab after completing the next step
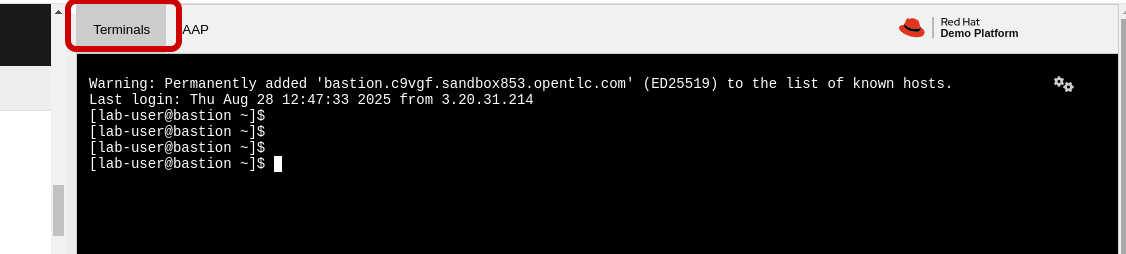
Step 2: Create an OPSF neighbor down event Access cisco-rtr1 from the bastion console to shut down interface tunnel0
💡 Lab Credentials: The SSH password ansible123! is provided for this lab environment only. In production environments, always use SSH keys or vault-encrypted credentials instead of plaintext passwords.
-
SSH password=
ansible123! -
SSH into cisco-rtr1 and add the following commands
ssh admin@cisco-rtr1
config t
int tu 0
shut
Step 3: Return to the Splunk search
paste in the following line and search:
%OSPF-5-ADJCHG: Process 1, Nbr 192.168.2.2 on Tunnel0 from FULL to DOWN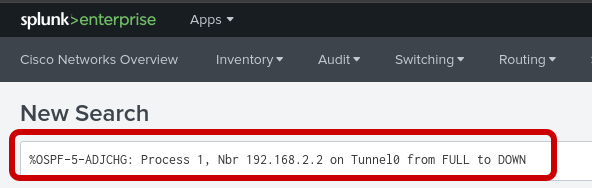

Step 4: Save as an Alert (ospf-neighbor)
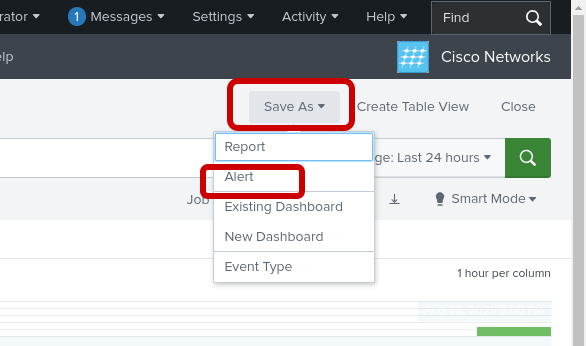
Complete the pop-up screen for save as an alert
Alert Settings
Configure the alert with the following settings:
| Setting | Value |
|---|---|
Title |
ospf-neighbor |
Permissions |
Shared in App |
Alert type |
Real-time |
Add Actions (first) |
Add to Triggered Alerts |
Add Actions (second) |
Webhook |
Webhook URL |
|
💡 Important: When configuring the Webhook action, use the{eda_webhook_url}variable shown above. The screenshot may showcontroller.example.combut you should use the EDA webhook URL specific to your lab environment.

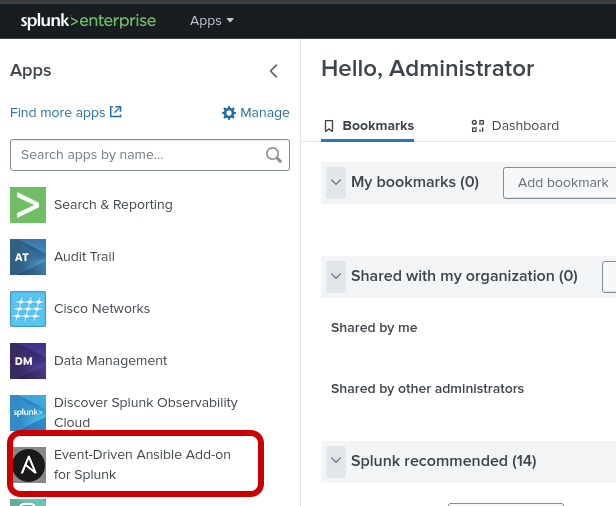
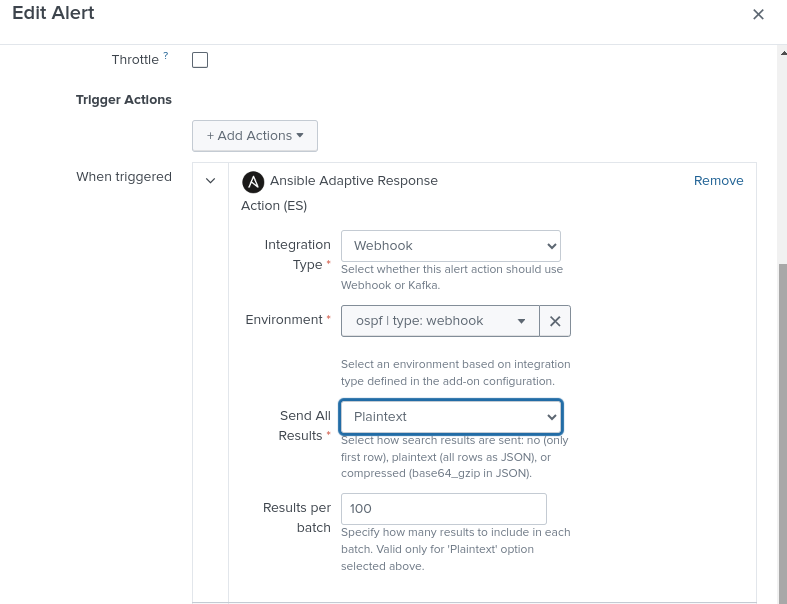
Event Driven Ansible Addon (Reference Only)
For this lab environment we are using a simple webhook. However, for a more secure webhook, Splunk offers the Ansible EDA addon to integrate with EDA event streams. EDA event streams allow for token based authentication as well as storing a history of events.
Note: Do not actually configure, this section is for reference only. The steps below are apart of the reference to set up EDA event streams.
Step 1: Access the Ansible addon (REFERENCE ONLY)
From the Splunk Apps menu, navigate to the Event-Driven Ansible app.
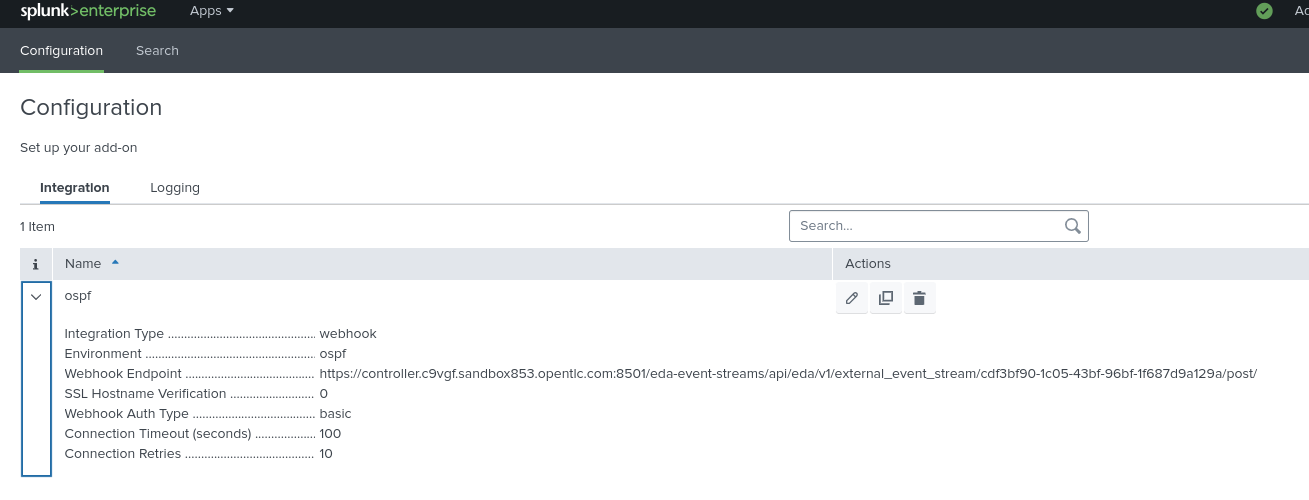
Step 2: Create a webhook to EDA event-stream configuration (REFERENCE ONLY)
Click on Configuration and then Event Streams. Create a new event stream with the following details:
-
Name: ospf-eda-stream
-
EDA Controller URL: Your EDA controller URL
-
Token: Authentication token from EDA
-
Verify SSL: Depends on your environment (typically disabled for lab environments)
Step 3: Return to Edit Alert (REFERENCE ONLY)
Navigate back to your alert configuration by going to Settings > Searches, reports, and alerts, then click on your ospf-neighbor alert to edit it.
Router State (Returning to the Lab)
Here we need to return the router’s OPSF neighbor to a steady state.
Step 1: Return the OPSF neighbor to a full adjacency
Access cisco-rtr1 from the bastion console to no shut interface tunnel0
💡 Lab Credentials: The SSH password ansible123! is provided for this lab environment only. In production environments, always use SSH keys or vault-encrypted credentials instead of plaintext passwords.
-
SSH password=
ansible123! -
SSH into cisco-rtr1 and add the following commands
ssh admin@cisco-rtr1
config t
int tu 0
no shut