Install and configure Trident on the DR OpenShift cluster
| Trident is already installed and configured on the PROD cluster. You will now install it on the DR cluster. |
This task is generally done by the OpenShift administrator.
NetApp Trident can be installed in various ways:
-
Using a installer binary for heavily customized environments
-
Using an operator
-
Using a Helm Chart (that installs the operator)
Beginning with NetApp Trident 25.02, this CSI driver is also available as a certified operator in the OperatorHub catalog. You will use that method in this lab.
Install the NetApp Trident Operator
Connect to the Red Hat OpenShift console on the DR cluster:
| Environment | URL | User | Password |
|---|---|---|---|
DR |
rosa_dr_openshift_console_url[window=_blank] |
|
|
In the Operators menu, locate the OperatorHub sub-menu and filter on trident
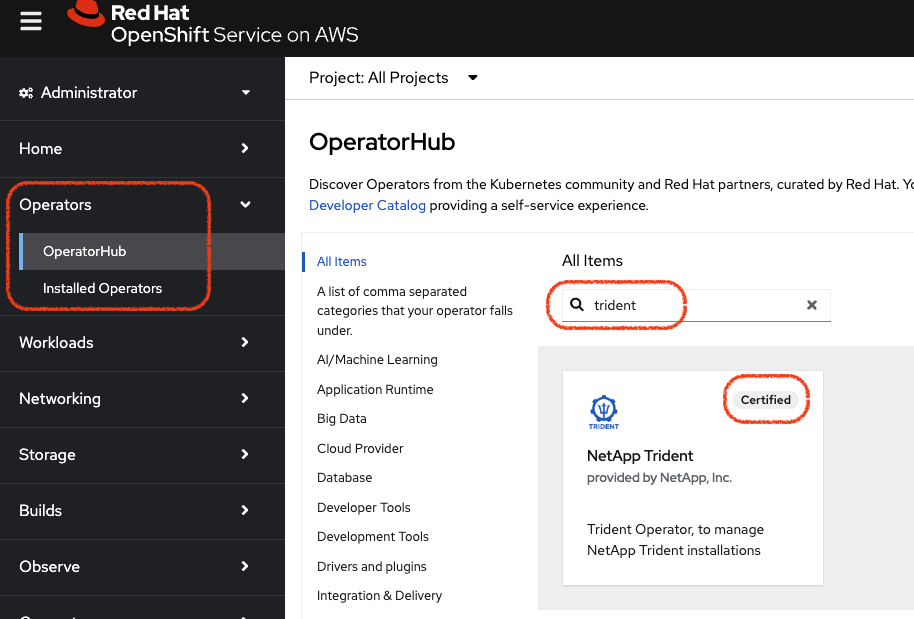
Locate the Trident box that has the Certified badge on the top right and click on it to enter the Installer window.
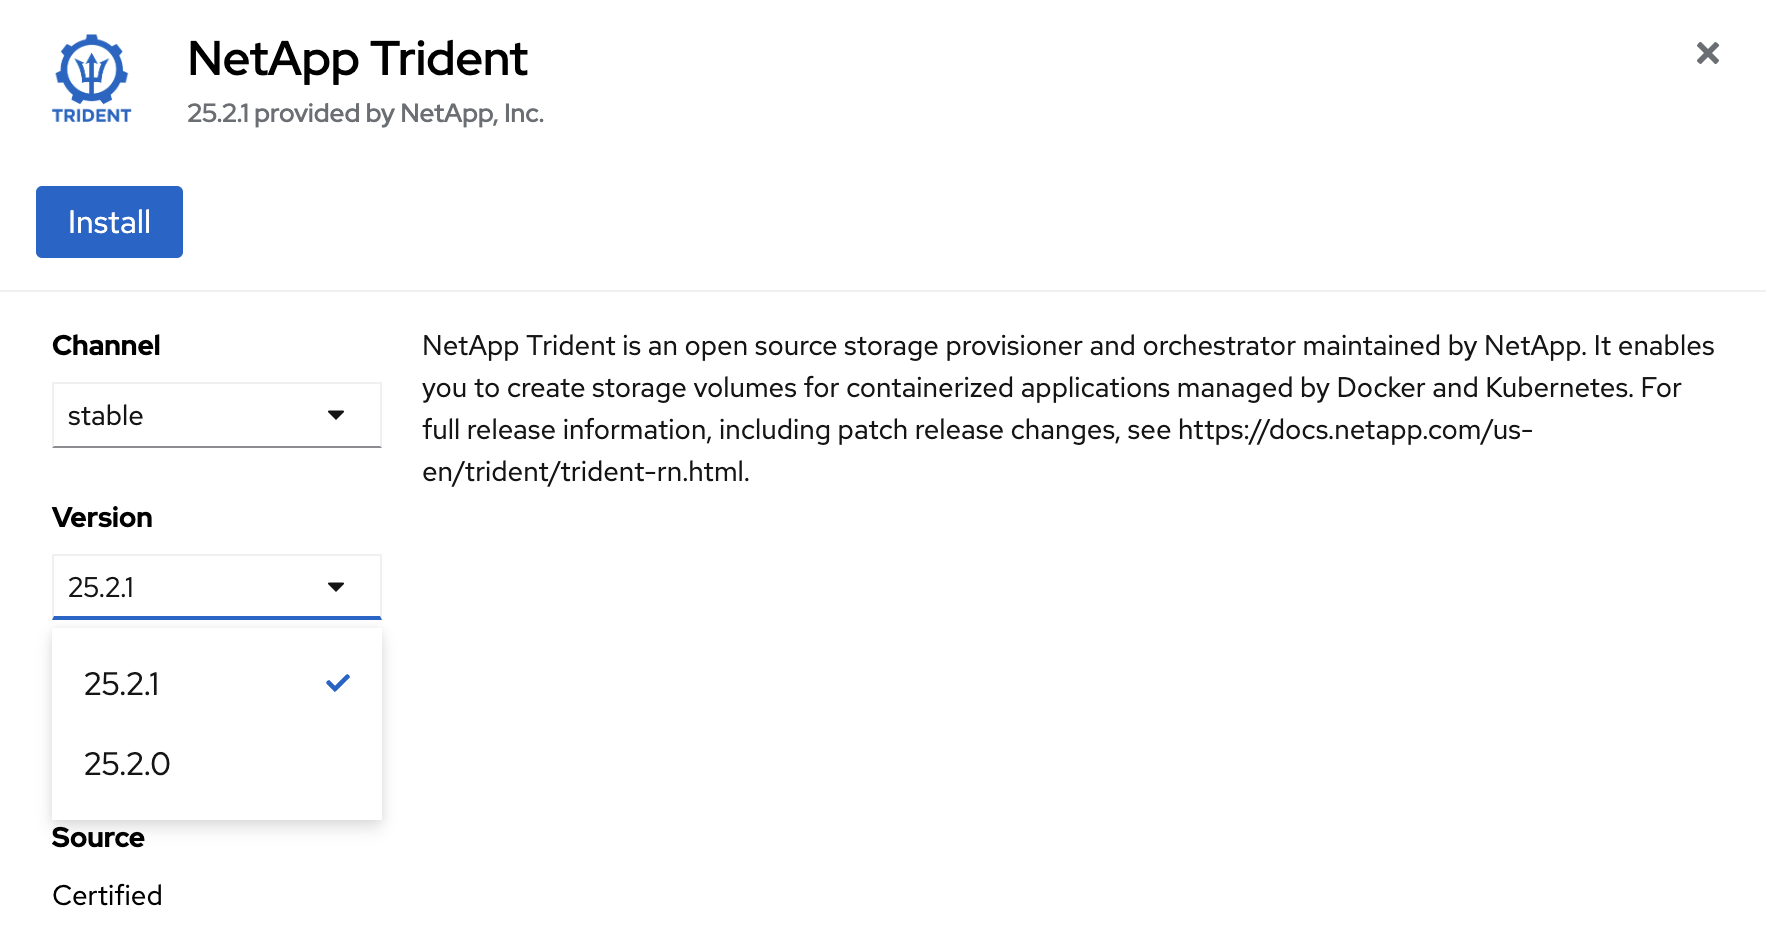
Make sure you are on the most recent version (25.2.1 in the screenshot) and press on the Install button which will open the configuration page.
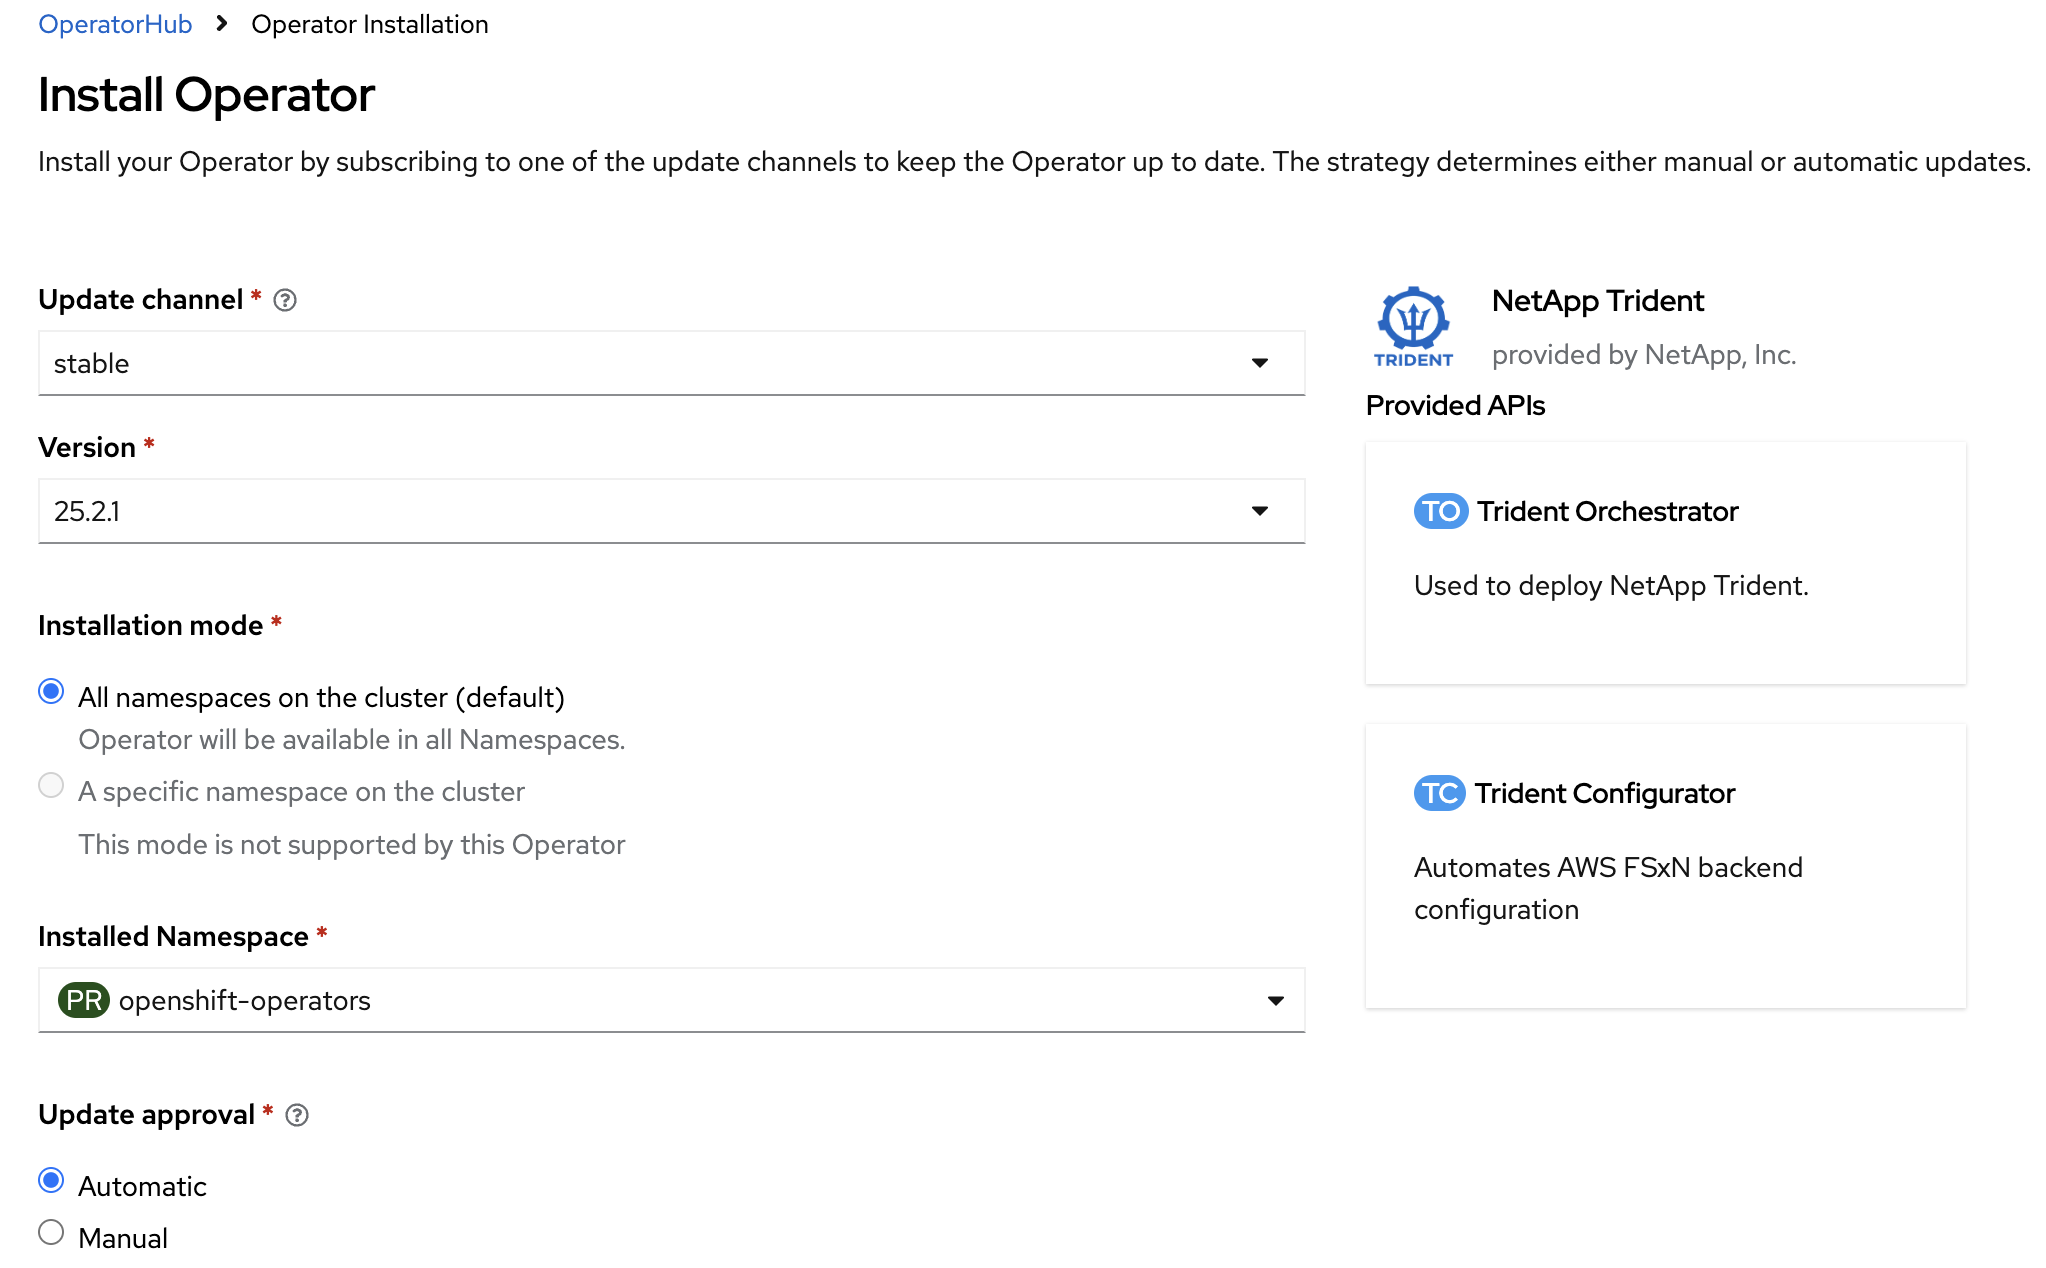
Leave all the parameters as they are and press Install
The installation is fairly quick. Wait until the installation is complete. In less than 2 minutes, the Operator will be ready to use.
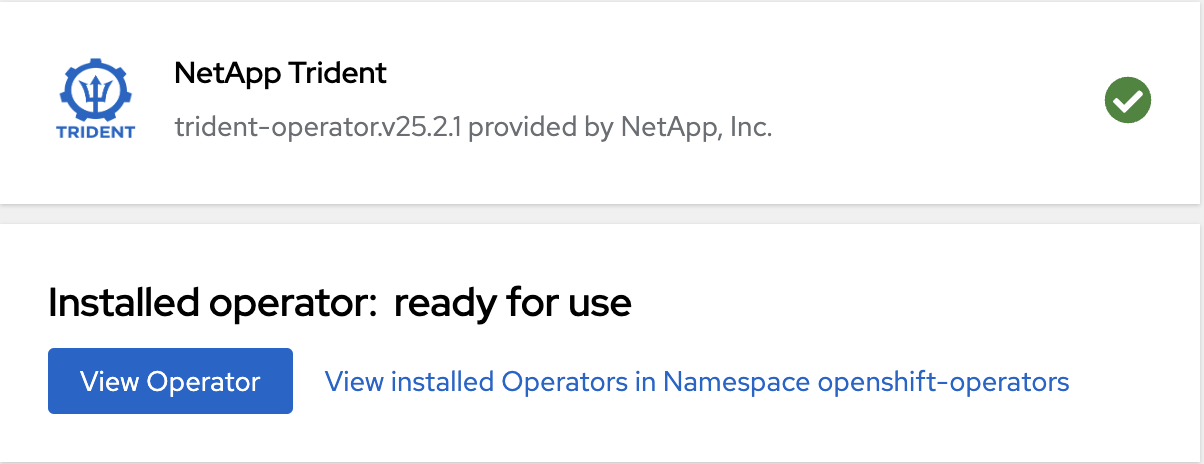
After pressing on the View Operator button, you will enter the details page of Trident.
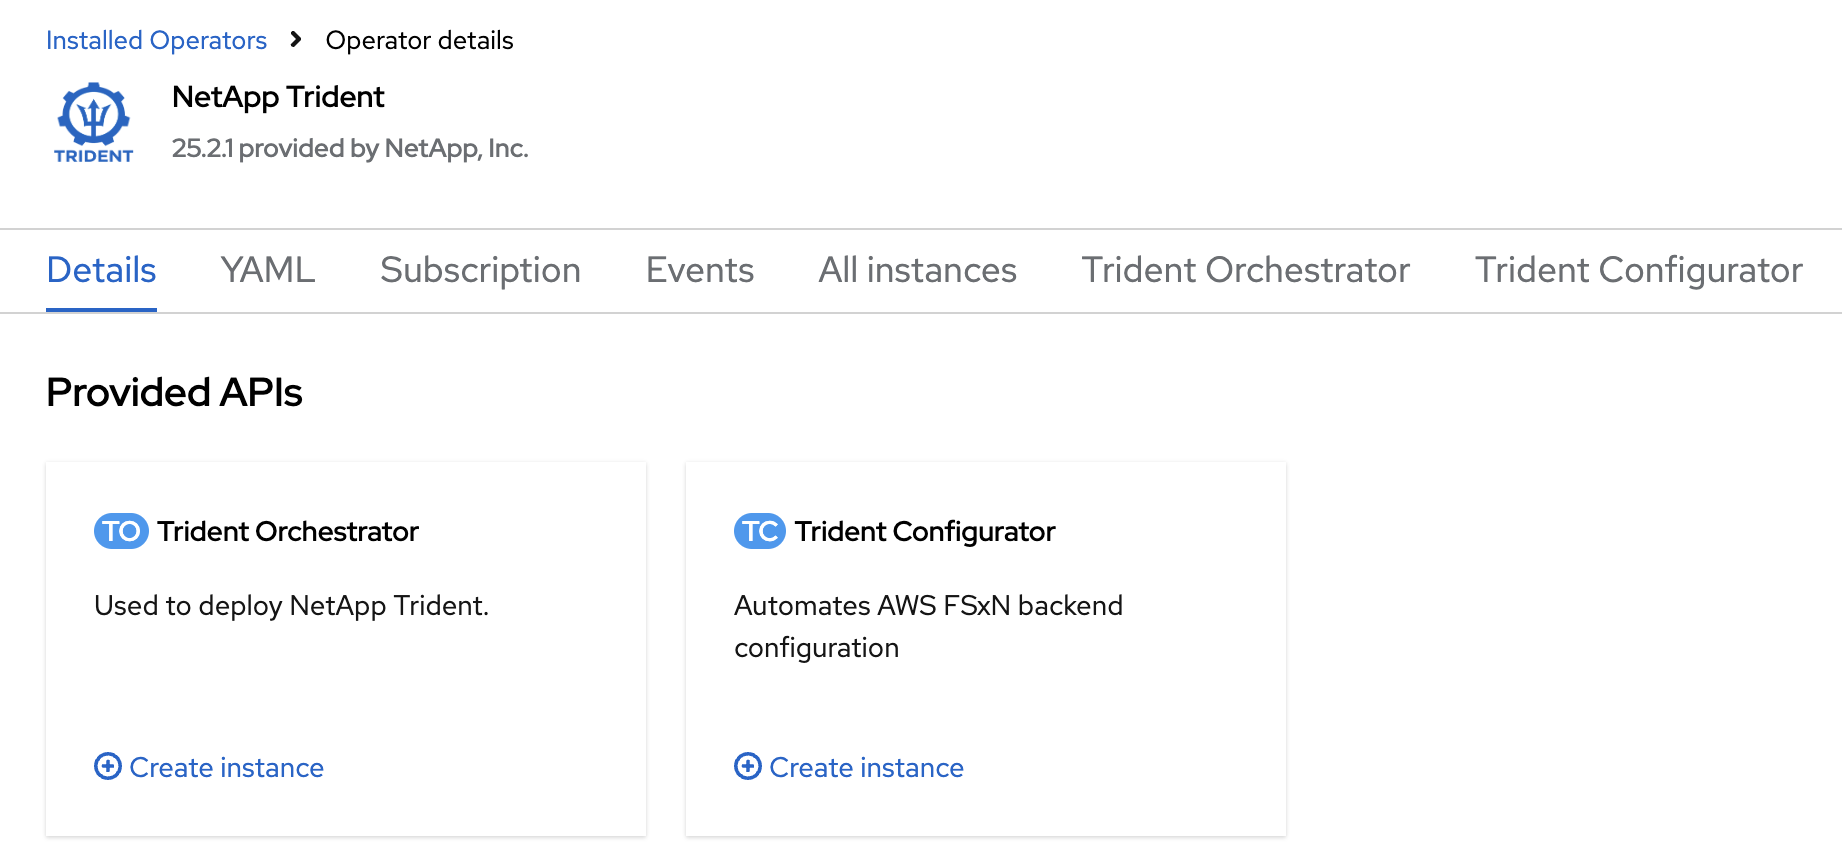
Locate the Trident Orchestrator box and click on the Create instance link within it. Creating an instance of the Trident orchestrator will open a new form

Switch to YAML view, remove the pre-filled YAML manifest and paste the following and press on Create
apiVersion: trident.netapp.io/v1
kind: TridentOrchestrator
metadata:
  name: trident
  namespace: openshift-operators
spec:
  IPv6: false
  debug: false
  nodePrep:
  - iscsi
  imageRegistry: ''
  k8sTimeout: 30
  namespace: trident
  silenceAutosupport: false
|
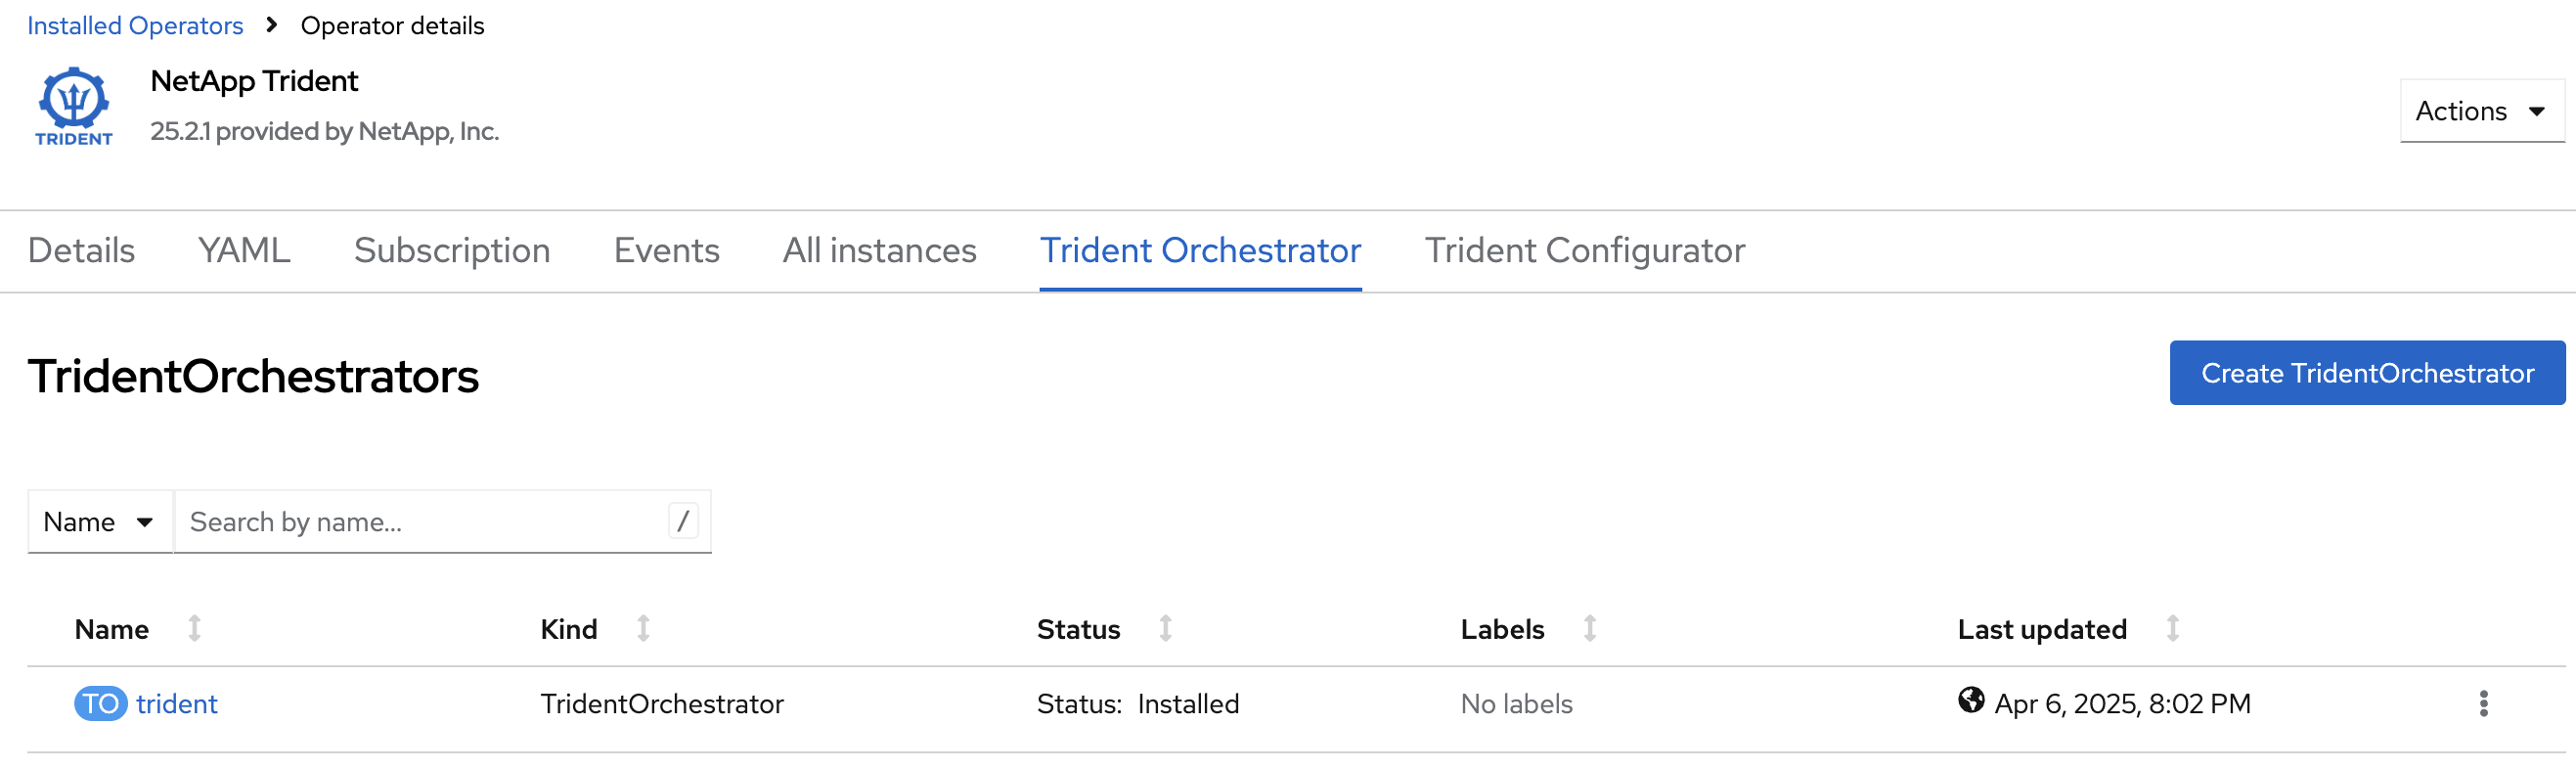
Observe the Status column. After a couple of minutes, the Trident Orchestrator will be fully installed
Verification with the command line
In this section we will go through the following steps:
-
Connect to the bastion
-
Log in to OpenShift CLI
-
Retrieve and verify the Trident version.
Verify that all Trident pods are running
oc get pods -n tridentNAME READY STATUS RESTARTS AGE
trident-controller-599494bc5f-qnssz 6/6 Running 0 34s
trident-node-linux-4s6jg 2/2 Running 0 34s
trident-node-linux-9jx9g 2/2 Running 0 34s
trident-node-linux-d7b7x 2/2 Running 0 34s| Trident consists of a controller component as well as a deamonset to ensure a Trident pod runs on each node and can control local mount/unmount activities for storage. |
Install the tridentctl tool
NetApp provides the tridentctl tool for easy handling of Trident installation. Installing the tridentctl binary can be useful, especially for troubleshooting.
wget https://github.com/NetApp/trident/releases/download/v{ocp_dr_trident_cli_version}/trident-installer-{ocp_dr_trident_cli_version}.tar.gz
tar -xf trident-installer-{ocp_dr_trident_cli_version}.tar.gz
mkdir /home/rosa/bin
cp trident-installer/tridentctl /home/rosa/bin
Verify the installation by viewing the Trident version of the installed operator.
tridentctl -n trident version+----------------+----------------+
| SERVER VERSION | CLIENT VERSION |
+----------------+----------------+
| 25.06.1 | {ocp_dr_trident_cli_version}
+----------------+----------------+Configure Trident
A backend defines the relationship between Trident and a storage system. It tells Trident how to communicate with that storage system and how Trident should provision volumes from it. These backends are linked to a secret which contains the credentials of the storage system (or a software-defined tenant on that system). Trident can handle multiple storage backends at the same time.
| In this lab we will create backends for NFS (file) and iSCSI (block) protocols. Trident also supports various other storage protocols such as NVMe, Fibre Channel and SMB. |
Create a secret to store the SVM username and password in the ROSA cluster
|
A SVM ("Storage Virtual Machine") is an ONTAP construct which serves data to clients and hosts from one or more volumes, through one or more network logical interfaces (LIFs). It provides secure multi-tenancy on a shared storage platform. When you run multiple OpenShift clusters, you can use this to isolate them from each other at the storage level. |
The credentials for the storage backend can be created via the OpenShift Console or the GUI.
Use the cli:
cat << EOF | oc apply -f -
apiVersion: v1
kind: Secret
metadata:
  name: dr-backend-fsxn-secret
  namespace: trident
type: Opaque
stringData:
  username: vsadmin
  password: {svm_admin_password}
EOF
Verify the secret has been added to the ROSA cluster.
oc get secrets -n trident dr-backend-fsxn-secretNAME TYPE DATA AGE
backend-fsxn-secret Opaque 2 24hCreate the Trident Backend for NFS
Before creating the backend, you need to retrieve the management IP of the Storage Virtual Machine that is set up in AWS FSxN. We will use the aws CLI to retrieve it.+ Assign it to a variable and keep it in your ~/.bash_profile in case you get disconnected.
export SVMIP=$(aws fsx --profile dr describe-storage-virtual-machines | jq -r '.StorageVirtualMachines[].Endpoints.Management.IpAddresses[]' | grep 10.10) && echo $SVMIP
echo "export SVMIP=$SVMIP" >> ~/.bash_profile
Run the following commands to create the Trident backend in the ROSA cluster.
cat << EOF | oc apply -f -
apiVersion: trident.netapp.io/v1
kind: TridentBackendConfig
metadata:
  name: dr-backend-fsxn-nfs
  namespace: trident
spec:
  version: 1
  backendName: dr-fsxn-nfs
  storageDriverName: ontap-nas
  managementLIF: $SVMIP
  nasType: nfs
  storagePrefix: dr       (1)
  defaults:
    snapshotDir: 'true'
    nameTemplate: "{{ .config.StoragePrefix }}_{{ .volume.Namespace }}_{{ .volume.RequestName }}"  (2)
  credentials:
    name: dr-backend-fsxn-secret
EOF
Some explanations about the content of that manifest:
| 1 | storagePrefix: all volumes created by Trident will start with those letters |
| 2 | nameTemplate: all volumes created by Trident will follow that naming convention (instead of using the PV UUID) |
Verify the backend configuration.
oc get tridentbackendconfigs dr-backend-fsxn-nfs -n tridentNAME BACKEND NAME BACKEND UUID PHASE STATUS
dr-backend-fsxn-nfs dr-fsxn-nfs 1f490bf3-492c-4ef7-899e-9e7d8711c82f Bound SuccessCreate the Trident Backend for iSCSI
The IP from the SVM has already been assigned to a variable in the previous paragraph.
You can reuse the same one here, as the same SVM will be used for both protocols
cat << EOF | oc apply -f -
apiVersion: trident.netapp.io/v1
kind: TridentBackendConfig
metadata:
  name: dr-backend-fsxn-iscsi
  namespace: trident
spec:
  version: 1
  backendName: dr-fsxn-iscsi
  storageDriverName: ontap-san
  managementLIF: $SVMIP
  sanType: iscsi
  storagePrefix: dr
  credentials:
    name: dr-backend-fsxn-secret
EOF
Verify the backend configuration.
oc get tridentbackendconfigs dr-backend-fsxn-iscsi -n tridentNAME BACKEND NAME BACKEND UUID PHASE STATUS
dr-backend-fsxn-iscsi dr-fsxn-iscsi 1f490bf3-492c-4ef7-899e-9e7d8711c82g Bound SuccessStorage Classes
The very last step is about creating storage classes that will use Trident backends.
A storage class is necessary to instruct Trident how to provision volumes.
|
ReadWriteMany (RWX) is required for Live Migration of your VMs. This access mode is supported with all protocols proposed by Trident (File and Block). However, configuring a RWX workload with a block protocol such as iSCSI requires two things:
|
You are going to create 2 storage classes:
-
storage-class-nfs: File workloads, supports all ROSA access modes
-
storage-class-iscsi: Block workloads, also supports all access modes
Create a NFS Storage Class
Run the following command to create the first storage class in the ROSA cluster.
This will be done via the lab console.
cat << EOF | oc apply -f -
apiVersion: storage.k8s.io/v1
kind: StorageClass
metadata:
  name: storage-class-nfs
provisioner: csi.trident.netapp.io
parameters:
  backendType: "ontap-nas"
  nasType: "nfs"
allowVolumeExpansion: true
EOF
Verify the storage class creation.
oc get sc storage-class-nfsNAME PROVISIONER RECLAIMPOLICY VOLUMEBINDINGMODE ALLOWVOLUMEEXPANSION AGE
storage-class-nfs csi.trident.netapp.io Delete Immediate true 10sCreate an iSCSI Storage Class
This will be done with the OpenShift Console.
Connect to the WEB UI of the DR Cluster and navigate to the Storage menu and StorageClasses sub-menu.
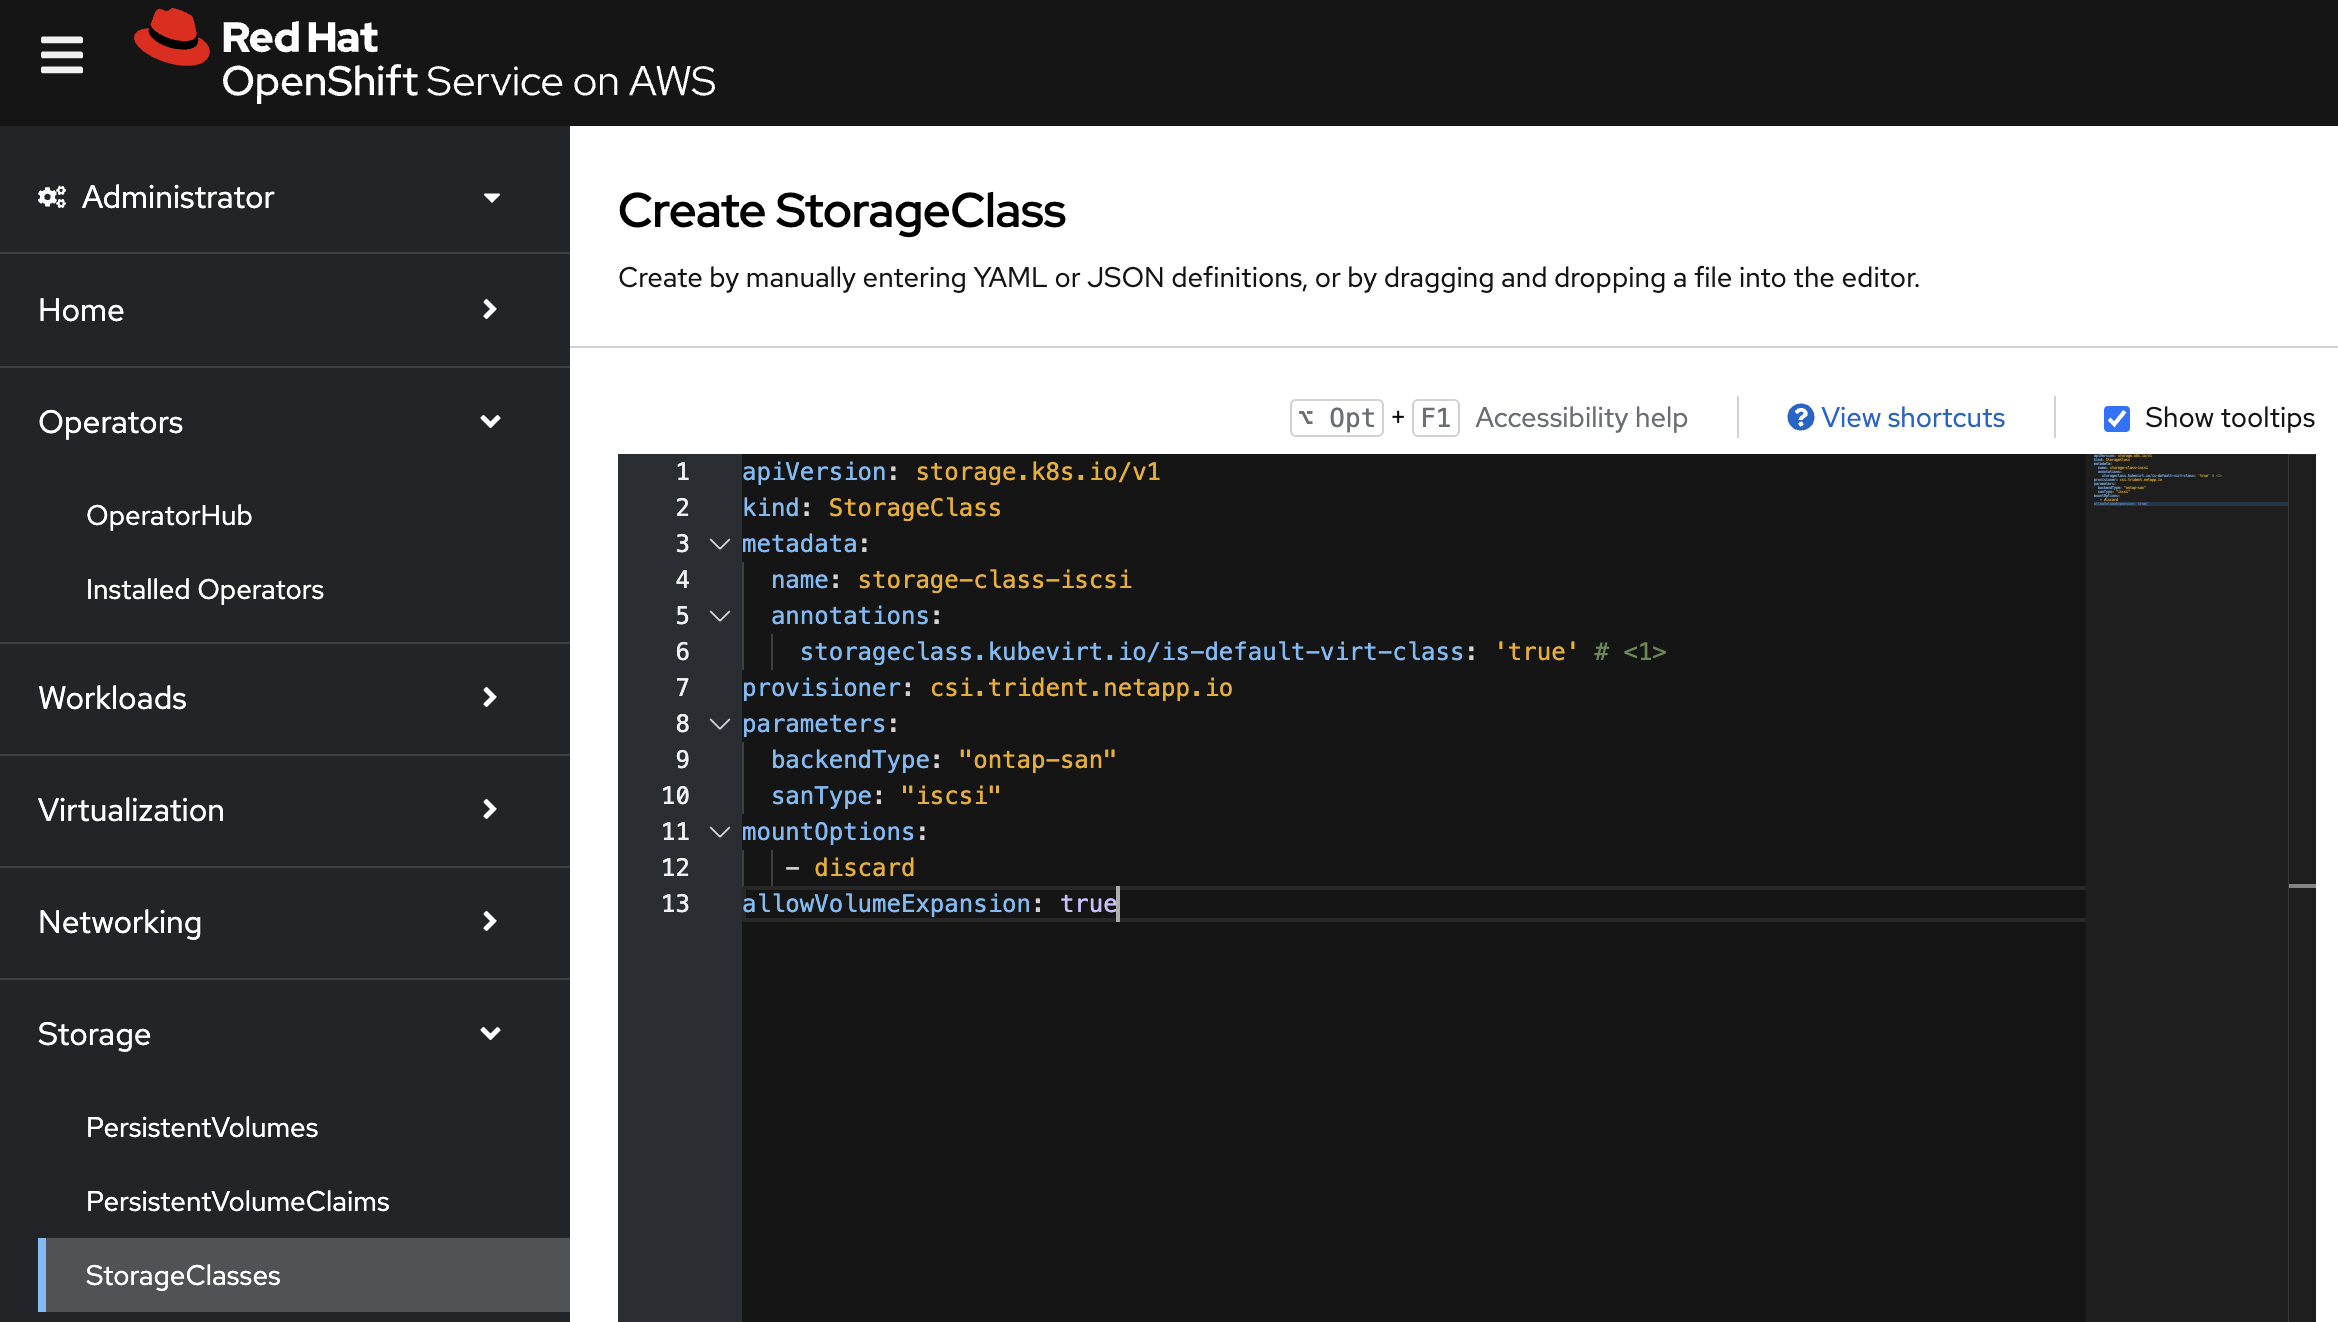
You can easily create a new one by pressing on the Create StorageClass button at the top right of the screen.
Once on this page, switch to edit mode by clicking on the Edit YAML link.
Remove the pre-filled YAML manifest and paste the following, then click Create
apiVersion: storage.k8s.io/v1
kind: StorageClass
metadata:
  name: storage-class-iscsi
  annotations:
    storageclass.kubevirt.io/is-default-virt-class: 'true' (1)
provisioner: csi.trident.netapp.io
parameters:
  backendType: "ontap-san"
  sanType: "iscsi"
mountOptions:
   - discard
allowVolumeExpansion: true
|
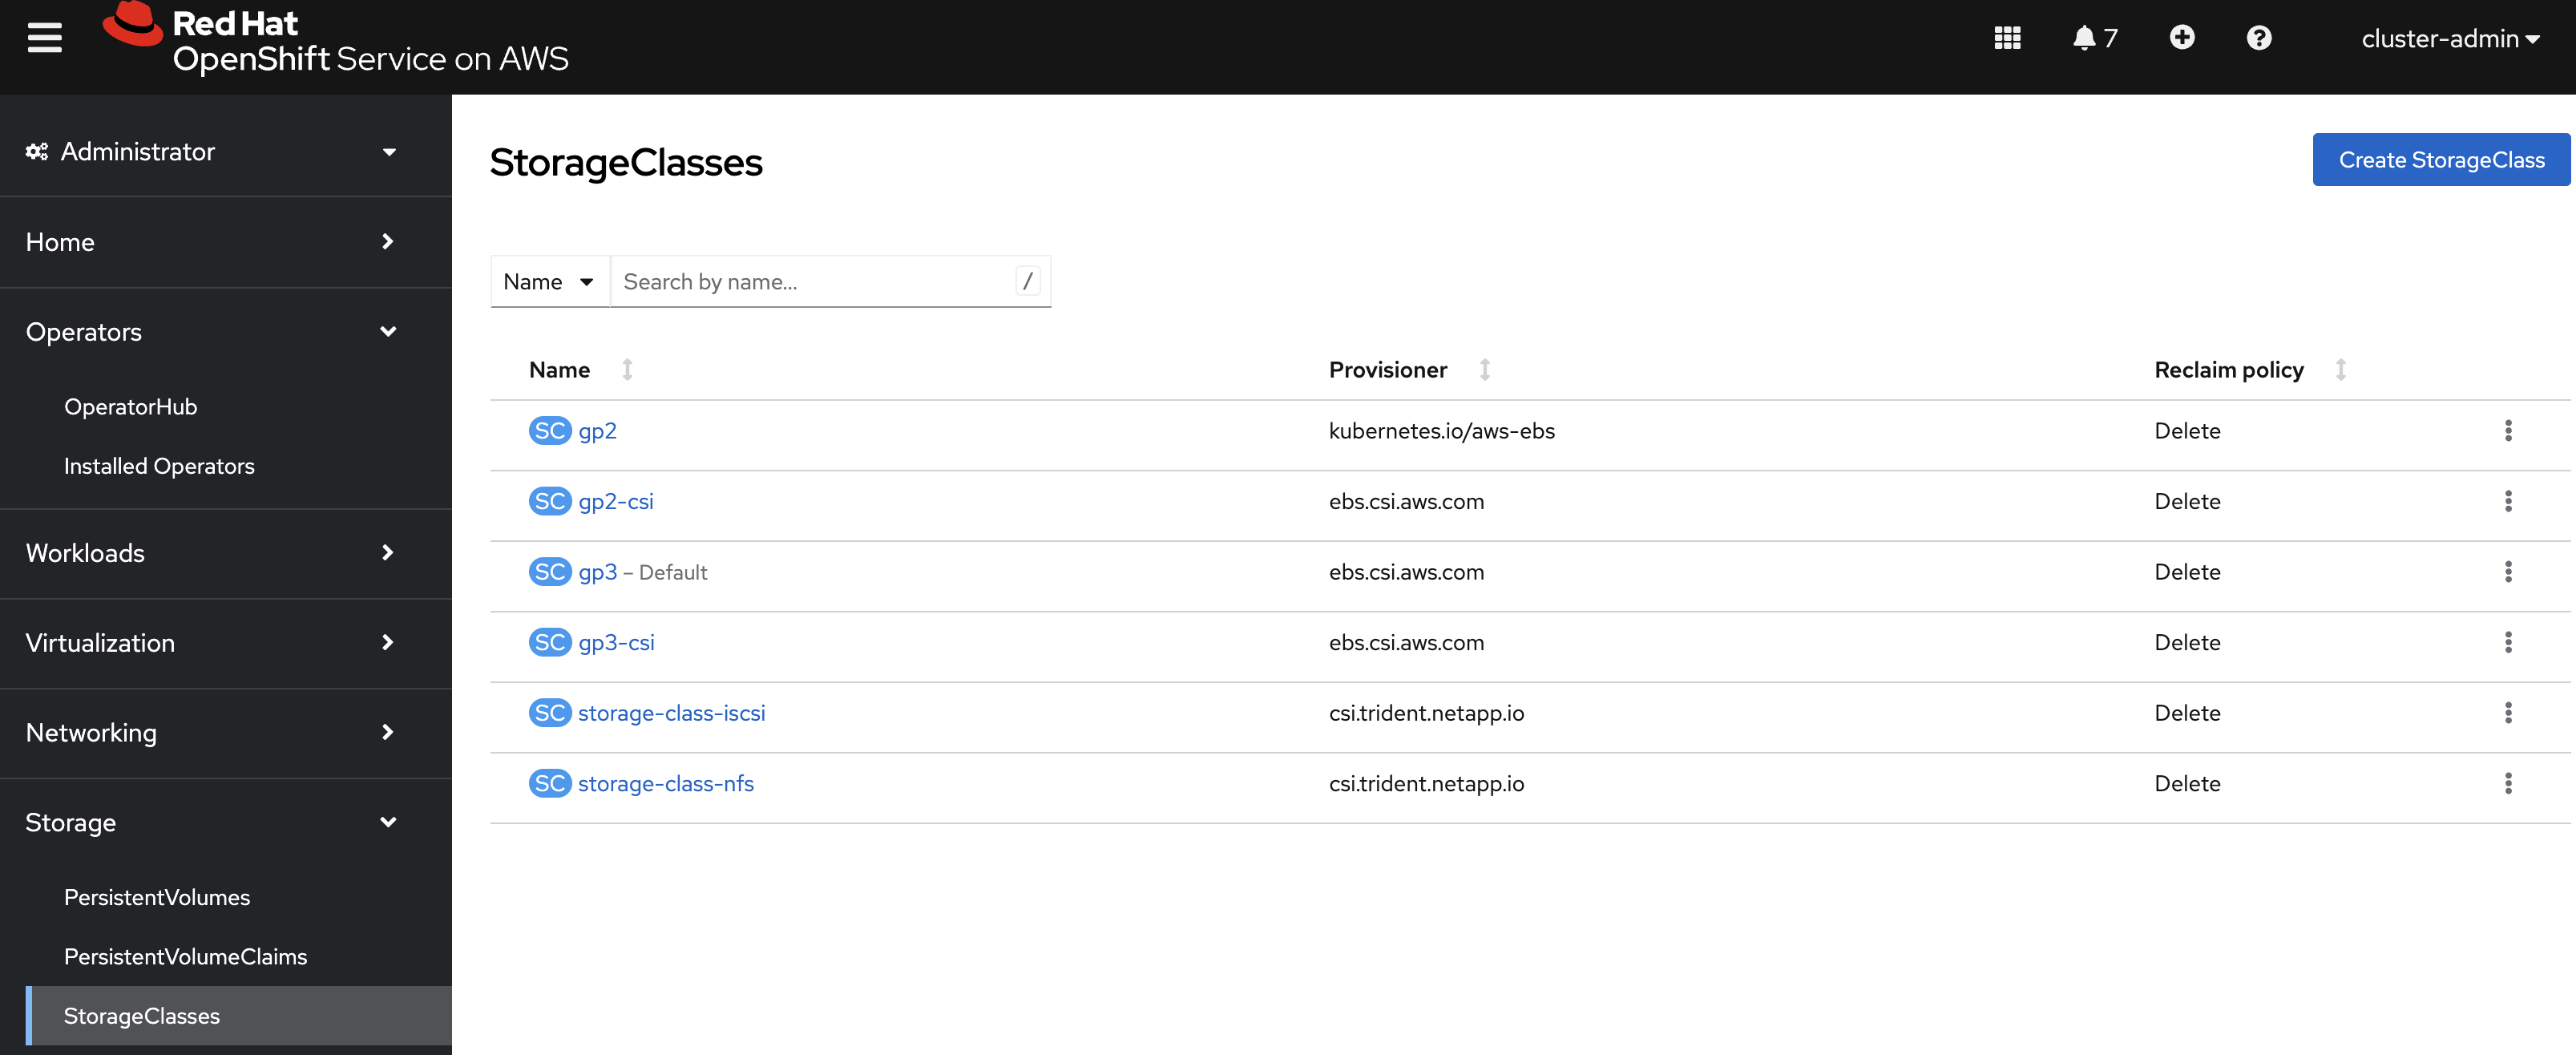
Switch back to CLI and verify the storage class creation.
oc get sc storage-class-iscsiNAME PROVISIONER RECLAIMPOLICY VOLUMEBINDINGMODE ALLOWVOLUMEEXPANSION AGE
storage-class-iscsi csi.trident.netapp.io Delete Immediate true 10sThis is also visible in the OpenShift Console:
Volume Snapshot Class
By default, there is already a Volume Snapshot Class configured for AWS EBS volumes.
In order to integrate the superior snapshot capabilties of the Ontap storage and allow Trident Protect to use snapshots as a step in the backup process, you also need to create a Volume Snapshot Class that is linked to the Trident driver:
cat << EOF | kubectl apply -f -
apiVersion: snapshot.storage.k8s.io/v1
kind: VolumeSnapshotClass
metadata:
  name: csi-trident-vsc
driver: csi.trident.netapp.io
deletionPolicy: Delete
EOF
You can now verify you have 2 classes available:
oc get vsclassNAME DRIVER DELETIONPOLICY AGE
csi-aws-vsc ebs.csi.aws.com Delete 2d5h
csi-trident-vsc csi.trident.netapp.io Delete 62sVirtual Machine Images optimization
The lab was initially setup with AWS EBS as a default storage class (type GP3).
OpenShift automatically created Virtual Machines images on a KubeVirt api called datavolume on top of that storage class.
|
A DataVolume is a custom resource provided by the Containerized Data Importer (CDI) project. |
You can see them with the following command:
oc get dv,volumesnapshot,pvc -n openshift-virtualization-os-images --selector=cdi.kubevirt.io/dataImportCronNAME READYTOUSE SOURCEPVC SOURCESNAPSHOTCONTENT RESTORESIZE SNAPSHOTCLASS SNAPSHOTCONTENT CREATIONTIME AGE
centos-stream10-d2d8f5434f68 true centos-stream10-d2d8f5434f68 30Gi csi-trident-vsc snapcontent-b8a2bd91-b142-4dbd-877d-96c464b6f827 5m4s 5m6s
centos-stream9-1688a50b70d6 true centos-stream9-1688a50b70d6 30Gi csi-trident-vsc snapcontent-5eed626c-ad3f-4523-9c87-b9e45acc3d46 5m47s 5m47s
fedora-4fcda30051d5 true fedora-4fcda30051d5 30Gi csi-trident-vsc snapcontent-2ea95de0-f079-43cb-9977-ec33056c6fc4 5m2s 5m3s
rhel10-be2560e5c97f true rhel10-be2560e5c97f 30Gi csi-trident-vsc snapcontent-4b30ebb2-208b-48f9-9636-c903fb7c5105 4m58s 4m59s
rhel8-684cedbd2c18 true rhel8-684cedbd2c18 30Gi csi-trident-vsc snapcontent-f3d27f57-c6e2-414d-9b38-0c50e8c3a9d4 5m3s 5m6s
rhel9-2f2cf92fff21 true rhel9-2f2cf92fff21 30Gi csi-trident-vsc snapcontent-2265468d-1b20-46b2-89c1-240c807b3c94 5m6s 5m6s|
This process takes about three minutes.
If you run this command several times you will see the DataVolume import processes run and then disappear.
You might also see the resource type indicated in the output, like so: |
Earlier, you defined AWS FSx as the default storage class for Virtual Machines.
You can also verify this by running the following.
You should get storage-class-iscsi as a result.
oc get storageclass -o=jsonpath='{.items[?(@.metadata.annotations.storageclass\.kubevirt\.io/is-default-virt-class=="true")].metadata.name}';echostorage-class-iscsiIf you tried to create a VM from a template, you would not see one with the label Source available, simply because the data sits on AWS EBS
To reach your goal, you would need to clone the existing PVC, so that the VM disk ends up on the right storage class.
This process takes roughly 10 minutes.
In order for the VM creation process to be much faster (a few seconds), you first need to rebuild the source images so they are stored on the more powerful Ontap storage.
To do so, you can just delete the existing datavolumes.
OpenShift will automatically recreate what you need with the new default storage class you created earlier.
oc delete dv,volumesnapshot -n openshift-virtualization-os-images --selector=cdi.kubevirt.io/dataImportCronYou can immediately see new datavolumes appearing to import data, and ultimately setting volume snapshots.
oc get dv -n openshift-virtualization-os-imagesNAME PHASE PROGRESS RESTARTS AGE
centos-stream9-1920d484672d Pending N/A 5s
fedora-4fcda30051d5 ImportScheduled N/A 5s
rhel10-beta-da1c0cdc24da Pending N/A 5s
rhel8-833d0f124287 N/A 5s
rhel9-0c9204ba64c2 N/A 5sGive it a couple of minutes and run the command again:
oc get dv,pvc,volumesnapshot -n openshift-virtualization-os-imagesNAME READYTOUSE SOURCEPVC SOURCESNAPSHOTCONTENT RESTORESIZE SNAPSHOTCLASS SNAPSHOTCONTENT CREATIONTIME AGE
volumesnapshot.snapshot.storage.k8s.io/centos-stream9-1920d484672d true centos-stream9-1920d484672d 30Gi csi-trident-vsc snapcontent-3e78ca37-c394-4323-a9e1-b9d955838e4e 16s 17s
volumesnapshot.snapshot.storage.k8s.io/fedora-4fcda30051d5 true fedora-4fcda30051d5 30Gi csi-trident-vsc snapcontent-2589ee80-d92b-4845-8242-61aec00f7fd1 43s 44s
volumesnapshot.snapshot.storage.k8s.io/rhel10-beta-da1c0cdc24da true rhel10-beta-da1c0cdc24da 30Gi csi-trident-vsc snapcontent-0a7b5dac-8406-4dba-91c1-a0d904a60050 14s 14s
volumesnapshot.snapshot.storage.k8s.io/rhel8-833d0f124287 true rhel8-833d0f124287 30Gi csi-trident-vsc snapcontent-429a77dc-a882-495d-b5f9-50183f8bcec1 4s 4s
volumesnapshot.snapshot.storage.k8s.io/rhel9-0c9204ba64c2 true rhel9-0c9204ba64c2 30Gi csi-trident-vsc snapcontent-48a33cbe-687e-4bcd-991b-9182ec0e12fa 23s 23s| Notice that the datavolume resources are automatically cleaned up after the import is complete. Instead you now see volume snapshots that were created against the Trident class. Any subsequent VM creation from these templates/snapshots will now use NetApp cloning technology to give you extremely fast and efficient provisioning of VM disks. |
This optimization configuration also needs to be applied to the production environment.
Switch to the PROD cluster.
oc config use-context PRODApply this command:
oc delete dv,volumesnapshot -n openshift-virtualization-os-images --selector=cdi.kubevirt.io/dataImportCronTime to deploy workloads!
In the next chapter, you will see the benefit of the configuration you just ran.
Please proceed with the next one.