Bonus Module: More Virtual Machine features
This is added as a bonus module, if you still have time and would like to explore Trident protect capabilities a bit more.
Restore a Virtual Machine from a snapshot
As a reminder, while protection is done for the whole application, restoring it with Trident Product can be done in many ways:
-
You can perform a complete restore or a partial restore
-
You can restore your application in-place or in a different namespace (same cluster or a different cluster)
-
You can even tailor the restore with a post-restore hook
For the sake of time, you will restore the VM from the snapshot vmsnap1 you took in the previous module.
Due to the NetApp snapshot technology, this is a very fast operation.
Restoring from a backup would take a bit more than 30 minutes.
Restoring from a snapshot can be done in-place or in a different namespace within the same cluster.
You are going to perform the latter one.
Also, make sure you are connected to the PROD cluster:
oc config use-context PROD
tridentctl-protect create sr vmsr1 --namespace-mapping my-vm:my-vm-restore --snapshot my-vm/vmsnap1 -n my-vm-restore| "sr" stands for SnapshotRestore |
Check that the process is running:
tridentctl-protect get sr -n my-vm-restore+-------+-----------+---------+-------+-----+
| NAME | APPVAULT | STATE | ERROR | AGE |
+-------+-----------+---------+-------+-----+
| vmsr1 | lab-vault | Running | | 16s |
+-------+-----------+---------+-------+-----+After a short time, the process should be done:
tridentctl-protect get sr -n my-vm-restore+-------+-----------+-----------+-------+-----+
| NAME | APPVAULT | STATE | ERROR | AGE |
+-------+-----------+-----------+-------+-----+
| vmsr1 | lab-vault | Completed | | 44s |
+-------+-----------+-----------+-------+-----+Let’s first verify the content of the target namespace (my-vm-restore):
oc get -n my-vm-restore all,pvcWarning: apps.openshift.io/v1 DeploymentConfig is deprecated in v4.14+, unavailable in v4.10000+
Warning: kubevirt.io/v1 VirtualMachineInstancePresets is now deprecated and will be removed in v2.
NAME READY STATUS RESTARTS AGE
pod/virt-launcher-centos-stream9-sapphire-mink-40-82nfm 1/1 Running 0 29s
NAME TYPE CLUSTER-IP EXTERNAL-IP PORT(S) AGE
service/headless ClusterIP None <none> 5434/TCP 29s
NAME PHASE PROGRESS RESTARTS AGE
datavolume.cdi.kubevirt.io/centos-stream9-sapphire-mink-40 Succeeded N/A 29s
NAME AGE PHASE IP NODENAME READY
virtualmachineinstance.kubevirt.io/centos-stream9-sapphire-mink-40 29s Running 10.131.0.171 ip-10-0-3-229.us-east-2.compute.internal True
NAME AGE STATUS READY
virtualmachine.kubevirt.io/centos-stream9-sapphire-mink-40 29s Running True
NAME STATUS VOLUME CAPACITY ACCESS MODES STORAGECLASS VOLUMEATTRIBUTESCLASS AGE
persistentvolumeclaim/centos-stream9-sapphire-mink-40 Bound pvc-1aa241da-ad1f-44e6-a48b-1f262ff66cd1 30Gi RWX storage-class-iscsi <unset> 36sEverything seems to be in order!
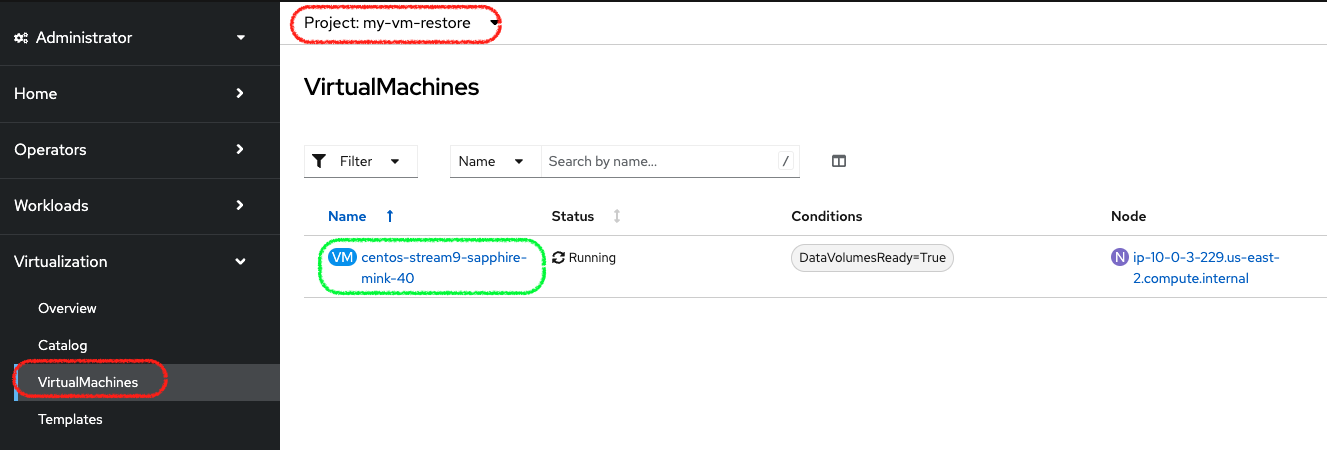
Last, let’s use the OpenShift console to connect to the VM
-
Navigate to the VirtualMachines sub-menu of the Virtualization menu (make sure you select the my-vm-restore project ), and check the list of VM:
-
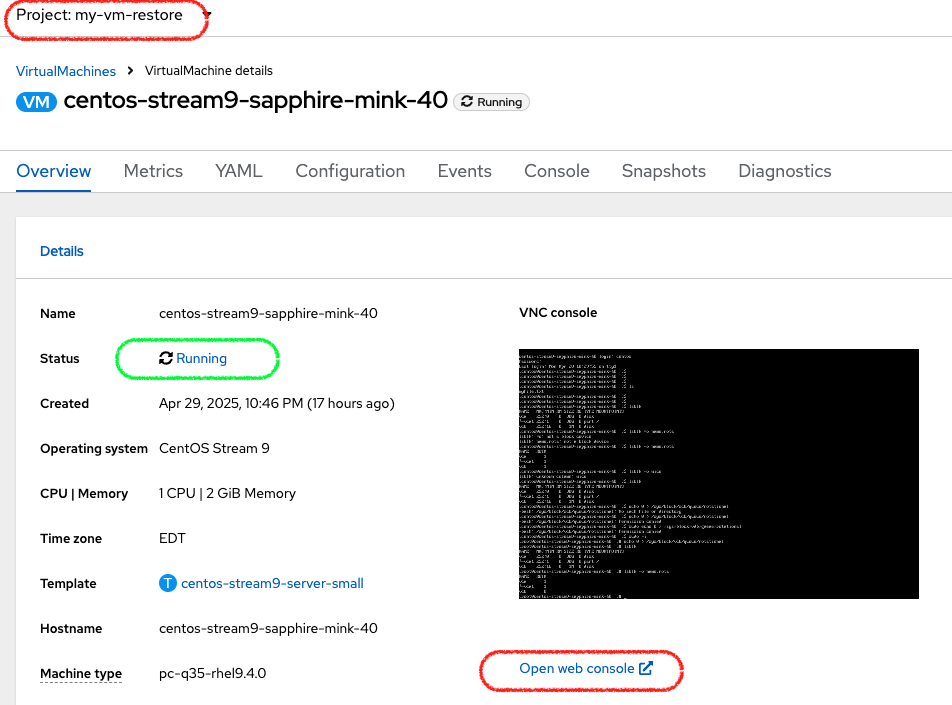
Enter the VM page and press on the Open web console link
-
After pressing on the Guest login credentials, copy and paste the user name and password, then click on the VM console
-
You can then check the content you created earlier:
ls; more *myfile.txt
this is my fileAnd voilà! You have quickly demonstrated how to restore a VM from a snapshot in just a few seconds.
Replicate a second VM
In this exercise, you are going to perform 2 tasks:
-
Add a new VM to existing my-vm project
-
Failover the Trident Protect app
The goal is to showcase that since the app is defined at the namespace level, any addition to that project will also be automatically replicated to the DR cluster.
Add a second VM on the PROD cluster
First, make sure you are connected to the PROD cluster console, in the my-vm project. Then you can:
-
Either create a whole new Centos9 VM, following the same steps earlier
-
Or clone the existing VM which also would take a couple of minutes to complete
|
To clone the VM, following those steps:
|
Trident Protect will automatically synchronize the new content of the project with the AMR configured previously. Wait a few minutes for the cloned VM to be fully deployed and for the next data synchronization to complete.
Failover the namespace with 2 VM
Let’s failover once again your app, and check the result.
oc config use-context DR
oc patch amr vmamr1 -n vmdr --type=merge -p '{"spec":{"desiredState":"Promoted"}}'
Fairly quickly, you should get to the following status (Promoting followed by Promoted)
tridentctl-protect get amr -n vmdr+----------+--------------+-----------------+---------------+-------------+-------+-------+
| NAME | SOURCE APP | DESTINATION APP | DESIRED STATE | STATE | AGE | ERROR |
+----------+--------------+-----------------+---------------+-------------+-------+-------+
| vmamr1 | lab-vault | lab-vault | Promoted | Promoted | 20s | |
+----------+--------------+-----------------+---------------+-------------+-------+-------+Now that the process is done, let’s check the content of our namespace:
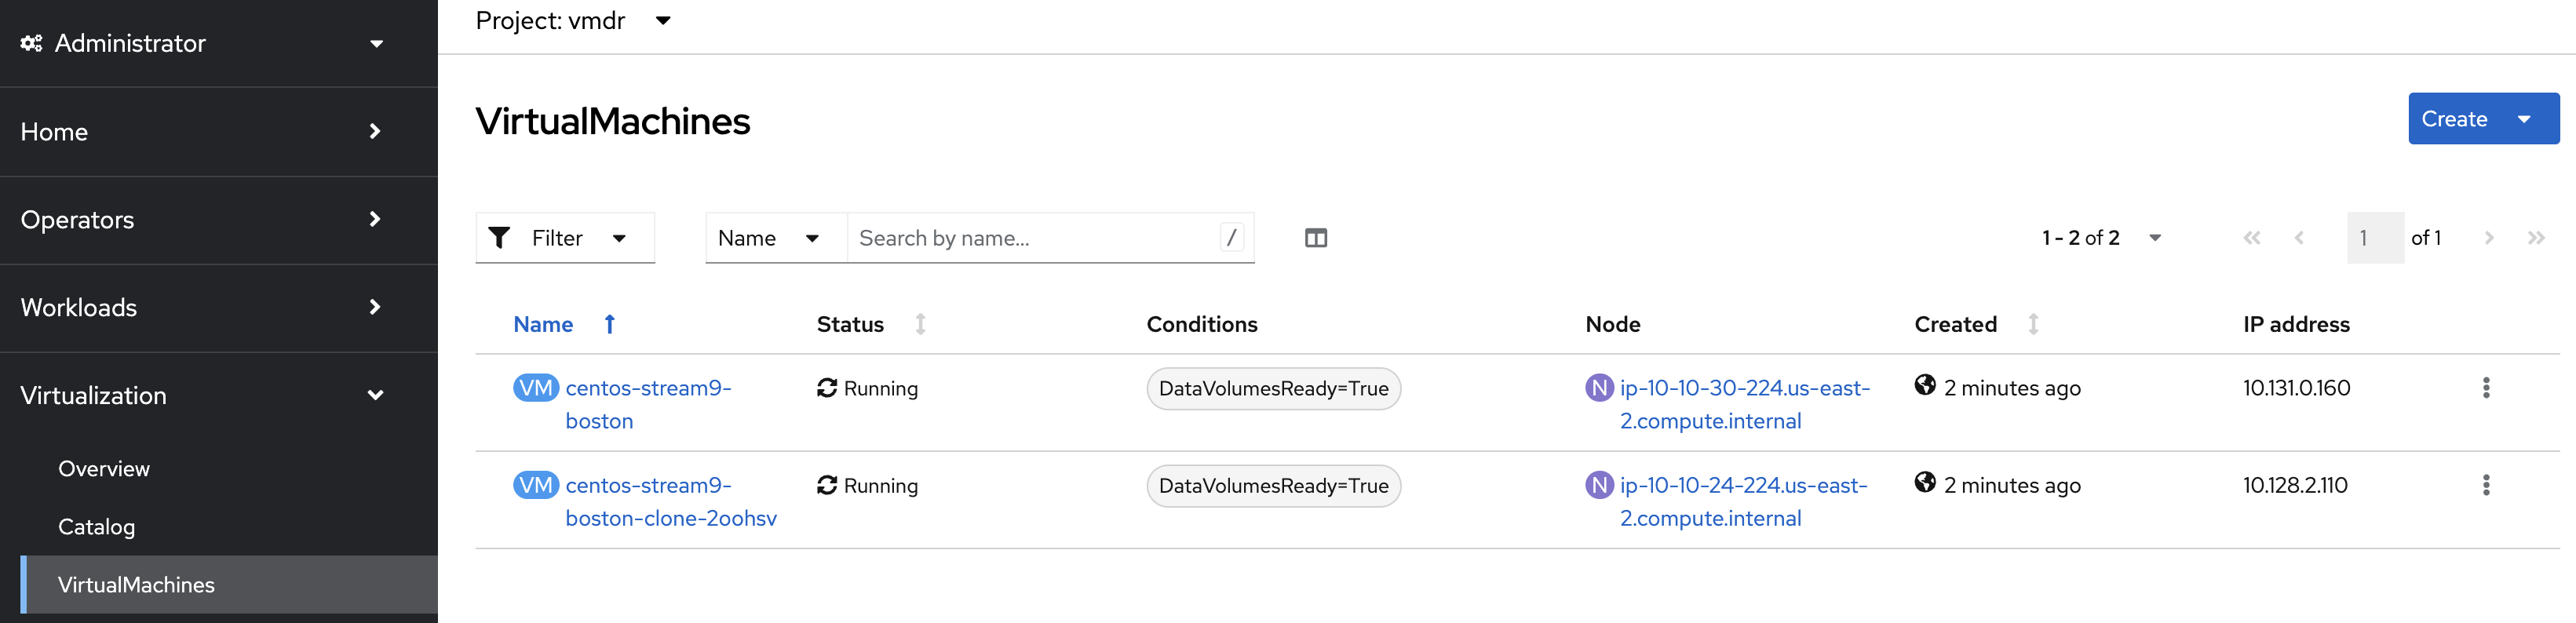
oc get -n vmdr vm,pvcNAME AGE STATUS READY
virtualmachine.kubevirt.io/centos-stream9-boston 35s Running True
virtualmachine.kubevirt.io/centos-stream9-boston-clone-2oohsv 35s Running True
NAME STATUS VOLUME CAPACITY ACCESS MODES STORAGECLASS VOLUMEATTRIBUTESCLASS AGE
persistentvolumeclaim/centos-stream9-boston Bound pvc-68178d10-557a-4633-a194-44d34f166cdf 30Gi RWX storage-class-iscsi <unset> 31m
persistentvolumeclaim/restore-e1cae597-3e5d-414c-be68-8e9bdbe8faf6-rootdisk Bound pvc-e5544494-2b85-4504-9bce-531ede45a1fb 30Gi RWX storage-class-iscsi <unset> 9m48sYou can see your two Virtual Machines!
If you go back to the OpenShift console, you will also see both of them: