Bonus Module: Backup, Restore, and Disaster Recovery for Container workloads
In this chapter, you will perform the following tasks:
-
Create a containerized workload with the cli
-
Backup/Restore container workloads
-
Disaster Recovery for your Wordpress application
Introduction
Trident Protect can help you protect applications.
Now, what IS an application? How do you DEFINE it?
Very philosophical questions, isn’t it?
10 people may have 10 different answers.
With Trident Protect you get full flexibility and can define applications in multiple ways:
-
with labels (ie subset of a namespace)
-
a whole namespace (ie everything in it)
-
multiple namespaces at once
| You can also bring cluster wide resources in the Application definition. |
Here are two examples with the Wordpress environment you have deployed:
-
Application by namespace: everything in the namespace will be protected as one (PVC, POD, ConfigMaps, …). This is the most common option.
-
Application by label: you could protect the frontend & the backend differently, maybe with different schedules.
|
In some cases, you may need to interact with the application to ensure consistency. |
Enough reading for now, let’s protect WordPress!
Deploy the Wordpress Helm chart
This is going to be done using the cli and in the PROD cluster.
Switch to the PROD cluster.
oc config use-context PRODWordpress installation
Wordpress is widely known as a blogging and content management platform.
Let’s deploy it on the production cluster with the help of a Helm chart.
helm repo add bitnami https://charts.bitnami.com/bitnami

helm install wordpress bitnami/wordpress -n wordpress --create-namespace \
--set wordpressUsername=rosa \
--set wordpressPassword=Rosa12345 \
--set global.storageClass=storage-class-nfs \
--set wordpressBlogName="Best Blog Ever" \
--set image.registry=docker.io \
--set image.repository=bitnamilegacy/wordpress \
--set mariadb.image.registry=docker.io \
--set mariadb.image.repository=bitnamilegacy/mariadb \
--set global.security.allowInsecureImages=true| It takes a tiny bit more than a minute for the installation to complete. |
|
This helm chart has been deprecated by Bitnami, and will not be receiving further updates. Contact the Red Hat Demo Platform team if you have trouble deploying this. |
Verify the installation
Check the content of the wordpress namespace.
oc get -n wordpress svc,po,pvcNAME TYPE CLUSTER-IP EXTERNAL-IP PORT(S) AGE
service/wordpress LoadBalancer 172.30.57.162 aa7ccfdb52de24e73867ae11c11bedc0-1849430877.us-east-2.elb.amazonaws.com 80:30087/TCP,443:32446/TCP 10m
service/wordpress-mariadb ClusterIP 172.30.248.149 <none> 3306/TCP 10m
service/wordpress-mariadb-headless ClusterIP None <none> 3306/TCP 10m
NAME READY STATUS RESTARTS AGE
pod/wordpress-74d5d98bcc-5hnhz 1/1 Running 0 10m
pod/wordpress-mariadb-0 1/1 Running 0 10m
NAME STATUS VOLUME CAPACITY ACCESS MODES STORAGECLASS VOLUMEATTRIBUTESCLASS AGE
persistentvolumeclaim/data-wordpress-mariadb-0 Bound pvc-9b53fcd7-09a9-4ce8-9b8e-9b24c22cd3ee 8Gi RWO storage-class-nfs <unset> 10m
persistentvolumeclaim/wordpress Bound pvc-774a516b-2205-462f-bf5d-d4014e37c72b 10Gi RWO storage-class-nfs <unset> 10mYou might have to wait a few more seconds and then repeat the above command until both pods show a staus of "Ready 1/1".
Notice the wordpress service ?
Copy & paste the address (the EXTERNAL-IP) provided by the Load Balancer in your browser and prepend https:// in order to access WordPress:
|
You could also retrieve this address by running the following command: |
Create your own blog
Before protecting that application, you may want to create your own blog.
You first need to connect to the admin page (use the same URL as Wordpress followed by "/wp-admin").
This will ask for credentials, which you set in the Helm chart: rosa/Rosa12345.
Once logged in, you need to click on Posts in the left bar, and then press on the Add New Post button.
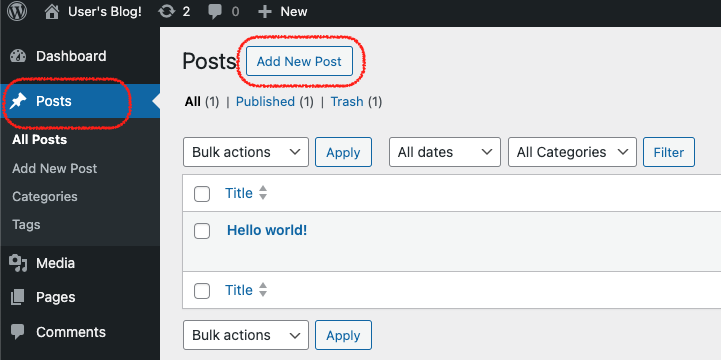
Write Something nice or funny, and when ready press on the two successive Publish buttons.
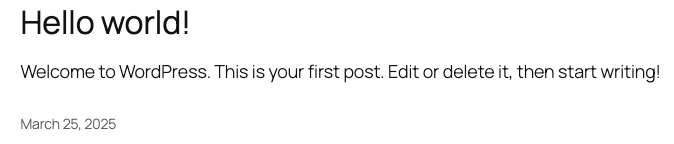
In another window, connect to the main page of the Wordpress user site to visualize the result.
Tadaaaa!
Your first application is now ready.
Create a Trident Protect application for the Wordpress namespace
Make sure you are logged into the production cluster:
oc config use-context PRODDefining an application can be done with the tridentctl-protect cli or via CR (more adapted for GitOps methodologies). In this case we will again use the tridentctl-protect cli:
tridentctl-protect create app wordpress --namespaces wordpress -n wordpress
Running this command with the --dry-run parameter will display the corresponding YAML manifest for integration in GitOps such as ArgoCD.
|
|
Check that the application is present:
tridentctl-protect get app -n wordpress+-----------+------------+-------+-----+
| NAME | NAMESPACES | STATE | AGE |
+-----------+------------+-------+-----+
| wordpress | wordpress | Ready | 26s |
+-----------+------------+-------+-----+Create an application snapshot of your application
An application snapshot is composed of several steps:
-
Pre snapshot hook (optional) to interact with your application (ex: Freeze the MariaDB database to flush the data on the disk)
-
CSI Snapshot for each volume of the application
-
Copy of all the application metadata onto the AppVault
-
Post snapshot hook (optional) to interact with your application (ex: Thaw the MariaDB database)
|
Hooks are not covered here in this lab. |
Let’s create one snapshot of the Wordpress app:
tridentctl-protect create snapshot wpsnap1 --app wordpress --appvault lab-vault -n wordpressCheck that the snapshot is done. Wait and repeat until the State is Completed:
tridentctl-protect get snap -n wordpress+---------+-----------+----------------+-----------+-------+-------+
| NAME | APP | RECLAIM POLICY | STATE | ERROR | AGE |
+---------+-----------+----------------+-----------+-------+-------+
| wpsnap1 | wordpress | Delete | Completed | | 11s |
+---------+-----------+----------------+-----------+-------+-------+As Wordpress has 2 PVC configured, you will find 2 associated CSI Volume Snapshots:
oc get -n wordpress vsNAME READYTOUSE SOURCEPVC SOURCESNAPSHOTCONTENT RESTORESIZE SNAPSHOTCLASS SNAPSHOTCONTENT CREATIONTIME AGE
snapshot-29a85194-428f-4e16-855a-c5ab9f849e3a-pvc-94cc256d-5764-4917-81d9-d4c5cf63f0fc true data-wordpress-mariadb-0 170280Ki csi-trident-vsc snapcontent-d1b45c23-6df7-4842-b357-8dc1ac51dfc6 38s 40s
snapshot-29a85194-428f-4e16-855a-c5ab9f849e3a-pvc-d527a991-4ba3-405a-b533-c22b23d09596 true wordpress 16552Ki csi-trident-vsc snapcontent-bec038bf-5d2a-4ea4-8004-5d14089c2a08 40s 40sCreate an application backup of your application
A application backup is pretty similar to a snapshot.
The main difference being that data is also going to be copied to the object store, making it a true backup where data is stored on a different physical system.
A backup is always based on a snapshot.
If you don’t specify one, Trident Protect will automatically create one for you.
You can also optionally use hooks in this process (pre-backup-hook & post-backup-hook).
Let’s create one backup of the Wordpress app, based on the snapshot you just took:
tridentctl-protect create backup wpbkp1 --app wordpress --snapshot wpsnap1 --appvault lab-vault -n wordpressCheck that the backup is done. Wait and repeat until the State is Completed:
tridentctl-protect get backup -n wordpress+--------+-----------+----------------+-----------+-------+-------+
| NAME | APP | RECLAIM POLICY | STATE | ERROR | AGE |
+--------+-----------+----------------+-----------+-------+-------+
| wpbkp1 | wordpress | Retain | Completed | | 1m15s |
+--------+-----------+----------------+-----------+-------+-------+| This process can take up to five minutes. It is expected for the backup to take more time than the snapshot, as data is also copied to the object store. |
While you wait for the backup to succeed, you can also verify that some content is getting created in the bucket.
First, you can notice that Trident Protect created some sub-folders to copy the app metadata as well as the data:
BUCKETFOLDERS=$(oc -n wordpress get backup wpbkp1 -o=jsonpath='{.status.appArchivePath}' | awk -F '/' '{print $1}')
echo "BUCKETFOLDERS: $BUCKETFOLDERS"
aws s3 ls --profile prod --no-verify-ssl --endpoint-url http://s3.{aws_default_region}.amazonaws.com s3://{s3_bucket_name}/$BUCKETFOLDERS/
PRE backups/ (1)
PRE kopia/ (2)
PRE snapshots/ (3)| 1 | The backups folder contains the app metadata related to Trident Protect backups |
| 2 | the kopia folder contains the data when running Trident Protect backups |
| 3 | The snapshots folder contains the app metadata related to Trident Protect snapshots |
Then, you can also parse the content of the backup:
BKPPATH=$(oc -n wordpress get backup wpbkp1 -o=jsonpath='{.status.appArchivePath}')
echo "BKPPATH: $BKPPATH"
aws s3 ls --profile prod --no-verify-ssl --endpoint-url http://s3.{aws_default_region}.amazonaws.com s3://{s3_bucket_name}/$BKPPATH --recursive --summarize --human-readable
Create an protection schedule for your application
Manually creating snapshots and backups is one thing…
Automating their creation is another one.
The best would be to create protection schedules!
The tridentctl-protect tool can be used for this, however this time you are going to use a YAML manifest in the lab command line.
| like the application, snapshot and backup, the schedule must be created in the application project (ie wordpress namespace) |
cat << EOF | oc apply -f -
apiVersion: protect.trident.netapp.io/v1
kind: Schedule
metadata:
  name: wpsched1
  namespace: wordpress
spec:
  appVaultRef: lab-vault
  applicationRef: wordpress
  backupRetention: "3"
  dataMover: Kopia
  enabled: true
  granularity: Custom
  recurrenceRule: |-
    DTSTART:20250326T000200Z
    RRULE:FREQ=MINUTELY;INTERVAL=5
  snapshotRetention: "3"
EOF
Even though the schedule was created via a YAML manifest, we can still check it via the tridentctl-protect tool:
tridentctl-protect get schedule -n wordpress+-------------+-----------+--------------------------------+---------+-------+-------+-----+
| NAME | APP | SCHEDULE | ENABLED | STATE | ERROR | AGE |
+-------------+-----------+--------------------------------+---------+-------+-------+-----+
| wpsched1 | wordpress | DTSTART:20250326T000100Z | true | | | 11s |
| | | RRULE:FREQ=MINUTELY;INTERVAL=5 | | | | |
+-------------+-----------+--------------------------------+---------+-------+-------+-----+After a few minutes, you are going to see new snapshots and backups appearing with the following command.
| No need to wait, you can always come back to this later, granted you will check that part in the Bonus module. |
tridentctl-protect get snapshot -n wordpress
tridentctl-protect get backup -n wordpress
+-----------------------------+-----------+----------------+-----------+-------+--------+
| NAME | APP | RECLAIM POLICY | STATE | ERROR | AGE |
+-----------------------------+-----------+----------------+-----------+-------+--------+
| custom-042be-20250407084700 | wordpress | Delete | Completed | | 2m36s |
| wpsnap1 | wordpress | Delete | Completed | | 11m34s |
+-----------------------------+-----------+----------------+-----------+-------+--------+
+-----------------------------+-----------+----------------+-----------+-------+--------+
| NAME | APP | RECLAIM POLICY | STATE | ERROR | AGE |
+-----------------------------+-----------+----------------+-----------+-------+--------+
| custom-042be-20250407084700 | wordpress | Retain | Completed | | 2m36s |
| wpbkp1 | wordpress | Retain | Completed | | 10m56s |
+-----------------------------+-----------+----------------+-----------+-------+--------+Restore your application
While protection is done for the whole application, restoring an application offers multiple choices:
-
You can perform a complete restore or a partial restore
-
You can restore your application in-place or in a different namespace (same cluster or a different cluster)
-
You can even tailor the restore with a post-restore hook
Let’s perform a full restore on the DR cluster!
First step, make sure you are connected on the DR context:
oc config use-context DRYou first need to find out the full path of your backup in the bucket.
From the command line, run the 2 following commands to browse the AppVault:
tridentctl-protect get appvaultcontent lab-vault --app wordpress --show-resources all -n trident-protect
tridentctl-protect get appvaultcontent lab-vault --app wordpress --show-resources backup --show-paths -n trident-protect
+---------+-----------+----------+-----------------------------+-----------+---------------------------+
| CLUSTER | APP | TYPE | NAME | NAMESPACE | TIMESTAMP |
+---------+-----------+----------+-----------------------------+-----------+---------------------------+
| prod | wordpress | snapshot | wpsnap1 | wordpress | 2025-03-26 07:23:30 (UTC) |
| prod | wordpress | snapshot | custom-64aea-20250106073100 | wordpress | 2025-03-26 07:31:10 (UTC) |
| prod | wordpress | backup | wpbkp1 | wordpress | 2025-03-26 07:26:23 (UTC) |
| prod | wordpress | backup | custom-64aea-20250106073100 | wordpress | 2025-03-26 07:32:29 (UTC) |
+---------+-----------+----------+-----------------------------+-----------+---------------------------+
+---------+-----------+--------+-----------------------------+-----------+---------------------------+--------------------------------------------------------------------------------------------------------------------+
| CLUSTER | APP | TYPE | NAME | NAMESPACE | TIMESTAMP | PATH |
+---------+-----------+--------+-----------------------------+-----------+---------------------------+--------------------------------------------------------------------------------------------------------------------+
| prod | wordpress | backup | bboxbkp1 | wordpress | 2025-01-06 07:26:23 (UTC) | bbox_c72389d7-813e-4ec4-ab1b-ebe002c53599/backups/bboxbkp1_b72088d5-65c3-45b3-a690-3dee53daa841 |
| prod | wordpress | backup | custom-64aea-20250106073100 | wordpress | 2025-01-06 07:32:29 (UTC) | bbox_c72389d7-813e-4ec4-ab1b-ebe002c53599/backups/custom-64aea-20250106073100_3c64a456-60df-4042-aa53-d3b67139467e |
+---------+-----------+--------+-----------------------------+-----------+---------------------------+--------------------------------------------------------------------------------------------------------------------+The second command provides the path to the backup in the last column. Now that you have the full path of your backup, you can easily restore it on the DR cluster.
Let’s put the path of the manual backup in a variable and proceed with the restore
BKPPATH=$(tridentctl-protect get appvaultcontent lab-vault --app wordpress --show-resources backup --show-paths -n trident-protect | grep wpbkp1  | awk -F '|' '{print $10}')
echo "BKPPATH: $BKPPATH"

tridentctl-protect create br wpbr1 --namespace-mapping wordpress:wordpressrestore --appvault lab-vault -n wordpressrestore \
  --storageclass-mapping storage-class-nfs:storage-class-iscsi \
  --path $BKPPATH
After a couple of minutes, the process should be done:
tridentctl-protect get br -n wordpressrestore+-------+-----------+-----------+-------+------+
| NAME | APPVAULT | STATE | ERROR | AGE |
+-------+-----------+-----------+-------+------+
| wpbr1 | lab-vault | Completed | | 1m8s |
+-------+-----------+-----------+-------+------+
|
Verify the result
First, check the content of the target namespace in the CLI:
oc get -n wordpressrestore svc,po,pvcNAME TYPE CLUSTER-IP EXTERNAL-IP PORT(S) AGE
service/wordpress LoadBalancer 172.30.51.27 a77ae9dd96eb14d2b9dc8083eb104515-1956388544.us-east-2.elb.amazonaws.com 80:32365/TCP,443:30840/TCP 87s
service/wordpress-mariadb ClusterIP 172.30.197.232 <none> 3306/TCP 87s
service/wordpress-mariadb-headless ClusterIP None <none> 3306/TCP 87s
NAME READY STATUS RESTARTS AGE
pod/wordpress-64f8c88c45-q9bsc 1/1 Running 0 87s
pod/wordpress-mariadb-0 1/1 Running 0 87s
NAME STATUS VOLUME CAPACITY ACCESS MODES STORAGECLASS VOLUMEATTRIBUTESCLASS AGE
persistentvolumeclaim/data-wordpress-mariadb-0 Bound pvc-ab5c1211-41fe-4a09-99e0-794e91e36b16 8Gi RWO storage-class-nfs <unset> 95s
persistentvolumeclaim/wordpress Bound pvc-f7209500-dba6-4429-9d7b-47a54f991f8b 10Gi RWO storage-class-nfs <unset> 95sAs expected, the Load Balancer provided a new address (EXTERNAL-IP) for the wordpress service.
After all, we restored to a completely different ROSA cluster in a different VPC.
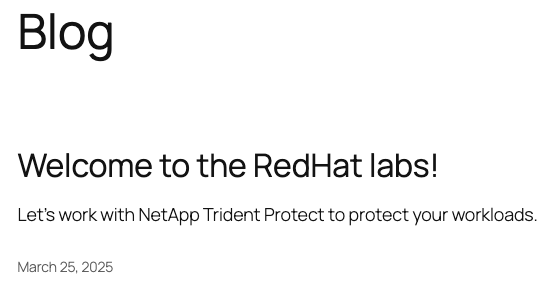
Copy and paste it in your browser and check the content of the blog.
|
You could also retrieve this address by running the following command: |
Tadaaaaa! Your great blog is back online!
You just managed to restore your whole application including its data onto a different cluster.
Disaster Recovery for your Wordpress application
You can follow here the same methodology you applied in DR for the Virtual Machine.
Setup the mirroring
You first need to retrieve the application ID on the PROD cluster using the command line.
We will use the oc config command line to switch between clusters context.
oc config use-context PROD
SRCAPPID=$(tridentctl-protect get app wordpress -n wordpress -o json | jq -r .metadata.uid) && echo $SRCAPPID
With that information, you can create the mirror relationship on the DR cluster.
Let’s first switch context to point to the DR cluster:
oc config use-context DRAs we use a YAML manifest, you also need to create the target namespace on the DR cluster.
oc create ns wordpressdr

cat << EOF | oc apply -f -
apiVersion: protect.trident.netapp.io/v1
kind: AppMirrorRelationship
metadata:
  name: wpamr1
  namespace: wordpressdr
spec:
  desiredState: Established
  destinationAppVaultRef: lab-vault
  namespaceMapping:
  - destination: wordpressdr
    source: wordpress
  recurrenceRule: |-
    DTSTART:20240901T000200Z
    RRULE:FREQ=MINUTELY;INTERVAL=5
  sourceAppVaultRef: lab-vault
  sourceApplicationName: wordpress
  sourceApplicationUID: $SRCAPPID
  storageClassName: storage-class-nfs
EOF
Let’s check the status of this new object on the DR cluster:
tridentctl-protect get amr -n wordpressdr+----------+--------------+-----------------+---------------+--------------+-----+-------+
| NAME | SOURCE APP | DESTINATION APP | DESIRED STATE | STATE | AGE | ERROR |
+----------+--------------+-----------------+---------------+--------------+-----+-------+
| wpamr1 | lab-vault | lab-vault | Established | Establishing | 41s | |
+----------+--------------+-----------------+---------------+--------------+-----+-------+It will take a couple of minutes for the mirroring to be setup, or Established in the Trident language.
tridentctl-protect get amr -n wordpressdr+----------+--------------+-----------------+---------------+-------------+-------+-------+
| NAME | SOURCE APP | DESTINATION APP | DESIRED STATE | STATE | AGE | ERROR |
+----------+--------------+-----------------+---------------+-------------+-------+-------+
| wpamr1 | lab-vault | lab-vault | Established | Established | 1m30 | |
+----------+--------------+-----------------+---------------+-------------+-------+-------+Let’s verify what we currently have in the target namespace:
oc get -n wordpressdr svc,po,pvcNAME STATUS VOLUME CAPACITY ACCESS MODES STORAGECLASS VOLUMEATTRIBUTESCLASS AGE
persistentvolumeclaim/data-wordpress-mariadb-0 Bound pvc-1fc62930-31da-4d2d-92ca-4449fe13211c 8Gi RWO storage-class-nfs <unset> 2m35s
persistentvolumeclaim/wordpress Bound pvc-29440095-169e-4524-94f7-e45e03e1e2d6 10Gi RWO storage-class-nfs <unset> 2m35sAs expected, you only see the PVC for now.
Failover your application
Failover your application is pretty straight forward.
You just need to patch the AMR on the DR cluster.
oc patch amr wpamr1 -n wordpressdr --type=merge -p '{"spec":{"desiredState":"Promoted"}}'Fairly quickly, you should get to the following result:
tridentctl-protect get amr -n wordpressdr+----------+--------------+-----------------+---------------+-------------+-------+-------+
| NAME | SOURCE APP | DESTINATION APP | DESIRED STATE | STATE | AGE | ERROR |
+----------+--------------+-----------------+---------------+-------------+-------+-------+
| wpamr1 | lab-vault | lab-vault | Promoted | Promoted | 20s | |
+----------+--------------+-----------------+---------------+-------------+-------+-------+Once in the Promoted state, let’s check the content of our namespace:
oc get -n wordpressdr svc,po,pvcNAME TYPE CLUSTER-IP EXTERNAL-IP PORT(S) AGE
service/wordpress LoadBalancer 172.30.104.107 a6fe2051eeb554284a7b3d398c119b63-831257922.us-east-2.elb.amazonaws.com 80:30175/TCP,443:30394/TCP 70s
service/wordpress-mariadb ClusterIP 172.30.227.139 <none> 3306/TCP 69s
service/wordpress-mariadb-headless ClusterIP None <none> 3306/TCP 69s
NAME READY STATUS RESTARTS AGE
pod/wordpress-64f8c88c45-hns76 1/1 Running 0 70s
pod/wordpress-mariadb-0 1/1 Running 0 69s
NAME STATUS VOLUME CAPACITY ACCESS MODES STORAGECLASS VOLUMEATTRIBUTESCLASS AGE
persistentvolumeclaim/data-wordpress-mariadb-0 Bound pvc-1fc62930-31da-4d2d-92ca-4449fe13211c 8Gi RWO storage-class-nfs <unset> 5m4s
persistentvolumeclaim/wordpress Bound pvc-29440095-169e-4524-94f7-e45e03e1e2d6 10Gi RWO storage-class-nfs <unset> 5m4sAs you can see, everything is back!
If you connect on your browser to the FQDN provided by the LoadBalancer, you should be able to connect to Wordpress and see the content created earlier.
If you have reached this point, congratulations, you have succesfully completed this lab! And you’ve learned how to provide fast and efficient backup, restore and disaster recovery for container and VM workloads on OpenShift.