Advanced Management of Virtual Machines
Introduction
As Legacy Systems Inc. continues its expansion, we’ve found ourselves deploying OpenShift Virtualization across multiple data centers and public cloud regions to host our critical VMs. With the potential to host virtualized clusters in various cloud providers such as AWS, IBM Cloud, and Google Cloud teams need to balance investments in and training on new platforms while keeping existing infrastructure and applications running. Managing these disparate VM workloads can become increasingly complex without a unified approach, which is where Red Hat Advanced Cluster Management for Kubernetes comes in. Using RHACM as a single pane of glass interface to manage all of your virtual workloads no matter where they live is key to running a large distributed virtualized environment. In this module we will explore how to discover our working cluster in RHACM, how to use it to visualize our virtual workloads, and how to deploy a virtual machine to a cluster remotely.
Discover Your Cluster
| This section of the lab uses a shared ACM hub cluster whose console URL will be provided by your lab proctor. You will login to the workstation interface where you will be assigned a user account: user1 - usern and will login with that user to complete this lab. |
-
Log in to the console of the shared Red Hat Advanced Cluster Managment (RHACM) hub with the assigned credentials for your lab user account.
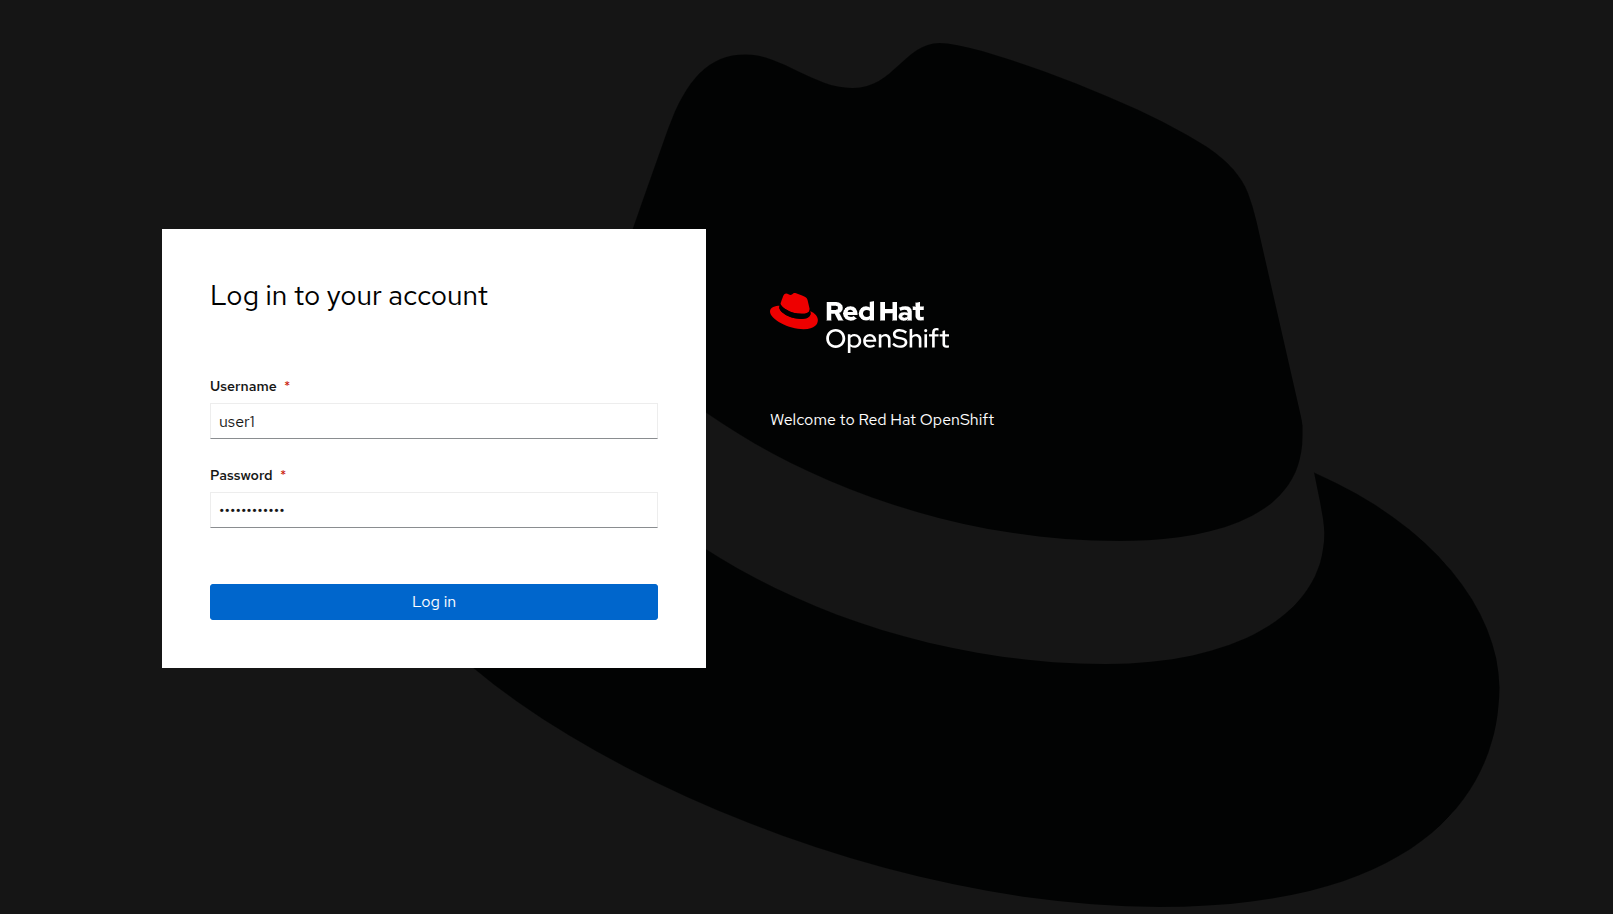 Figure 1. OpenShift Login
 -
When you first log in, you will see that there are no clusters present to manage. Click the button to Import cluster.
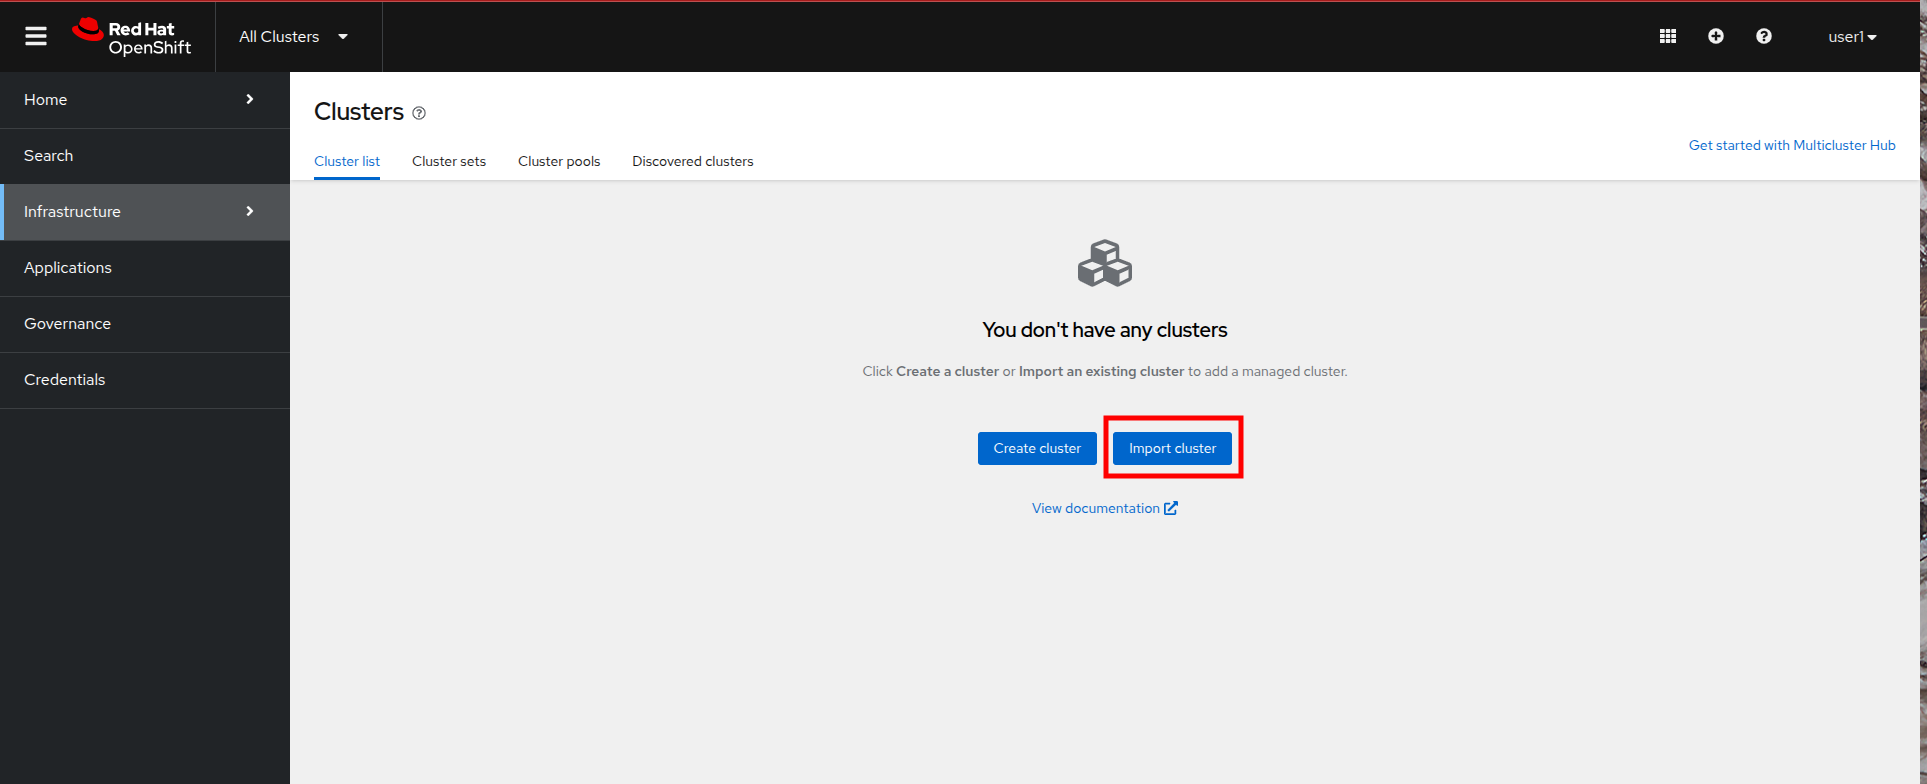 Figure 2. Import Cluster
It’s possible that if other lab attendees have advanced past this step the page will not exactly reflect the screenshot above. You can still import your cluster and continue your lab by clicking the Import Cluster button at the top. 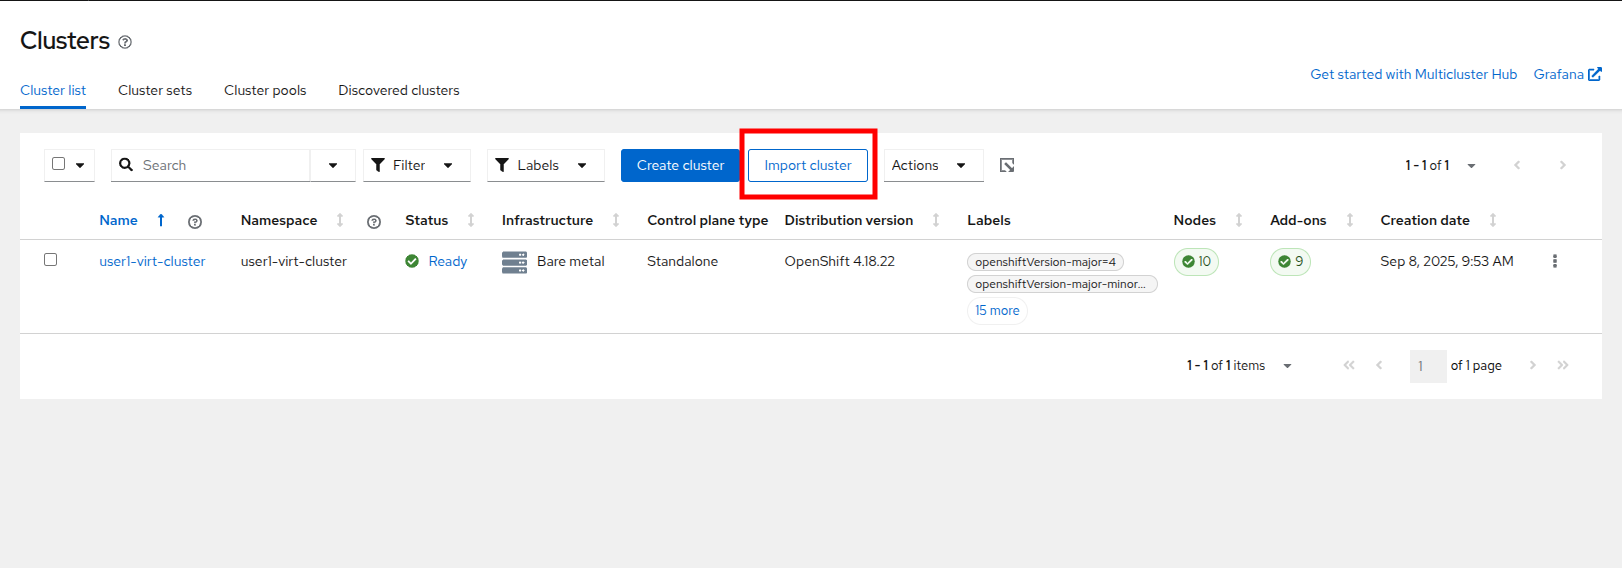 Figure 3. Import Cluster Alt
 -
The next screen you will be presented with is the Details page for the Import an existing cluster wizard. Fill in the fields on the page with the following values:
-
Name:
userX-virt-cluster -
Cluster set: legacy-systems-inc
-
Import mode: Enter your server URL and API token for the existing cluster
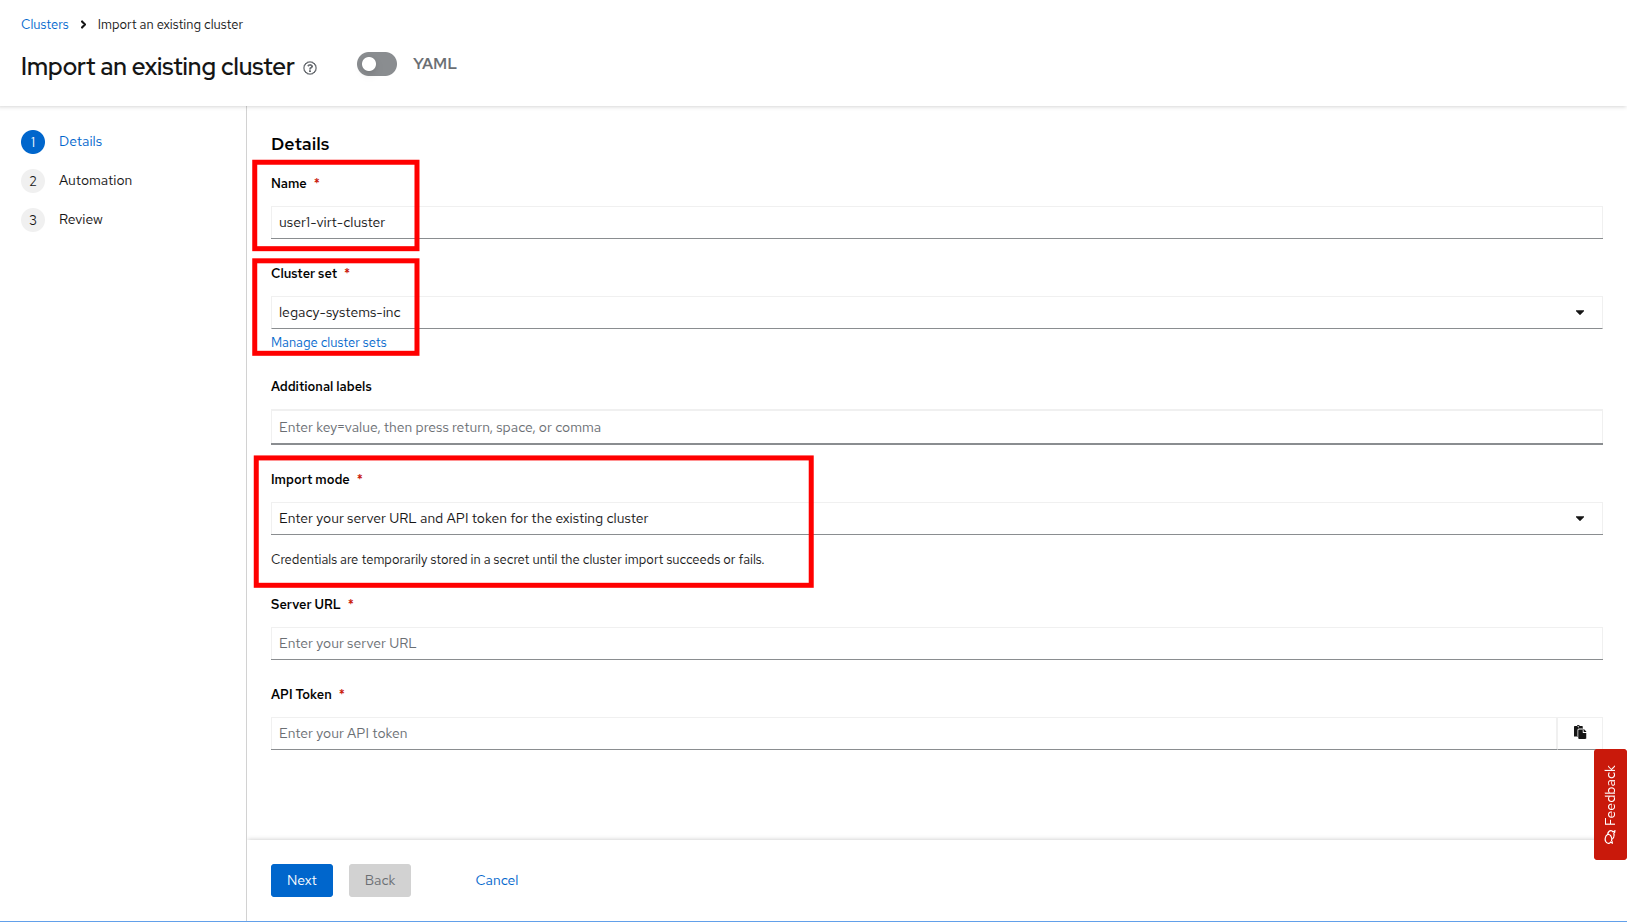 Figure 4. Import Cluster Details
-
-
Once you have selected the Import mode you will be prompted to provide the Server URL and API Token to discover your cluster. You will need to get these values from your original cluster in order to discover it.
-
Return to the tab with your original lab cluster open, and click on the admin user at the top and select the option to Copy login command from the dropdown menu.
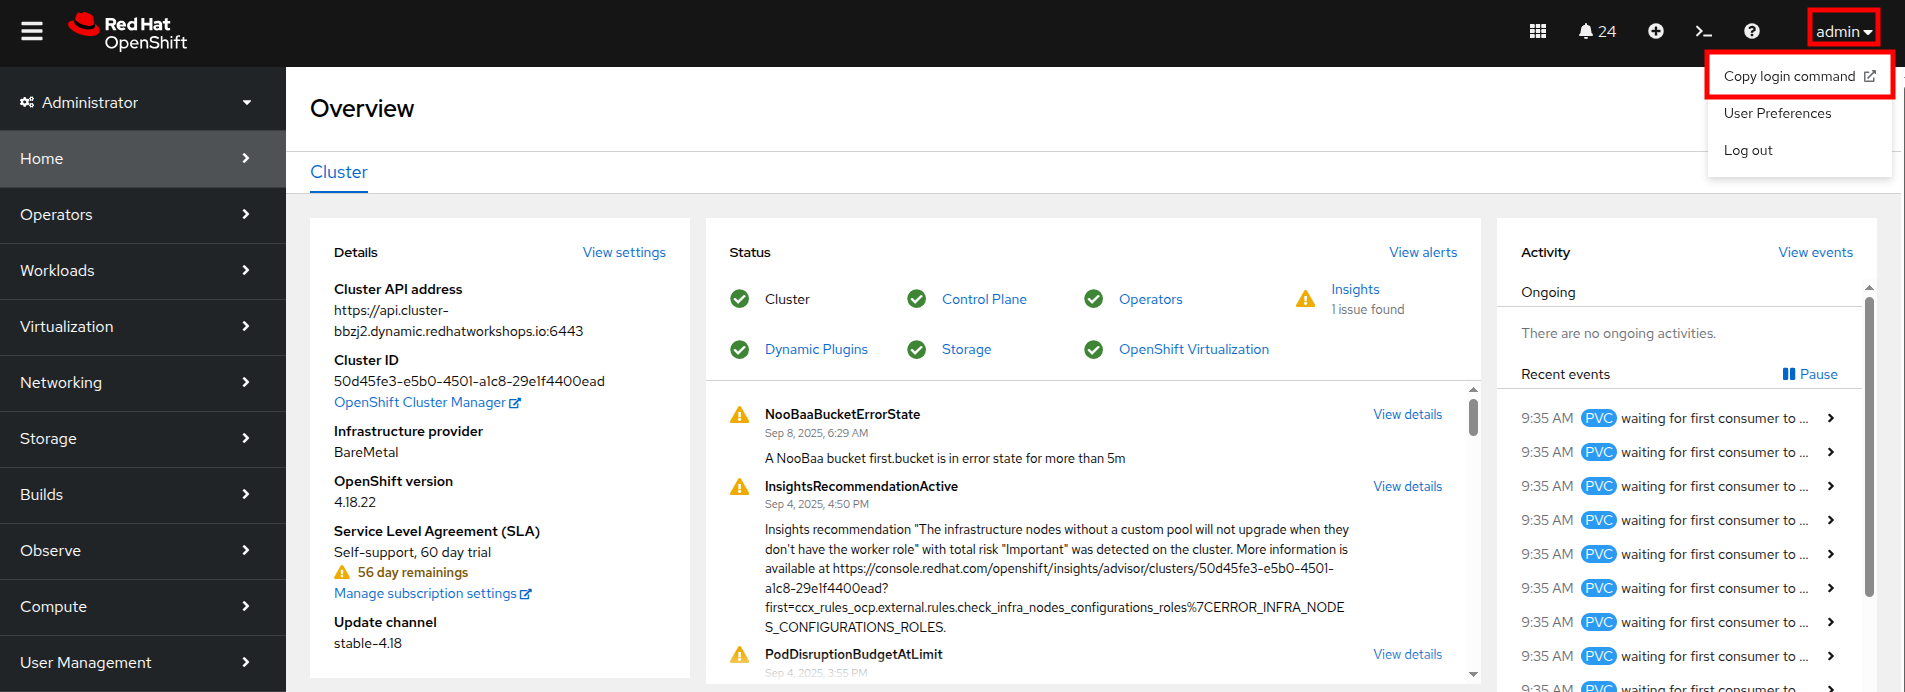 Figure 5. Copy Login Command
 -
A new tab will open and you will be prompted to login to your cluster through the htpass_provider authorization agent again. As a reminder, your cluster admin credentials are:
-
User:
username -
Password:
password
-
-
When you login you will see a large white screen with a link named Display Token. Click it.
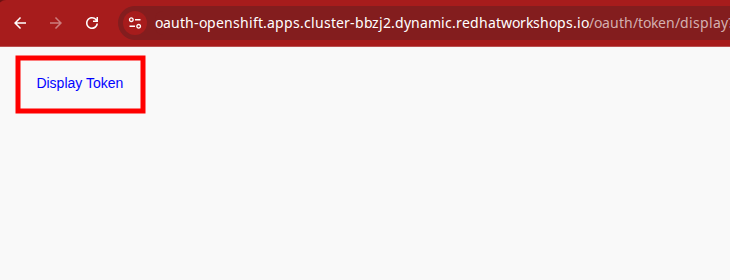 Figure 6. Display Token
 -
When you click on it, you will see a page that shows you a CLI authentication command with both the API Token and the Server URL value.
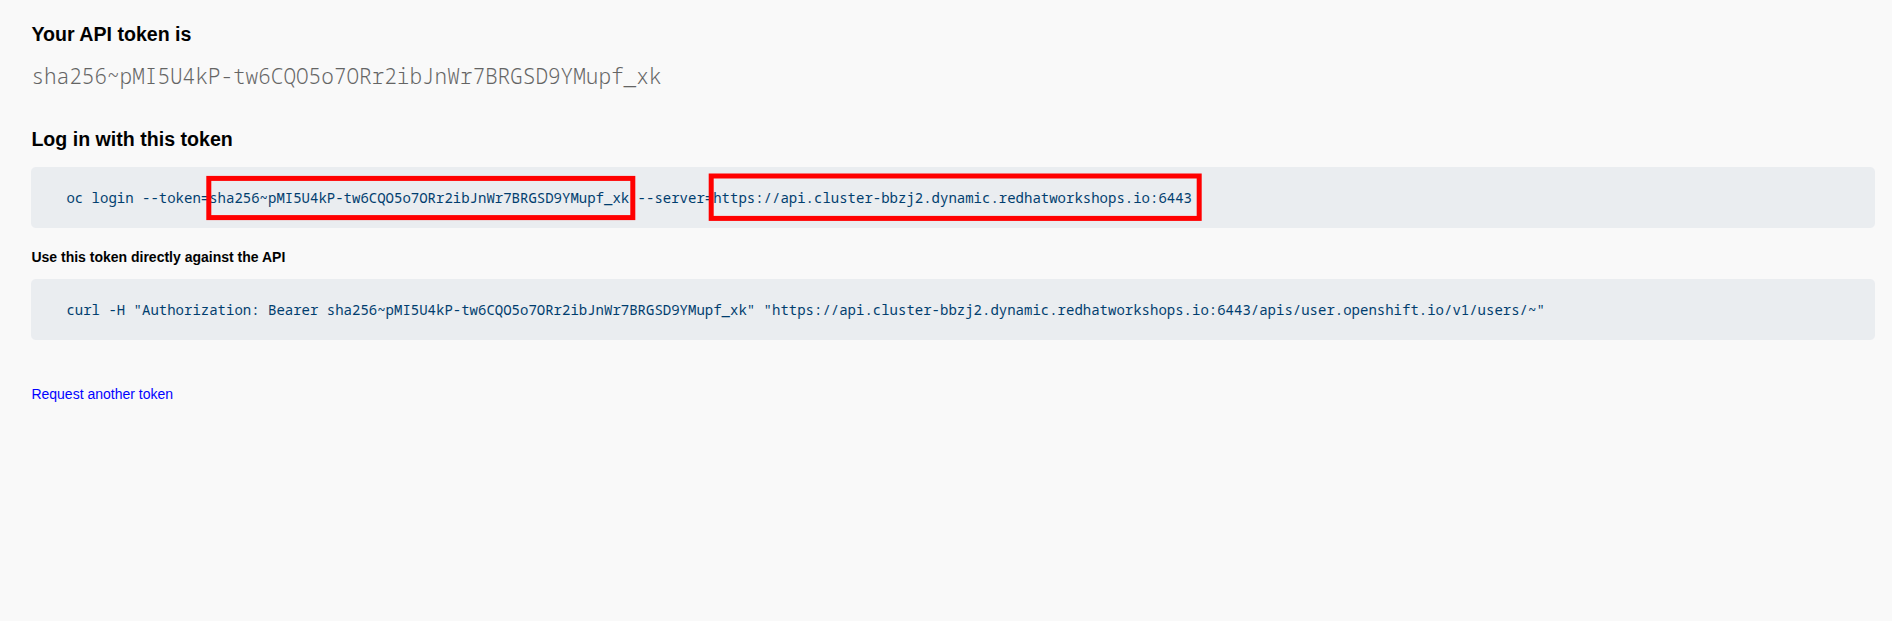 Figure 7. Display API Token, Server URL
 -
Copy and paste each of these values over into their respective fields on the Details page of the Import an existing cluster wizard. You may click on the eye button on the right side to see the API Token to ensure it copied correctly. When you are ready to continue, click the Next button.
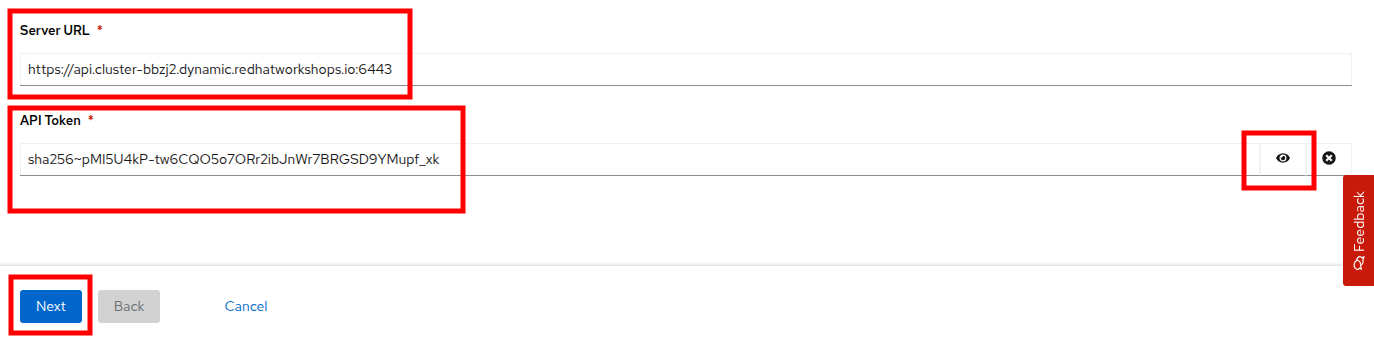 Figure 8. Paste API Token, Server URL
 -
The next page in the wizard is the Automation page which allows you to configure automation templates using Ansible Automation Platform to perform various cluster management duties in a multicluster environment. These actions are currently beyond the scope of this workshop, click the Next button to continue.
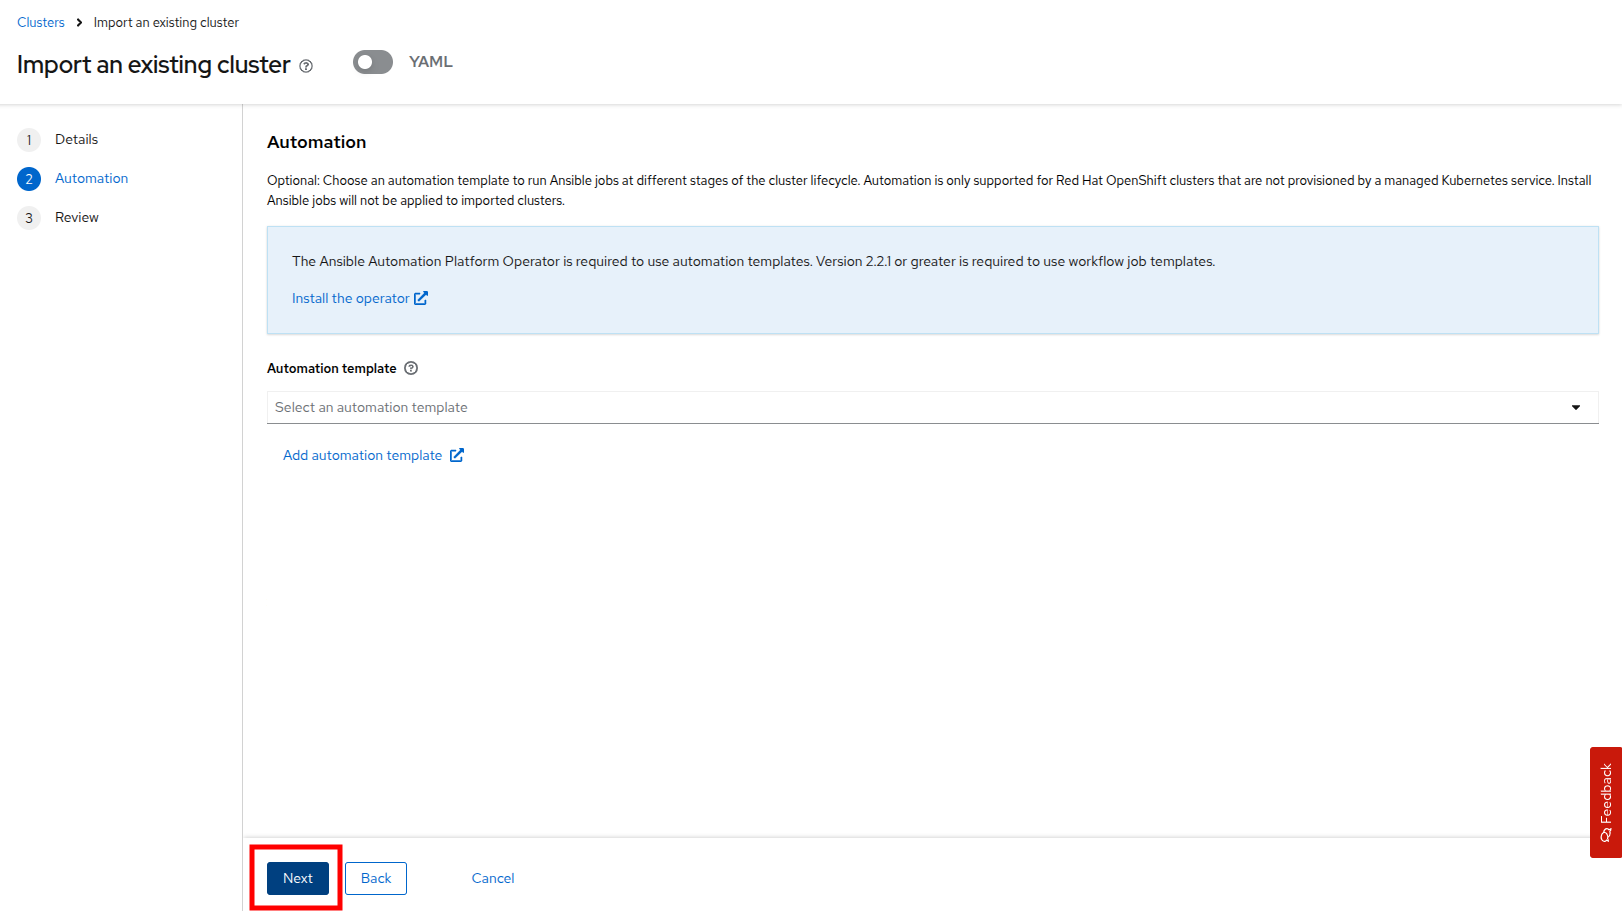 Figure 9. Automation Page
 -
The last page in the wizard is the Review page which allows you to confirm the details you have provided. When you are ready, click the Import button.
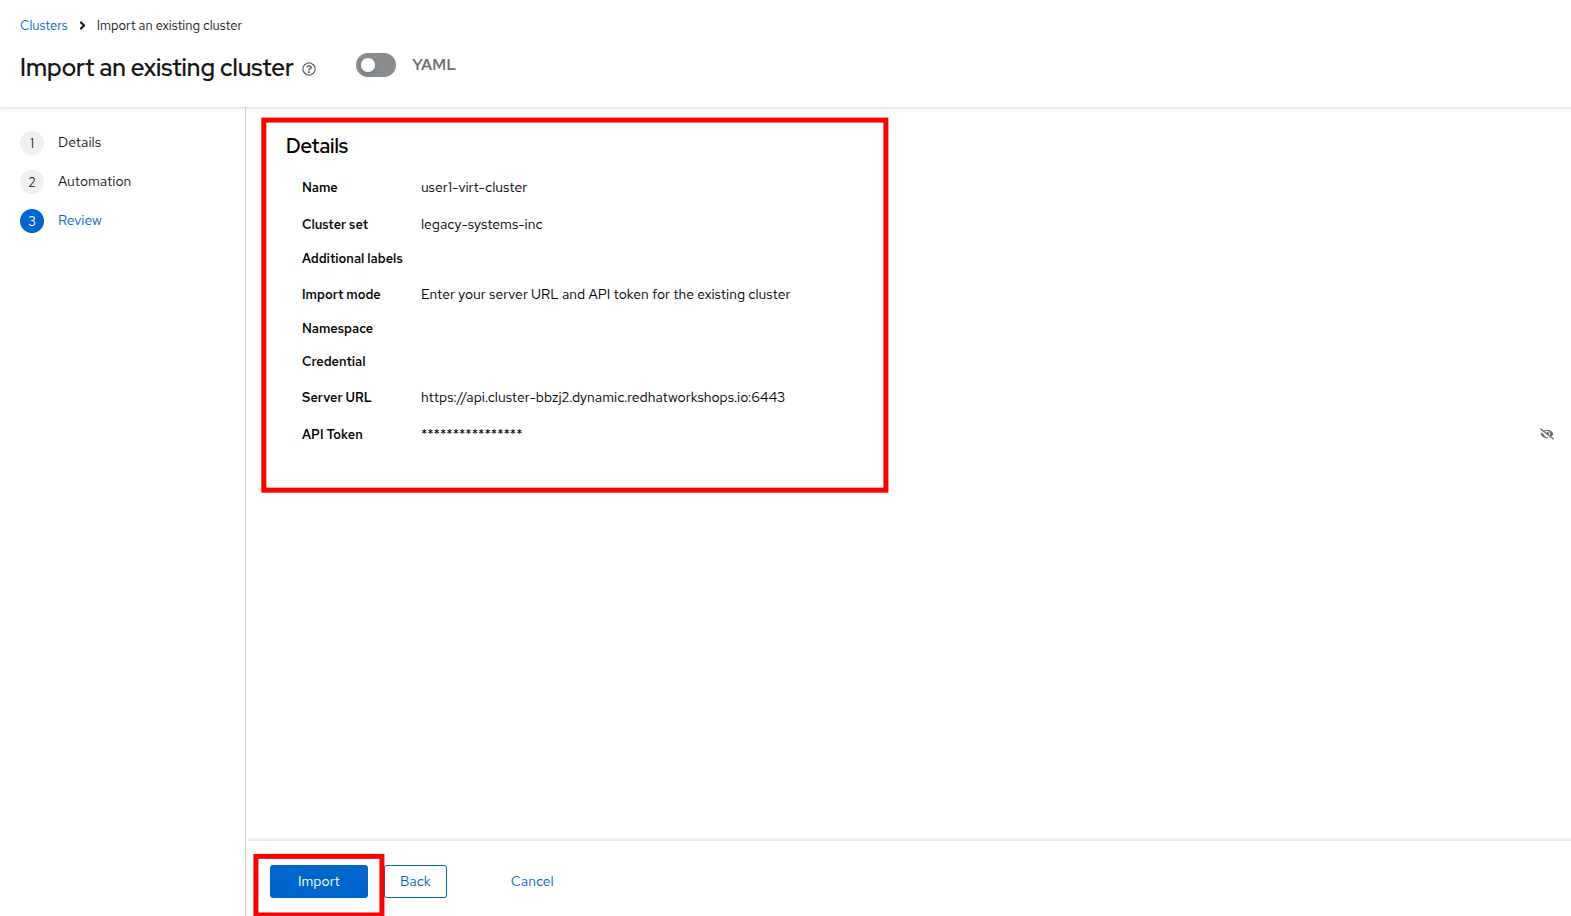 Figure 10. Import Cluster Review
 -
You will see a brief pop-up that the process has begun and the cluster will start to import, the process should move fairly quickly, although this could be affected by the number of users attempting to import at the same time.
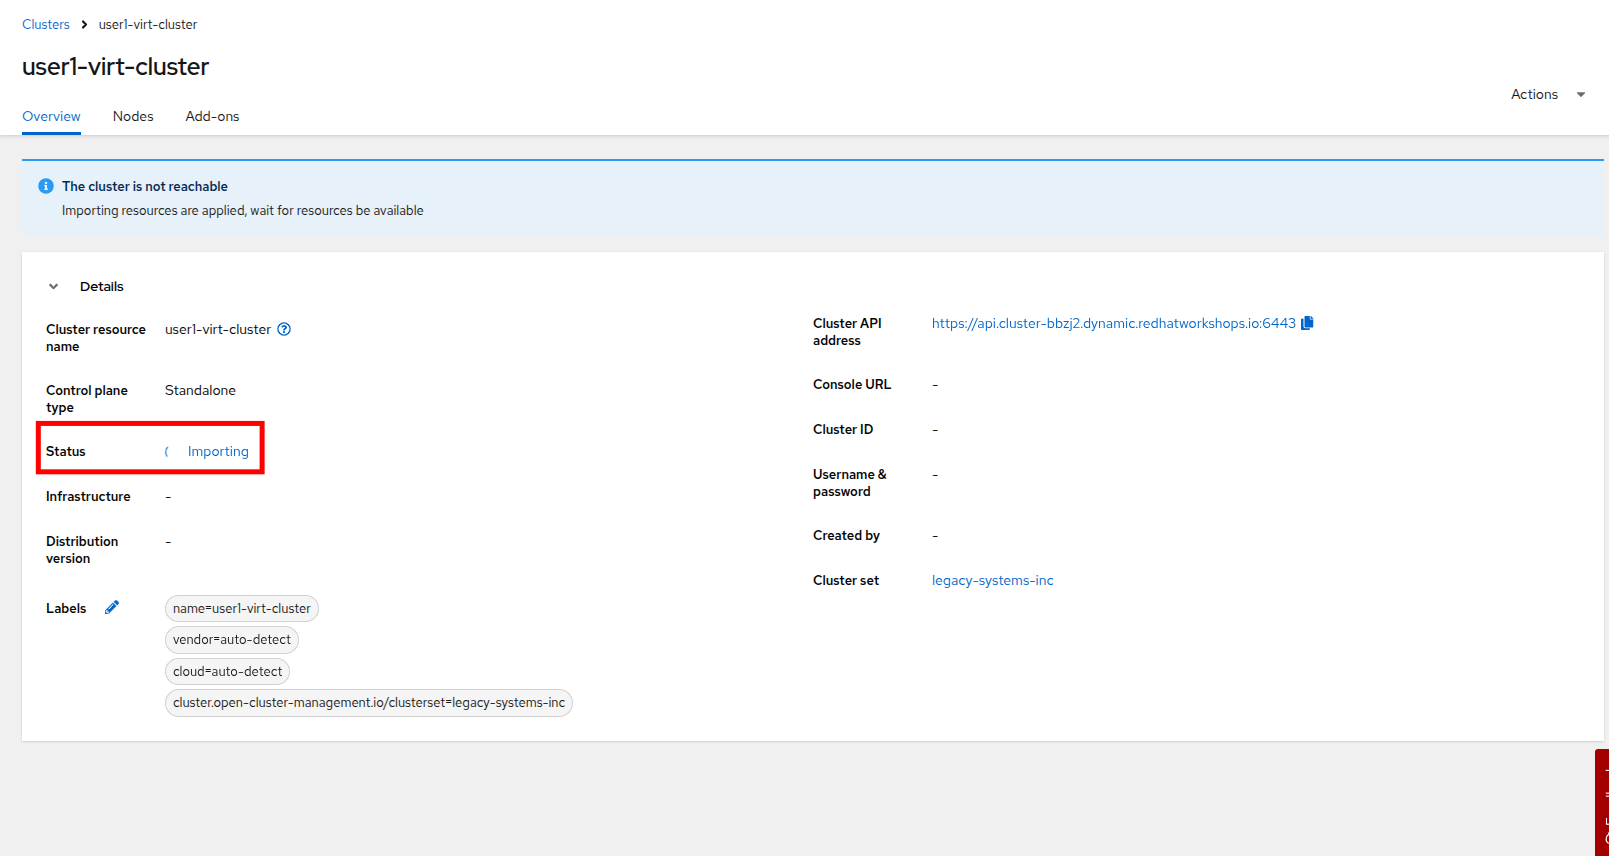 Figure 11. Import In Progress
 -
When the cluster import process completes you will see the cluster status listed as Ready and see a large amount of information about the cluster, including its Infrastructure type, the current subscribed software Channel, its Cluster set, links to open its console directly, and a list of Labels used to describe the cluster.
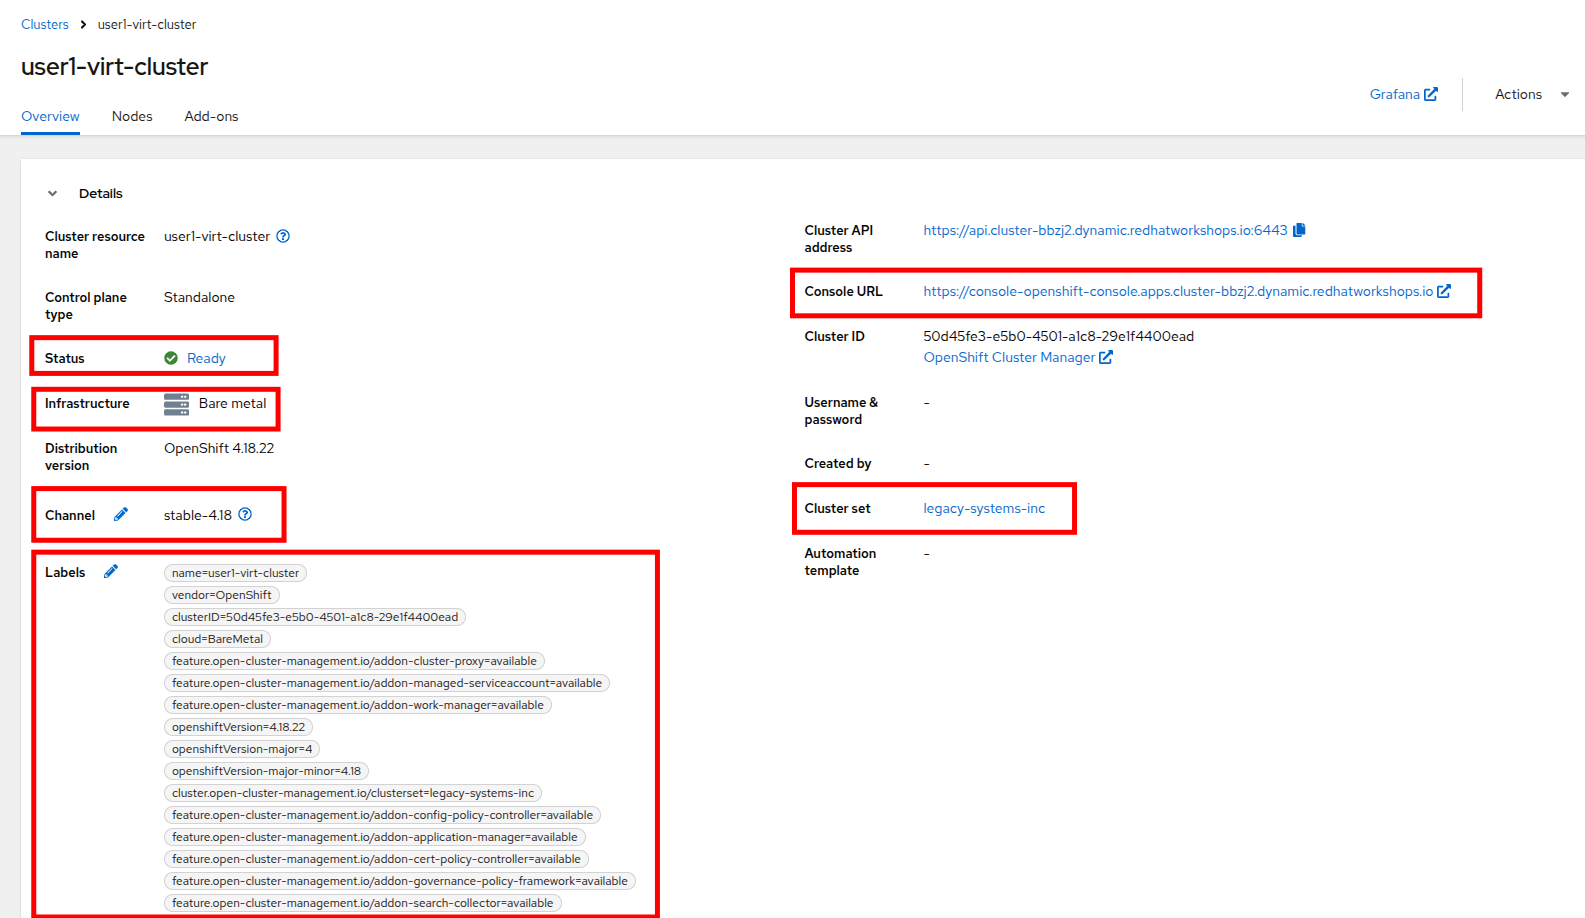 Figure 12. Import Complete
Explore Managed Cluster Resources
Now that we have discovered our cluster, lets take a look around at what benefits having Red Hat Advanced Cluster Managment for Kubernetes (RHACM) provides us when managing multiple clusters.
-
We can click on the Nodes tab to see a list of the physical nodes in our cluster and their current status. We can get a more descriptive view by clicking on a node itself. Try it now by clicking on worker node 3 in your managed cluster.
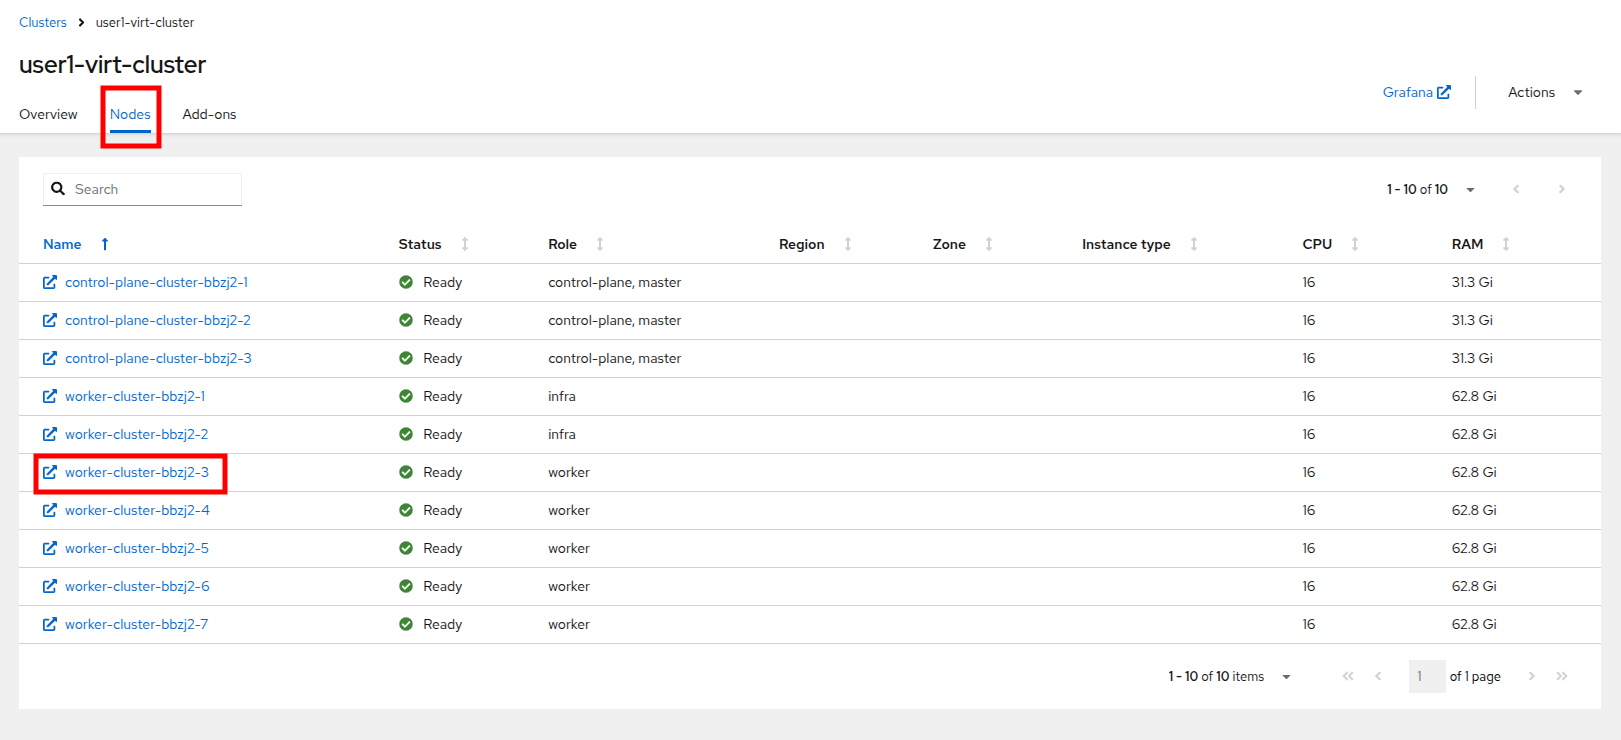 Figure 13. Node List
 -
A new tab will launch and display the node page from your mananged cluster, just as we reviewed in module 1.
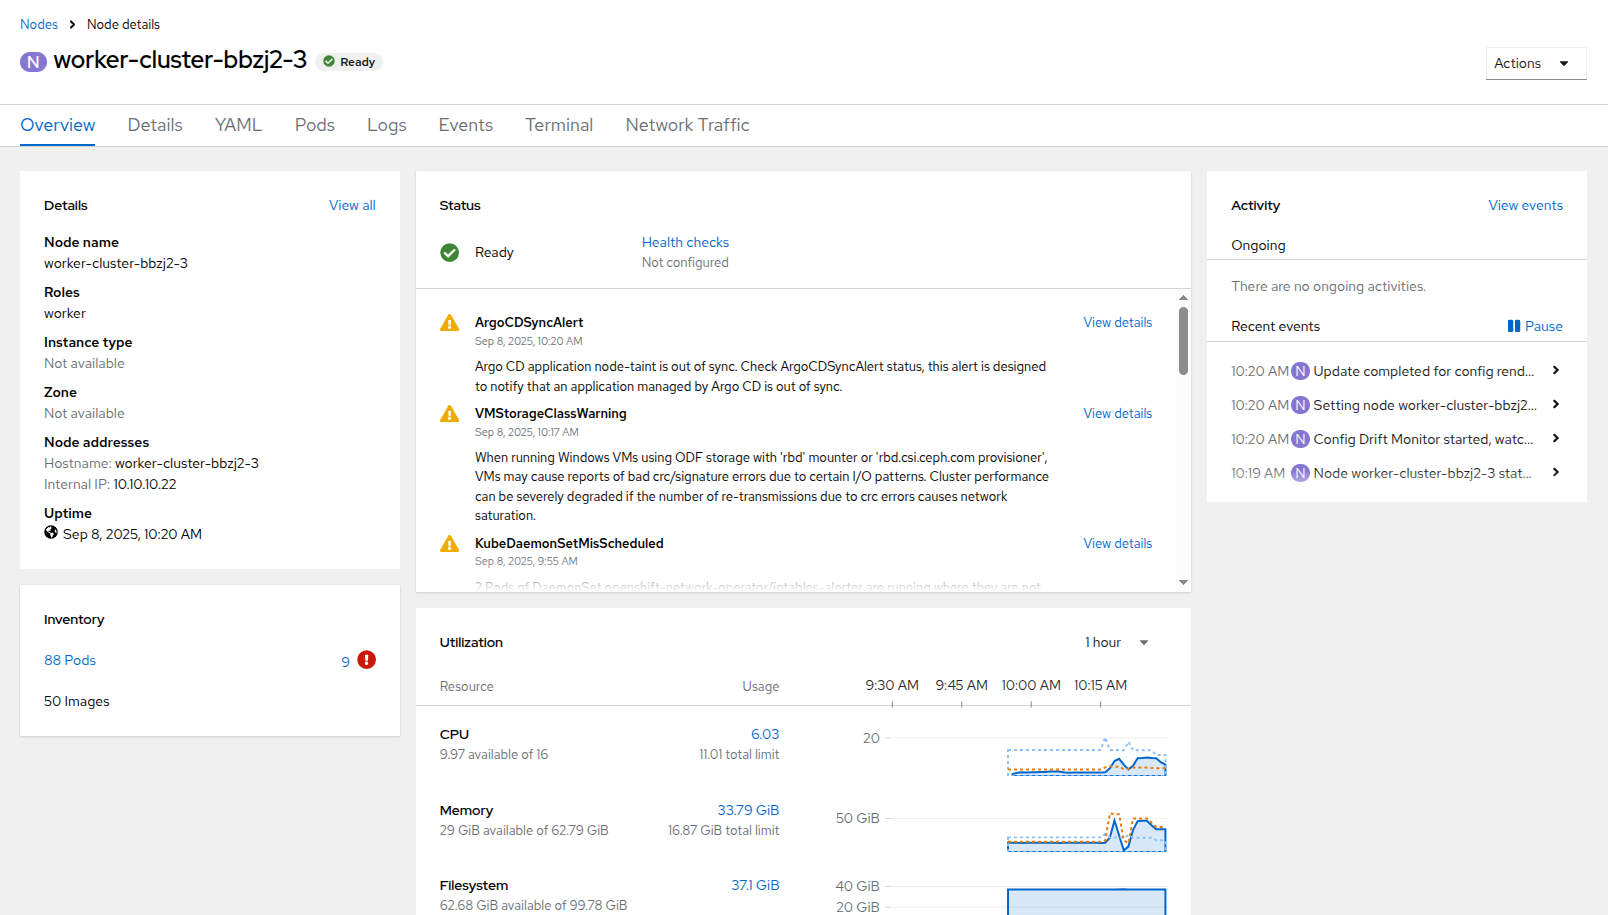 Figure 14. Node 3 Details
 -
We can close this window and we can also see collected graphs on the managed cluster by click on the Grafana link at the top of the page. Click the link now.
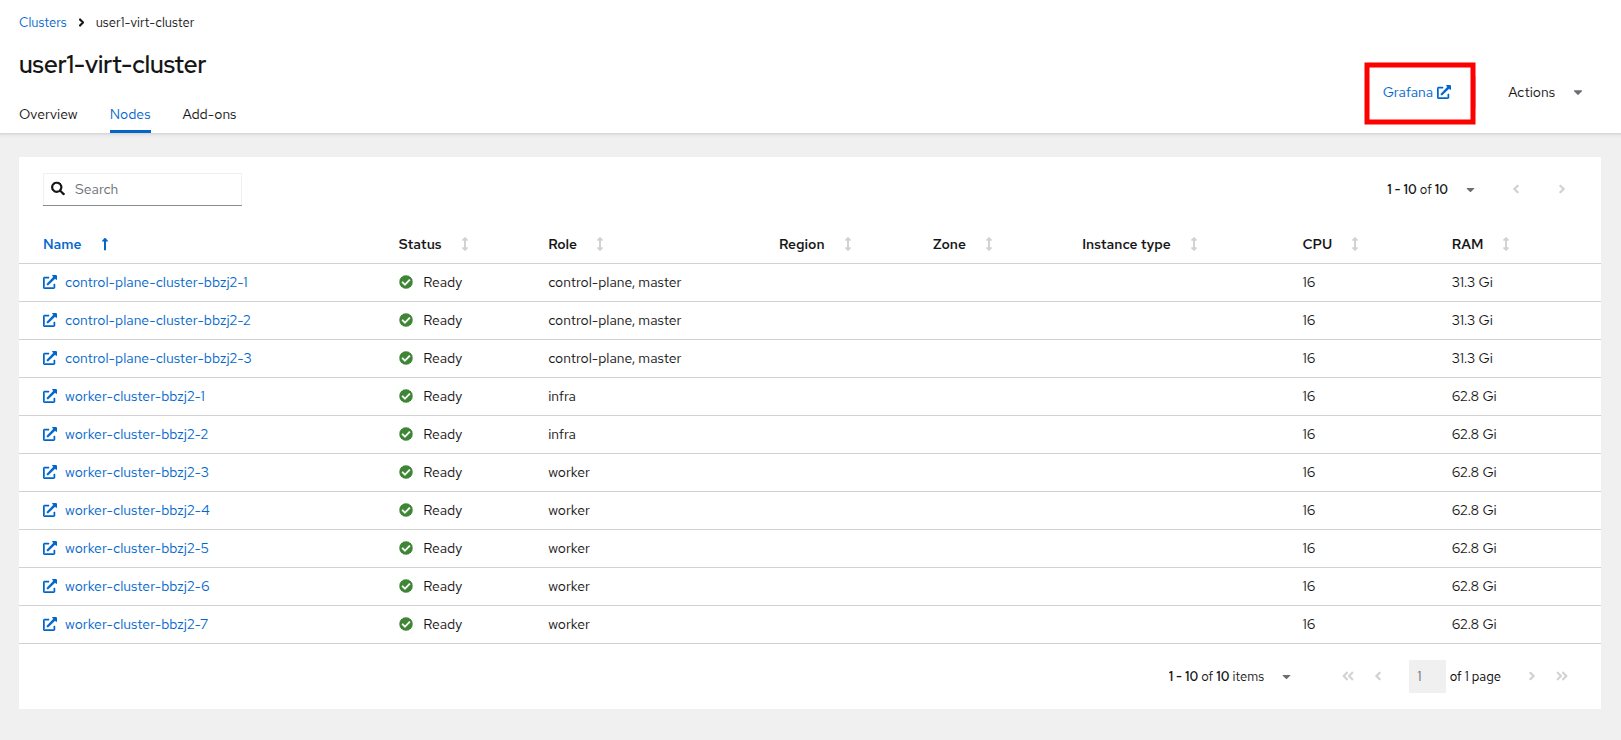 Figure 15. Grafana Link
 -
You will be prompted to login using your OpenShift credentials. Click the Log in with OpenShift button.
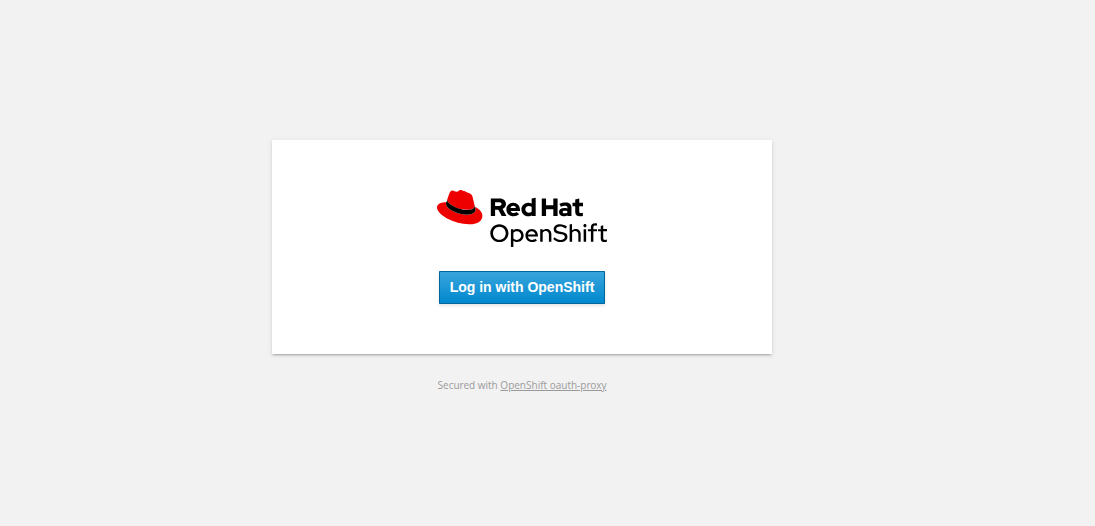 Figure 16. Grafana Login
 -
The OpenShift login will appear and you will need to login with your associated UserX account and its password.
Figure 17. OpenShift Login -
You will land on the ACM - Clusters Overview dashboard where you will see basic info about every cluster in the lab environment that is being managed.
Depending on when you reach this stage, it may take a few moments for data to populate in the graphs. 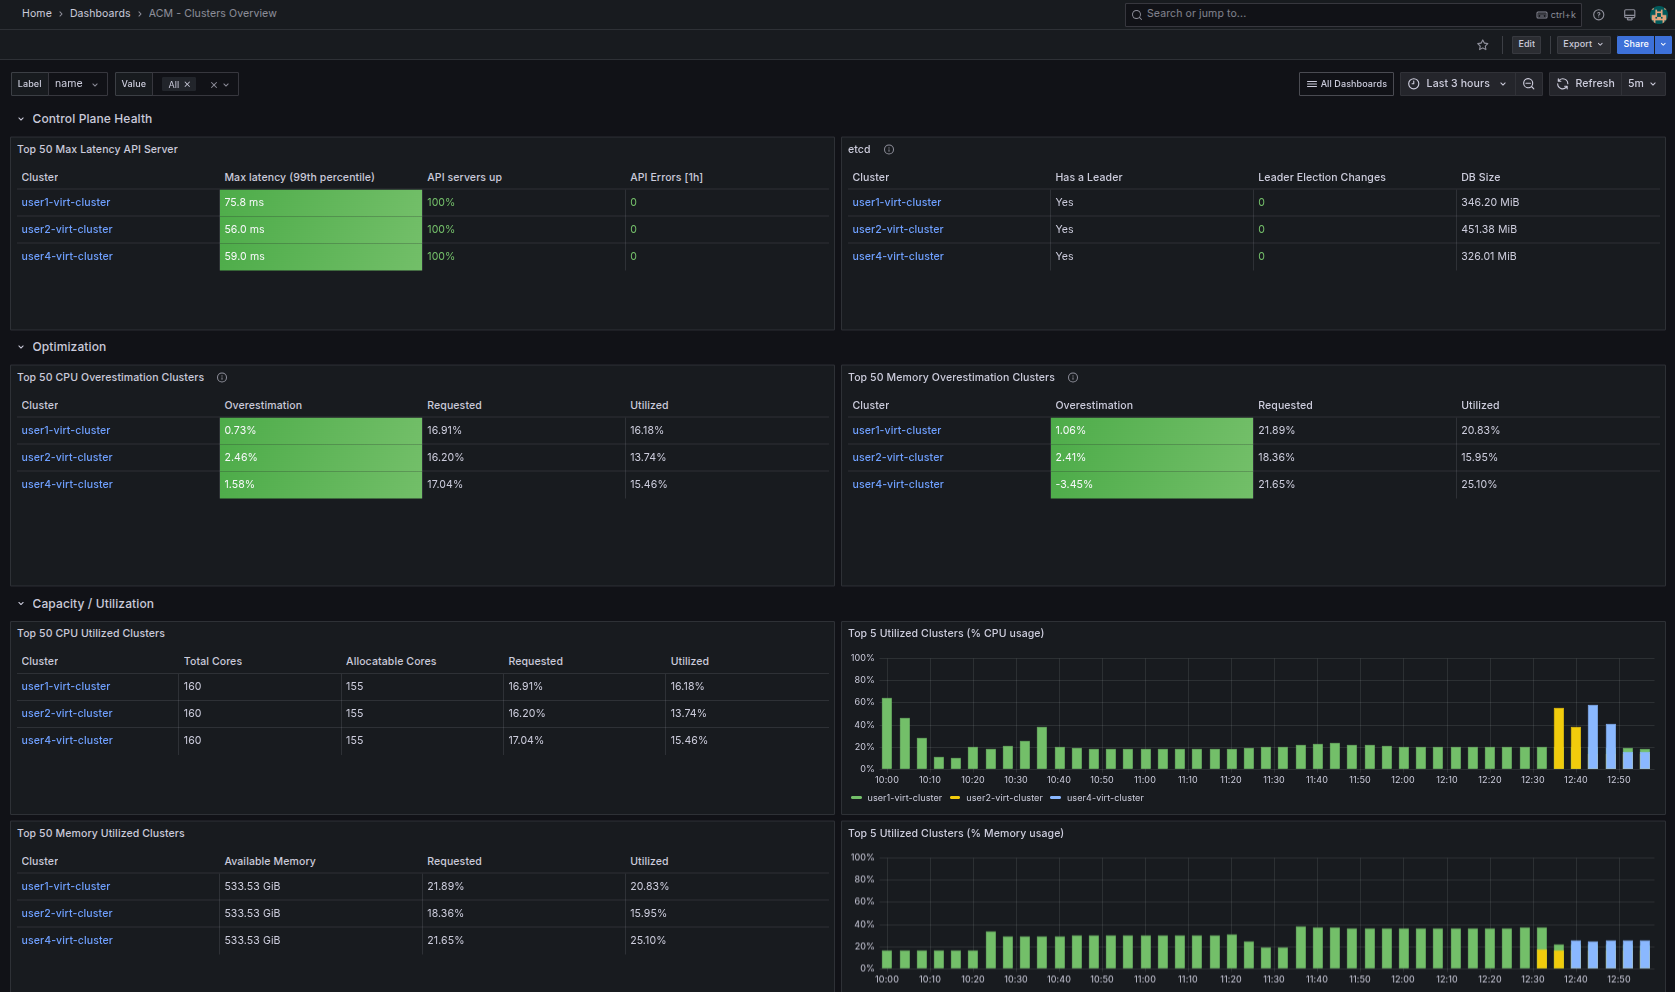 Figure 18. Default Grafana Dashboards
 -
You can click on the button for All Dashboards and select the dashboard for Executive dashboards / Single Cluster View in order to see how RHACM displays information about your cluster’s virtual machine deployments in a centralized manner.
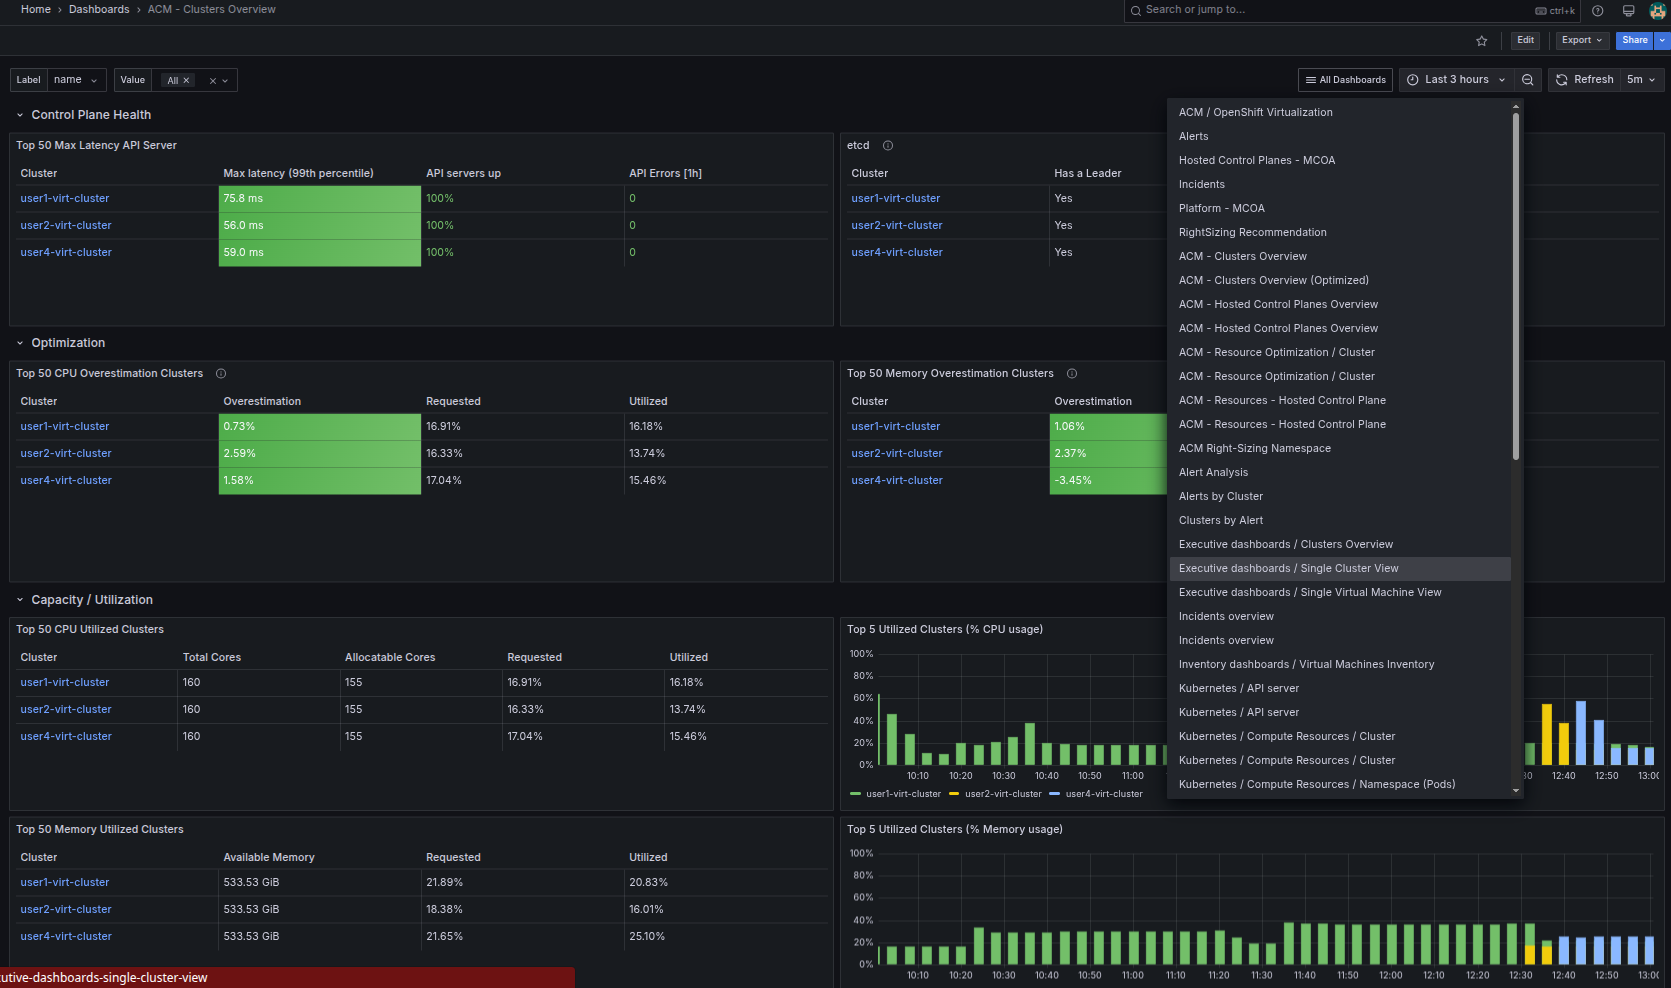 Figure 19. Virt Cluster View
 -
The top panel of the single cluster view presents you with a lot of handy information about the virtual machine workloads on your cluster, including the total number of virtual guests, their current status, and a breakdown of the operating systems reported by each VM.
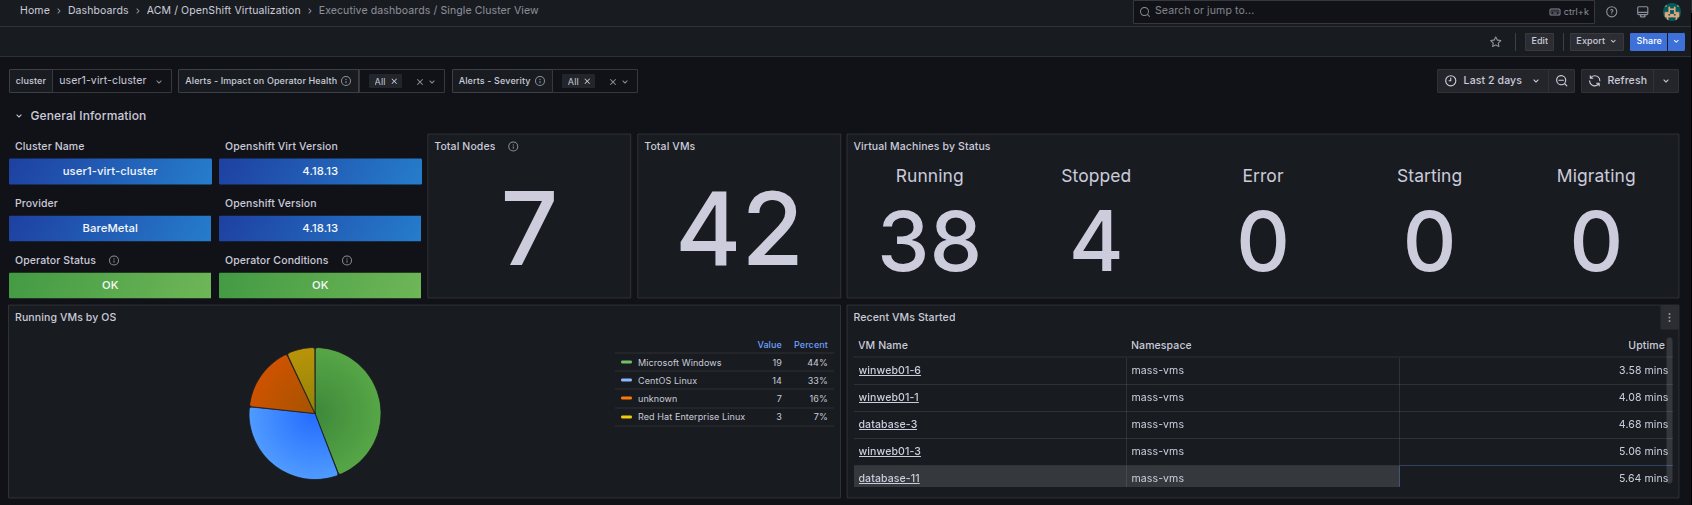 Figure 20. Single Cluster Top
 -
The bottom half of the single cluster view consisted of a number of collapsible panels that shows you important inforformation about resource utilization for your worker nodes and the virtual machines in your cluster. Click on CPU Utilization to expand it down and take a look. You can also reset the time window for collected stats with the drop down menu in the corner.
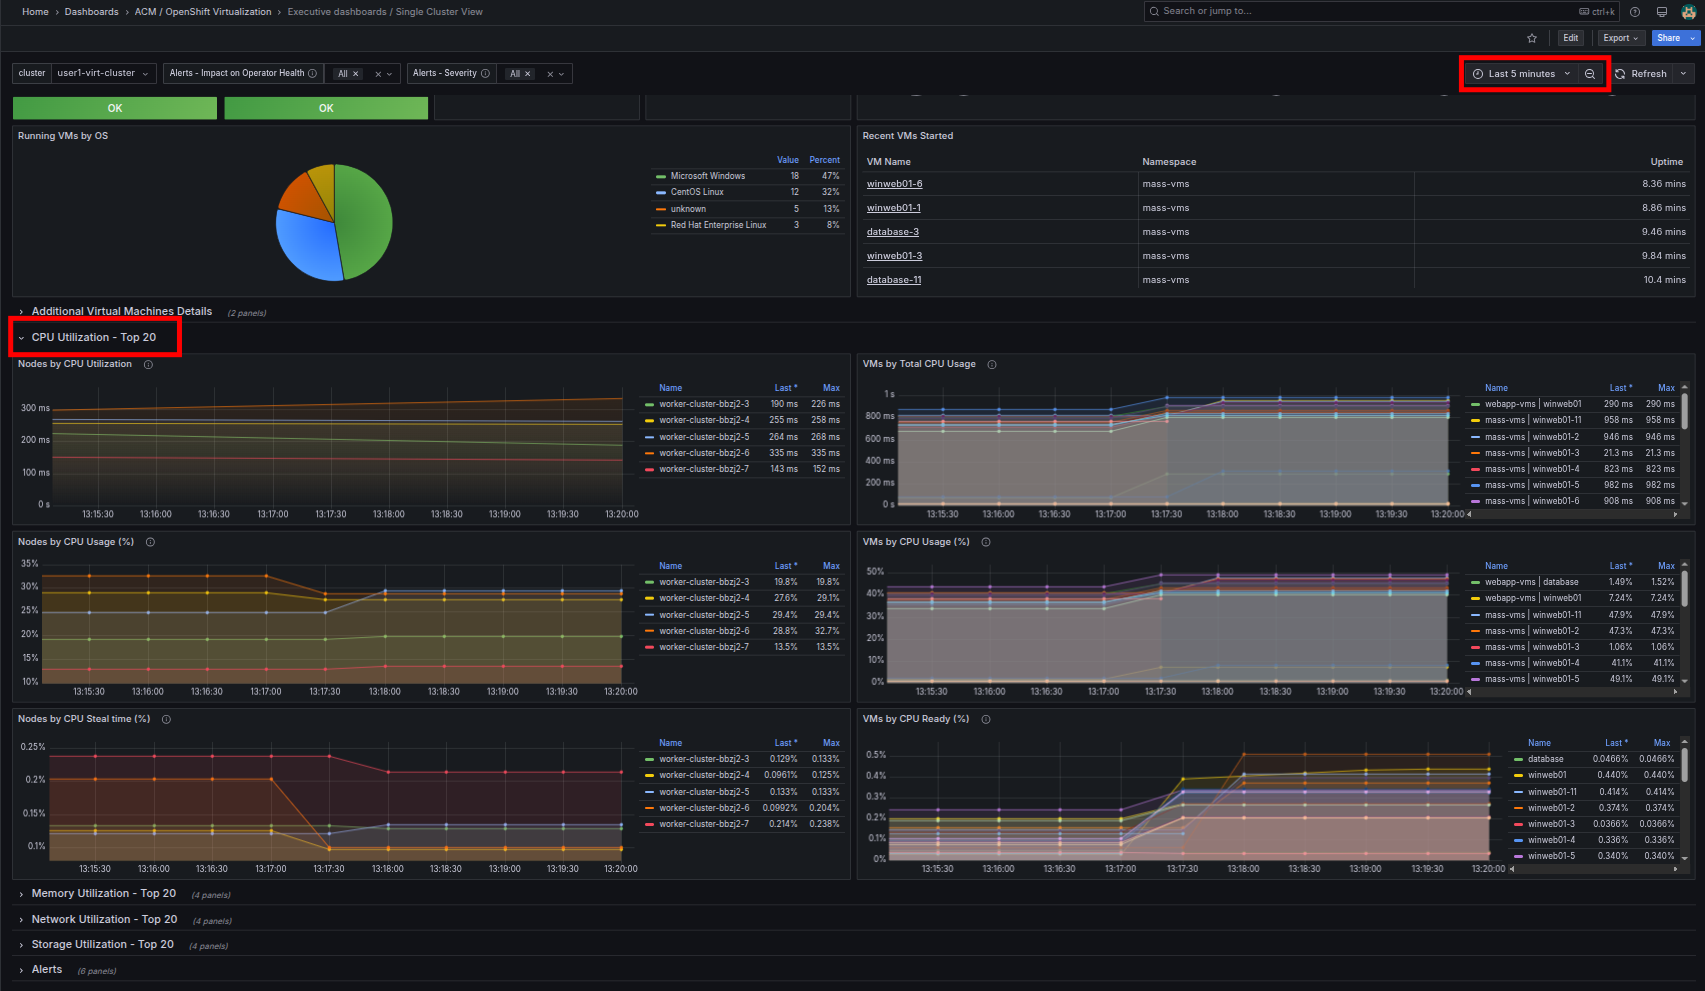 Figure 21. Single Cluster Bottom
 -
When you are done exploring the single cluster view, you can close that tab.
-
You should now be back on the ACM - Clusters Overview page where you can select the All Dashboards button again and this time select Executive dashboards / Clusters Overview so that you can see a view of your entire multi-cluster estate.
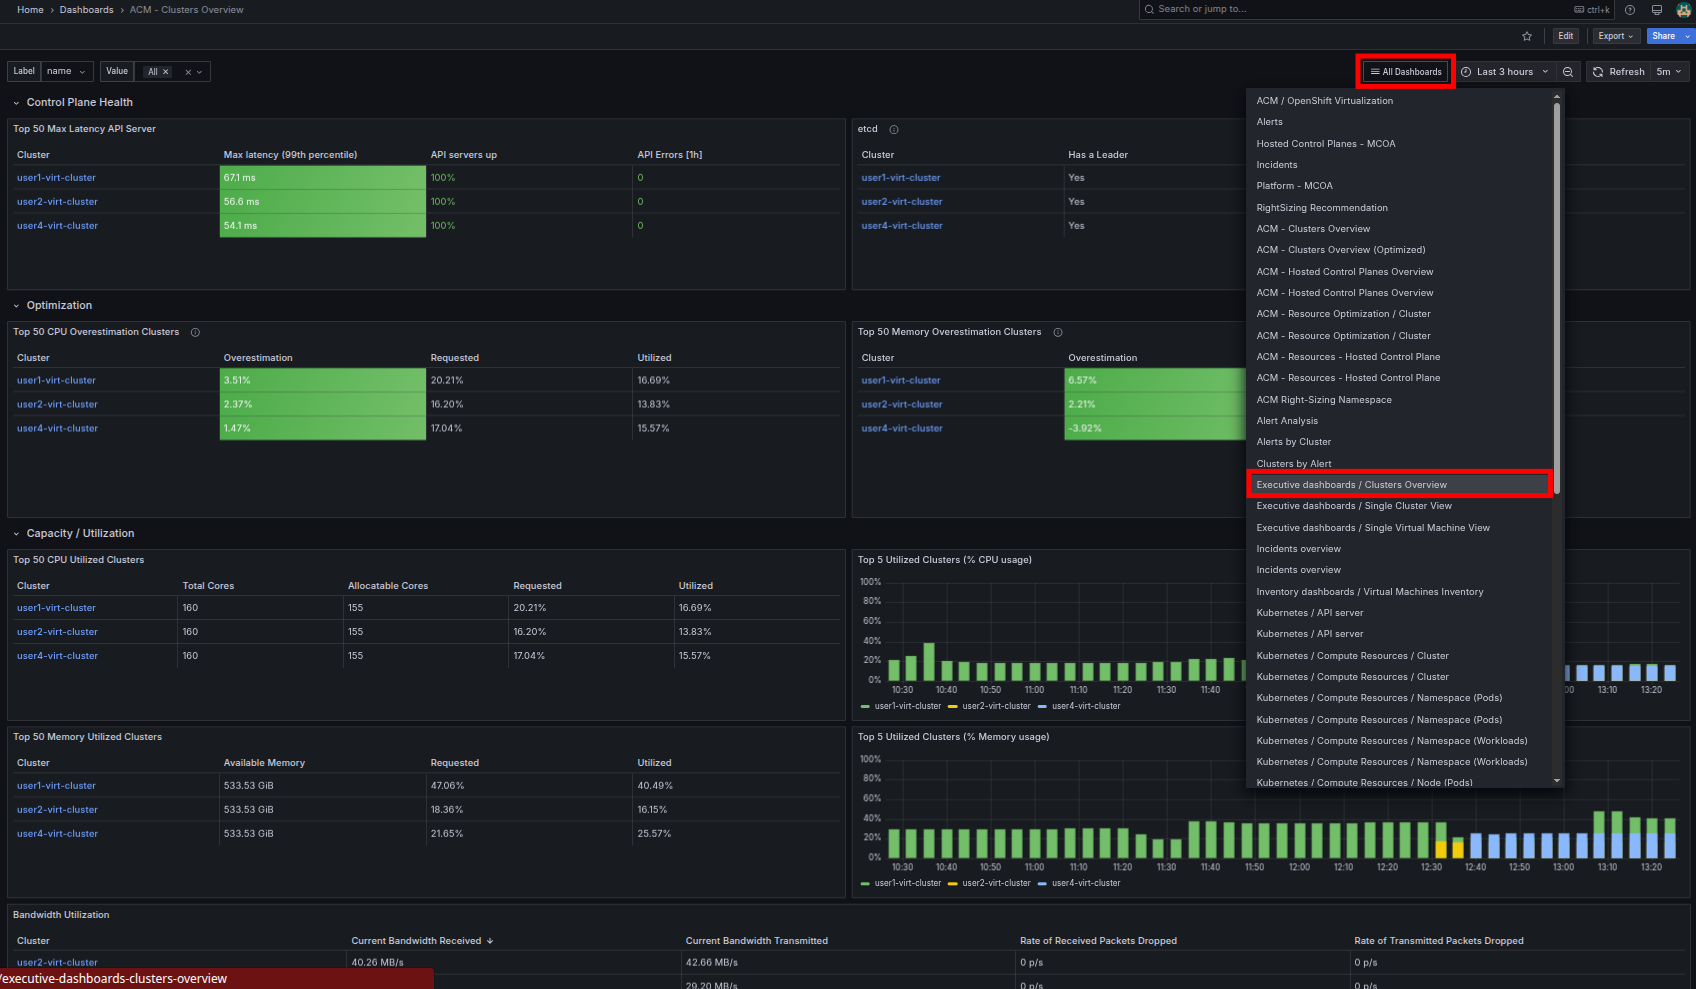 Figure 22. Multi Cluster View
 -
You will find that this dashboard presents information on each of our clusters, the total nodes available, the total number of virtual machines, and the status of those virtual machines across each cluster. Also with warnings, guest OS summaries, and resource utilizations just as before, but on a larger scale.
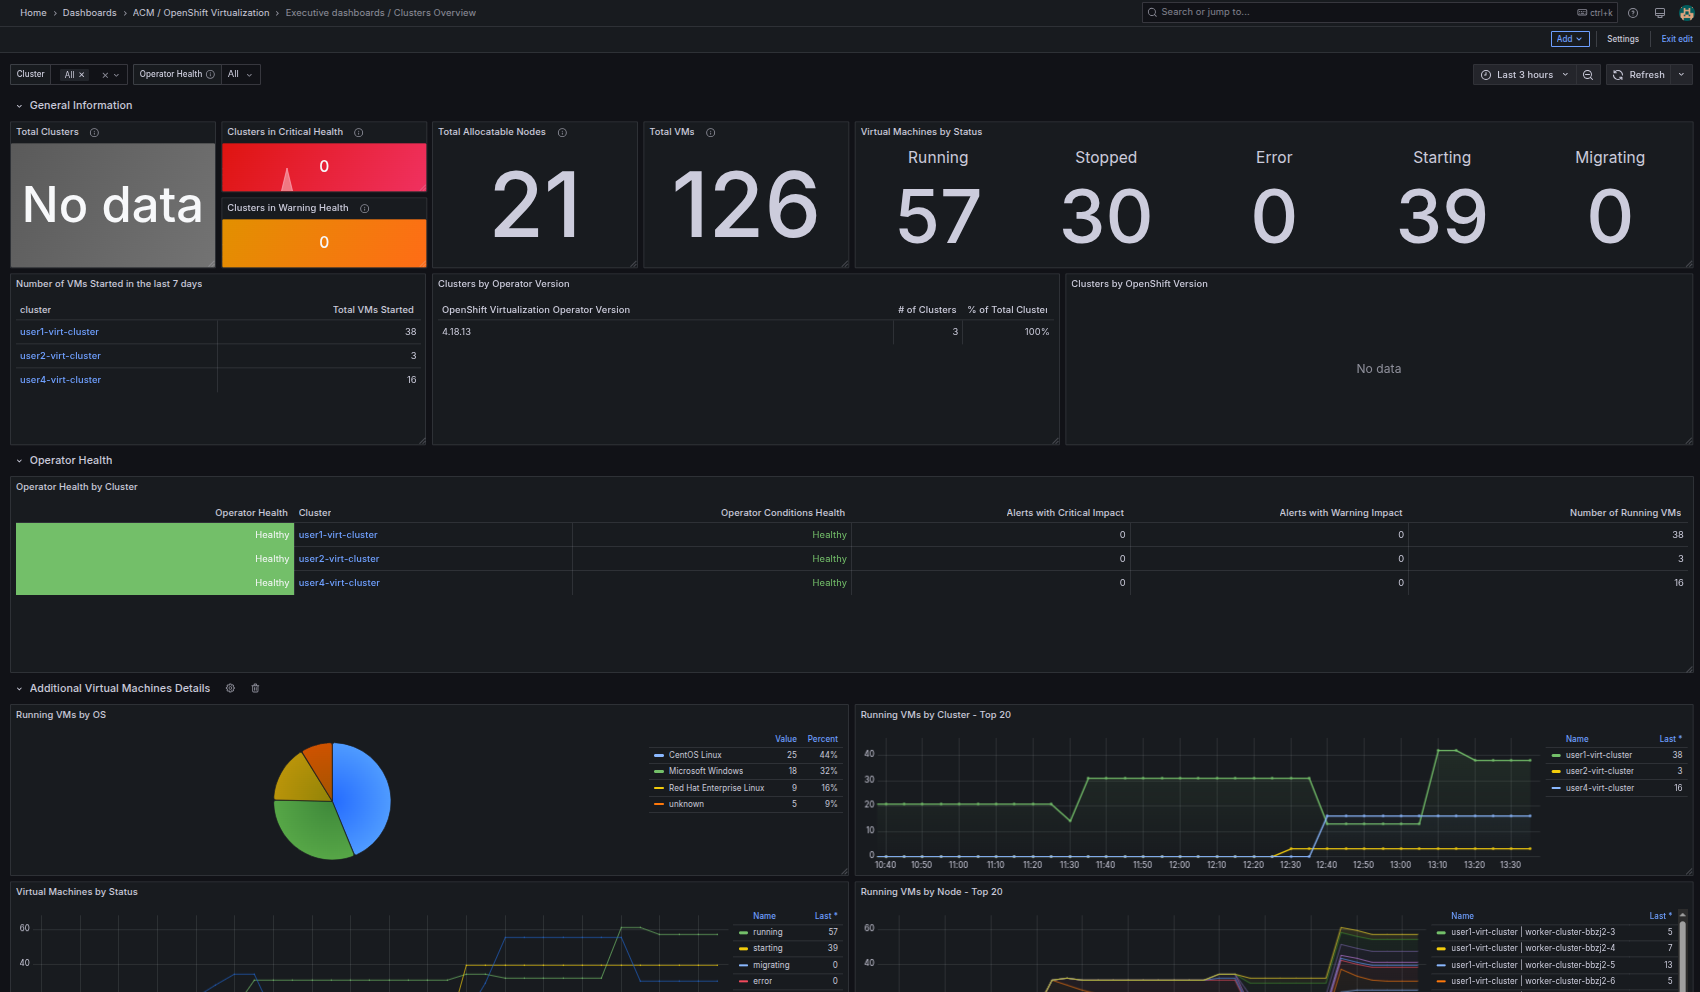 Figure 23. Multi Cluster Dashboard
Now that we know how to observe the status of our virtual estate across a multicluster environment, lets see how we can manage it.
| You may now close the tab where Grafana launched and return to the RHACM console |
Manage VMs From RHACM
-
Starting with the left side menu, click on Infrastructure followed by Virtual machines.
 Figure 24. Left Side Menu
 -
You will be brought to a page that lists all of the virtual machines that RHACM can currently see.
-
The columns present help you sort and identify specific virtual machines by their Name, Cluster, Namespace, or Node.
-
The list of columns is fully customizable, and so are the number of machines displayed on the page.
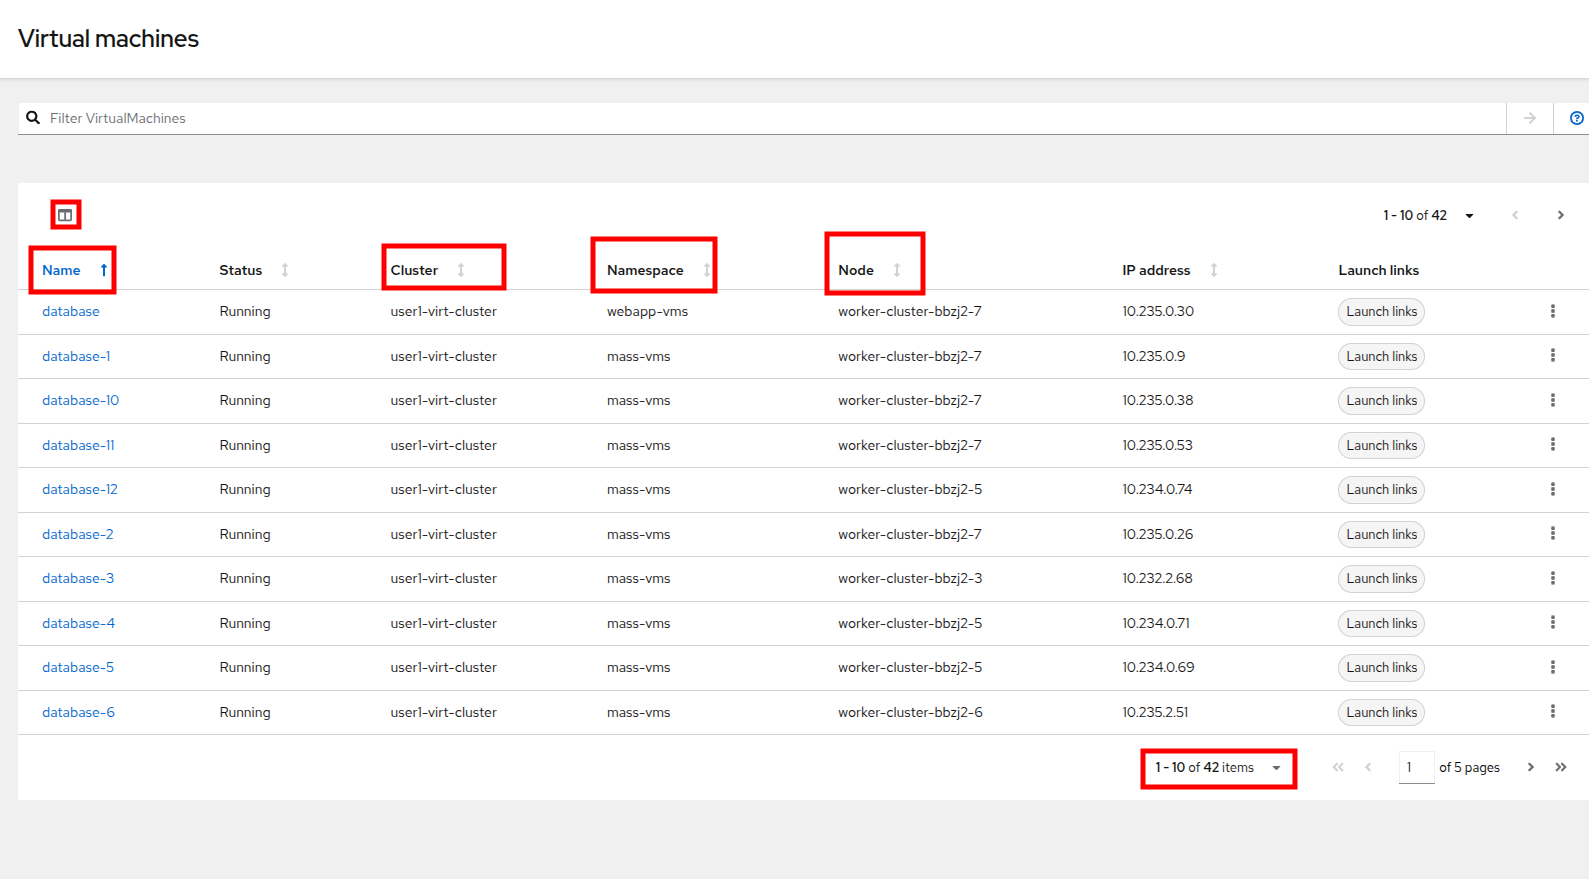 Figure 25. Virtual Machine List
 -
The Launch links button provides you with shortcut links that open a new tab to either the virtual machine details page, the virtual machine console, or the observability metrics, all from one easy access point.
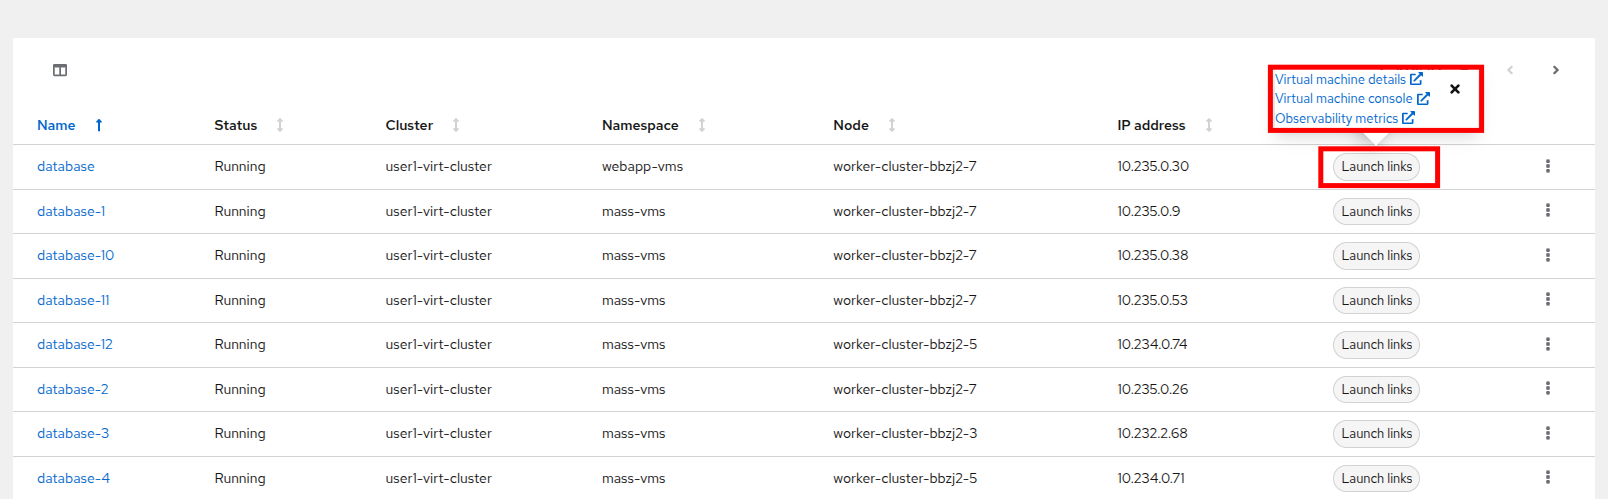 Figure 26. Launch Links
 -
While clicking the Virtual machine details link from Launch links opens the VM management in a new tab, if you had to manipulate a number of VMs quickly it would be much nicer to do it directly from RHACM.
-
You can do exactly that by clicking on the 3-dot menu on the right side of each VM, and you will see the list that appears is almost exactly the same as the actions list you see on the Virtual machine details page.
-
You can use this menu to stop/start/restart a VM, take a snapshot, or edit the machine’s definition via YAML.
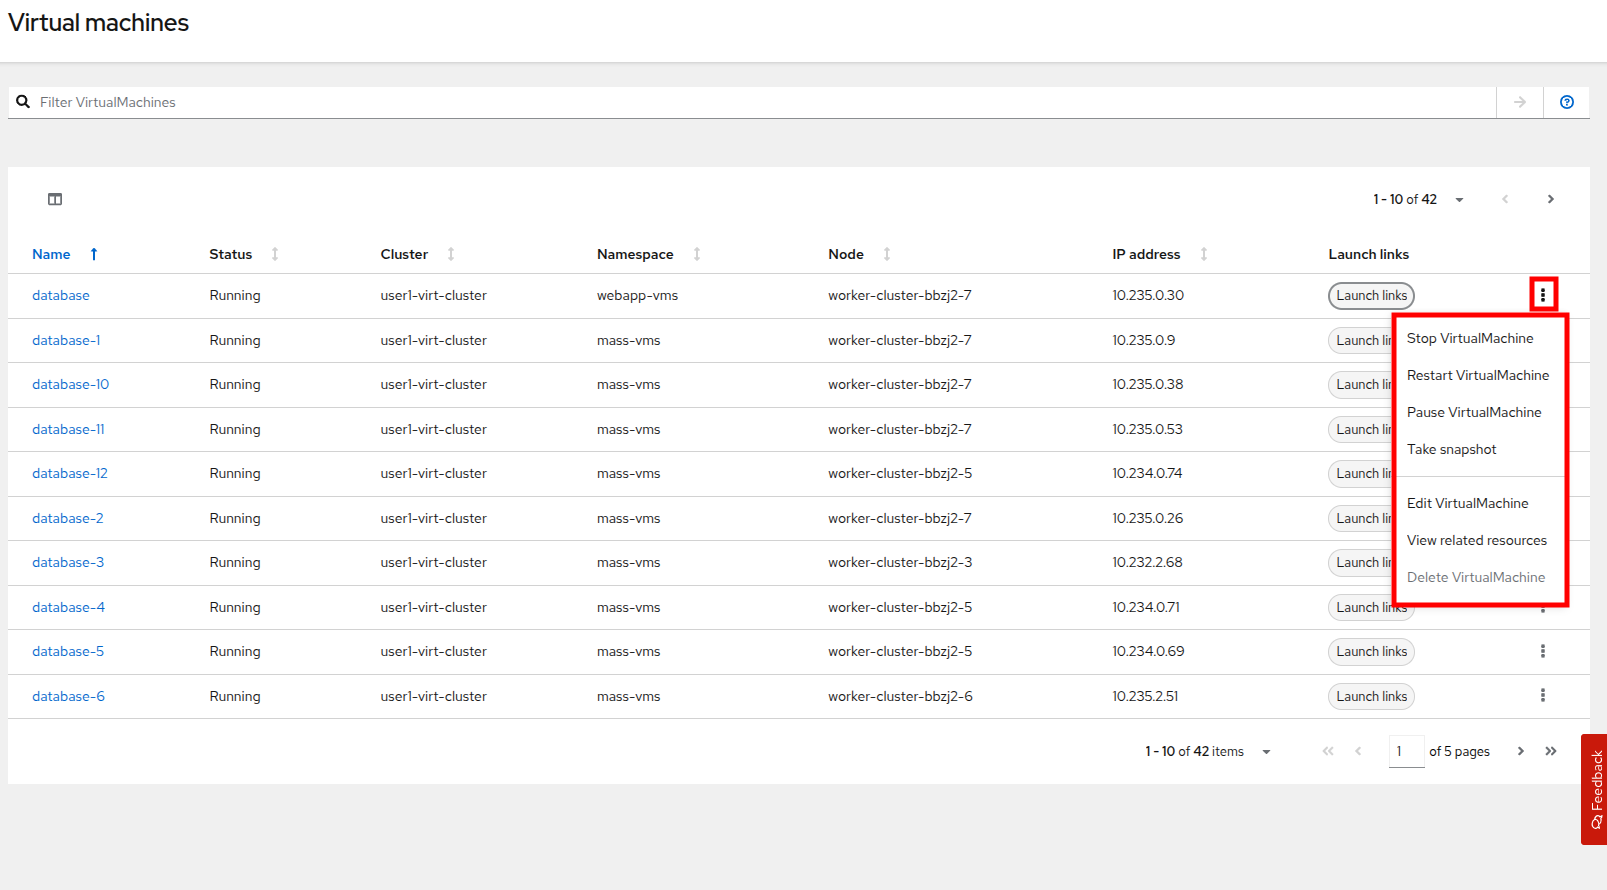 Figure 27. Virtual Machine Management
Summary
In this module we learned how to discover, observe and manage our virtualized workloads using Red Hat Advanced Cluster Managment for Kubernetes (RHACM). The content in this module is just the tip of the iceberg when it comes to what RHACM can do in a multicluster OpenShift Virtualization environment. As mentioned before Ansible automation can be leveraged to perform automated actions across multiple clusters, and powerful tools like GitOps can be leveraged to deploy sets of VMs and ensure that cluster configurations are kept in sync across the entire virtual estate.