AI-Assisted Development
Now that you have your model endpoint and API key, you can proceed to your work as an AI developer. Your organization leverages OpenShift Dev Spaces for your development team to develop and collaborate all in one OpenShift cluster. And now, you have been given access to a Models as a Service endpoint to enhance your work.
The impact of AI code assistants
You’re not just going to write code - you’re going to collaborate with an AI-powered teammate.
Modern code assistants can:
-
Understand Full Project Context: Assistants like Continue, GitHub Copilot, and Cursor can read across files and directories, understanding how your code fits together.
-
Edit code with Natural Language: You can describe a change—like "add error handling here" or "convert this to async"—and AI-powered assistants can apply that change intelligently.
-
Proactively Suggest Improvements: They catch bugs, highlight inefficiencies, and recommend best-practice patterns.
-
Automate Tedious Tasks: From generating unit tests and docstrings to scaffolding boilerplate or renaming variables across a project—they take care of the grunt work so you can focus on logic and design.
These assistants don’t just write code - with the right guardrails and knowledge in place, they can understand your project and help you build better software faster. And the best part? Most of them work seamlessly inside popular IDE’s like Visual Studio Code, so you don’t need to switch tools to get started.
Let’s get set up.
Step 1: Setting up a cloud integrated developer environment (IDE) with OpenShift Dev Spaces
As a developer, your environment should be fast, consistent, and ready to go for your work. That is what OpenShift Dev Spaces delivers: instant access to pre-configured, containerized workspaces — all running securely on your OpenShift cluster.
You could also leverage an exposed model API endpoint in your local environment as a developer, if the model is exposed properly. However, your company has not exposed the model outside of the confines of the cluster, so you are required to work within the environment and not locally.
| Even though the model route information you copied from the OpenShift AI dashboard interface showed as an External endpoint route, there is no external route exposed in this cluster. However, the current MaaS implementation expects external route exposure so this naming is hardcoded into the dashboard. |
Access OpenShift Dev Spaces
-
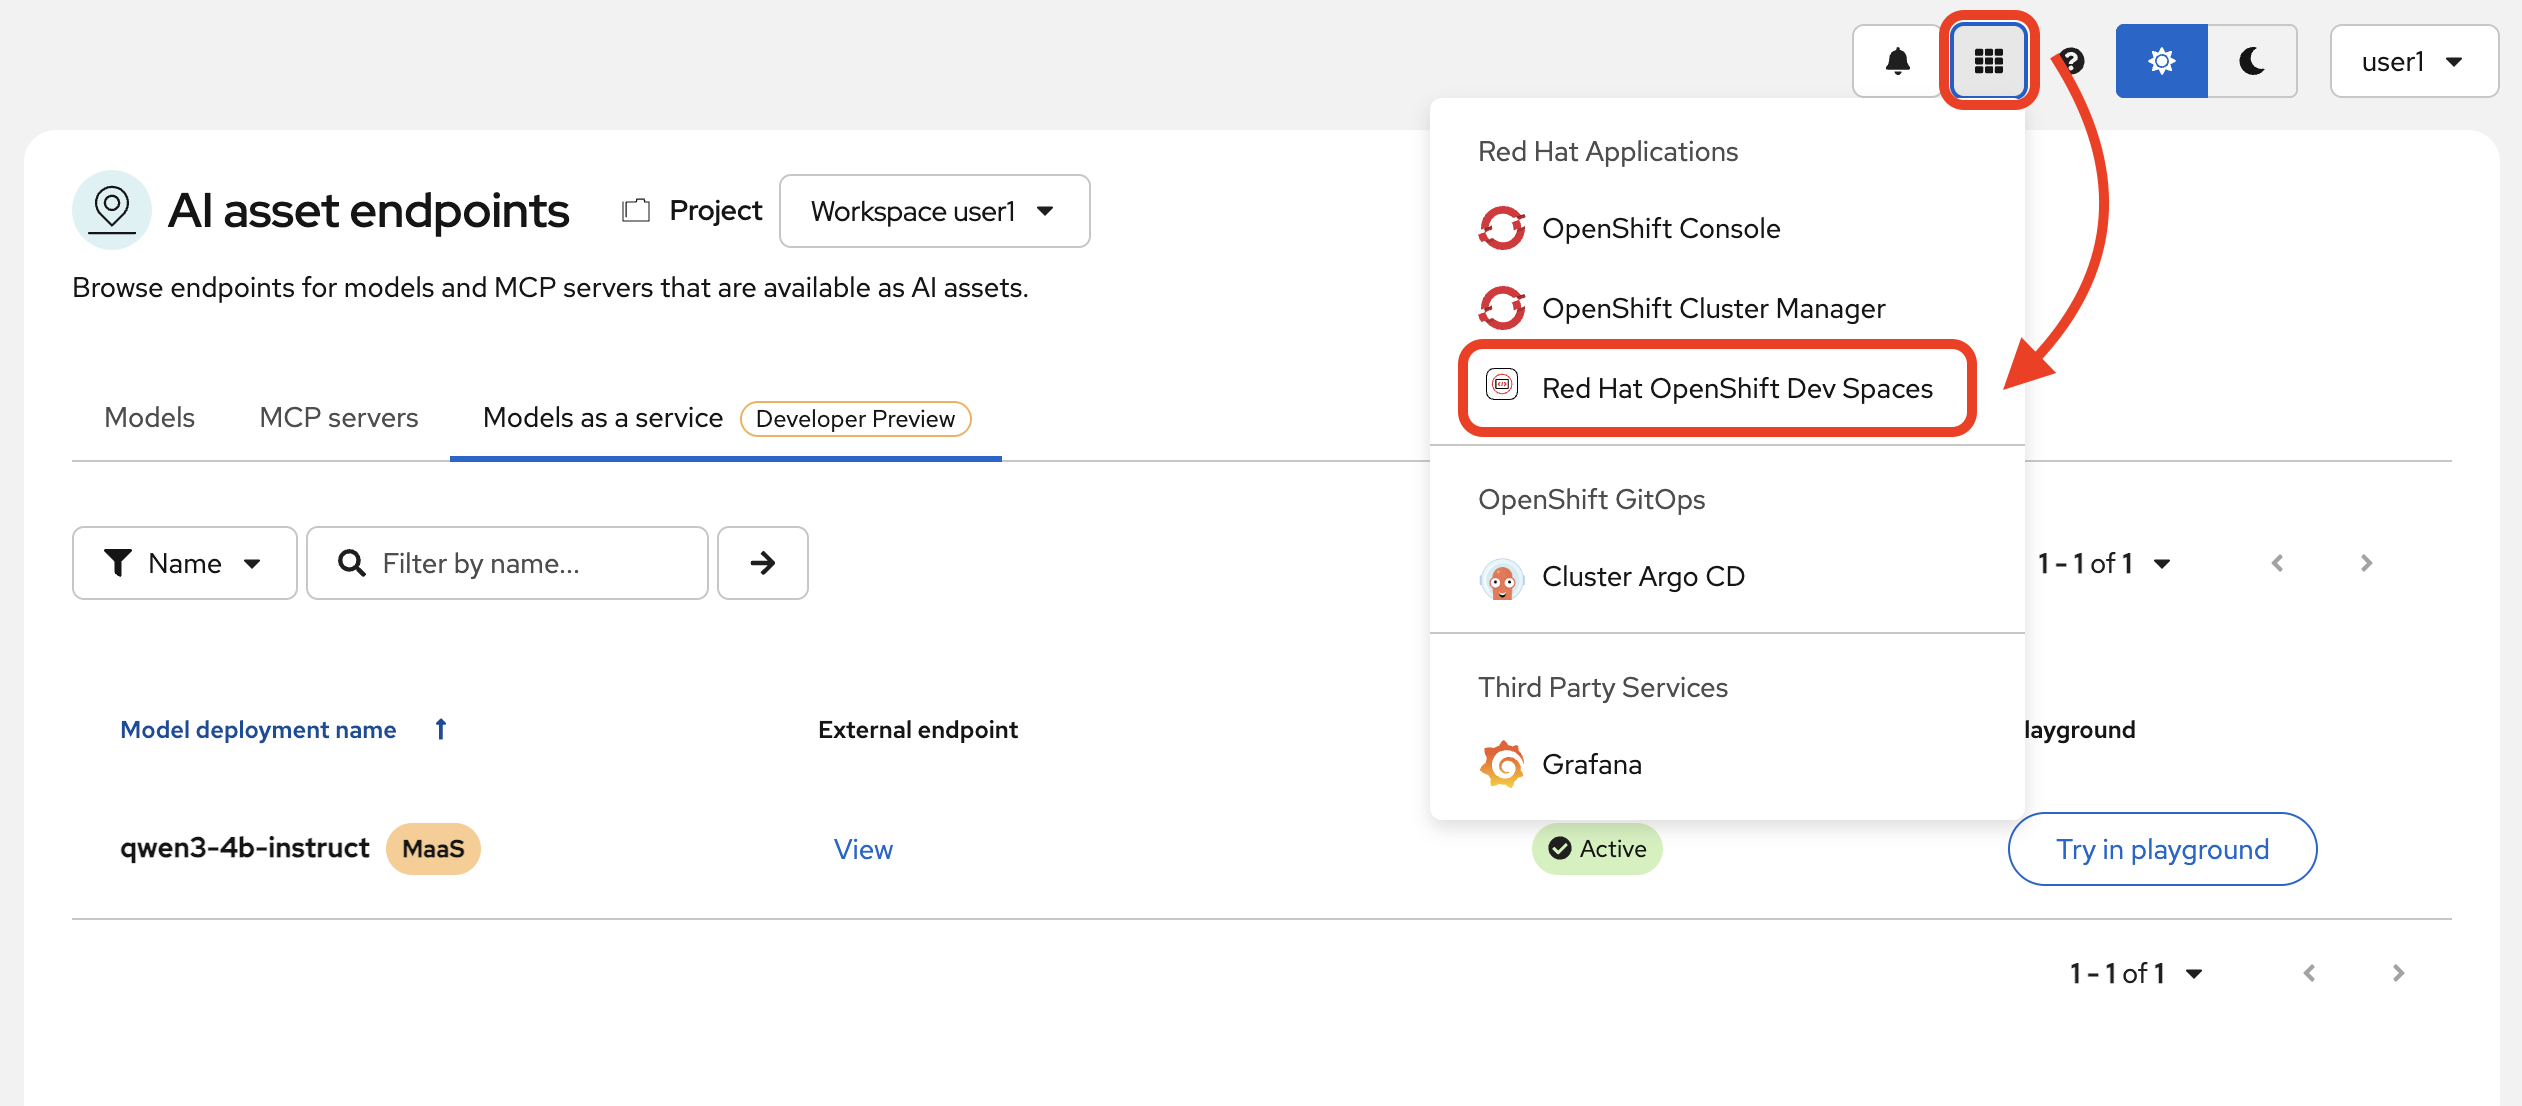
Navigate to the OpenShift Dev Spaces application.
When prompted for your login credentials, repeat the same user login from previous steps.
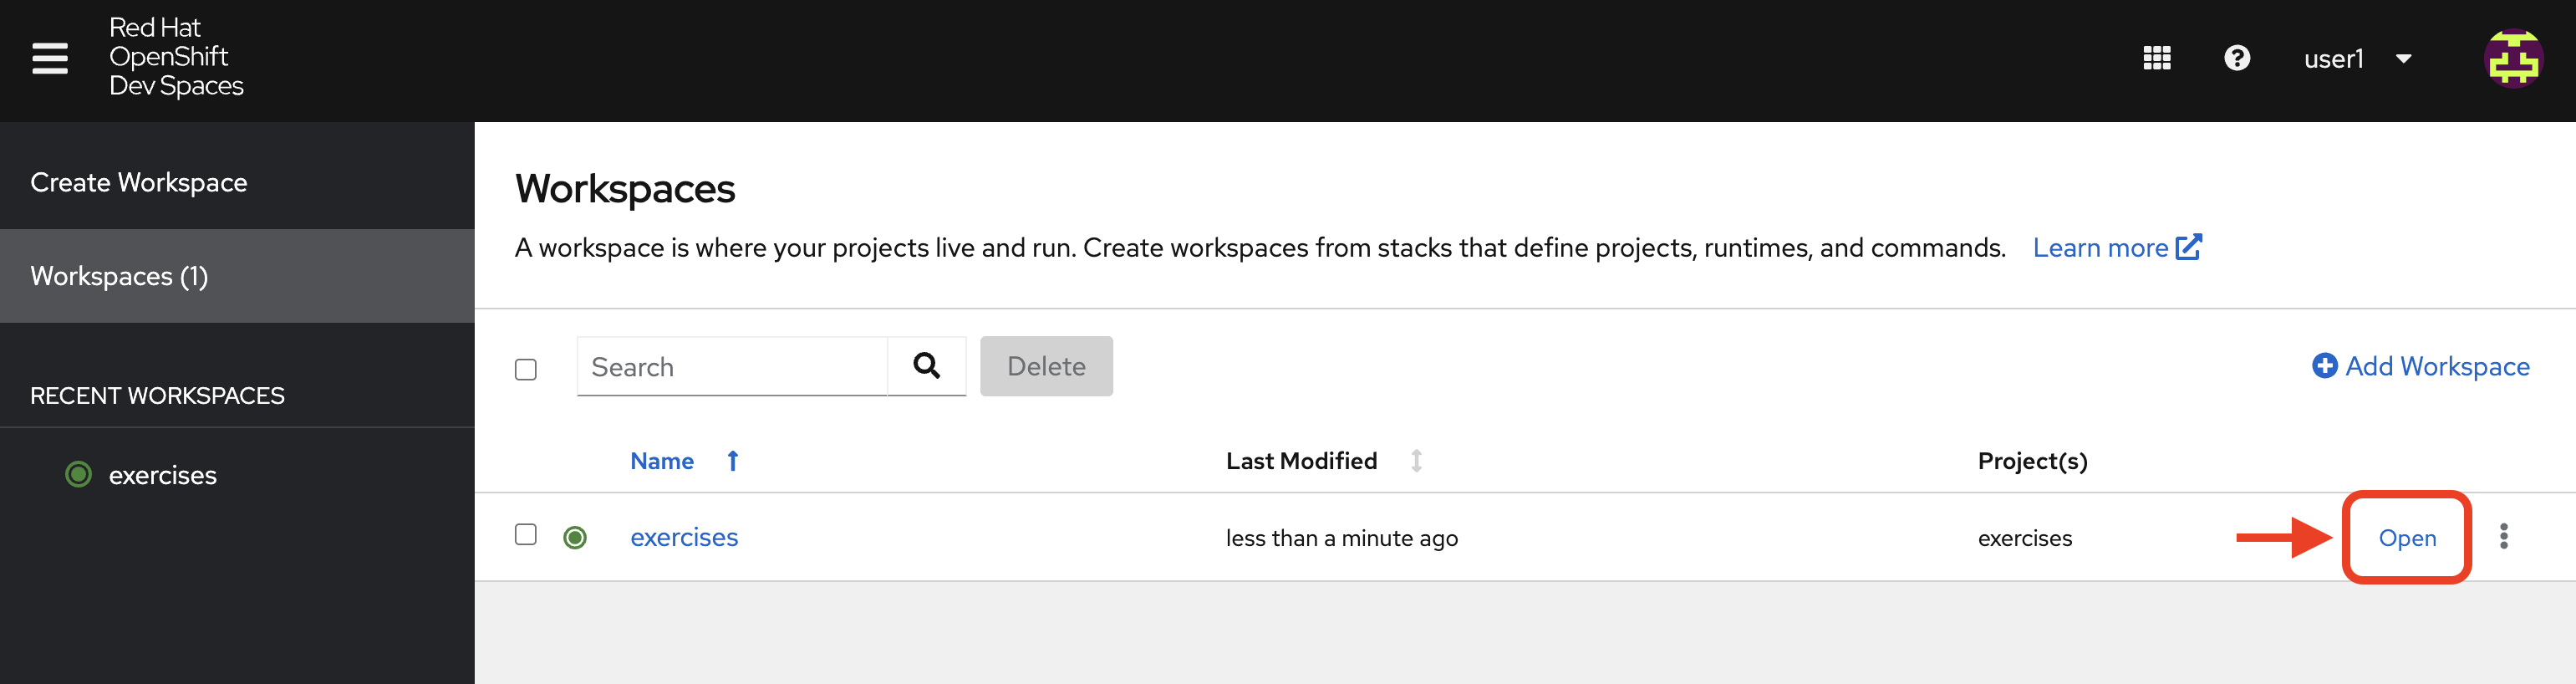
Once authenticated, you will see the OpenShift Dev Spaces central dashboard. We have prepared a workspace for you to access. This is a VSCode IDE workspace with a prepared repository already cloned in and necessary dependencies.
When fully loaded, as indicated by a green dot by the workspace name (this could take a moment), click Open.
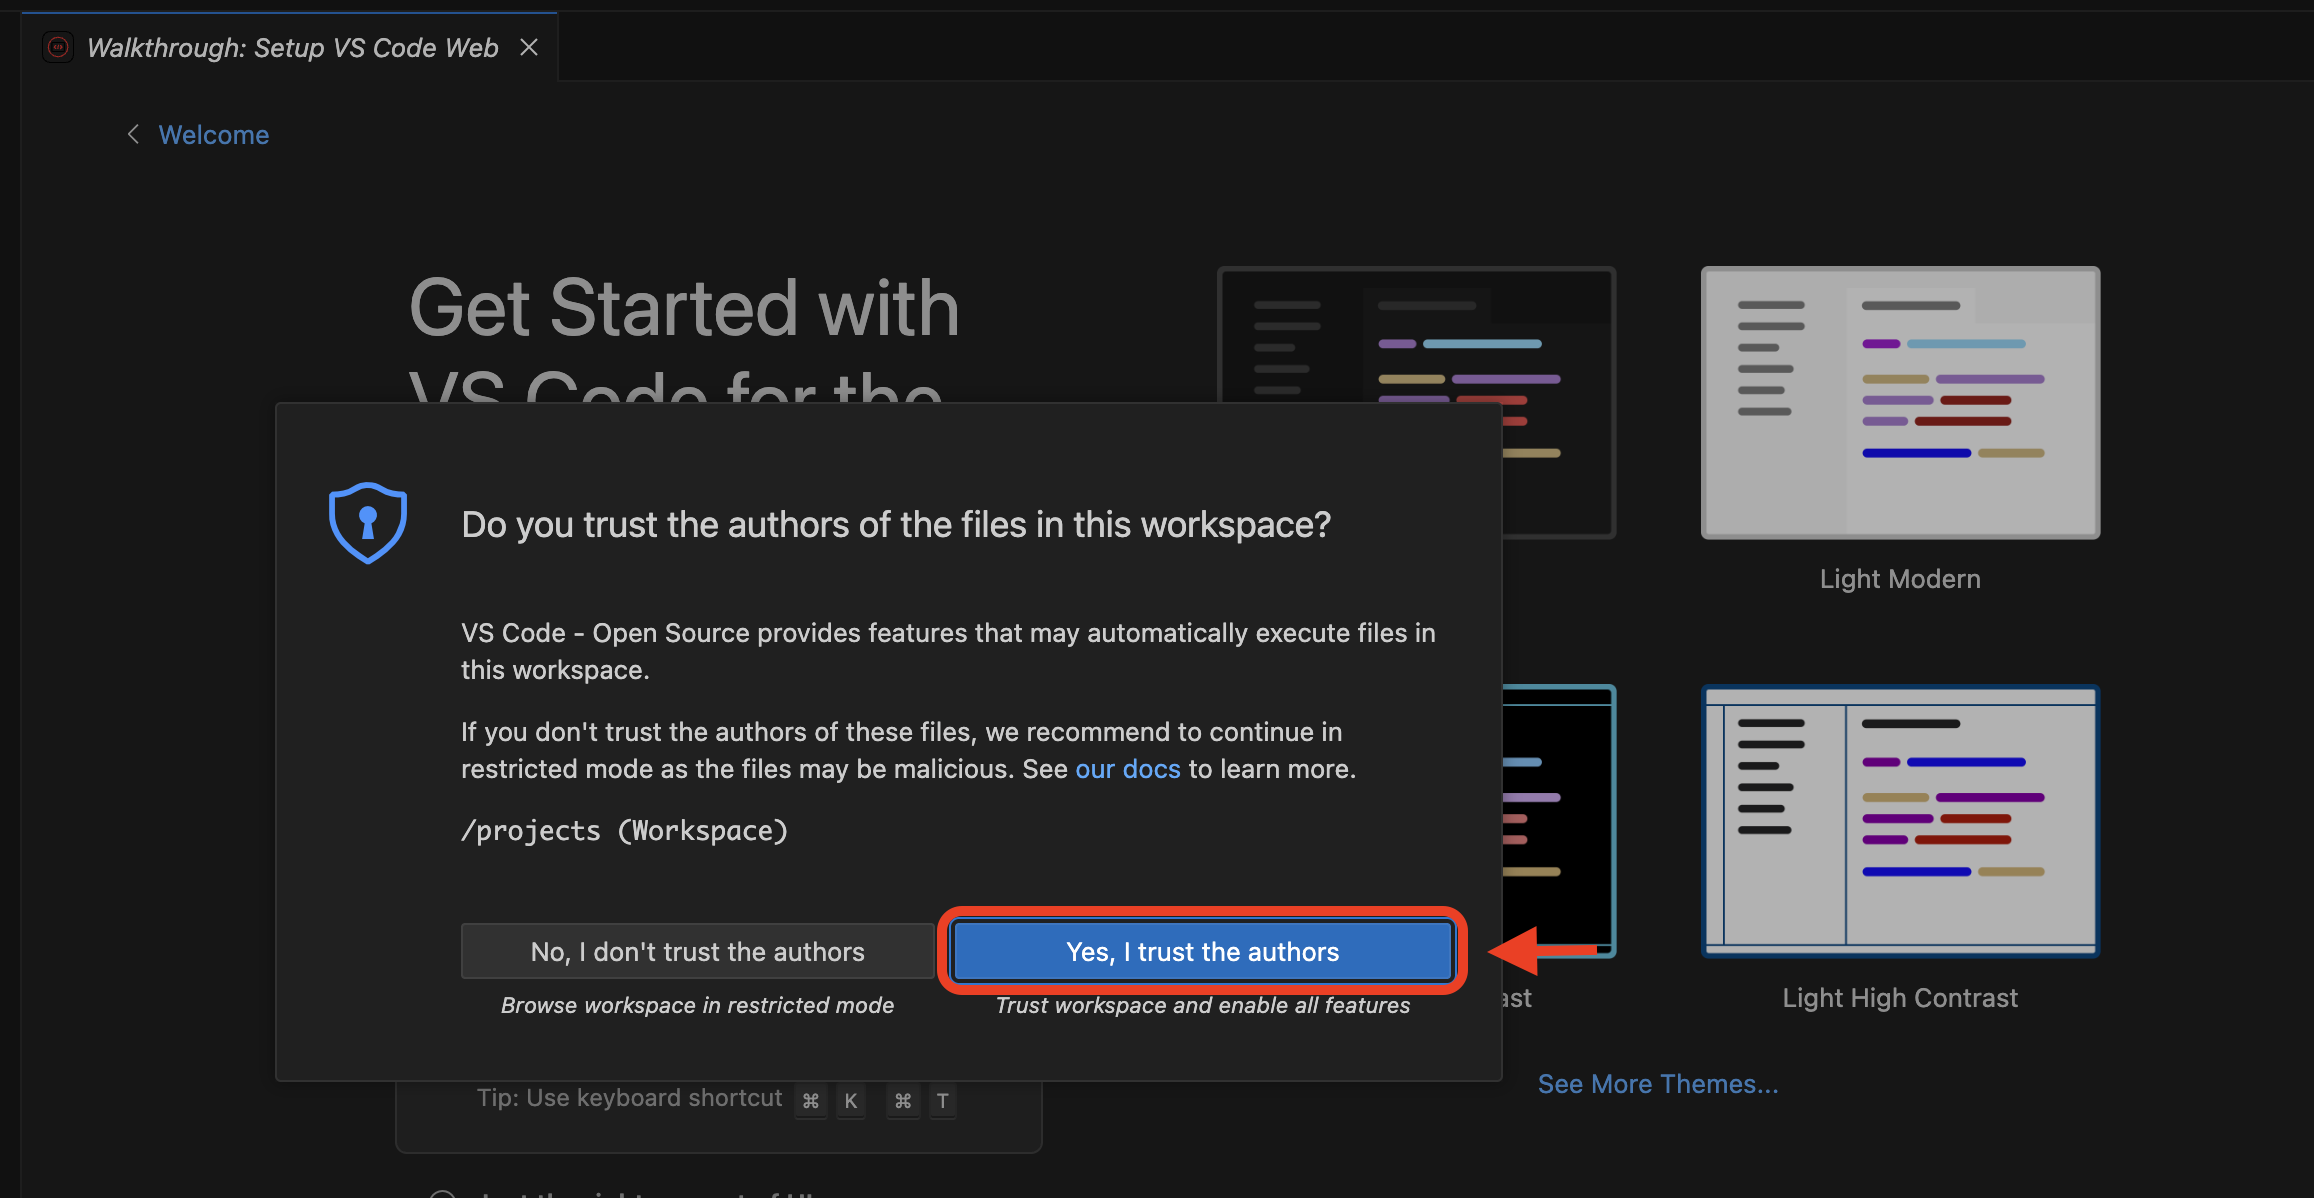
After a moment, you’ll see the VSCode interface running in your browser. If prompted, click "Trust" when asked about the authors. We’re friendly, I promise!
Inside your workspace, you’ll find the aforementioned cloned GitHub repository. This is where you will build and refine with some AI assistance. The only thing we need to configure now is our code extension.
Before we dive into the code, let’s meet Continue.
Step 2: Add Continue, Your Coding Teammate
Continue is an open-source AI code assistant that integrates seamlessly into VS Code. Unlike traditional code completion tools, Continue provides an interactive chat interface where you can have natural conversations about your code. You can ask Continue to perform actions like:
“Add logging to this function”
“Generate a unit test for this file”
“Refactor this into smaller components”
“Explain what this code does”
Continue will execute these requests directly in your editor, with full awareness of your codebase and project context.
What makes Continue particularly powerful is its flexibility - it supports custom model endpoints, making it perfect for connecting to your private enterprise models. As an open-source solution, Continue gives you complete control over your AI coding workflow.
| Continue is an example of an AI-powered coding assistant for this workshop experience. You can easily imagine how this could work with any other desired code assistant extensions that allow you to customize the model used. |
Install Continue
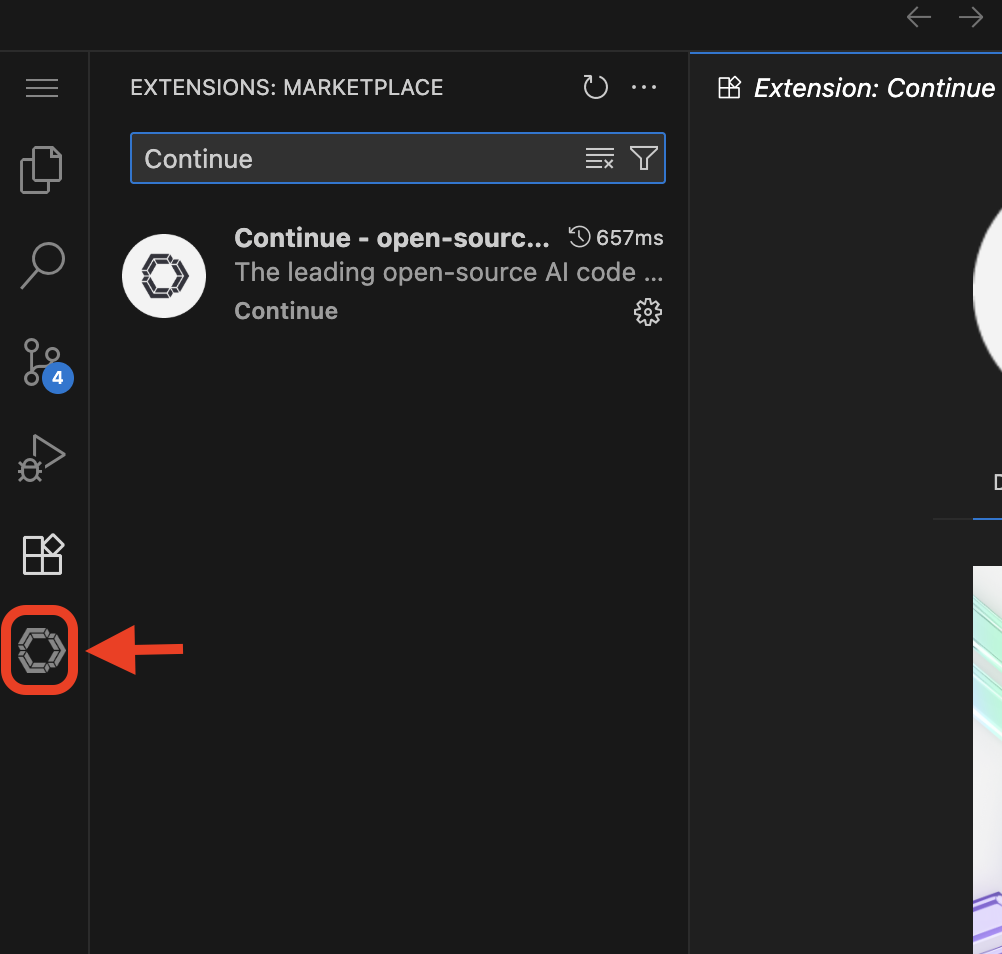
Select the bottom navigation item on the left-hand side to open up the extensions marketplace.

In the search bar, search for Continue and click Install.
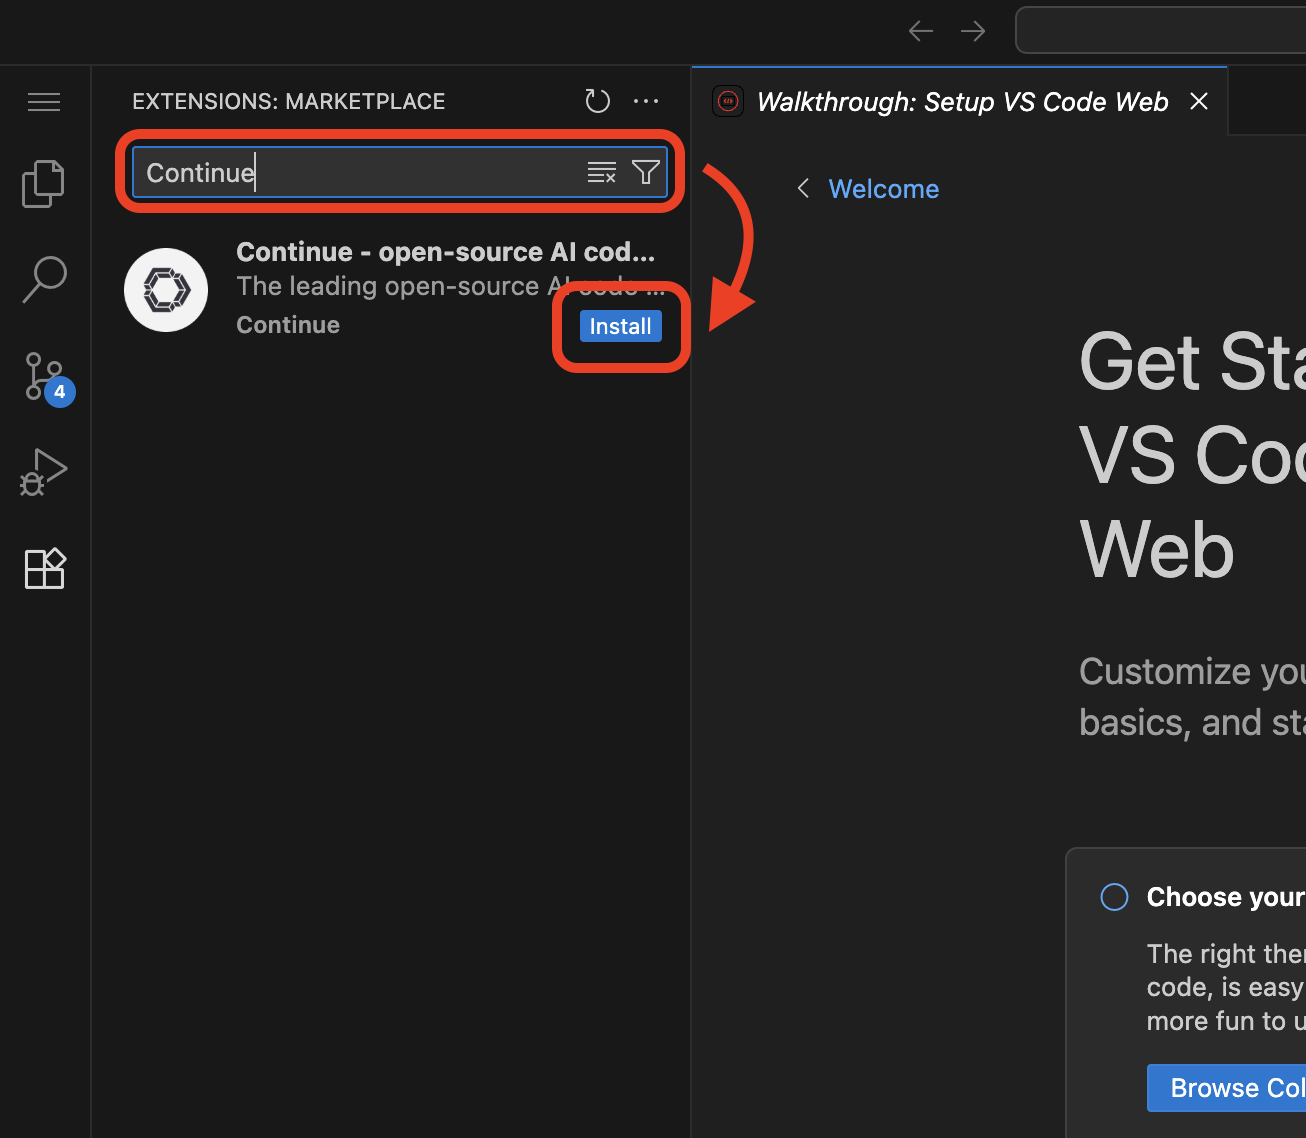
When prompted, trust publisher and install the extension.
You’ve now installed Continue - next, let’s connect it to your private model.
Step 3: Connect Continue to Your MaaS Model
Navigate to the Continue sidebar icon in the left-hand side navigation panel:
| Expand the Continue app sidebar by dragging the border over. |
We will do two things in this module:
-
Connect to our MaaS model
-
Use our model’s "brain" to help us understand and deploy a fun game, and then work on an impactful Kubernetes deployment.
In order to connect our model to the Continue code extension we must provide the extension our model’s endpoint URL and API key from our MaaS application in the previous module.
| If needed, go back to the OpenShift AI dashboard to the AI asset endpoints section to retrieve the credentials. |
Enter MaaS endpoint details
Click on the searchbar at the top of the VSCode window:

Search for the configuration file of the Continue extension:
~/.continue/config.yaml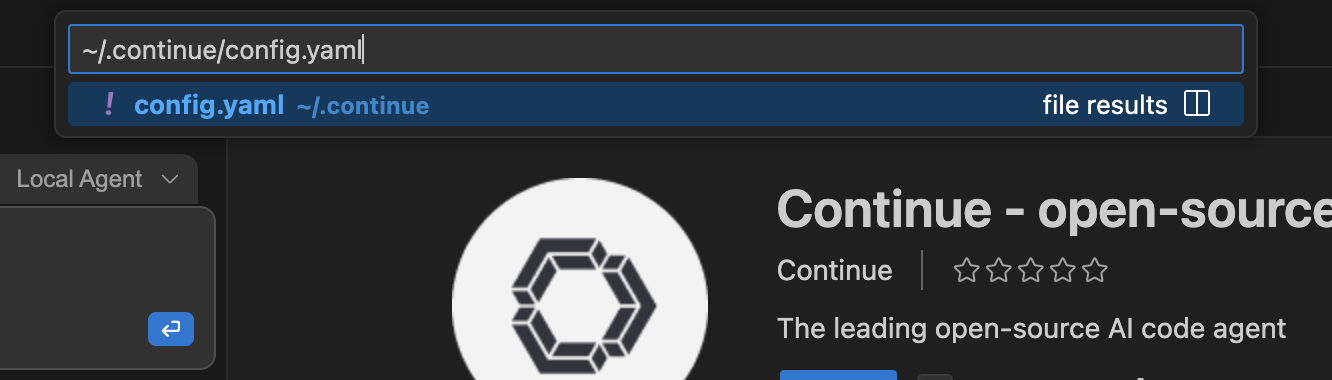
Hit Enter.
This will open the config.yaml file. Delete the file contents and replace with the following:
name: Local Assistant
version: 1.0.0
schema: v1
models:
  - name: Qwen3-4B-Instruct
    provider: openai
    model: "qwen3-4b-instruct"
    apiBase: "YOUR_MAAS_ROUTE/v1"
    apiKey: "YOUR_API_KEY"
context:
  - provider: code
  - provider: docs
  - provider: diff
  - provider: terminal
  - provider: problems
  - provider: folder
  - provider: codebase
Replace the apiBase URL with your actual MaaS endpoint URL and YOUR_API_KEY with the API key from your MaaS application. Ensure you retain the v1 at the end of the path.
|
For example:
-
apiBase:
https://granite-model-maas.apps.example.com/llm/qwen3-4b-instruct/v1(Note thev1at the end of the URL) -
apiKey:
your-actual-api-key-here
Reference the complete configuration documentation here: Continue Documentation
When the model is properly configured, you will see the model name, Qwen3-4B-Instruct in the Continue chat sidebar.
Go ahead - test it out and chat a bit!
If the container restarts, which will prompt you to have to reload the VSCode workspace window, you will need to re-edit the config.yaml file with the model configuration details.
|