Creating a Hosted Cluster on OpenShift Virtualization
You can use the hosted control plane command line interface, hcp, to create an OpenShift Container Platform hosted cluster. The hosted cluster is automatically imported as a managed cluster.
Size guidance
See the following highly available hosted control plane requirements, which were tested with OpenShift Container Platform version 4.12.9 and later:
-
78 pods
-
Three 8 GiB PVs for etcd
-
Minimum vCPU: approximately 5.5 cores
-
Minimum memory: approximately 19 GiB
Prerequisites
-
Connect to the bastion host of your environment
sudo ssh root@192.168.123.100 -
Login to the OpenShift Cluster (your hosting cluster)
oc login {ocp_api} --username={ocp_username} --password={ocp_password} --insecure-skip-tls-verify=true -
Allow wildcard routes for your Ingress Controllers
oc patch ingresscontroller -n openshift-ingress-operator default --type=json -p '[{ "op": "add", "path": "/spec/routeAdmission", "value": {wildcardPolicy: "WildcardsAllowed"}}]'This command was already executed for you to avoid disconnect your terminal.
Install hcp CLI
-
When Red Hat Advanced Cluster Manager for Kubernes is installed on a hosting cluster it provides a convenient download location for the
hcpcommand line tool. Download the cli from your cluster:curl -O https://hcp-cli-download-multicluster-engine.apps.my-guid.dynamic.redhatworkshops.io/linux/amd64/hcp.tar.gz -
Extract the client
tar xvfz hcp.tar.gz -C /usr/local/bin/ -
Confirm that the command
hcpis availablehcp --versionSample Outputhcp version openshift/hypershift: e87182ca75da37c74b371aa0f17aeaa41437561a. Latest supported OCP: 4.14.0
Create Hosted Cluster
Some considerations:
-
Run the hub cluster and workers on the same platform for hosted control planes.
-
Each hosted cluster must have a unique name in order for multicluster engine operator to manage it.
-
A hosted cluster cannot be created in the namespace of a multicluster engine operator managed cluster.
-
Create a new hosted cluster named cluster1 using the command
hcp:hcp create cluster kubevirt \ --name cluster1 \ --release-image quay.io/openshift-release-dev/ocp-release:4.14.9-x86_64 \ --node-pool-replicas 2 \ --pull-secret ~/pull-secret.json \ --memory 6Gi \ --cores 2Sample Output2023-12-02T21:49:55Z INFO Applied Kube resource {"kind": "Namespace", "namespace": "", "name": "clusters"} 2023-12-02T21:49:55Z INFO Applied Kube resource {"kind": "Secret", "namespace": "clusters", "name": "cluster1-pull-secret"} 2023-12-02T21:49:55Z INFO Applied Kube resource {"kind": "", "namespace": "clusters", "name": "cluster1"} 2023-12-02T21:49:55Z INFO Applied Kube resource {"kind": "Secret", "namespace": "clusters", "name": "cluster1-etcd-encryption-key"} 2023-12-02T21:49:55Z INFO Applied Kube resource {"kind": "NodePool", "namespace": "clusters", "name": "cluster1"}The parameter --release-imageflag to set up the hosted cluster with a specific OpenShift Container Platform release.A default node pool is created for the cluster with two virtual machine worker replicas according to the
--node-pool-replicasflag. -
Verify the host control plane are being created inside of the new namespace created (
clusters-cluster1)oc get pod -n clusters-cluster1Sample OutputNAME READY STATUS RESTARTS AGE capi-provider-554c58b965-6cx78 1/1 Running 0 4m23s cluster-api-5f5b78d889-2tnqm 1/1 Running 0 4m24s control-plane-operator-67b7d4556b-4b4mq 1/1 Running 0 4m23s
-
Check the status of the host clusters, querying the Custom Resource named
HostedCluster.oc get --namespace clusters hostedclustersSample OutputNAME VERSION KUBECONFIG PROGRESS AVAILABLE PROGRESSING MESSAGE cluster1 cluster1-admin-kubeconfig Partial False False Waiting for Kube APIServer deployment to become available
It takes around 15 minutes until the cluster switches from Partial to Completed. You do not have to wait for the cluster to be fully deployed at this point and you may continue with the lab. -
Go back to the ACM Console (
All Clustersin the top menu) -
Notice that the
cluster1will appear automatically. If you don’t see it yet, wait until it appears.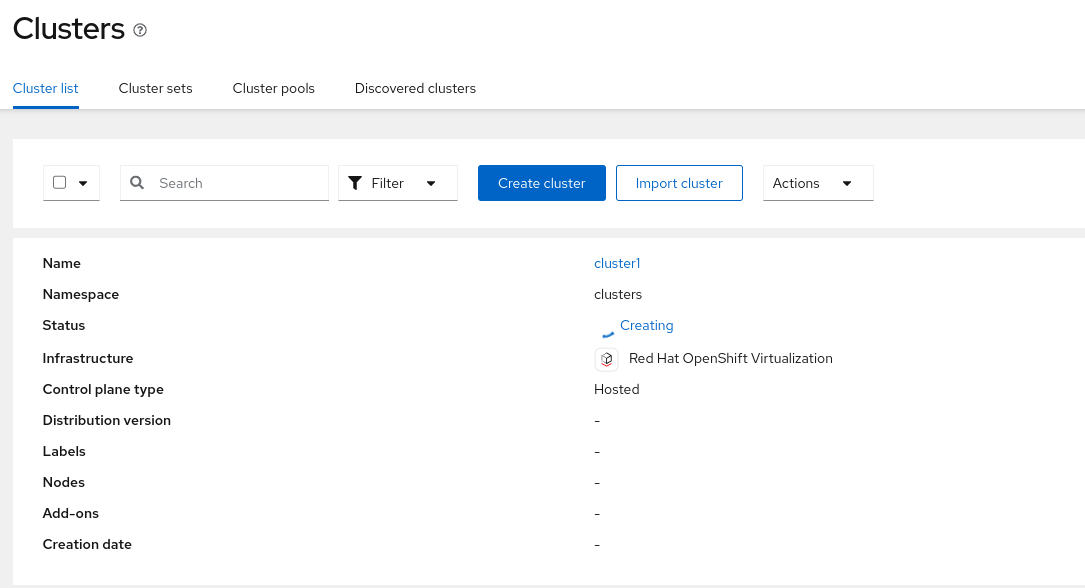
-
Click on
cluster1and check the progress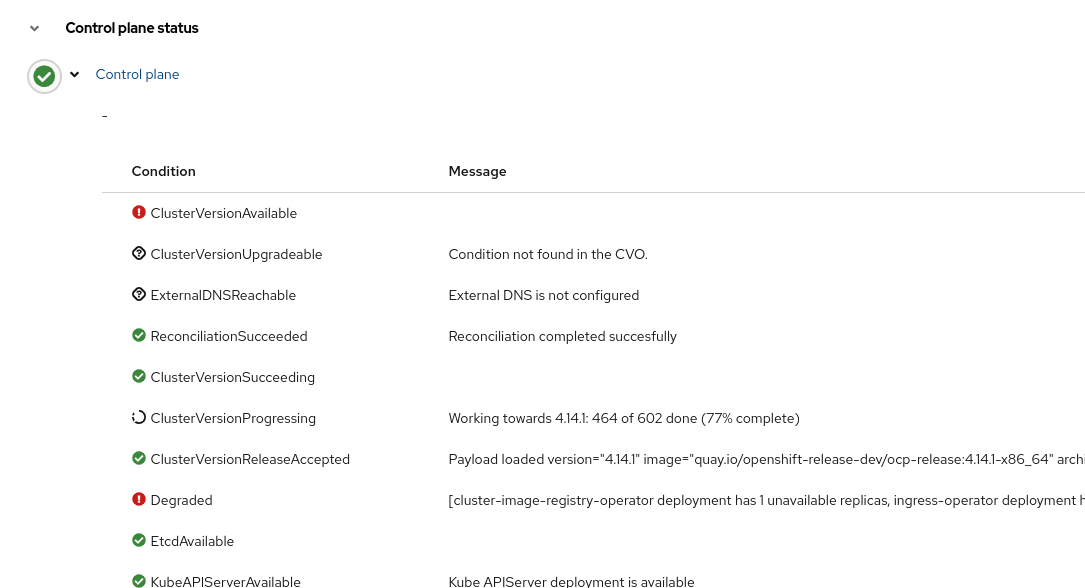
-
Review the information and scroll down and wait until the status is
Ready -
In the middle of the screen, press
Control plane pods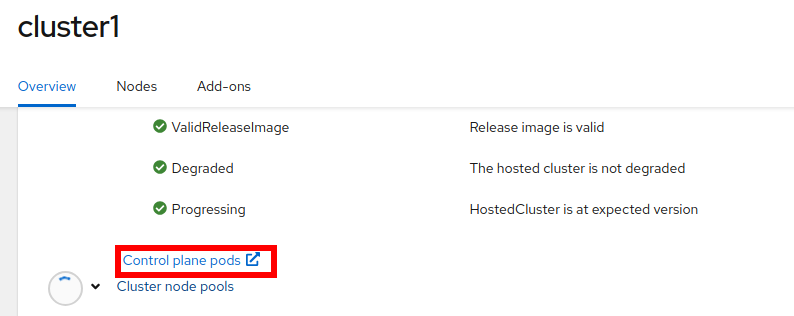
-
Expect to see a big list of pods, as shown in the following image:
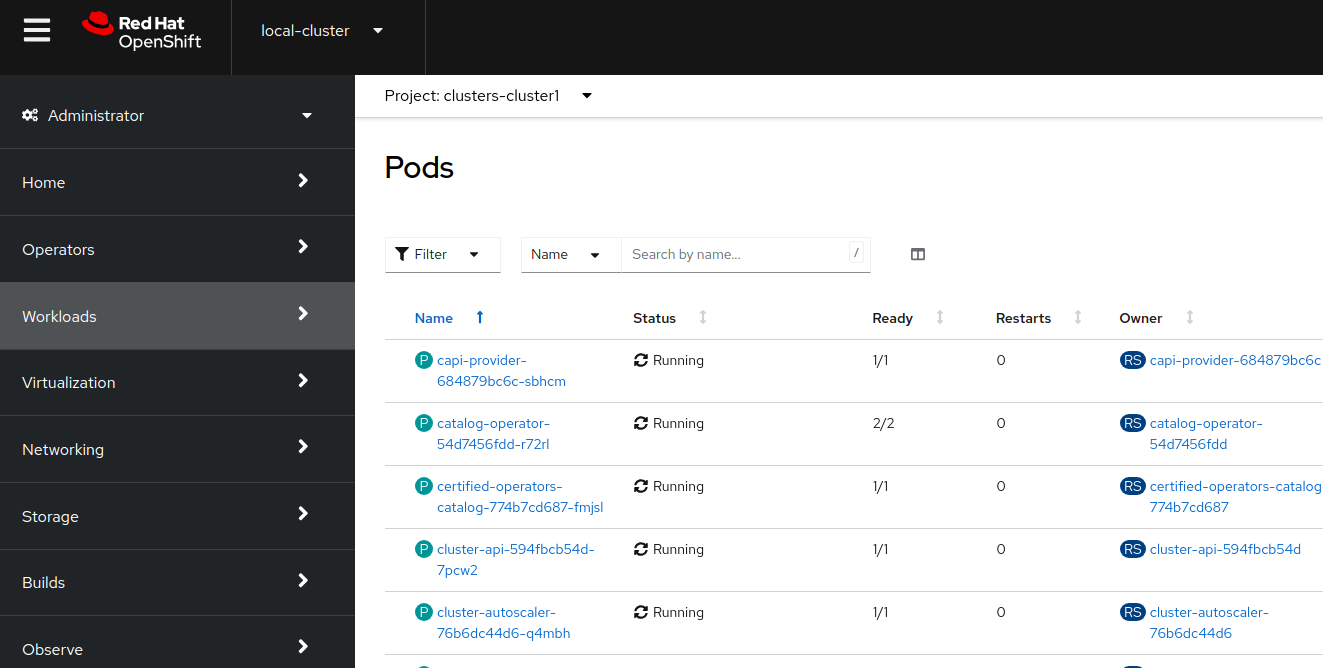
-
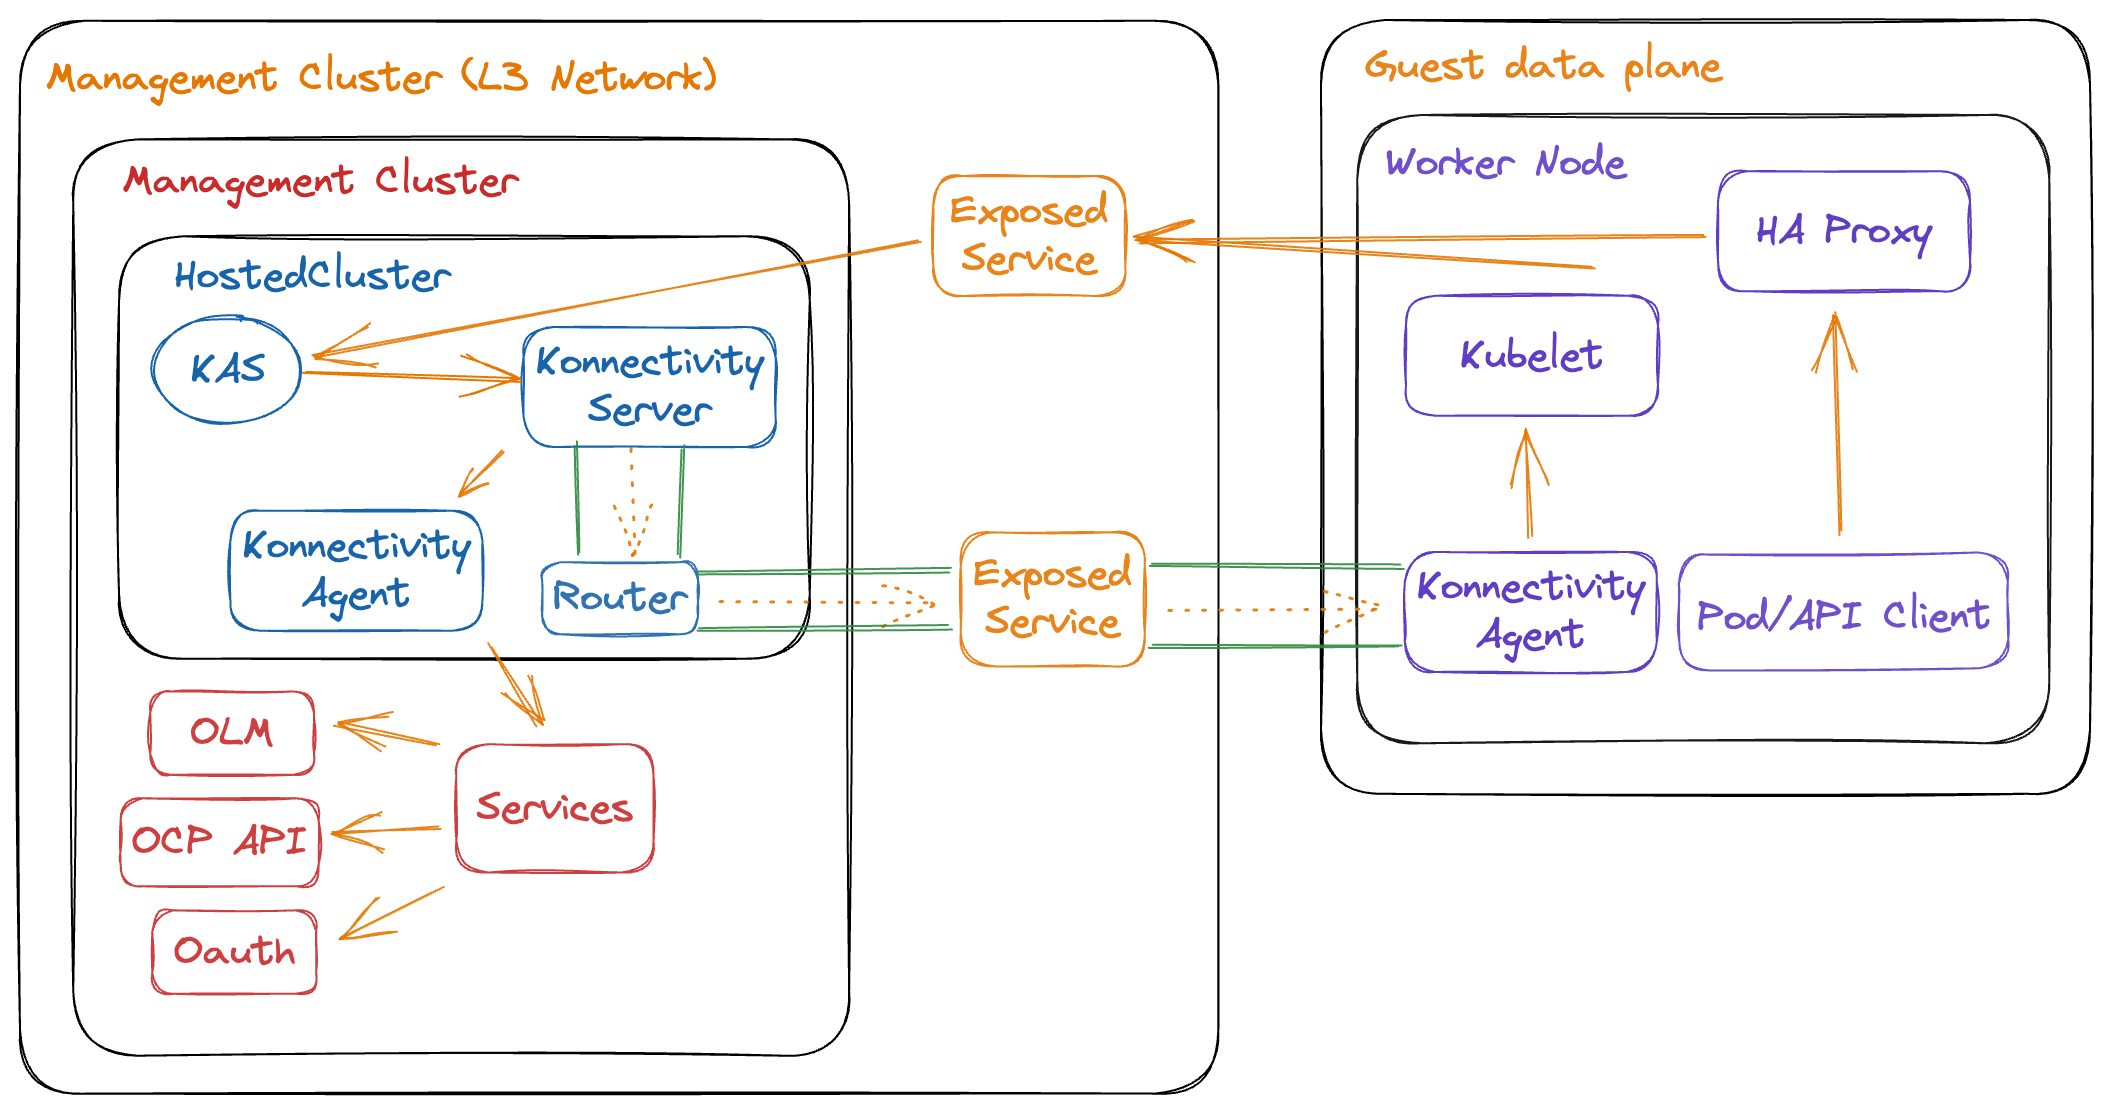
The Hosted Control Plane and Data Plane use the Konnectivity service to establish a tunnel for communications from the control plane to the data plane. This connection works as follows:
The Konnectivity agent in the compute nodes, connects with the Konnectivity server running as part of the Hosted Control Plane.
The Kubernetes API Server uses this tunnel to communicate with the kubelet running on each compute node.
The compute nodes reach the Hosted Cluster API via an exposed service. Depending on the infrastructure where the Hosted Control Plane runs this service can be exposed via a load balancer, a node port, etc.
The Konnectivity server is used by the Hosted Control Plane to consume services deployed in the hosted cluster namespace such as OLM, OpenShift Aggregated API and OAuth.
Review creation
-
While the installation continues, check OpenShift Virtualization
-
Switch back to your
local-cluster -
In the left menu navigate to Virtualization → Virtual Machines
-
Select project
clusters-cluster1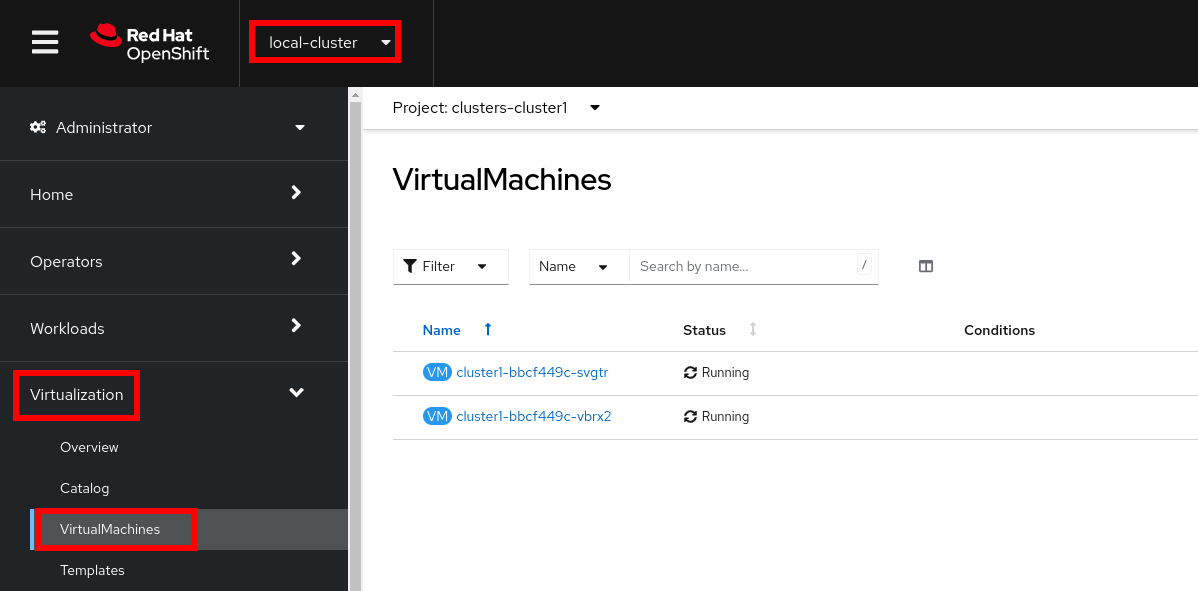
CoreOS disks are imported automatically and the VMs starts. They will act as a workers for the hosted control planes cluster.
-
| In some situations in the lab we have detected the servers are failing reaching the ignition server. If the installation is taking long and accessing the console of the VM is showing failures accessing to ignition server please remove the router pods. |
-
(Run only if VMS are failing to reach ignition server)
oc delete pods -n openshift-ingress --all -
In the left menu navigate to Networking → Services:
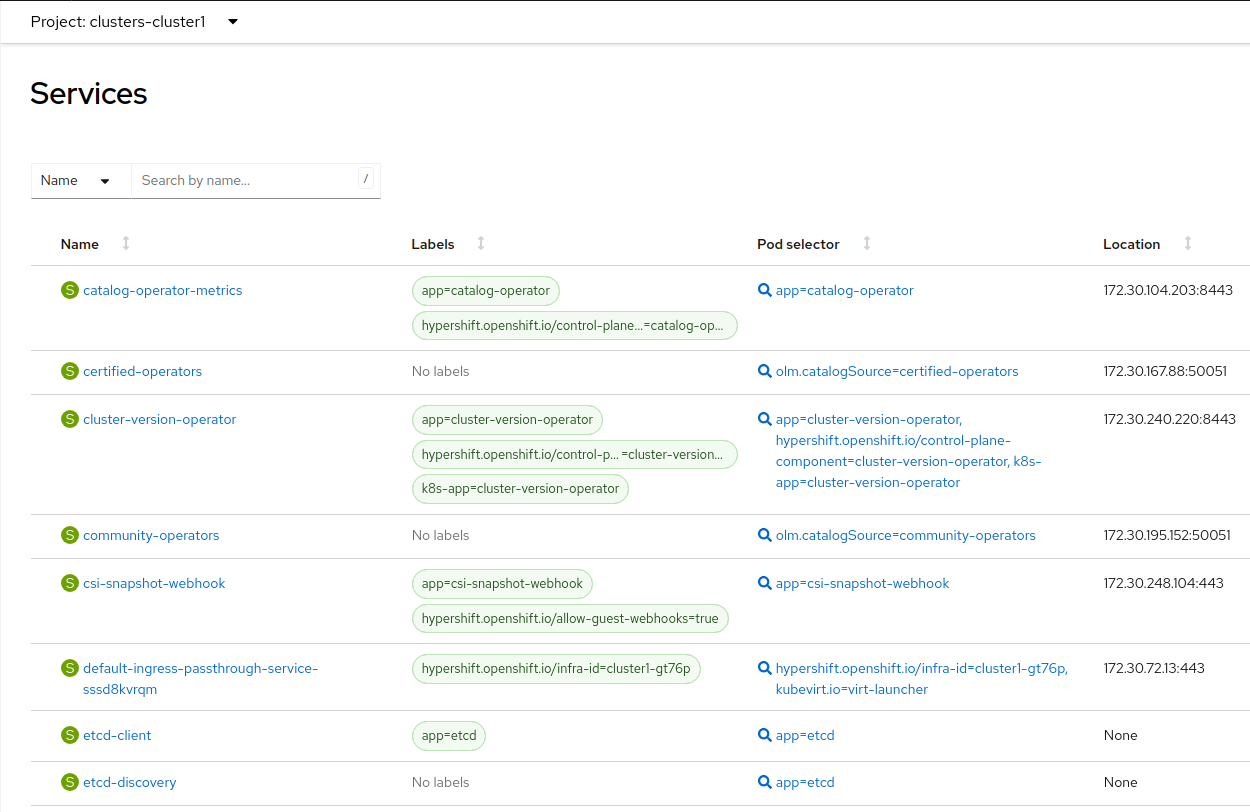
Notice the required services for OpenShift are created inside the namespace for each cluster that has been created.
-
Navigate to Networking → Routes:
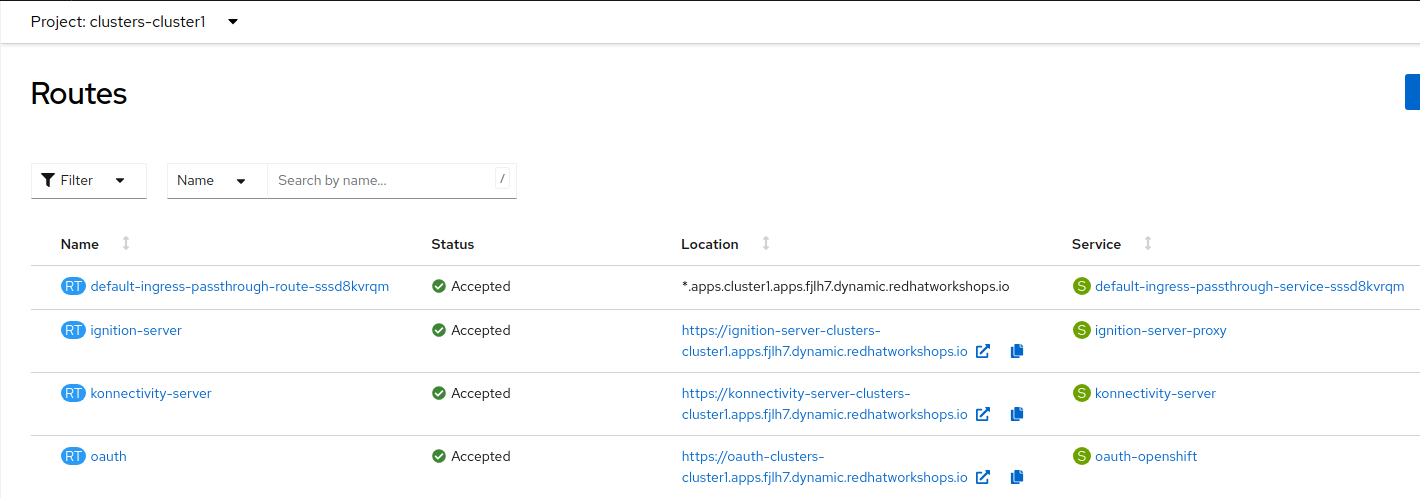
The routes to access the hosted cluster from the internet are listed.
-
Navigate to Storage → PersistentVolumeClaims
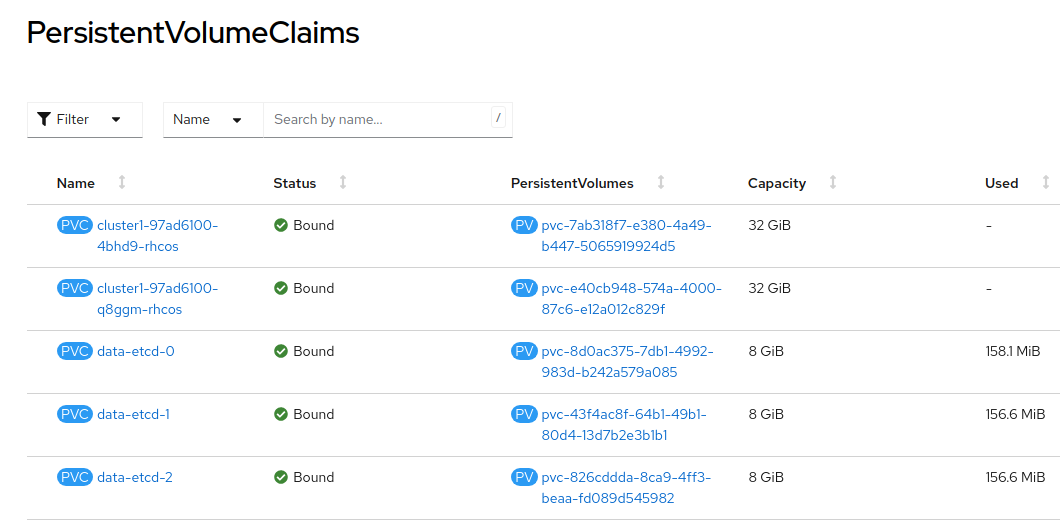
Notice that the etcd disks for the control plane are created. These disks are used for the control planes pods. It is recommended to use a low-latency and fast I/O disks for etcd to avoid issues.
Review creation
-
Go back to ACM console and select
cluster1and wait until the cluster creation is complete.
The cluster can be
Readybut the worker nodes may still be provisioning - which also means that Cluster Operators are still rolling out.Wait until the
Cluster node poolssection switches fromPendingtoReady -
Review the Details information of the cluster

-
Click
Reval credentialsand copy the password for thekubeadminuser -
Click on the
Console URLand accept the self-signed certificate -
Login to the new cluster with the credentials
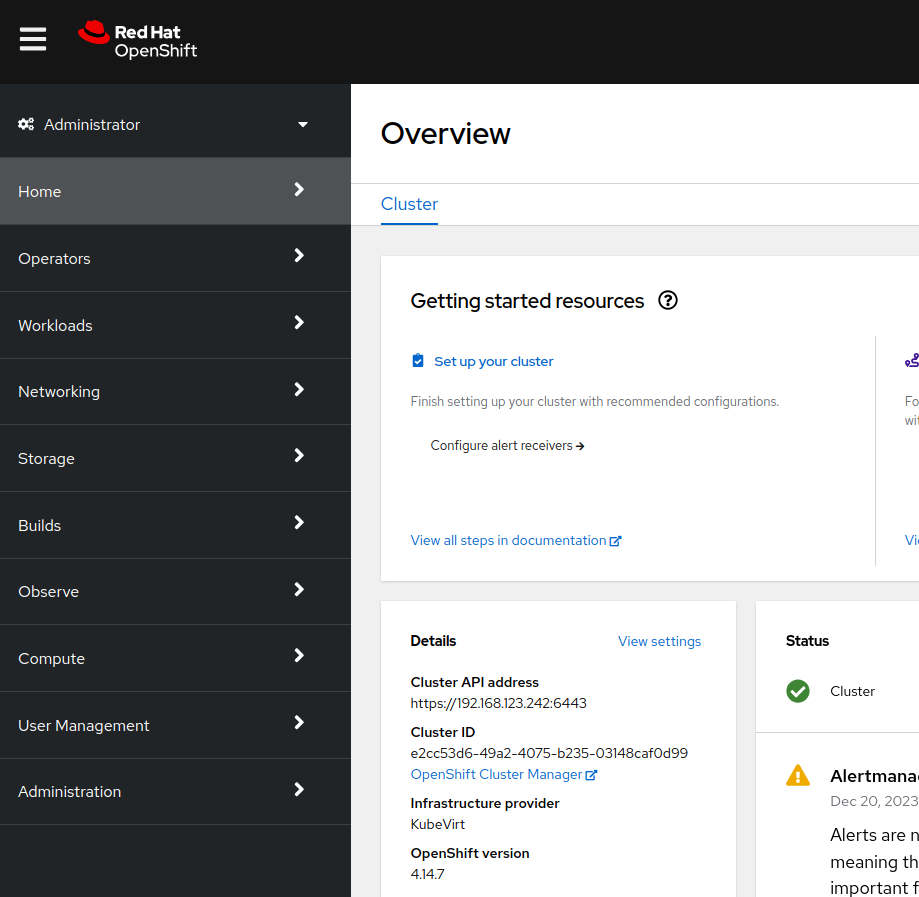
Notice the
Infrastructure providerisKubeVirt. -
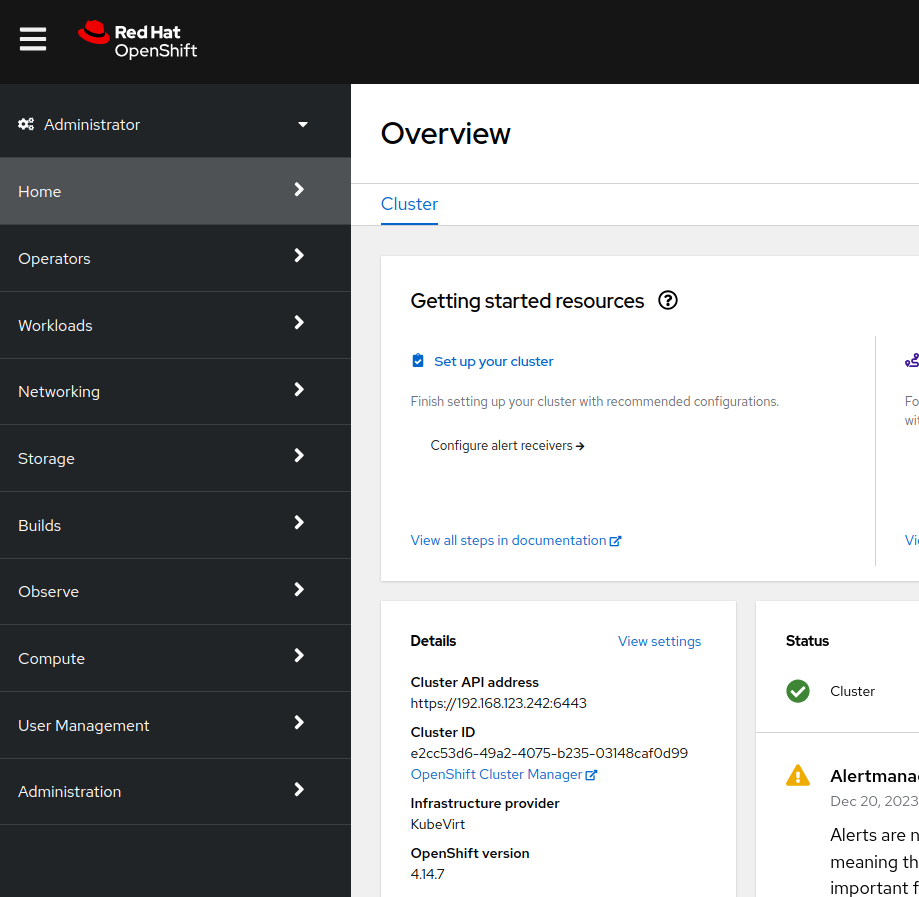
Navigate in the left menu to Compute → Nodes and review the workers
-
Navigate to the left menu to Storage → StorageClasses
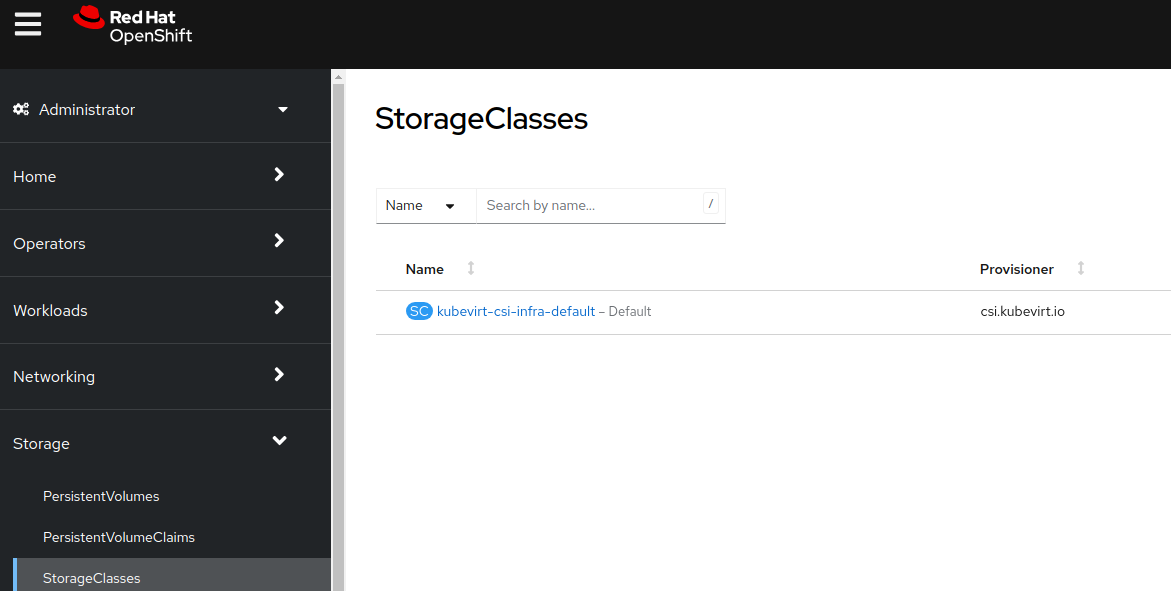
Storage Class is a interface to the host OpenShift Cluster storage class. Storage will be covered with more detail later on.
Review the cluster using the CLI
It is possible download the kubeconfig using the UI interface and using the command hcp.
-
Generate the kubeconfig for the
cluster1clusterhcp create kubeconfig --name cluster1 > cluster1-kubeconfigSample OutputNAME VERSION KUBECONFIG PROGRESS AVAILABLE PROGRESSING MESSAGE cluster1 cluster1-admin-kubeconfig Partial False False Waiting for Kube APIServer deployment to become available
-
Check the cluster operators
oc get co --kubeconfig=cluster1-kubeconfigSample OutputNAME VERSION AVAILABLE PROGRESSING DEGRADED SINCE MESSAGE console 4.14.5 True False False 66m csi-snapshot-controller 4.14.5 True False False 72m dns 4.14.5 True False False 67m image-registry 4.14.5 True False False 67m ingress 4.14.5 True False False 66m insights 4.14.5 True False False 67m kube-apiserver 4.14.5 True False False 72m kube-controller-manager 4.14.5 True False False 72m kube-scheduler 4.14.5 True False False 72m kube-storage-version-migrator 4.14.5 True False False 67m monitoring 4.14.5 True False False 65m network 4.14.5 True False False 66m node-tuning 4.14.5 True False False 69m openshift-apiserver 4.14.5 True False False 72m openshift-controller-manager 4.14.5 True False False 72m openshift-samples 4.14.5 True False False 66m operator-lifecycle-manager 4.14.5 True False False 72m operator-lifecycle-manager-catalog 4.14.5 True False False 72m operator-lifecycle-manager-packageserver 4.14.5 True False False 72m service-ca 4.14.5 True False False 67m storage 4.14.5 True False False 72m
-
Check the cluster nodes
oc get nodes --kubeconfig=cluster1-kubeconfigSample OutputNAME AGE STATUS READY cluster1-ee50e7fb-ctrdd 62m Running True cluster1-ee50e7fb-dc59k 62m Running True