Storage
Hosted Cluster storage
Using the UI create a PVC inside of the guest cluster (Ensure you are in the cluster cluster1)
-
Navigate to Storage → PersistentVolumeClaims
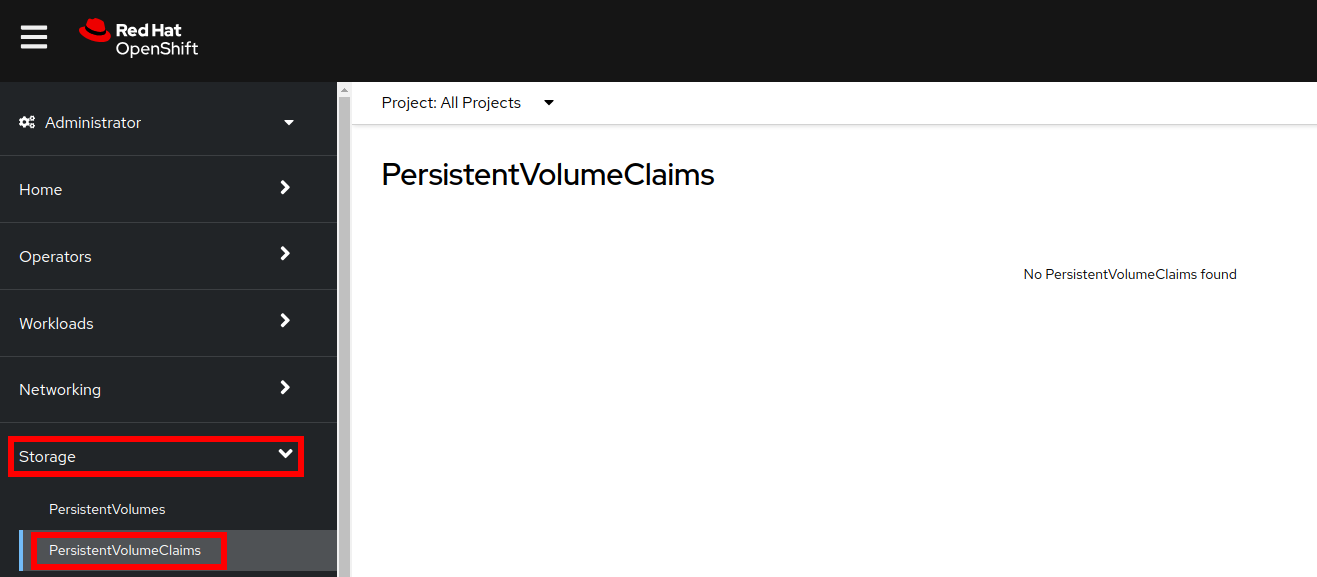
-
Press
Create PersistentVolumeClaimon the top-right -
Fill with the name
pvc-1and the size1 GiB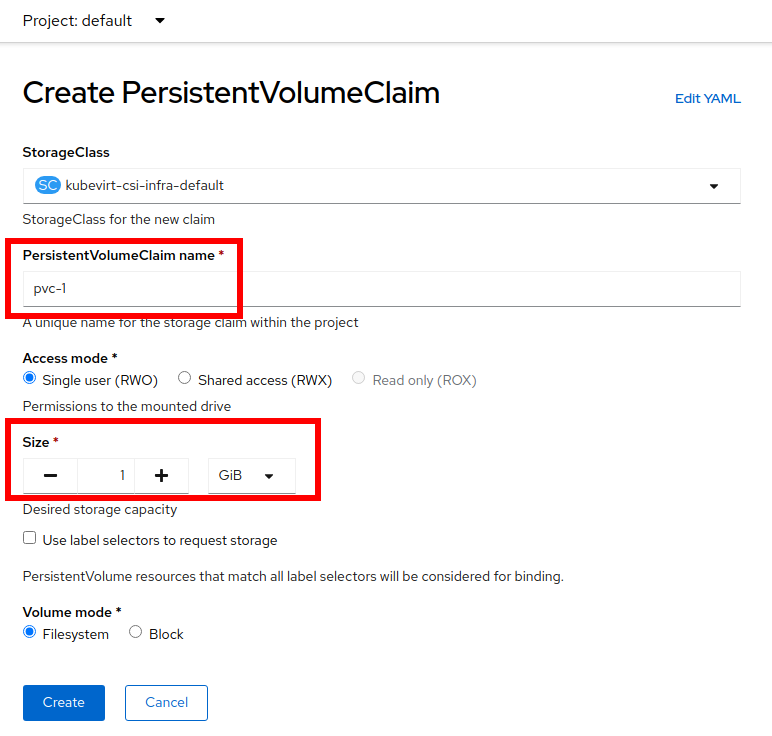
-
The PVC will be created and switch to Bound status almost immediately.
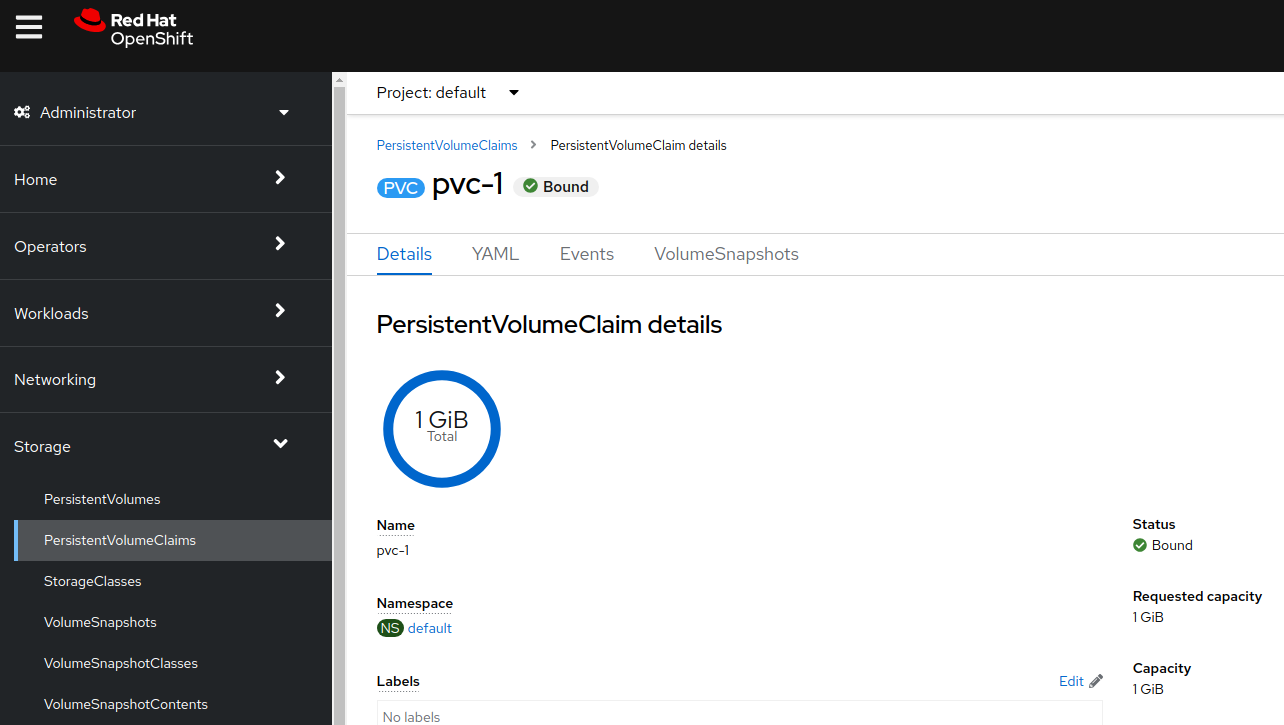
-
Now in the main cluster, navigate to Storage → PersistentVolumeClaims and select project
clusters-cluster1. Sort by Capacity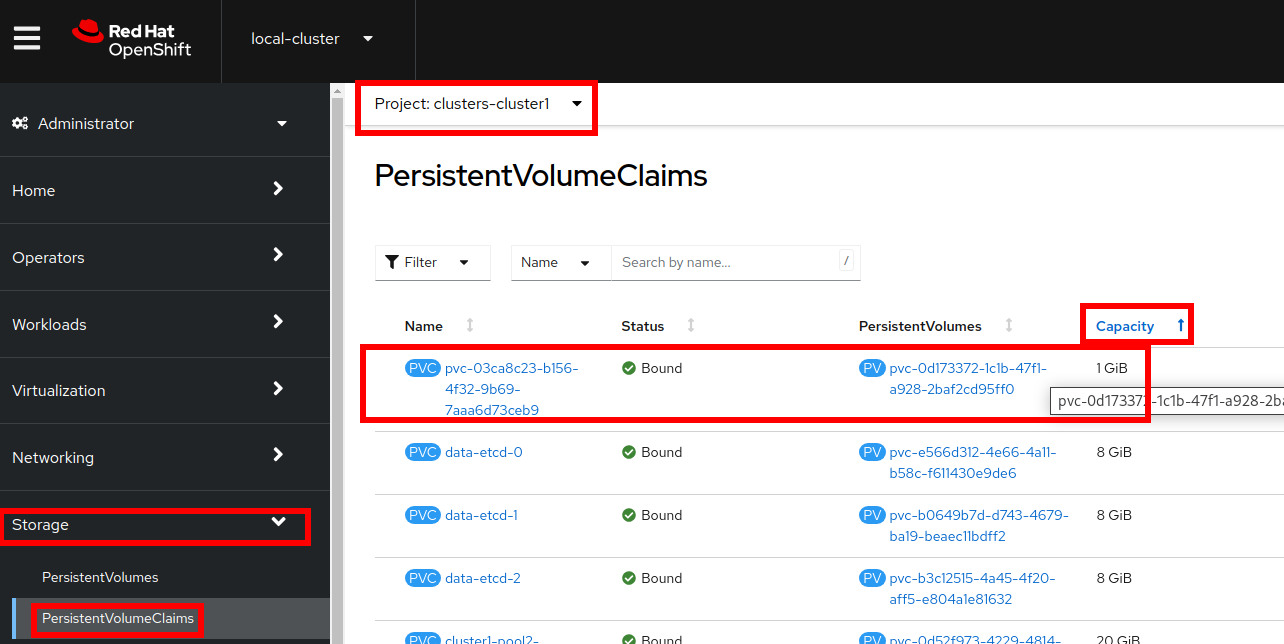
You will see the PVC that has been created for use by the hosted cluster.
Etcd storage
Because etcd writes data to disk and persists proposals on disk, its performance depends on disk performance. Although etcd is not particularly I/O intensive, it requires a low latency block device for optimal performance and stability.
-
In terms of latency, run etcd on top of a block device that can write at least 50 IOPS of 8000 bytes long sequentially.
-
That is, with a latency of 10ms, keep in mind that uses fdatasync to synchronize each write in the WAL.
-
For heavy loaded clusters, sequential 500 IOPS of 8000 bytes (2 ms) are recommended.
-
To achieve such performance, run etcd on machines that are backed by SSD or NVMe disks with low latency and high throughput.
Review the current etcd PVCs for the cluster1
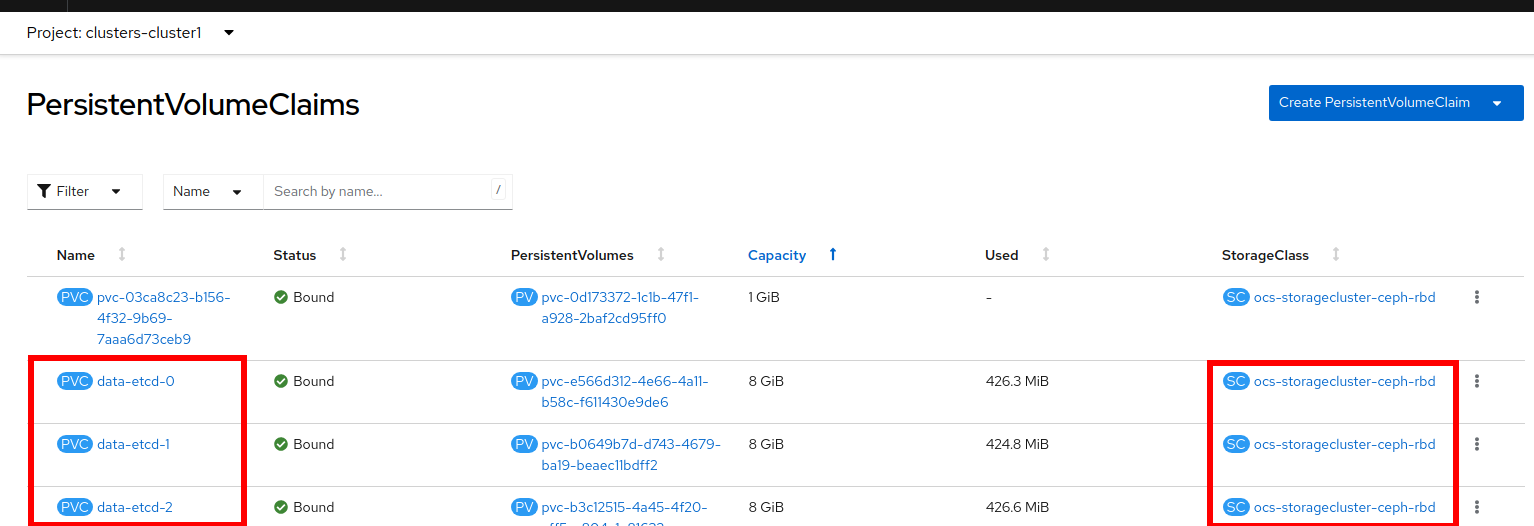
Later in this lab a new cluster is created using local disks for etcd.
OpenShift Virtualization image caching
By default a CoreOS image is downloaded for each of the workers, which will cause more storage used and more overhead to import the image.
Image caching is an advanced feature that you can use to optimize both cluster startup time and storage utilization.
| This feature requires the use of a storage class that is capable of smart cloning and the ReadWriteMany access mode. |
Image caching works as follows:
-
The VM image is imported to a PVC that is associated with the hosted cluster.
-
A unique clone of that PVC is created for every KubeVirt VM that is added as a worker node to the cluster.
Image caching reduces VM startup time by requiring only a single image import. It can further reduce overall cluster storage usage when the storage class supports copy-on-write cloning.
Destroy current cluster
-
Delete the managed cluster resource on multicluster engine operator by running the following command:
oc delete managedcluster cluster1Sample Outputmanagedcluster.cluster.open-cluster-management.io "cluster1" deleted
This command takes a while to return - be patient and wait until you’re back at the prompt.
-
Delete the hosted cluster and its back-end resources by running the following command
hcp destroy cluster kubevirt --name cluster1Sample Output2024-01-02T21:09:35Z INFO Found hosted cluster {"namespace": "clusters", "name": "cluster1"} 2024-01-02T21:09:36Z INFO Updated finalizer for hosted cluster {"namespace": "clusters", "name": "cluster1"} 2024-01-02T21:09:36Z INFO Deleting hosted cluster {"namespace": "clusters", "name": "cluster1"} 2024-01-02T21:11:24Z INFO Deleting Secrets {"namespace": "clusters"} 2024-01-02T21:11:24Z INFO Deleted CLI generated secrets 2024-01-02T21:11:24Z INFO Finalized hosted cluster {"namespace": "clusters", "name": "cluster1"} 2024-01-02T21:11:24Z INFO Successfully destroyed cluster and infrastructure {"namespace": "clusters", "name": "cluster1", "infraID": "cluster1-qwpqk"}Again this command takes a while to return - be patient and wait until you’re back at the prompt.
Create a new hosted cluster using image caching and local storage for etcd
The hosting cluster is already configured to use LVM Storage to provide local storage.
-
Navigate to Operators → Installed Operators
-
Search for LVM Storage
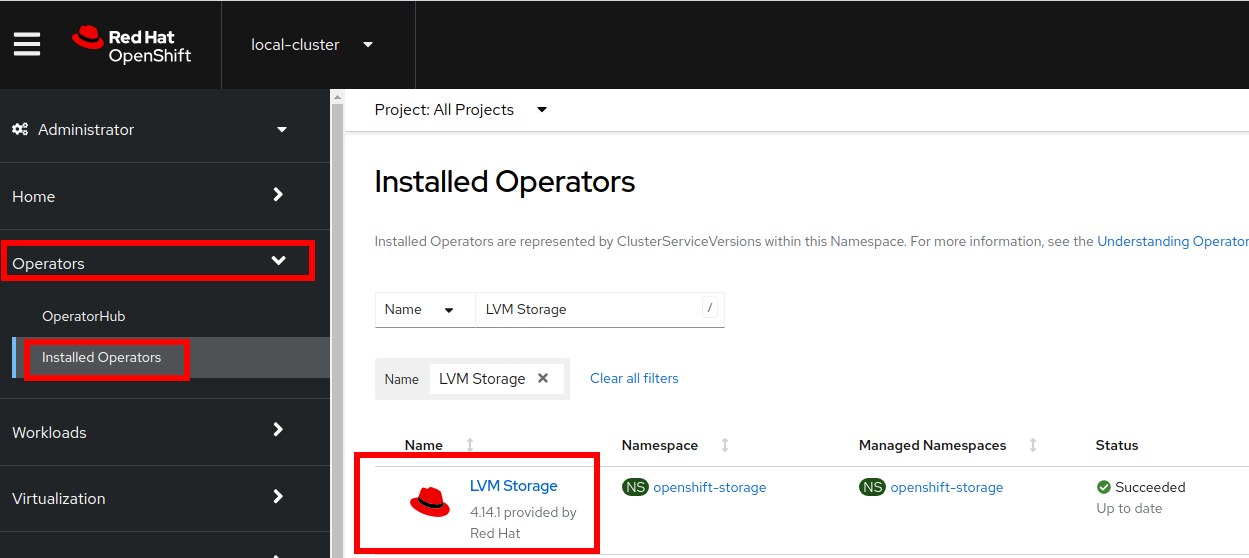
-
Click to get the details and navigate to tab LVMCluster
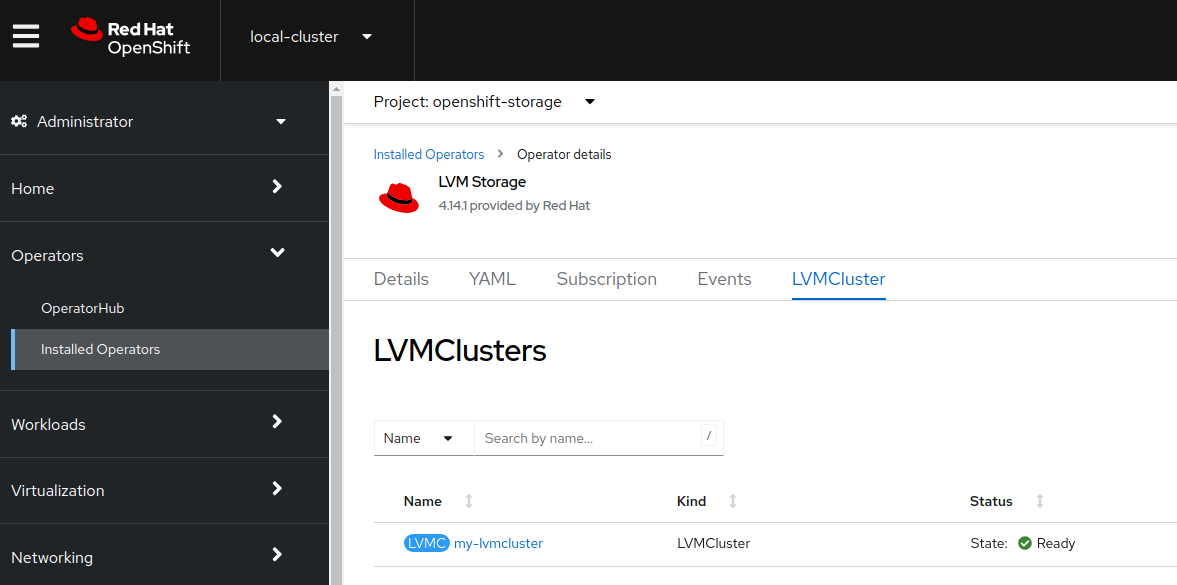
-
Click on my-lvmcluster and review the YAML
<<REDACTED>> spec: storage: deviceClasses: - deviceSelector: paths: - /dev/vdd fstype: xfs name: vg1 thinPoolConfig: name: thin-pool-1 overprovisionRatio: 10 sizePercent: 90 <<REDACTED>> -
Navigate to Storage → StorageClasses. A storageclass named
lvms-<name>is created automatically when a LVMCluster is configured. In this cluster it is calledlvms-vg1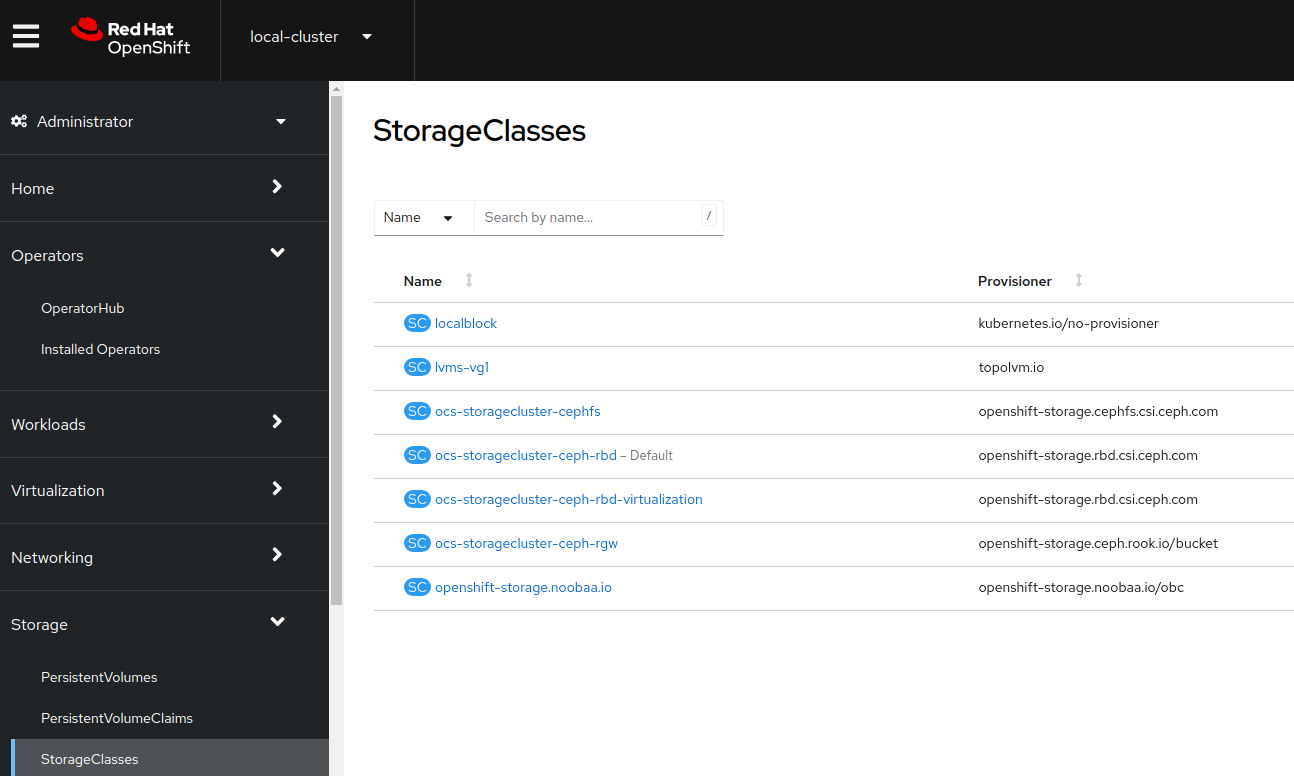
-
Create a new hosted cluster named cluster2 using the
hcpcommand:hcp create cluster kubevirt \ --name cluster2 \ --release-image quay.io/openshift-release-dev/ocp-release:4.14.9-x86_64 \ --node-pool-replicas 2 \ --pull-secret ~/pull-secret.json \ --memory 6Gi \ --cores 2 \ --root-volume-cache-strategy=PVC \ --etcd-storage-class lvms-vg1 -
While the new cluster is being created, review the Persistent Volume Claims in the namespace
clusters-cluster2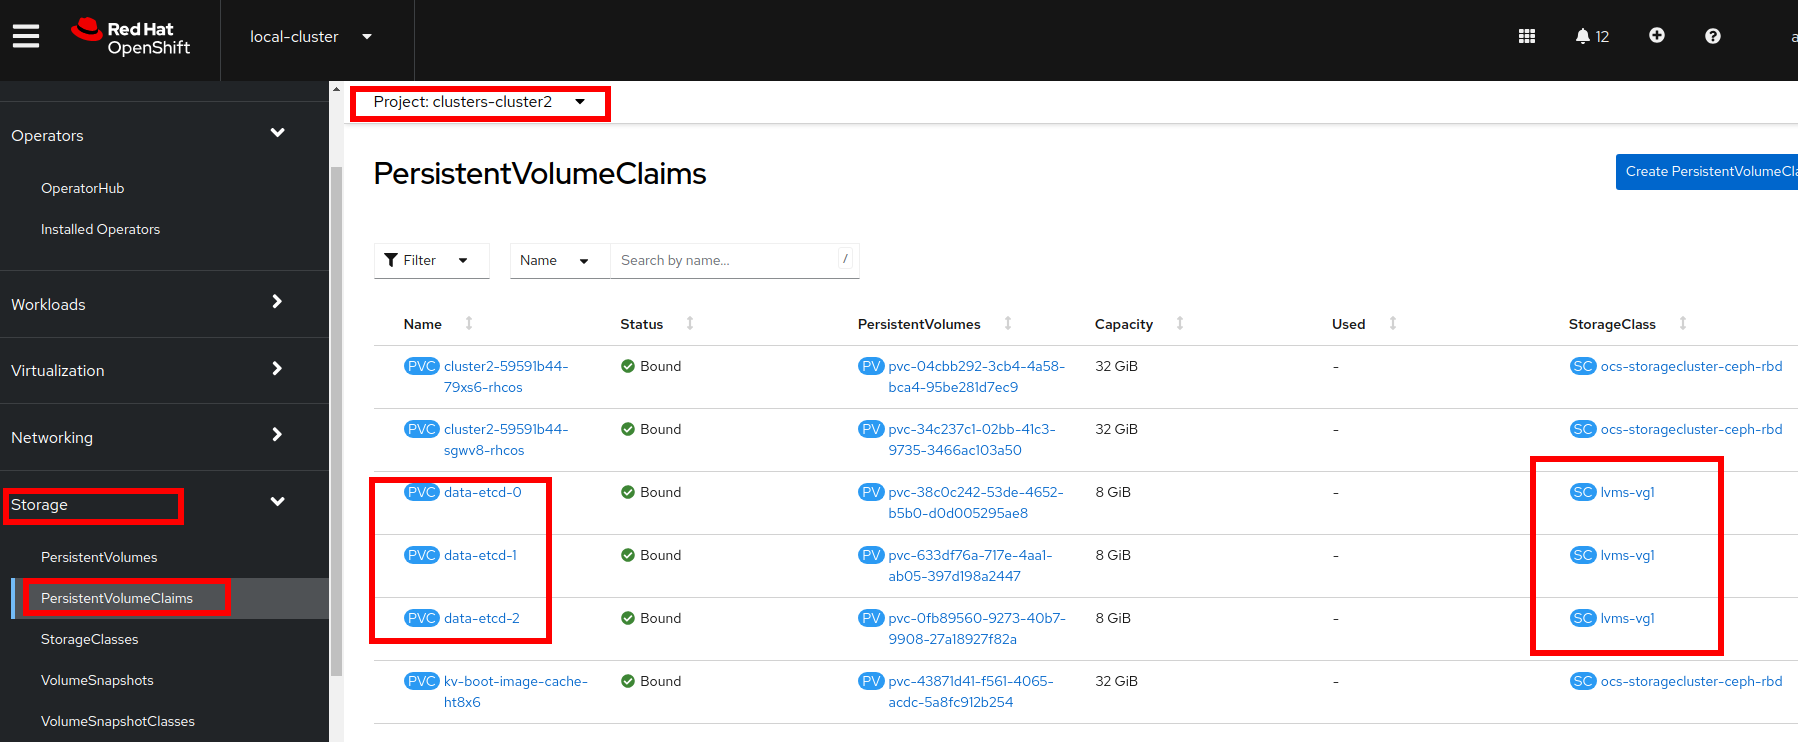
-
Notice a image with prefix
kv-boot-image-cacheis created.
-
Select one of the PVCs starting with cluster2 and scroll down to find the Owner.
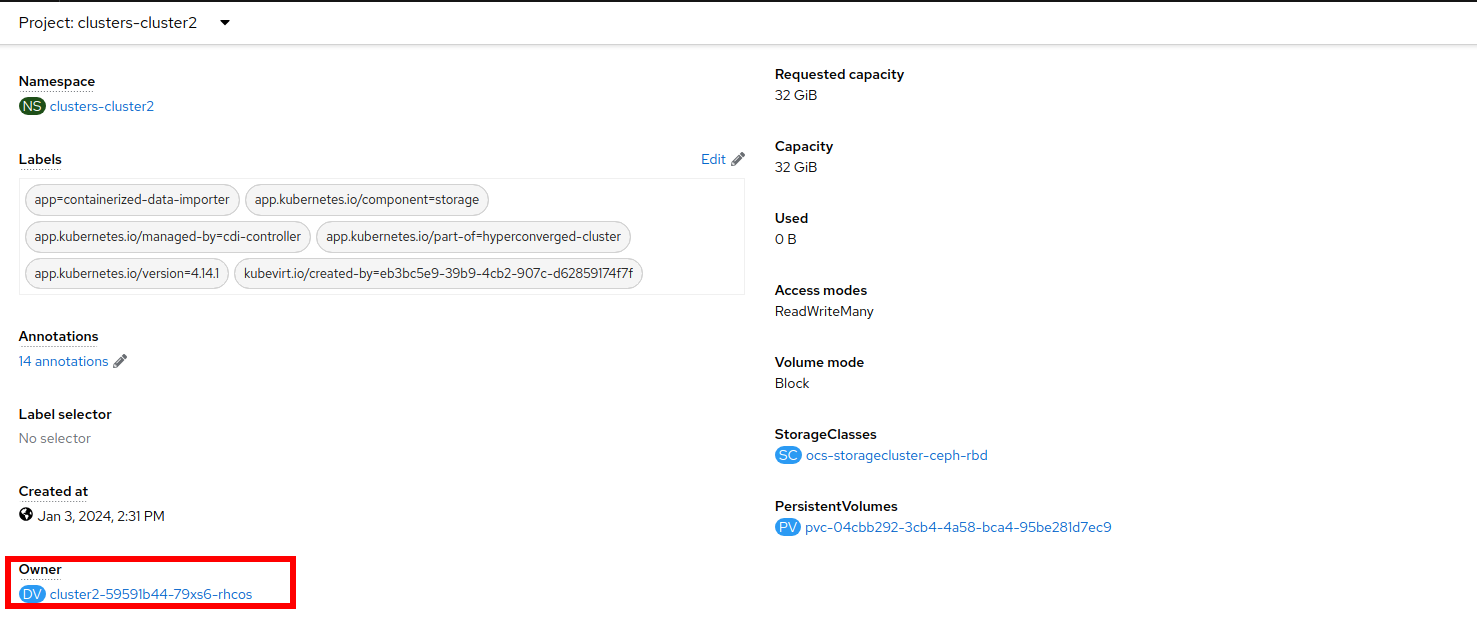
It may take a few minutes for those PVCs to appear. Be patient and wait until you see two PVCs whose name starts with
cluster2. -
Information about the DataVolume will appear, scrolling down you can see information about the clone process.
