Declarative IaC for Automating Virtual Machine Creation
Introduction
Now you will use the YAML tab to automate the creation of a new virtual machine. We’ve provided the two things you need to do this:
-
A virtual machine image of the desired OS, its basic configuration, and if appropriate, the apps deployed.
-
The YAML manifest to instruct OpenShift how to deploy the virtual machine.
Please don’t forget to delete this new virtual machine winweb03 when done with this lab.
If you do not, there will not be resources available to finish the workshop.
|
Use the YAML manifest to create the virtual machine
-
Make sure you’re in the proper namespace by using the Projects: drop-down on the top bar to select the windowsnetworking-sample_username project.
-
Click VirtualMachines → Create → With YAML in the top right corner.
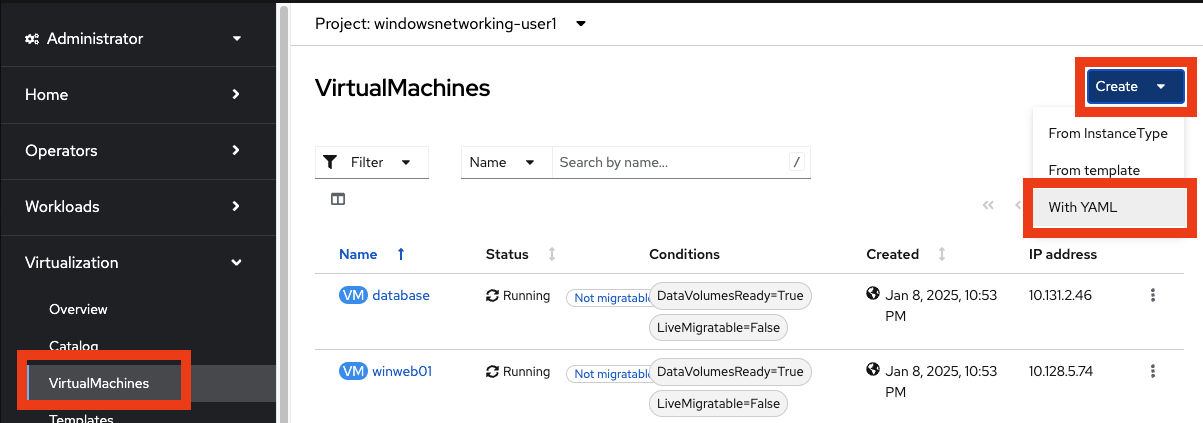 Figure 1. Locating the new virtual machine page
 -
Delete the pre-created YAML. Copy/Paste the YAML template below. Click Create and notice the new virtual machine is created.
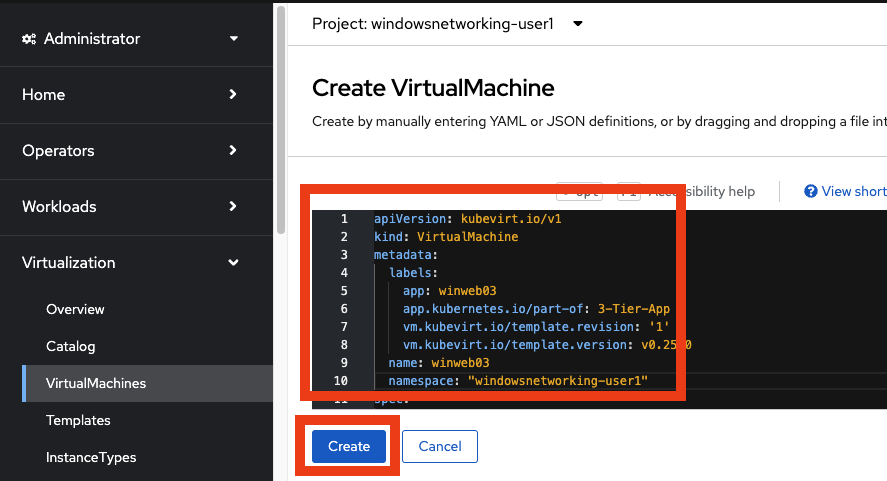 Figure 2. New virtual machine manifest ready to create
apiVersion: kubevirt.io/v1
kind: VirtualMachine
metadata:
  labels:
    app: winweb03
    app.kubernetes.io/part-of: 3-Tier-App
    vm.kubevirt.io/template.revision: '1'
    vm.kubevirt.io/template.version: v0.25.0
  name: winweb03
  namespace: "windowsnetworking-sample_username"
spec:
  dataVolumeTemplates:
  - apiVersion: cdi.kubevirt.io/v1beta1
    kind: DataVolume
    metadata:
      name: winweb03
    spec:
      source: (1)
        http:
          url: 'http://s3.us-east.cloud-object-storage.appdomain.cloud/roadshowocpvirt/winweb01.qcow2'
      storage:
        resources:
          requests:
            storage: 90Gi
  running: true
  template:
    metadata:
      labels:
        app: winnetworking
    spec:
      domain:
        clock:
          timer:
            hpet:
              present: false
            hyperv: {}
            pit:
              tickPolicy: delay
            rtc:
              tickPolicy: catchup
          utc: {}
        cpu:
          cores: 1
          sockets: 2
          threads: 1
        devices:
          disks:
          - disk:
              bus: sata
            name: rootdisk
          inputs:
          - bus: usb
            name: tablet
            type: tablet
          interfaces:
          - masquerade: {}
            model: e1000e
            name: default
        features:
          acpi: {}
          apic: {}
          hyperv:
            frequencies: {}
            ipi: {}
            relaxed: {}
            reset: {}
            runtime: {}
            spinlocks:
              spinlocks: 8191
            synic: {}
            synictimer:
              direct: {}
            tlbflush: {}
            vapic: {}
            vpindex: {}
          smm:
            enabled: true
        firmware:
          bootloader:
            efi: {}
        machine:
          type: q35
        resources:
          requests:
            memory: 6Gi
      networks:
      - name: default
        pod: {}
      terminationGracePeriodSeconds: 3600
      volumes:
      - dataVolume:
          name: winweb03
        name: rootdisk
1 The virtual machine image -
Watch the new
winweb03virtual machine go through three phases:-
WaitingForVolumeBinding- a new storage volume is created for this vm.
-
Provisioning- identifying the target OpenShift Node, marshalling the compute resources, downloading the vm image.
-
Running- the virtual machine is available.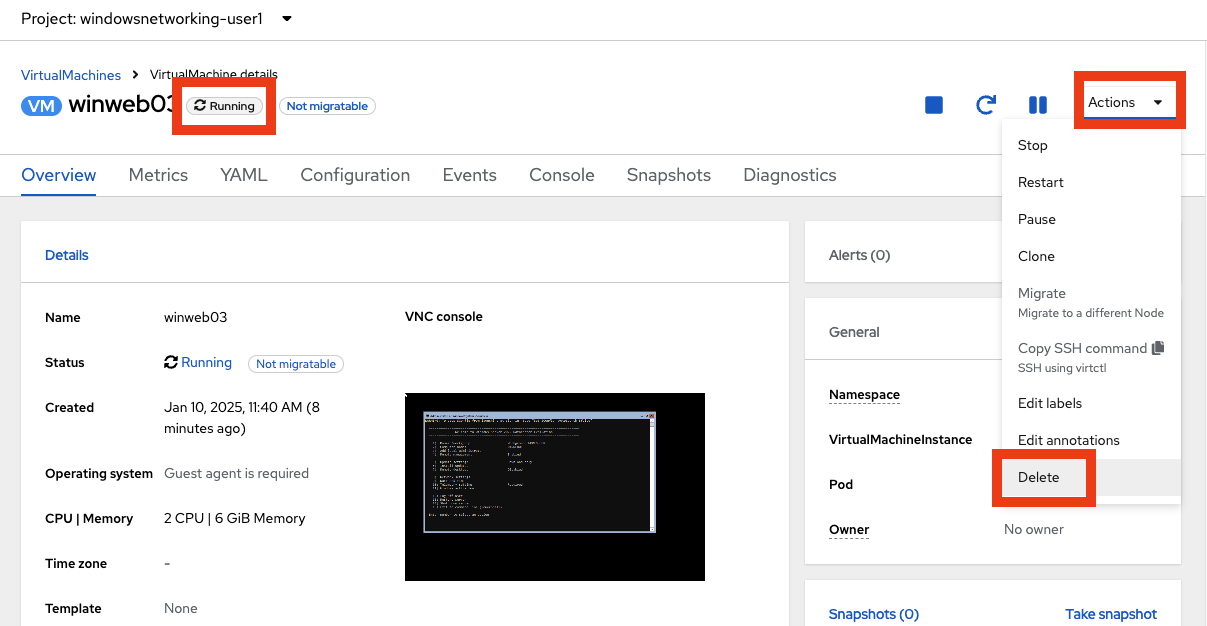 Figure 3. New virtual machine is running, go ahead and delete it
-
Deleting the Virtual Machine
-
Please Delete the new virtual machine to make room on the workshop cluster for later activities.
-
Click Actions → Delete and then on the nag window, click Delete to free up resources.
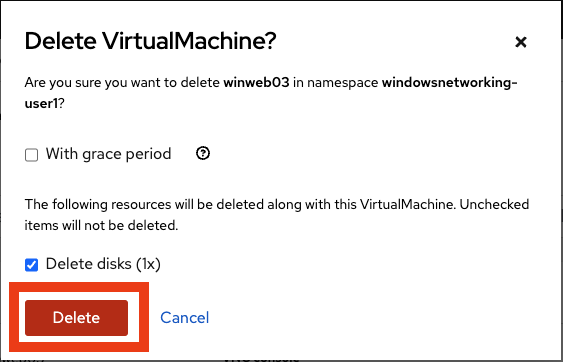 Figure 4. Confirm virtual machine deletion
-
If you don’t delete winweb03 you are likely not going to be able to finish this workshop.
|