Simplified configuration for load balancing
Introduction
In most systems, load balancing virtual machiness typically requires multiple different tools and configurations to work properly. For example, to load balance two virtual machines internally and externally you might have to:
-
Create a private internal load balancer
-
Create an internet facing endpoint and route it to the internal load balancer
-
Create private DNS records for the internal load balancer
-
Create public DNS records for the public endpoint for external access
-
Register virtual machines with the load balancer
-
Configure the listening/forwarding port or port translation
-
Configure health check endpoints and tests
-
Configure health check timeouts and intervals
OpenShift trivializes networking and load balancing. In this module, you’ll accomplish all of this, without leaving OpenShift.
Set up internal load balancing with Services
Services are internal load balancers in OpenShift. Services route traffic to resources by identifing them with a label selector. Labels can be applied to any OpenShift resources, including virtual machines,to identify and group them. You will create a service and identify the virtual machines it services as a load balancer by means of labels on the virtual machines.
-
On the left bar, click the Virtualization → VirtualMachines and on the top bar select the Project:
windowsnetworking-sample_username -
To find the label on the virtual machine that will identify it to the Service for selection, click on the
winweb01virtual machine. Click the YAML tab and search for "app: winnetworking". It’s usualy near line 186. This is an arbitrary label assigned to both virtual machines.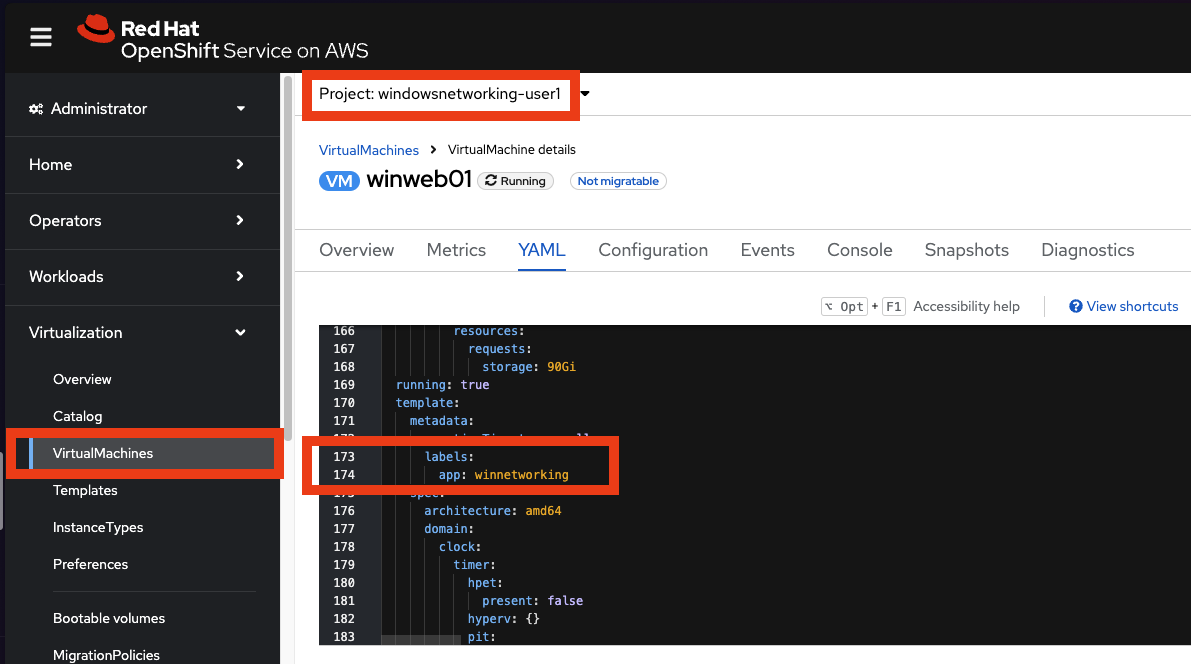 Figure 1. Identify the label on the virtual machine instance
 -
On the left side of the console, click to expand Networking → Services and on the top right corner, click Create Service.
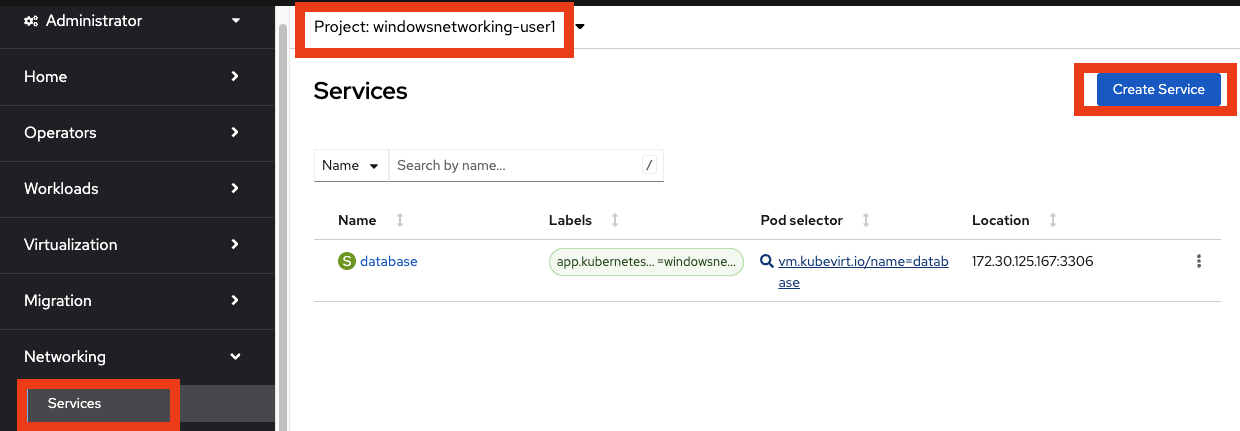 Figure 2. Begin Service creation
 -
Modify the Service to load balance between virtual machines
-
On line 4, change the name: to
windowsnetworking. -
Modify line 8 to read
app: winnetworking -
Change the targetPort: value on line 12 to
80then click "Create" in the bottom left corner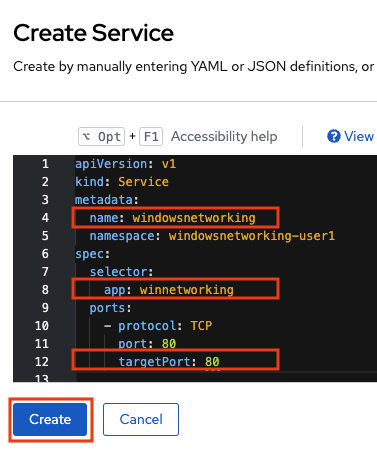 Figure 3. Modify the Service configuration
-
-
Click the Pods tab and notice that the two
winwebvirtual machines have already registered with the service object. This will allow applications within the OpenShift cluster to access these virtual machines through the windowsnetworking Service, aka "load balancer".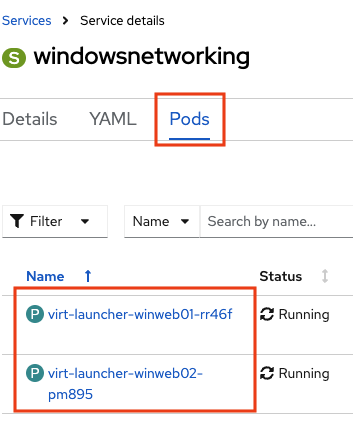 Figure 4. Examine Pods identified by the label selector
Set Up External Access to Load Balancing
OpenShift was the first to introduce the concept of Routes in the early days of Kubernetes. Use a Route to provide external access to the virtuals machines through the internal Service, aka, load balancer.
-
On the left side, Click Networking → Routes and then click Create Route.
 Figure 5. Begin Route creation
 -
Use the form to create the Route.
-
In the name: field put
windowsnetworking. -
Click the drop down box below Service and select the
windowsnetworkingService you just created. -
Click the drop down box below Target port and select port
80. -
Tick the Secure Route checkbox.
-
Under TLS termination, select
Edge. -
Under Insecure traffic, select
Redirect. -
Finally, click Create in the bottom left corner.
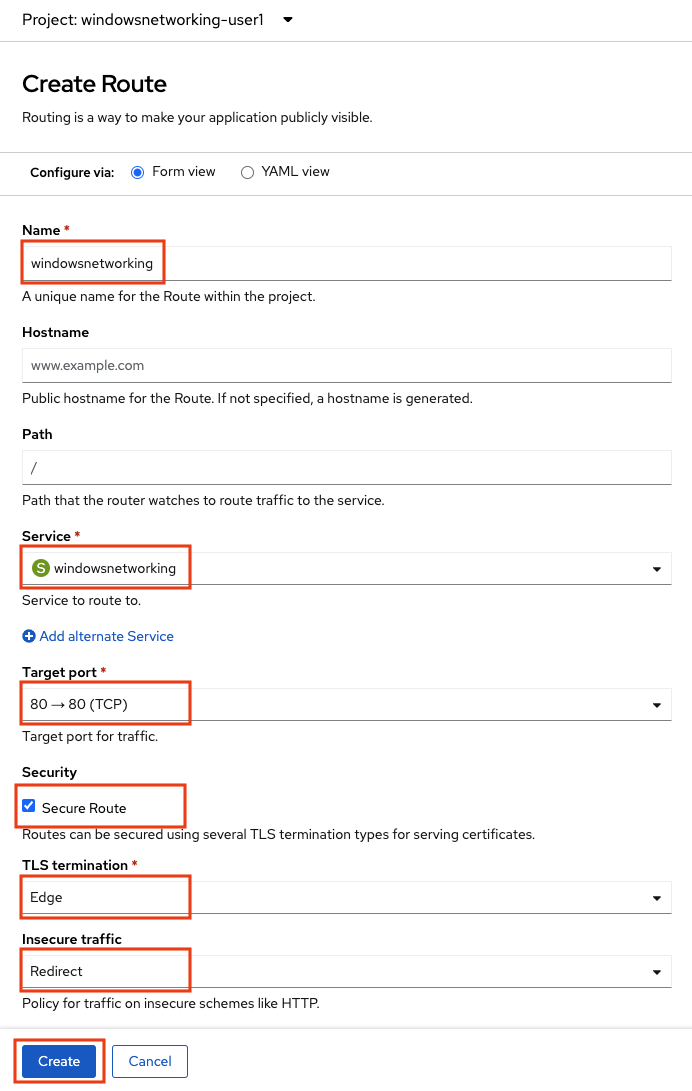 Figure 6. Completed Route
-
-
Test the Route. In the middle right, find the Location section. Click the link to view your load balanced virtual machines.
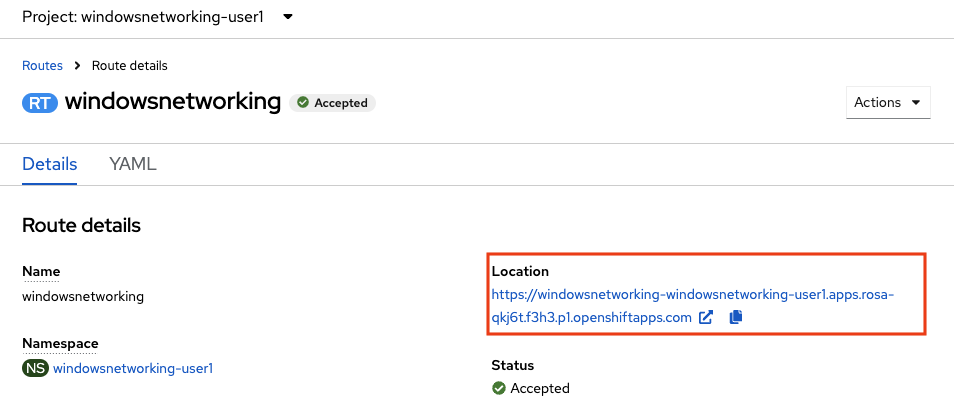 Figure 7. Functioning application accessed via the Internet
 -
A new browser window opens and accesses the web application.

-
Routes are implemented by HAProxy inside OpenShift. By default, they are sticky sessions based on cookies. If you’d like, update the Route to disable cookies and sticky sessions.
oc annotate route windowsnetworking haproxy.router.openshift.io/disable_cookies='true'