Module 1 - Explore OpenShift Virtualization and connect the virtual machines
Please login as admin user in order to have all necessary permissions for this lab.
|
oc login --username=admin --server=https://api.cluster-guid.guid.sandbox.opentlc.com:6443 --password=password
All assets for this module are in the folder lab-1. Please change the directory into this folder.
|
cd $HOME/virt-ossm-workspace/lab-1Task 1: Explore the deployed Virtual Machines
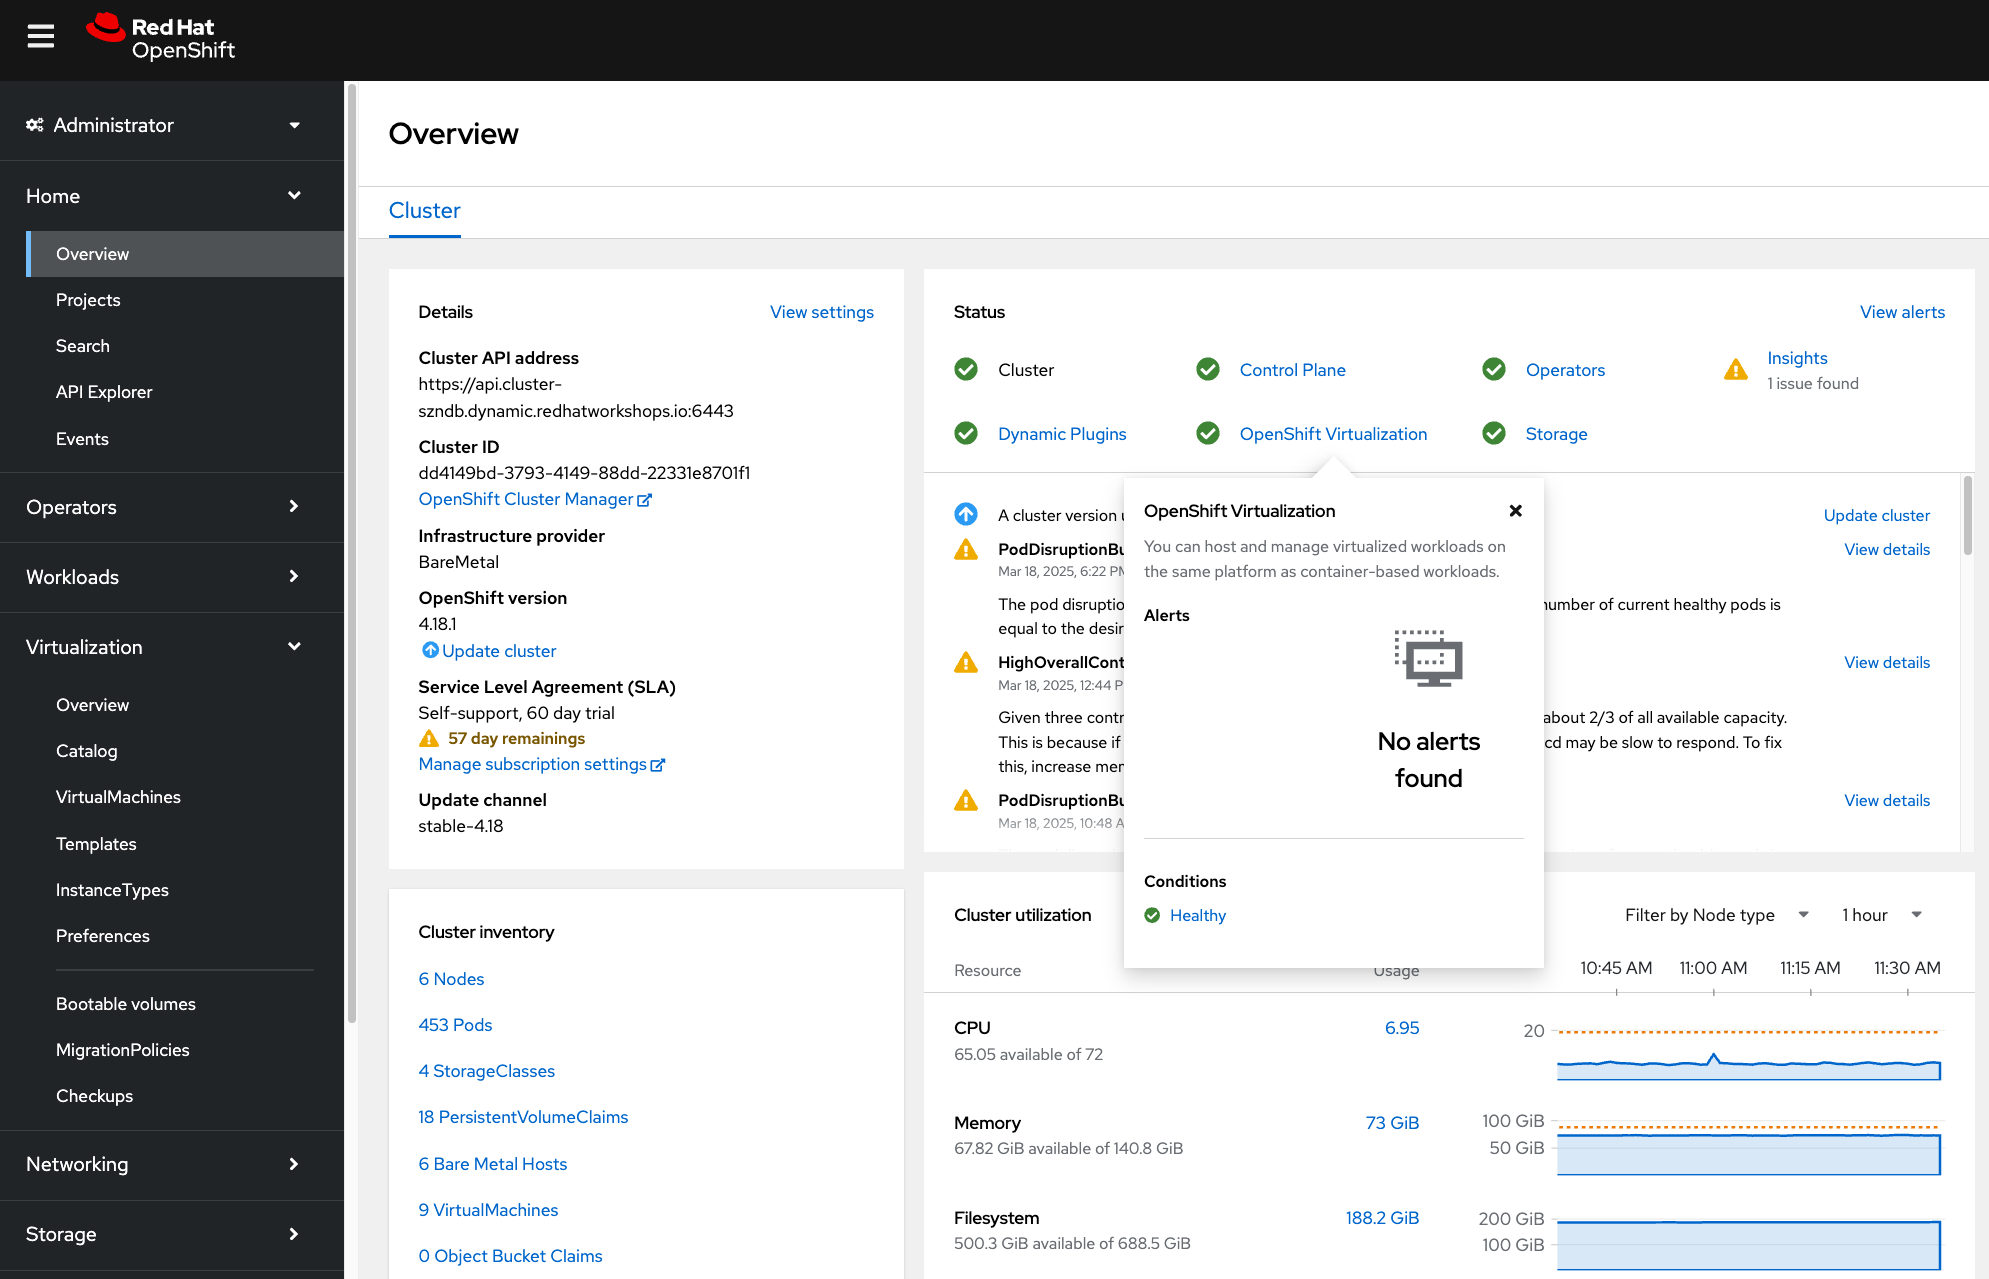
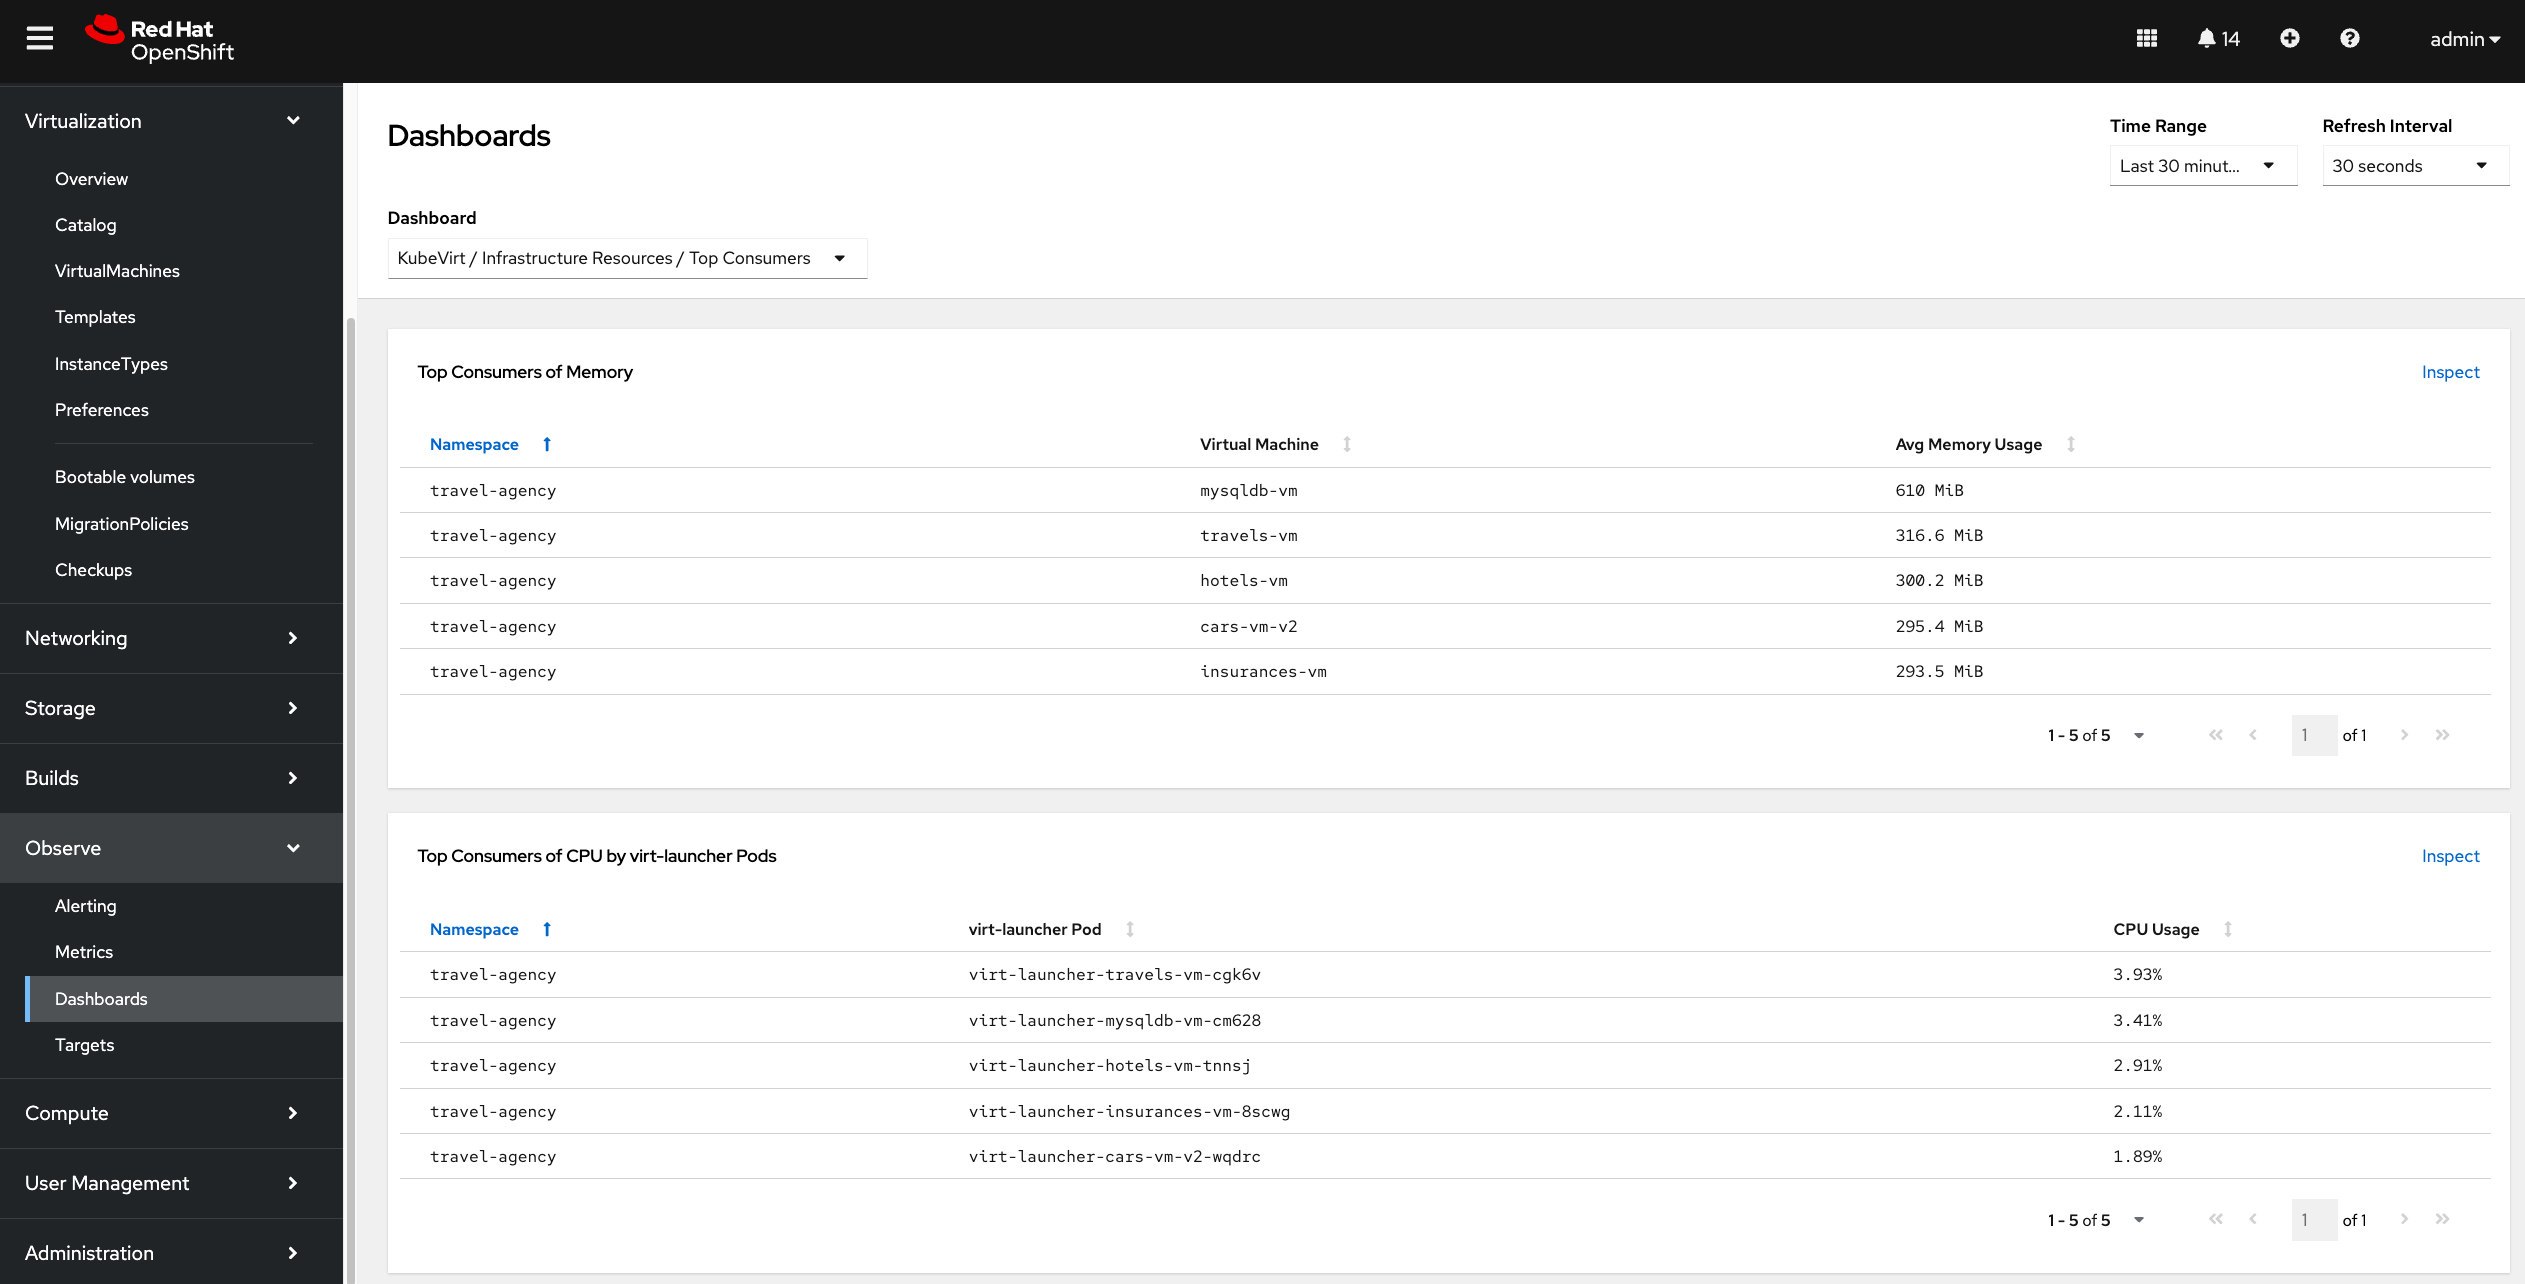
View the overall health of your OpenShift Virtualization environment in the web console by navigating to the Home → Overview page in the OpenShift Container Platform web console. The Status card displays the overall health of OpenShift Virtualization based on the alerts and conditions.
Now navigate to Virtualization → VirtualMachines. You will see the list of running VMs in the travel-agency namespace:
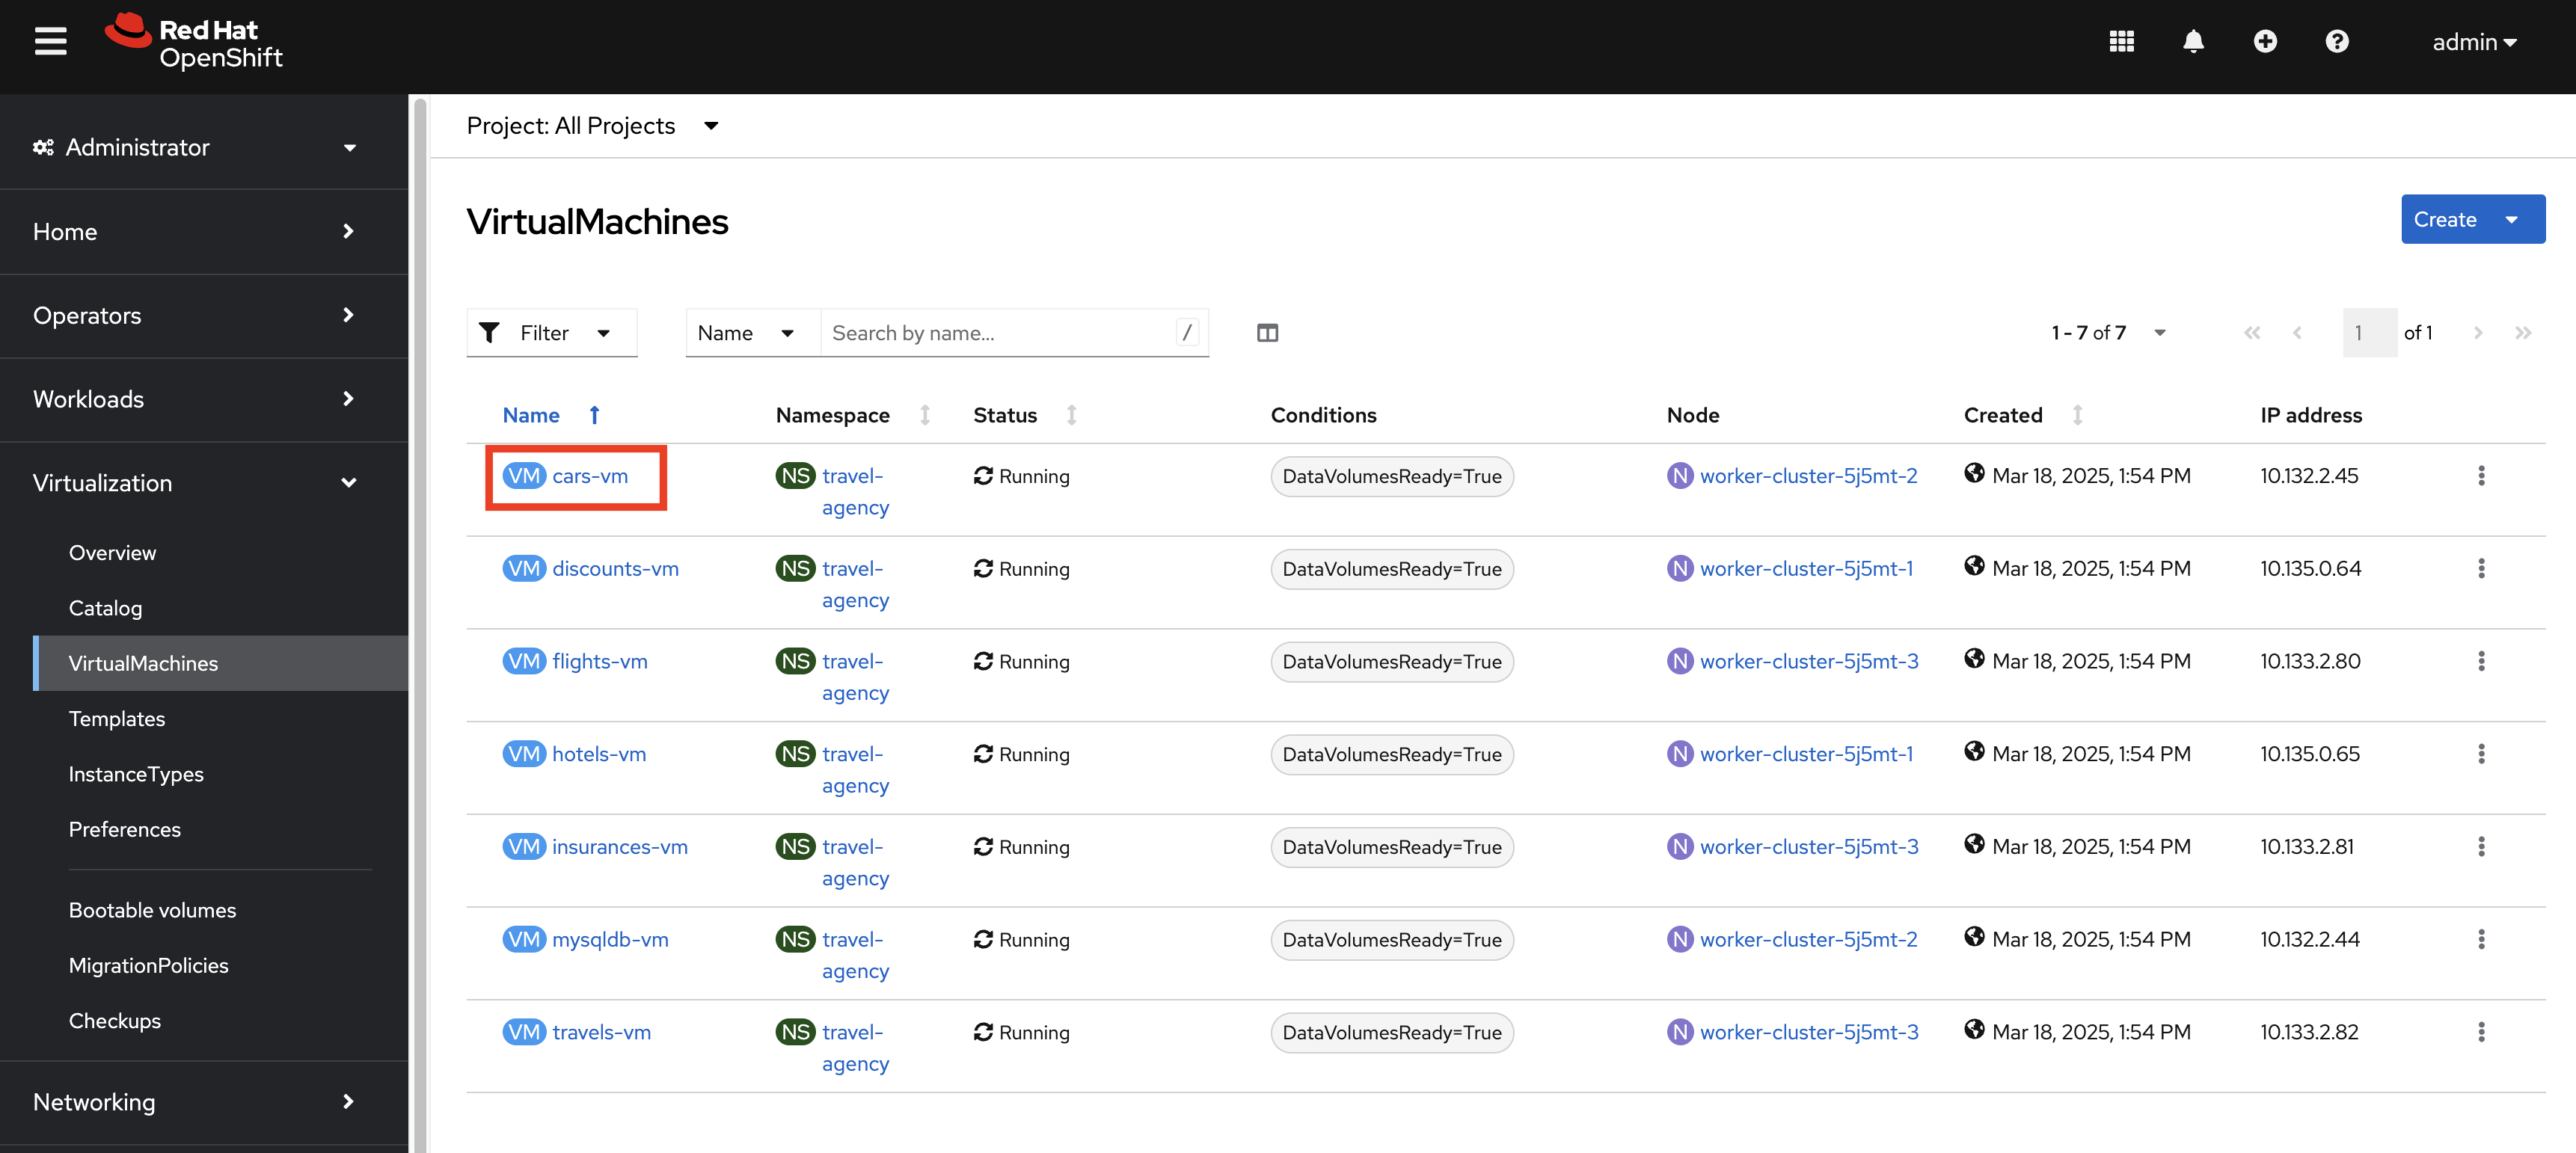
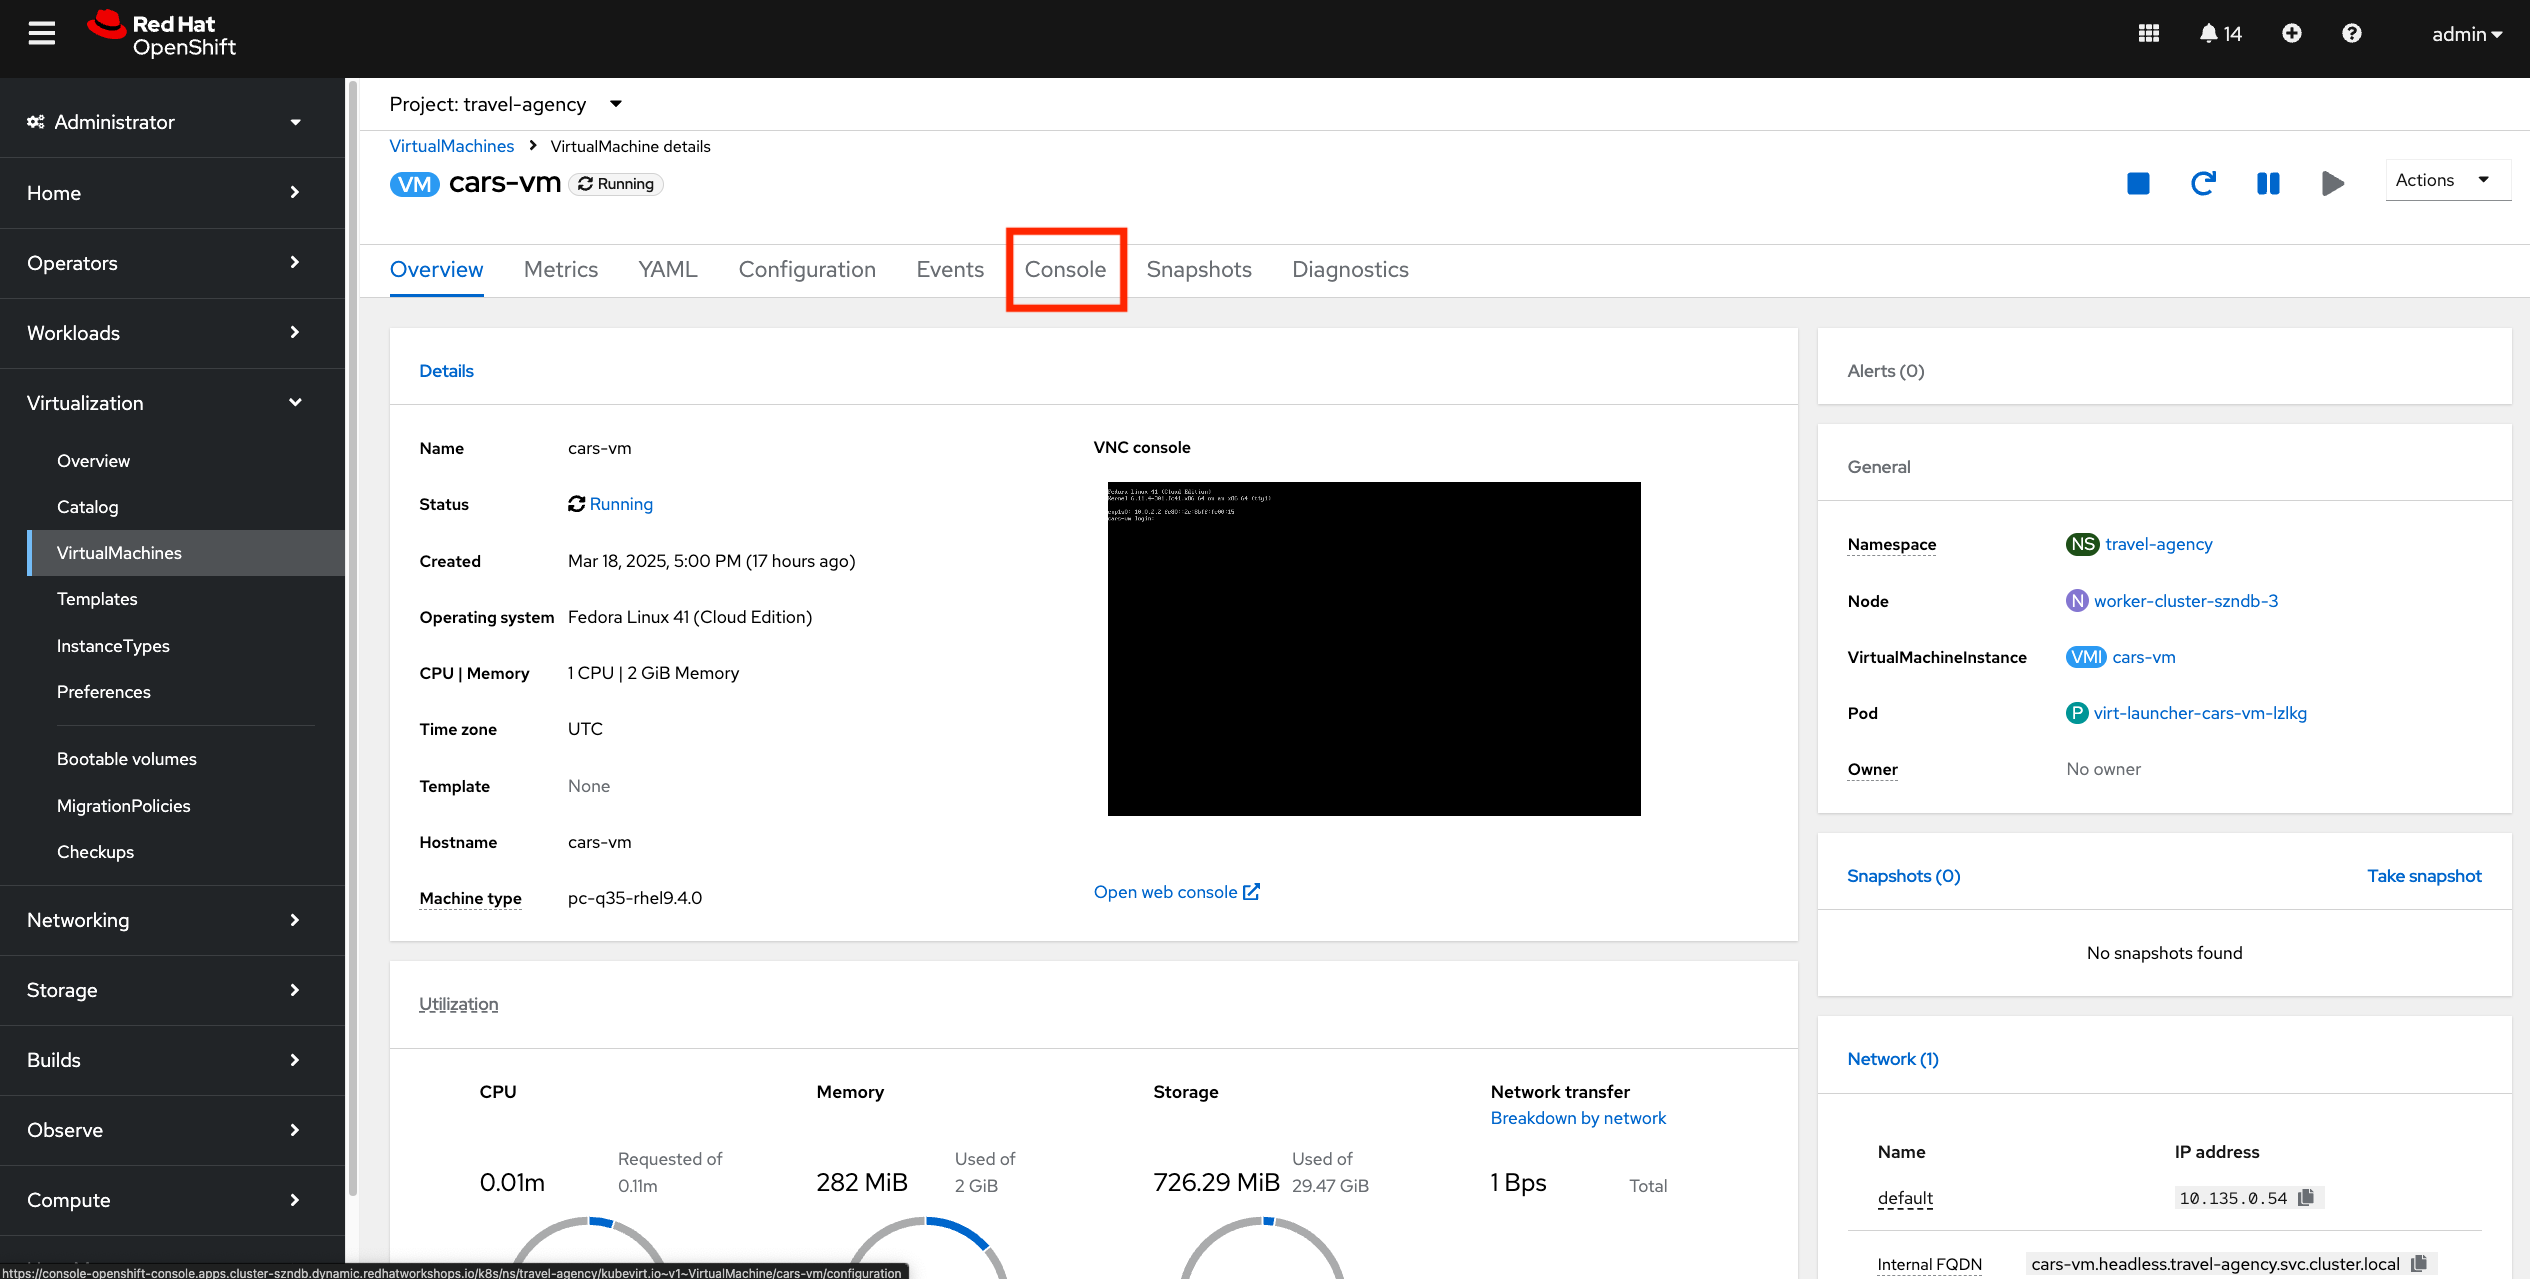
Click on the cars-vm, this directs you to the details of this VM.
You can explore the configuration (storage, networking, hardware devices, users etc.) of this VM and access the console by clicking on the Console tab.
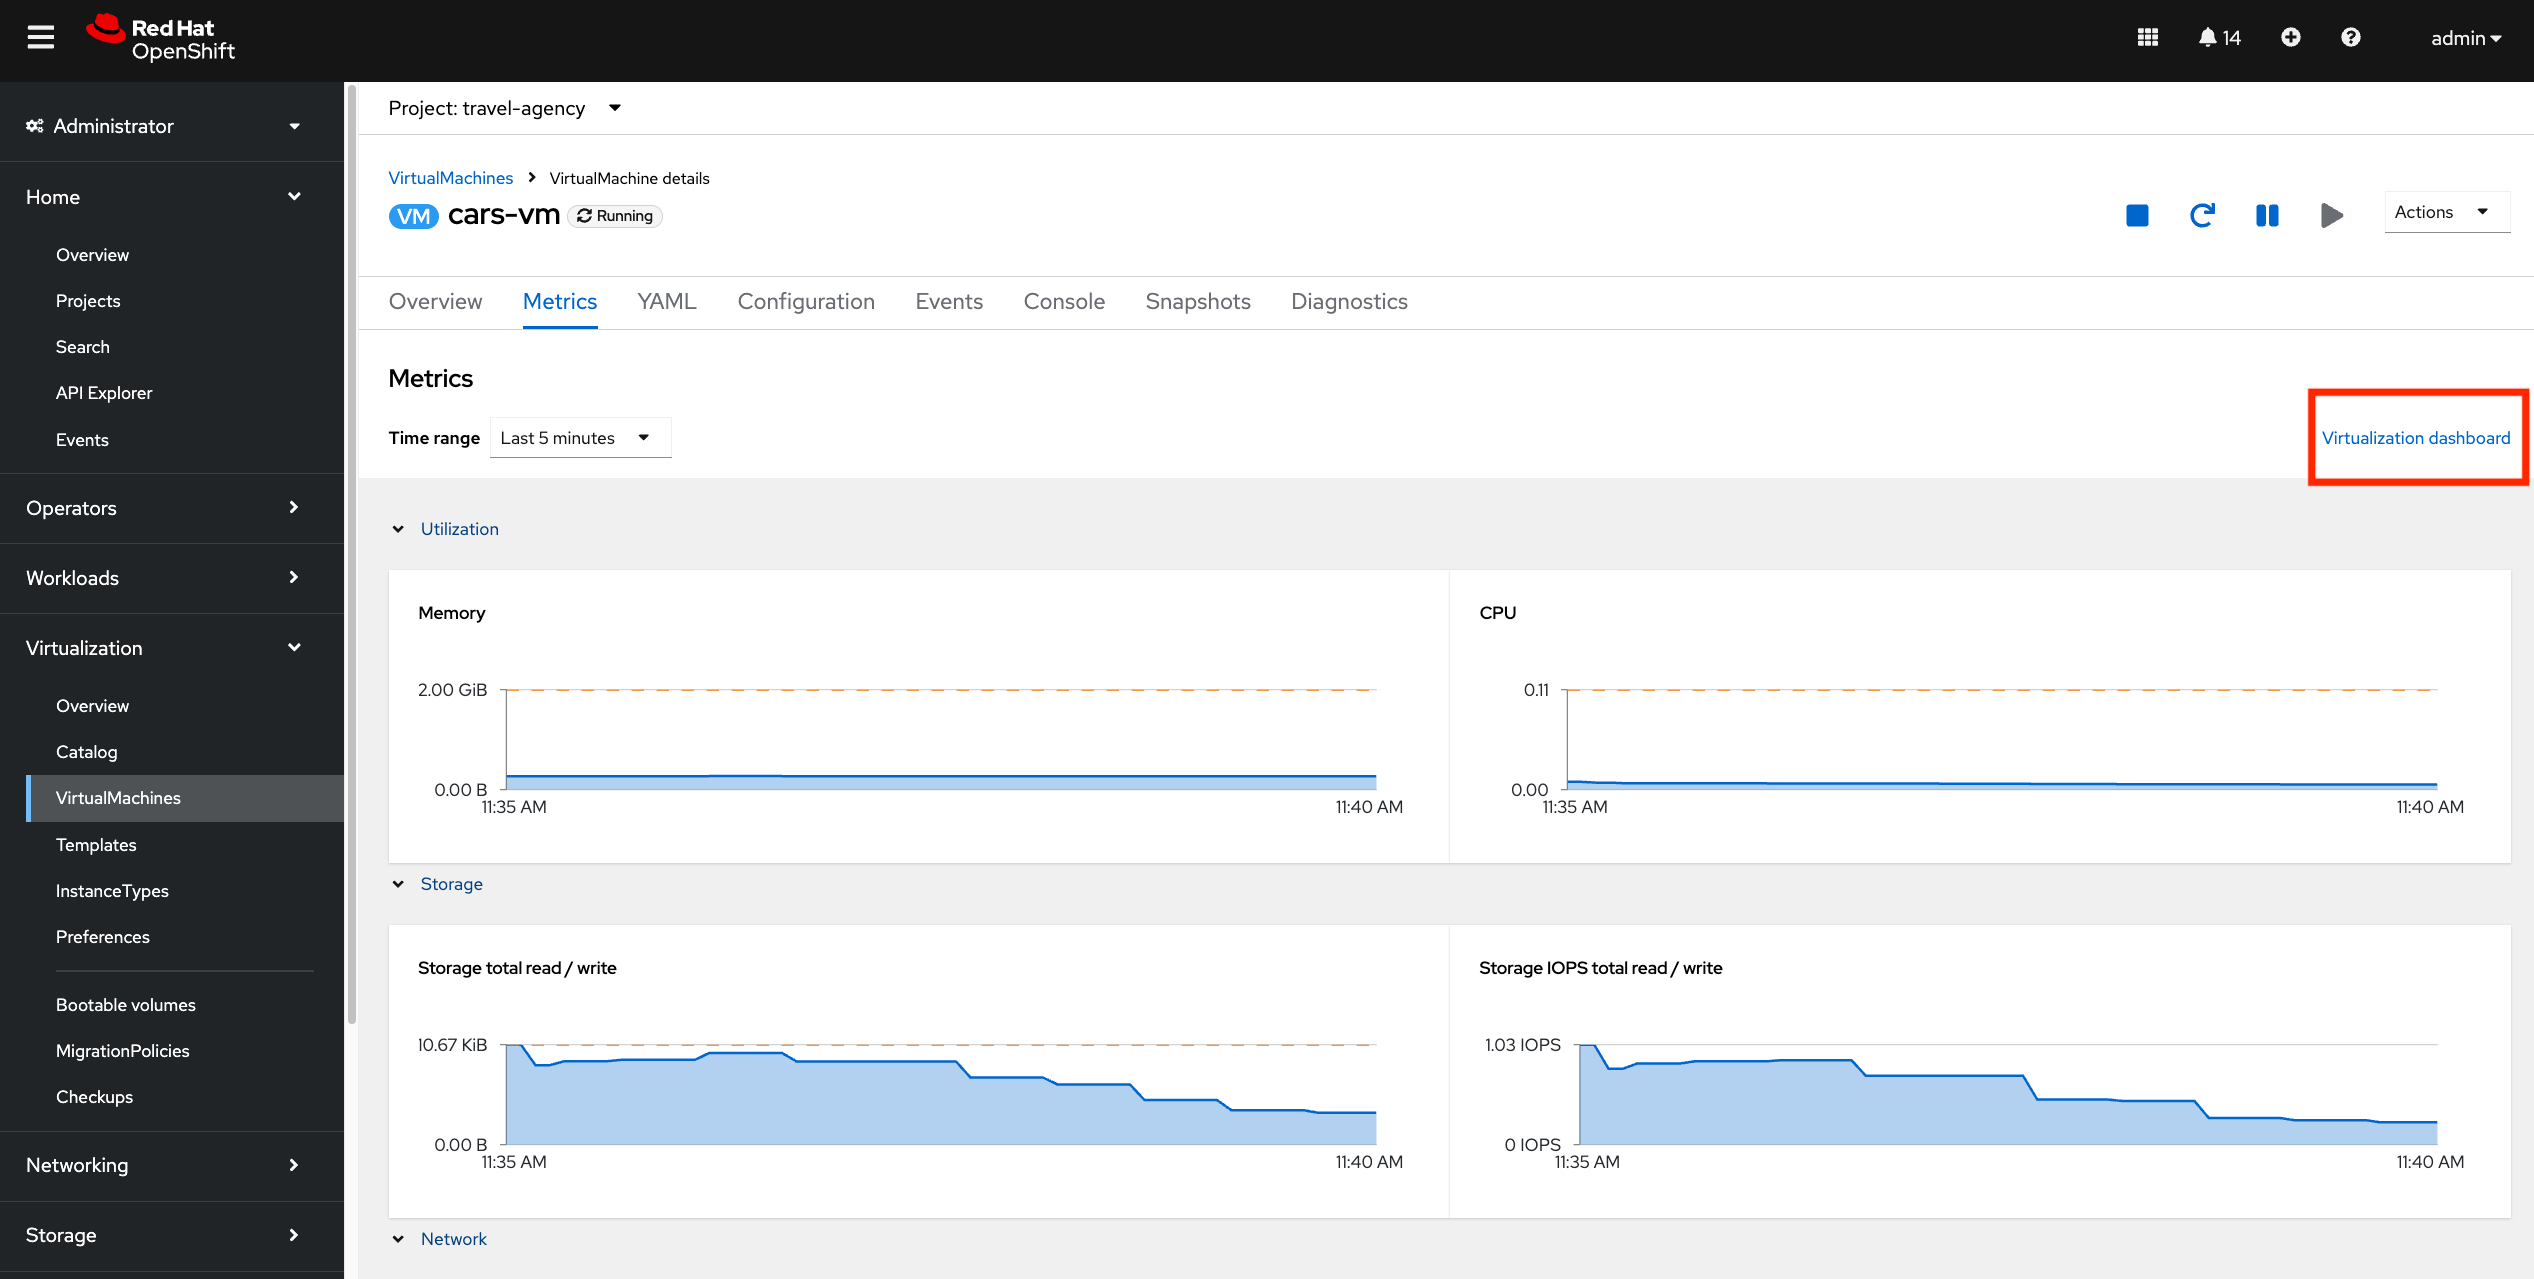
Click on the Metrics tab.
This gives you an overview of the VM metrics, like memory and cpu consumption, storage and networking data.
Now click on the link Virtualization dashboard on the top right of the page and explore the Prometheus dashboard.
So far we have explored the Virtualization Dashboard in the OpenShift console and some of the out of the box available observability features in OpenShift for VMs.
| But the workloads running inside the VMs are currently not accessable from other pods or VMs. This is what we want to achieve in the next step. |
Task 2: Create a service for the cars-vm Virtual Machine
About Loadbalancing Virtual Machines
In most systems, load balancing virtual machiness typically requires multiple different tools and configurations to work properly. For example, to load balance two virtual machines internally and externally you might have to:
-
Create a private internal load balancer
-
Create an internet facing endpoint and route it to the internal load balancer
-
Create private DNS records for the internal load balancer
-
Create public DNS records for the public endpoint for external access
-
Register virtual machines with the load balancer
-
Configure the listening/forwarding port or port translation
-
Configure health check endpoints and tests
-
Configure health check timeouts and intervals
| OpenShift trivializes networking and load balancing. In this step, you’ll accomplish all of this, without leaving OpenShift. |
Internal Loadbalancing with Kubernetes Services
Kubernetes Services are internal load balancers in OpenShift. These Services route traffic to resources by identifing them with a label selector. Labels can be applied to any OpenShift resources, including virtual machines, to identify and group them. You will create a service and identify the virtual machines it services as a load balancer by the means of labels on the virtual machines.
The actual workload running in this virtual machine is an http based API service running on port 8000.
Let us create a service in the travel-agency namespace that exposes port 8000 and sends traffic to all VMs labeled as kubevirt.io/domain: cars-vm
apiVersion: v1
kind: Service
metadata:
  name: cars-vm
  namespace: travel-agency
  labels:
    app: cars-vm
spec:
  ports:
    - port: 8000
      name: http
  selector:
    kubevirt.io/domain: cars-vm
oc apply -f ./cars-svc.yamlOn the left side in the OpenShift Web Console, click Networking → Services and select the just created service cars-vm.
Click the Pods tab and notice that the virtual machine has already registered with the service object.
This will allow applications within the OpenShift cluster to access this virtual machines through the cars-vm Service, aka "load balancer".
Now we create the remaining services for the other VMs:
oc apply -f ./services/Task 3: Validate the communication between VMs
Now that all VMs have related services, they can connect to each other.
We validate the communication between the VMs by sending an internal booking request to the central travels API service. This service is then sending requests to other VMs (flights, hotels, cars etc.) and is aggregating the response.
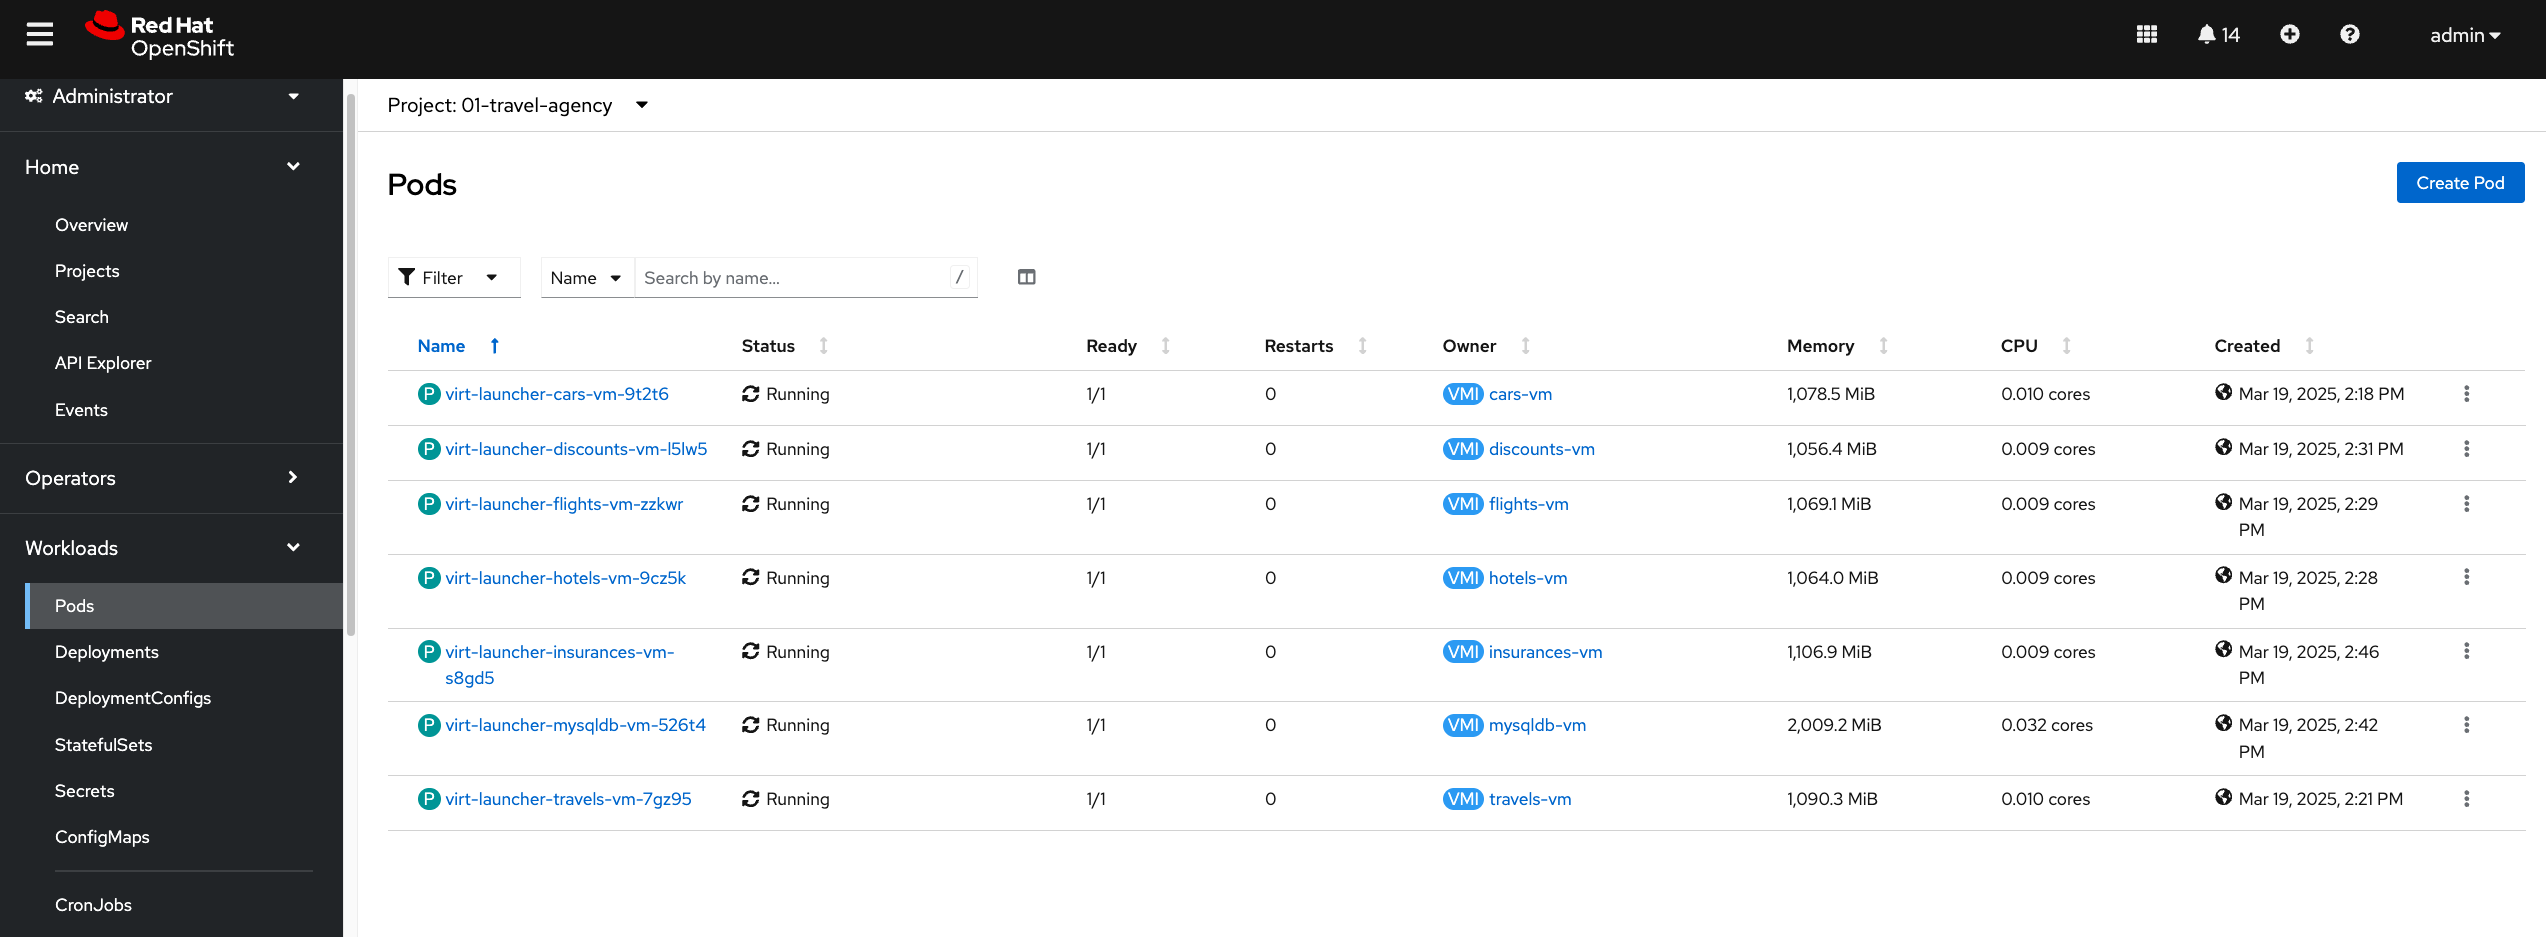
Go to Workloads → Pods and click on one of the virt-launcher-* VM pods.
Click on the Terminal tab and execute the following curl command:
curl -v http://travels-vm.travel-agency.svc.cluster.local:8000/travels/LondonYou should receive a response from the travels service similar to this:
{"city":"London","coordinates":null,"createdAt":"2025-03-19T13:47:55Z","status":"Valid",
"flights":[{"airline":"Red Airlines","price":1018},{"airline":"Blue Airlines","price":368},{"airline":"Green Airlines","price":318}],"hotels":[{"hotel":"Grand Hotel London","price":590},{"hotel":"Little London Hotel","price":116}],
"cars":[{"carModel":"Sports Car","price":1090},{"carModel":"Economy Car","price":336}],"insurances":[{"company":"Yellow Insurances","price":325},{"company":"Blue Insurances","price":74}]}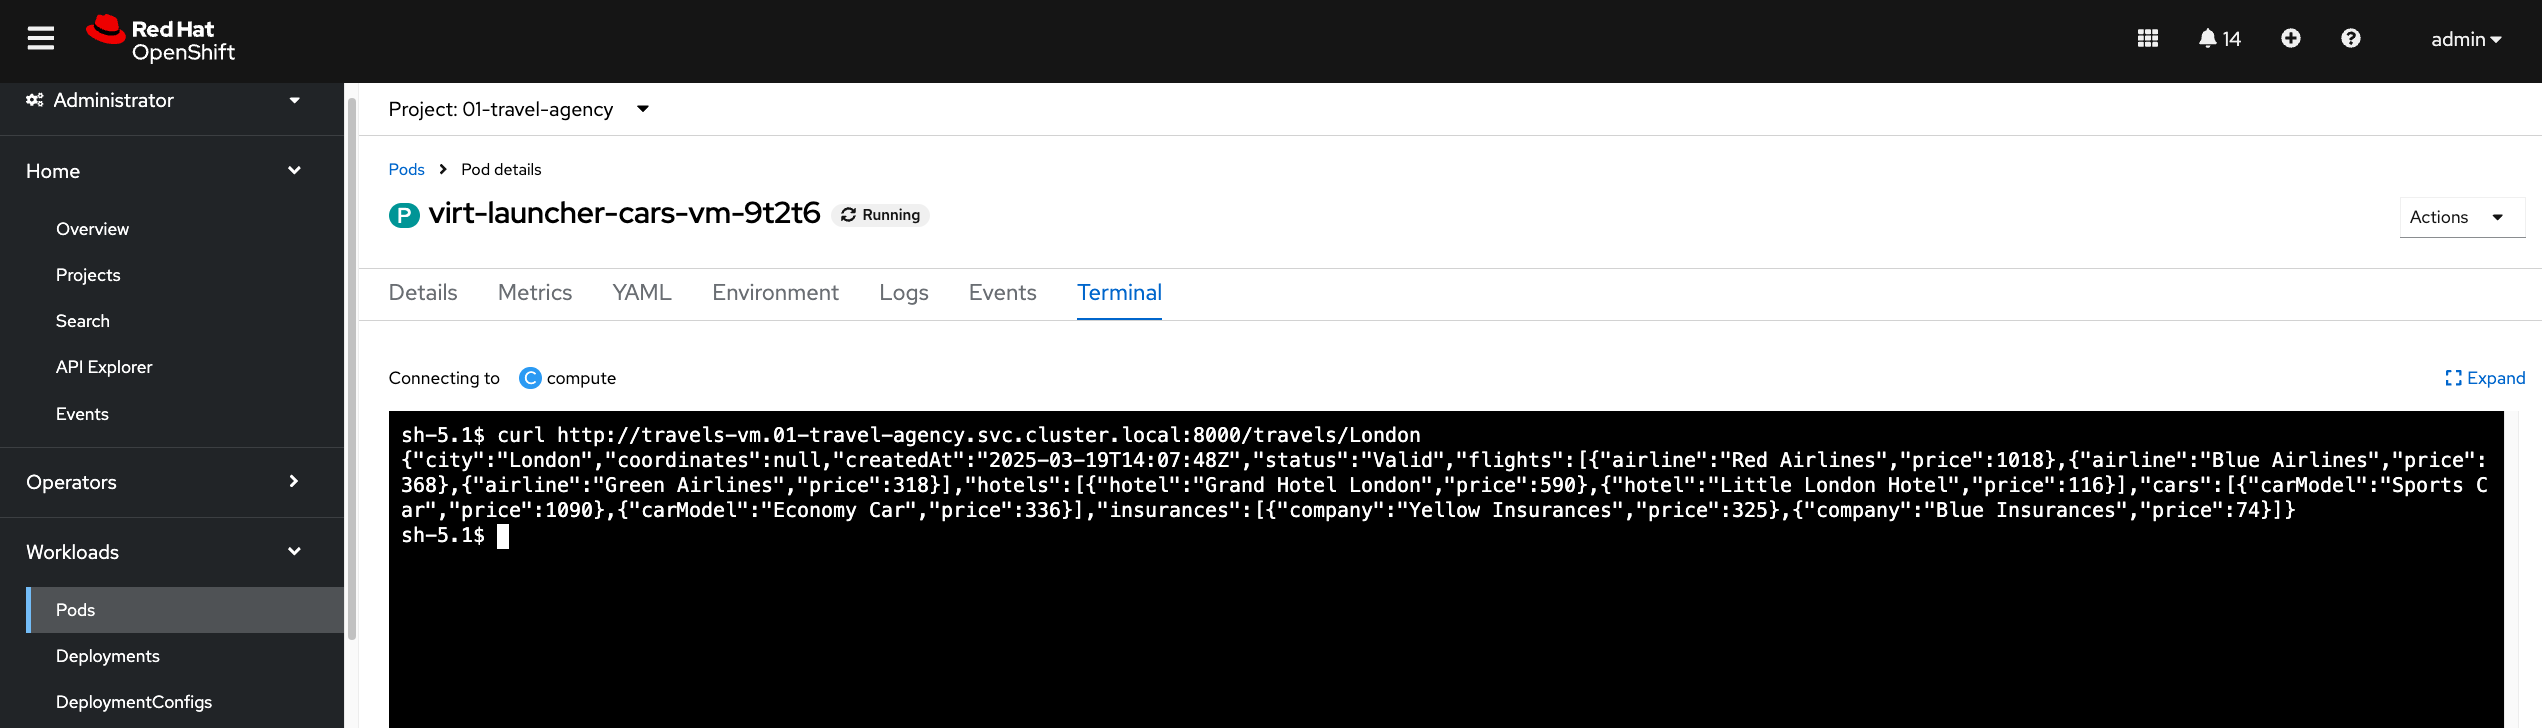
| We have established the communication between our services and VMs. But the services are not reachable from outside the cluster. |
Task 4: Set Up External Access with Routes
OpenShift was the first to introduce the concept of Routes in the early days of Kubernetes. Use a Route to provide external access to the virtuals machines through the internal Service, aka, load balancer.
Now, if we want to make the travels API service accessable from outside of the cluster, we have to create an OpenShift Route to expose the service:
kind: Route
apiVersion: route.openshift.io/v1
metadata:
  name: travels-vm
  namespace: travel-agency
spec:
  to:
    kind: Service
    name: travels-vm
    weight: 100
  port:
    targetPort: http
oc apply -f ./travels-route.yamlNow let us test the Route.
export TRAVELS_ROUTE=$(oc get route travels-vm -o jsonpath='{.spec.host}' -n travel-agency)And make an external API call to the travels service:
curl -v http://$TRAVELS_ROUTE/travels/LondonWe should get the same result as before:
{"city":"London","coordinates":null,"createdAt":"2025-03-19T13:47:55Z","status":"Valid",
"flights":[{"airline":"Red Airlines","price":1018},{"airline":"Blue Airlines","price":368},{"airline":"Green Airlines","price":318}],"hotels":[{"hotel":"Grand Hotel London","price":590},{"hotel":"Little London Hotel","price":116}],"cars":[{"carModel":"Sports Car","price":1090},{"carModel":"Economy Car","price":336}],"insurances":[{"company":"Yellow Insurances","price":325},{"company":"Blue Insurances","price":74}]}
Routes are implemented by HAProxy inside OpenShift. By default, they are sticky sessions based on cookies. If you’d like, update the Route to disable cookies and sticky sessions.
oc annotate route travels-vm haproxy.router.openshift.io/disable_cookies='true' -n travel-agencyTask 5: Create a network policy to block egress (like firewall rules)
Security is important to every customer. The principle of least privilege is a common security practice that limits an application’s access to only those resources it needs to operate. For example, if we know an application does not need access to the Internet, we should create a policy to block that application’s access to the Internet.
In the real world, customers will solve this challenge with outbound proxies/VLANs/firewalls, but those solutions can be expensive and complex to implement. Now we will show OpenShift Virtualization allows us to add an additional layer of security with just a few button clicks.
In this step, you will test blocking egress access from the cars-vm virtual machine to the Internet with the built-in, cloud native features of OpenShift.
Implement a Network Policy to Block Egress
-
On the left side, click Networking → NetworkPolicies → Create NetworkPolicy.
-
Select the YAML View radio button.
-
Replace the sample YAML with the following NetworkPolicy.
kind: NetworkPolicy
apiVersion: networking.k8s.io/v1
metadata:
 name: noegress
 namespace: travel-agency
spec:
 podSelector:
   matchLabels:
     kubevirt.io/domain: cars-vm
 policyTypes:
   - Egress
Click Create
Validate that the Internet Access is Blocked from the cars-vm virtual machine
Go back to Virtualization → VirtualMachines → cars-vm → Console
Click on Guest login credentials. Copy and paste the credentials into the Console to log in.
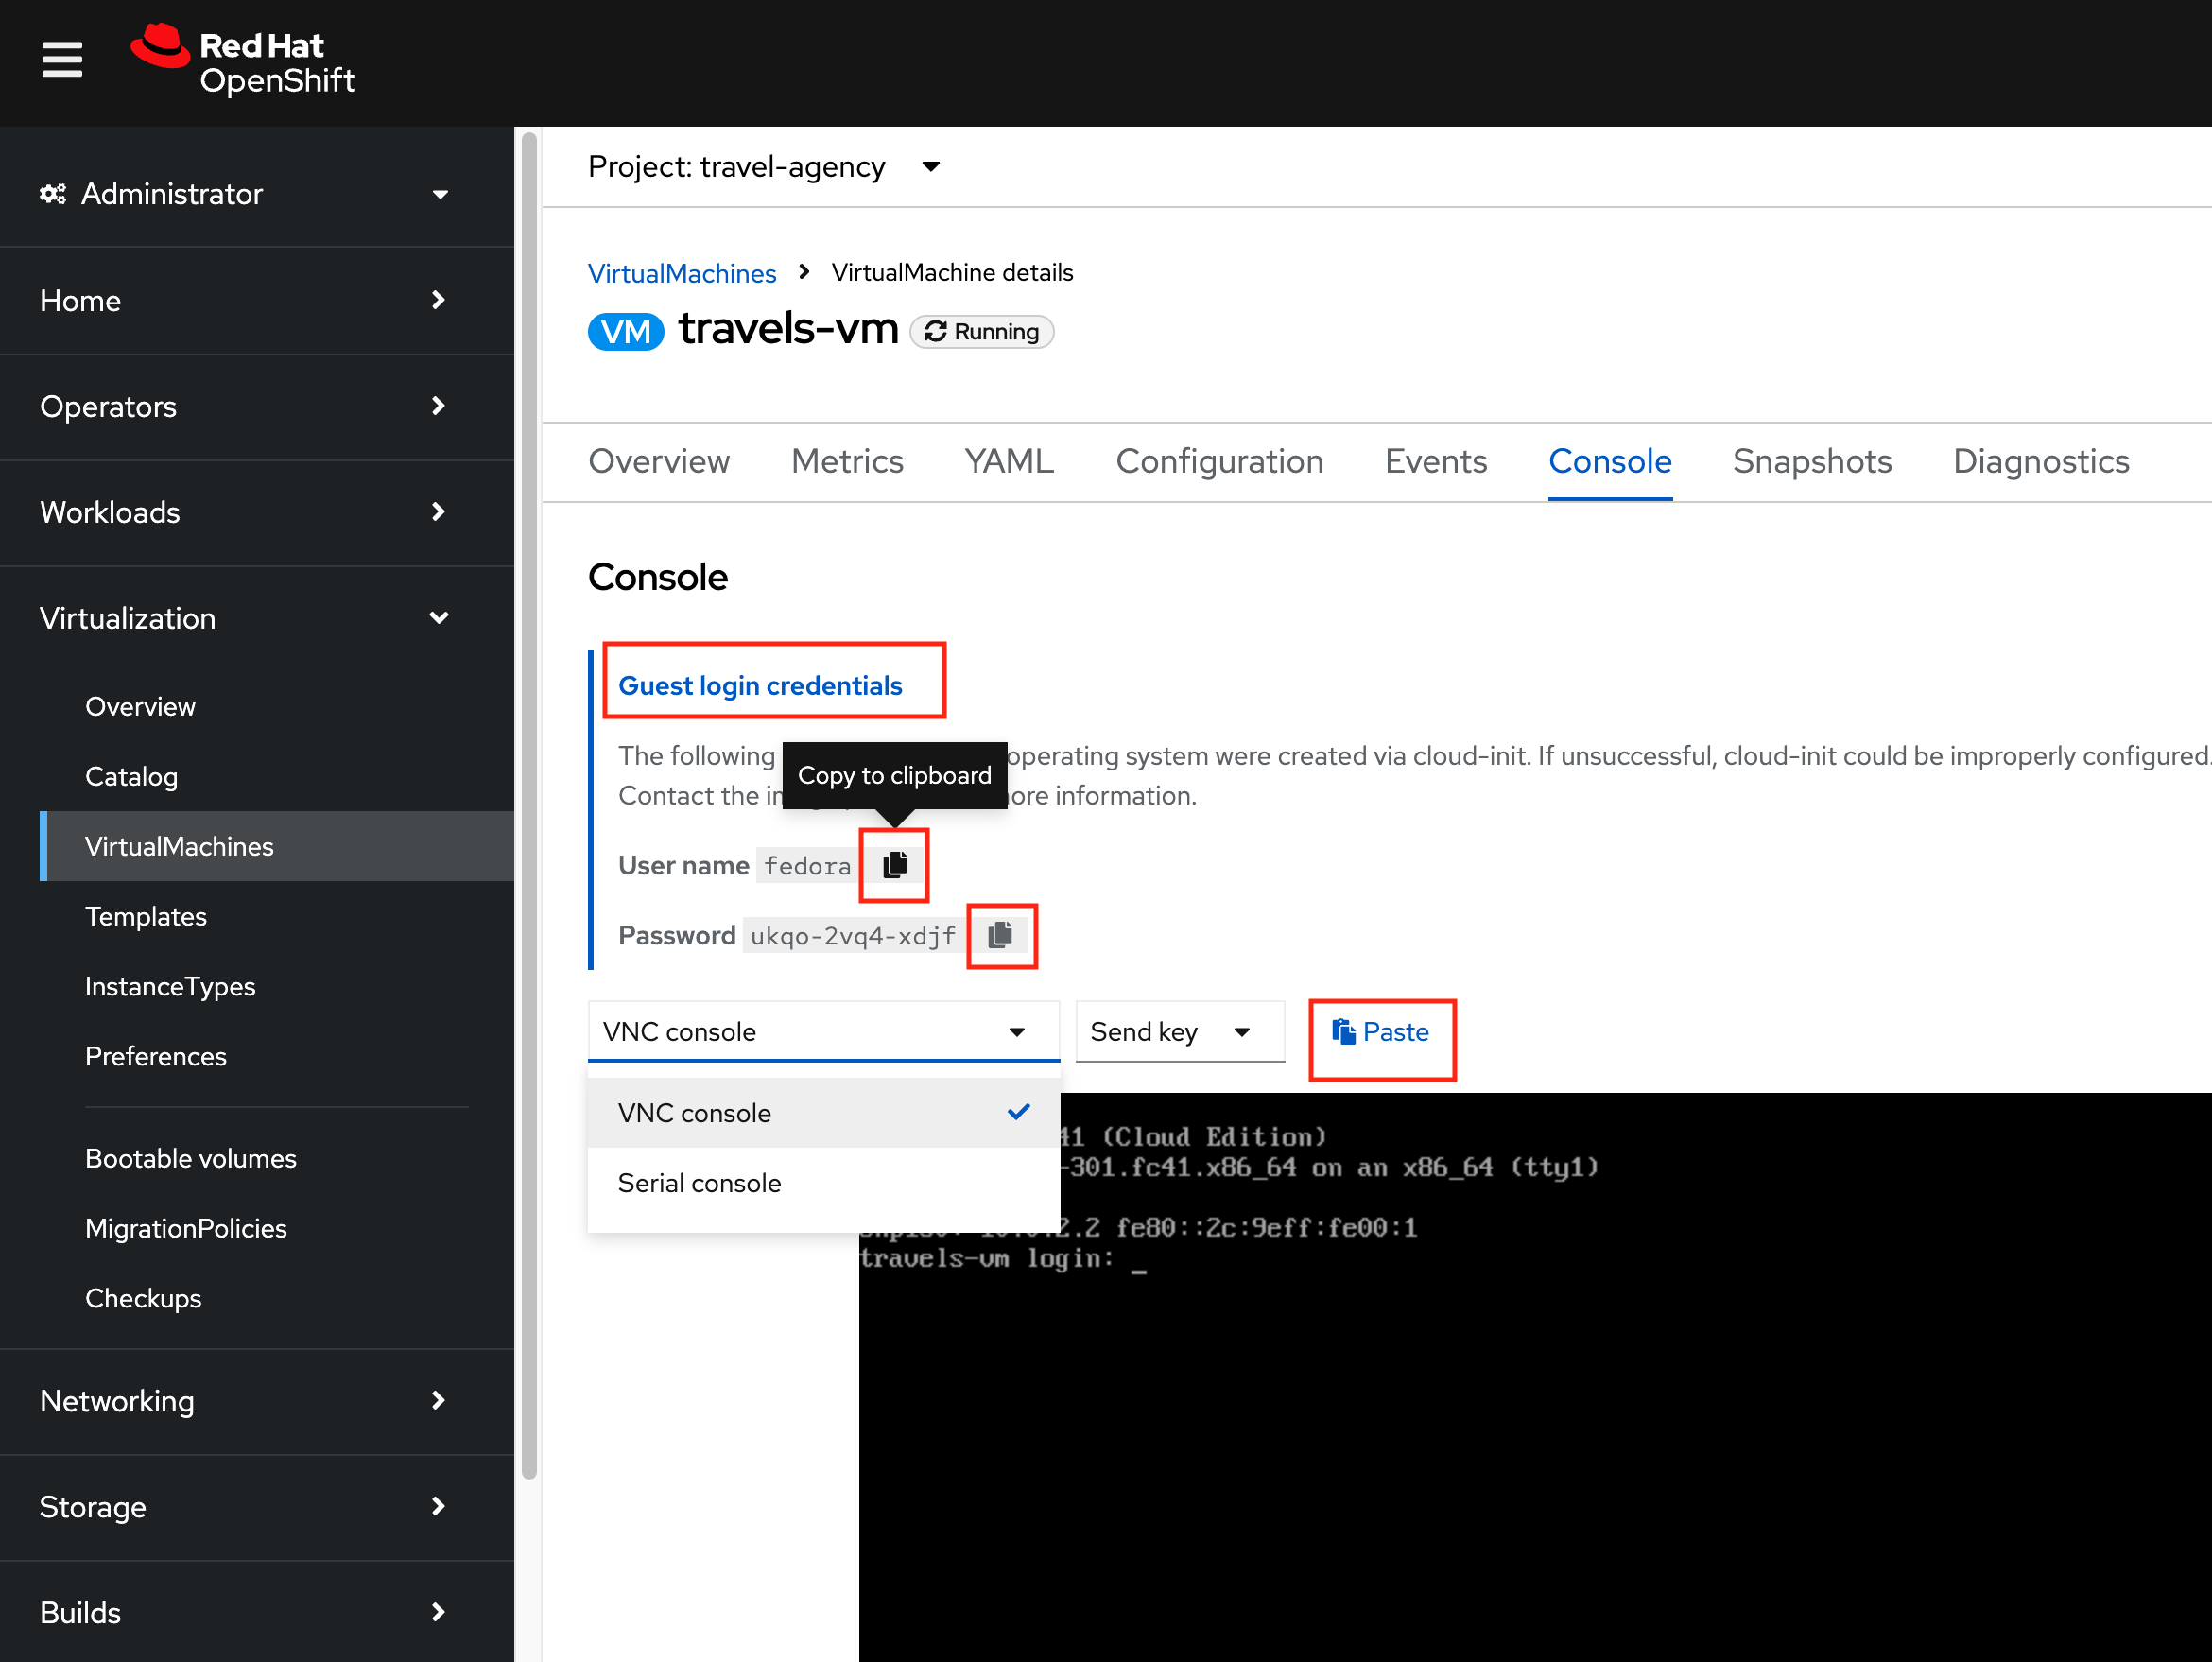
In the VM terminal, execute the following command:
curl http://www.google.com| The egress to Internet connection has been denied with a timeout. |
Now test the same from one of the other VMs.
Go to Virtualization → VirtualMachines → travels-vm → Console. Log in the same way described above, and try to access the internet from this VM. This should work!
curl http://www.google.com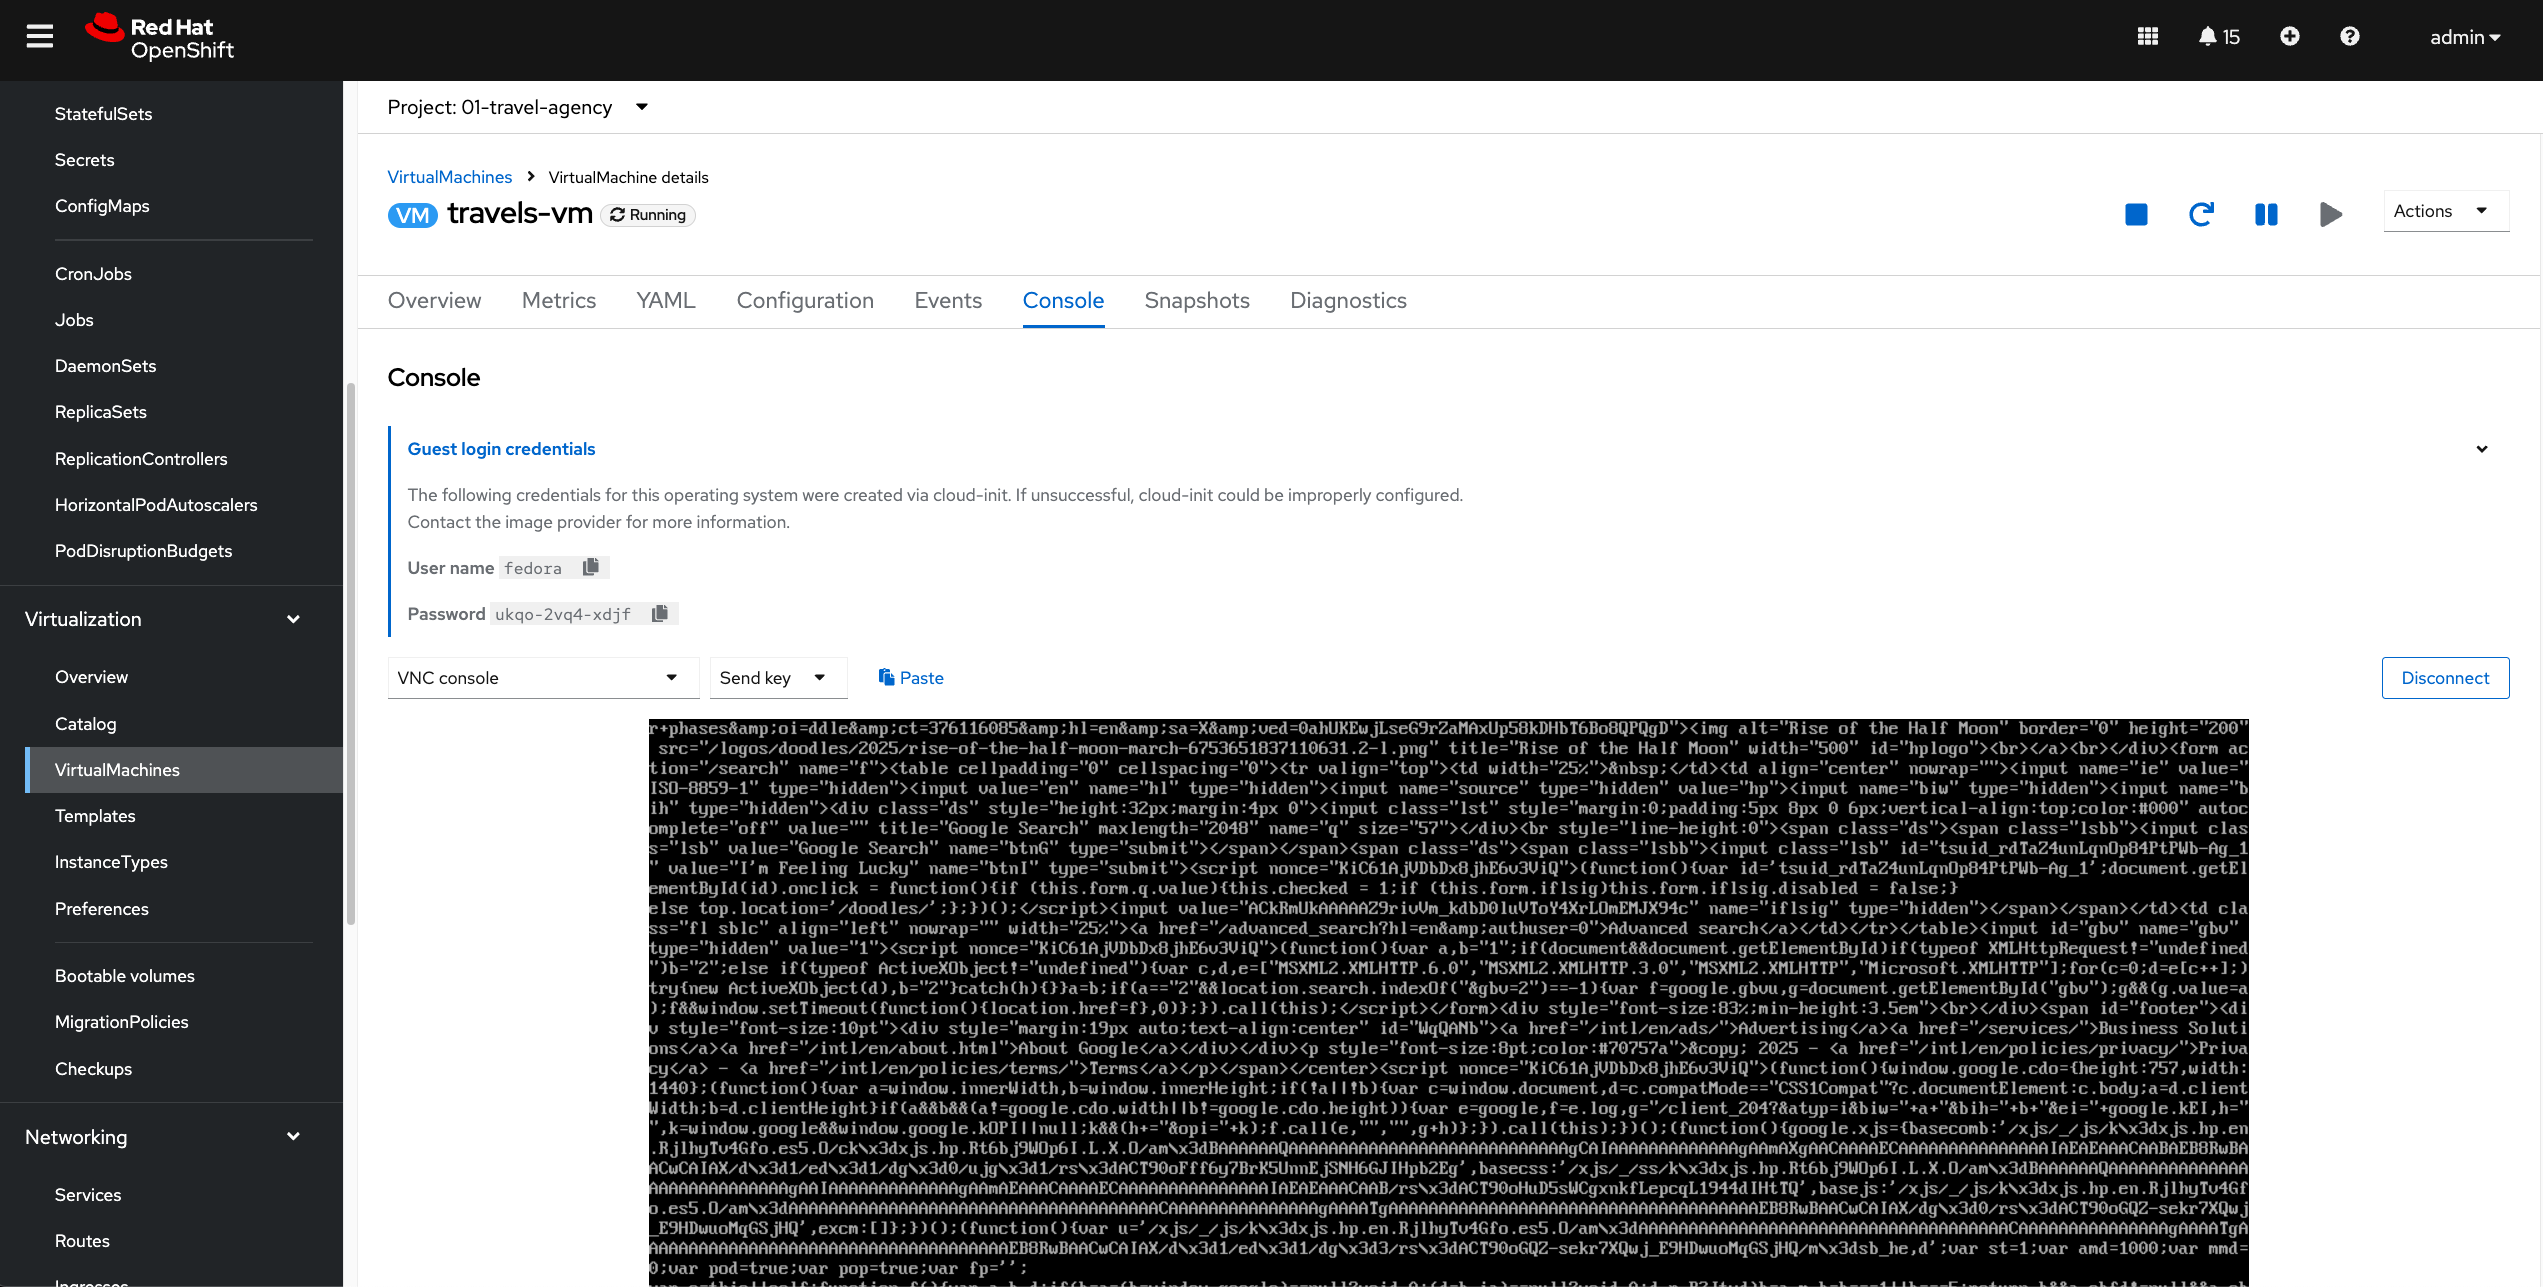
Now we clean up by deleting the NetworkPolicy:
oc delete networkpolicy noegress -n travel-agency