Module 2 - Scaling Virtual Machines on OpenShift
All assets for this module are in the folder lab-2. Please change the directory into this folder.
|
cd $HOME/virt-ossm-workspace/lab-2Task 1: Complete the Travel Demo Application - Create the UI component
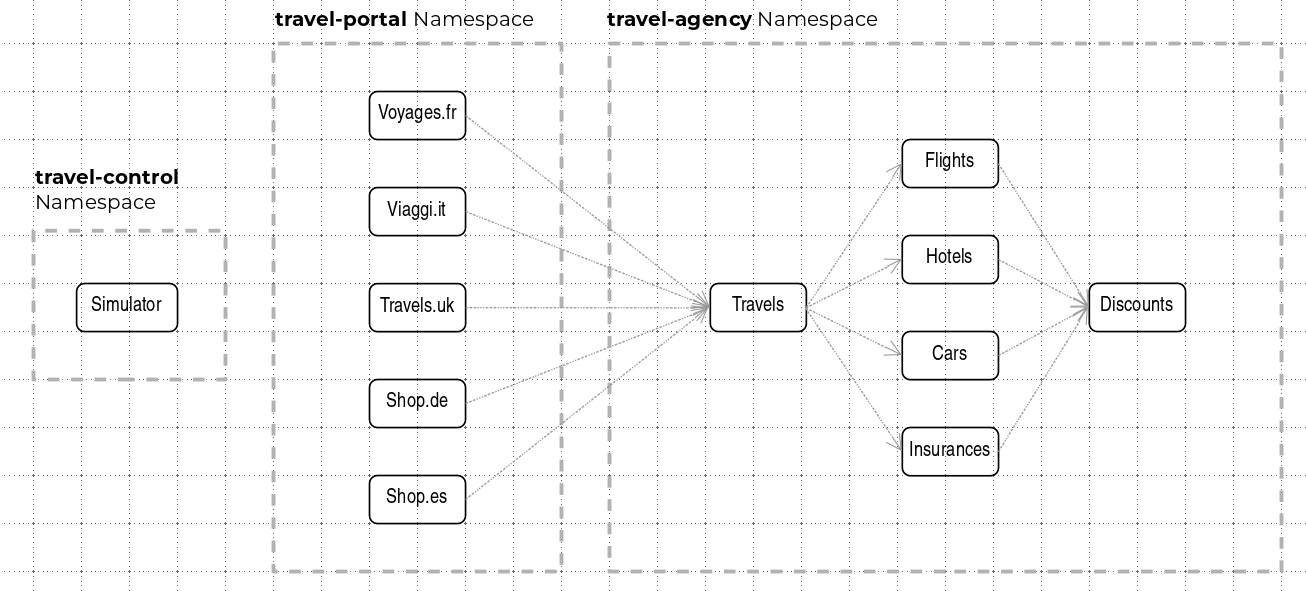
Let us revisit the application architecture.
As of now all backend services are running as virtual machines in the travel-agency namespace.
In the travel-portal namespace we have three Customer Portals running in the form of containers.
What is missing, is the business dashboard (Simulator) in the travel-control namespace.
This component provides an UI and simulates sending booking requests to the booking portals.
We are going to deploy this component now as a virtual machine.
First we create a new OpenShift project (namespace) for this Virtual machine:
oc new-project travel-controlThen go to Virtualization → VirtualMachines → Create
Select With YAML and replace the content with the following:
apiVersion: kubevirt.io/v1
kind: VirtualMachine
metadata:
  name: control-vm
  namespace: travel-control
spec:
  dataVolumeTemplates:
    - apiVersion: cdi.kubevirt.io/v1beta1
      kind: DataVolume
      metadata:
        creationTimestamp: null
        name: fedora-control
      spec:
        sourceRef:
          kind: DataSource
          name: fedora
          namespace: openshift-virtualization-os-images
        storage:
          resources:
            requests:
              storage: 30Gi
  running: true
  template:
    metadata:
      annotations:
        vm.kubevirt.io/flavor: small
        vm.kubevirt.io/os: fedora
        vm.kubevirt.io/workload: server
#        sidecar.istio.io/inject: 'true'
      creationTimestamp: null
      labels:
        kubevirt.io/domain: control-vm
        kubevirt.io/size: small
        app: control-vm
        version: v1
    spec:
      architecture: amd64
      domain:
        cpu:
          cores: 1
          sockets: 1
          threads: 1
        devices:
          disks:
            - disk:
                bus: virtio
              name: rootdisk
            - disk:
                bus: virtio
              name: cloudinitdisk
          interfaces:
            - masquerade: {}
              name: default
          rng: {}
        features:
          acpi: {}
          smm:
            enabled: true
        firmware:
          bootloader:
            efi: {}
        machine:
          type: pc-q35-rhel9.4.0
        memory:
          guest: 2Gi
        resources: {}
      networks:
        - name: default
          pod: {}
      terminationGracePeriodSeconds: 180
      volumes:
        - dataVolume:
            name: fedora-control
          name: rootdisk
        - cloudInitNoCloud:
            userData: |-
              #cloud-config
              user: fedora
              password: ukqo-2vq4-xdjf
              chpasswd: { expire: False }
              ssh_pwauth: true
              runcmd:
              - loginctl enable-linger fedora
              - su - fedora -c 'XDG_RUNTIME_DIR=/run/user/$(id -u) DBUS_SESSION_BUS_ADDRESS="unix:path=${XDG_RUNTIME_DIR}/bus" systemctl --user daemon-reload'
              - su - fedora -c 'XDG_RUNTIME_DIR=/run/user/$(id -u) DBUS_SESSION_BUS_ADDRESS="unix:path=${XDG_RUNTIME_DIR}/bus" systemctl --user start control.service'
              write_files:
              - content: |
                  [Unit]
                  Description=Fedora Control Container

                  [Container]
                  Label=app=control-container
                  ContainerName=control-container
                  Image=quay.io/kiali/demo_travels_control:v1
                  Environment=PORTAL_SERVICES='voyages.fr;http://voyages.travel-portal.svc.cluster.local:8000,viaggi.it;http://viaggi.travel-portal.svc.cluster.local:8000,travels.uk;http://travels.travel-portal.svc.cluster.local:8000'
                  PodmanArgs=-p 8080:8080

                  [Install]
                  WantedBy=multi-user.target default.target

                  [Service]
                  Restart=always
                path: /etc/containers/systemd/users/control.container
                permissions: '0777'
                owner: root:root
          name: cloudinitdisk
Click on Create.
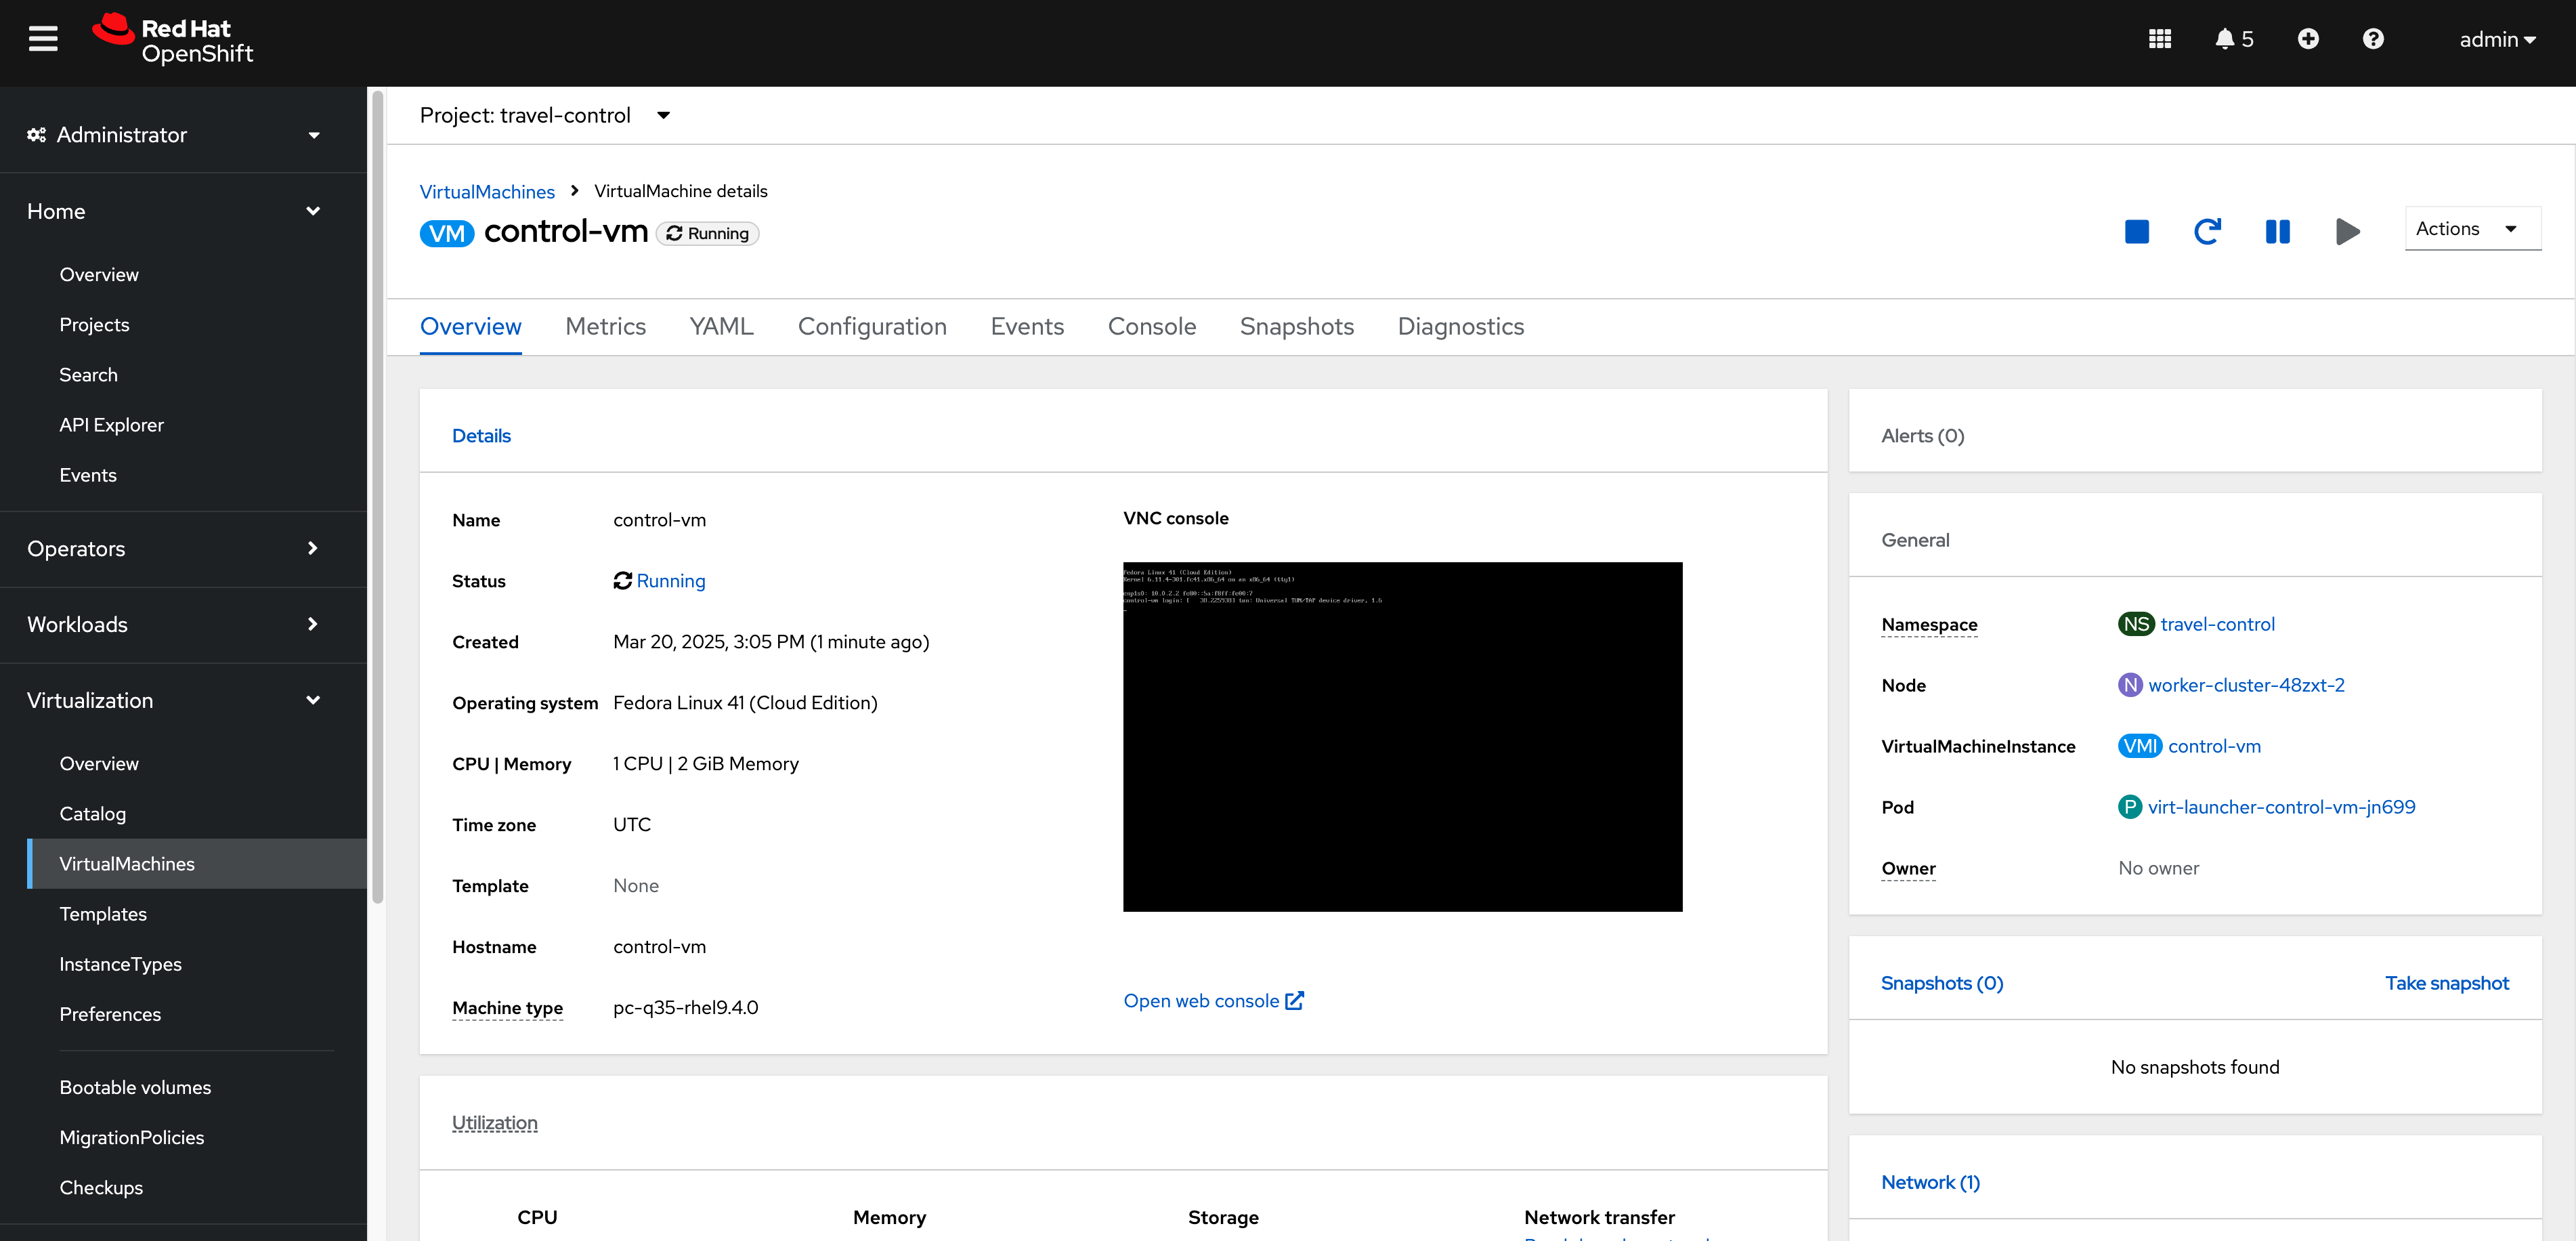
The Virtual Machine instance is going to be provisioned now. After a minute or two, the VM should be up and running:
Task 2: Expose the Business Dashboard
The business dashboard is now running and sending booking request to the booking portals. In order to access the UI of the Dashboard from our Browser, we have to create a Kubernetes Service and expose this Service with an OpenShift Route, like we did in Module 1.
First create the Kubernetes services:
apiVersion: v1
kind: Service
metadata:
  name: control-vm
  namespace: travel-control
  labels:
    app: control-vm
spec:
  ports:
    - port: 8080
      name: http
  selector:
    kubevirt.io/domain: control-vm
oc apply -f ./control-svc.yamlNow expose the service with a route:
kind: Route
apiVersion: route.openshift.io/v1
metadata:
  name: travel-control
  namespace: travel-control
spec:
  to:
    kind: Service
    name: control-vm
    weight: 100
  port:
    targetPort: http
  tls:
    termination: edge
    insecureEdgeTerminationPolicy: Allow
  wildcardPolicy: None
oc apply -f ./control-route.yaml| You can access the dashboard now through https or http as we have configured TLS with edge termination. |
Go to Networking → Routes and click on the URL in the Location column.
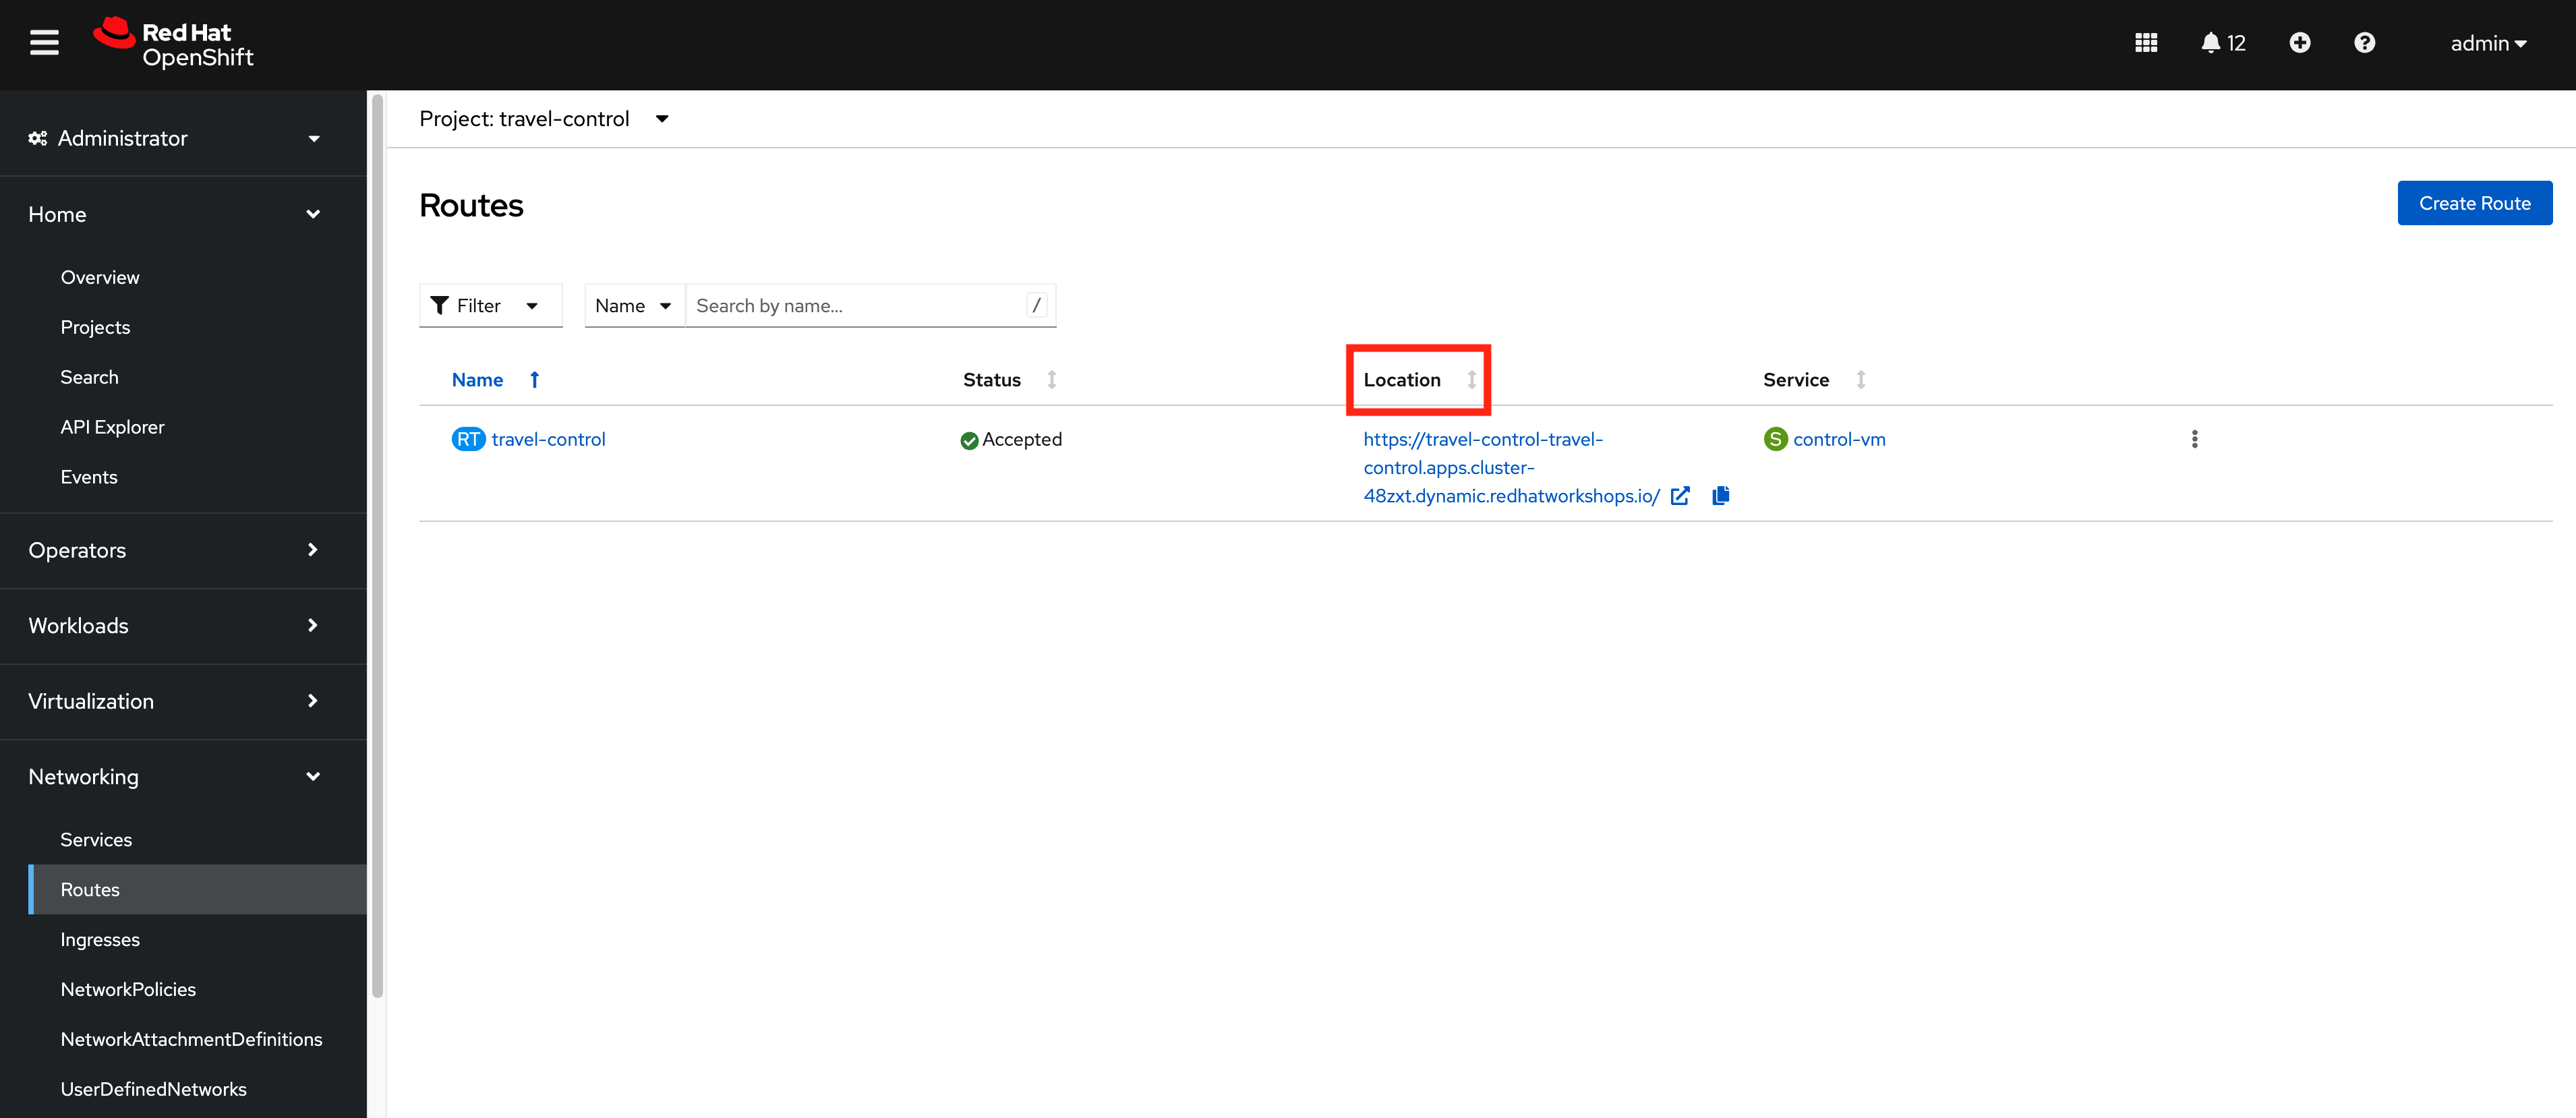
Or use the CLI to get the URL:
echo "$(oc get route travel-control -o jsonpath='{.spec.host}' -n travel-control)"Open the Business Dashboard and explore the features.
You can now adjust the settings (Request Ratio, Travel Type etc.) of each travel portal by using the sliders.

| Congratulations!! You helped the Travel Agency company to have their complete Booking system running in OpenShift with VMs alongside containers. |
Task 3: Scale Up the control-vm
The busines dashboard is the central UI component in the Travel Booking application. Therefore we want to increase the cpu and memory. The VM instance is currently configured with 1 cpu and 2GB of memory. Let us validate this.
Got to Virtualization → VirtualMachines → control-vm
Click on the Console tab and login to the VM. In the terminal please type:
lscpuYou should see something similar to this:

free -h
Now click on the Configuration tab, scroll down and click on CPU | Memory
Select 2 vCPU and 4GB of Memory and click Save.
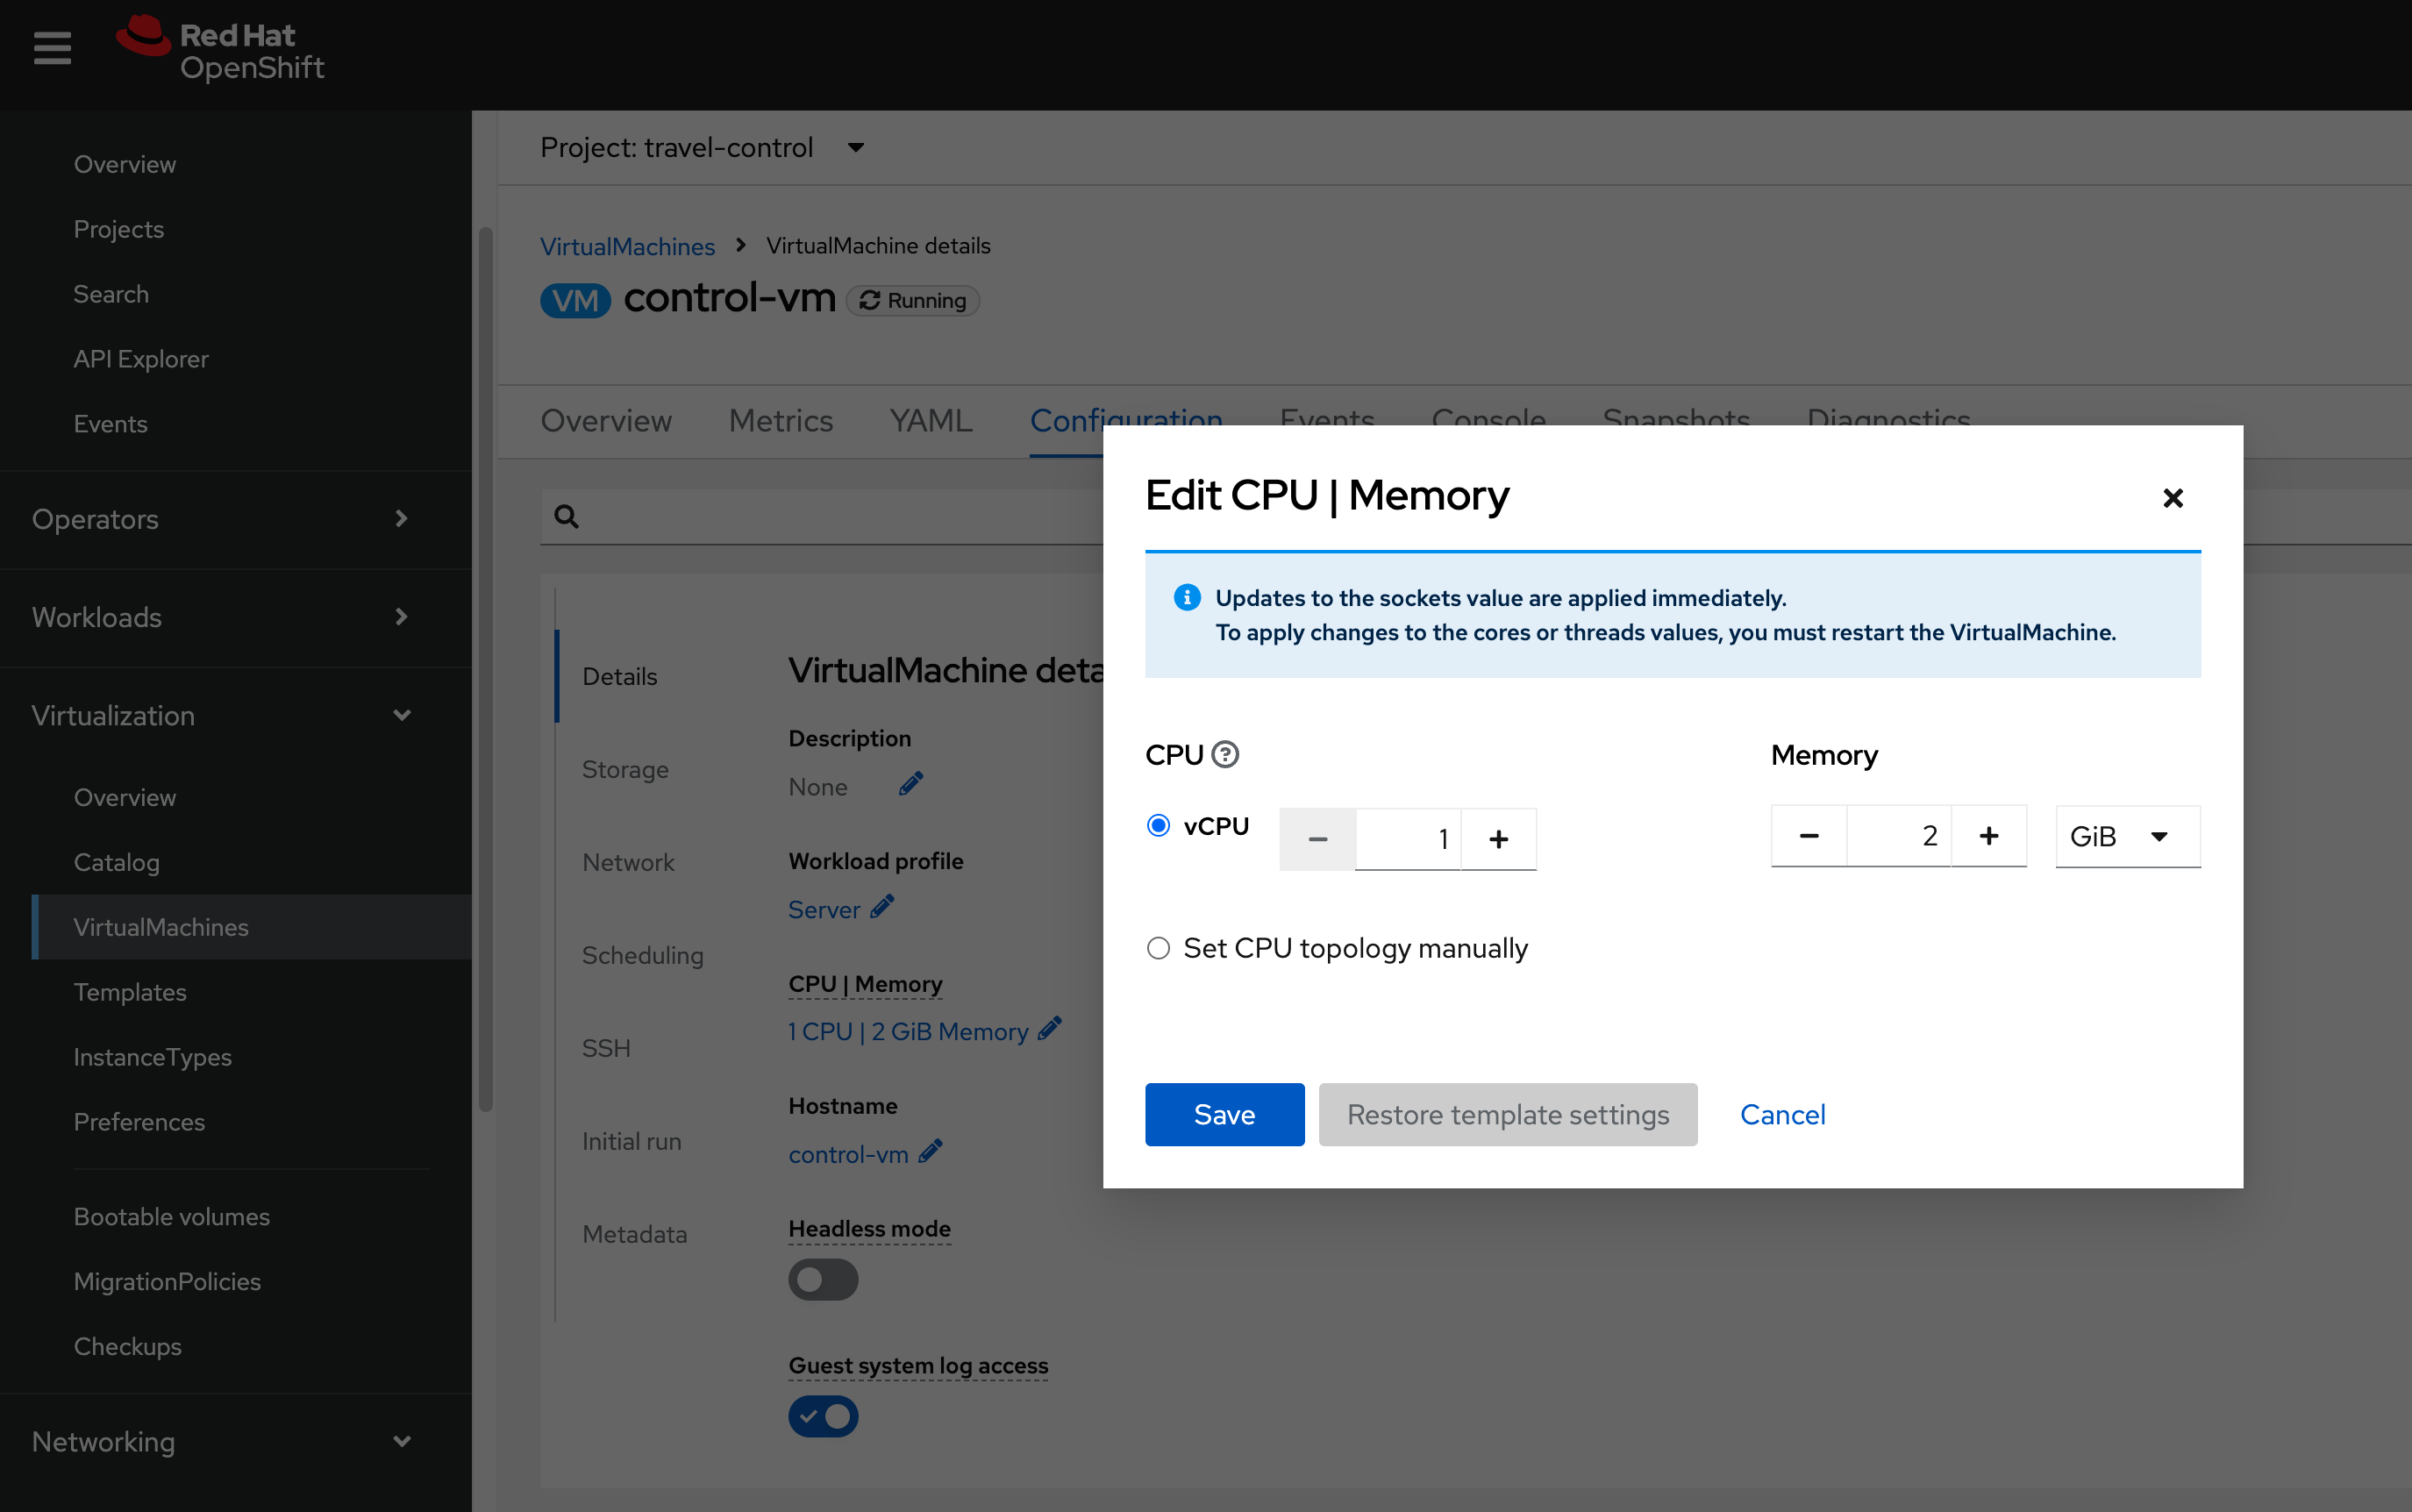
Now we see that the VM is in the state migrating. The changes will automatically be applied.
| OpenShift Virtualization also supports Live Migration when increasing resources, so it can migrate VMs across nodes for better resource utilization. The underlying node must have enough available resources for scaling up. |
Congratulations! You have scaled up a Virtual Machine.
Task 4: Scale Out a VM to showcase the loadbalancing ability in OCP
As we have mentioned already, there are three options to scale out VMs.
We are going to use a VirtualMachinePool resource in this task.
|
Please note that |
A VirtualMachinePool tries to ensure that a specified number of VirtualMachine replicas and their respective VirtualMachineInstances are in the ready state at any time. In other words, a VirtualMachinePool makes sure that a VirtualMachine or a set of VirtualMachines is always up and ready.
First we are going to delete the existing control-vm Virtual Machine:
oc delete vm control-vm -n travel-controlAnd replace it with a VirtualMachinePool configuration.
The actual interesting parts are the spec.replicas and the matchLabels selectors. In this case we want to have 2 replicas of this VM running at any time.
apiVersion: pool.kubevirt.io/v1alpha1
kind: VirtualMachinePool
metadata:
  name: travel-control-vm-pool
  namespace: travel-control
spec:
  replicas: 2
  selector:
    matchLabels:
      kubevirt.io/domain: control-vm
  virtualMachineTemplate:
    metadata:
..
    spec:
      runStrategy: Always
..
      template:
        metadata:
..
          labels:
            kubevirt.io/domain: control-vm
            kubevirt.io/size: small
            app: control-vm
            version: v1
        spec:
          architecture: amd64
          domain:
            cpu:
              cores: 1
              sockets: 1
              threads: 1
..
..
..
Now let’s apply the VirtualMachinePool configuration:
oc apply -f ./vm-pool.yamlGo to Virtualization → VirtualMachines in the travel-control namespace and you should see two instances of the control-vm coming up.
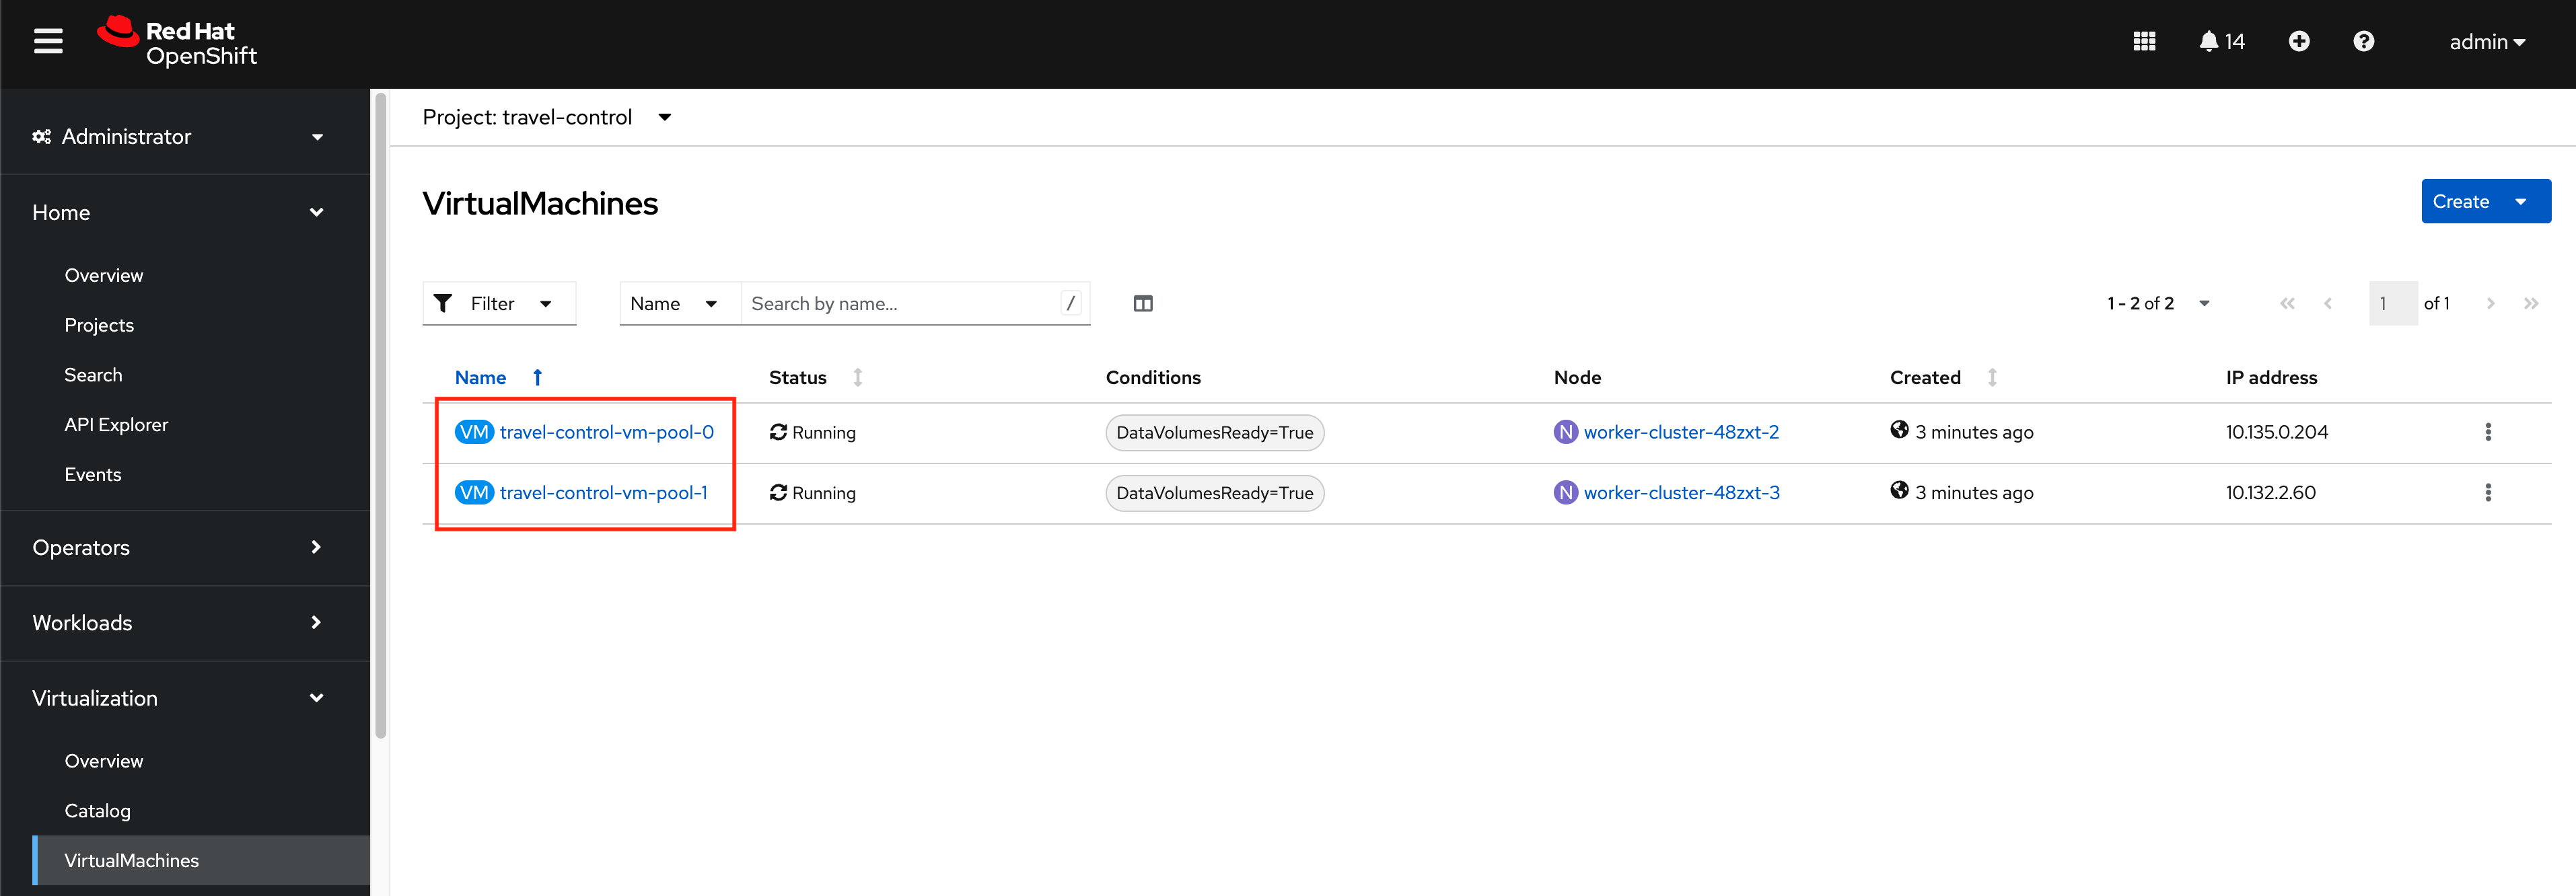
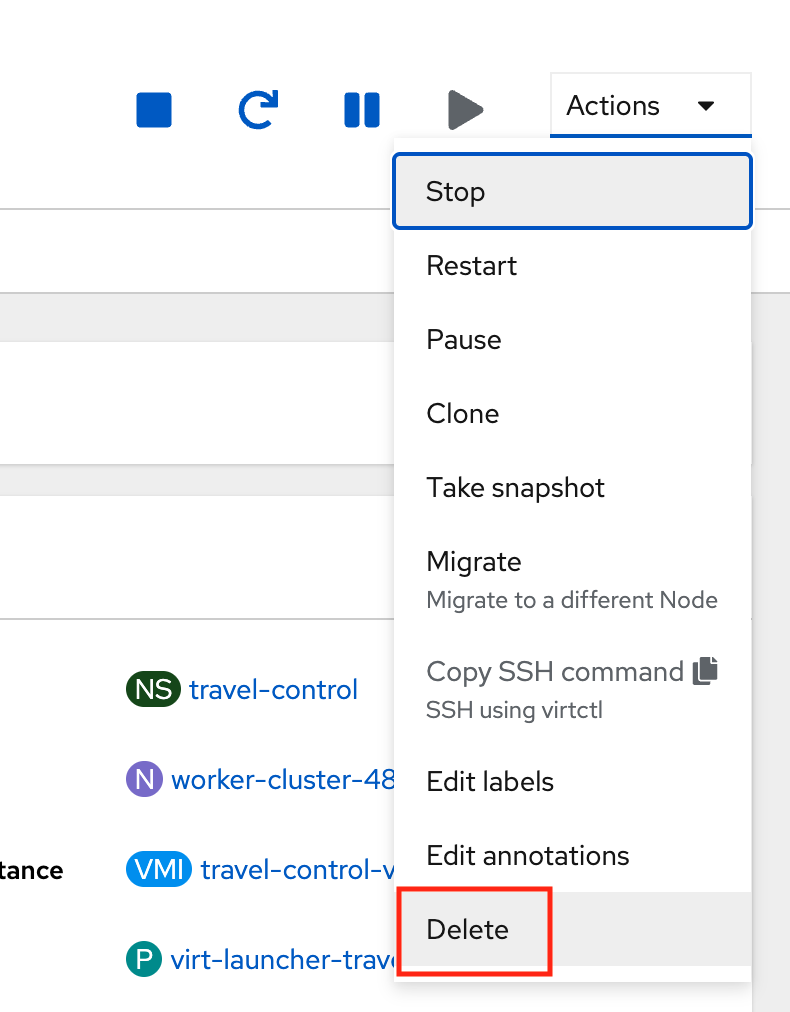
Select one of the VMs and delete it!
Open the business dashboard and validate that it is still working.
You will also recognize that the control-vm is automatically recreated.
| It is also possible to autoscale Virtual Machines by using a HorizontalPodAutoscaler (HPA) with a VirtualMachinePool. |
Simply reference it in the spec of the autoscaler:
apiVersion: autoscaling/v1
kind: HorizontalPodAutoscaler
metadata:
  name: vm-pool-hpa
  namespace: travel-control
spec:
  maxReplicas: 10
  minReplicas: 2
  scaleTargetRef:
    apiVersion: pool.kubevirt.io/v1alpha1
    kind: VirtualMachinePool
    name: travel-control-vm-pool
  targetCPUUtilizationPercentage: 50
oc apply -f ./vm-pool-hpa.yamlNow the HorizontalPodAutoscaler will scale up to 10 instances if the CPU utilization exceeds 50%.
Go to Workloads → HorizontalPodAutoscalers and select vm-pool-hpa.
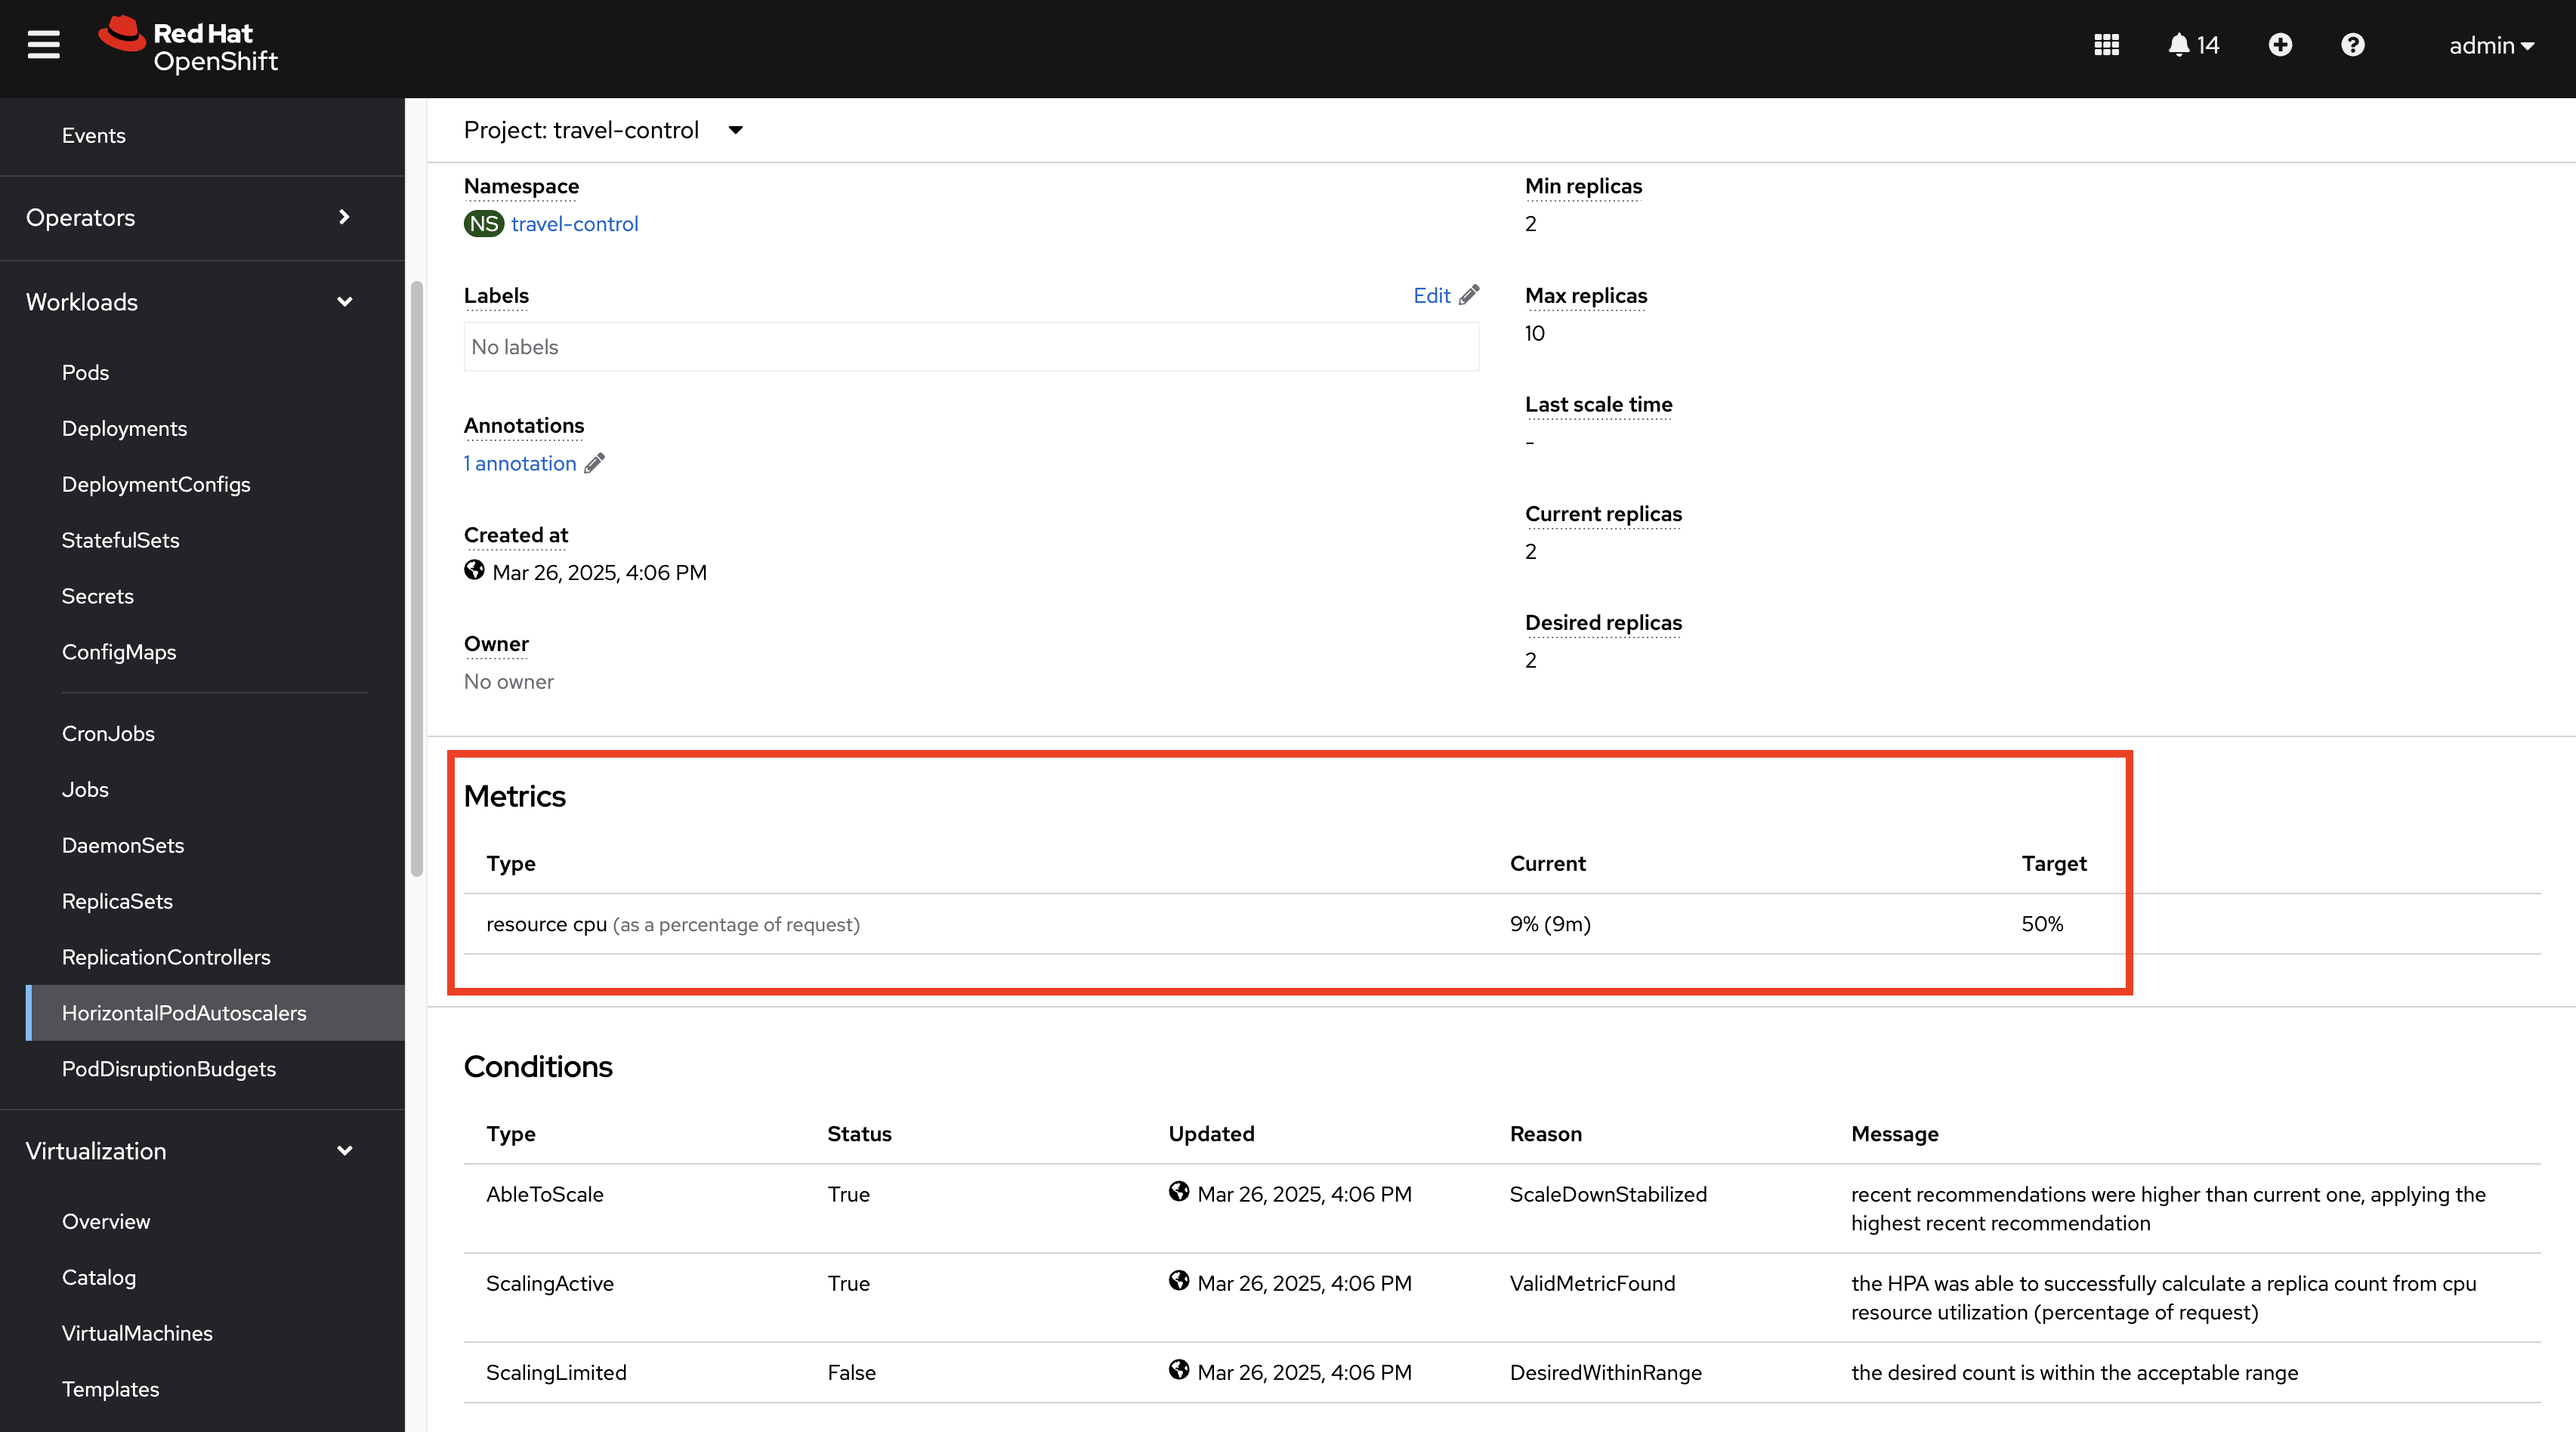
In the Metrics section you’ll see the Current and Target Values. If the Target Value is getting exceeded additional VMs will spin up.
Depending on the CPU load of your specific cluster, it might look like this:

We clean up by deleting the HorizontalPodAutoscaler and scaling down the VirtualMachinePool to 1 replica:
oc delete hpa vm-pool-hpa -n travel-control

oc patch virtualmachinepool travel-control-vm-pool --type merge --patch '{"spec":{"replicas":1}}'