Declarative Management of VMs with OpenShift GitOps
All assets for this module are in the folder lab-5. Please change the directory into this folder.
|
cd $HOME/virt-ossm-workspace/lab-5In this module we want to deploy everything declaratively and let it be managed by OpenShift GitOps.
You’ll notice that three parts of the application, the travel-portal and travel-agency as well as the service mesh components are already managed by OpenShift GitOps.
|
We will be using a helm-chart to provide the Kubernetes and service mesh manifests for the missing travel-control domain.
But first, let’s explore what is already managed by OpenShift GitOps.
Task 1: Explore the ArgoCD Dashboard and the existing Argo applications
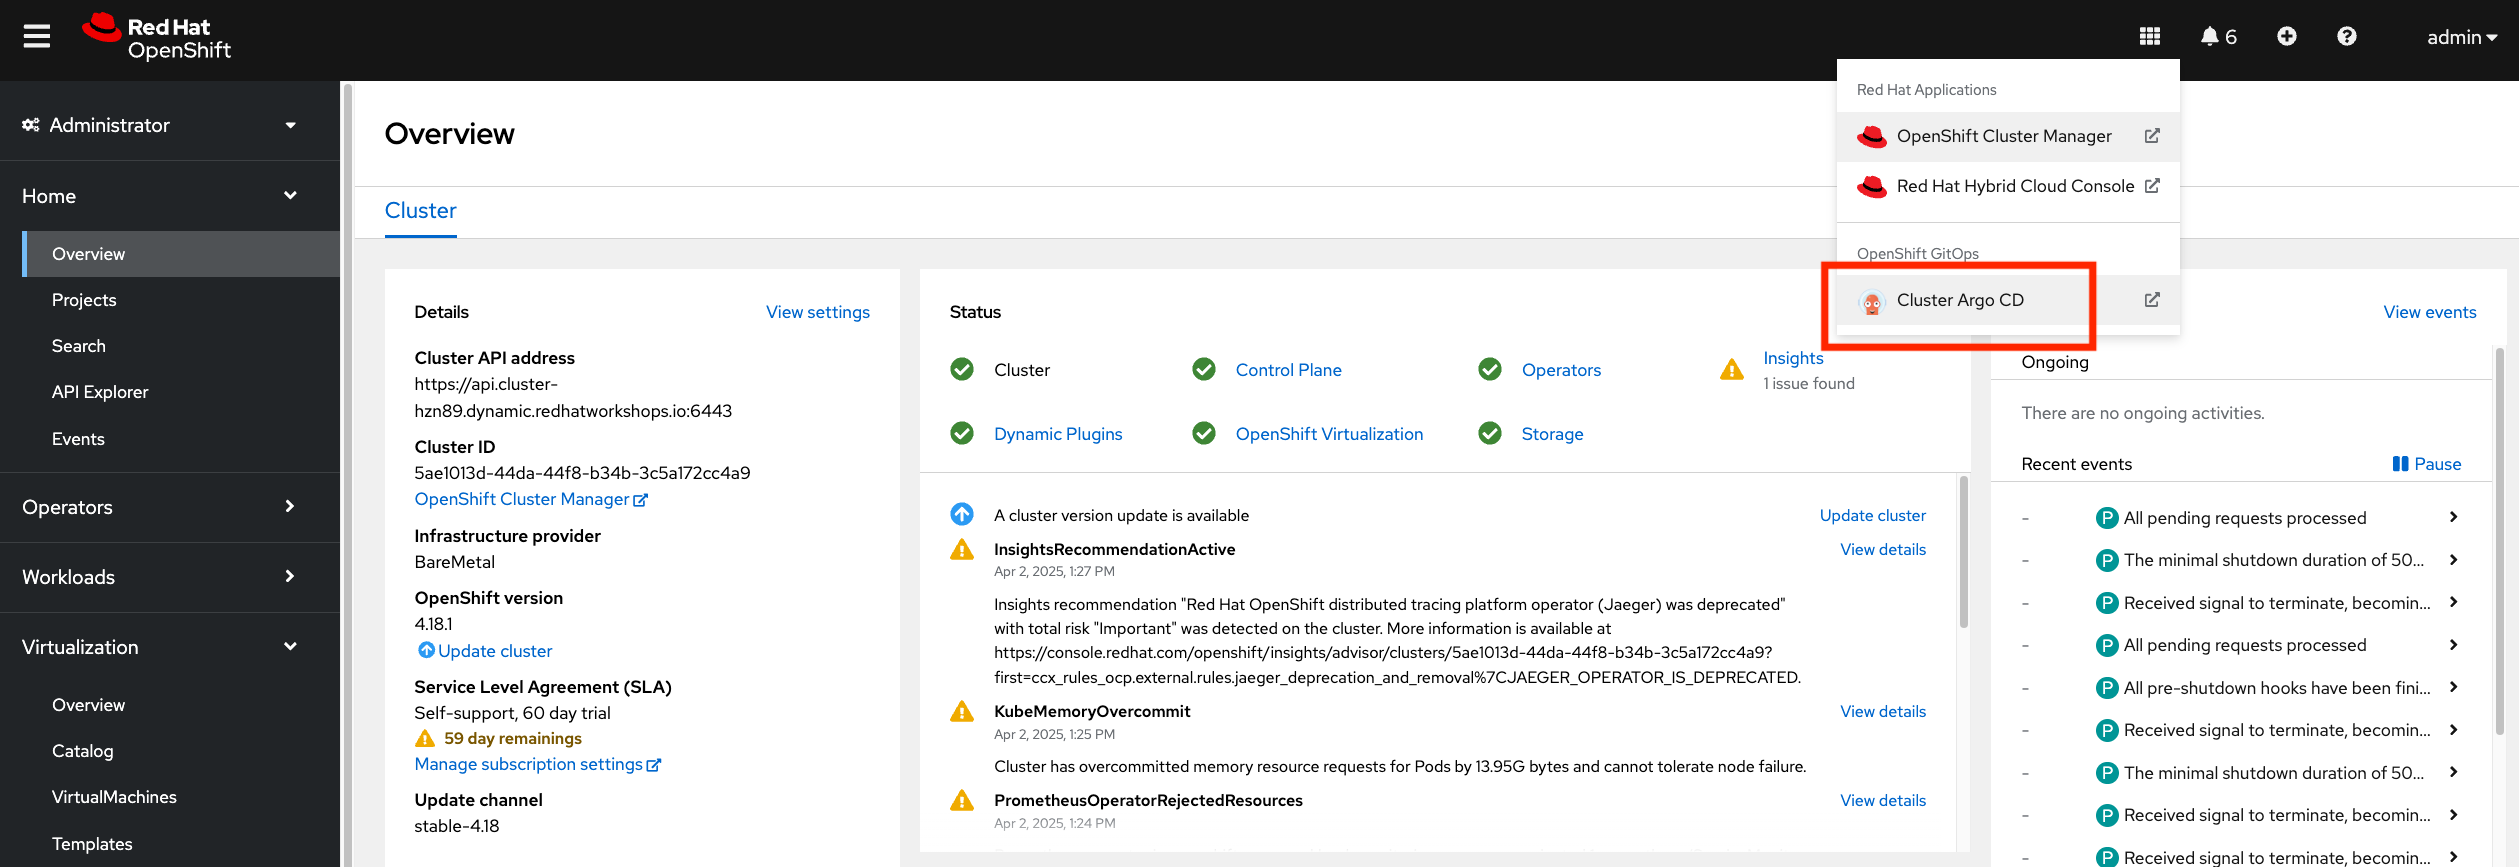
First, we are going to open the OpenShift GitOps Dashboard.
In the OpenShift Web Console, click at the top on the applications icon and select Cluster Argo CD
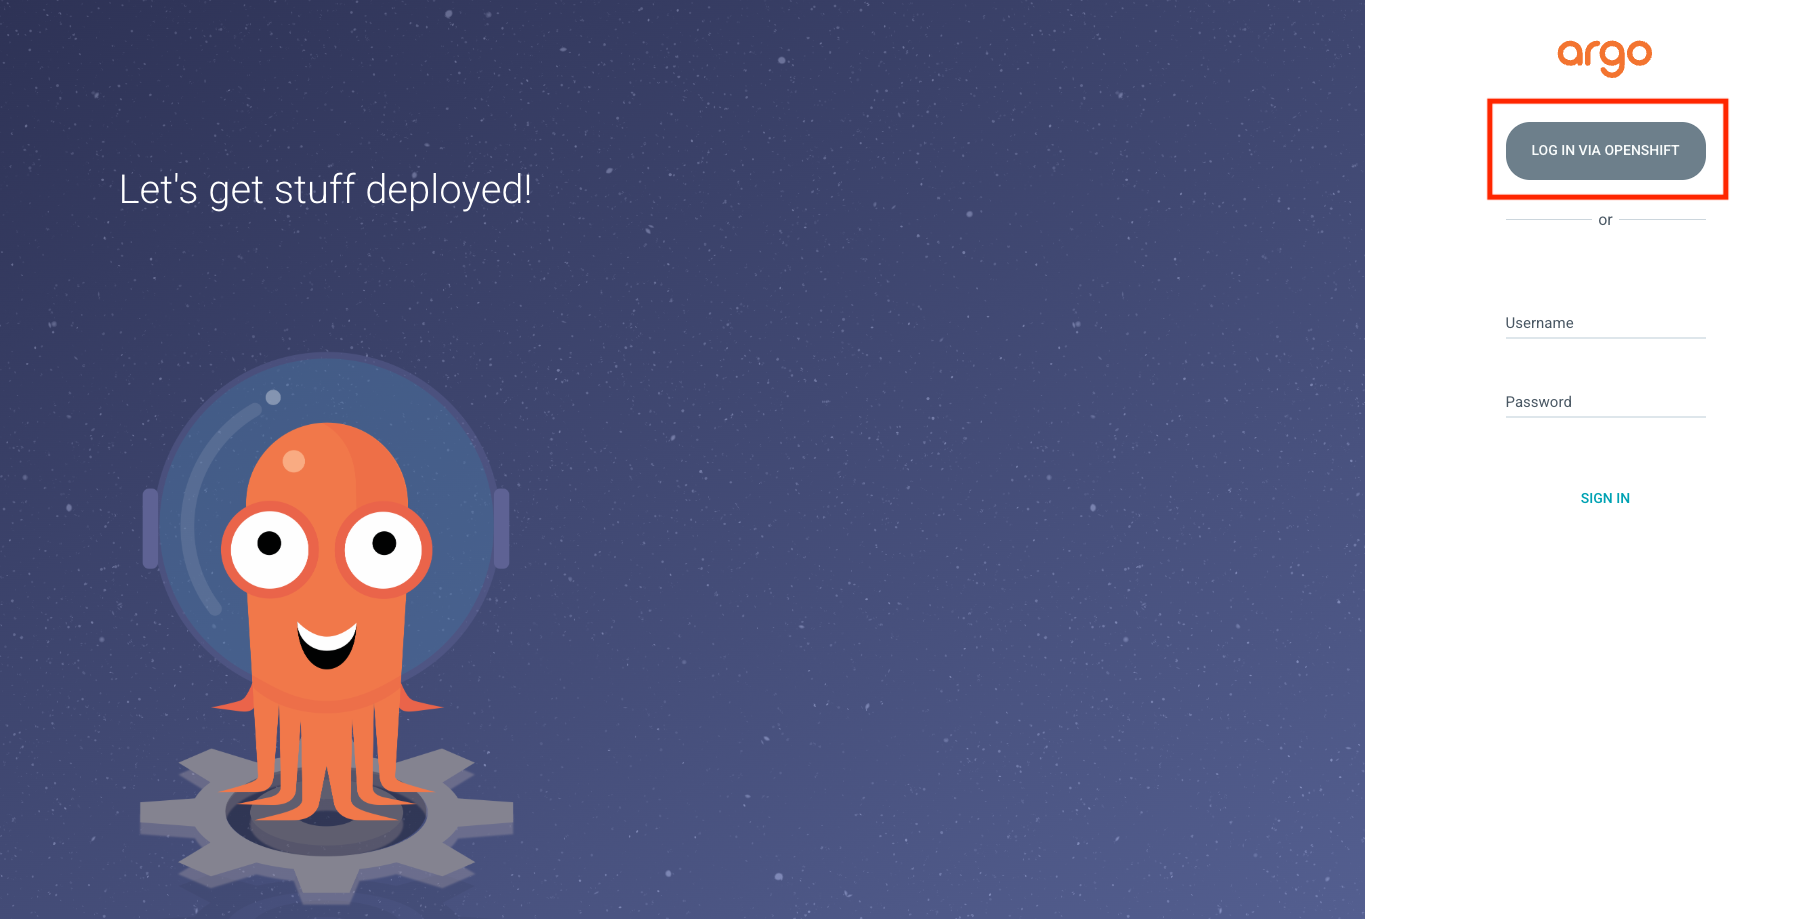
Click on LOG IN VIA OPENSHIFT and use your admin credentials: username / password
Welcome to the Argo Dashboard.
You see 4 Argo applications running and being managed by OpenShift GitOps. (You can ignore the bootstrap application)
An Argo CD application is a Kubernetes resource that defines and manages the deployment of workloads based on a Git repository. It continuously syncs the desired application state from Git to the cluster, ensuring consistency and enabling automated rollbacks if deviations occur.
You also notice the Sync status and the Health for each application:
Sync status - Whether or not the live state matches the target state. Is the deployed application the same as Git says it should be?
Health - The health of the application, is it running correctly? Can it serve requests?
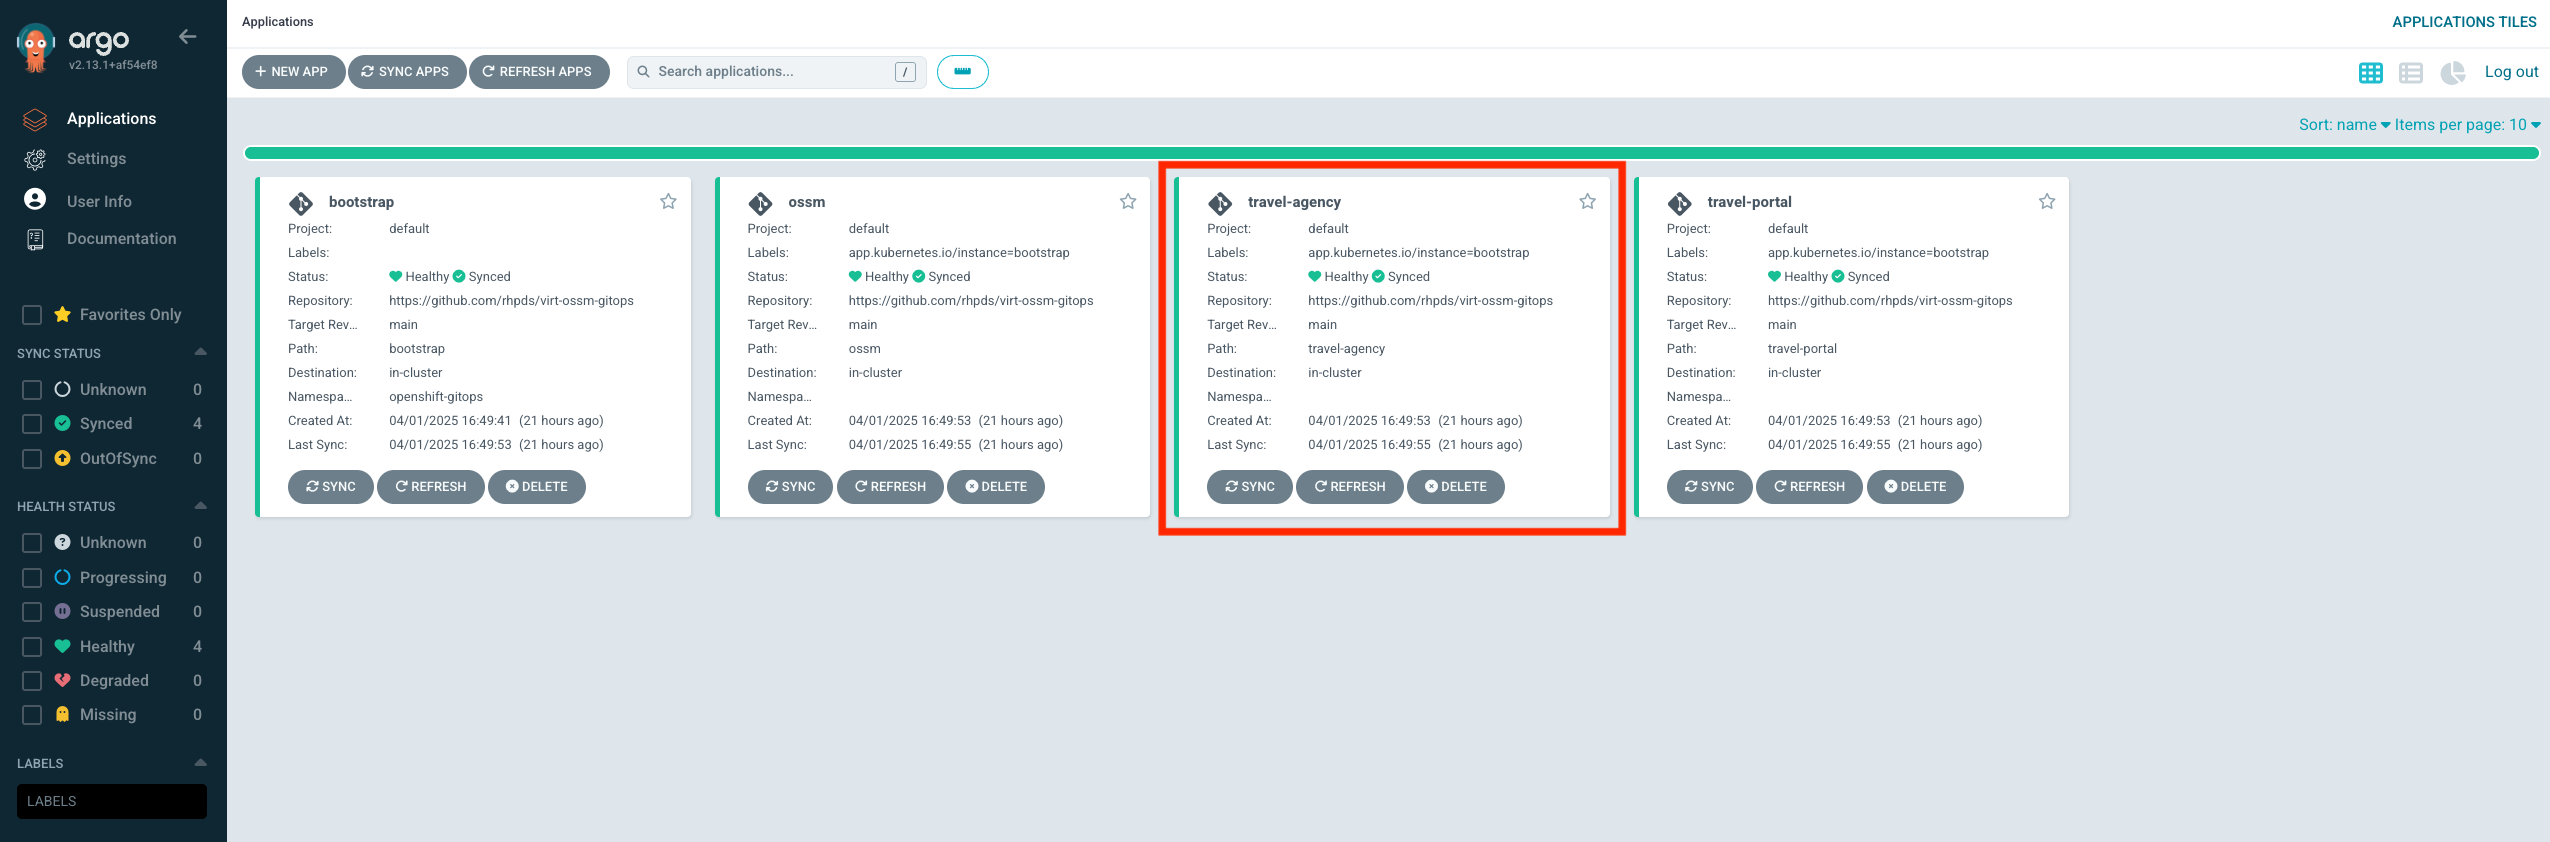
Now click on the travel-agency application.
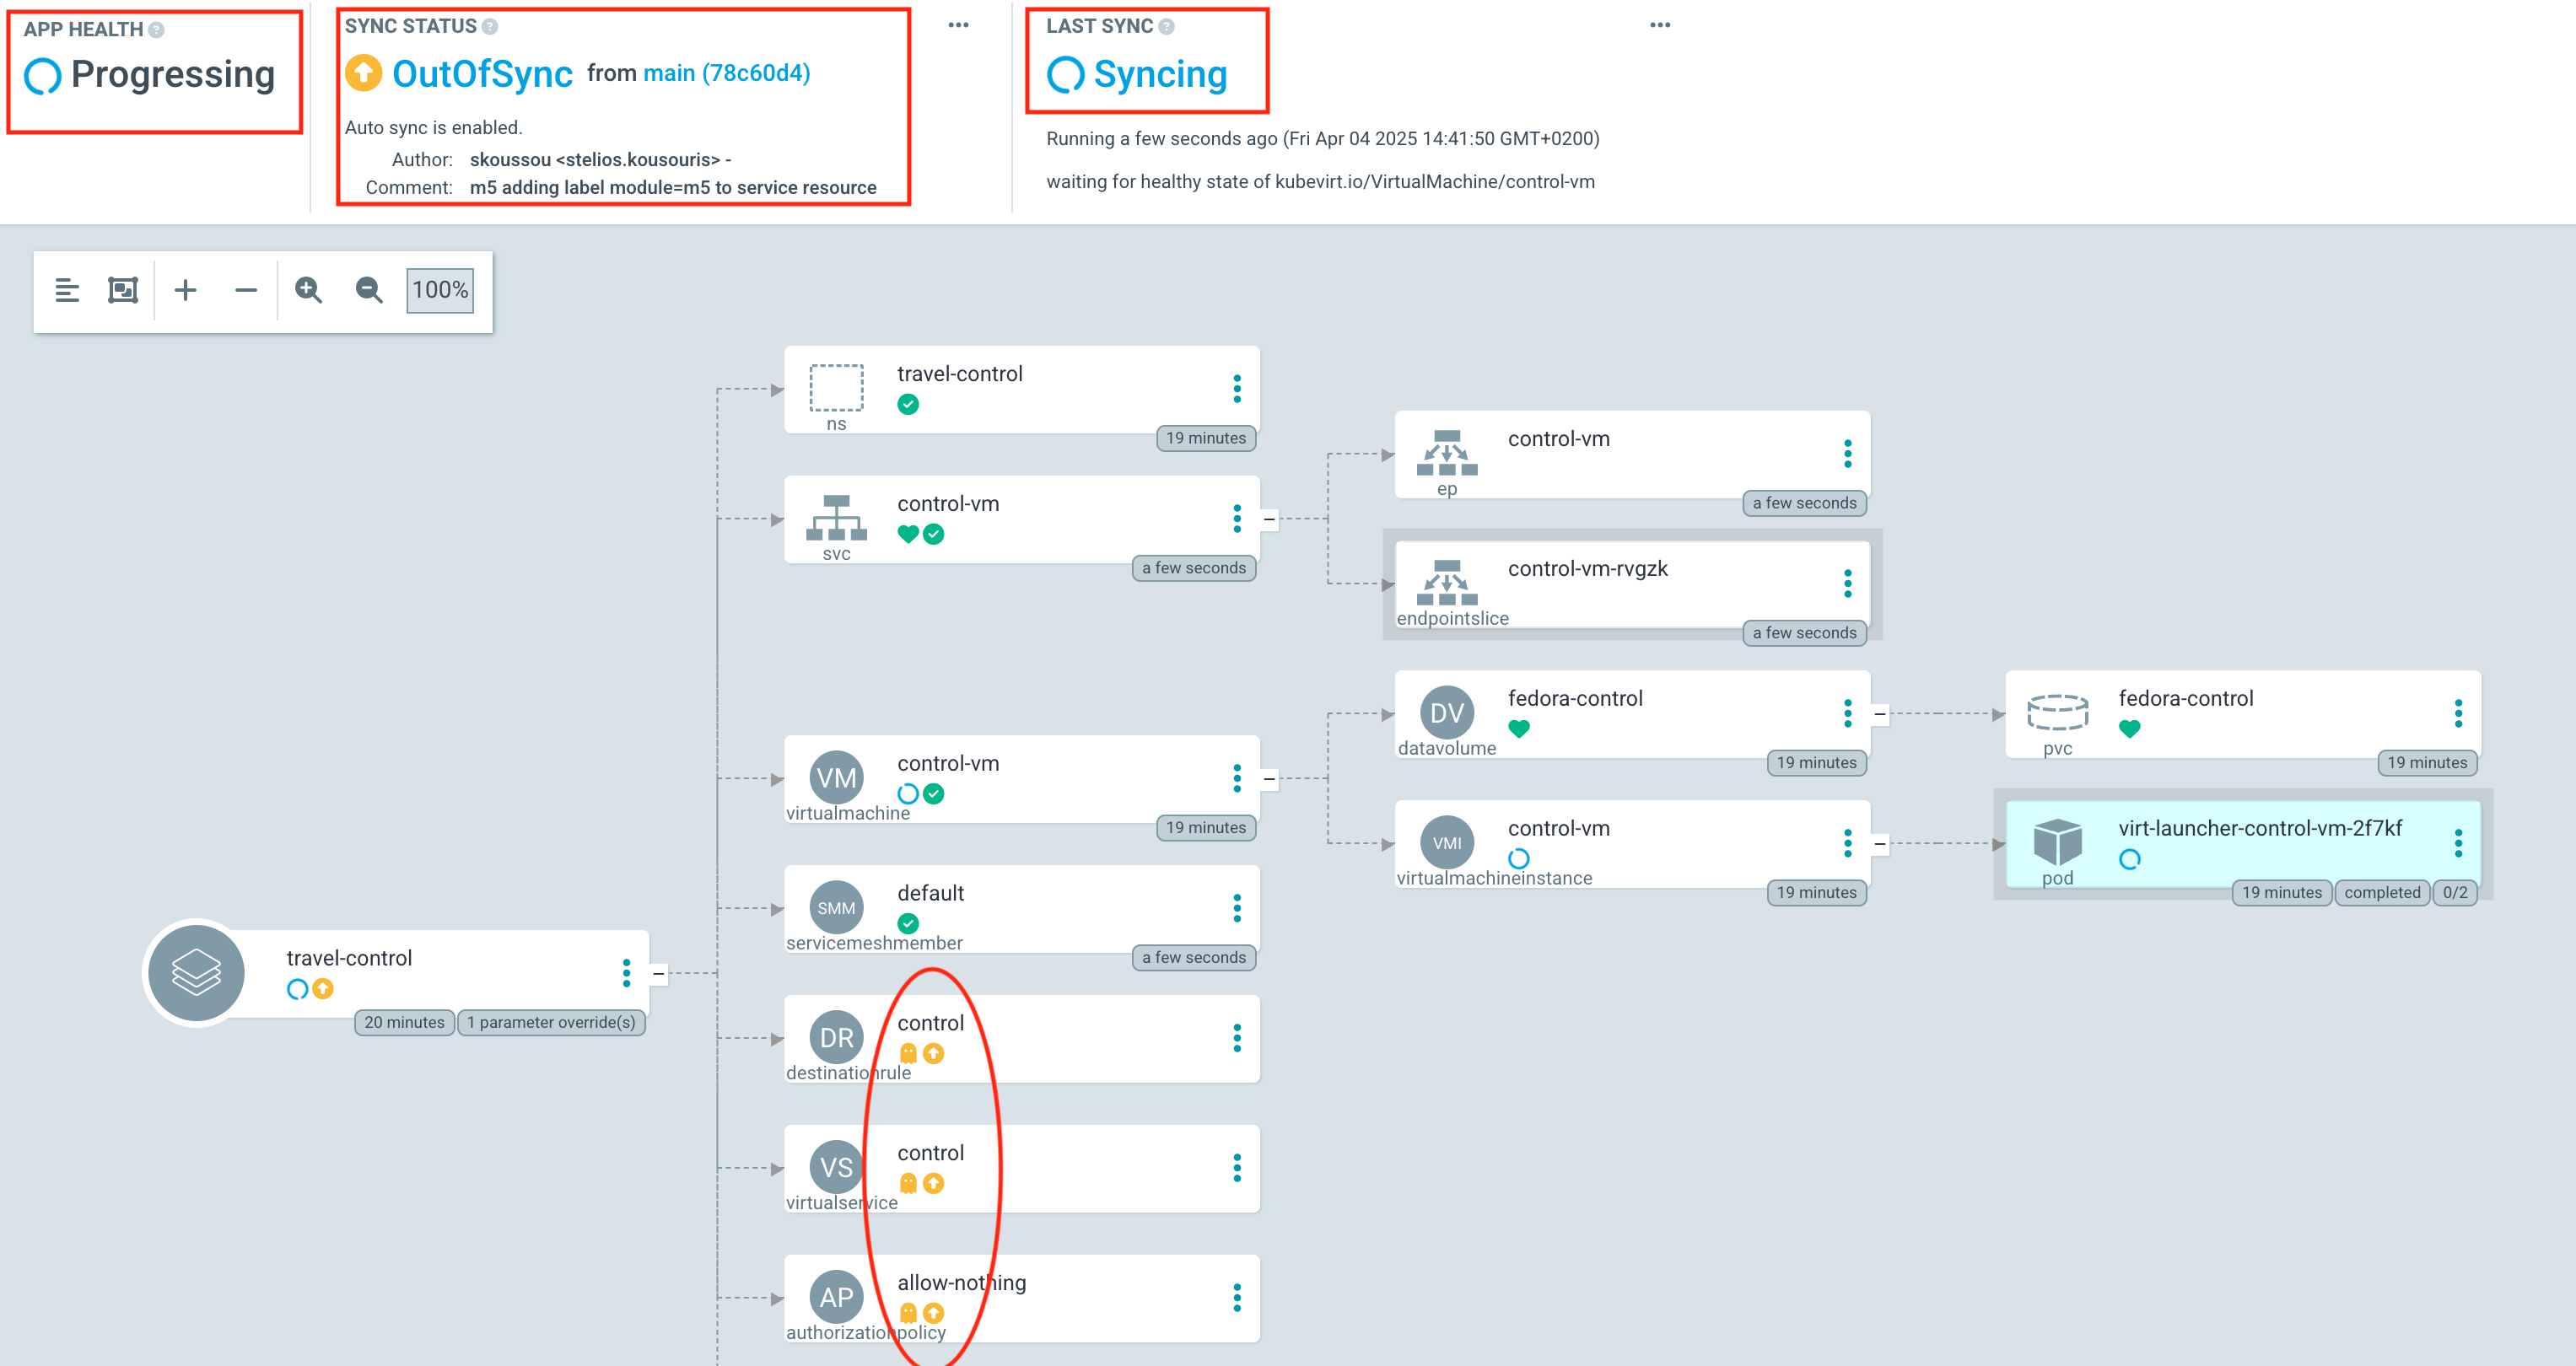
You now see a visual representation of the Kubernetes resources that are deployed as part of this argo application.
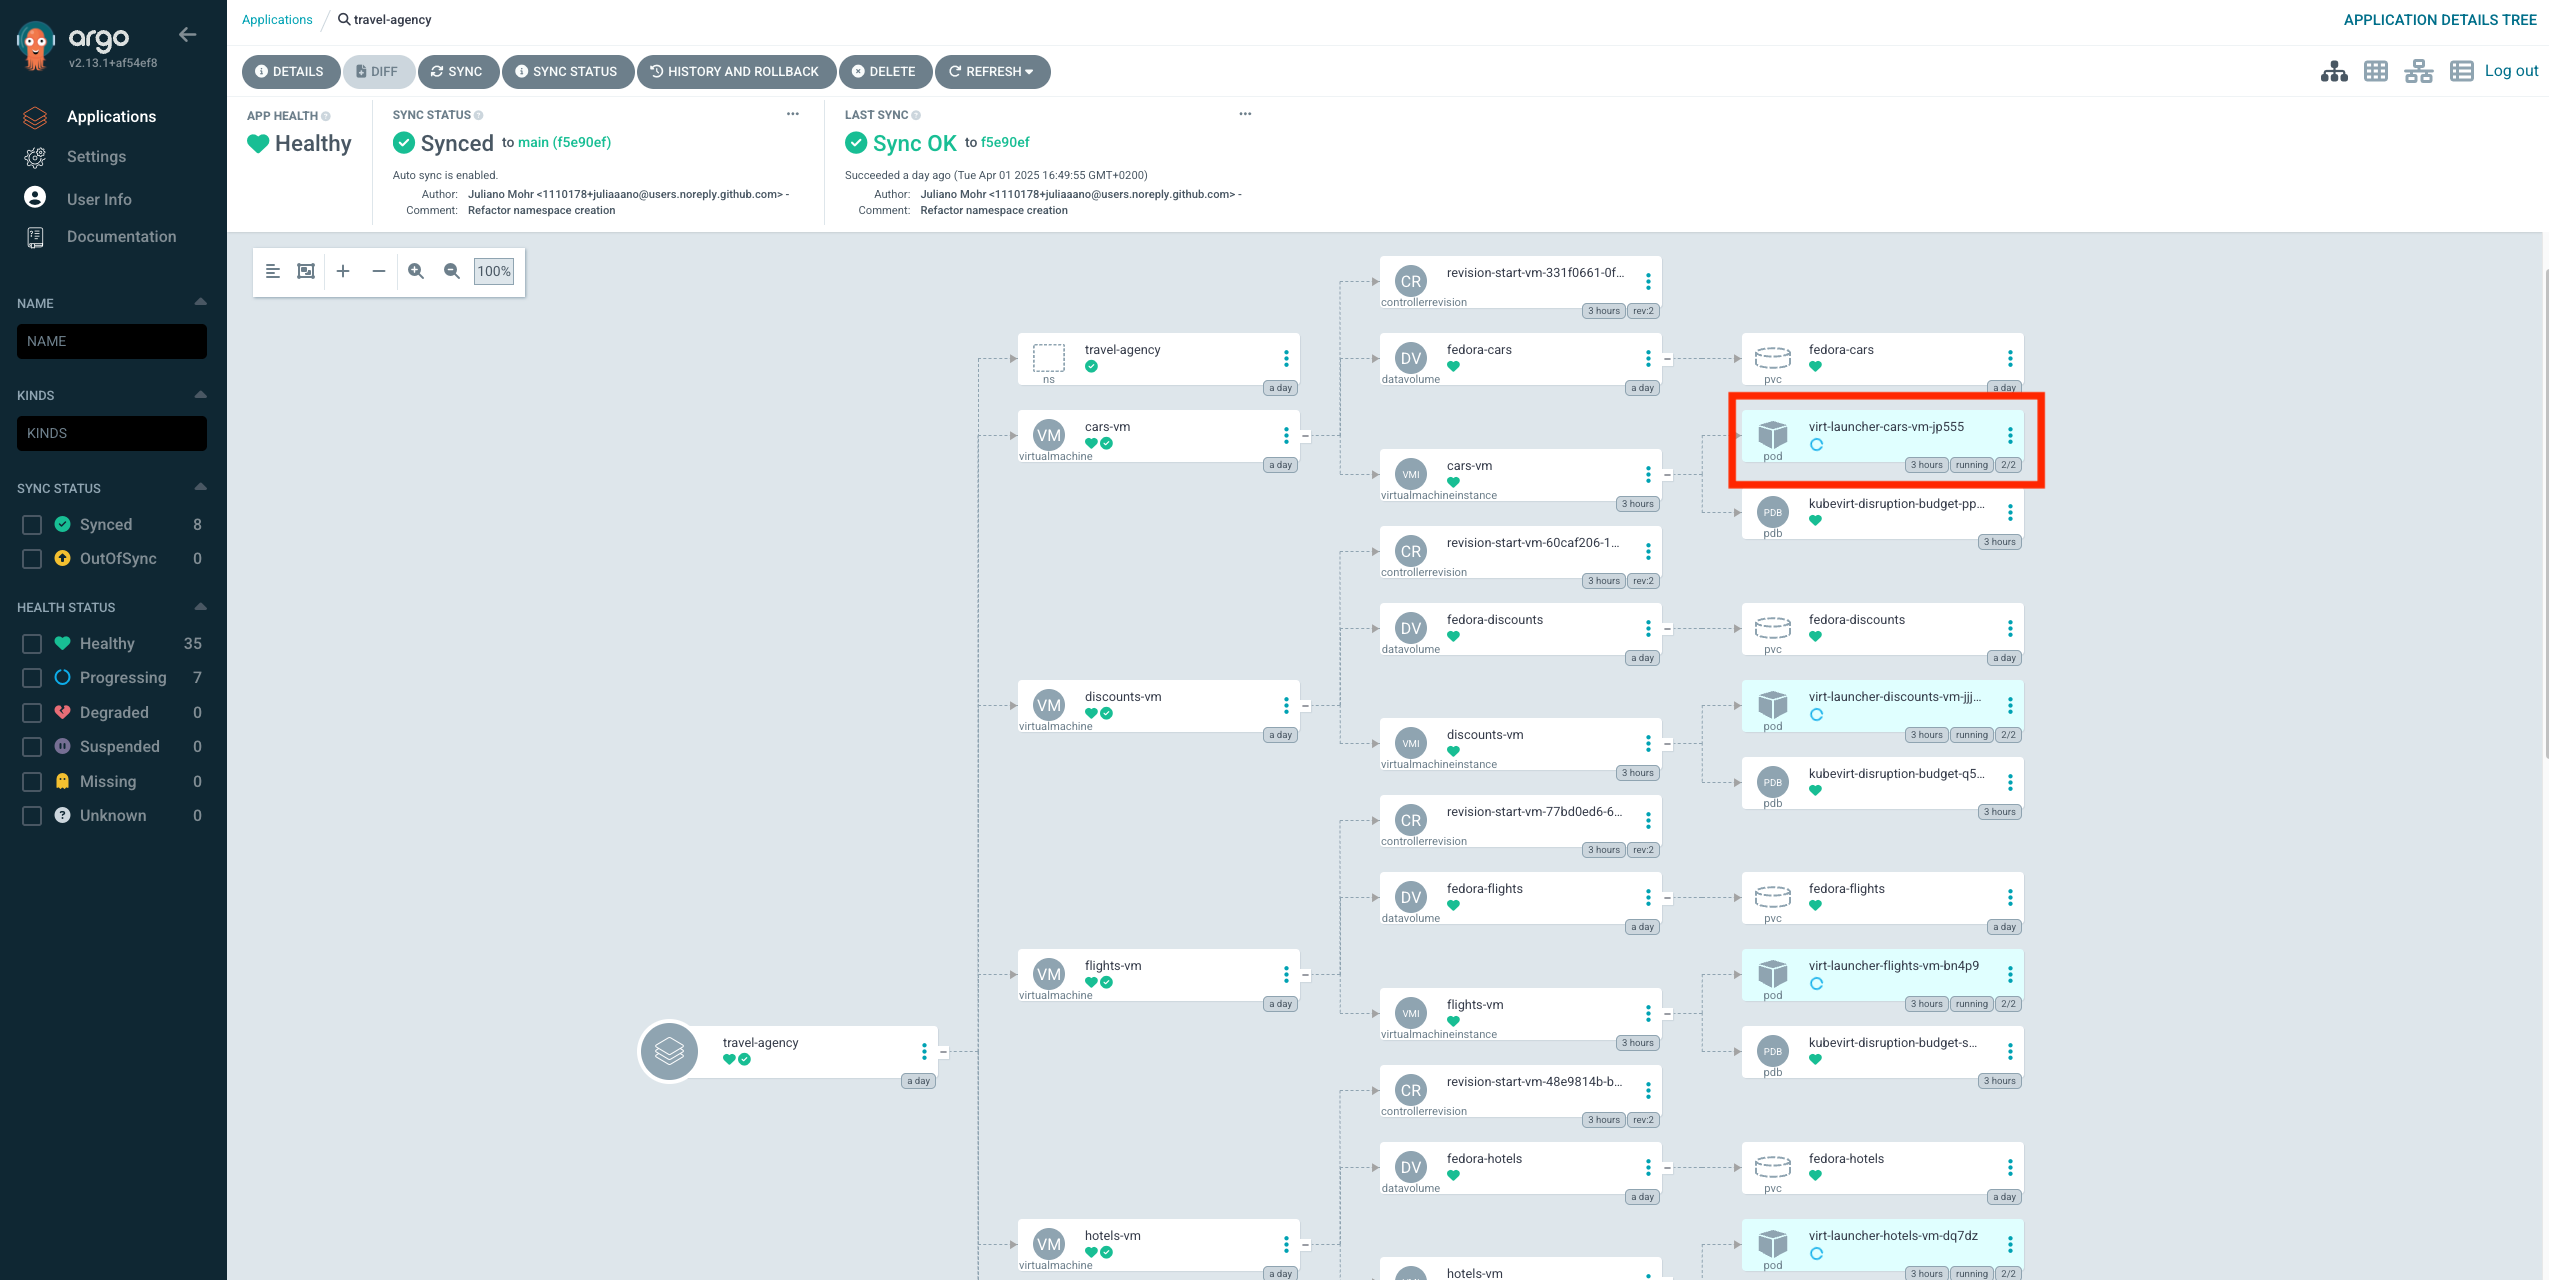
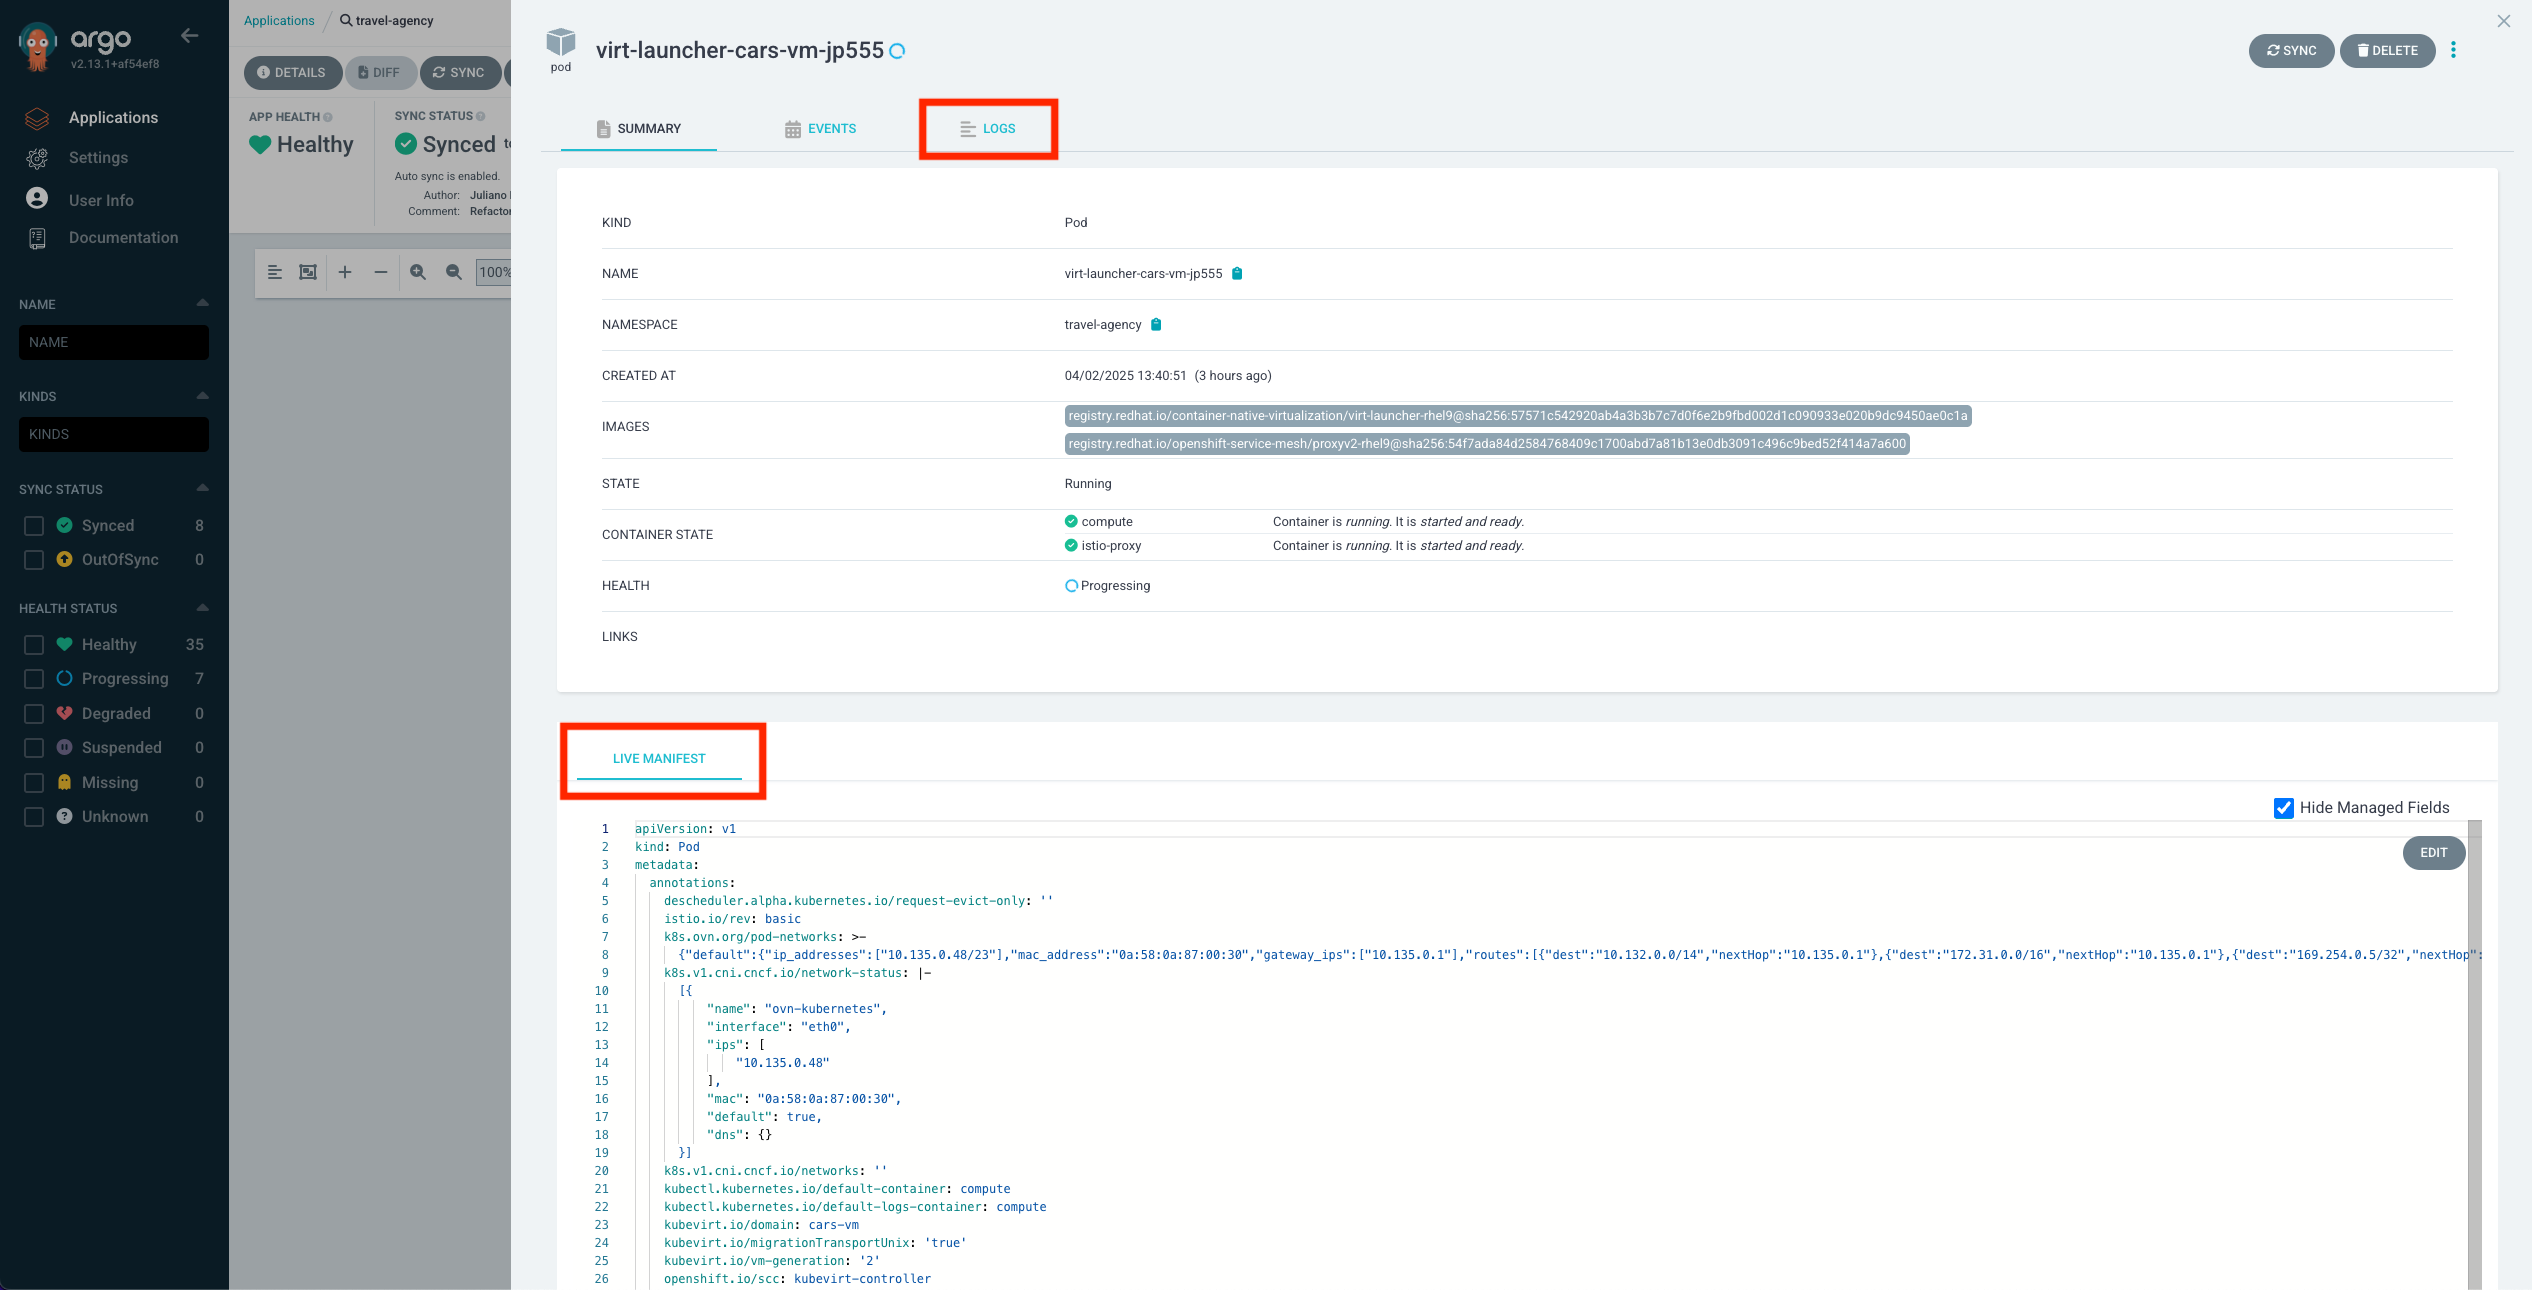
Now click i.e. on the virt-launcher-cars-vm… pod to look at the details of this component.
You’ll get an overview with the details and the state of this pod. You can also explore the deployed LIVE MANIFEST of this component.
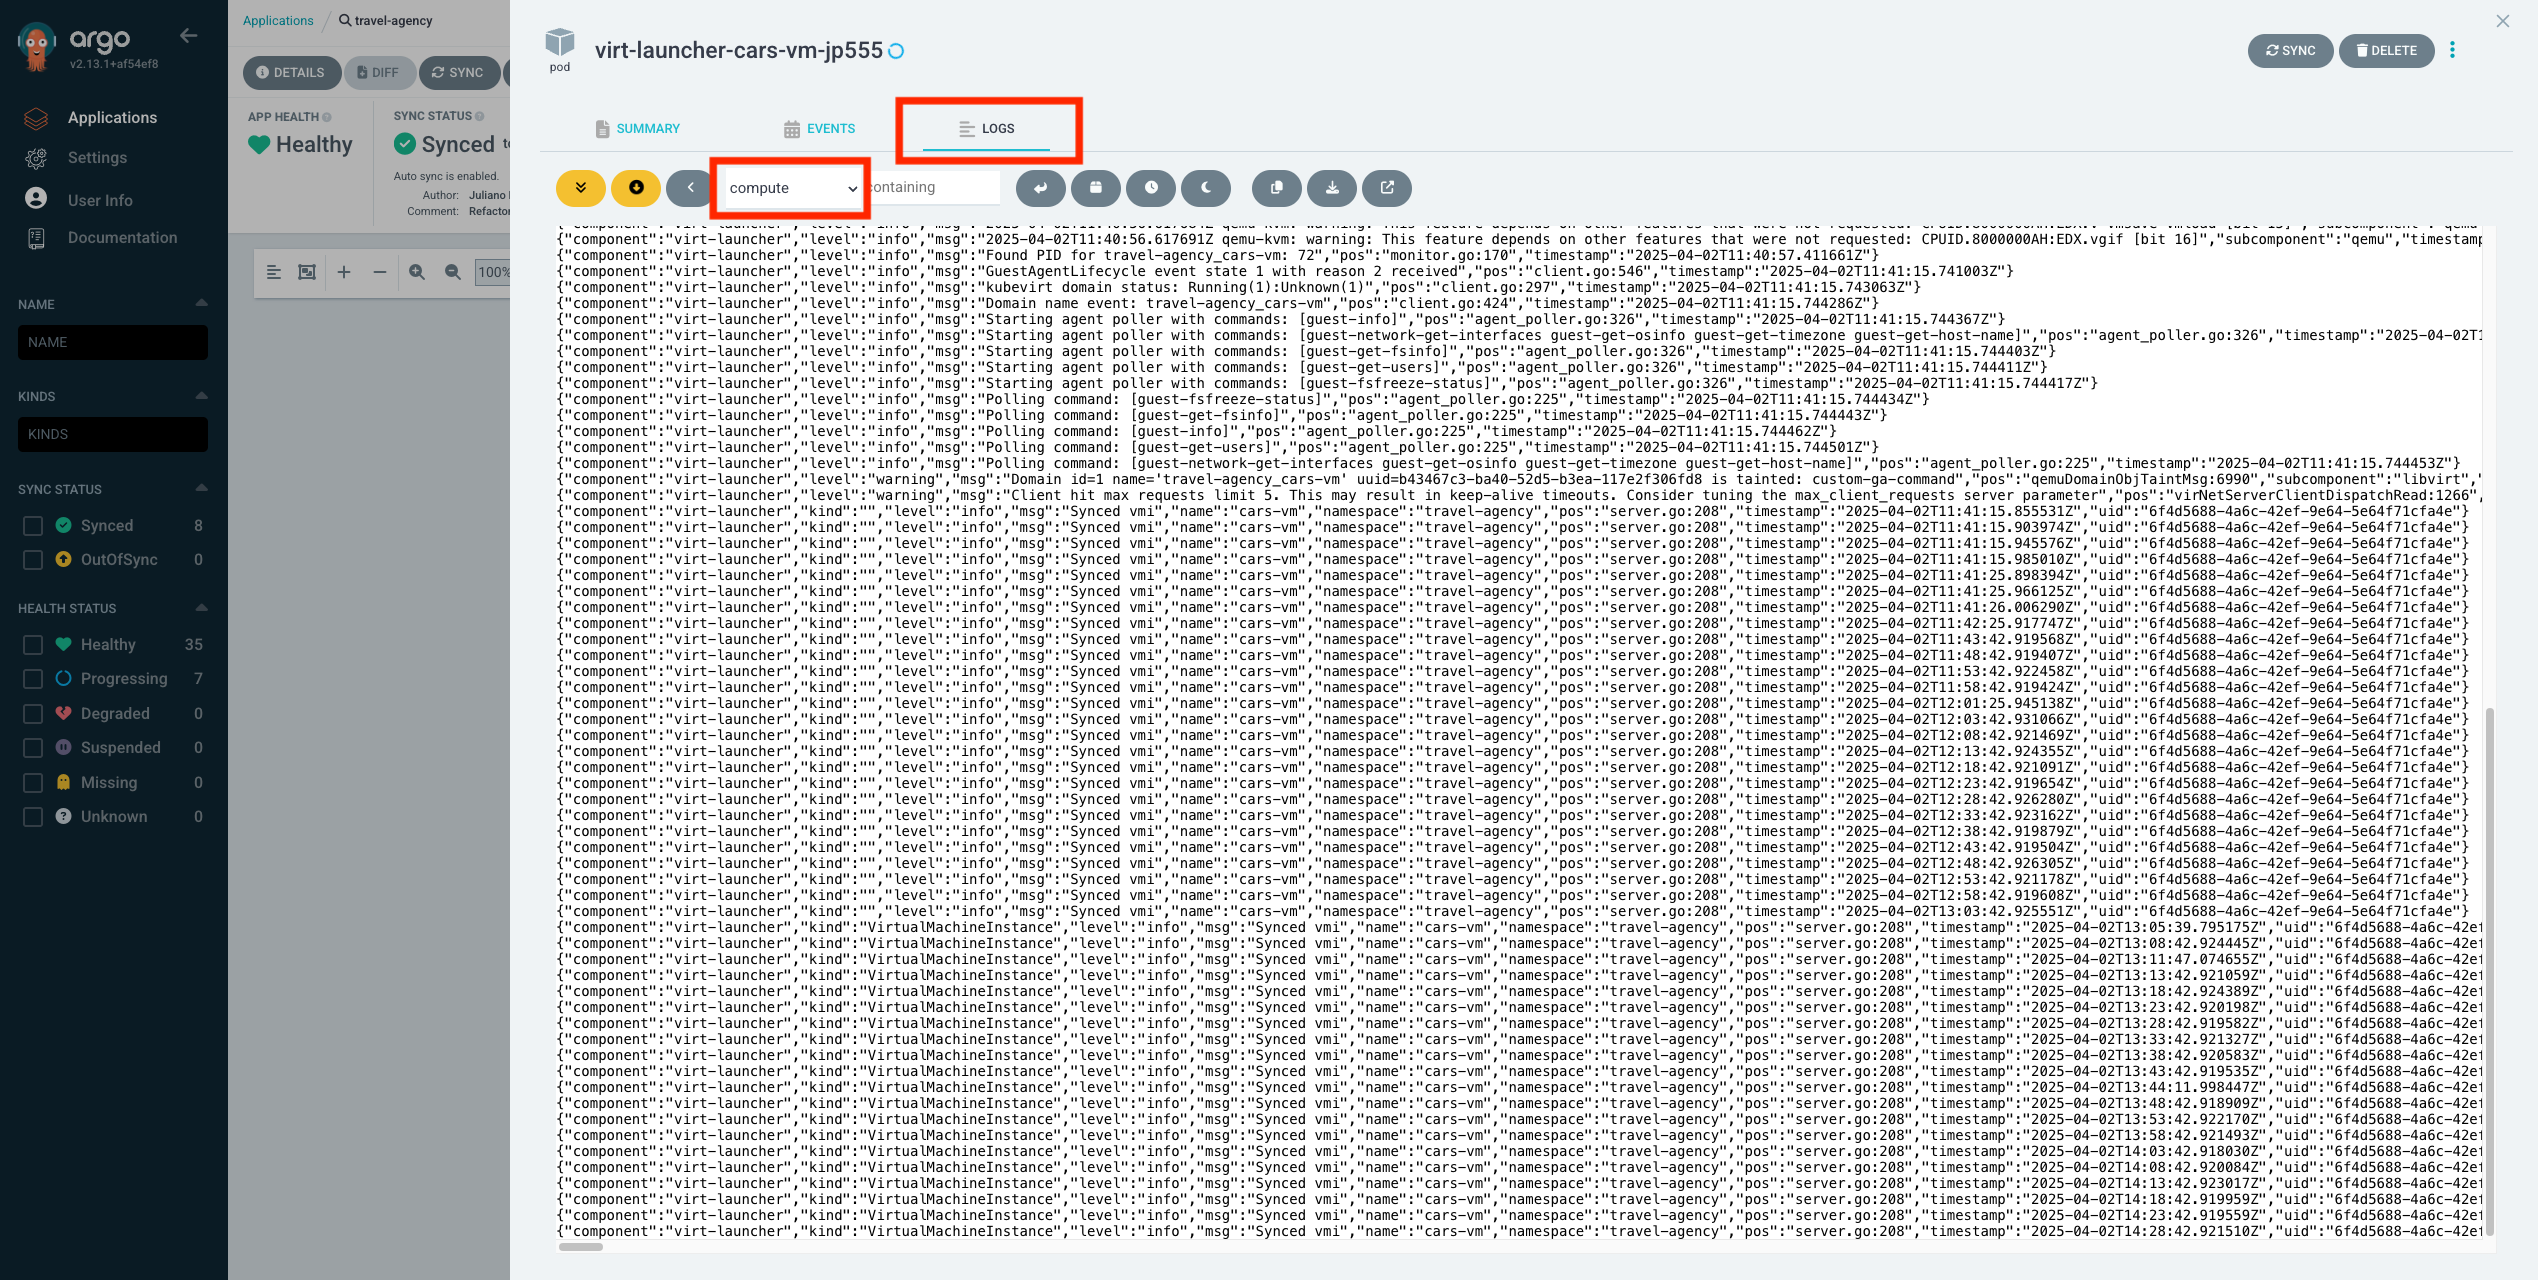
Now click on the LOGS tab.
You see the logs of the running containers inside this pod. You can switch between the containers by selecting them from the shown dropdown menu.
Close this window which brings you back to the overview.
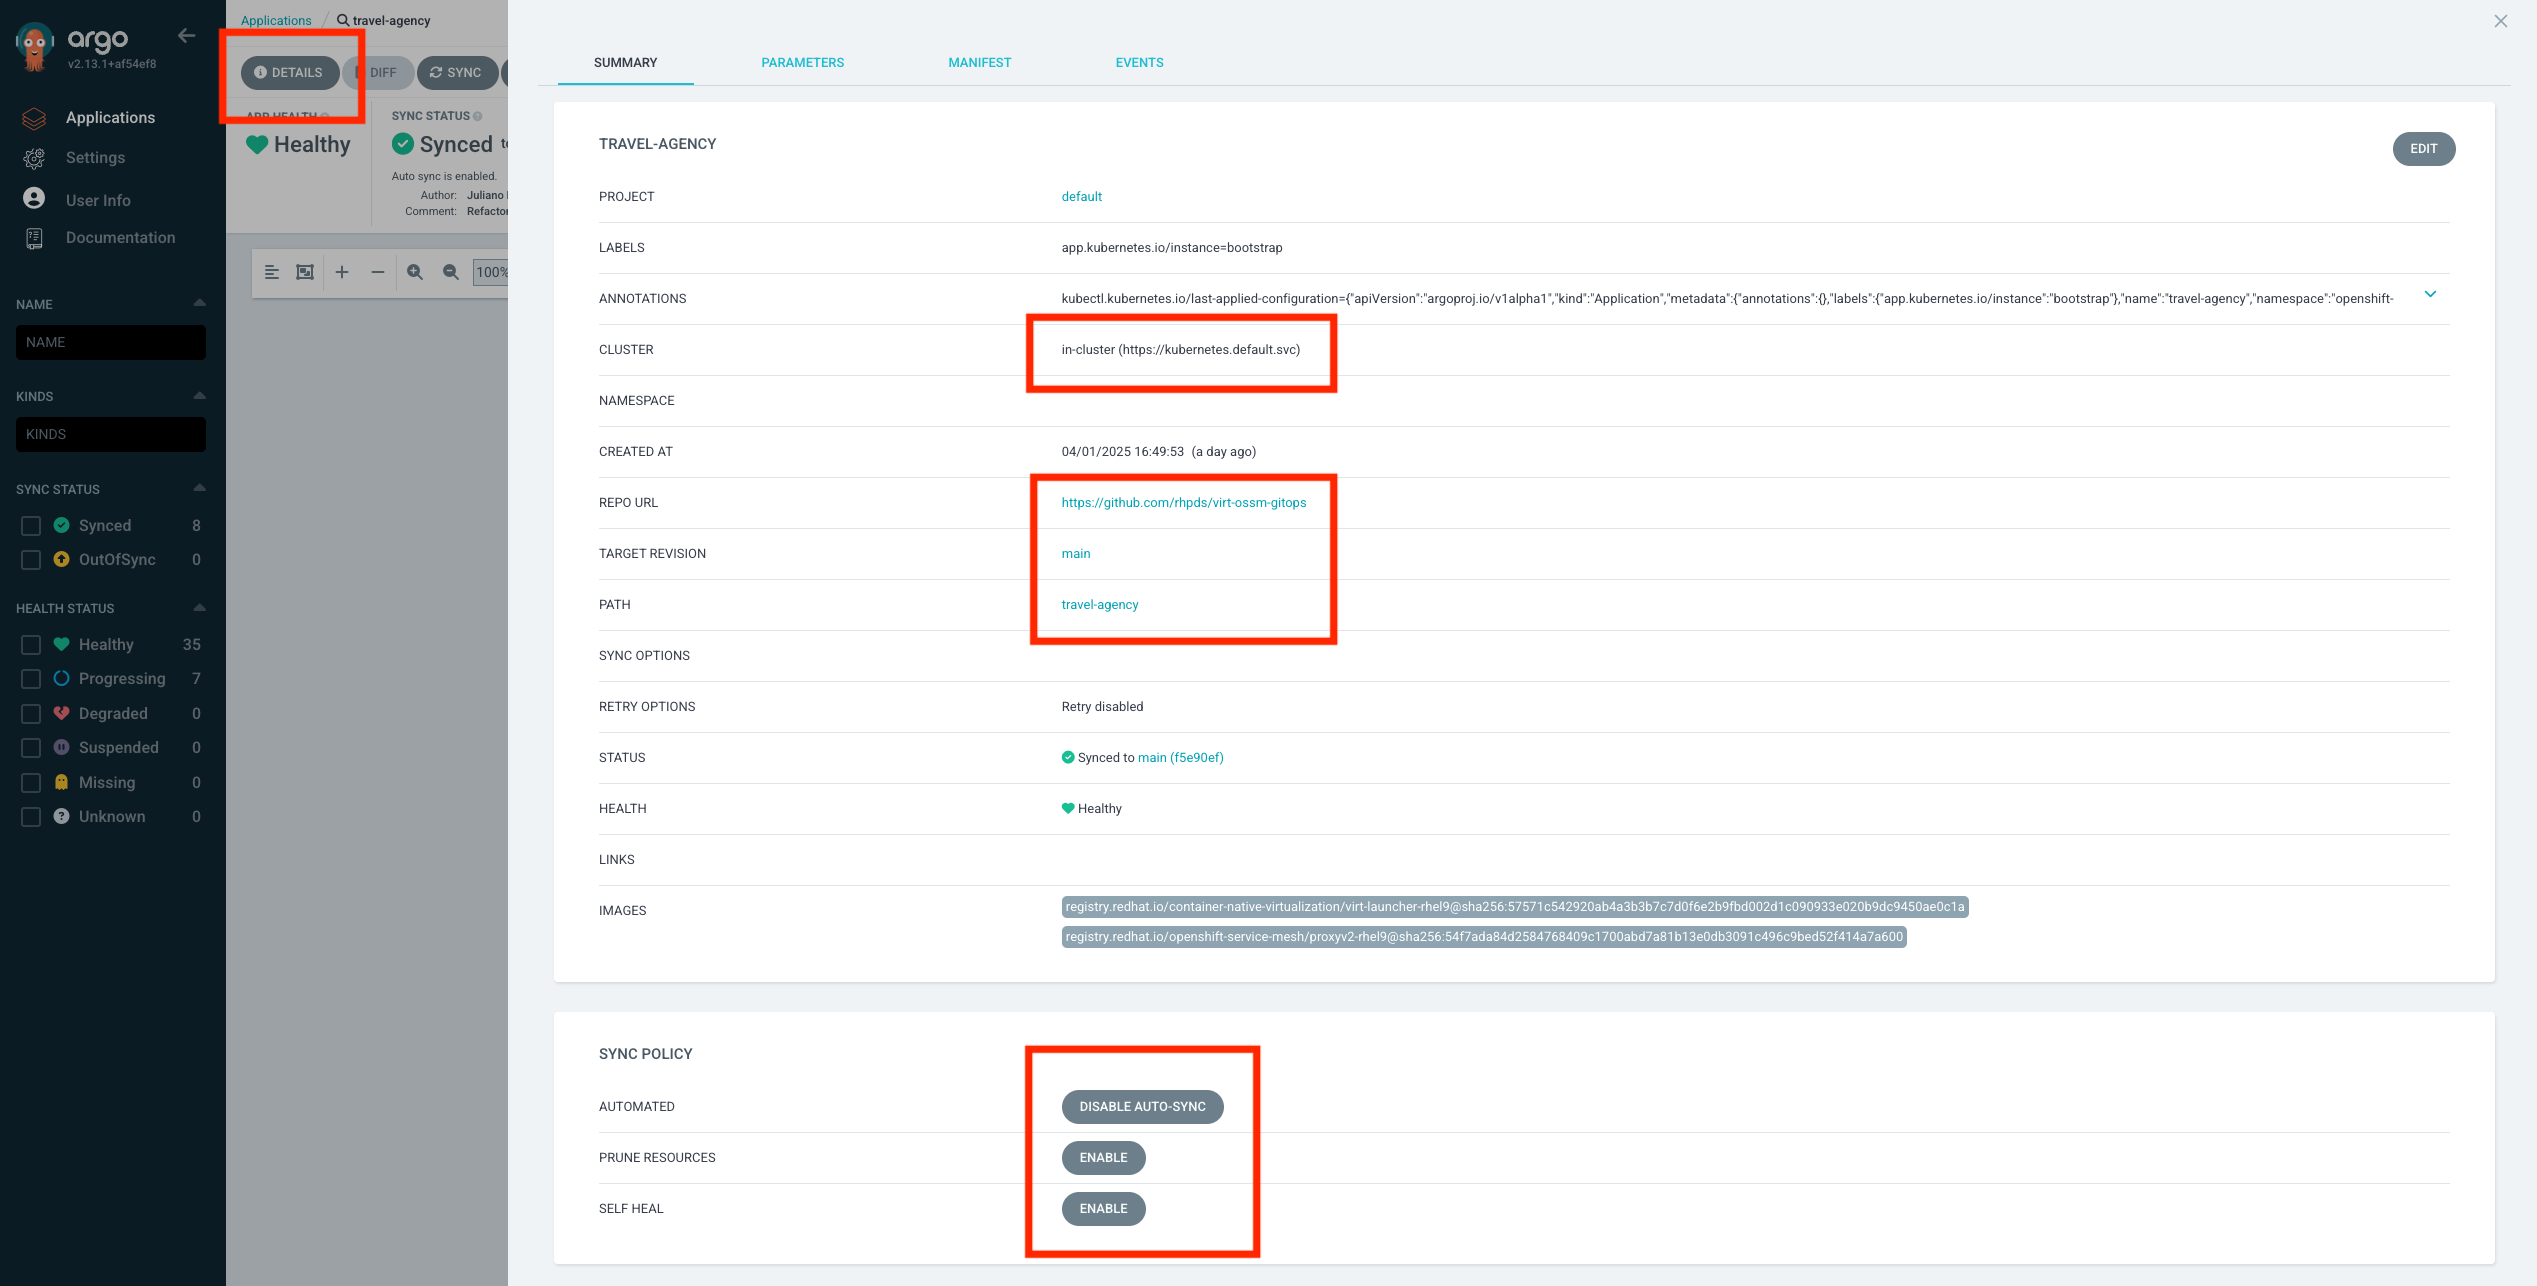
Back in the overview click on DETAILS at the top.
This gives you an overview of the configuration for this argo application, like the source git repository, the target cluster, status and health, as well as the configured
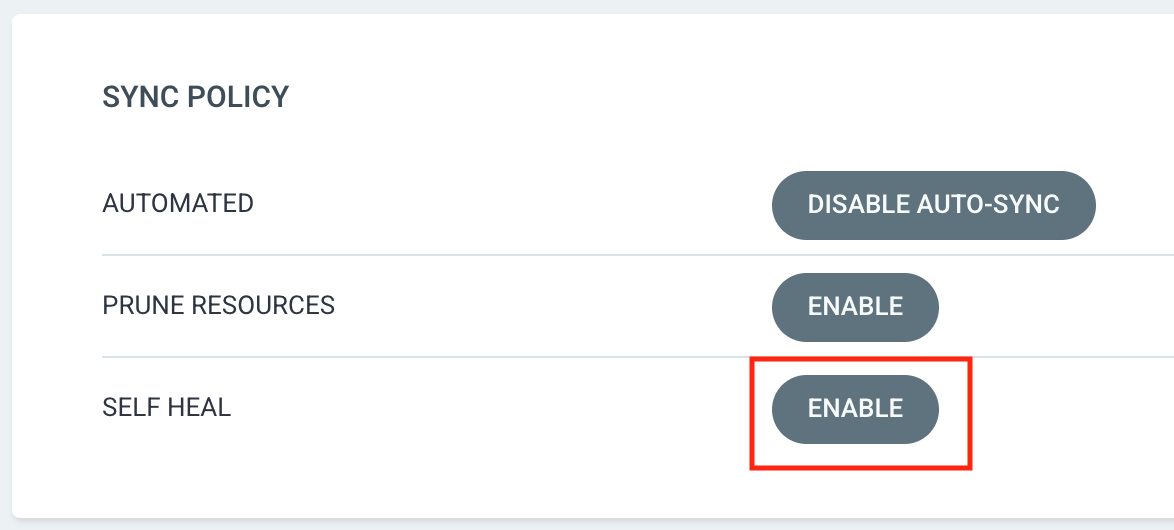
Sync Policy:
-
Automated Sync – Automatically applies changes from Git to the cluster when updates are detected, without manual intervention.
-
Prune Resources – Deletes resources from the cluster if they are removed from the Git repository, preventing orphaned resources.
-
Self-Heal – Continuously monitors and corrects drift by reverting manual changes in the cluster to match the desired state from Git.
Close the window and click on Applications in the left menu of the Argo Dashboard.
Task 2: Create an Argo application for travel-control
Imagine a DevOps engineer accidentally deletes the travel-control namespace that contains critical applications for the Travel Agency company. Without Argo CD, this would require manual intervention to restore the namespace and redeploy the applications, leading to downtime.
Exactly, what we do right now!
oc delete project travel-control| With Argo CD and Self-Heal enabled, the system would detect the deletion and automatically recreates the namespace and all its resources from the Git repository. This ensures minimal disruption and maintains the desired state without manual effort. |
This makes Argo CD a great fit for teams that need automated recovery, drift correction, and continuous deployment in OpenShift.
Now let us create an argo app for the travel-control component.
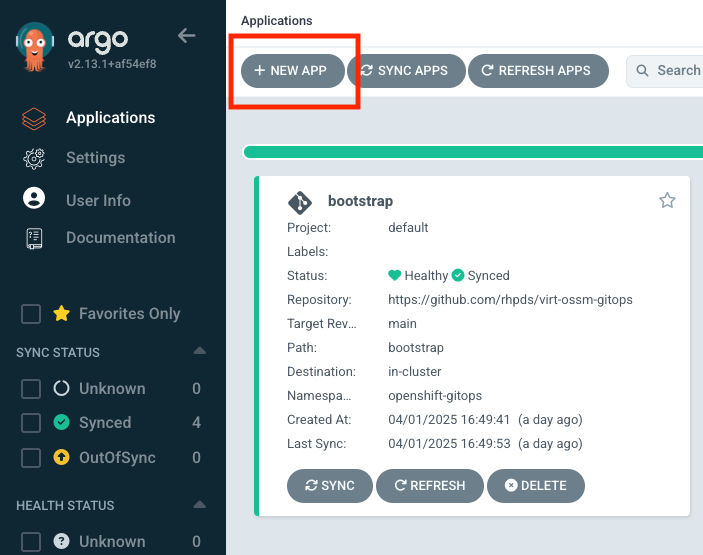
After logging in, click the + New App button as shown below:
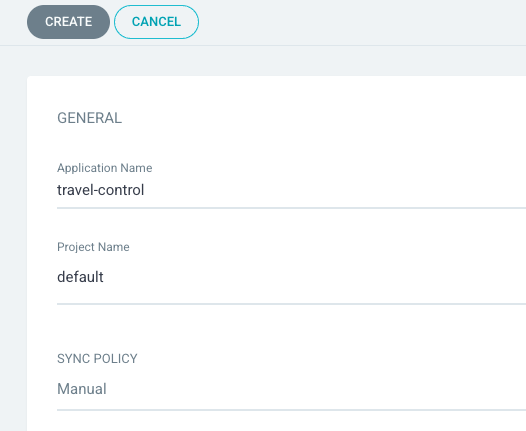
Give your app the name travel-control, use the argo project default, and leave the sync policy as Manual:
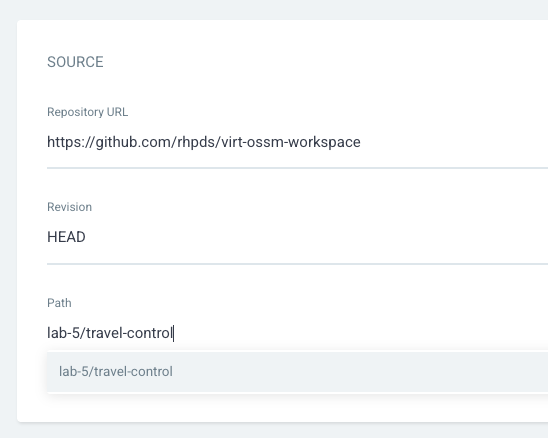
Connect the https://github.com/rhpds/virt-ossm-workspace repo to Argo CD by setting repository url to the github repo url, leave revision as HEAD, and set the path to lab-5/travel-control:
We have already provided all necessary Kubernetes manifests in this repository and path. Feel free to explore this Helm Chart if you like.
|
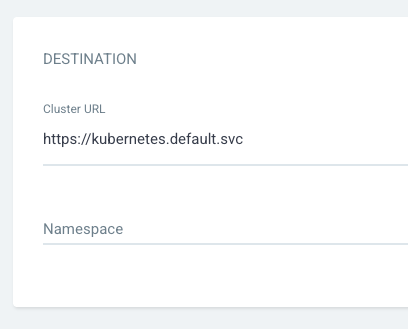
For Destination, set cluster URL to https://kubernetes.default.svc (or in-cluster for cluster name) and leave the namespace empty:
In the Helm section, provide the URL of the Service Mesh ingress gateway by overwriting the ossm_ingress parameter:
istio-ingressgateway-istio-system.apps.cluster-guid.guid.sandbox.opentlc.com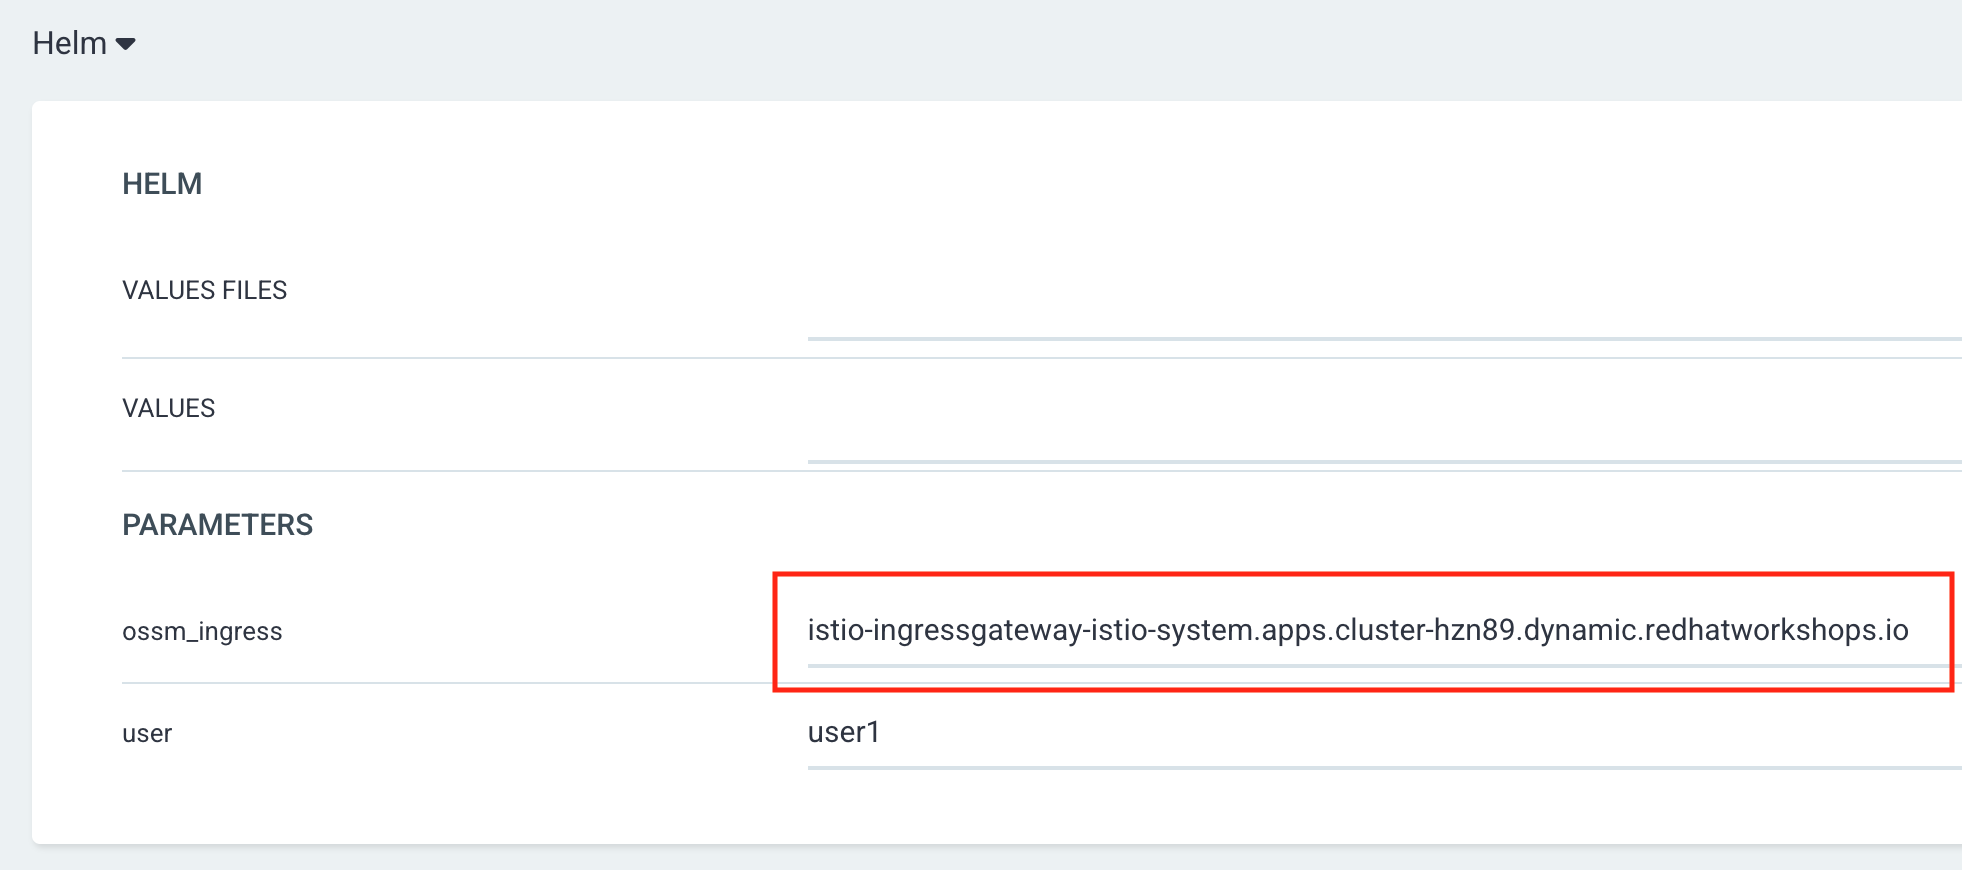
After filling out the information above, click Create at the top of the UI to create the travel-control application:

Once the travel-control argo application is created, you can now view its status:
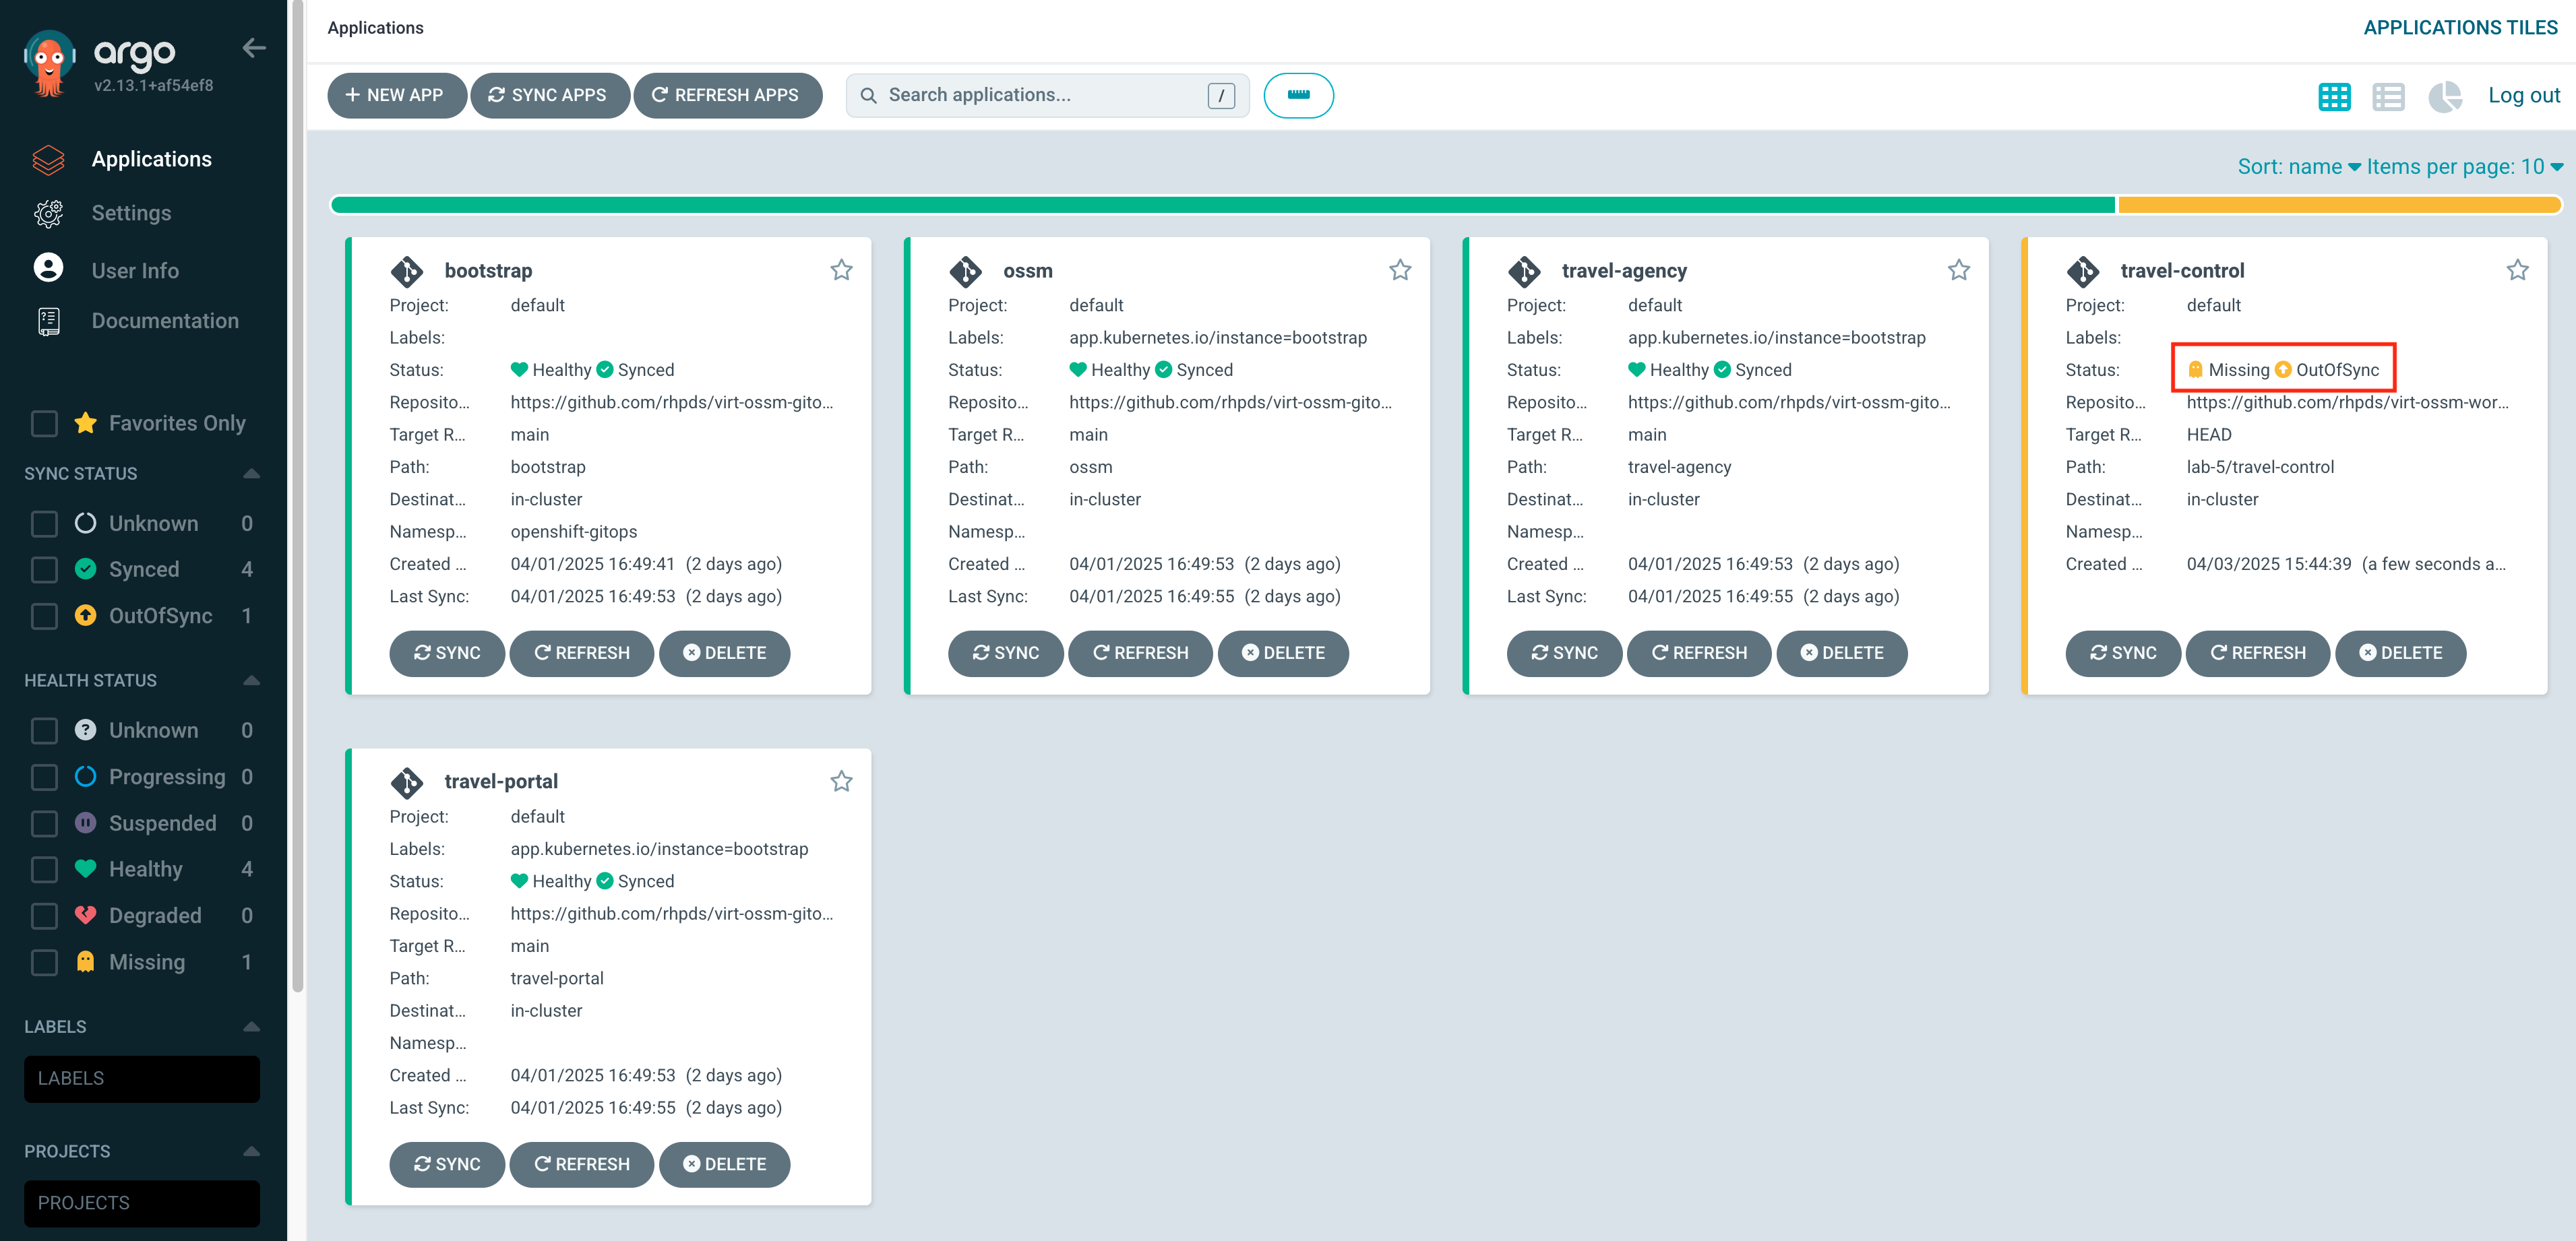
The application status is initially in OutOfSync state since the application has yet to be deployed, and no Kubernetes resources have been created.
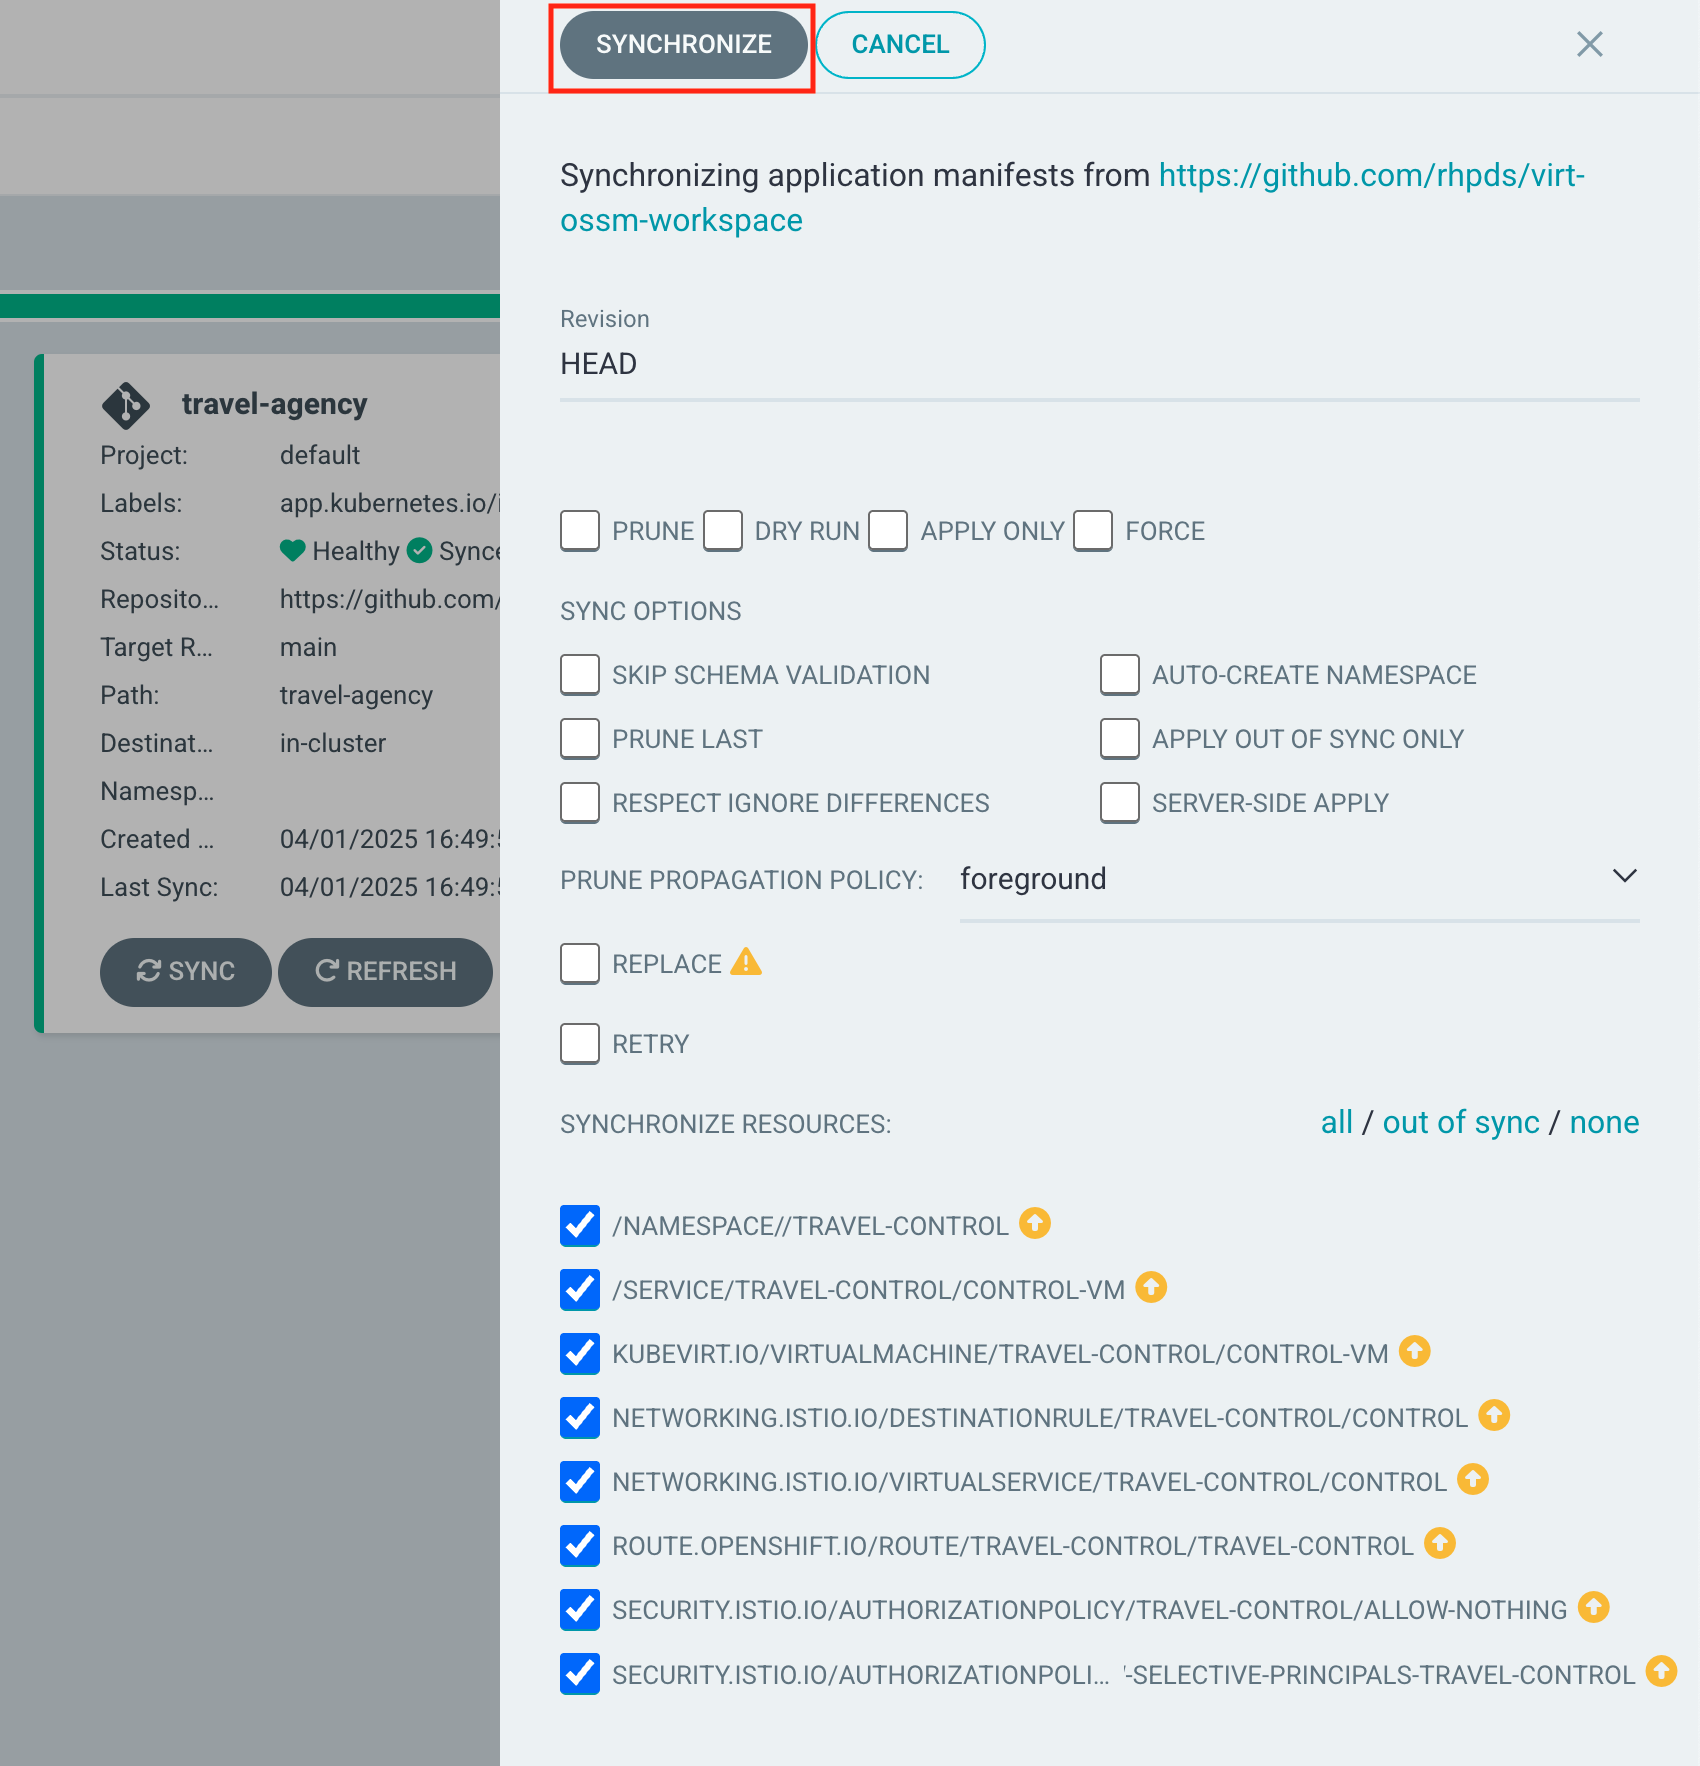
To sync (deploy) the application:
On the Applications page, click on SYNC button of the travel-control application.
A panel will be opened and then, click on SYNCHRONIZE button.
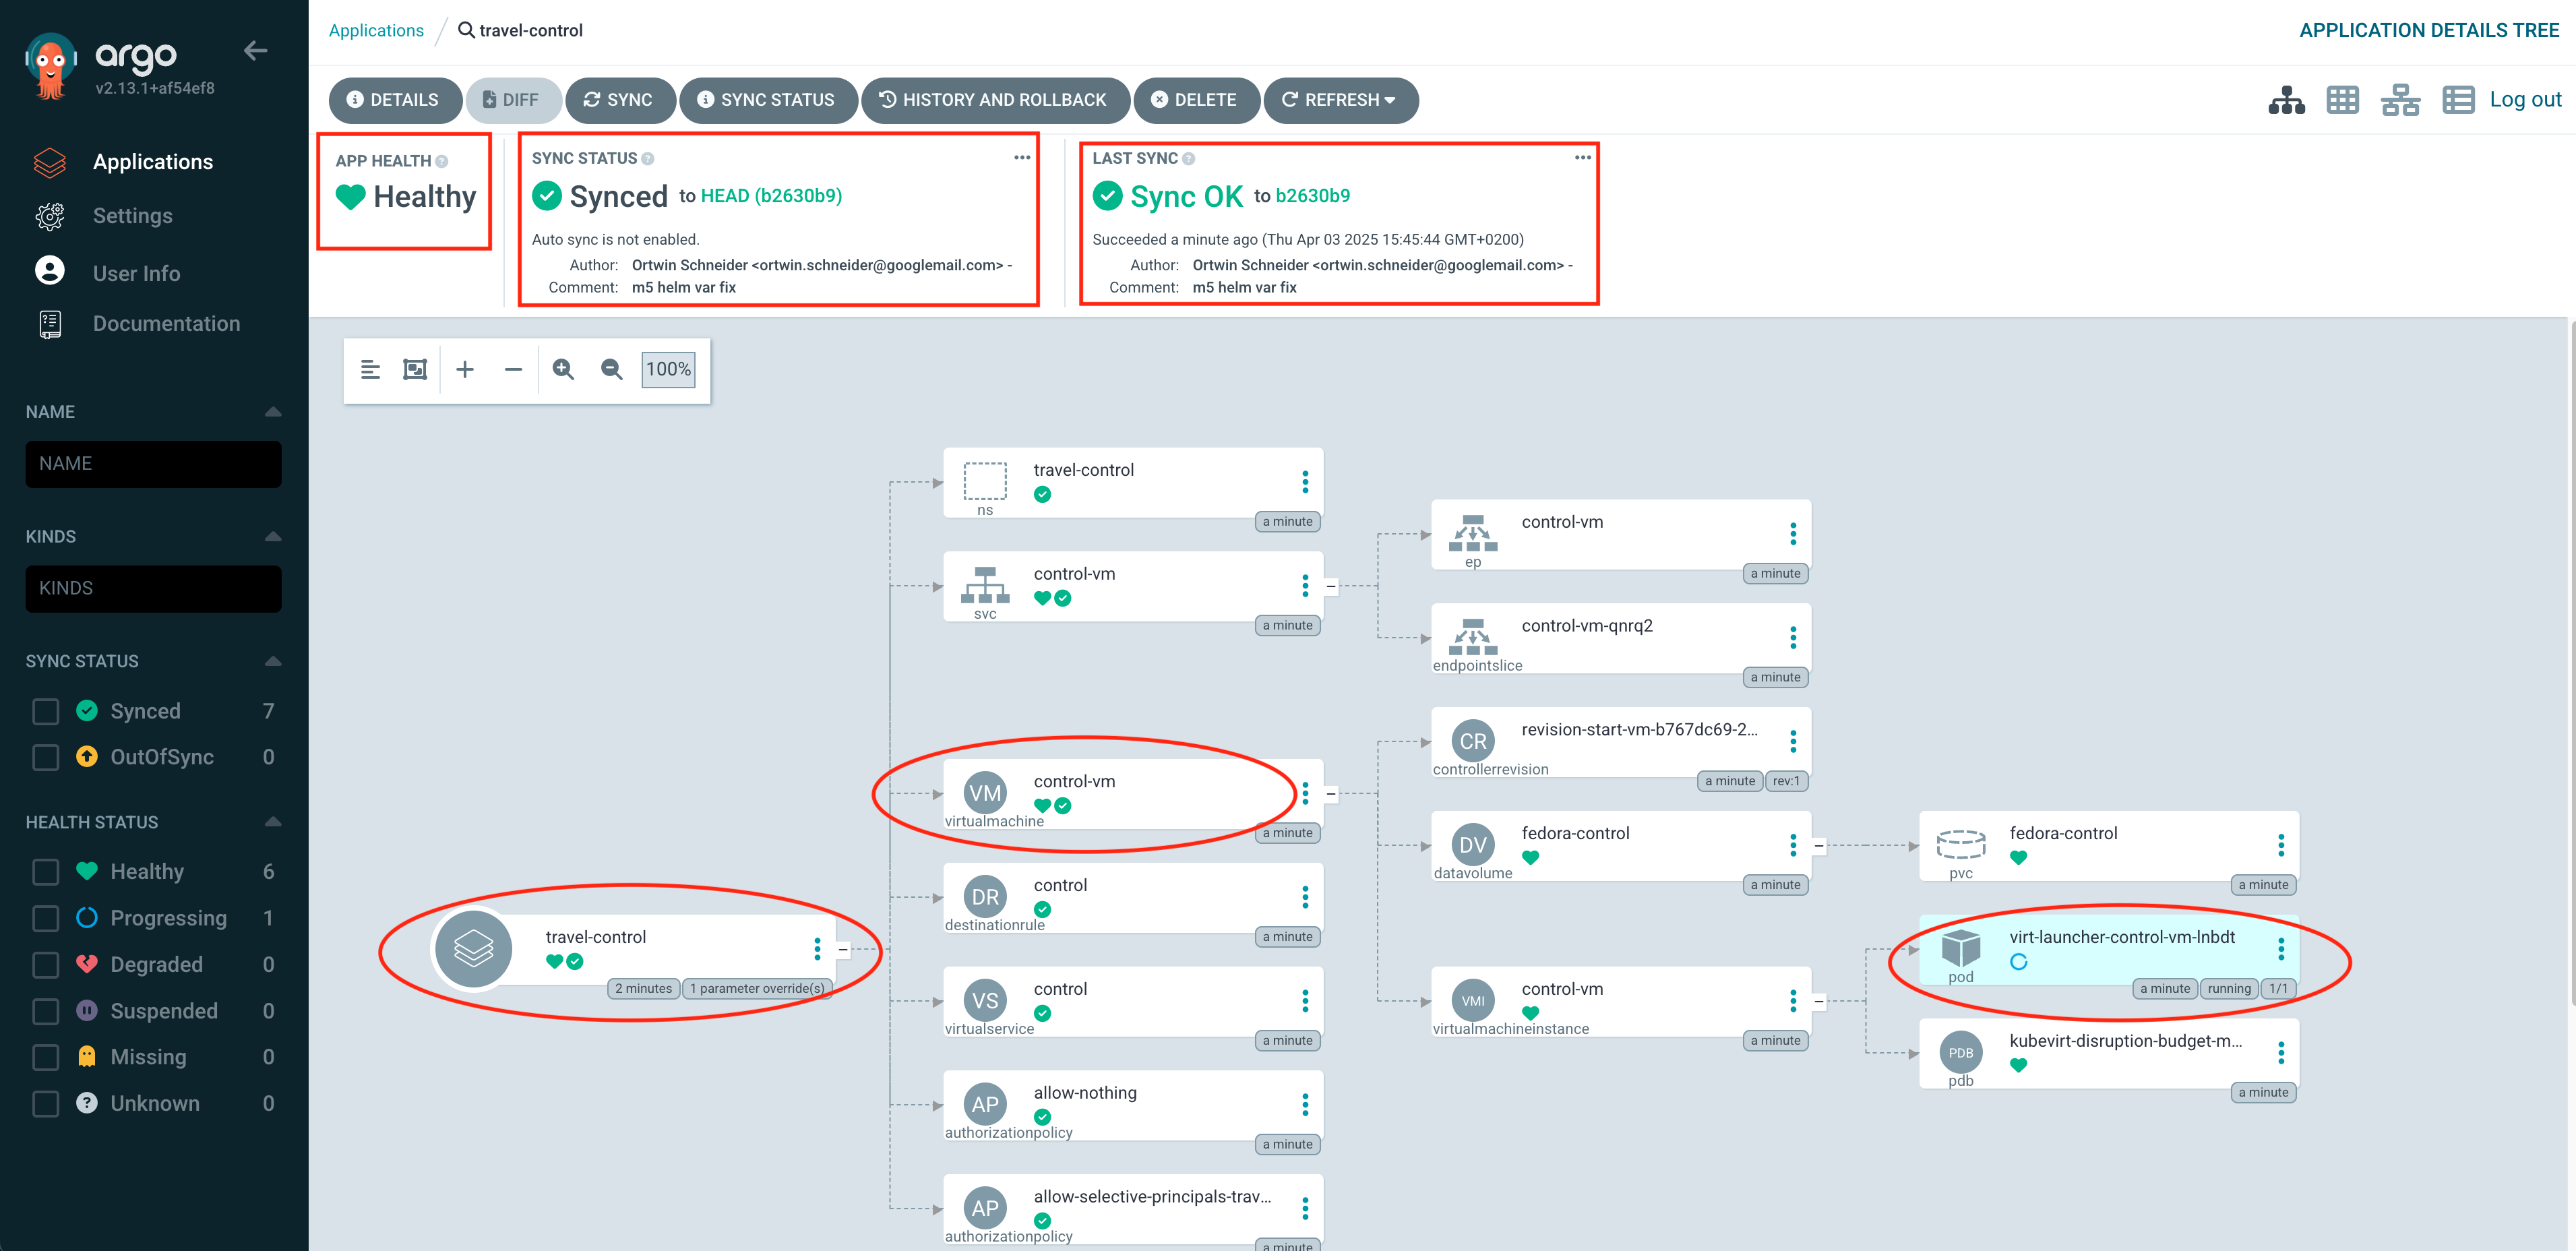
By clicking on the travel-control application you open the details of the app, and you’ll see which resources have been applied, as well as the Sync status, last sync and application health.
Wait for a few minutes until everything is up and running.
In the last step we test if the whole solution is working correctly, by opening the Business Dashboard of the Booking Application again.
Task 3: Validate Argo CD Self-Healing
To test Argo CD’s self-healing capability, you can manually delete a Kubernetes resource managed by Argo CD. With Automated Sync and Self-Heal enabled, Argo CD will detect the drift from the desired Git state and automatically recreate the deleted resource, confirming that self-healing is working as expected.
First, we need to enable Auto-Sync and Self-Healing for the travel-control application.
Click on DETAILS, and in the details window scroll down and click on ENABLE AUTO-SYNC.
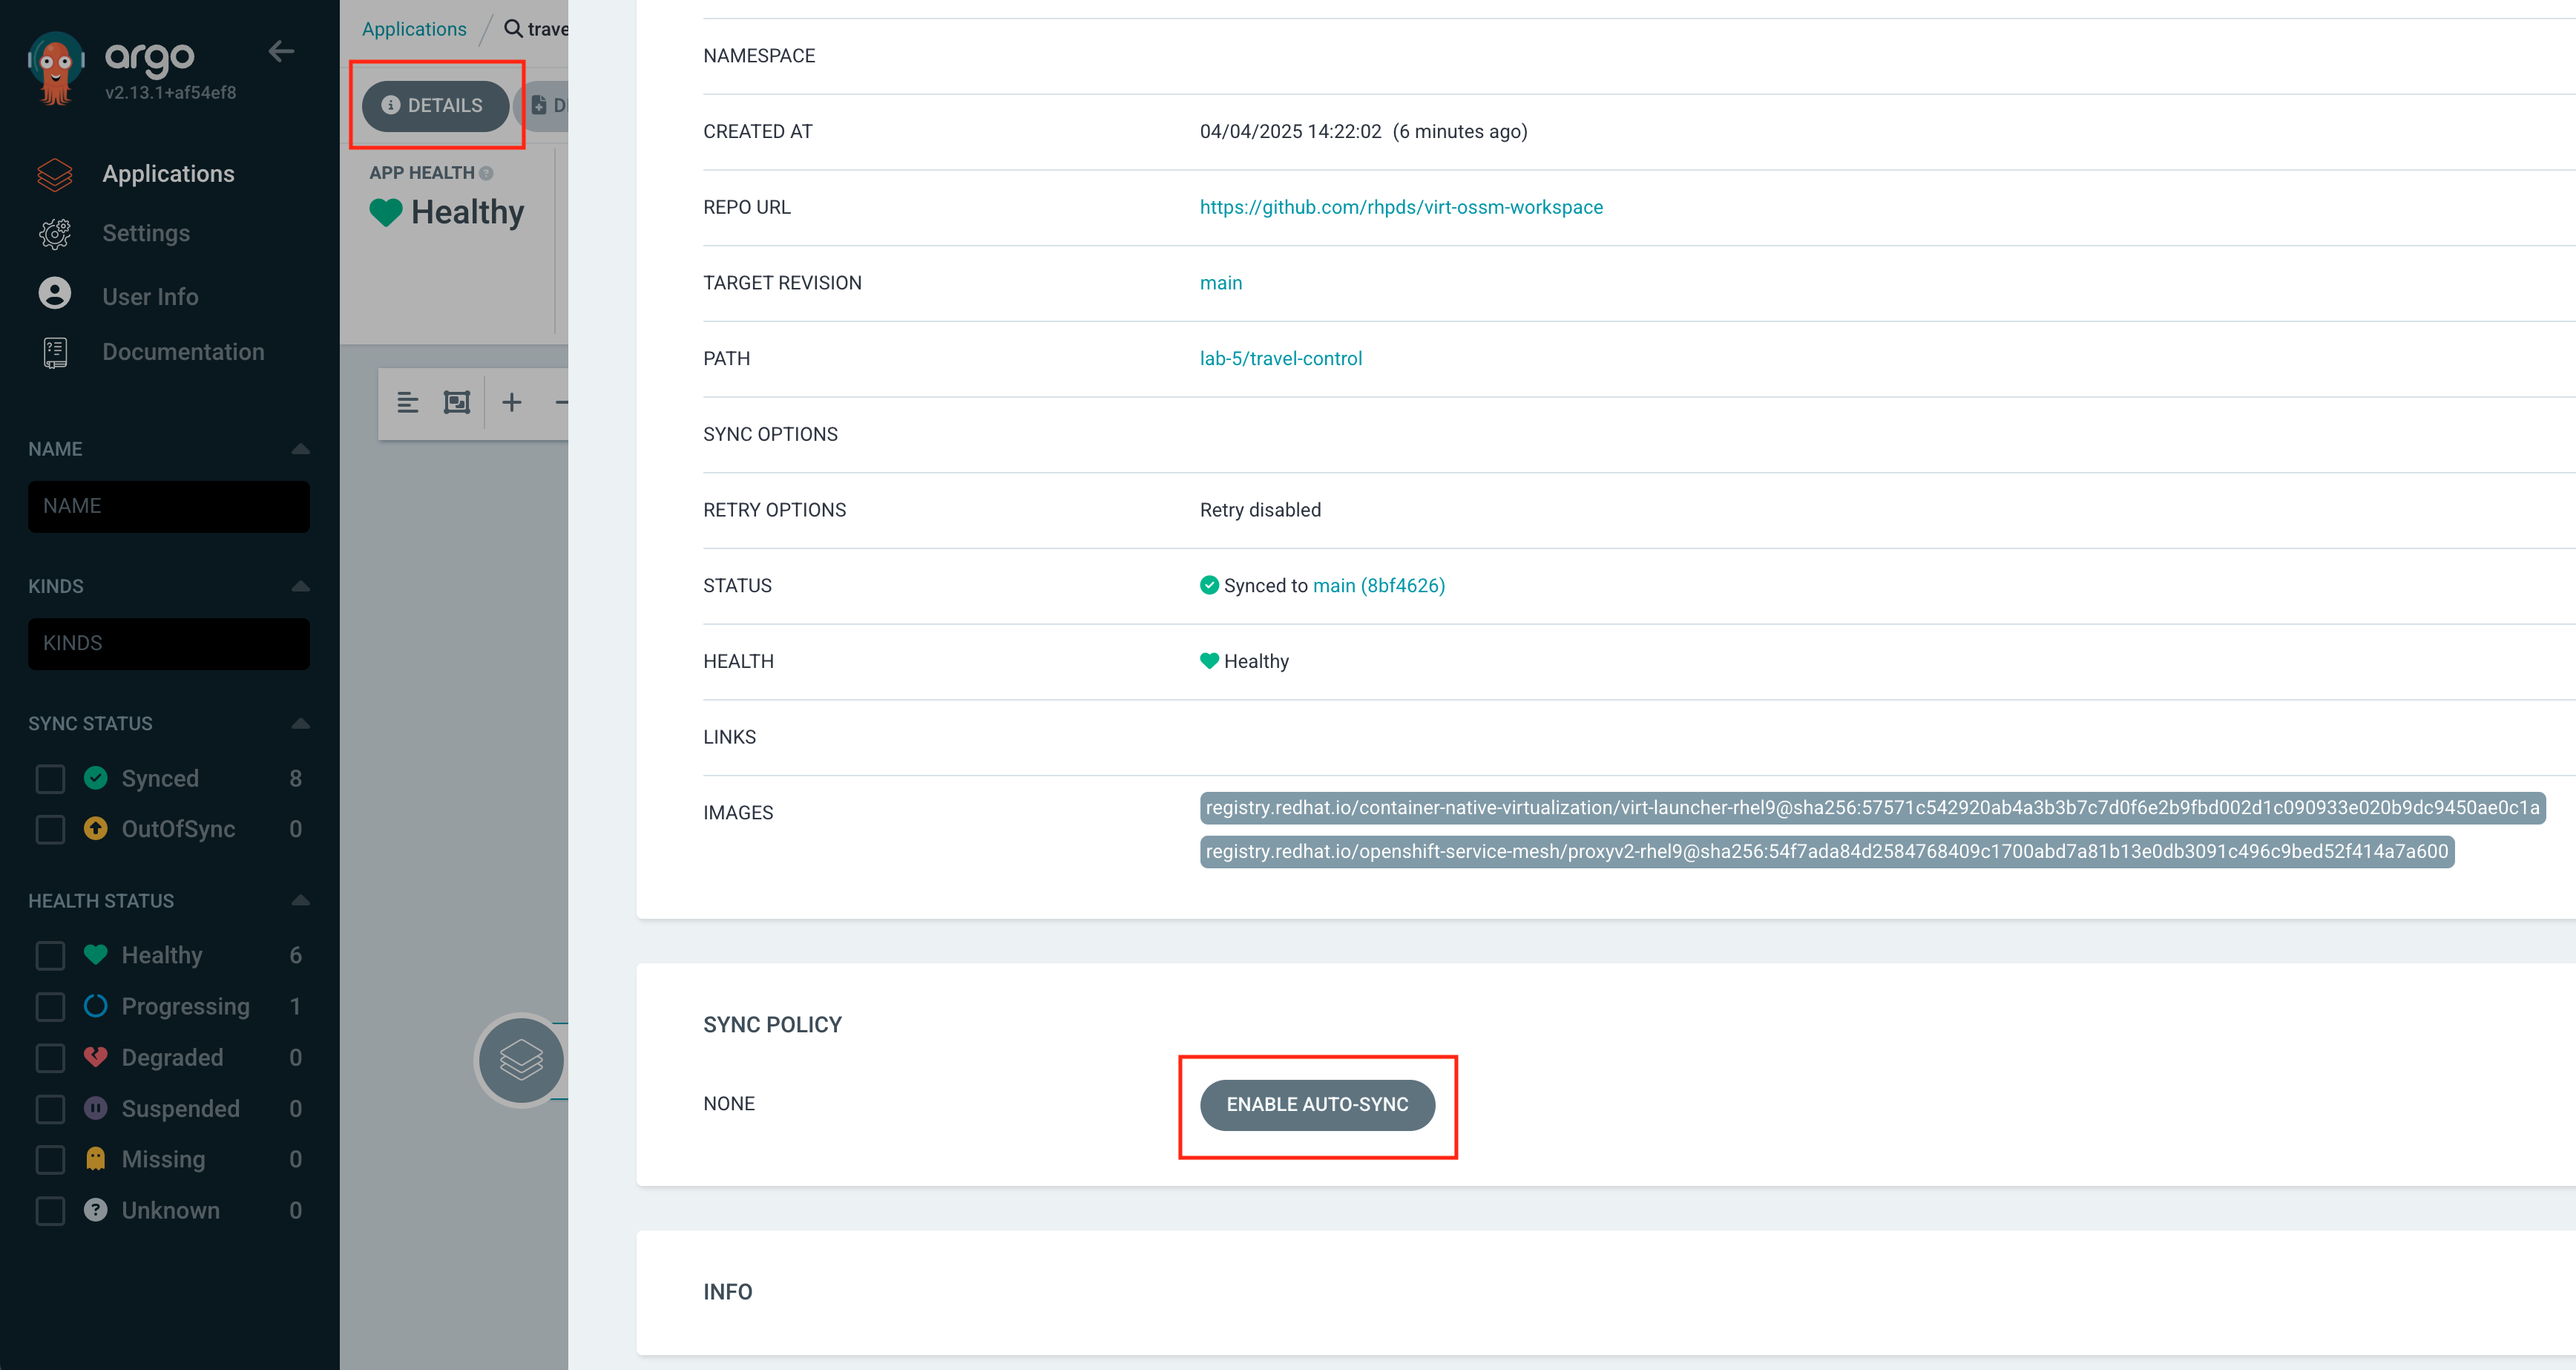
Now click on ENABLE for the Self Heal sync option.
And that is it!
Now we are going to delete all content from the travel-control namespace. Execute the following command in the terminal on your right hand side:
oc delete AuthorizationPolicy,DestinationRule,Route,Service,smm,VirtualMachine,VirtualService -l module=m5 -n travel-controlThe Argo CD dashboard will briefly show:
-
Application status as "OutOfSync" – indicating that the live cluster state no longer matches the Git source.
-
The deleted resource will disappear from the resource tree temporarily.
-
Within moments, Argo CD will auto-sync, and the deleted resource will reappear, restoring the desired state.
-
The status will return to "Synced" and "Healthy", confirming self-healing has taken place.
Congratulations!! You helped the Travel Agency company to operate their whole solution now through GitOps.