Lab Guide: Creating a Collection with the VS Code Extension
A guide to using the Ansible extension for Visual Studio Code to scaffold a new Ansible collection and playbook project.
Lab briefing
ansible-creator is a Command-Line Interface (CLI) tool designed for effortlessly scaffolding all your Ansible content. Whether you are initializing an Ansible collection or creating the framework for specific plugins, this tool streamlines the process with efficiency and precision based on your requirements.
ansible-creator is also integrated into the VS Code user interface through the Ansible extension for VS Code for even a smoother experience when developing content.
In this section, you will create an Ansible collection and a playbook using the Ansible extension’s wizard in VS Code.
Learning objectives
After completing this module, you will be able to:
-
Scaffold a new Ansible collection using the
ansible-creatorCLI -
Use the Ansible VS Code extension to create collection and playbook projects
-
Compare CLI-generated and VS Code-generated collection structures
Lab guide: Hands-on tasks
In this section you will learn how to create, test, and deploy an Ansible collection using the ansible-creator tool through the Ansible extension for VS Code.
For this lab, all necessary tools and dependencies are pre-installed and configured for you.
Task 0: Create a collection using the ansible-creator CLI
Lets start by running ansible-creator in the command line to scaffold a collection, with the directory structure and several file templates to speed up our content development. In the following tasks we will do the same using the Ansible extension in VS Code.
-
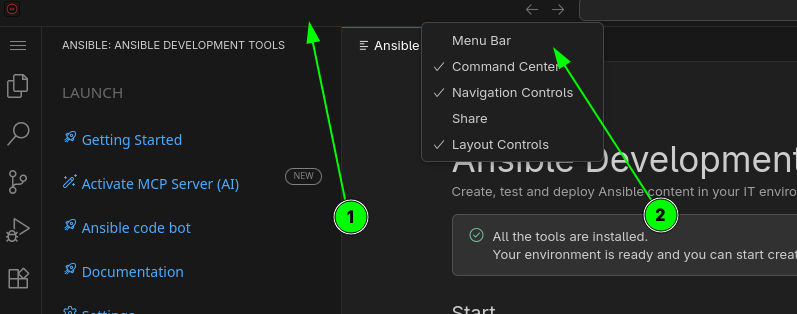
If you don’t see the menu bar at the top of VS Code, right-click on the free space on the top bar and select Menu Bar to enable it.
-
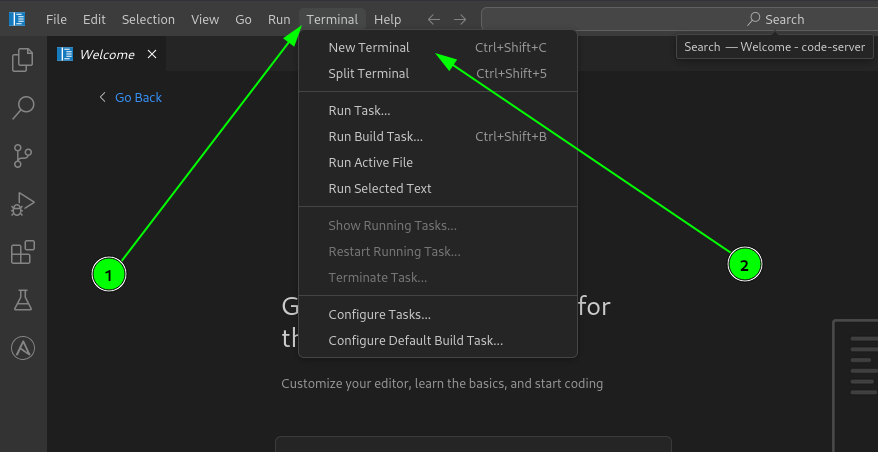
Open the VS Code Terminal by clicking the Terminal on the top VS Code menu, then New Terminal option. If you already have a Terminal open in VS Code you can reuse that one.
-
Scaffold a CLI collection with ansible-creator: Using
ansible-creatorinitialize a collection calledmynamespace.creatorcollection:ansible-creator init collection mynamespace.creatorcollection /projects/ansible-dev-tools-workspace/mynamespace.creatorcollection -
Inspect the generated collection structure and files:
ls -lha /projects/ansible-dev-tools-workspace/mynamespace.creatorcollectionYou should see the scaffolded collection directory structure including files like galaxy.yml,README.md,LICENSE, and directories likeplugins/,tests/, andmeta/. -
Congrats: You created a default collection. This collection was created for demonstration purposes only — in the following tasks you will create the collection used throughout the rest of the lab.
-
Close the terminal by clicking the trash can icon on the terminal panel or by typing
exitin the terminal.
Task 1: Explore the Ansible extension
First, let’s explore the Ansible extension for VS Code.
-
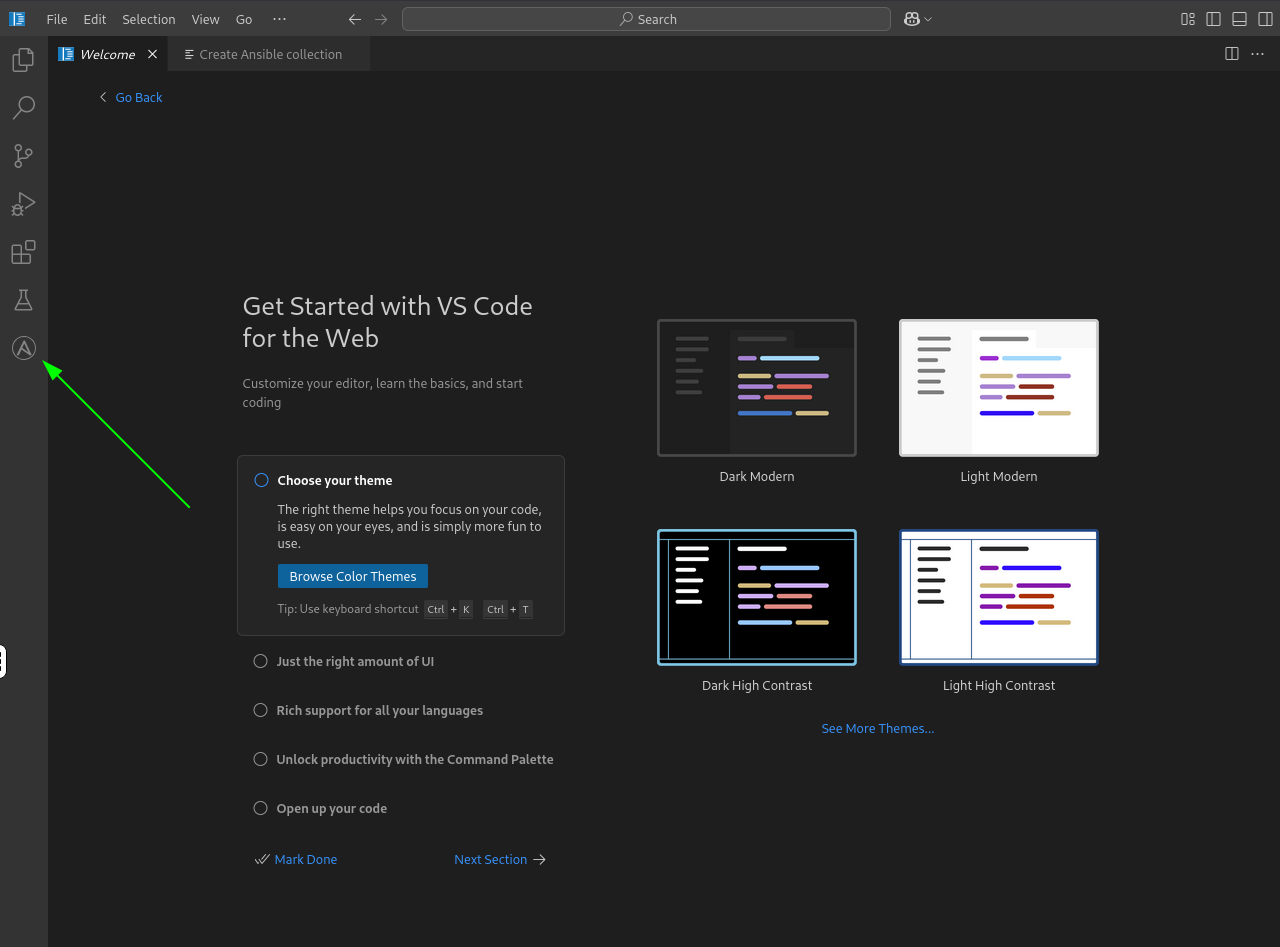
Open the Ansible extension icon on the left sidebar of VS Code. You will see the Ansible Development Tools section with shortcuts and guided wizards to scaffold projects, manage execution environments, and perform other common Ansible development tasks.
The Ansible extension also supports AI-powered assistance through its LLM settings. You can configure this later to connect to Ansible Code Assistant or other language model services.
Task 2: Create a collection project
Next, you will scaffold a new Ansible collection.
-
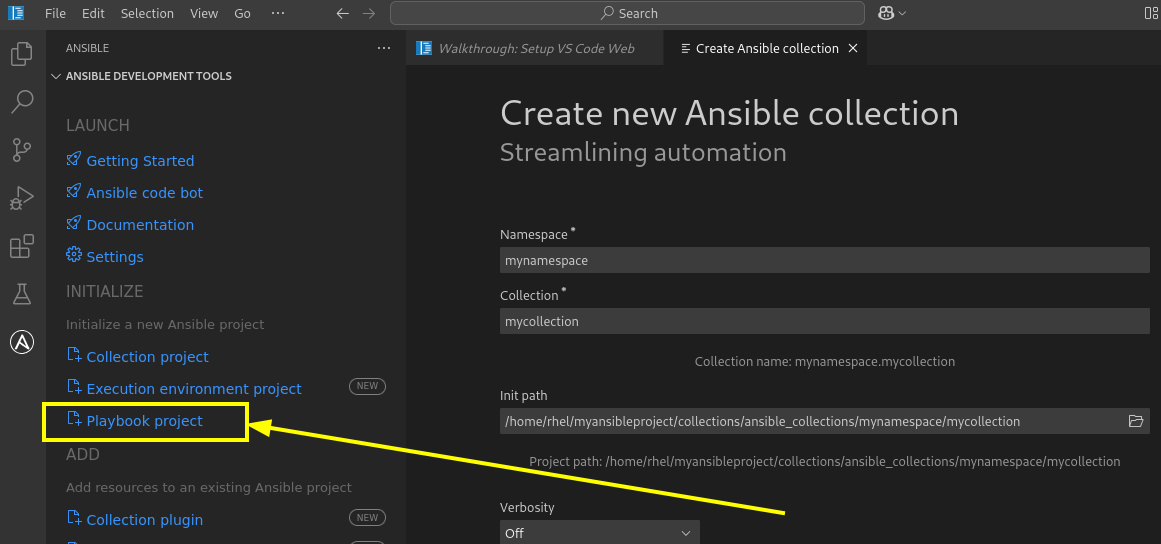
Open the Collection project creator by clicking the Collection project link in the Ansible Development Tools section.

Paths shown in screenshots may differ from your environment — always follow the written instructions. -
Fill out the collection details in the new tab that opens. Use the following information:
-
Namespace:
mynamespace -
Collection:
mycollection -
Init path:
/projects/ansible-dev-tools-workspace/mynamespace.mycollection -
Check the box for
Install collection from source code (editable mode)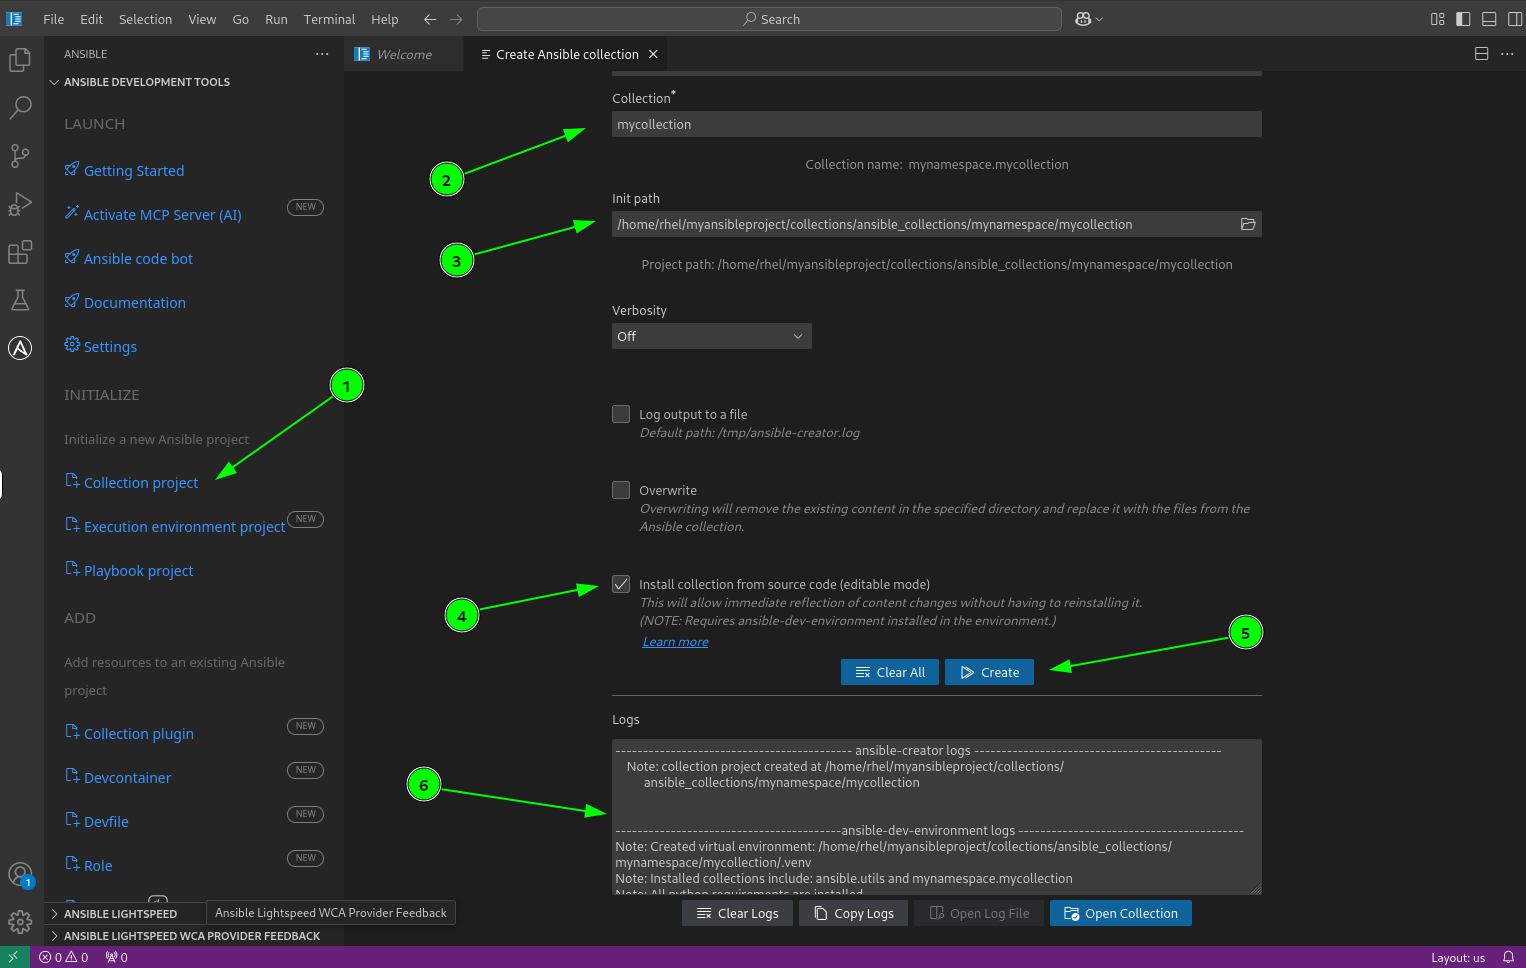
-
Create the collection by clicking the blue Create button.
-
After a few moments, you should see the creation details appear in the Logs box.
------- ansible-creator logs ---------
    Note: collection project created at /projects/ansible-dev-tools-workspace/
          mynamespace.mycollection


------- ansible-dev-environment logs -------
Note: Created virtual environment: /projects/ansible-dev-tools-workspace/mynamespace.mycollection/.venv
Note: Installed collections include: ansible.utils and mynamespace.mycollection
Note: All python requirements are installed.
Note: All required system packages are installed.
Note: A virtual environment was specified but has not been activated.
Note: Please activate the virtual environment:
source /projects/ansible-dev-tools-workspace/mynamespace.mycollection/.venv/bin/activate
-
Task 3: Create a playbook project
Now, you will create a separate playbook project.
-
Open the Playbook project creator by clicking the Playbook project link in the Ansible extension sidebar.
Paths shown in screenshots may differ from your environment — always follow the written instructions. -
Fill out the playbook project details in the new tab. Use the following information:
-
Destination directory:
/projects/ansible-dev-tools-workspace/myplaybook -
Namespace:
mynamespace -
Collection:
playbookcollection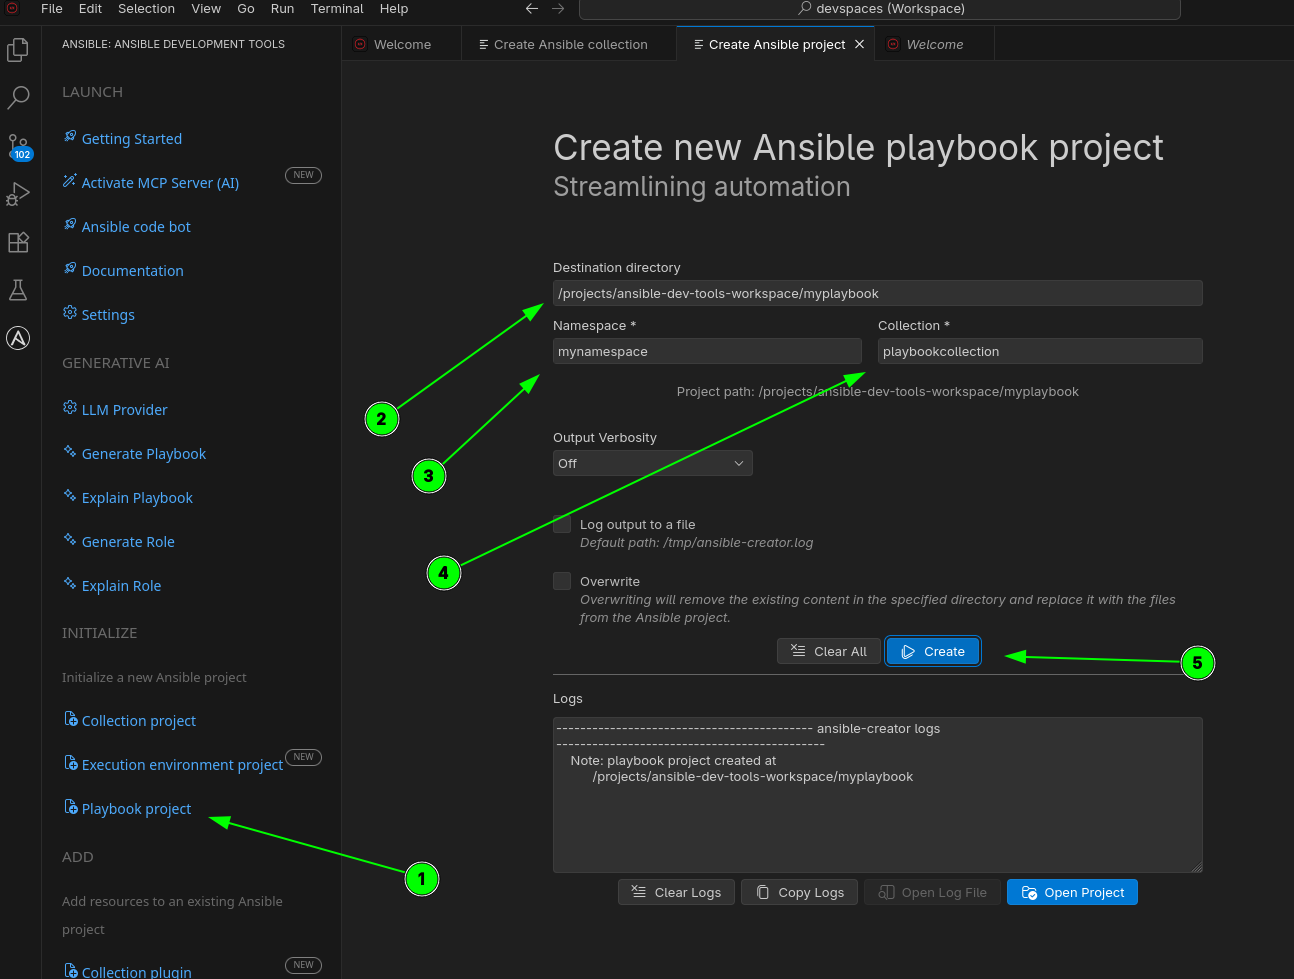
-
-
Create the project by clicking the Create button. After a couple of seconds, you should see a success message in the logs.
--- ansible-creator logs ---
Note: playbook project created at /projects/ansible-dev-tools-workspace/myplaybook
Task 4: Open the collection folder
Now you will explore the collection files that were generated for you.
-
Open the file Explorer by clicking the Explorer icon (the icon with two files) in the VS Code left sidebar.
-
View the scaffolded files. In the file explorer sidebar, expand the
mynamespace.mycollectionfolder. You will see the complete directory structure and all the files created by the Ansible extension for your new collection.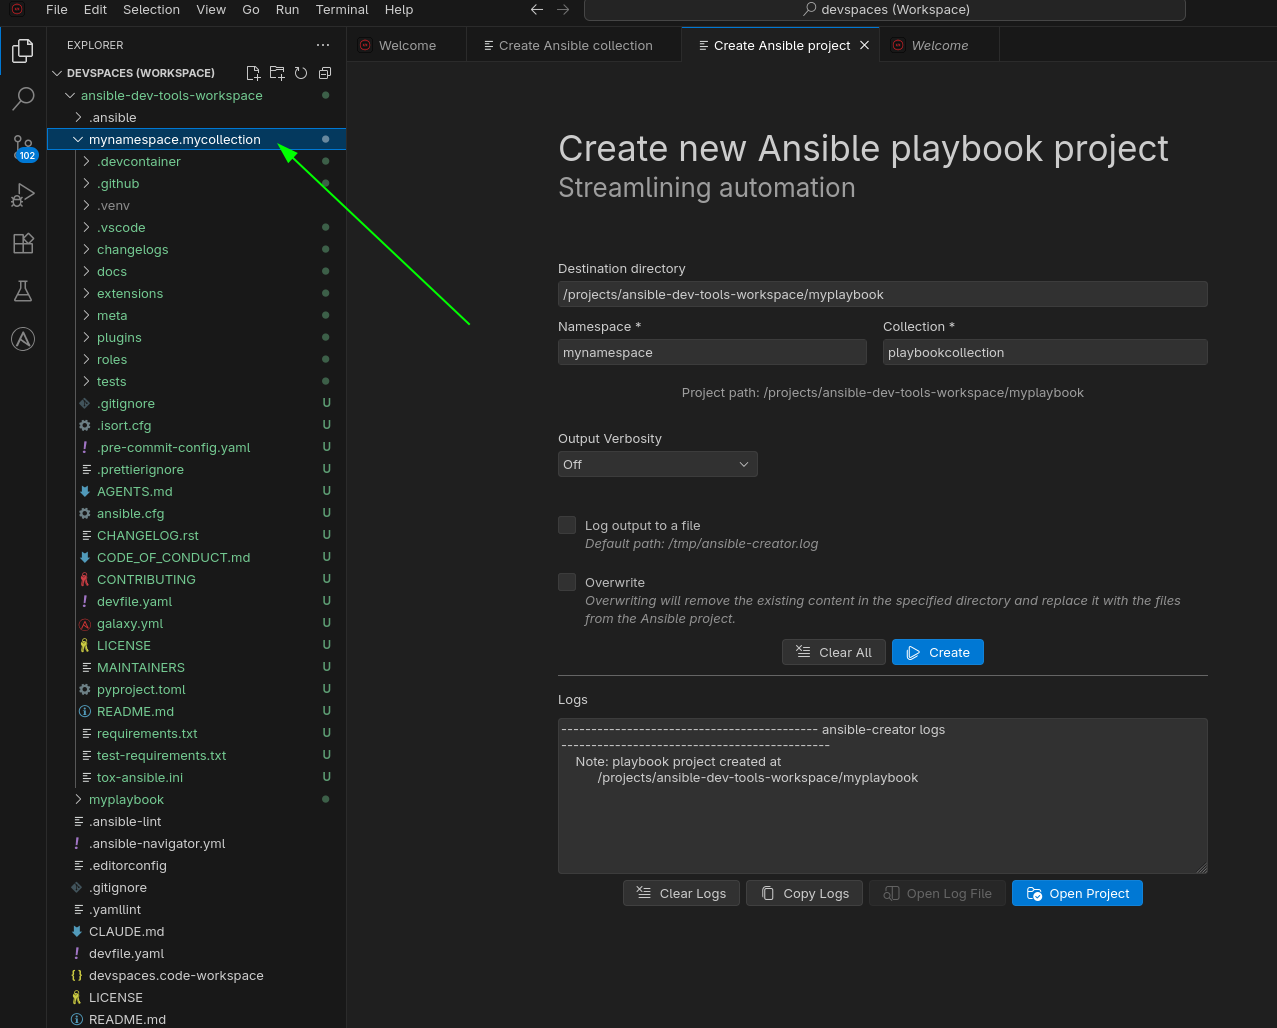
Paths shown in screenshots may differ from your environment — always follow the written instructions. -
Activate the Ansible extension by clicking on the
galaxy.ymlfile in the file explorer. This ensures VS Code recognizes the project as an Ansible collection and activates the Ansible language features.
Task 5: Compare the CLI-generated with the VS Code-generated collections
Take a moment to compare the two collections you created — mynamespace.creatorcollection (CLI) and mynamespace.mycollection (VS Code). Expand both folders in the VS Code file explorer and notice:
-
Same layout — both collections have the same directory structure (
plugins/,tests/,meta/, etc.) -
Same defaults — both contain the same default files (
galaxy.yml,README.md,LICENSE) -
Same metadata files — both use the same
galaxy.ymlformat andmeta/runtime.yml
The VS Code wizard and the CLI produce identical scaffolding — choose whichever fits your workflow.
Next steps
You have successfully explored how ansible-creator and VS Code work together to scaffold a collection. Please click the Next button below to proceed to Lab 1.2 - Using the Ansible Development Environment tool.