Lab Guide: Adding a Module to a Collection
A guide to adding a custom module to your Ansible collection and using it in a playbook.
Lab briefing
In this section, you will be adding content in the form of an Ansible module plugin to the collection you created, and then using the module for a new playbook, which you will fix with ansible-lint before running it with ansible-navigator.
Learning objectives
After completing this module, you will be able to:
-
Add a custom Python module to an Ansible collection
-
Create a playbook that uses your custom module
-
Use
ansible-lintto detect and auto-fix playbook issues -
Run playbooks with both
ansible-playbookandansible-navigator
Lab guide: Hands-on tasks
In this section, you will copy an existing Python module into your collection’s plugins/modules directory. While you can develop your own modules from scratch, we will use a pre-written one for simplicity.
Task 1: Add a custom module to the collection
First, you will create a new Python file and add the code for a simple cowsay module.
-
Create the module file. In the VS Code file explorer on the left, expand the
mynamespace.mycollection>plugins>modulesdirectory path, then right-click onmodulesand select New File. Name the filecowsay.py.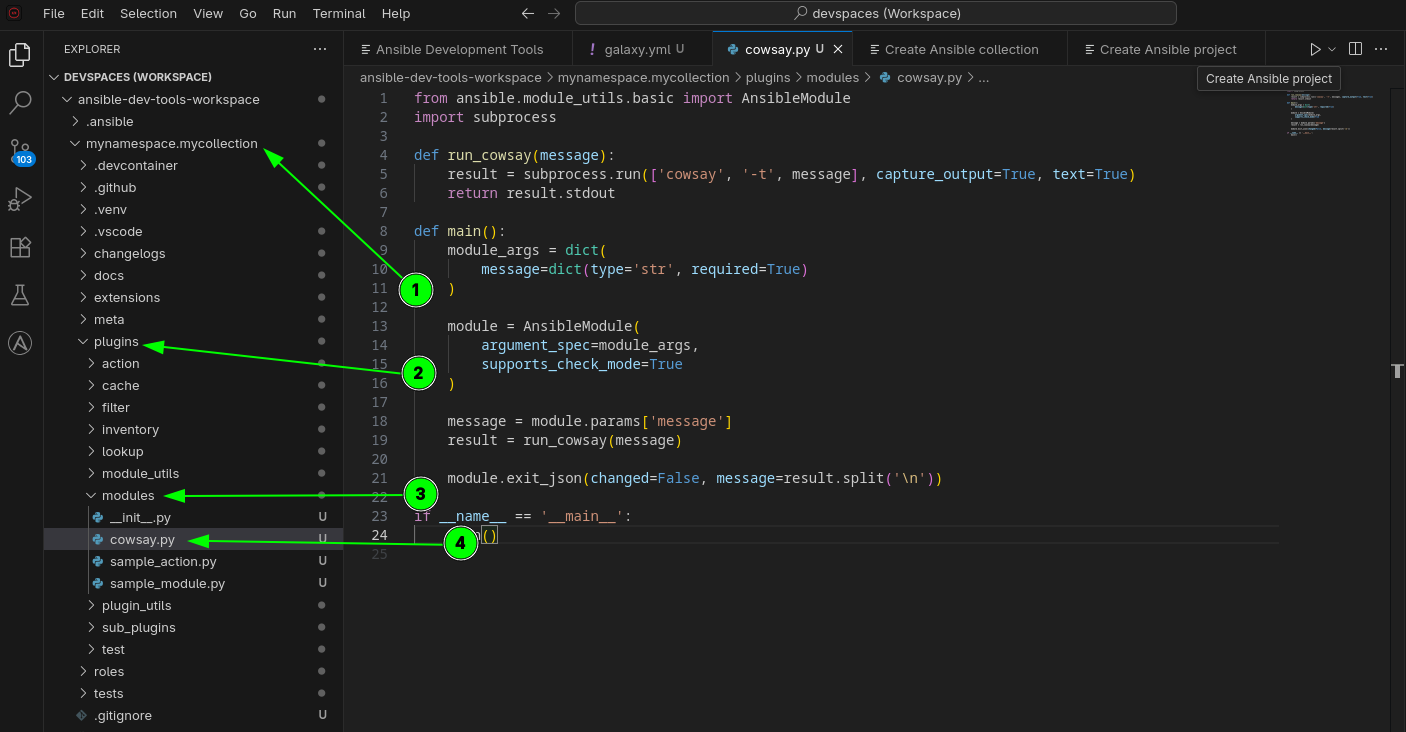
-
Add the Python code. Copy the following Python code and paste it into the
cowsay.pyfile you just created.from ansible.module_utils.basic import AnsibleModule import subprocess def run_cowsay(message): result = subprocess.run(['cowsay', '-t', message], capture_output=True, text=True) return result.stdout def main(): module_args = dict( message=dict(type='str', required=True) ) module = AnsibleModule( argument_spec=module_args, supports_check_mode=True ) message = module.params['message'] result = run_cowsay(message) module.exit_json(changed=False, message=result.split('\n')) if __name__ == '__main__': main()
Task 2: Create a playbook to use the new module
Now, you will switch to your playbook project folder and create a new playbook that calls your custom module.
-
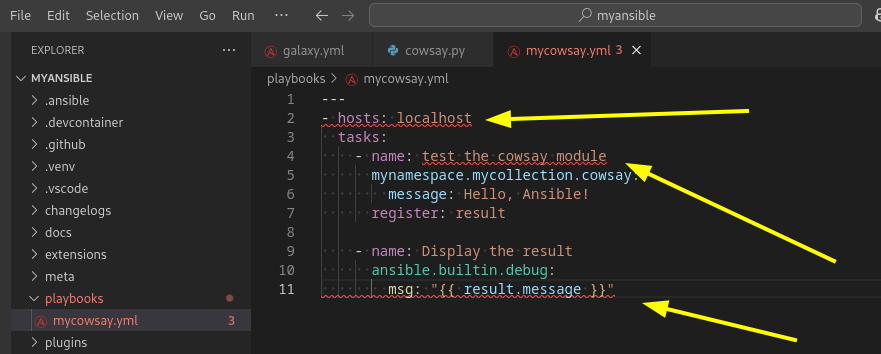
Create a
playbooksdirectory. In the VS Code file explorer on the left, right-click onmynamespace.mycollectionand select New Folder. Name itplaybooks. -
Create a new playbook file. Right-click on the newly created
playbooksfolder and select New File. Name the filemycowsay.yml. -
Add the playbook content. Copy and paste the following content into the
mycowsay.ymlfile:--- - hosts: localhost tasks: - name: test the cowsay module mynamespace.mycollection.cowsay: message: Hello, Ansible! register: result - name: Display the result ansible.builtin.debug: msg: "{{ result.message }}"
Task 3: Use ansible-lint to fix the playbook
You will notice red curly lines under parts of your playbook. These are warnings from ansible-lint. You will now use its auto-fix capabilities.
-
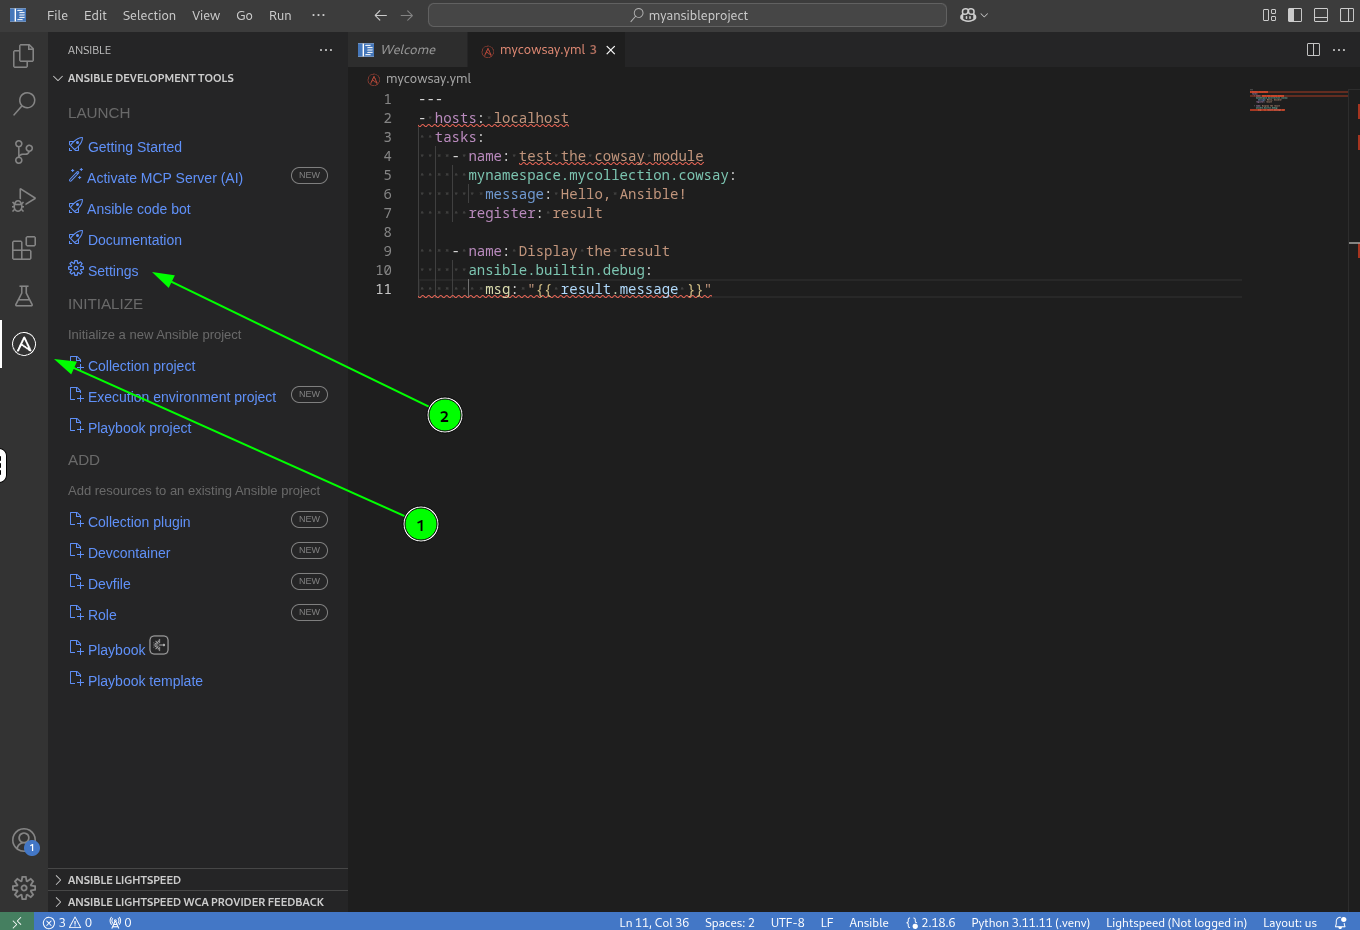
Open the Ansible extension settings. Click the Ansible icon in the left sidebar then the Settings option in the menu.
-
Enable the linter and auto-fix. In the search bar at the top, type
lintto filter the settings.-
Make sure the checkbox for
Ansible › Validation › Lint: Enabledis checked. -
Check the
Ansible › Validation › Lint: Auto Fix On Savecheckbox. This tells the linter to automatically fix issues when you save a file.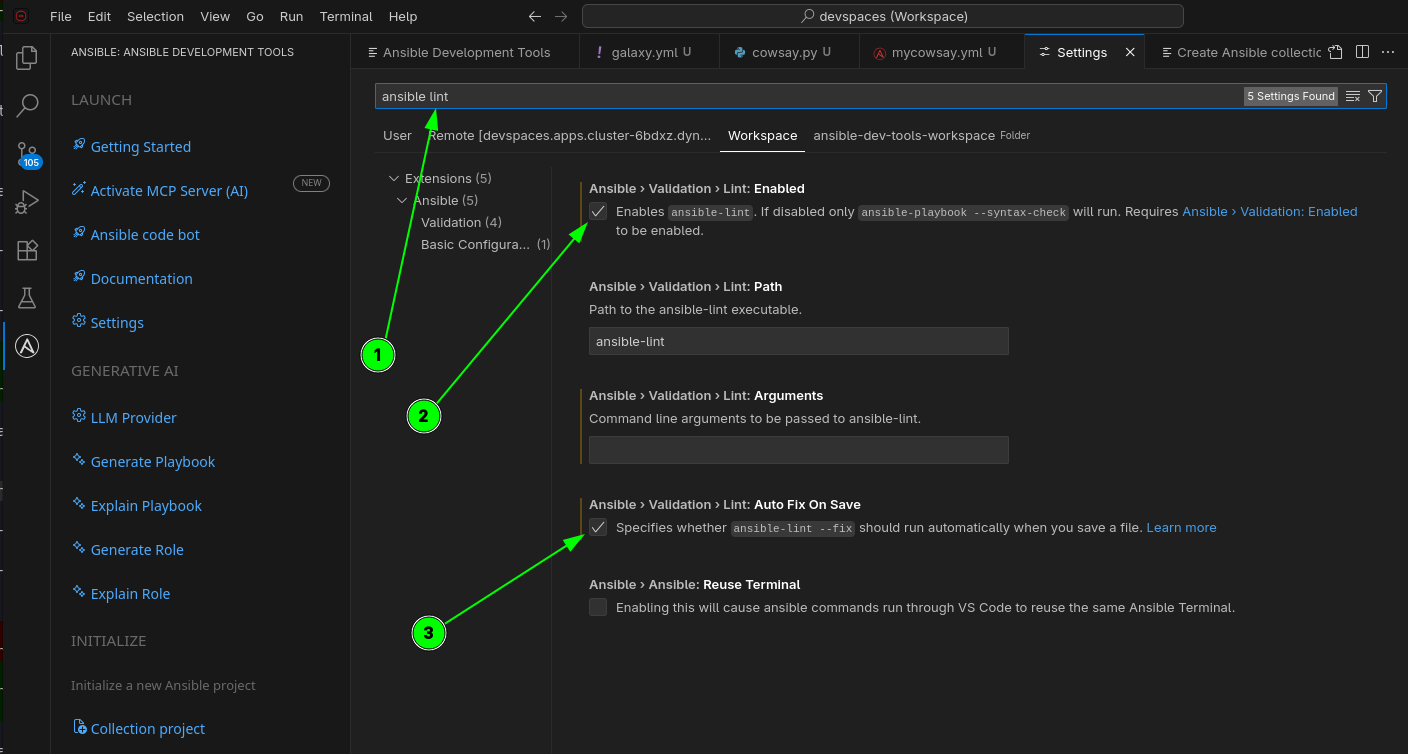
-
-
Trigger the auto-fix. Go back to the
mycowsay.ymlplaybook tab and save the file (Ctrl + SorCmd + S). Wait a few seconds foransible-lintto run. It should automatically fix several formatting issues. -
Apply the final manual fix. One warning will remain. Hover your mouse over it to see the reason: "All plays should be named." The linter cannot fix this for you. To fix it, add a
- name:line to the play. The final, correct playbook should look like this:--- - name: Using our cowsay module hosts: localhost tasks: - name: Test the cowsay module mynamespace.mycollection.cowsay: message: Hello, Ansible! register: result - name: Display the result ansible.builtin.debug: msg: "{{ result.message }}"
Task 4: Run the playbook
Now that your playbook is lint-free, let’s run it. Go back to the VS Code file Explorer view.
-
Run with
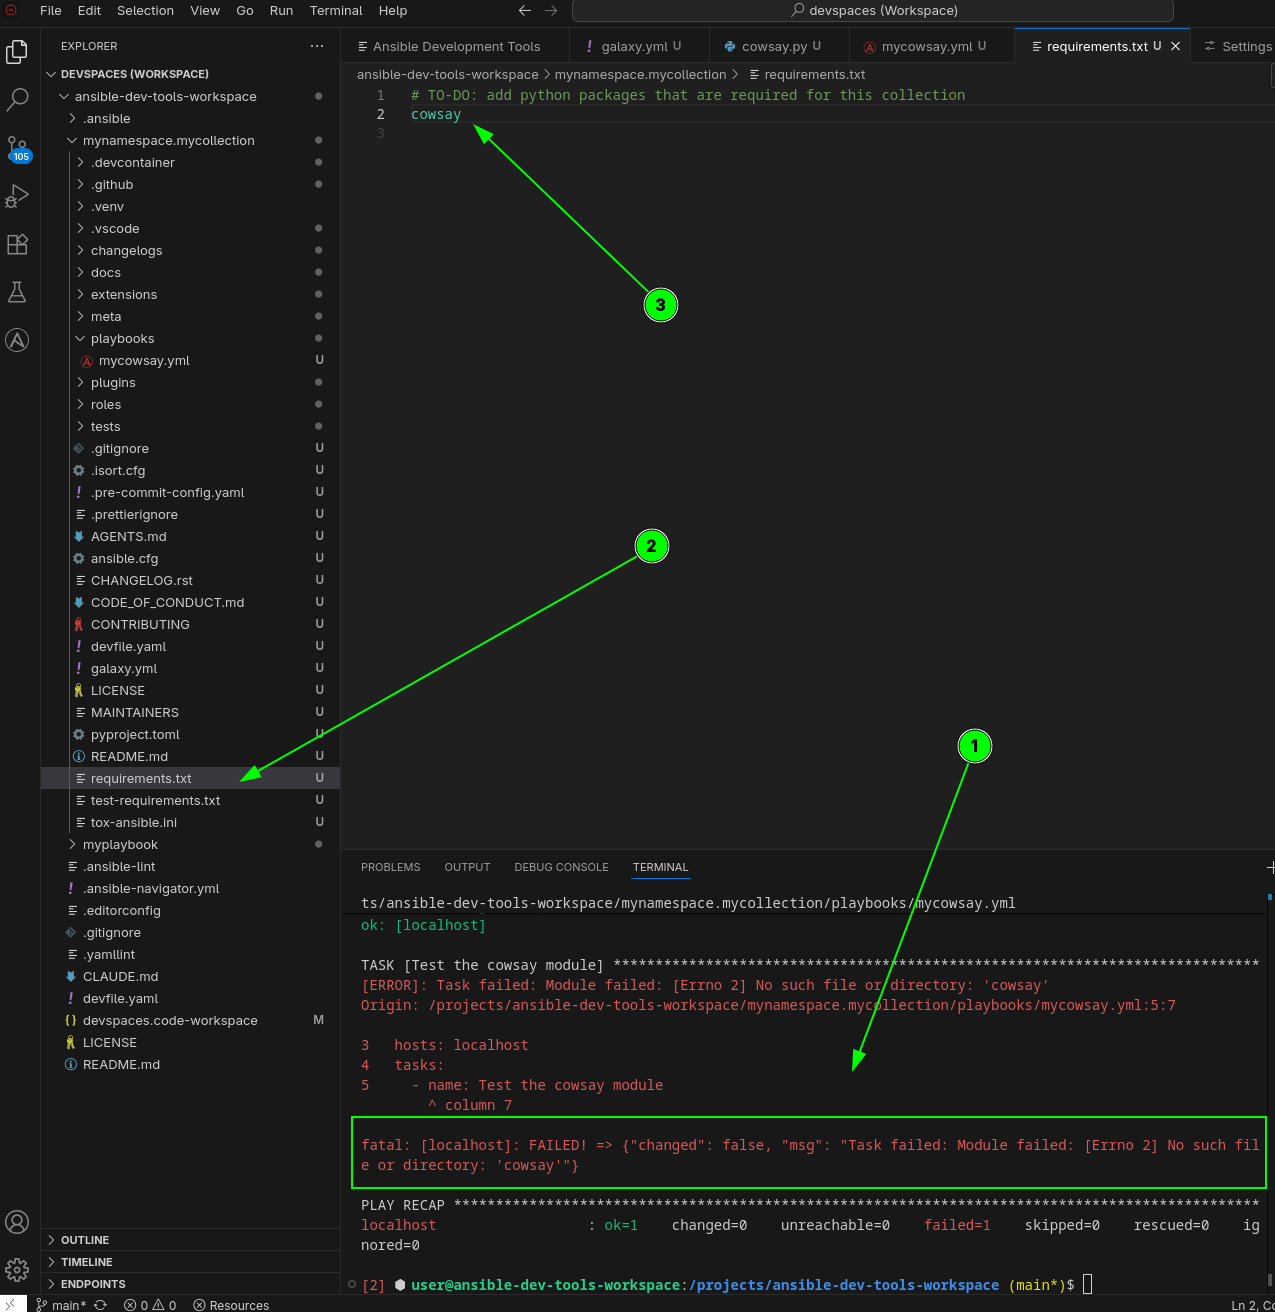
ansible-playbook. In the VS Code file explorer, click onmycowsay.ymlto open it in the editor, then right-click the file in the explorer. From the context menu, select Run Ansible Playbook.The playbook will fail with an error similar to:
No such file or directory: 'cowsay'This is expected! Your module calls the
cowsaycommand, but the Python package that provides it is not installed in your virtual environment yet. -
Add the missing Python dependency. Open the
requirements.txtfile in the collection root. This file declares the Python packages your collection needs. Addcowsayto it:cowsaySave the file.
The requirements.txtfile is for Python packages that can be installed withpip. In the previous module you saw howadehandles system packages (installed withdnf). When a dependency is available as a Python package, preferrequirements.txt— it works in any environment, including containers where the system filesystem may be read-only. -
Re-run
ade installto pick up the new dependency. Make sure you are in the collection directory first:cd /projects/ansible-dev-tools-workspace/mynamespace.mycollectionade install -e .You should see
cowsayincluded in the installed packages. -
Open
mycowsay.ymlin the editor by clicking on it in the VS Code file explorer. -
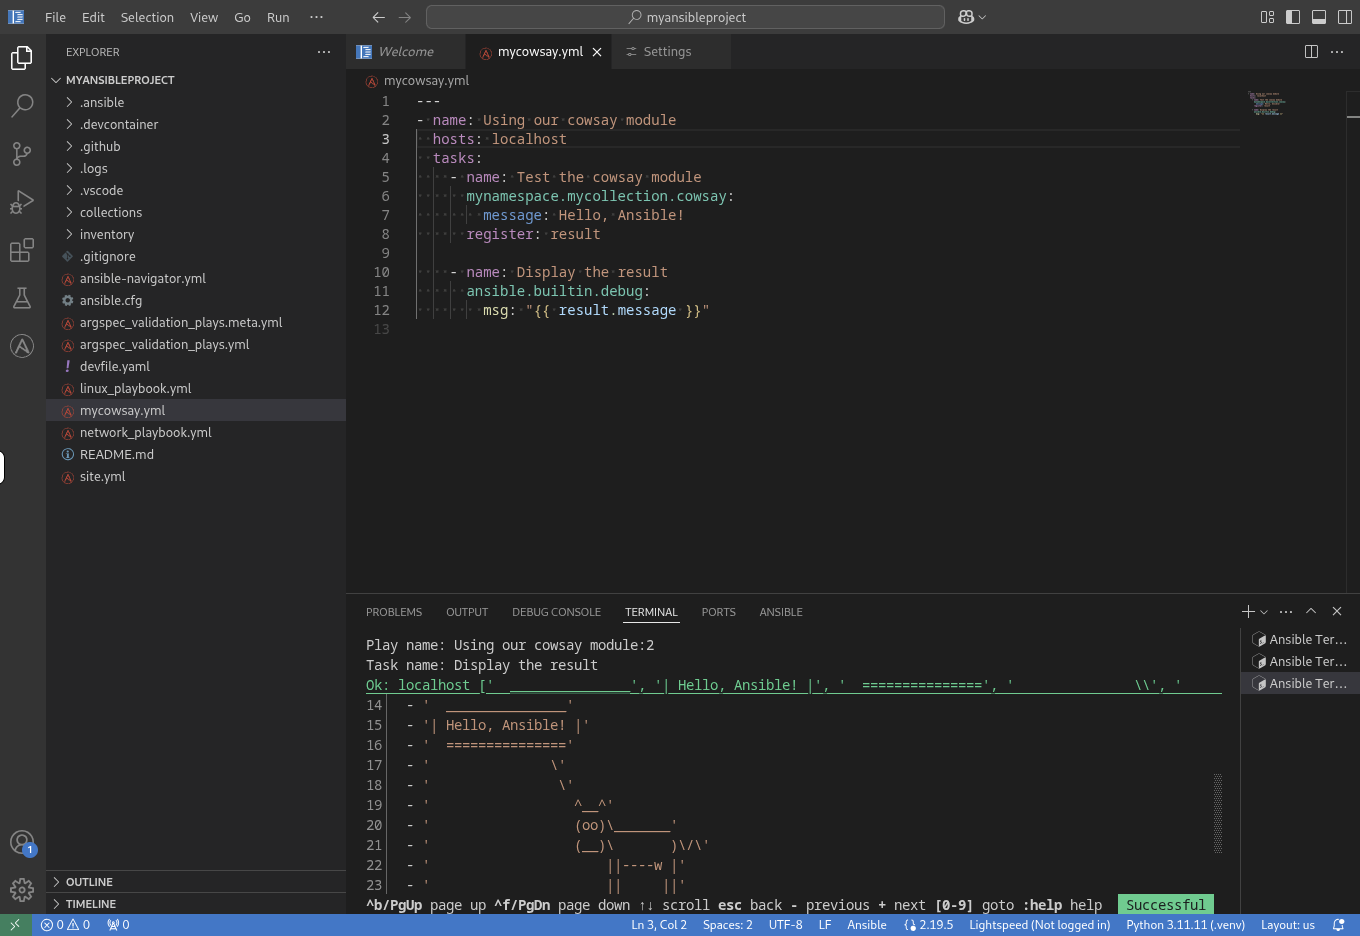
Run the playbook again. Right-click
mycowsay.ymlin the file explorer and select Run Ansible Playbook. This time it should succeed and display a friendly cow saying "Hello, Ansible!".
-
Run with
ansible-navigator. Withmycowsay.ymlstill open in the editor, right-click the file in the explorer again, but this time select Run with Ansible Navigator. This will launch the Terminal User Interface (TUI).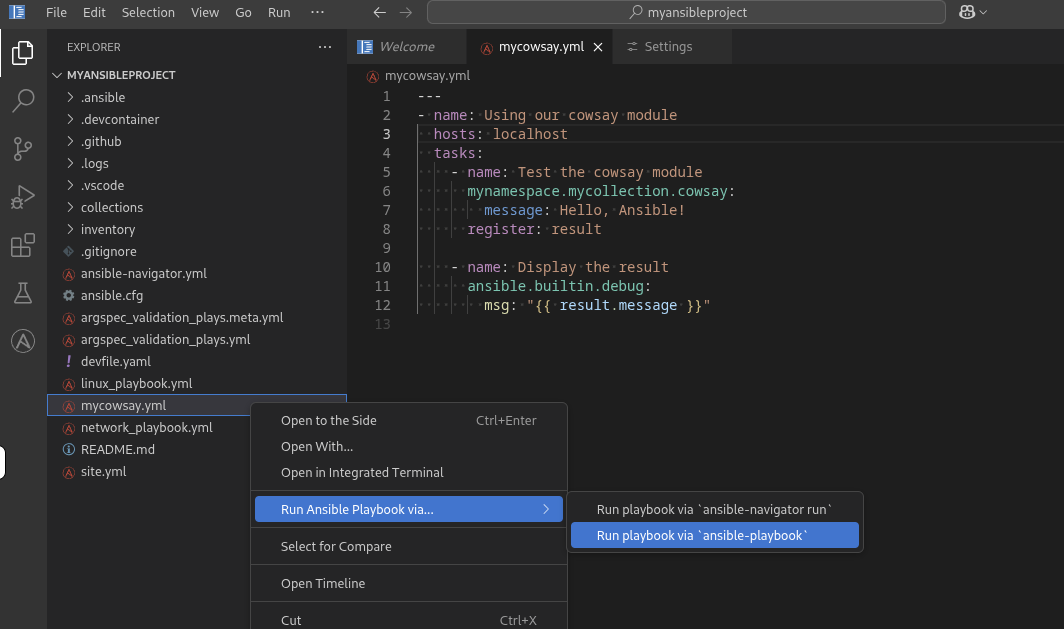
-
Explore the Navigator output. You are now inside the
ansible-navigatorTUI.-
To the left of the play name, you will see the number
0. Press0to drill down into the details for that play. -
You can now see the 3 tasks from your playbook. Press
2to see the output of the final "Display the result" task. -
You may need to scroll down to find the cow message.
-
-
Exit Ansible Navigator. Press the
ESCkey 3 times to exit the TUI and return to the normal terminal prompt.
Next steps
You have successfully added and tested a custom module in your collection. Please click the Next button below to proceed to Lab 2.1 - Testing a Collection with Ansible Molecule.