Workshop Exercise - Your Lab Environment
Objectives
-
Understand the lab topology and how to access the environment
-
Understand how to perform the workshop exercises
-
Understand challenge labs
Guide
Your Lab Environment
The workshop is provisioned with a pre-configured lab environment. Your access to the lab is made possible by a number of services running on the bastion host. You have access to a host deployed with Ansible Automation Platform (AAP) which you will use to control the playbook and workflow jobs that automate the RHEL in-place upgrade workflow steps. You will also have access to three "pet" application servers, one each running RHEL7, RHEL8, and RHEL9 respectively. These are the hosts where we will be upgrading the RHEL operating system (OS) to the next major version.
| Role | Inventory name |
|---|---|
Workshop bastion host |
|
AAP controller host |
|
RHEL7 pet app server |
|
RHEL8 pet app server |
|
RHEL9 pet app server |
|
We’ll dive deeper into why we are using random pet names in a later exercise.
Step 1 - Access the Environment
We will use Visual Studio Code (VS Code) as it provides a convenient and intuitive way to use a web browser to edit files and access terminal sessions.
-
Open VS Code in your web browser:
VS Code URL: {code_server_url}
Password:
{code_server_password} -
After opening the link, type in the provided password to access your instance of VS Code.
Note
A welcome wizard may appear to guide you through configuring your VS Code user experience. This is optional as the default settings will work fine for this workshop. Feel free to step through the wizard to explore the VS Code bells and whistles or you may just skip it.
Step 2 - Open a Terminal Session
Terminal sessions provide access to the RHEL commands and utilities that will help us understand what’s going on "behind the curtain" when the RHEL in-place upgrade automation is doing its thing.
-
Use VS Code to open a terminal session. For example:
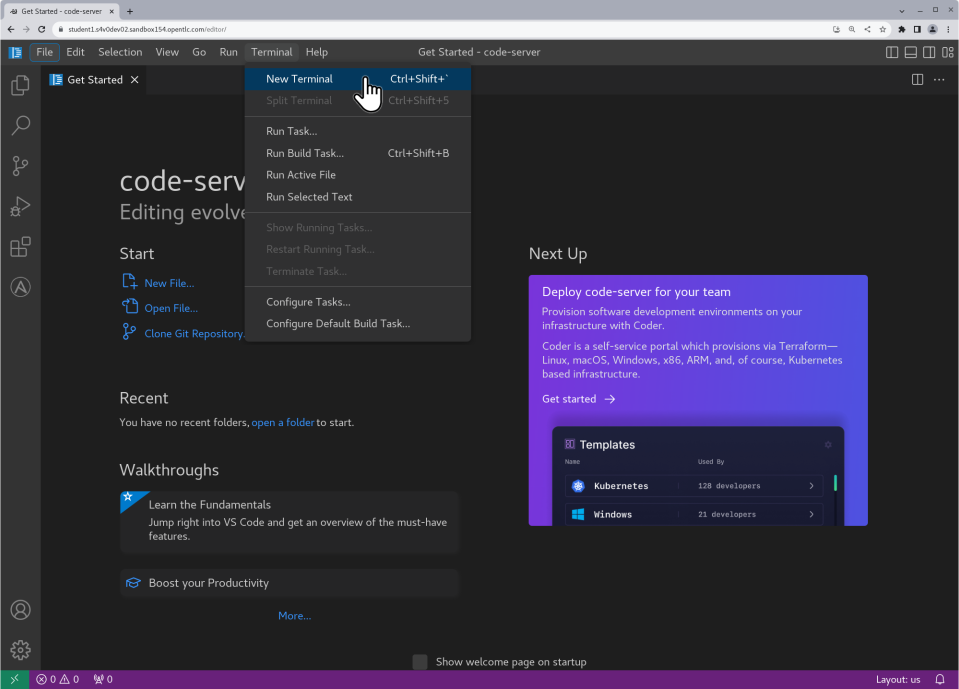
-
This terminal session will be running on the workshop bastion host
ansible-1. From here, you can usesshcommands to log in to your pet app servers.For example, the command
ssh {rhel7_pet_app_server}will log you into your RHEL7 server.After logging in, use the commands highlighted in the example below to confirm the RHEL OS version and kernel version installed.
For example:
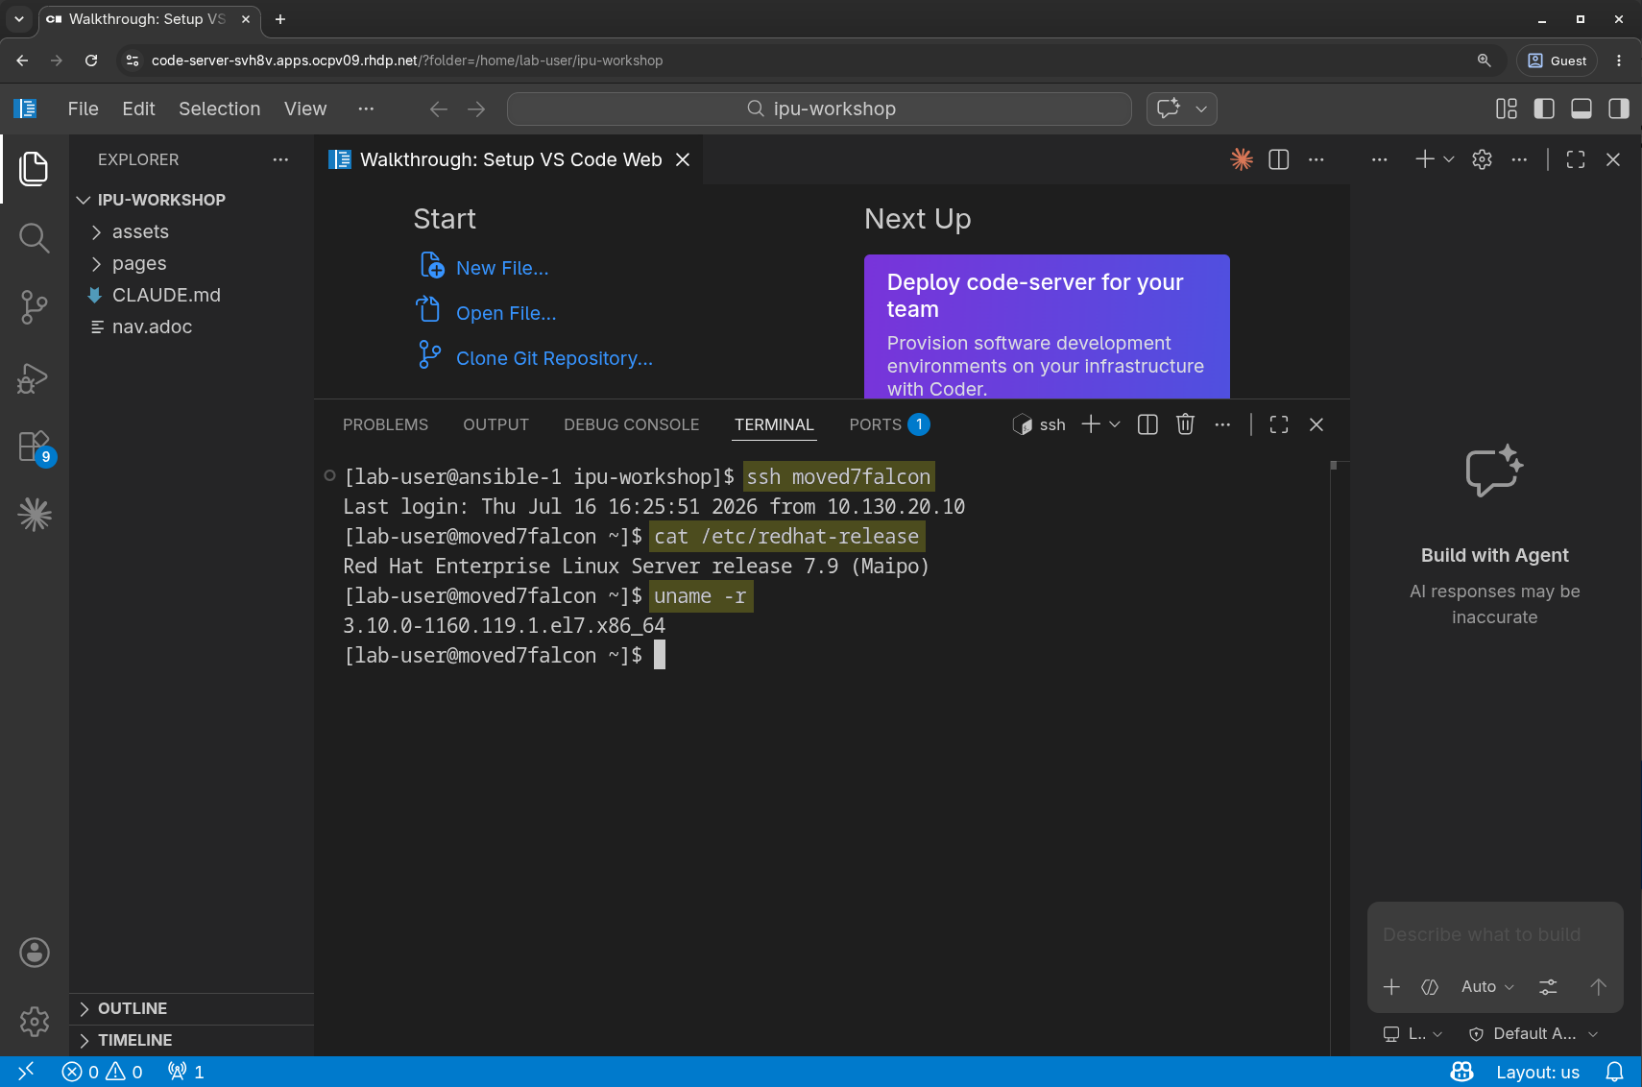
In the example above, the
sshcommand connected us to a new session on our RHEL7 pet app server.Then the commands
cat /etc/redhat-releaseanduname -rwere used to output the OS release information "Red Hat Enterprise Linux Server release 7.9 (Maipo)" and show that kernel version "3.10.0-1160.119.1.el7.x86_64" is running.Use the
exitcommand to end the session on the RHEL7 pet app server. That will return you back to the command prompt on the workshop bastion host. Then you can try logging into your RHEL8 and RHEL9 pet app servers to check their OS versions as well.Note
If VS Code is not your cup of tea or you just prefer to work at the command line, you may connect directly from your own terminal session. Use the following
sshcommand and password to connect directly to the workshop bastion host:{ssh_command}Password:
{ssh_password}
Step 3 - Access the AAP Web UI
The AAP Web UI is where we will go to submit and check the status of the Ansible playbook jobs we will use to automate the RHEL in-place upgrade workflow.
-
Open the AAP Web UI in a new web browser tab:
AAP Controller URL: {controller_url}
Username:
{controller_username}Password:
{controller_password} -
Enter the username and password above. This will bring you to your AAP Web UI dashboard like the example below:
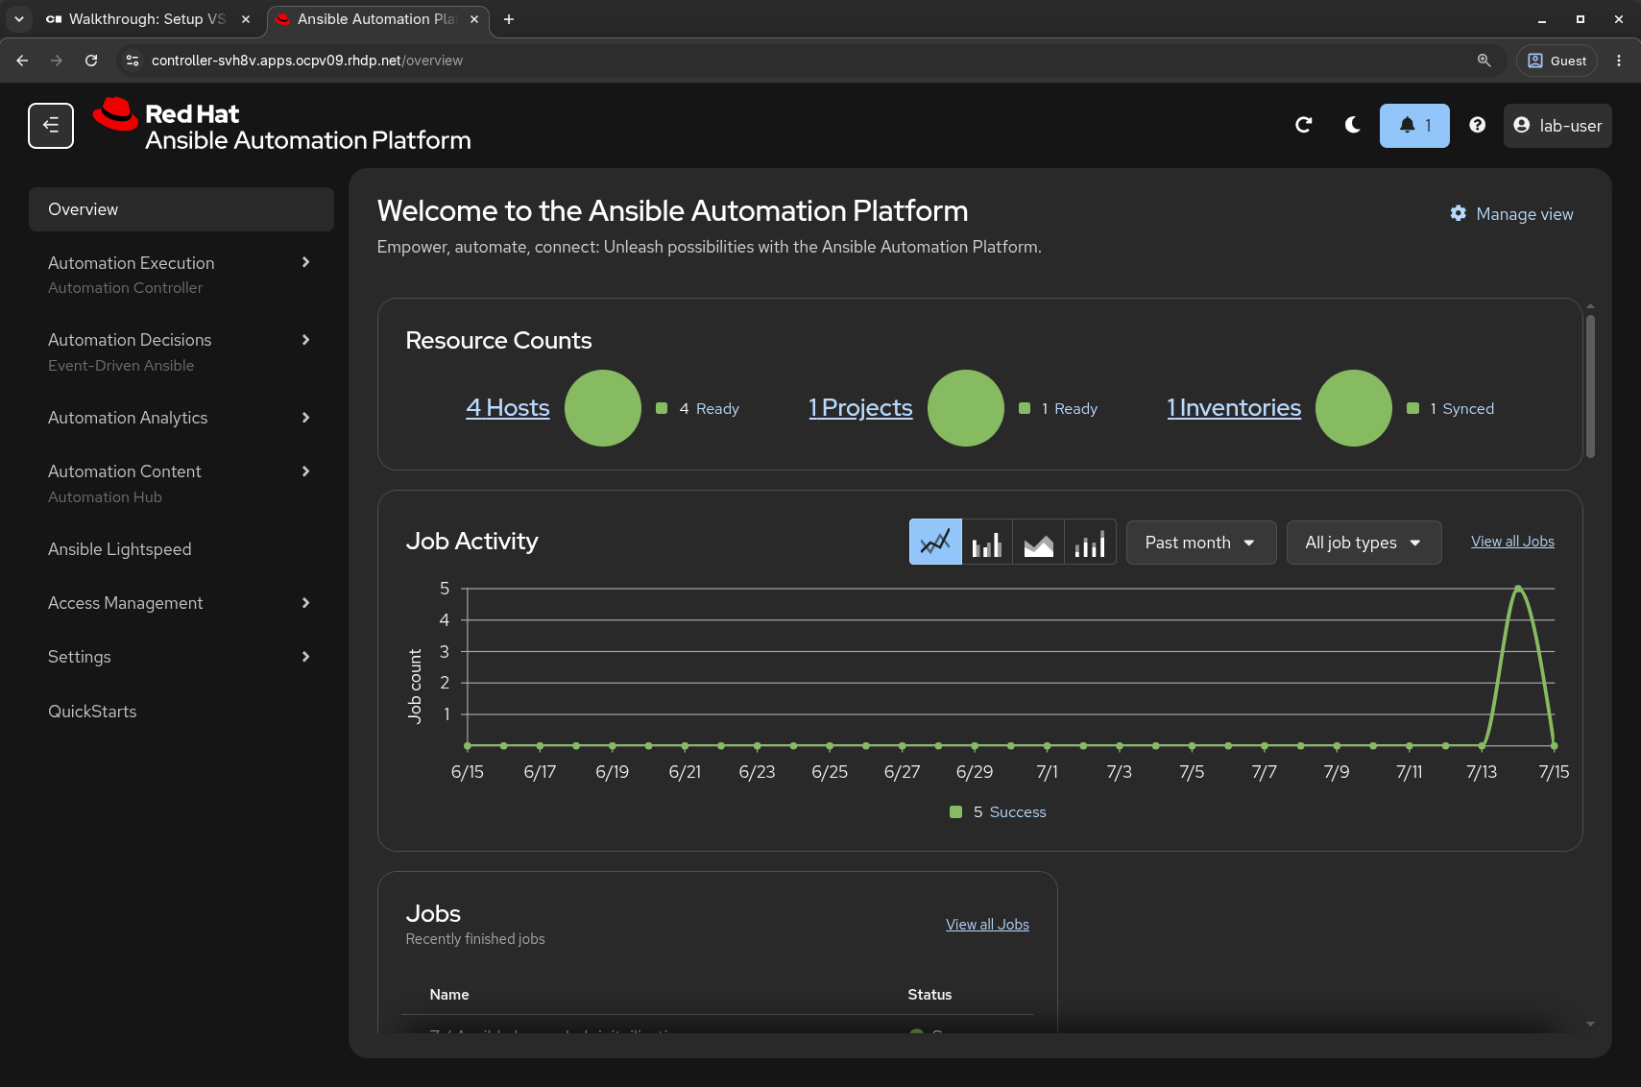
-
We will learn more about how to use the AAP Web UI in the next exercise.
Step 4 - Access the RHEL Web Console
We will use the RHEL Web Console to review the results of the Leapp pre-upgrade reports we generate for our pet app servers.
-
Open a new web browser tab:
Cockpit URL: {cockpit_url}
Username:
{cockpit_username}Password:
{cockpit_password} -
Enter the username and password above. This will bring you to a RHEL Web Console Overview page like the example below:
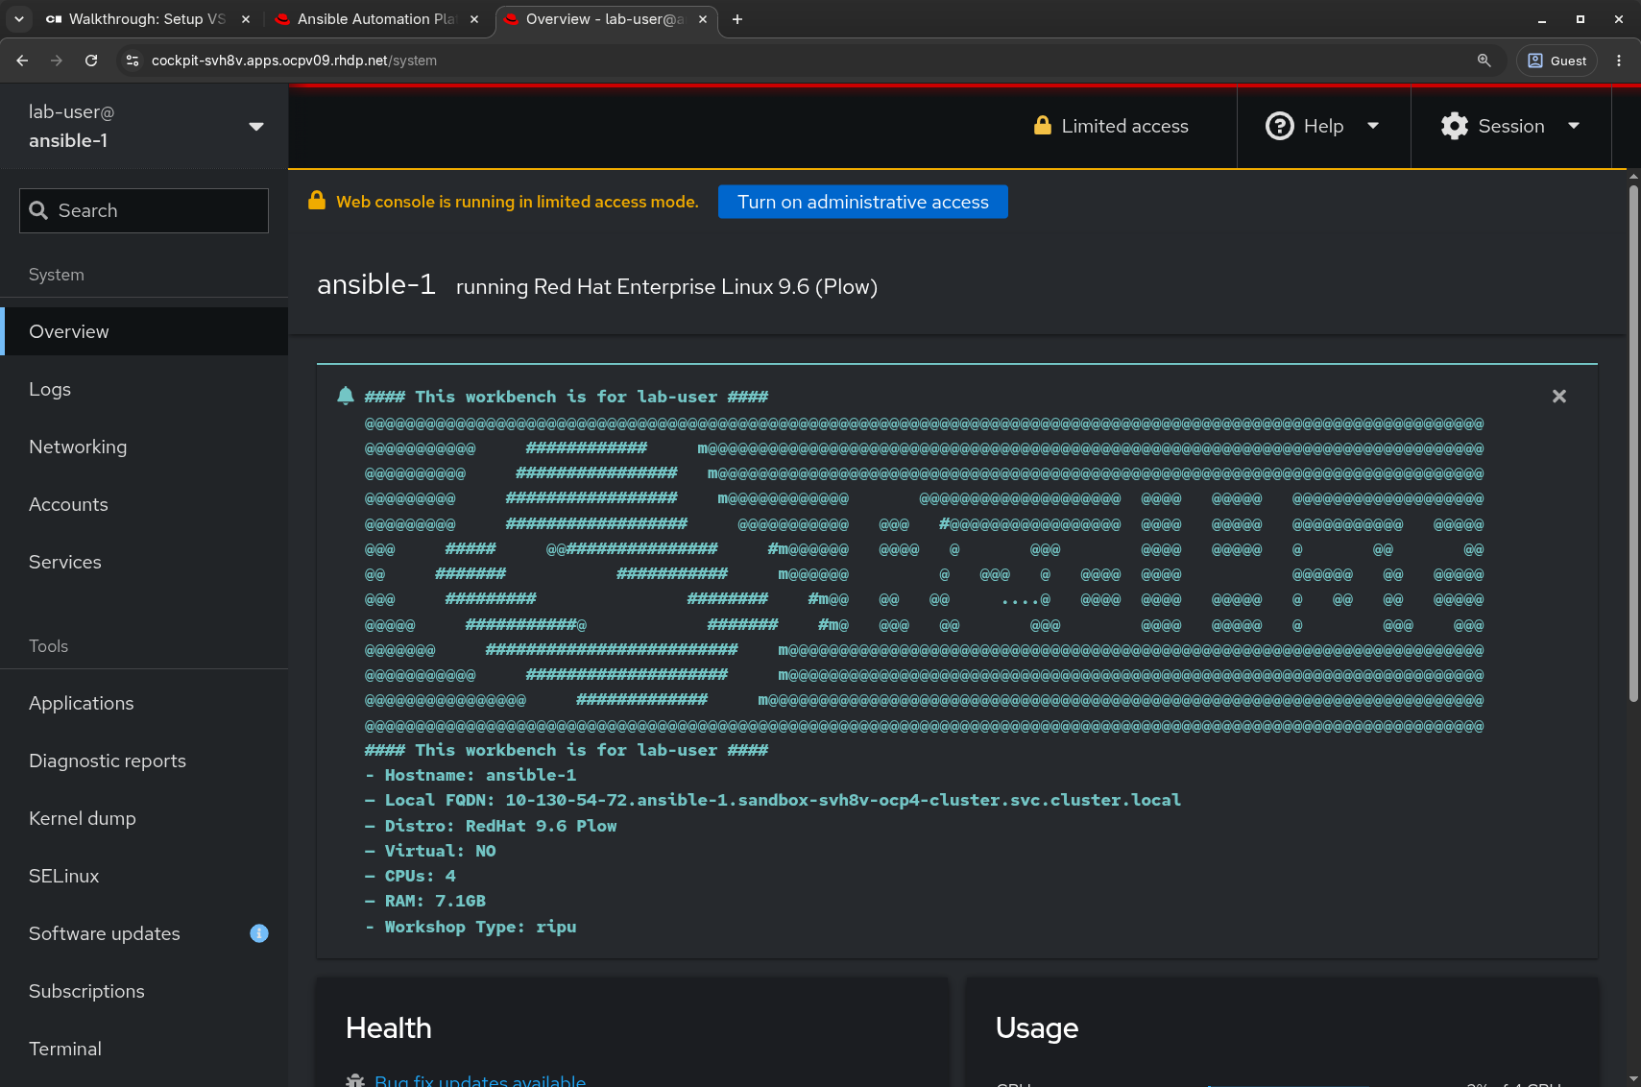
-
We will revisit the RHEL Web Console when we are ready to review our pre-upgrade reports in an upcoming exercise.
Conclusion
In this exercise, we learned about the lab environment we will be using to continue through the workshop exercises. We verified that we are able to use VS Code in our web browser and from there we can open terminal sessions. We also made sure we are able to access the AAP Web UI which will be the self-service portal we use to perform the next steps of the RHEL in-place upgrade automation workflow. Finally, we connected to the RHEL Web Console where we will soon be reviewing pre-upgrade reports.
Use the link below to move on to the next exercise.