Virtual Machine Basics with OpenShift Virtualization
Introduction
The beginning section of this lab will introduce you to the basics of creating and managing VMs in OpenShift Virtualization. Starting with OpenShift 4.19 there is an entirely new UI based on patternfly 6, including a tree view for virtual machines that make it easier to visualize and manage your virtualization-based assets. After exploring the UI changes, you will see how the web console guides you through the whole process of creating a virtual machine from a pre-defined template. We will then review the properties of that VM and perform some basic state management operations with the virtual machine as a refresher on the basics of OpenShift Virtualization.
-
Create a new virtual machine
-
Review configurations and options for virtual machines
-
Understand how VM power states are managed using the OpenShift console
Accessing the OpenShift Cluster
Your OpenShift cluster console is available {openshift_cluster_console_url}[here^].
Your console login is available with:
-
User: {openshift_cluster_admin_username}
-
Password: {openshift_cluster_admin_password}
You can login to your OpenShift cluster on the provided terminal by copying and pasting the following syntax:
oc login -u {openshift_cluster_admin_username} -p {openshift_cluster_admin_password} --server={openshift_api_server_url}Create a New Project
-
When you first log in, you will be placed in the Core Platform perspective, with an introductory prompt. Click the Skip tour button to close the window.
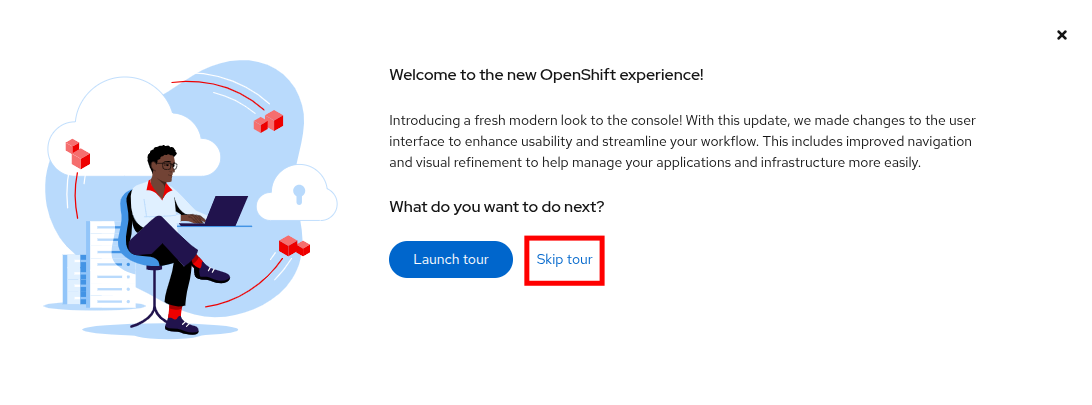 Figure 1. Welcome Message
 -
You will find yourself on the Overview page of the cluster. To get started working with virtual machines, you need to create a project to do that in.
-
In the left side menu click on Home → Projects.
-
You will be presented with a page that shows all of the projects that your user currently has access to. On this page we will create a new project that will work as our working area for the remainder of this workshop. Click on the Create Project button in the upper right corner.
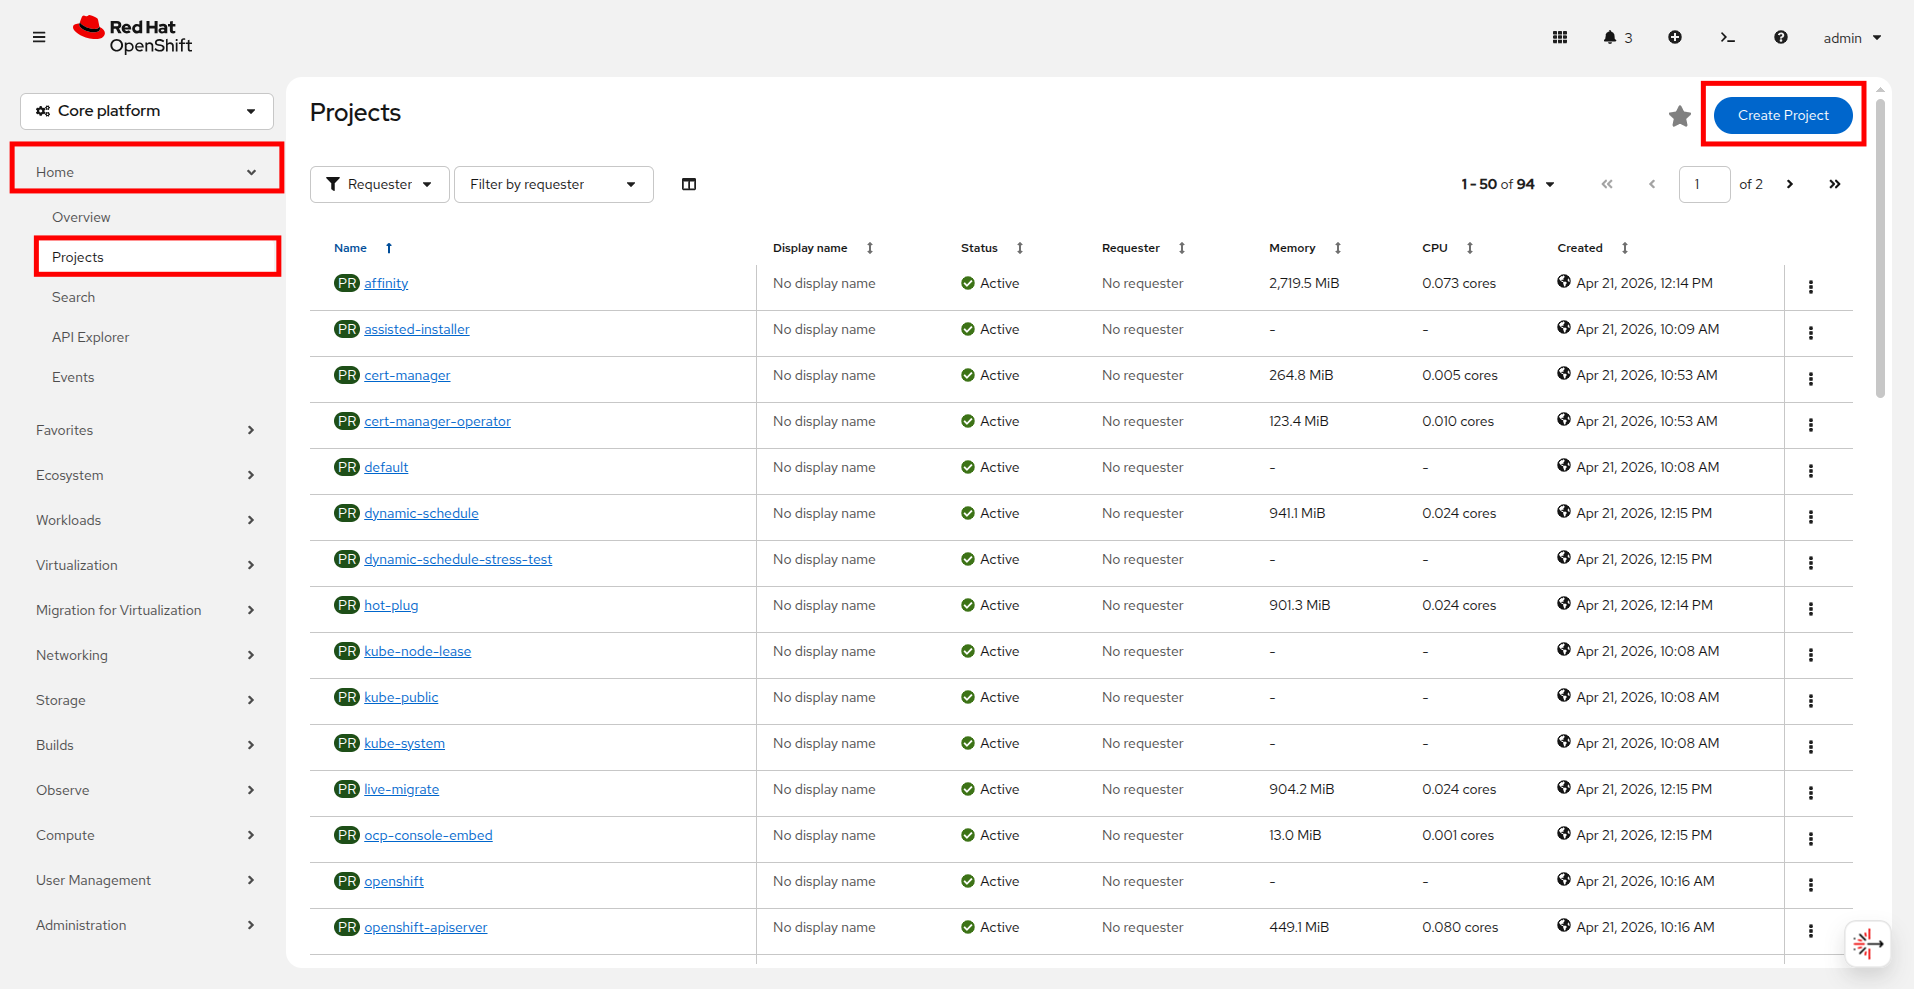 Figure 2. Create Project
 -
A box will pop up which will give you the opportunity to name this new project, name the project virtual-machines and click the Create button.
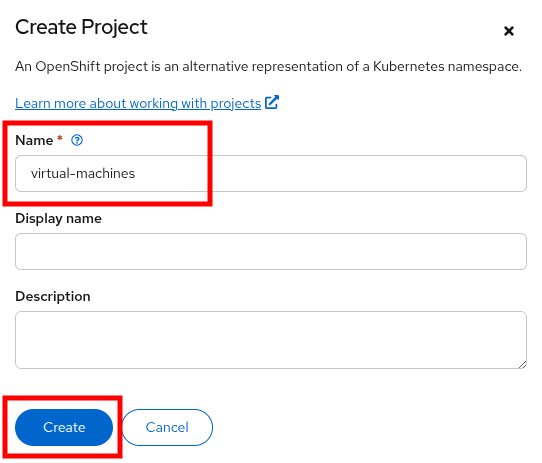 Figure 3. Name Your Project
Exploring OpenShift Virtualization
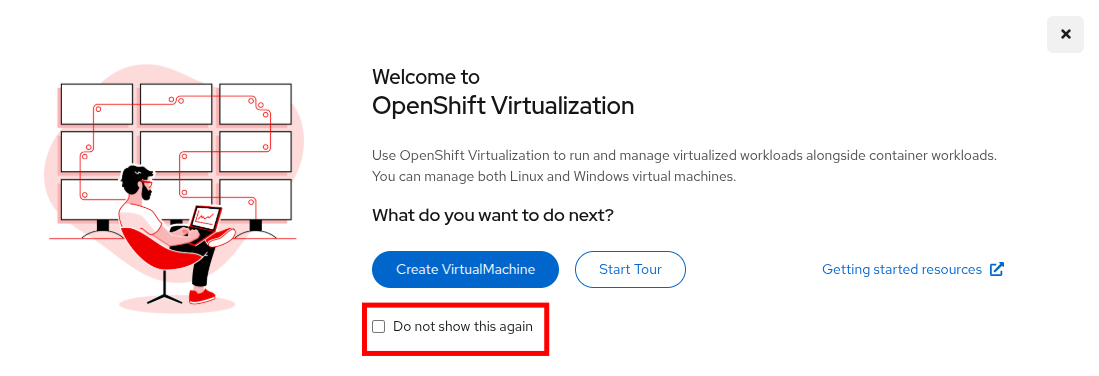
Now it’s time to get started with OpenShift Virtualization, in the left side menu click on Core Platform and select Virtualization from the dropdown menu. This will take you to the Virtualization centric view in OpenShift Virtualization.

When you first arrive in this view, you will recieve a prompt welcoming you to OpenShift Virtualization. Click the box that says Do not show this again.
You will be taken to the Overview page for OpenShift Virtualization where you can observe a high-level view of all virtualization resources currently in use, lets take a moment to explore.
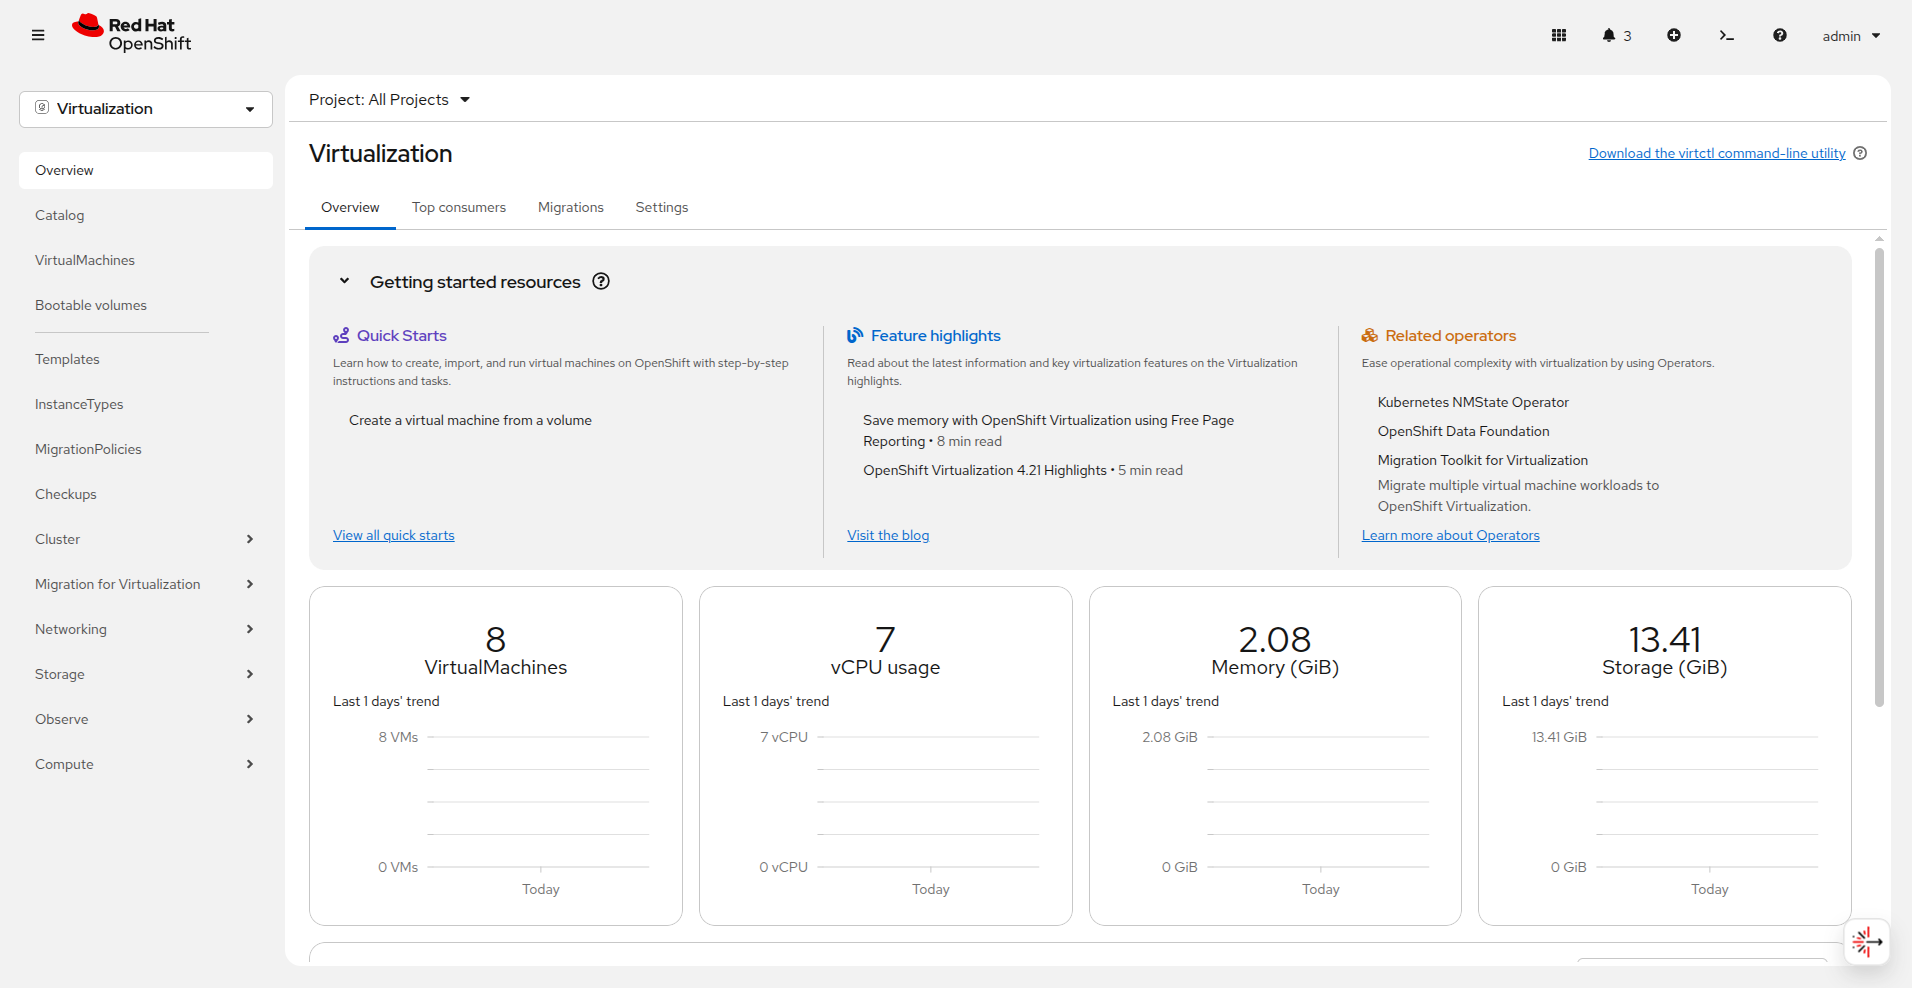
| The Virtualization perspective is available only when Red Hat OpenShift Virtualization is installed and properly configured. In this lab environment the installation and configuration has already been performed for us. |
-
Click on the VirtualMachines item in the left side menu and you will be presented with the virtualization tree view of all VM assets currently in the cluster.
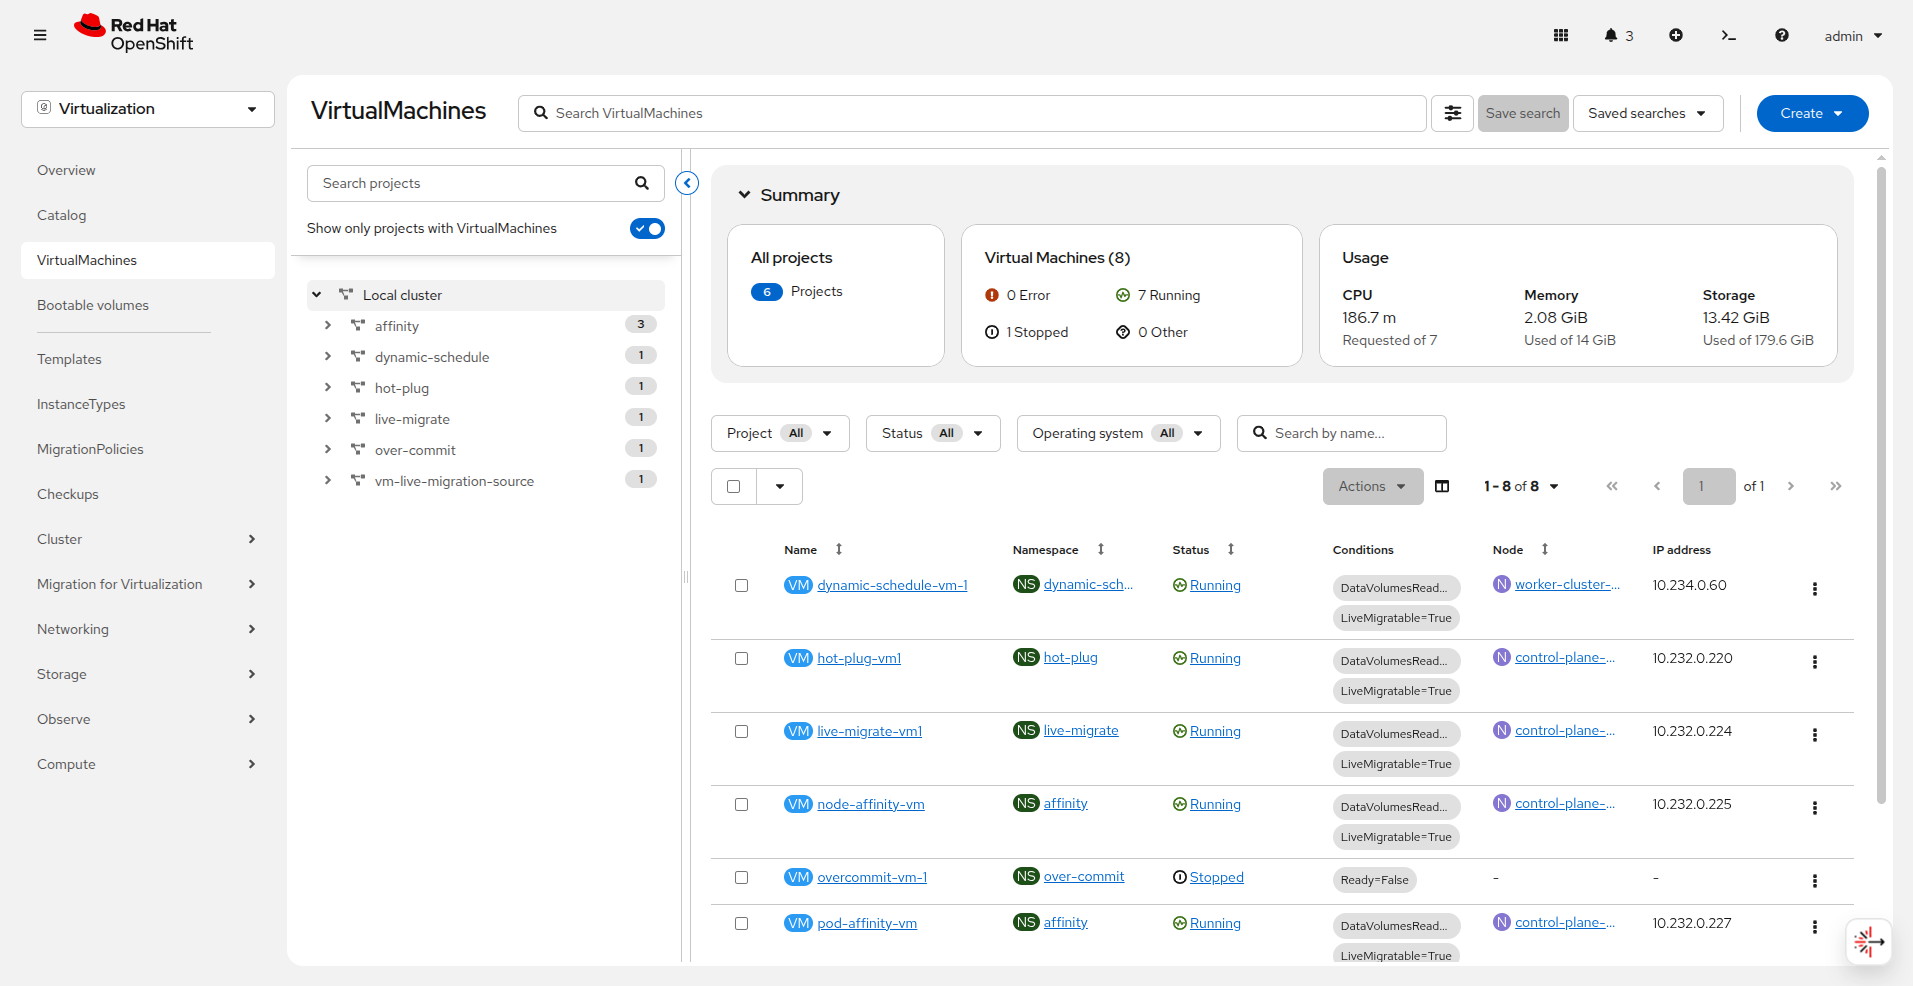 Figure 7. Tree View
 -
Lets explore this page for a few moments: notice that this view is divided into 3 columns, the left-side management menu, the central column for organization of VM-based projects, and then the virtual machine view.
-
The left side navigation menu is the main control for Virtualization integrated functions in OpenShift. We can see virtualization related items like the Catalog, Templates and InstanceTypes to build VMs from, and the menus to configure Storage and Networking options for virtual machines.
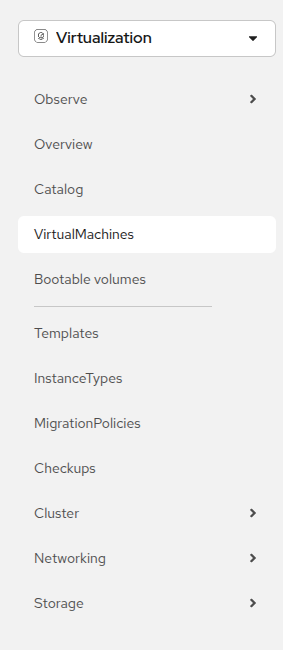 Figure 8. Navigation Menu
 -
The central column as mentioned is a project view. Like other objects in OpenShift, Projects (which are an abstraction for Kubernetes namespaces), are the boundaries for which permissions and other aspects of using and managing the resources are available to a user. By default there is a slider here that only shows projects with existing VMs. Currently we see a number of projects with virtual machines that have been staged for the various modules in this lab.
Notice that your newly created virtual-machines project does not appear as there are no virtual machines in it. You can flip the toggle to make it and all other projects in the cluster appear if you’d like. 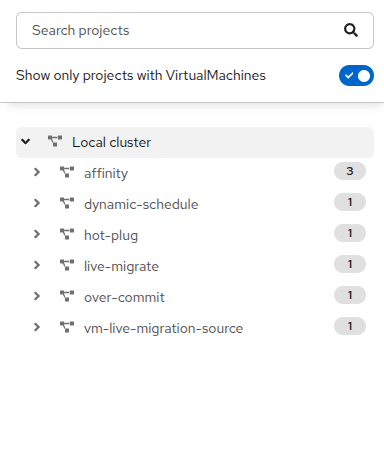 Figure 9. Project Tree
 -
In the virtual machine overview column, it will list all of the VMs in the cluster by as we are viewing All Projects by default. If you highlight a specific project or virtual machine in the center column this screen will change. Lets try that now.
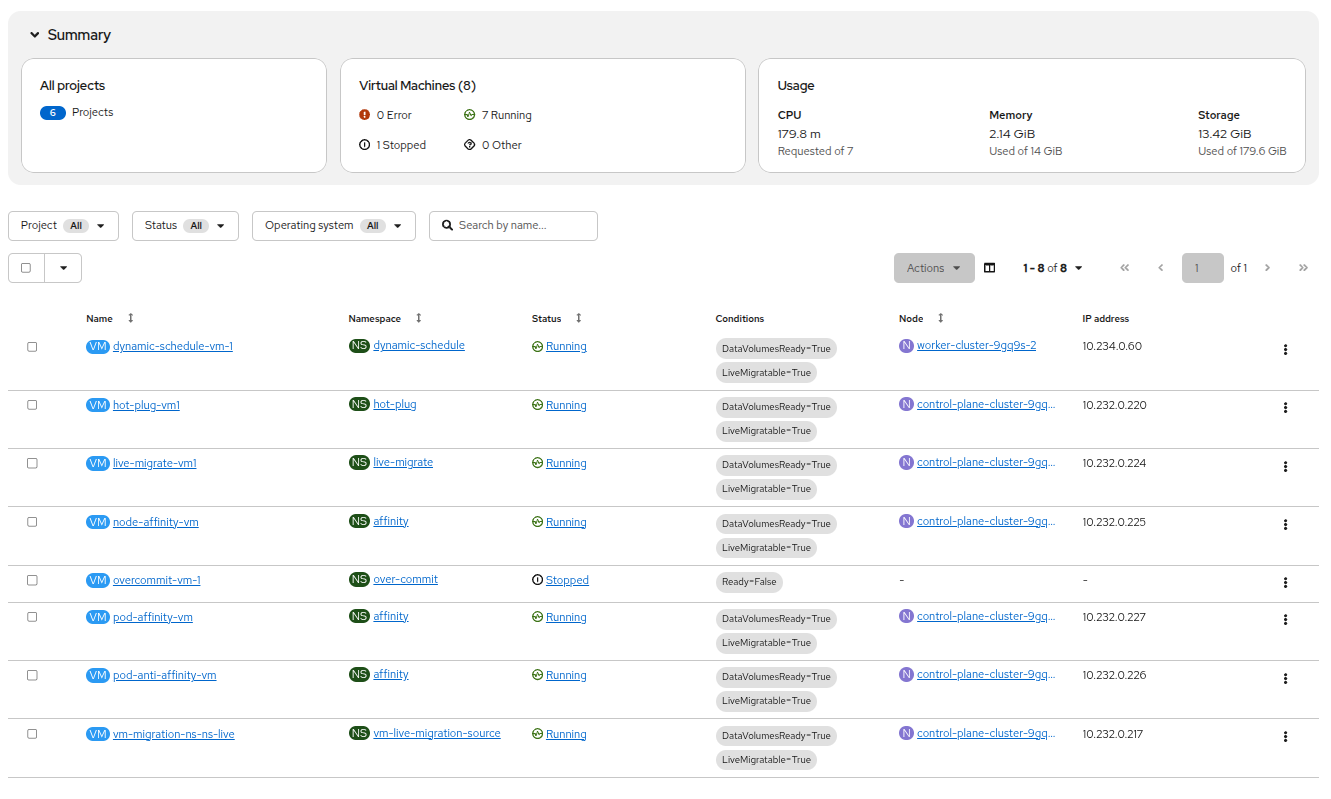 Figure 10. List of Virtual Machines
 -
In the center project view column click on the project affinity to see the virtual machines that are currently deployed there.
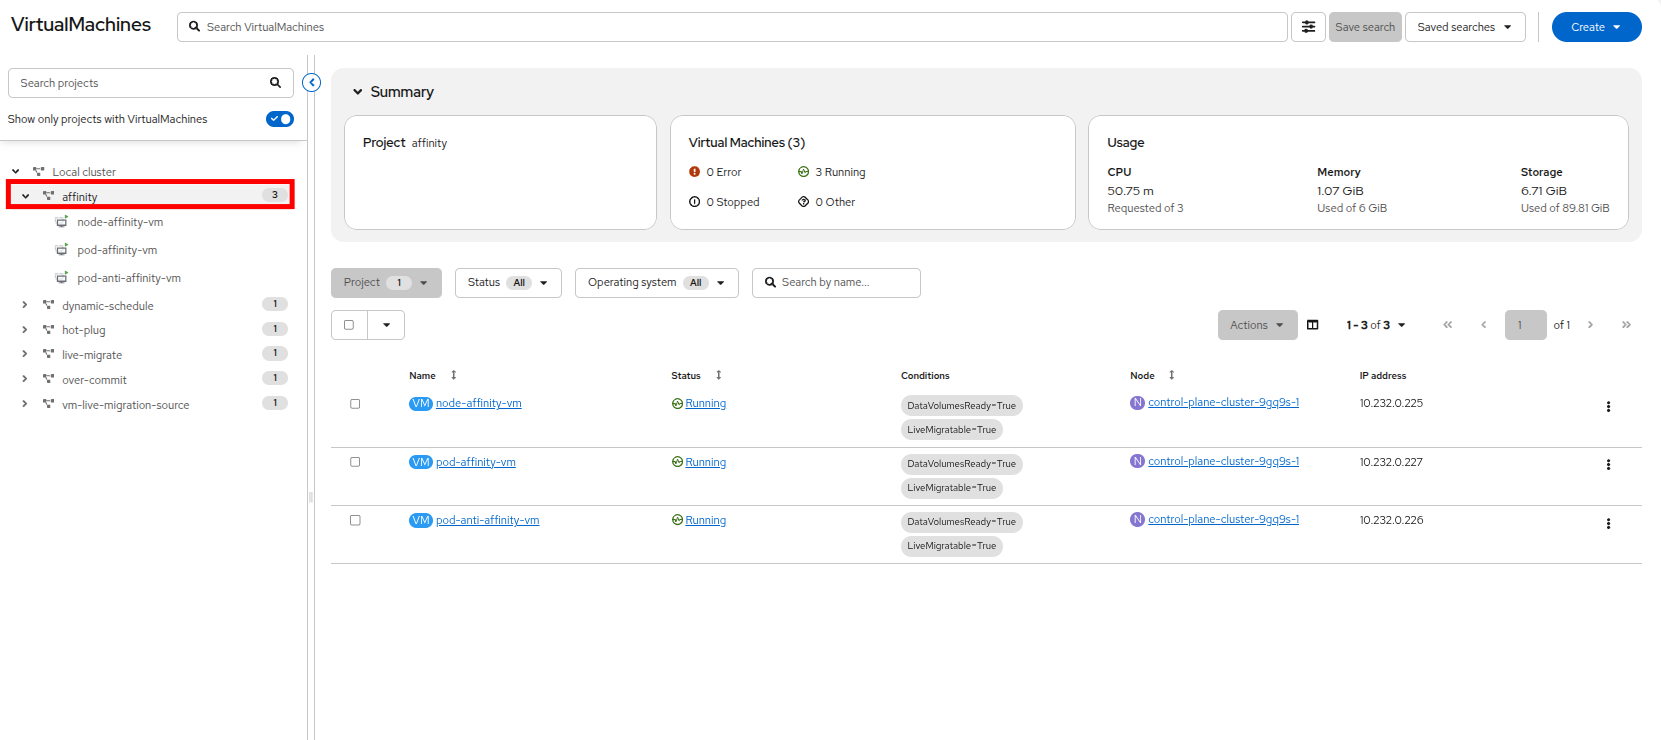 Figure 11. Affinity Project
 -
The Affinity project will expand listing the three virtual machines that reside there, and the virtual machine overview column will update to show only the virtual machines in the project. You should see three VMs listed, they may or may not currently be powered on, these are for use in a later module of this lab.
 Figure 12. VMs in Affinity Project
Create a Linux Virtual Machine
-
To create a virtual machine, we must select the project we would like to create it in.
-
In the the center project view, click the toggle button to turn off the option for Show only projects with VirtualMachines. This way you can see all of the projects that your user has access to, including the virtual-machines project that we created earlier.
-
Click on your virtual-machines project and you will see that the virtual machine overview column updates and now has a Create VirtualMachine button.
-
Click on the Create VirtualMachine button and select From template from the drop-down menu.
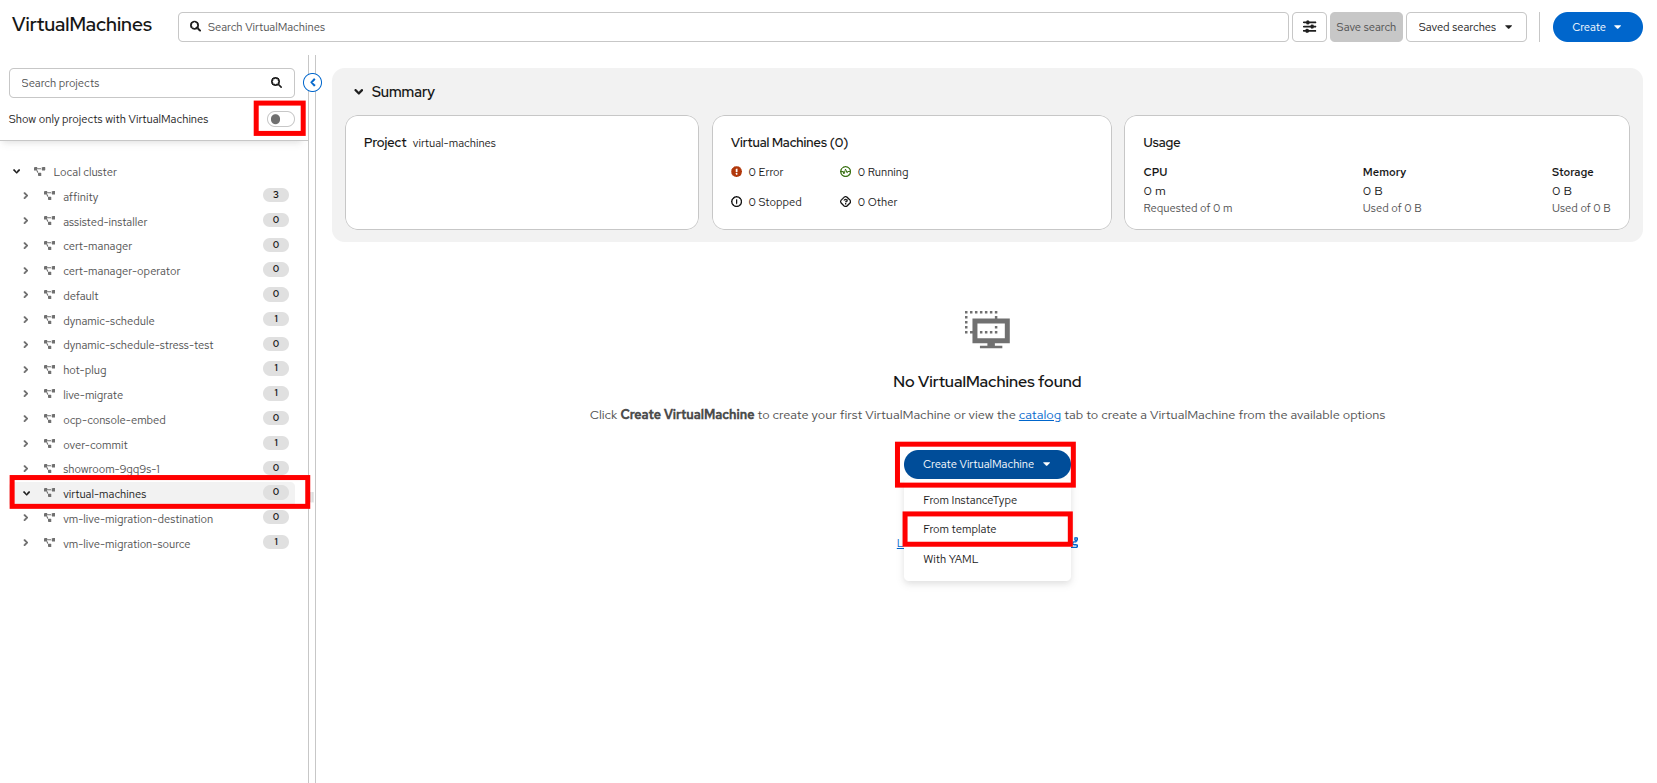 Figure 13. Create VM Button
VMs can also be created from an InstanceType wizard as well as created by entering a custom YAML definition, but for this current lab scenario we are going to stick with creating VMs based on existing templates. -
You will be taken to the Catalog screen, where a number of tiles will appear showing the available pre-defined VM templates.
Reviewing the list of available templates you’ll notice that some have a blue badge which indicates Source available. These are templates which are using automatically downloaded and stored template source disks provided by Red Hat.
If you were deploying in your own environment where you can customize the options available, you can choose to modify the availability of these boot sources by default, and/or remove these source disks, in favor of creating custom disks for your organization’s needs.
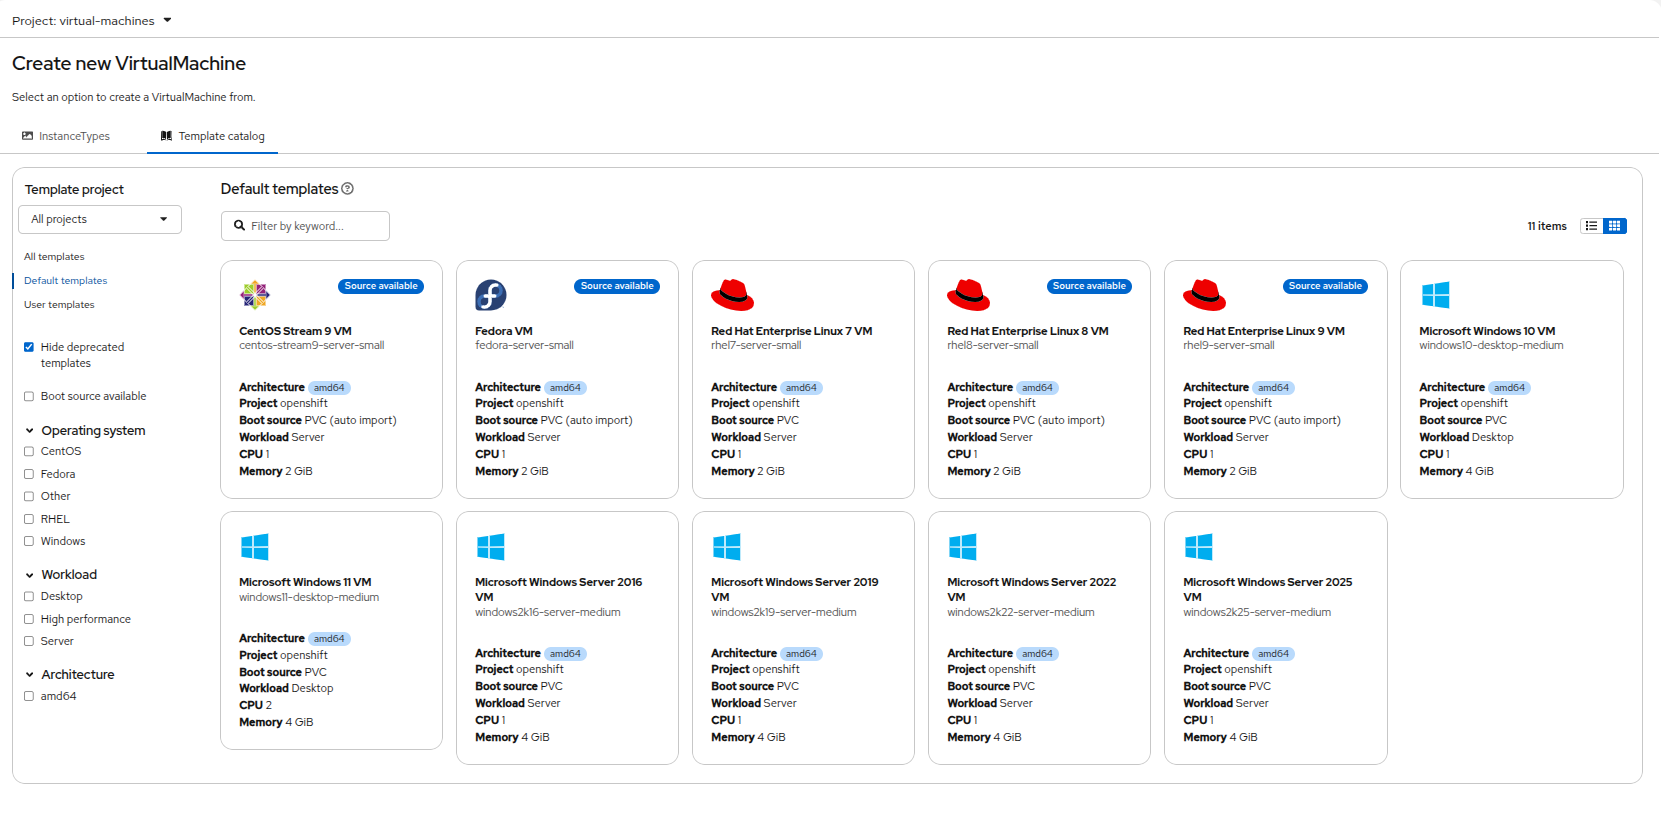 Figure 14. List of Templates
 -
Select the Fedora VM tile, and a dialog opens.
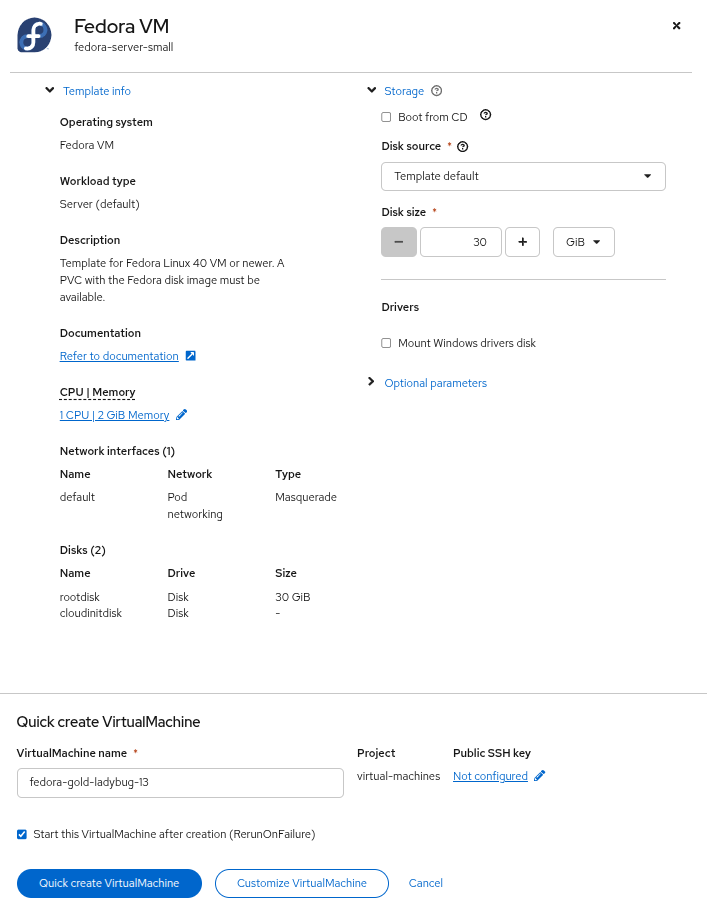 Figure 15. Quick Create VM Dialog
 -
Change the name to my-vm and press Quick create VirtualMachine.
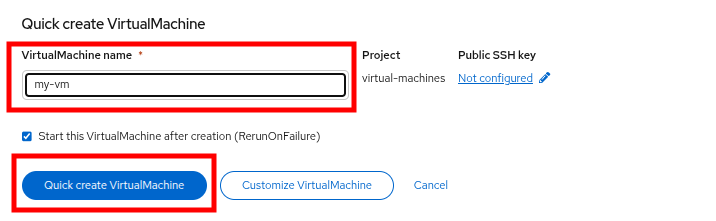 Figure 16. Change the VMs Name
 -
We will return to our tree view and see information about our new VM in the virtual machine overview column.
If we watch closely we can see the VM Status switch from Provisioning to Starting and finally Running in the virtual machine overview column when it is ready.
During this time, the storage provider has cloned the template disk so that it can be used by the newly created virtual machine. The amount of time this takes can vary based on the storage provider being used to create the boot disk, and the current load on the system.
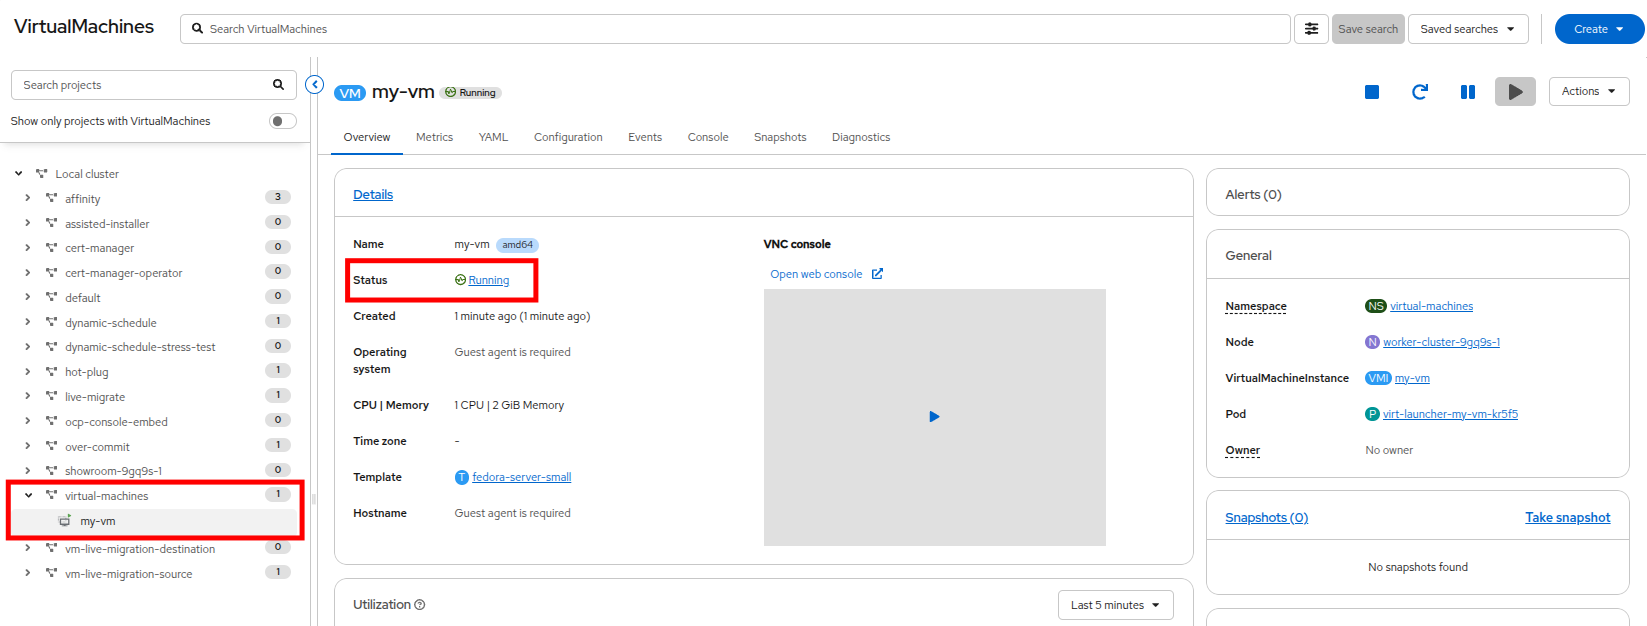 Figure 17. Your Fedora VM is Running
 -
Once the virtual machine is running we can do some further exploration of the Overview page in the right side column.
-
Details: This tile shows us information about our VM, including it’s name, status, creation time, OS, virtual resources, and the template from which it was created. It also contains a minature VNC terminal, and the ability to launch a fullscreen web console.
-
General: This tile shows us information specific to OpenShift, including the Namespace (Project), instance name, and Kubernetes pod where the guest is running.
-
Snapshots: This tile gives us information about any existing snapshots, and also has the button to quickly create a snapshot.
-
Network: This tile gives us the IP address of the virtual machine on the software-defined network (SDN) and it’s internal hostname. If no advanced networks are defined, VMs are automatically attached to the pod network. Later in this lab we will explore advanced networking options, and how to customize connectivity for VMs.
-
Utilization: This tile gives us an overview of the resources currently in use by this virtual machine, including CPU, Memory, Storage, and Network throughput.
-
Storage: This tile gives us information about the current storage volumes, for this VM in particular the cloudinit disk that was used to boot the VM from the template, and the virtual hard disk we installed the machine to.
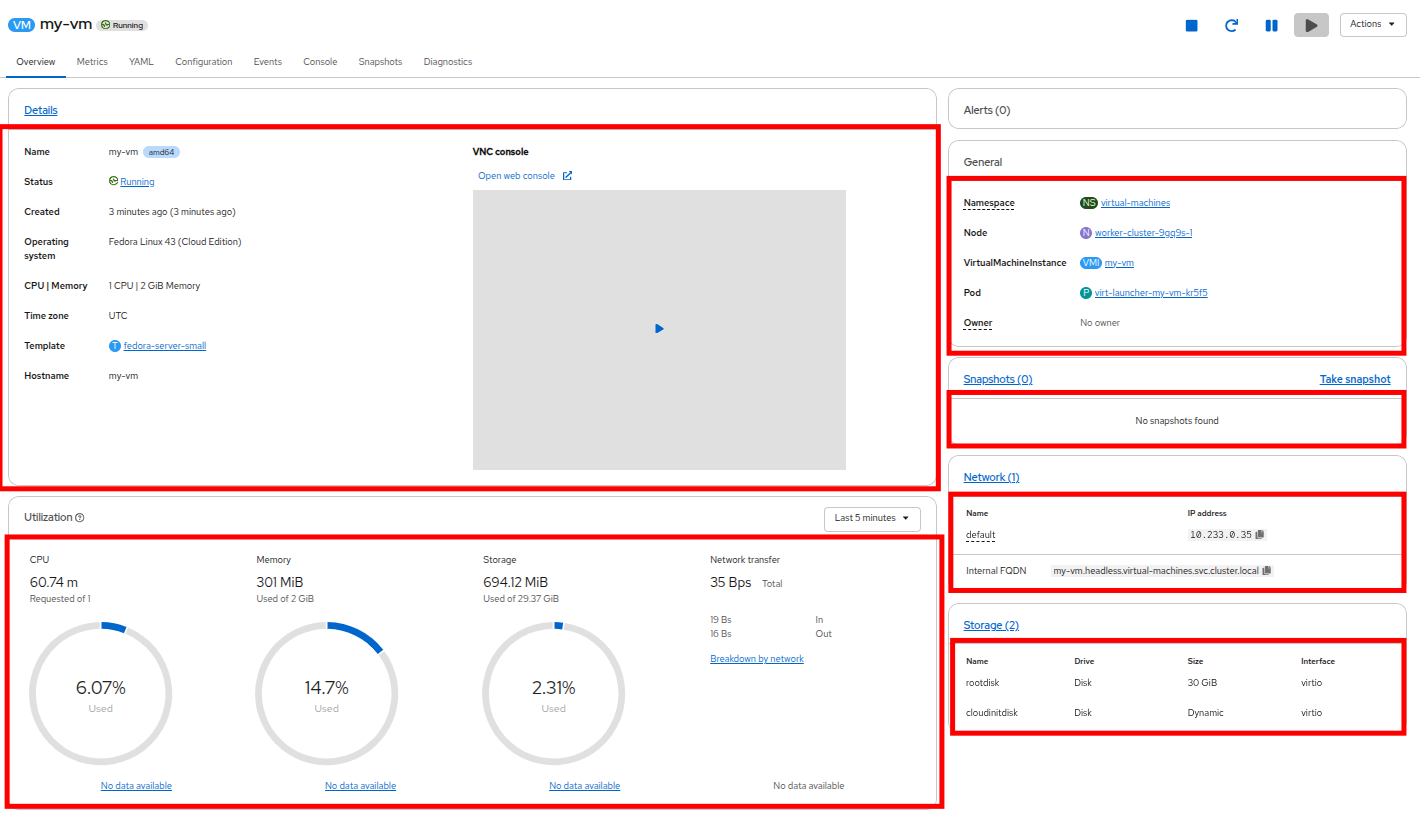 Figure 18. VM Details Page
-
-
After you are done looking at the VM details, click the Events tab to see some details of the provisioning process that just took place. If there are any issues with the creation of the VM, they will show up on this tab as well. The following events took place during creation:
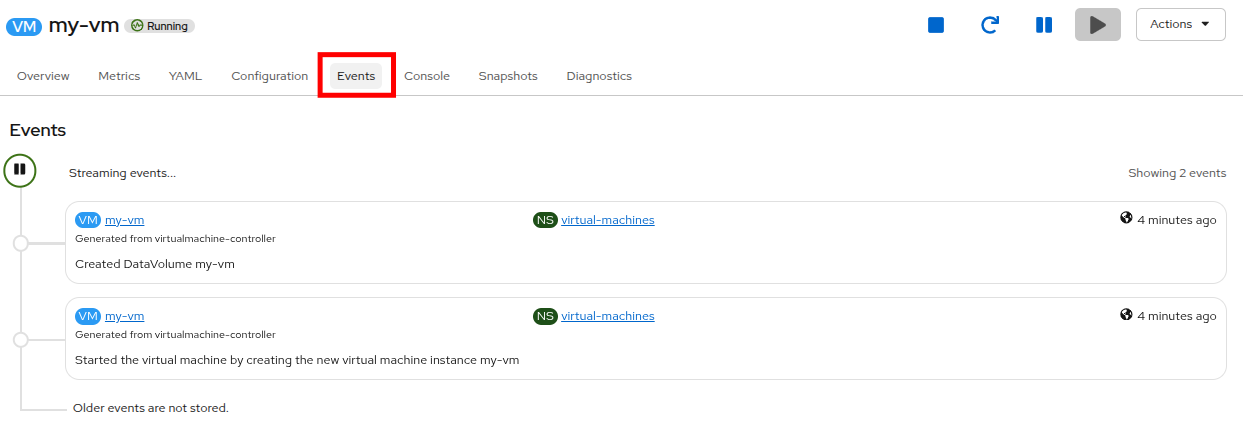 Figure 19. VM Events
-
A DataVolume was created. DataVolumes are used to manage the creation of a VM disk, abstracting the clone or import process onto OpenShift native storage during the virtual machine’s creation workflow.
-
The new VM instance my-vm has been started.
-
Administering Virtual Machines
Administering and using virtual machines is more than simply creating and customizing their configuration. As the platform administrator, we need to be able to control the states of the virtual machine, and perform advanced operations such as live migrations between worker nodes so that we can balance resources, perform maintenance tasks, and reconfigure nodes. We will cover many of these scenarios later in this lab.
-
Click the Configuration tab, this is the entry point to obtain more information about, and modify the resources of the virtual machine.
It includes seven subtabs:
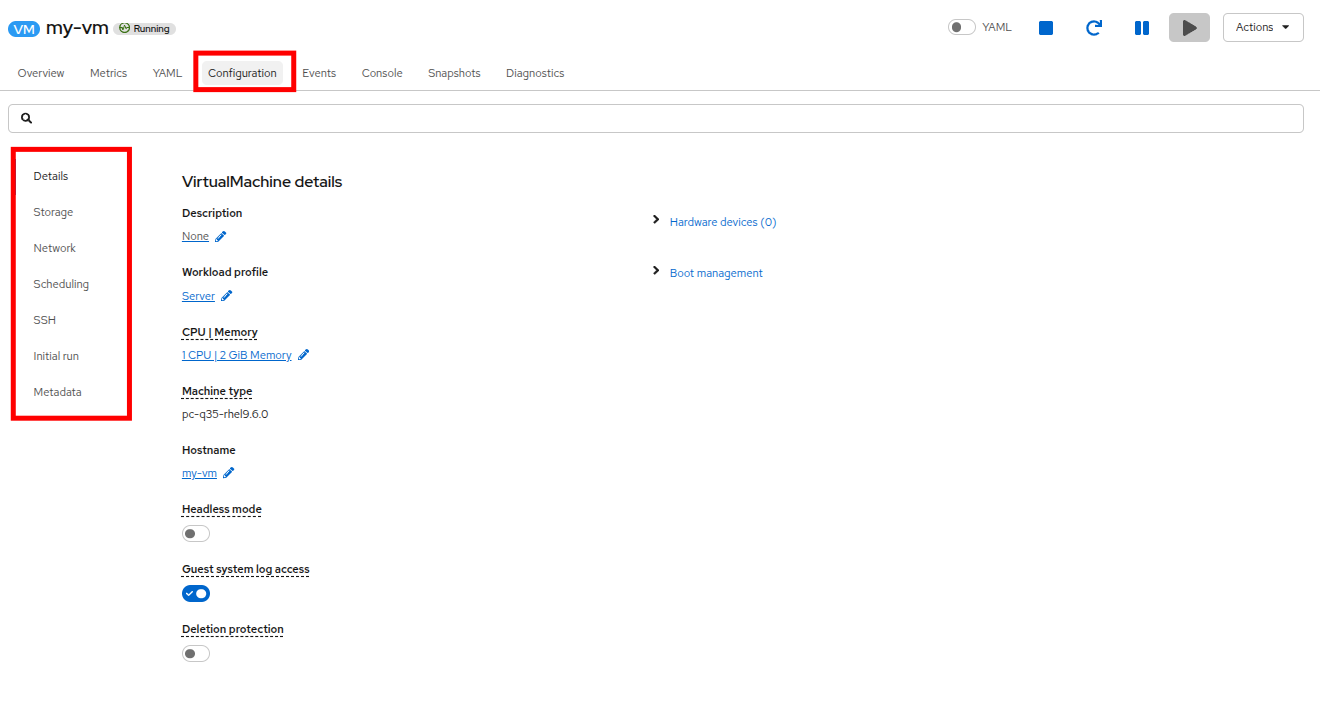 Figure 20. Configuration Tab
-
Details: This tab presents all of the physical features of the VM in a single panel. From here you can make edits to various descriptors and basic hardware configurations including modifying the cpu or memory, changing the hostname, attaching passthrough devices, and modifying the boot order.
-
Storage: This tab lists the disks attached to the system and allows you to add new disks to the system. If the guest is configured with the agent, it lists the filesystems and the utilization. Here it is possible to attach ConfigMaps, Secrets, and Service Accounts as extra disks. This is useful when passing configuration data to the application(s) running in the virtual machine.
-
Network: This Tab shows the current network interfaces configured for the VM and allows for you to add new ones.
-
Scheduling: This tab includes advanced configuration options indicating where the VM should run and the strategy to follow for eviction. This tab is used to configure (anti)affinity rules, configure node selectors and tolerations, and other behaviors that affect which cluster nodes the VM can be scheduled to.
-
SSH: This tab allows you to configure remote access to the machine by creating an SSH service on a configured load-balancer, or by injecting public SSH keys if the feature is enabled.
-
Initial run: This tab allows us to configure cloud-init for Linux or sys-prep for Microsoft Windows, including setting the commands to be executed on the first boot, such as the injection of SSH keys, installation of applications, network configuration, and more.
-
Metadata: This tab shows current Labels and Annotations applied to the virtual machine. Modifying these values can help us tag our machines for specific purposes, or help us enable automated workflows by uniquely identifying machines.
-
-
You can click on each of these to explore at your leisure, but for introductory purposes, lets focus on storage and networking specifically as we will work with them later in this lab.
-
List the disks associated with the VM by clicking on the Storage tab:
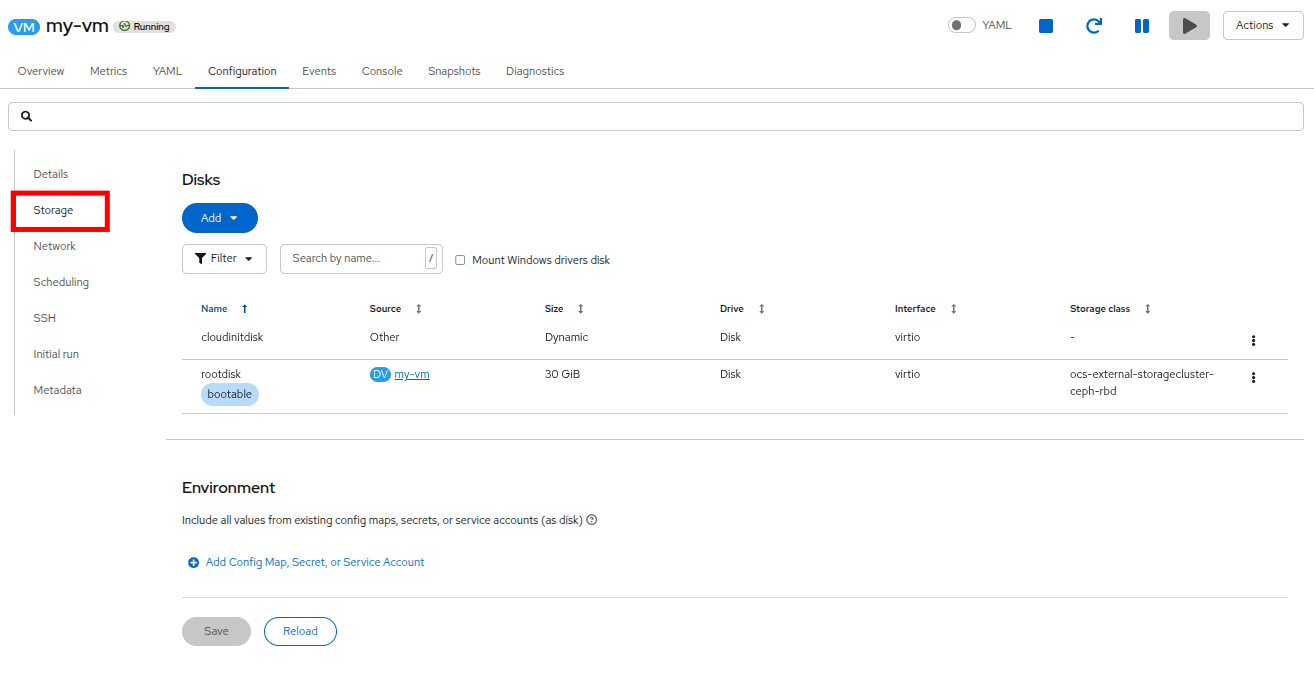 Figure 21. Storage Tab
In this environment, the default StorageClass, which defines the source and type of storage used for the disk, is called ocs-external-storagecluster-ceph-rbd. This storage is the default type provided by OpenShift Data Foundation (ODF) for running virtual machines. Each storage provider has different storage classes that define the characteristics of the storage backing the VM disk.
-
Examine the network interfaces attached to the VM by clicking on the Network subtab:
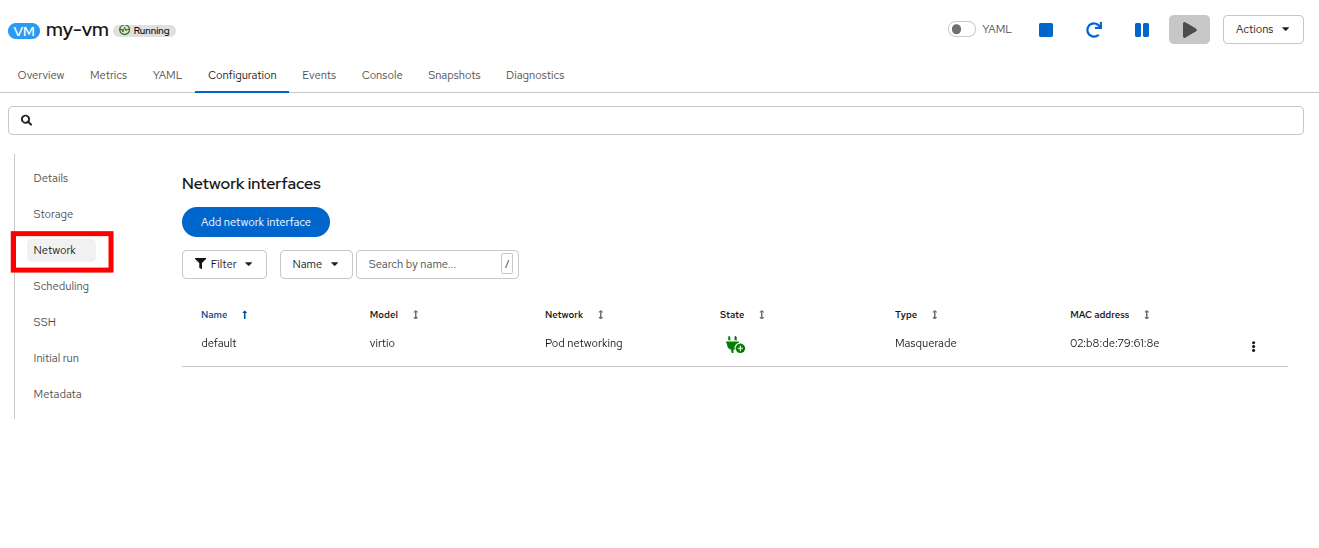 Figure 22. Network Tab
When a VM is quick created, an interface on the Pod Networking network of type masquerade is created by default. This connects the VM to the SDN and provides egress from the VM to the world outside the OpenShift cluster. Other VMs, and Pods within the cluster, can access the virtual machine using this interface.
Furthermore, a VM connected to the SDN can be accessed externally using a Route, or Service with type load balancer, or even have a Network Attachment Definition or User-defined Network (UDN) define a VLAN or external network to directly attach it to
Controlling Virtual Machine State
As a user with granted permissions to manage a Virtualization environment: you can stop, start, restart, pause, and unpause virtual machines from the web console.
-
Click the Overview tab to return to the summary screen.
-
In the top right corner you will notice shortcut buttons for running state: stop, restart, pause, and start. As well as a dropdown menu title Actions.
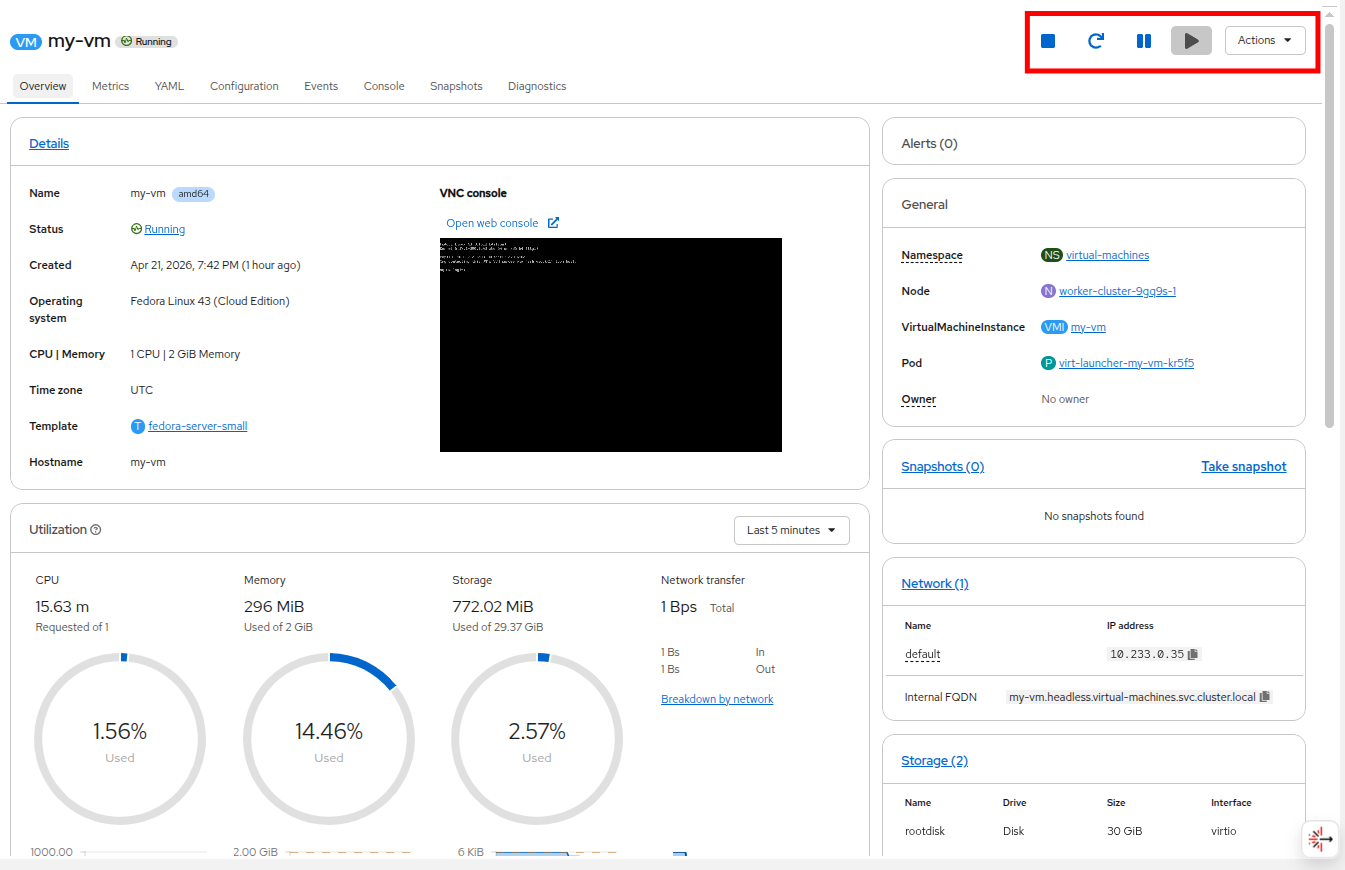 Figure 23. VM State Buttons
-
Stop: Starts a graceful shutdown of the Virtual Machine.
-
Restart: This will send a signal to the operating system to reboot the Virtual Machine. Guest integrations are needed for this to work properly.
-
Pause: The process is frozen without further access to CPU resources and I/O, but the memory used by the VM at the hypervisor level will stay allocated.
-
Start: Starts up a stopped virtual machine. It will be greyed out if the machine is running.
-
-
While the shortcut buttons are handy, you can also access these options and more by clicking on the Actions menu under the Control menu, and you can also see many other options for interacting with the VM are available in the drop down list.
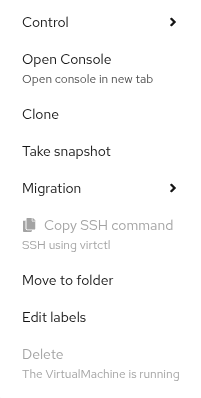 Figure 24. Action Menu
 -
Press the Stop button and wait until the Virtual Machine is in state Stopped.
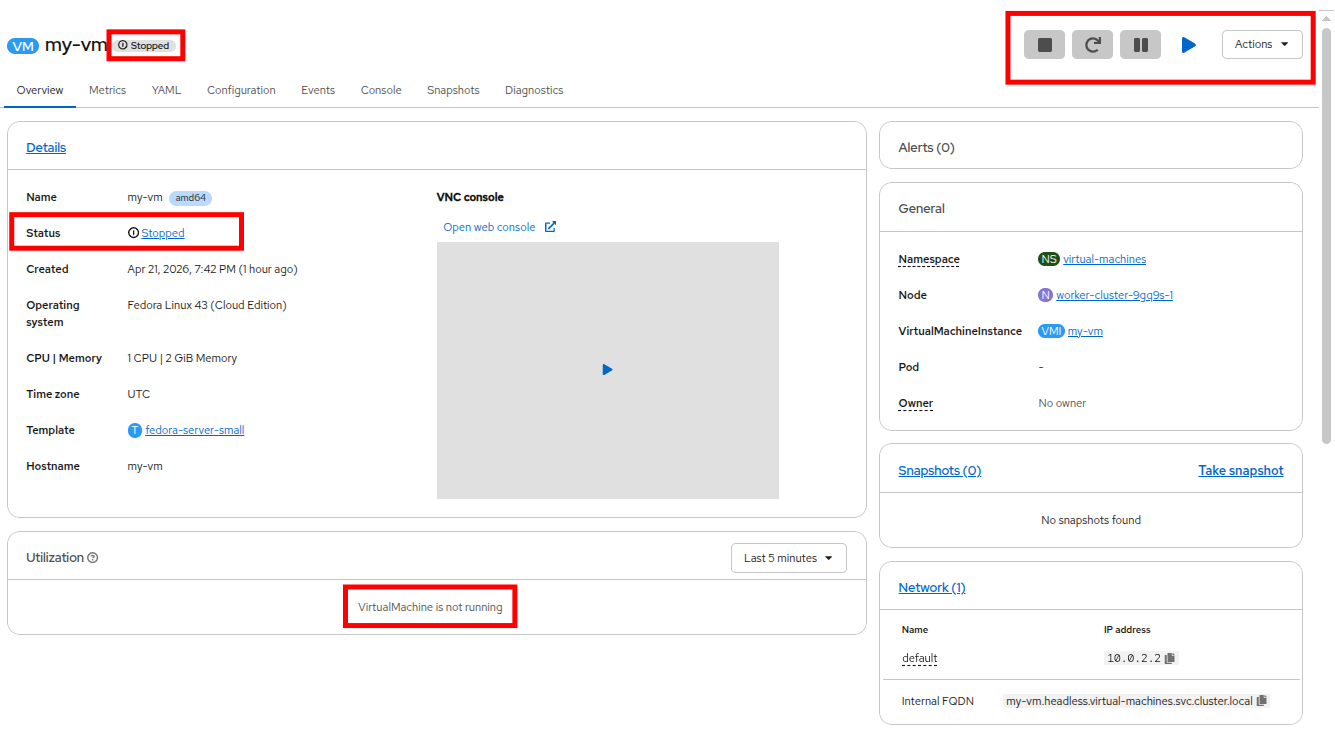 Figure 25. The VM is Stopped
 -
Clicking on Actions and Control, the option Start appears, and the options Restart and Pause are greyed out.
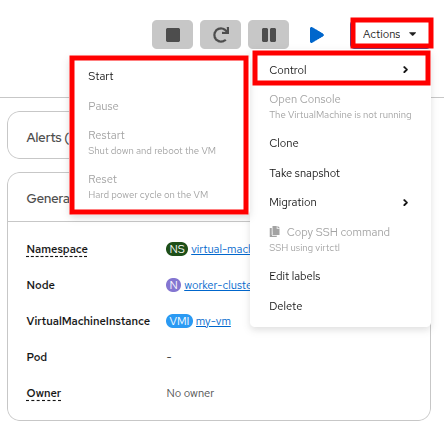 Figure 26. Action Menu with VM Stopped
 -
Click Start, and wait for the Running status.
-
Using the Actions menu, or the shortcut button, press the Pause option. The Virtual Machine state will change to Paused which is useful if you need to immediately free up resources on a hypervisor host, but don’t want to lose the state of applications running on your VM.
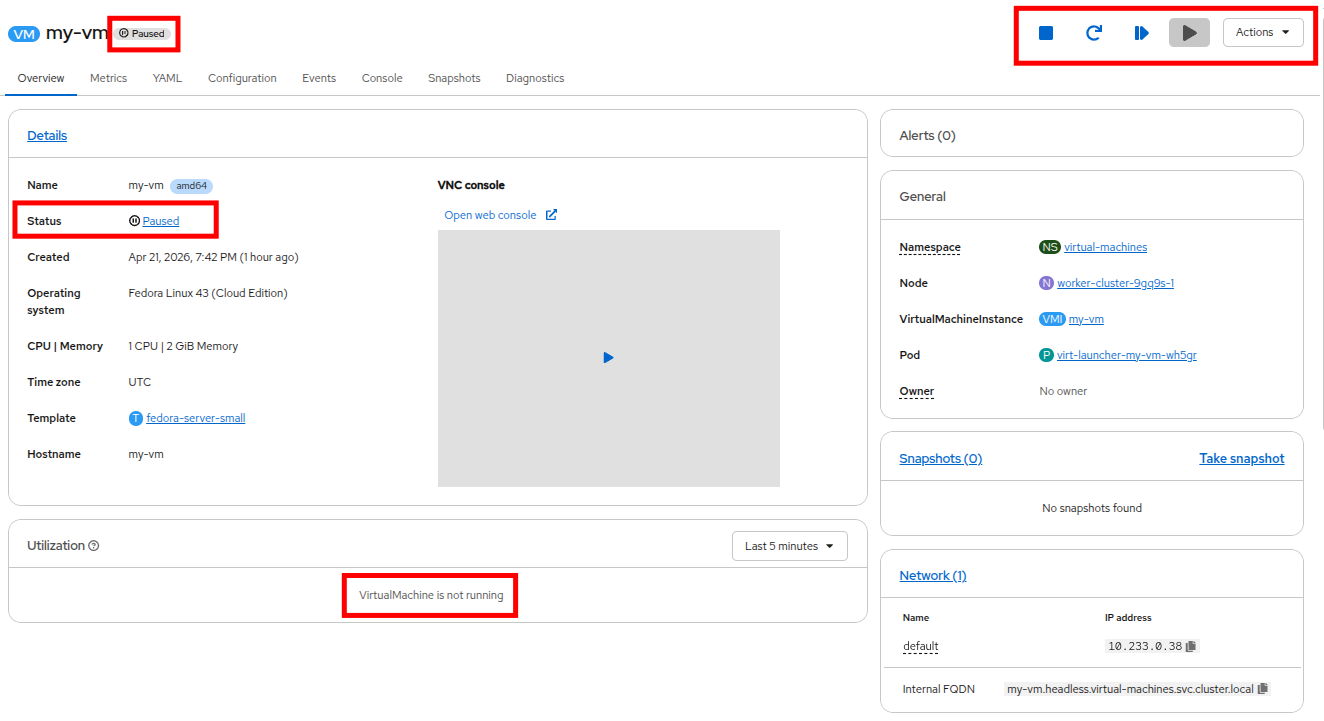 Figure 27. The VM is Paused
 -
Have the Virtual Machine resume operations by using the Actions → Control menu and the option Unpause, or by using the shortcut button for the Unpause action.
Congratulations, you have completed this module!
| Prior to moving on to the next section, please shut down the my-vm virtual machine using the Stop button or the Actions menu in order to conserve lab resources. |
Summary
In this lab, we did an overview of the Virtualization management environment in OpenShift Virtualization, provisioned a virtual machine from a provided template, and performed some basic virtual machine state controls. These basic tasks get you started with OpenShift Virtualization, each module that follows is designed to expand on these fundamental features, and to take you Beyond the Basics.