Fencing and Node Failure Remediation Scenarios
Fencing is a vital mechanism that safeguards cluster resources and ensures data integrity. It works by isolating an unresponsive or failed node and evacuating all workloads in a timely manner. This process is crucial to prevent the "split-brain" scenario, which occurs when multiple nodes try to write to shared storage simultaneously, inevitably leading to data corruption.
This lab demonstrates the capabilities of the Node Health Check Operator and the Self Node Remediation Operator. You will simulate a node failure to observe the virtual machine migration process and subsequent node recovery.
-
Goals
-
Understand how to configure a nodeHealthCheck policy.
-
Understand how fencing a node works during a simulated failure scenario.
-
Accessing the OpenShift Cluster
Your OpenShift cluster console is available {openshift_cluster_console_url}[here^].
Your console login is available with:
-
User: {openshift_cluster_admin_username}
-
Password: {openshift_cluster_admin_password}
You can login to your OpenShift cluster on the provided terminal by copying and pasting the following syntax:
oc login -u {openshift_cluster_admin_username} -p {openshift_cluster_admin_password} --server={openshift_api_server_url}Configuring Node Health Checks
For this next portion of our lab we need to exit the Virtualization perspective and return to the Core platform perpective.
-
Using the OpenShift Console, from the left side navigation menu, select the dropdown for Virtualization and then select Core platform. You will be taken to the Overview page for your cluster.
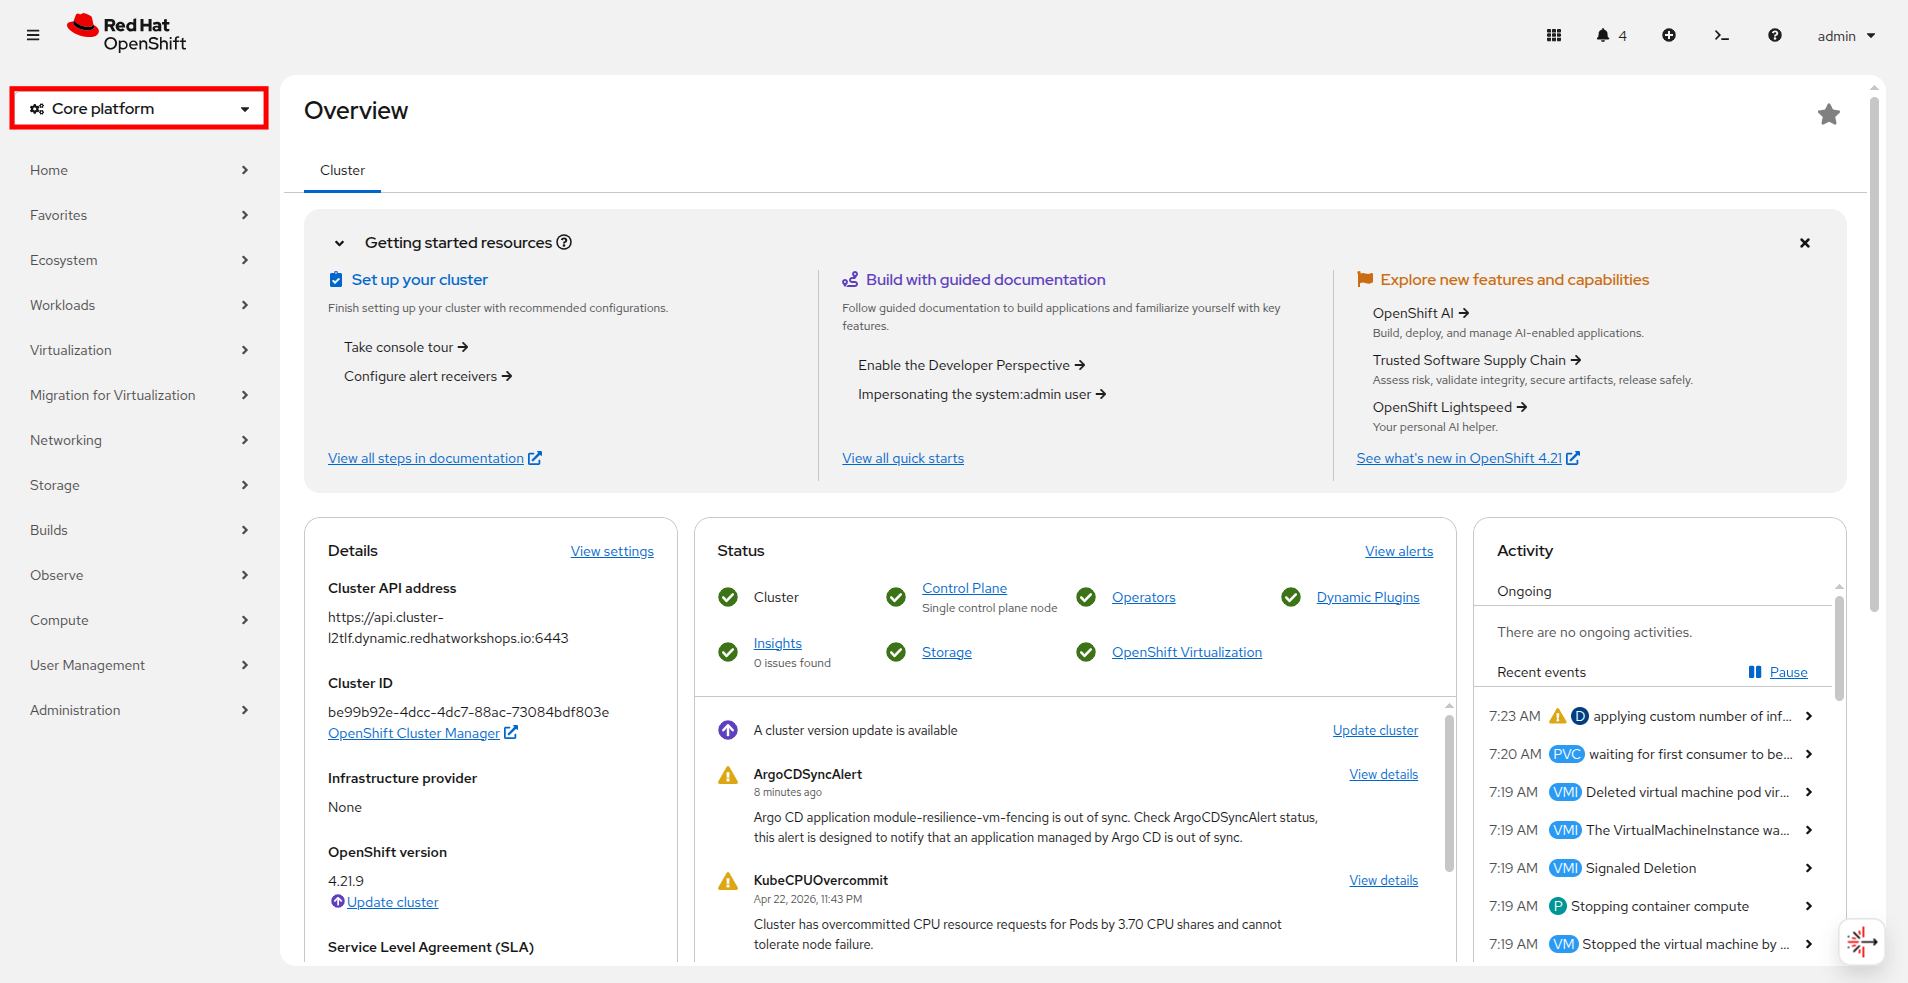 Figure 1. Return to Core Platform
 -
From there navigate to Compute → NodeHealthChecks, you will see that there are currently no NodeHealthChecks to be found. Click the Create NodeHealthCheck button.
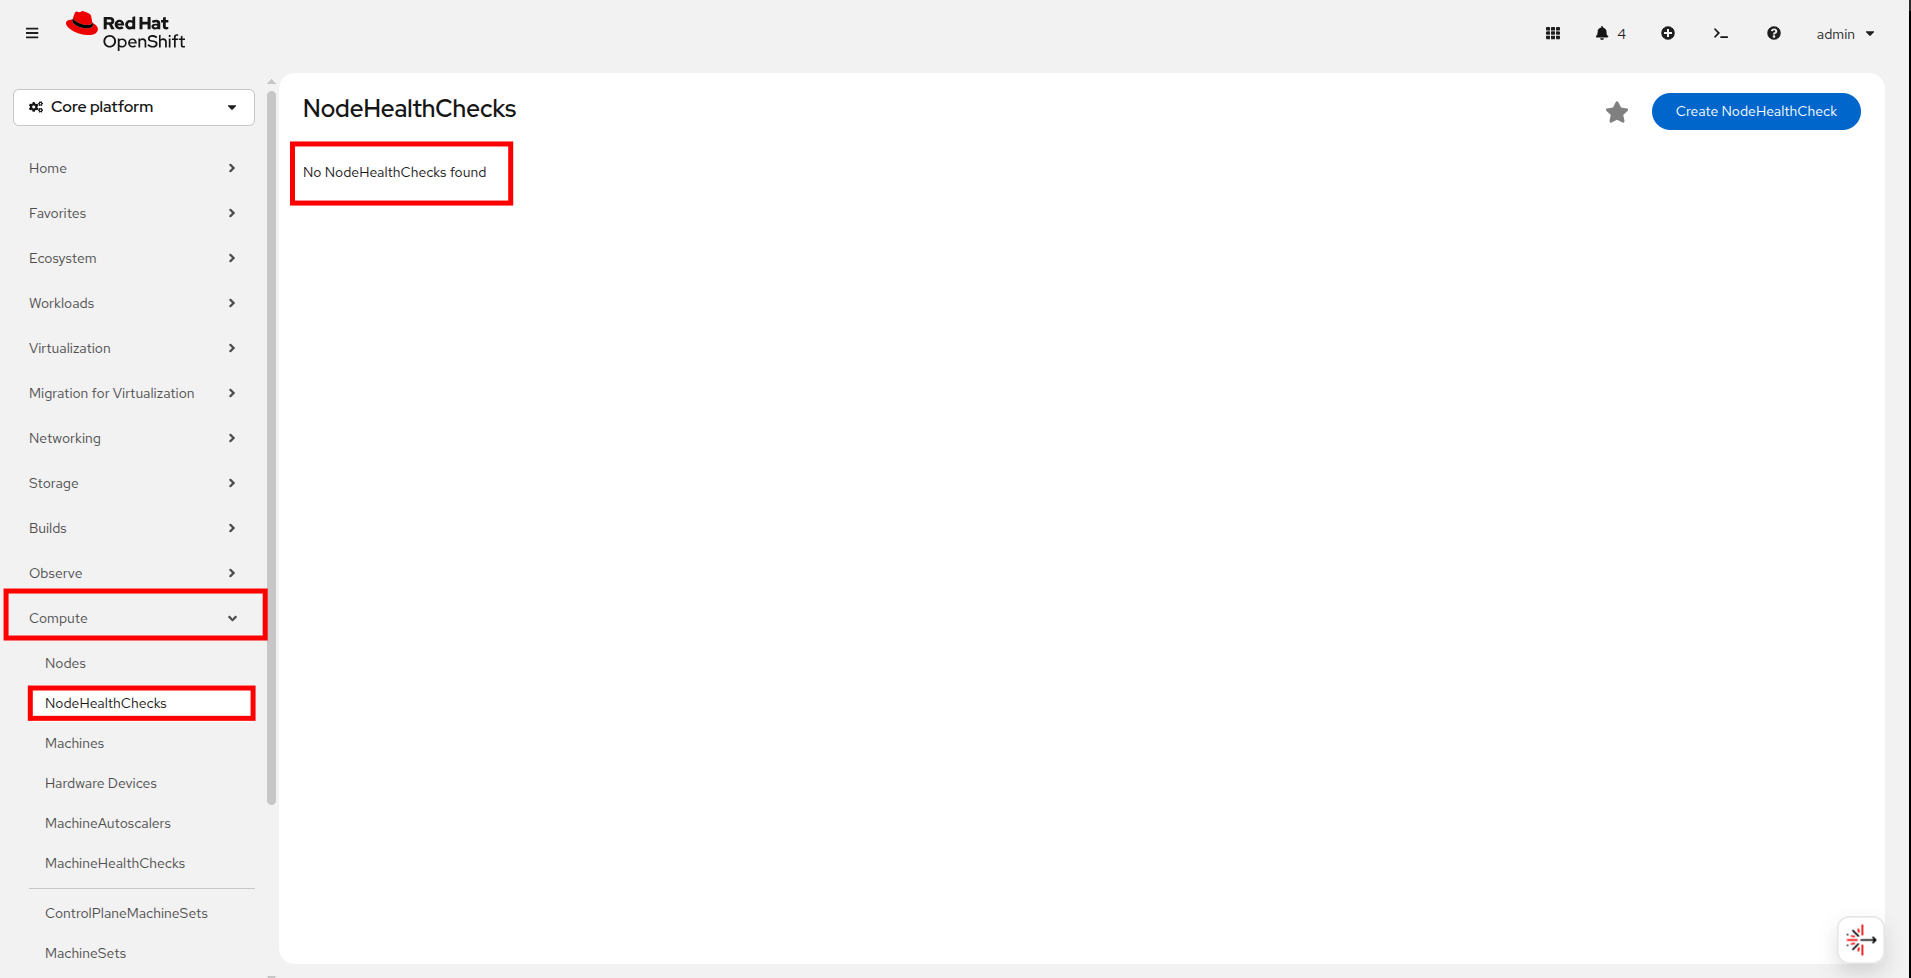 Figure 2. Create NodeHealthCheck
 -
A new page will launch, fill it out with the following info:
-
Name the NodeHealthCheck
workerhealthcheck. -
Leave the Remediation template set to Self node remediation.
-
From the Selector labels dropdown, select Worker under Role. You do not need to select any additional Labels.
-
Leave Min healthy and both Type and Status drop downs as the default.
-
Change duration to 5s for both of the Unhealthy conditions.
-
-
Click the Create button.
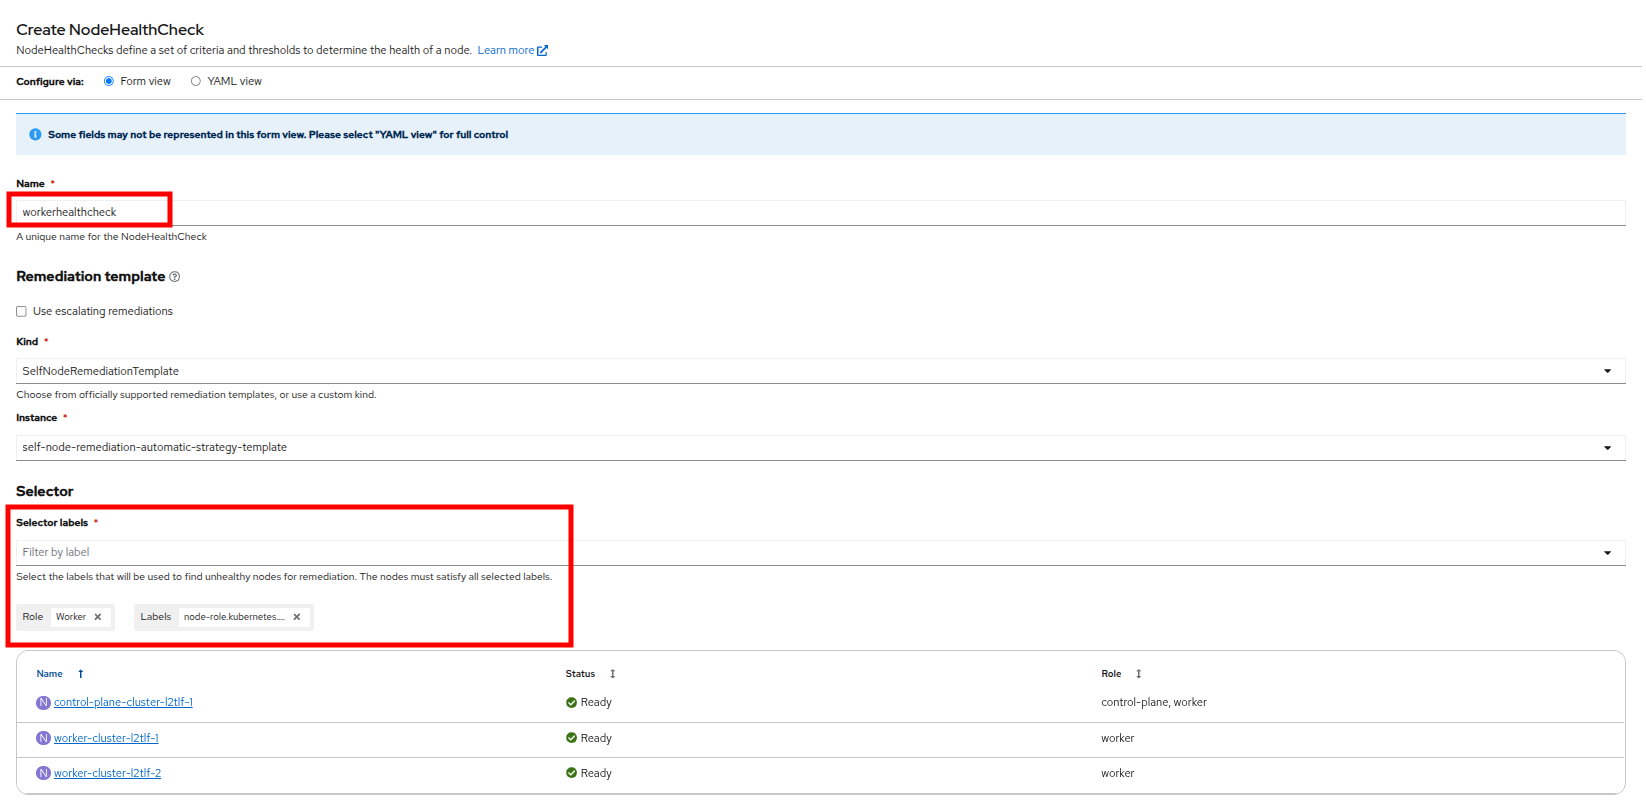 Figure 3. Create NodeHealthCheck
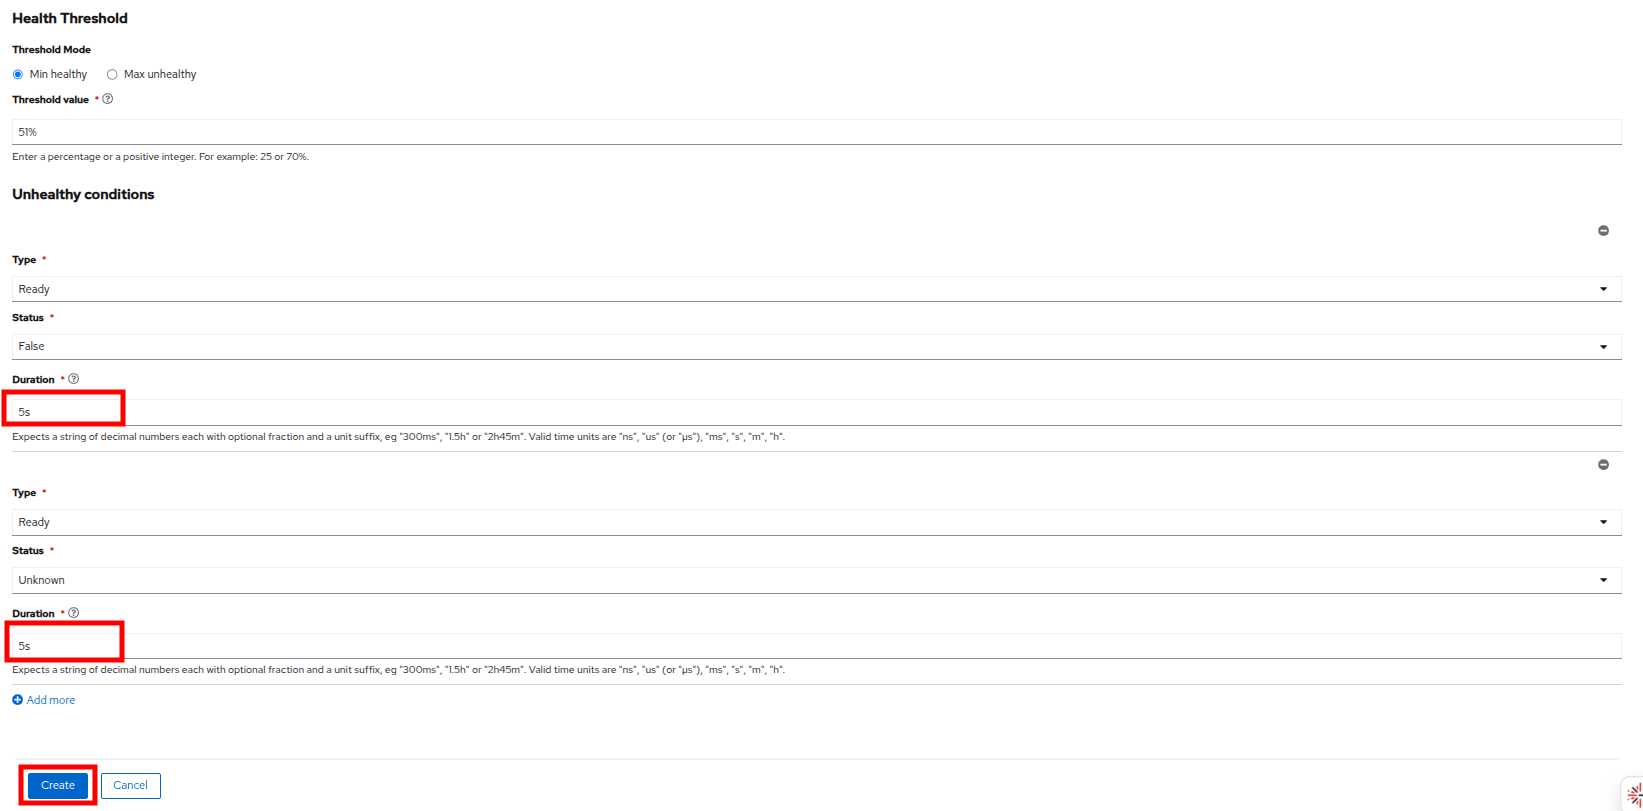 Figure 4. Create NodeHealthCheck
 -
Once created you should be returned to the NodeHealthCheck page where it shows that the policy we just created is now enabled.
Simulating a Node Failure
Now we are going to simulate a node failure and see how OpenShift Virtualization handles the situation.
-
Using the left side navigation menu, return to the Virtualization perspective by clicking on the Core platform dropdown, and selecting the Virtualization option.
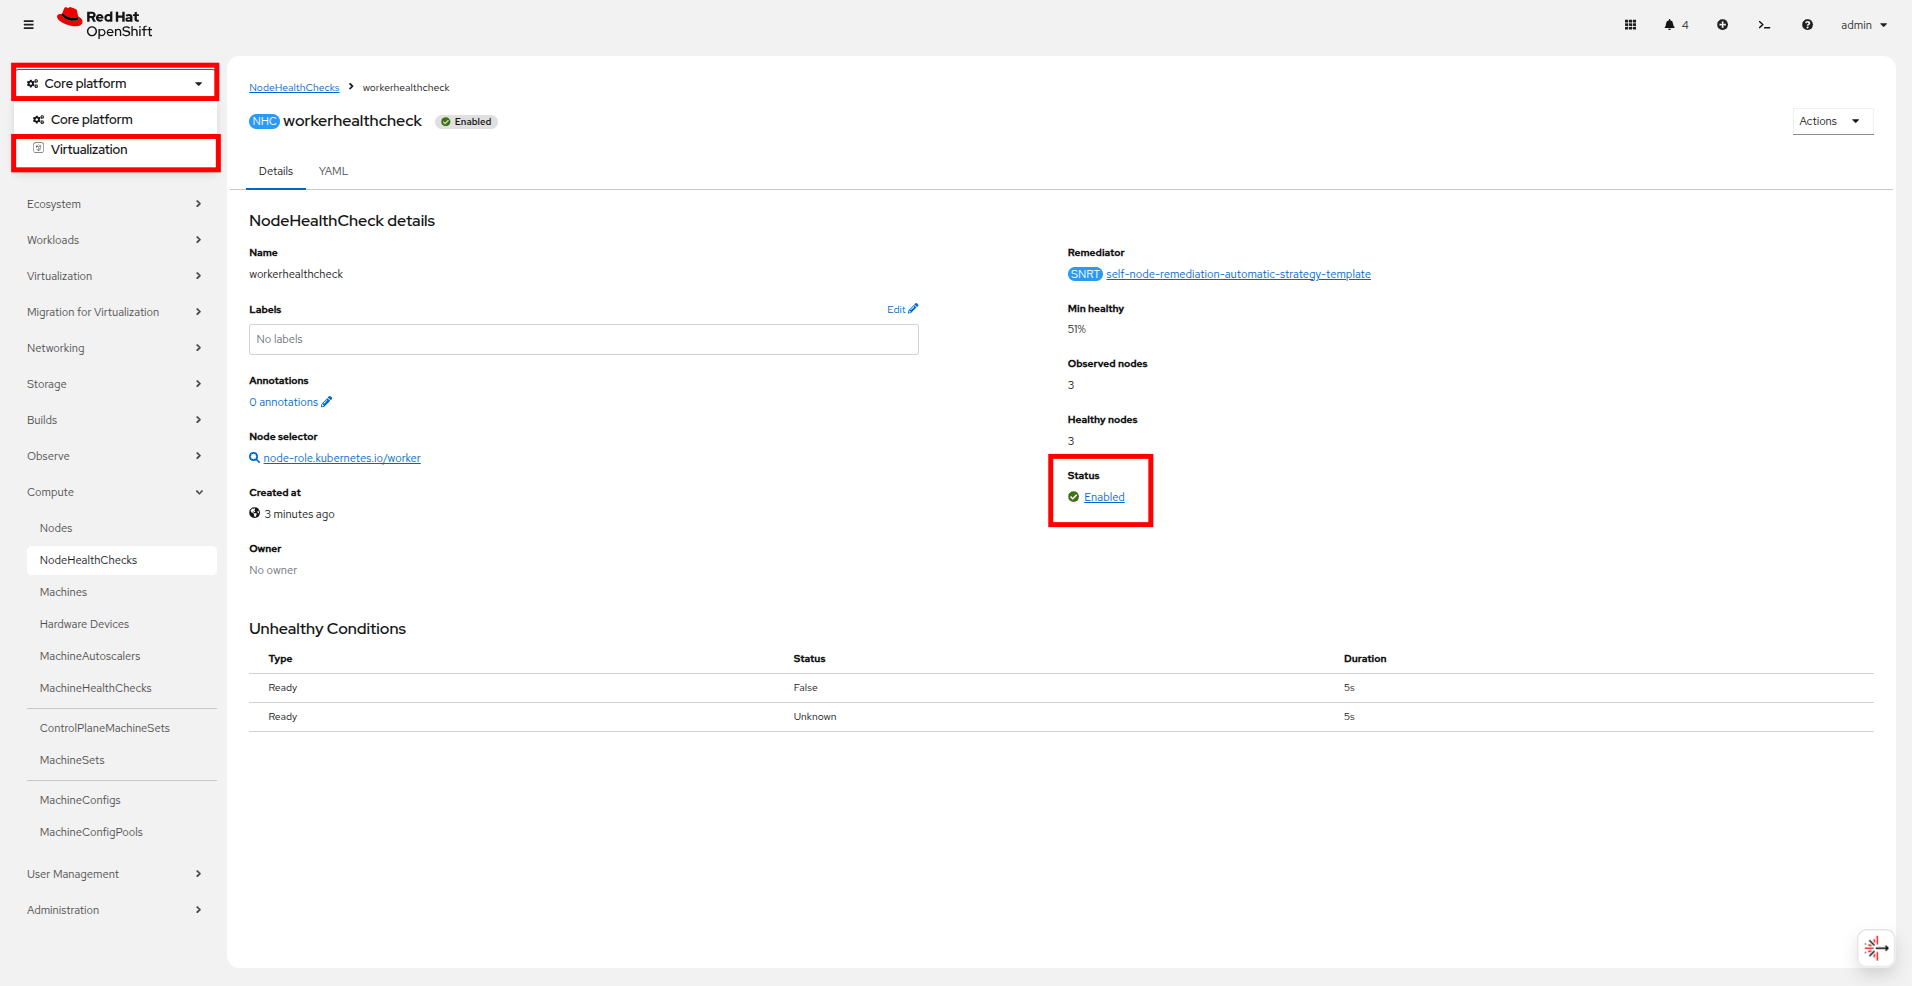 Figure 5. Return to Virtualization
 -
Once you are in the Virtualization perspective, use the left side navigation menu to select VirtualMachines, find the fencing project in the center column and expand it to see the fencing-vm1 virtual machine. Power on this machine with the Play button or Actions menu.
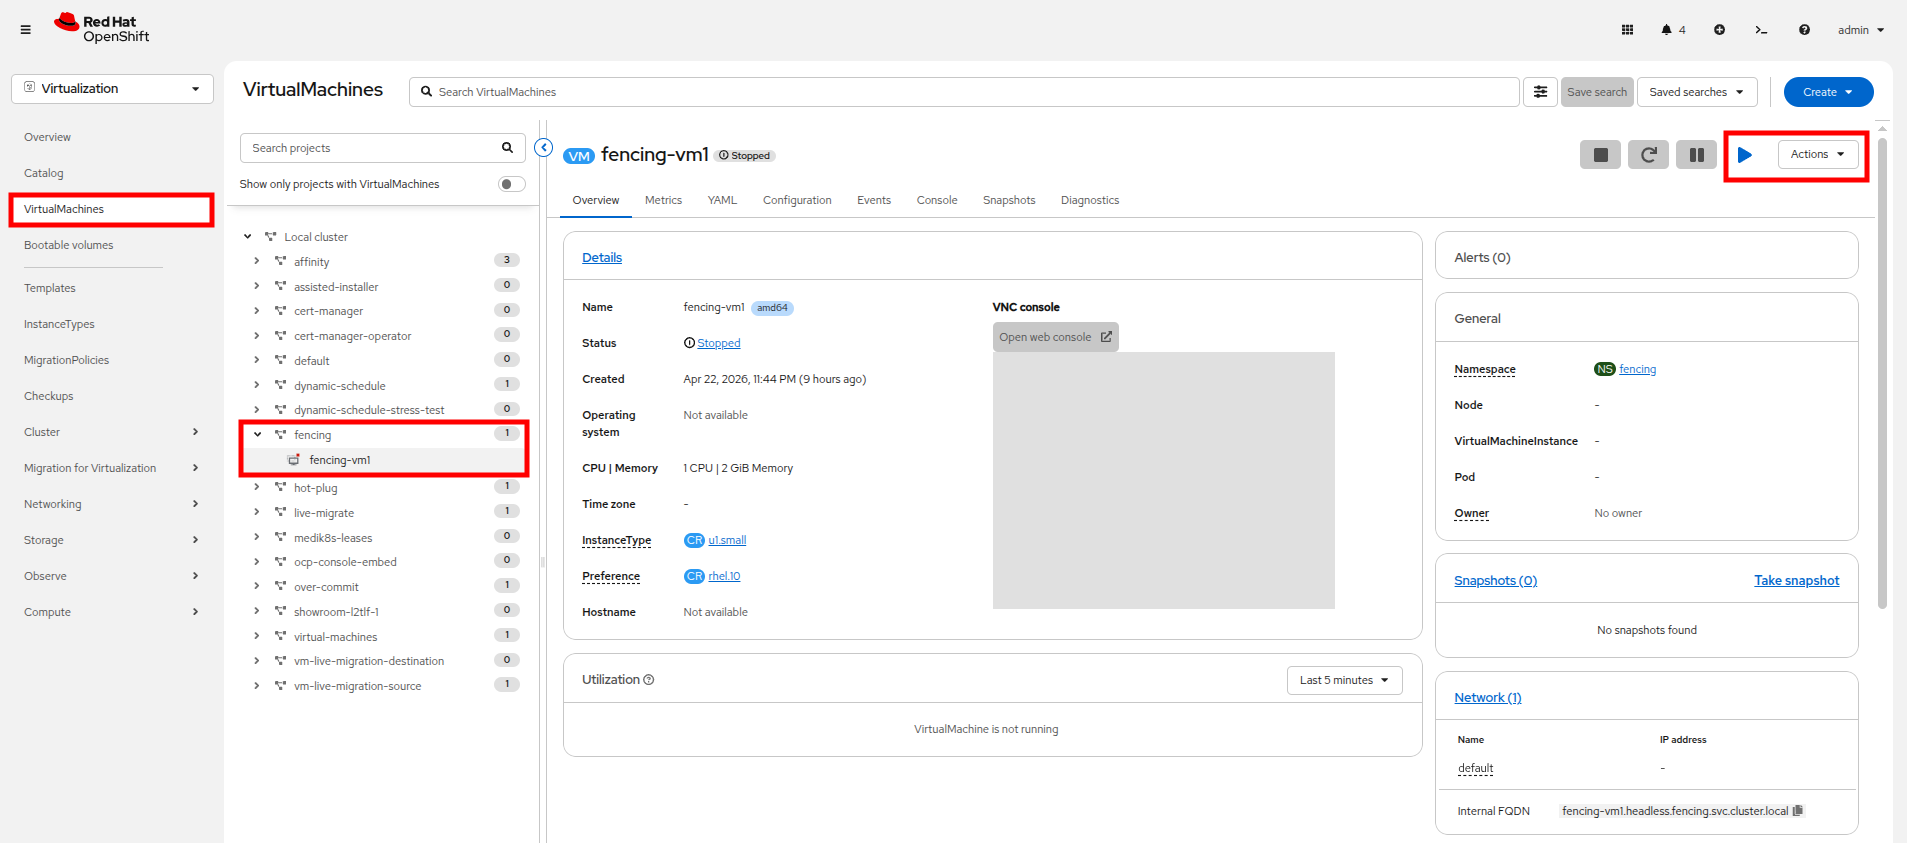 Figure 6. Power-on VM
 -
For the next step we need to determine which node is currently hosting fencing-vm1. We can do that by checkign the General box on the VM Overview page, or with the following command in our embedded terminal:
Get VM infooc get vmi fencing-vm1 -n fencingOutputNAME AGE PHASE IP NODENAME READY fencing-vm1 3m53s Running 10.234.0.74 worker-cluster-l2tlf-2 True
-
To make later exercises easier, we can store the worker node name as a variable. We can use the jq command to only return the nodeName field, and assign that to a variable for later use:
Get VM info into a variablenode=`oc get vmi fencing-vm1 -n fencing -o json | jq -r '.status.nodeName'`Show node nameecho ${node}Outputworker-cluster-l2tlf-2
-
Before we trigger a failure, let us take a look at our nodes in the OpenShift console.
-
In the left side navigation menu click on Compute → Nodes and you will see all of your cluster nodes listed, and their status will show as Ready.
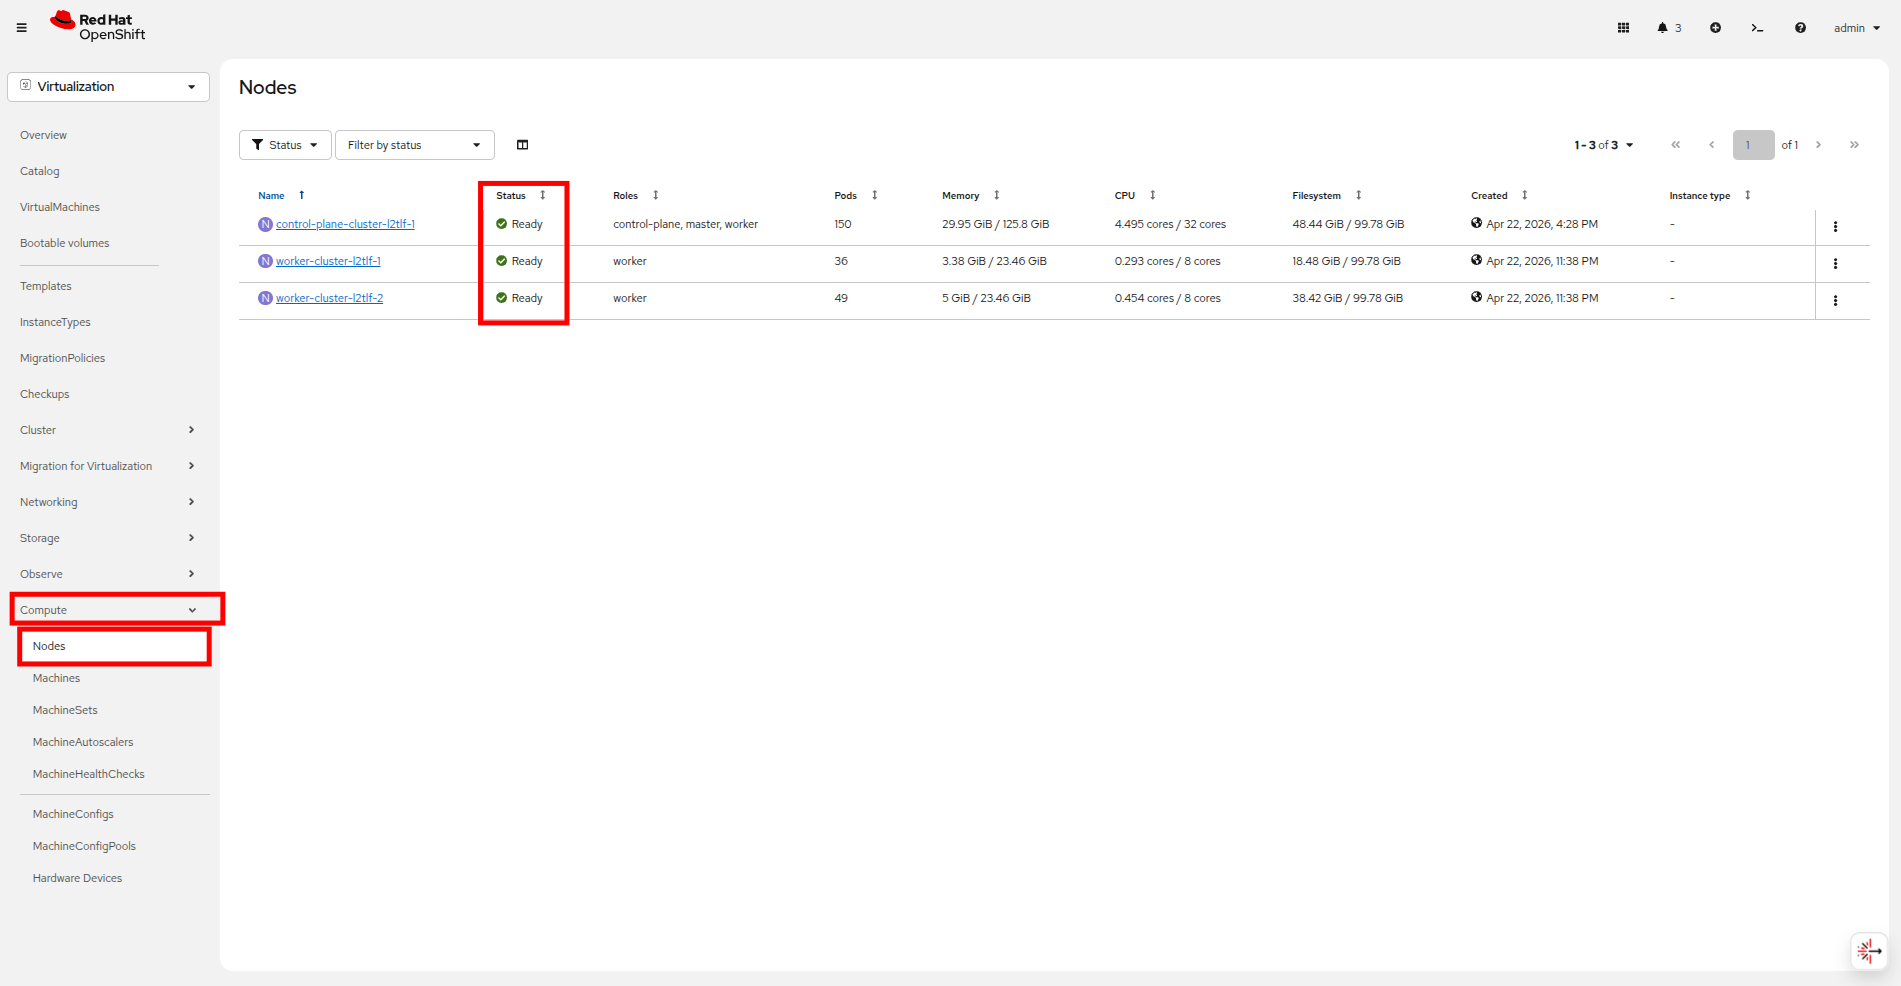 Figure 7. Node list
 -
Now we are going to create a failure condition. Back on the embedded terminal, we are going to access the node from step 4, using the ${node} variable and the oc debug command, to put it into an unhealthy state by stopping the kubelet service. You can perform this action with the following syntax:
Debug into the nodeoc debug node/${node}chrootchroot /hostForce the node into a unhealthy statesystemctl stop kubeletOutputRemoving debug pod ...
-
Check back on your OpenShift console and you will see that the worker node where we forced the failure is now in a Not Ready state.
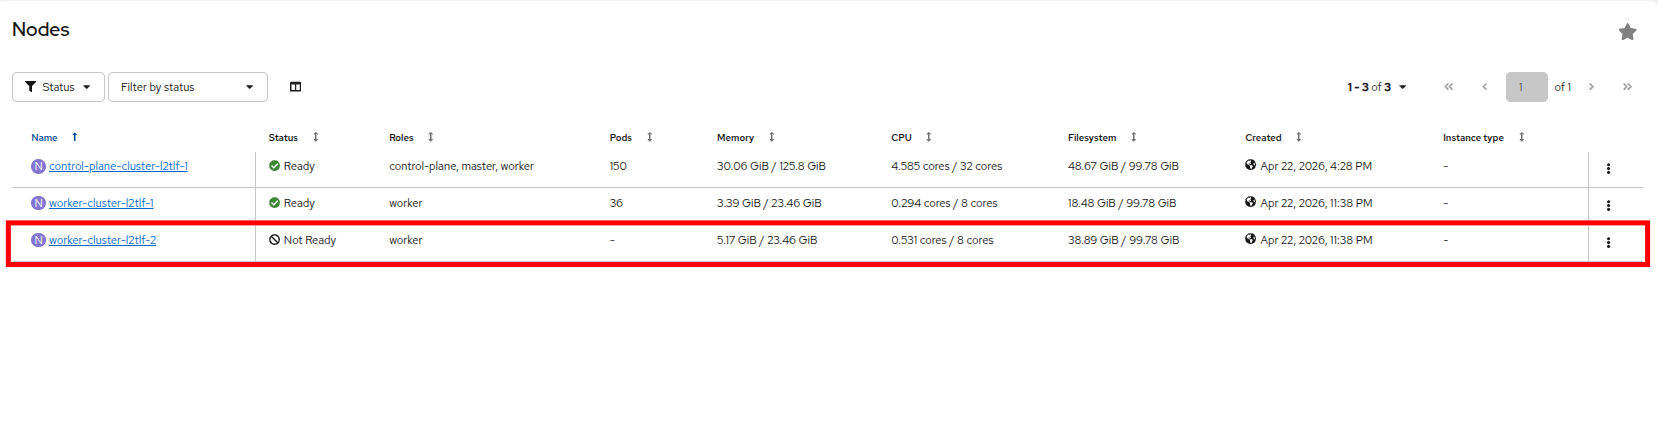 Figure 8. Node failed
 -
Once the debug pod exits, you can monitor the status of your Virtual Machine, fencing-vm1 by running a
watchcommand. You will see that the self remediation process is isolating the node and migrating the workloads.Get VM infooc get vmi fencing-vm1 -n fencing -wOutputNAME AGE PHASE IP NODENAME READY fencing-vm1 21m Running 10.234.0.74 worker-cluster-l2tlf-2 True fencing-vm1 21m Running 10.234.0.74 worker-cluster-l2tlf-2 False fencing-vm1 23m Running 10.234.0.74 worker-cluster-l2tlf-2 False fencing-vm1 23m Failed 10.234.0.74 worker-cluster-l2tlf-2 False fencing-vm1 23m Failed 10.234.0.74 worker-cluster-l2tlf-2 False fencing-vm1 23m Failed 10.234.0.74 worker-cluster-l2tlf-2 False fencing-vm1 23m Failed 10.234.0.74 worker-cluster-l2tlf-2 False fencing-vm1 0s Pending fencing-vm1 0s Pending fencing-vm1 0s Scheduling False fencing-vm1 0s Scheduling False fencing-vm1 10s Scheduled worker-cluster-l2tlf-1 False fencing-vm1 12s Scheduled worker-cluster-l2tlf-1 False fencing-vm1 12s Running 10.233.0.29 worker-cluster-l2tlf-1 False fencing-vm1 12s Running 10.233.0.29 worker-cluster-l2tlf-1 True fencing-vm1 12s Running 10.233.0.29 worker-cluster-l2tlf-1 True -
Return to your OpenShift console and click on VirtualMachines, and expand the fencing folder and click on the fencing-vm1 virtual machine to confirm it’s status. Confirm that is is back running after the unexpected node failure, and that it is now scheduled on a different worker node.
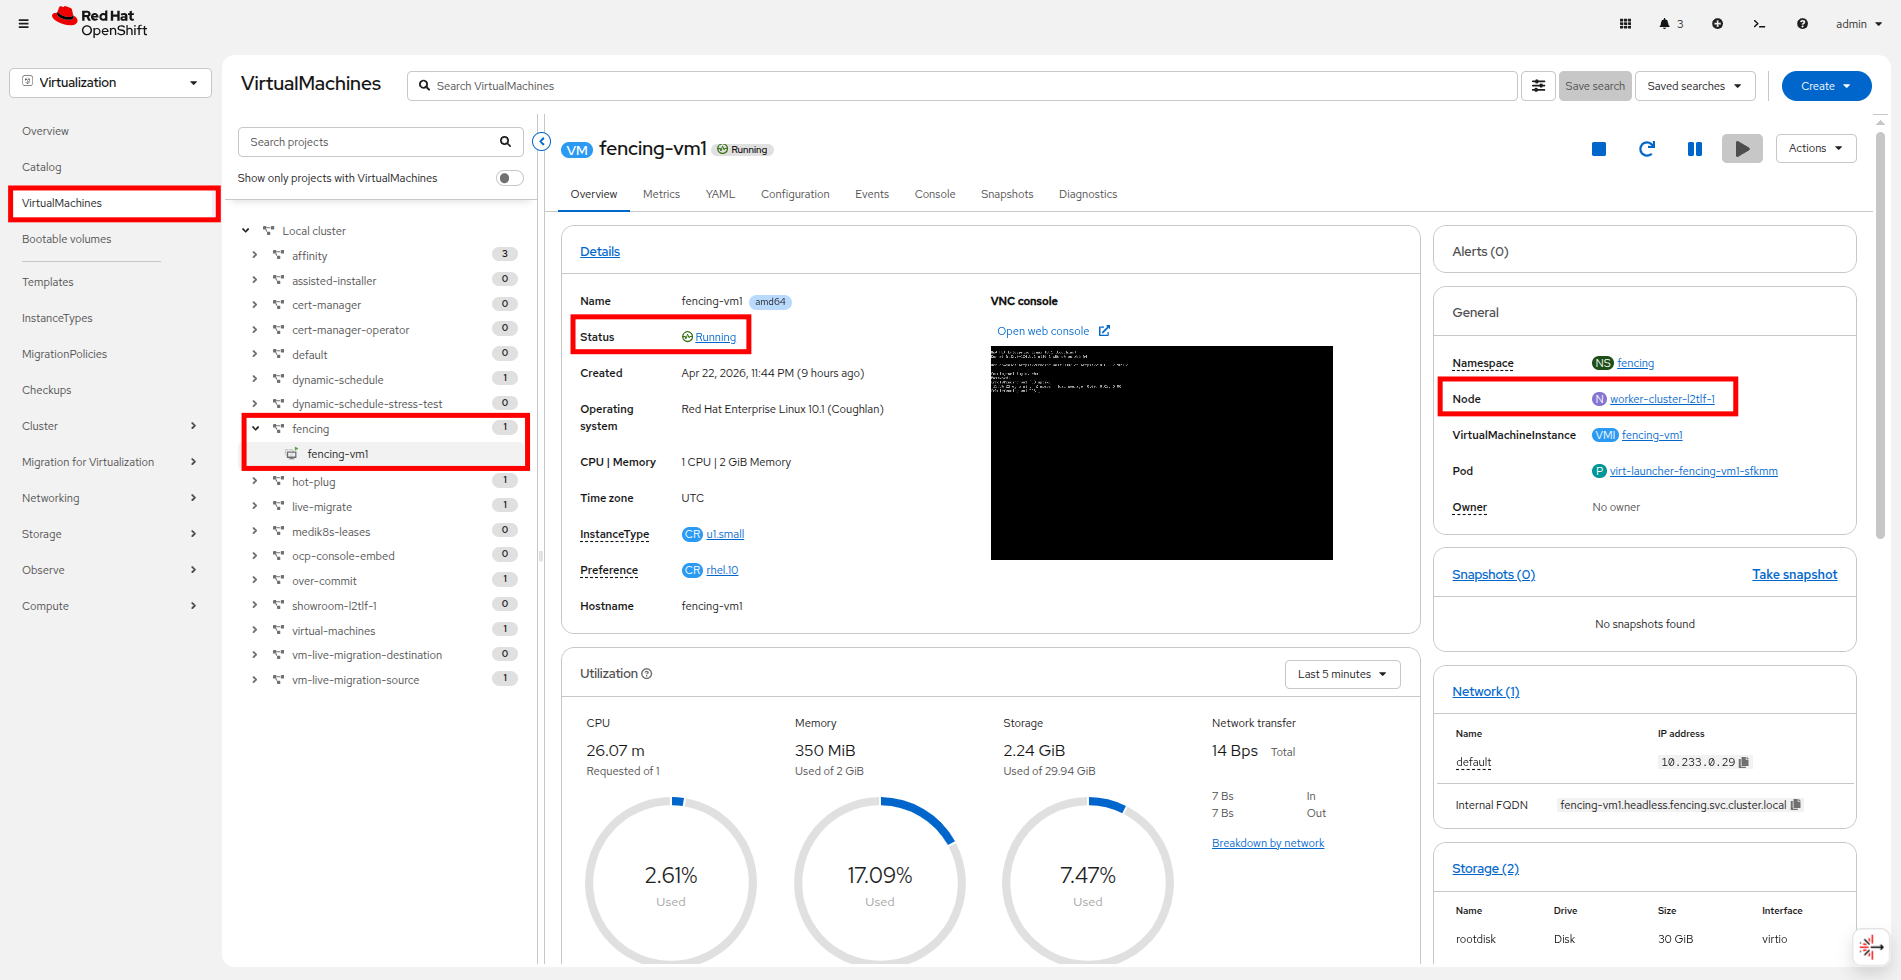 Figure 9. VM back running
Congratulations, you have completed this module!
| Be sure to stop fencing-vm-1 when you complete this module to ensure that there are enough resources in the cluster to complete the other modules. You can perform this action through the OpenShift console by clicking the Stop button or using the Actions dropdown. |
Summary
In this module we explored node remediation and fencing, which are critical to configure when it comes to protecting your virtualized workloads in the case of a node failure. Appropriate fencing takes a stalled node offline allowing workloads that were scheduled there to be appropriately scheduled elsewhere in the cluster, in a more rapid fashion, avoiding extended downtime and protecting workloads from creating a split-brain scenario that could endanger the state of the VM.