Live Migration of Workloads
Introduction
Live migration of workloads between compute nodes and storage types is a crucial feature expected of any modern hypervisor. OpenShift Virtualization allows for the simple and easy process of migrating your virtual machine workloads between nodes and storageclasses in the cluster as determined by either the Kubernetes scheduler, or you the end user.
In a container-based application there are often multiple replicas of a container spread across the cluster ensuring availability, and should a hosting node run out of resources, a container is simply killed and redeployed elsewhere in the cluster. The same does not apply to virtual machines which are stateful workloads with persistent storage. Thus virtual workloads may need to be live migrated for reasons related to physical resource limitations, planned maintenance, or to enhance performance of particular workload.
-
Live migration of a virtual machine from one node to another random node.
-
Live migration of a virtual machine from one node to another specific node.
-
Live migration of virtual machine storage from one StorageClass to another.
Prerequisites
-
The underlying PVC must use ReadWriteMany (RWX) access mode
-
The pod network must not be configured with the bridge binding type.
-
Ports 49152 and 49153 must be available in the VM’s virt-launcher pod; live migration fails if these ports are specified in a masquerade network interface.
-
CPU model must match on the source and destination compute node - you can not live migrate virtual guests from Intel to AMD, ARM, or PowerPC processor types, even though they are all supported by OpenShift Virtualization and mixed clusters can exist.
Accessing the OpenShift Cluster
Your OpenShift cluster console is available {openshift_cluster_console_url}[here^].
Your console login is available with:
-
User: {openshift_cluster_admin_username}
-
Password: {openshift_cluster_admin_password}
You can login to your OpenShift cluster on the provided terminal by copying and pasting the following syntax:
oc login -u {openshift_cluster_admin_username} -p {openshift_cluster_admin_password} --server={openshift_api_server_url}Compute Migration to a random node
During maintenance or troubleshooting, you might need to migrate a VM to a different node. Live migration is the process of moving a running Virtual Machine Instance (VMI) to a different node without disruption.
In this lab, you will be performing a live migration of Virtual Machine from one compute node to another. To do this, you will access a running VM, determine its current node, and then migrate it to another node.
-
From the left side panel, click on VirtualMachines. In the central virtual machine overview column, select the live-migrate project and click on the Virtual Machine named live-migrate-vm1.
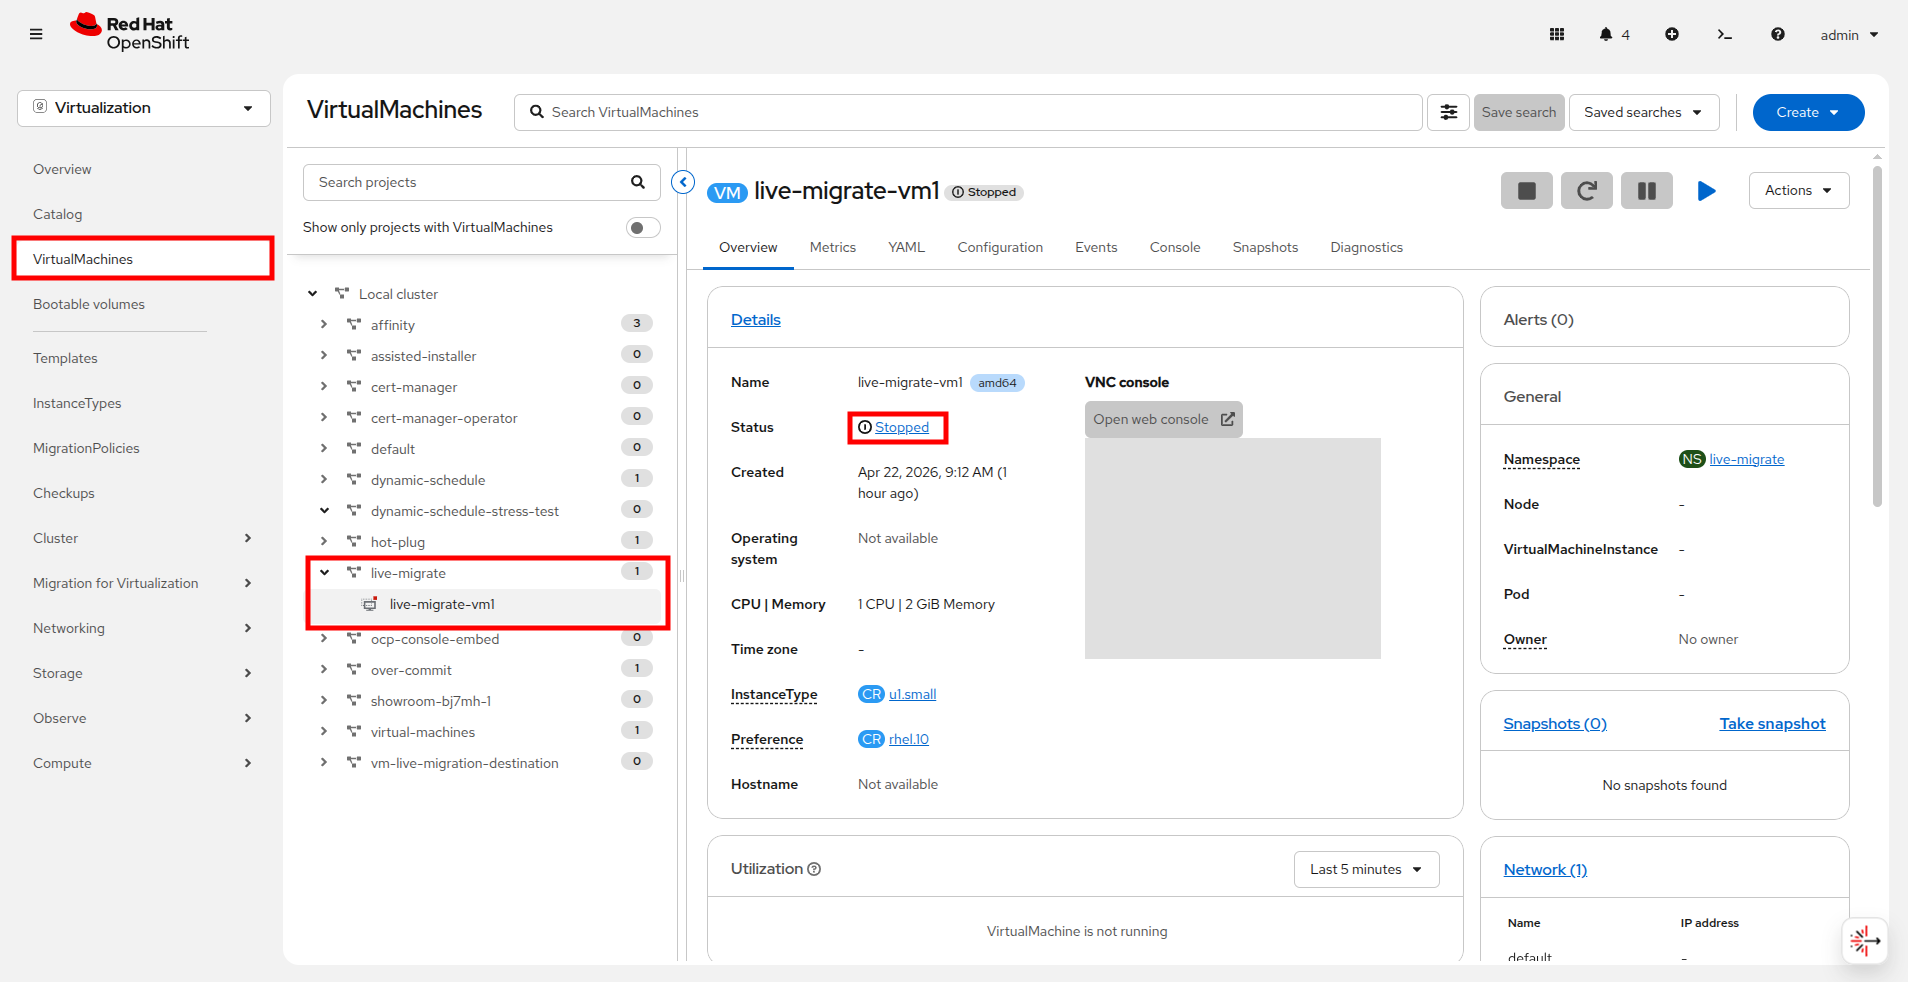 Figure 1. Select the Virtual Machine
 -
If the virtual machine is currently powered of click the blue Play button to Start the Virtual Machine.
 Figure 2. Start the Virtual Machine
 -
The Virtual Machine will schedule, start and move into the Running state as seen below.
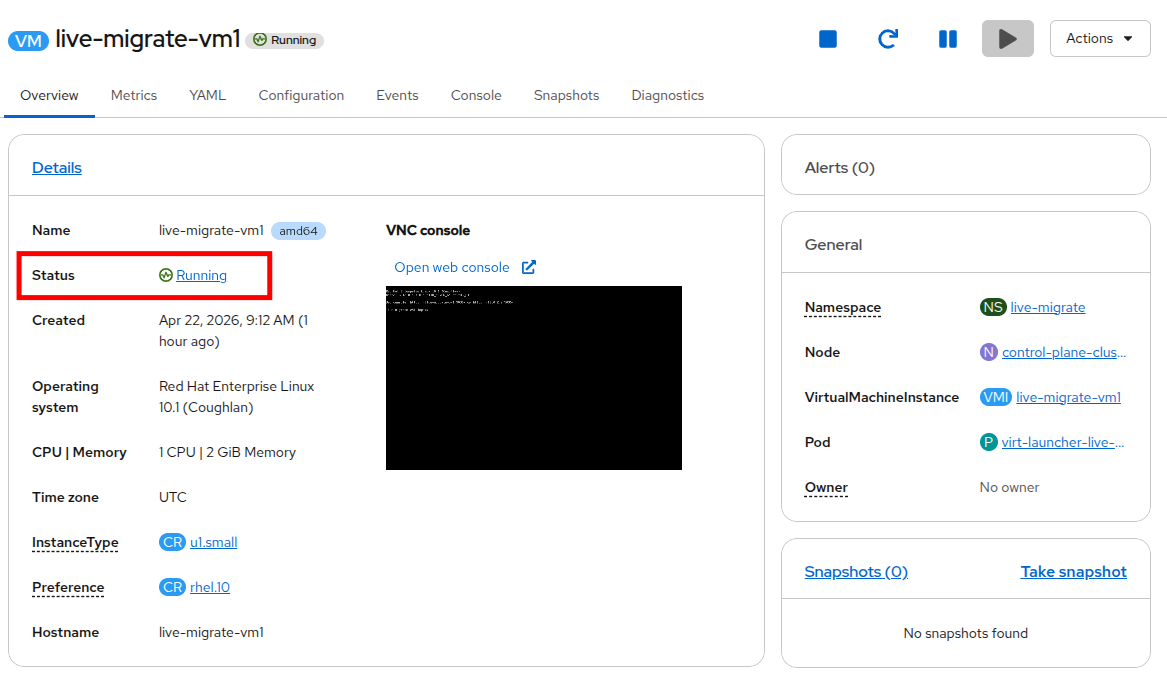 Figure 3. Running Virtual Machine
 -
To see the node the Virtual Machine is currently running on, look at the General box on the right hand side of the VirtualMachine details page for the Node name. In the following screenshot, the node is worker-cluster-bj7mh-1.
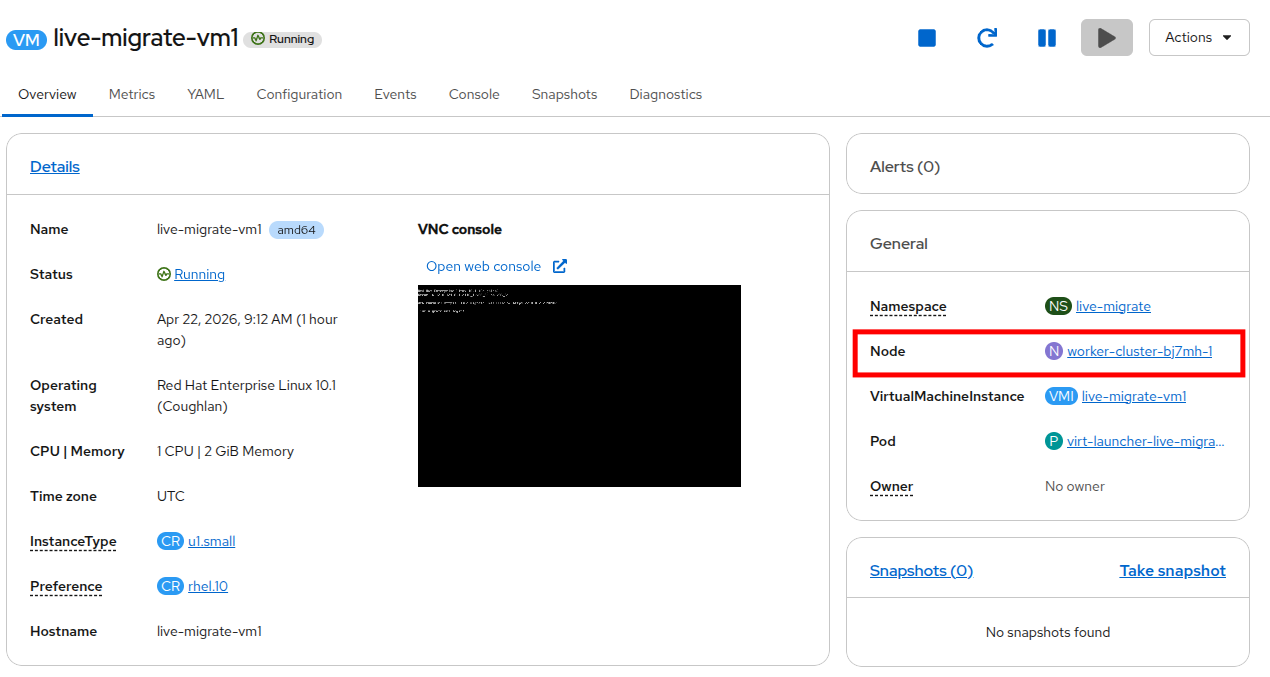 Figure 4. Virtual machine details
 -
To migrate the Virtual Machine to another node, click on the Actions menu, hover over Migration, and then click Compute.
 Figure 5. Initiate migration
 -
The default selection is Automatically selected Node which allows the Kubernetes scheduler to decided the best placement for the virtual guest. Click the Migrate VirtualMachine button.
 Figure 6. Configure migration
 -
Wait a few moments and the virtual nachine status will change from Running to Migrating.
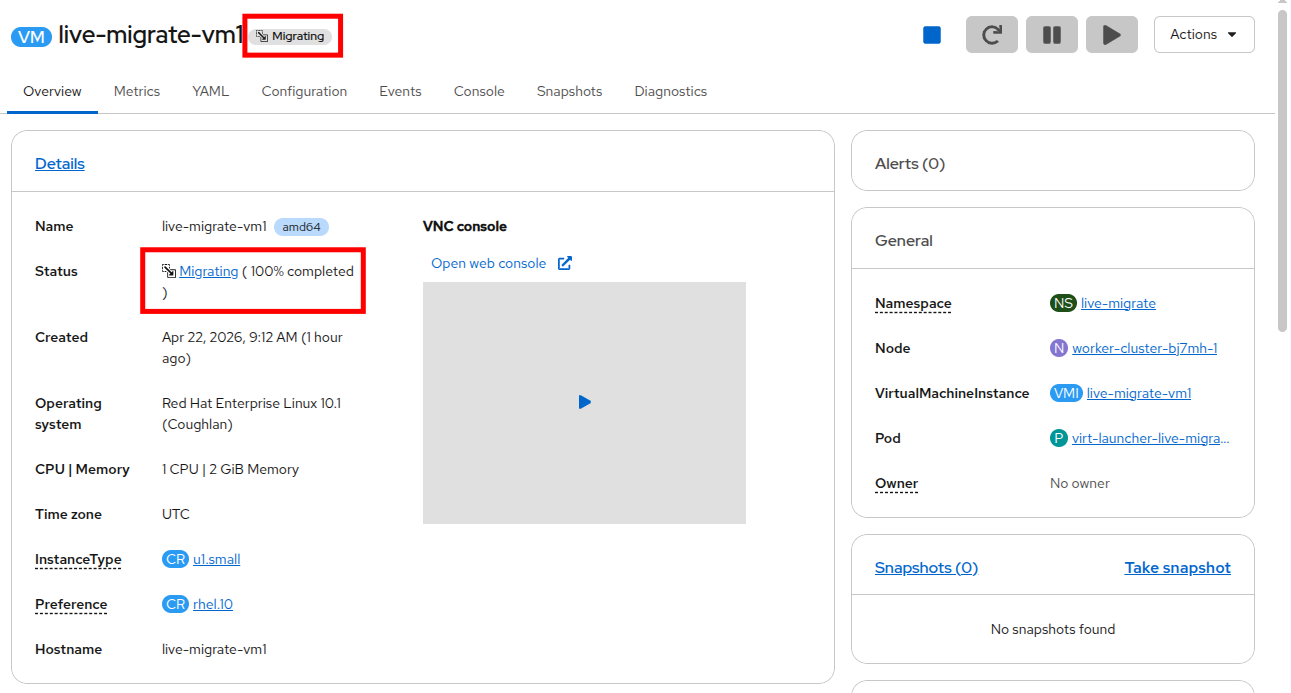 Figure 7. VM is migrating
 -
The live migration will complete and the virtual machine will return to a Running state on a different worker node. In the following screenshot, the node is worker-cluster-bj7mh-2.
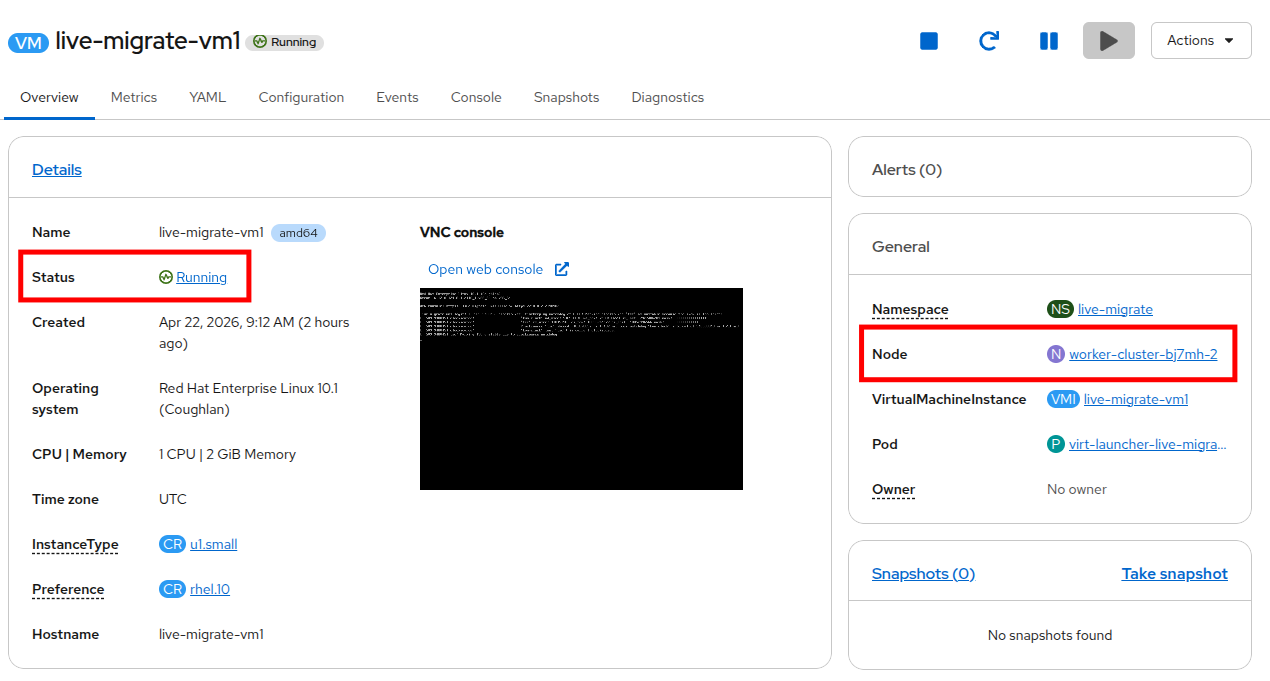 Figure 8. VM is running
 -
The VM has live migrated to a new worker node while still running.
Compute Migration to a specific node
During maintenance or troubleshooting, you may need to choose the destination of a virtual guest during the live migration process. The process here is quite similar to the last exercise, there are just a few additional steps that allow for you to live migrate a Virtual Machine to a specific node in the cluster.
-
The Virtual Machine should already be Running from the last lesson. If it is not, click the blue Play button to Start the Virtual Machine and wait for it to enter the Running state.
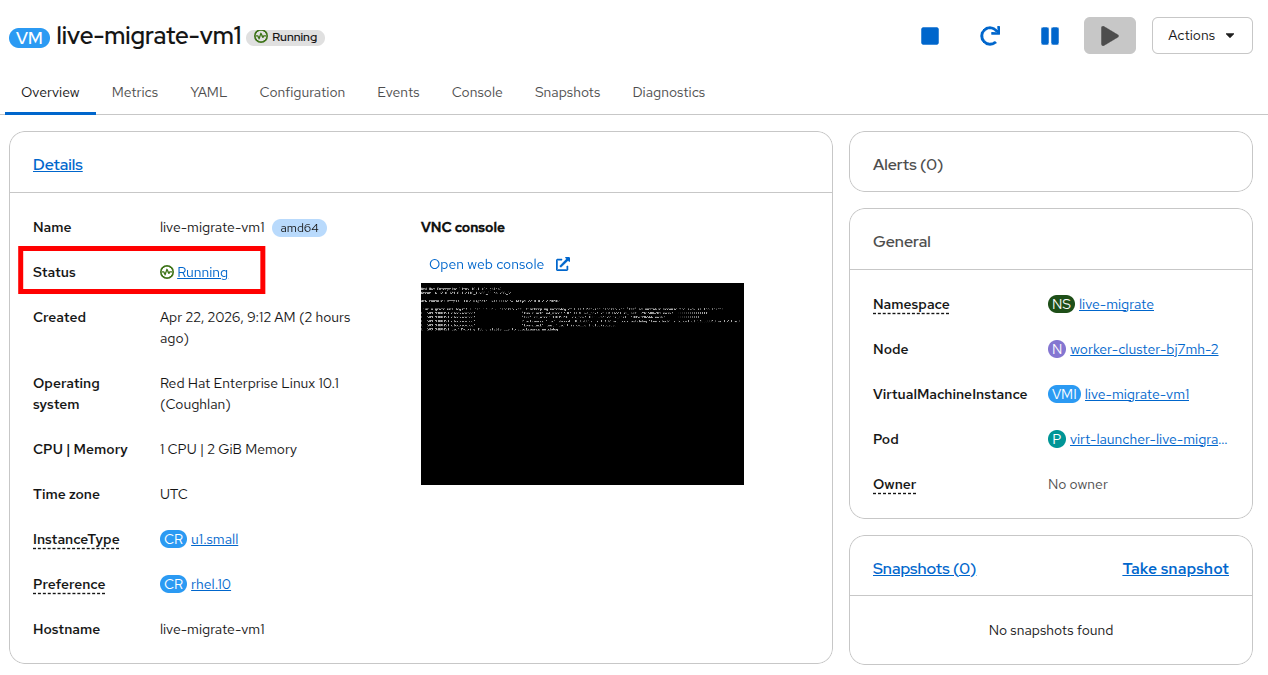 Figure 9. Virtual machine details
 -
To migrate the Virtual Machine to another node, click on the Actions menu, hover over Migration, and then click Compute.
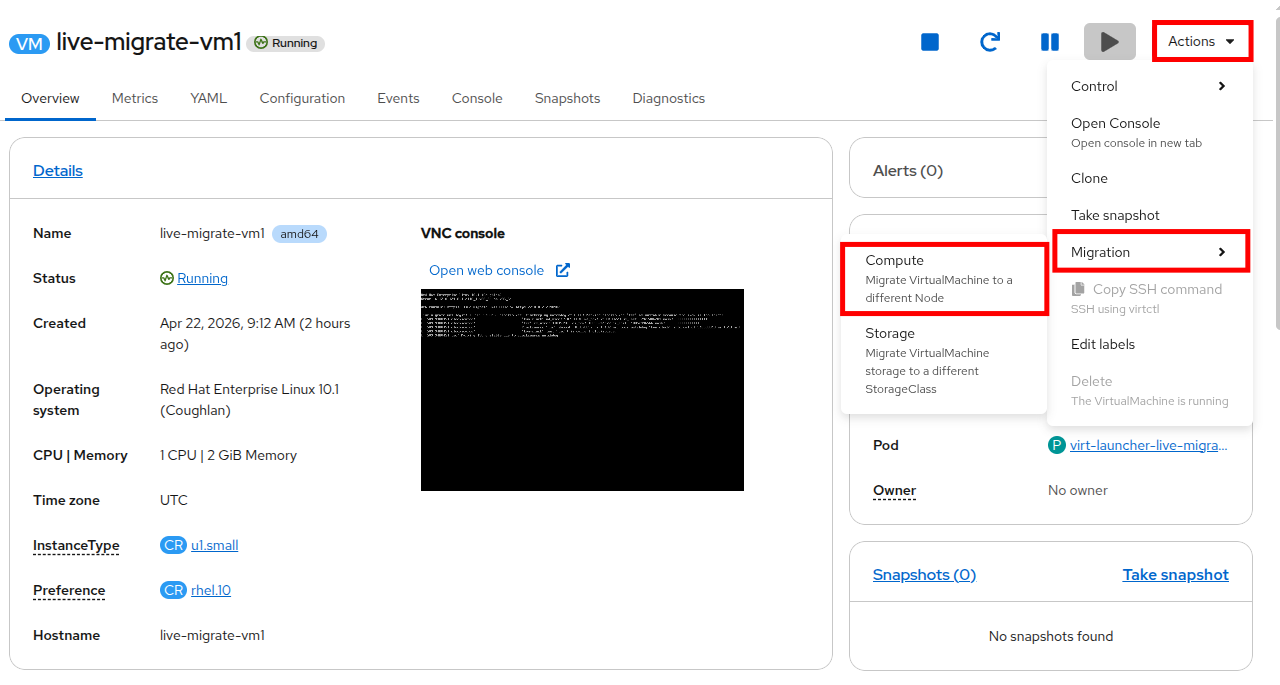 Figure 10. Initiate migration
 -
You will be presented with the Migrate VirtualMachine to a different Node window.
-
Select the Specific Node option, which will then display the list of available nodes. Select the check the box next to the other worker node and click the Migrate VirtualMachine button.
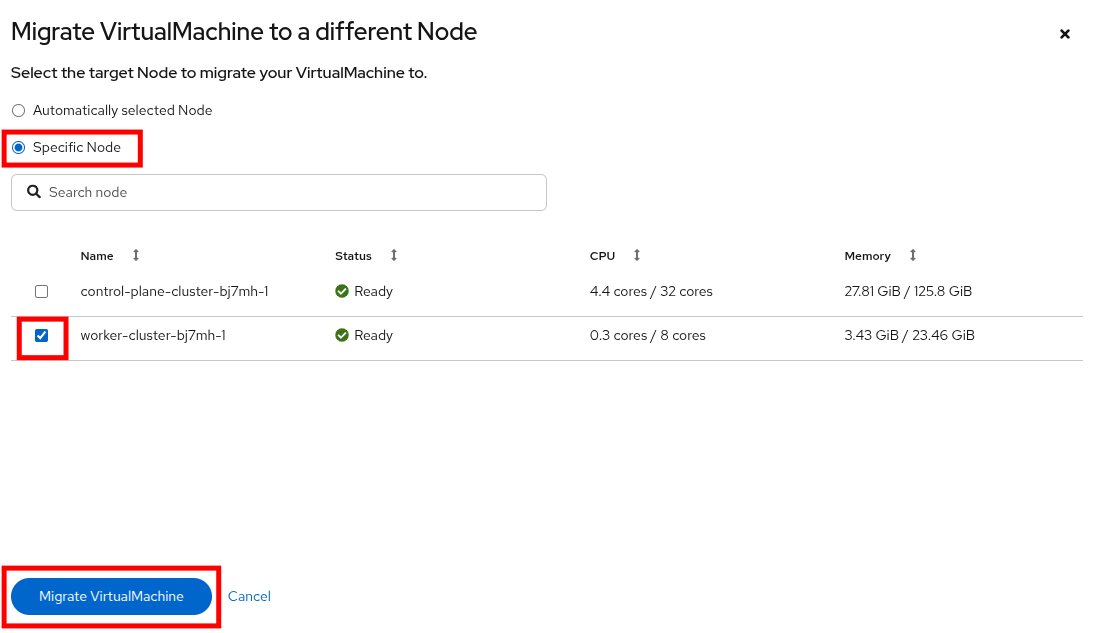 Figure 11. Configure migration
 -
You will see the Virtual Machine status changes from Running to Migrating.
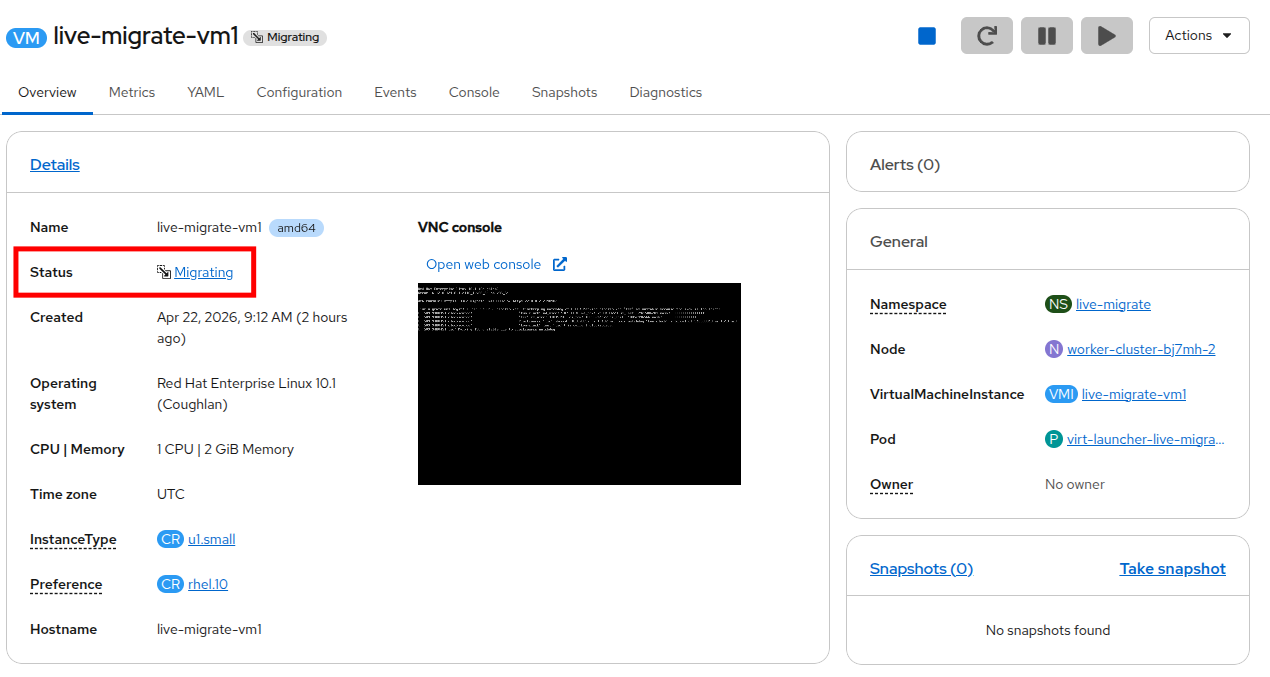 Figure 12. VM is migrating
 -
Once the migration completes, the virtual machine status will return to a Running state, and the VM will now reside on the chosen destination node.
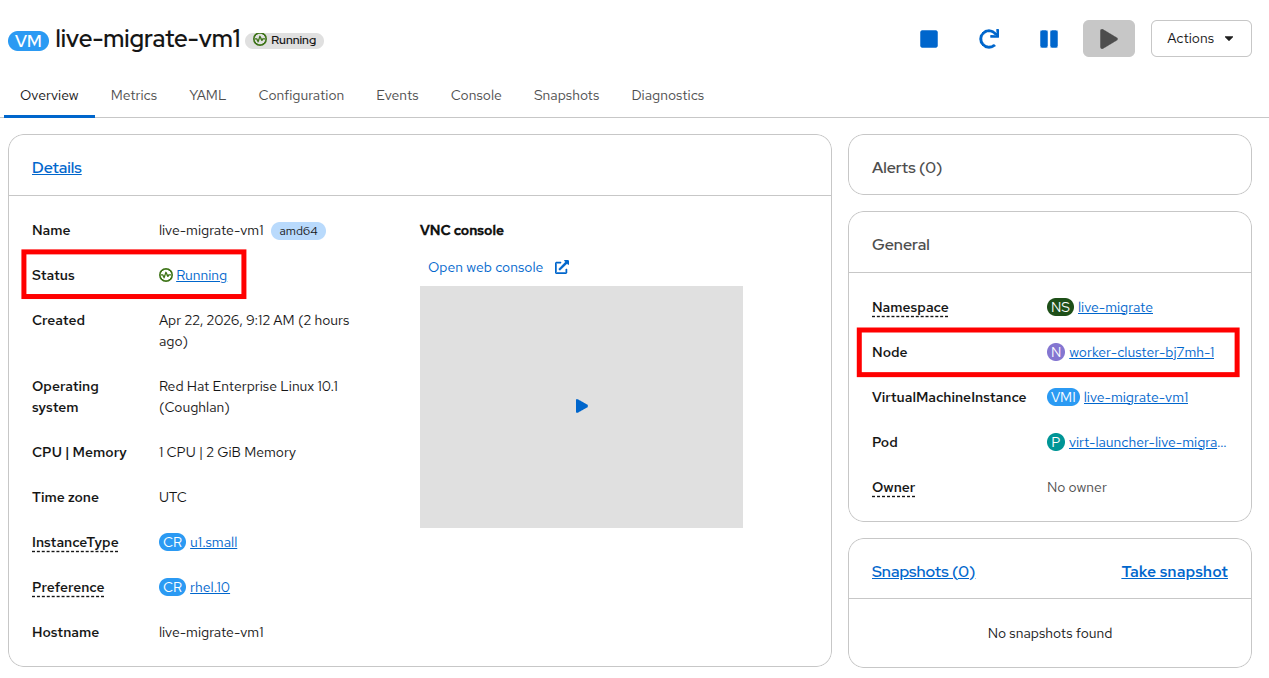 Figure 13. VM is running
Storage Migration
Storage environments often have their own lifecycles, maintenance schedules, and performance profiles. It may become necessary to migrate virtual workloads to a new storage class should the backing storage system need to undergo maintenance window or be replaced entirely. Likewise, many customers create custom storage classes based on tiers of performance. A virtual machine running a database that needs to be highly responsive may map to a storageclass provided by an all-flash system, while a simple virtual webserver may find itself attached to a storageclass from a traditional spinning disk array. A customer may also find their demands changing and the ability to live migrate the VMs helps to reduce downtime. For all these case, OpenShift Virtualization allows the migration of PVCs from one StorageClass to another while the virtual machine is running.
-
Let’s begin by taking a look at the storage on our live-migrate-vm1 virtual machine.
-
Click on the Configuration tab and select Storage. You can see that the Virtual Machine currently has a single 30GB bootable disk that is using the storage class called ocs-external-storagecluster-ceph-rbd.
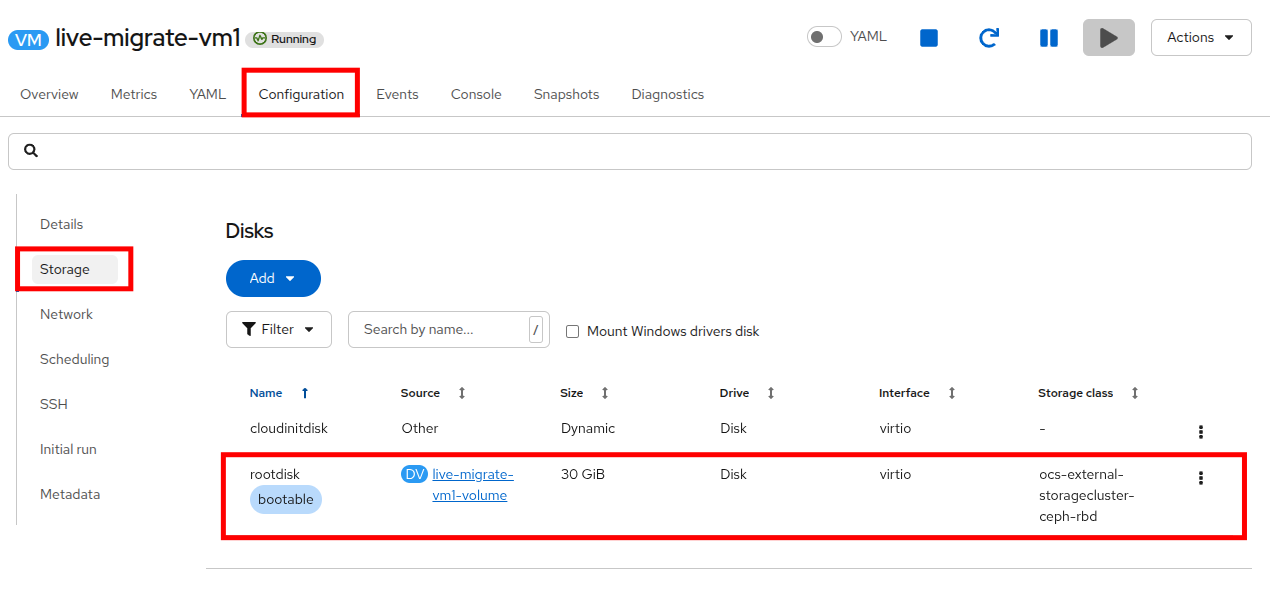 Figure 14. View storage details
 -
The storage live migration task can often take a bit longer than the compute live migration so we are going to add an additional test to confirm that the virtual machine operation is unaffected during the process.
-
Click on the Console tab and login to the virtual machine using the provided credentials, and the Copy to clipboard and Paste to console buttons.
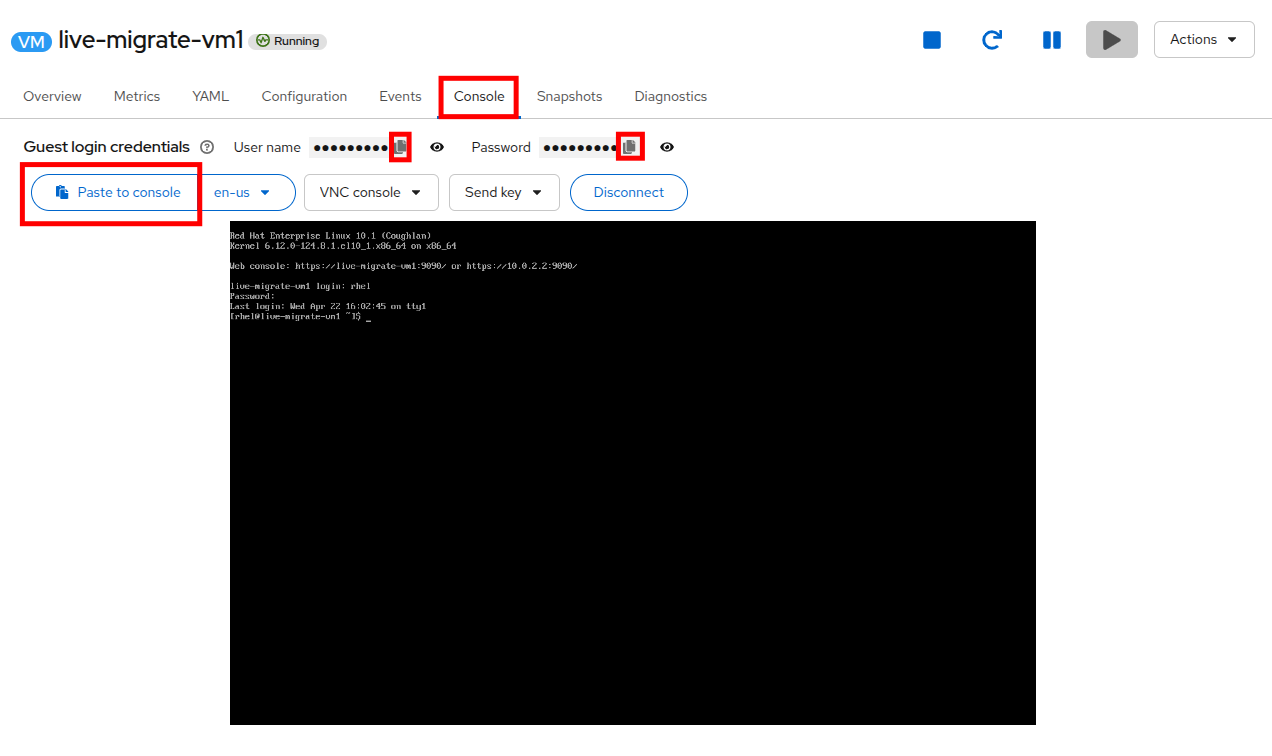 Figure 15. Log into virtual console
You may need to click on a browser pop-up to allow this action to take place. -
Now lets run a command that will run continuously through the migration process, to demonstrate that the VM does not go offline perhaps the
pingcommand to a publicly available website like www.google.com. You can use the provided toolbox below to copy the command, and paste it using the Paste to console button as in the previous step.ping www.google.com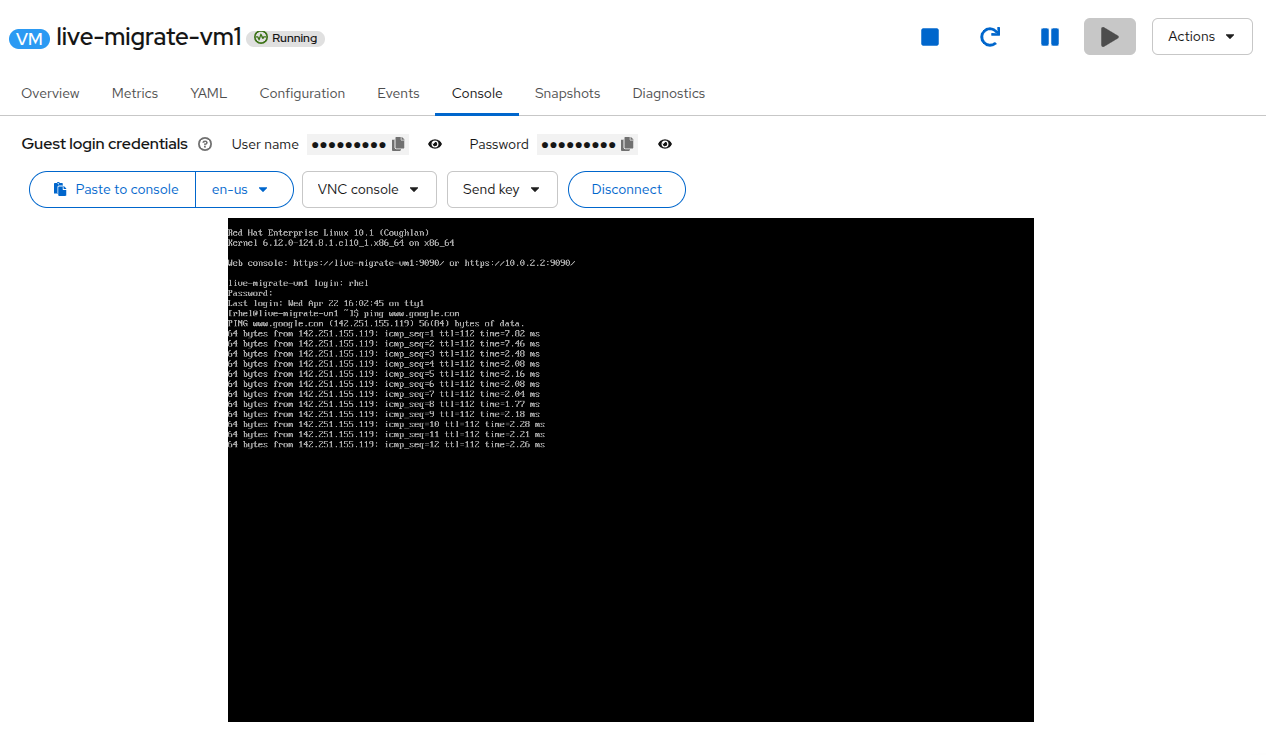 Figure 16. Run command on console
 -
Now click on the Actions menu, hover over the Migration option and click on the option for Storage.
 Figure 17. Initiate storage migration
 -
In the Migrate VirtualMachine storage window, review the options, keep the defaults and click the Next button.
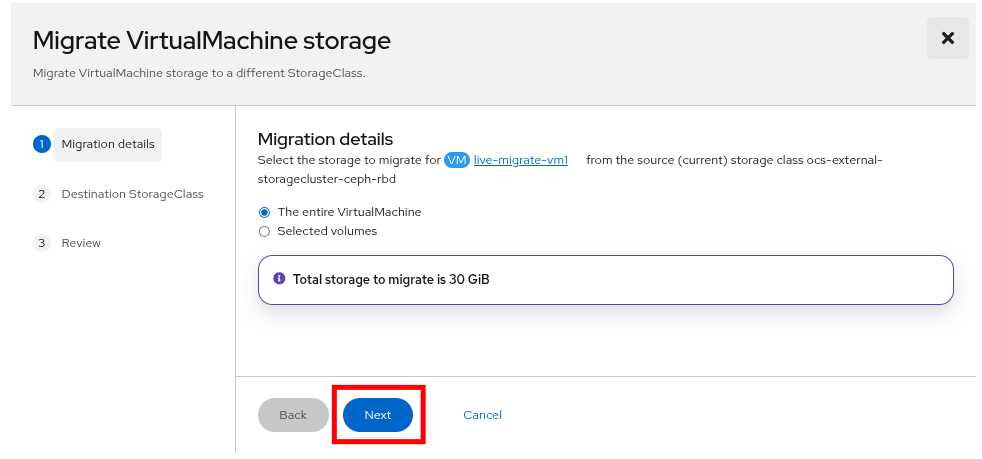 Figure 18. Migration details
 -
For the Destination StorageClass, select the new StorageClass called custom-storage-class and click Next.
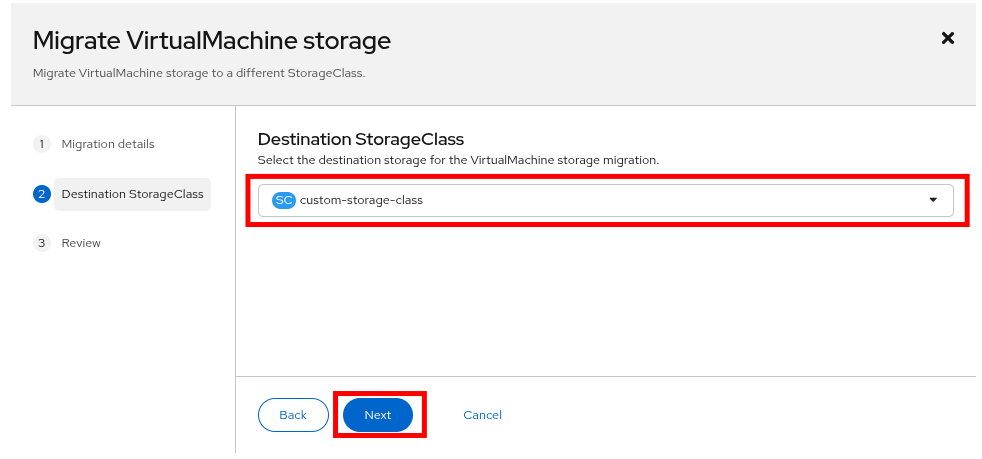 Figure 19. Select destination StorageClass
 -
Review the final storage migration configuration and click Migrate VirtualMachine storage.
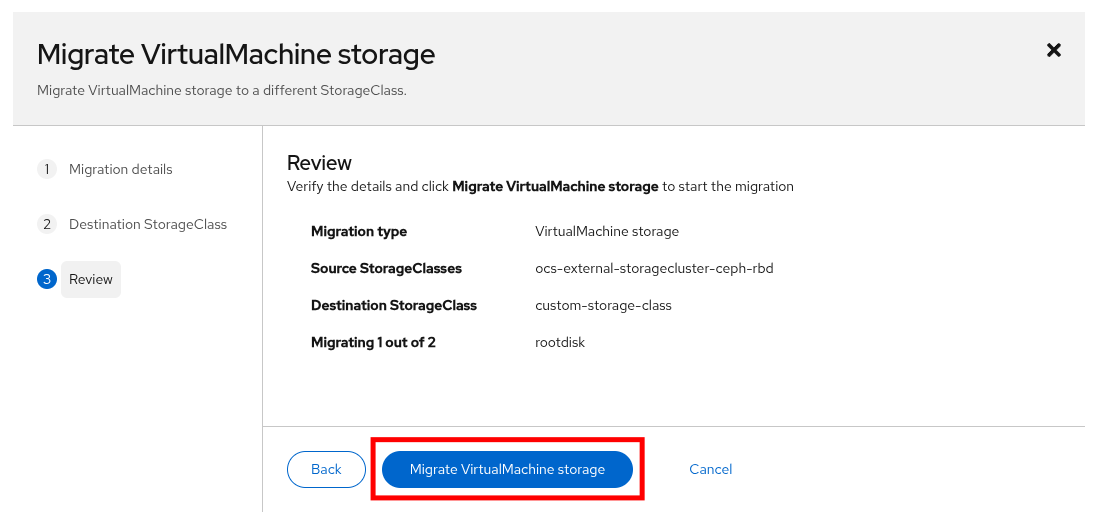 Figure 20. Review migration details
 -
The next window will show you the status of the storage migration. It is safe to close the window by clicking the X in the top corner, or you may click on the link to View storage migrations. Do not click the Stop button.
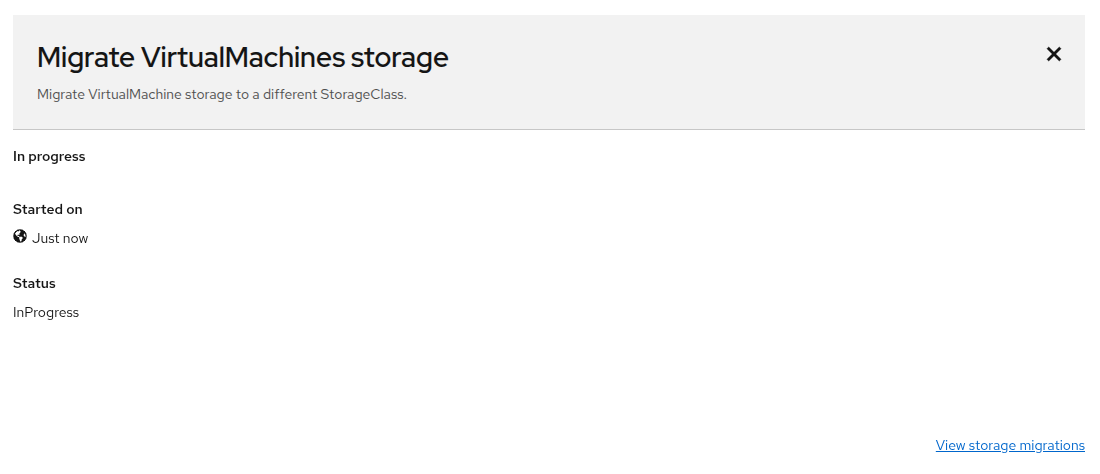 Figure 21. Migration has started
Because this is a lab environment, and with the number of concurrent users here at Red Hat Summit, the migration process may take longer than it would in a production environment. Please be patient as this process completes. -
To view the storage migration status, click on Overview on the left side navigation menu, and select the Migrations tab. You will see the current migration listed, along with a progress bar, and other informational graphs such as bandwidth consumption.
 Figure 22. Migration is running
 -
Once the migration is complete it will disappear from the Overview → Migrations page.
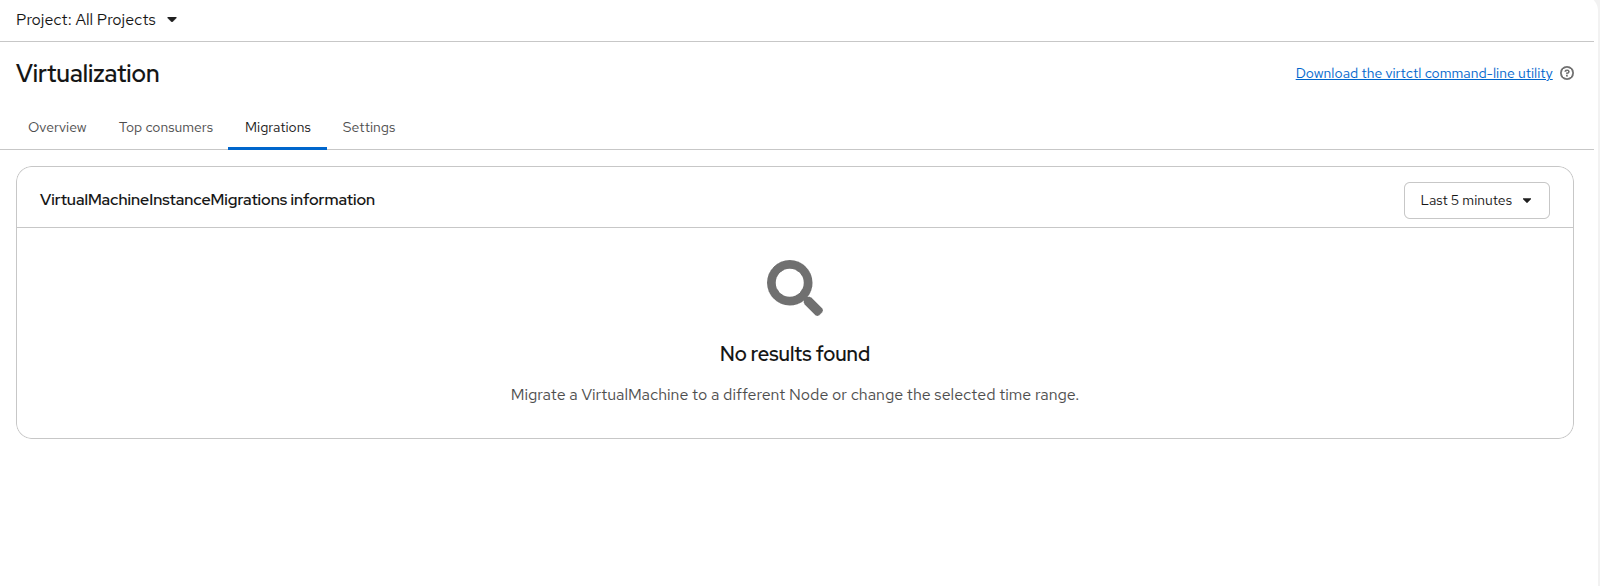 Figure 23. Migration is complete
 -
Using the left side navigation menu select the live-migrate namespace and click on the Virtual Machine named live-migrate-vm1.
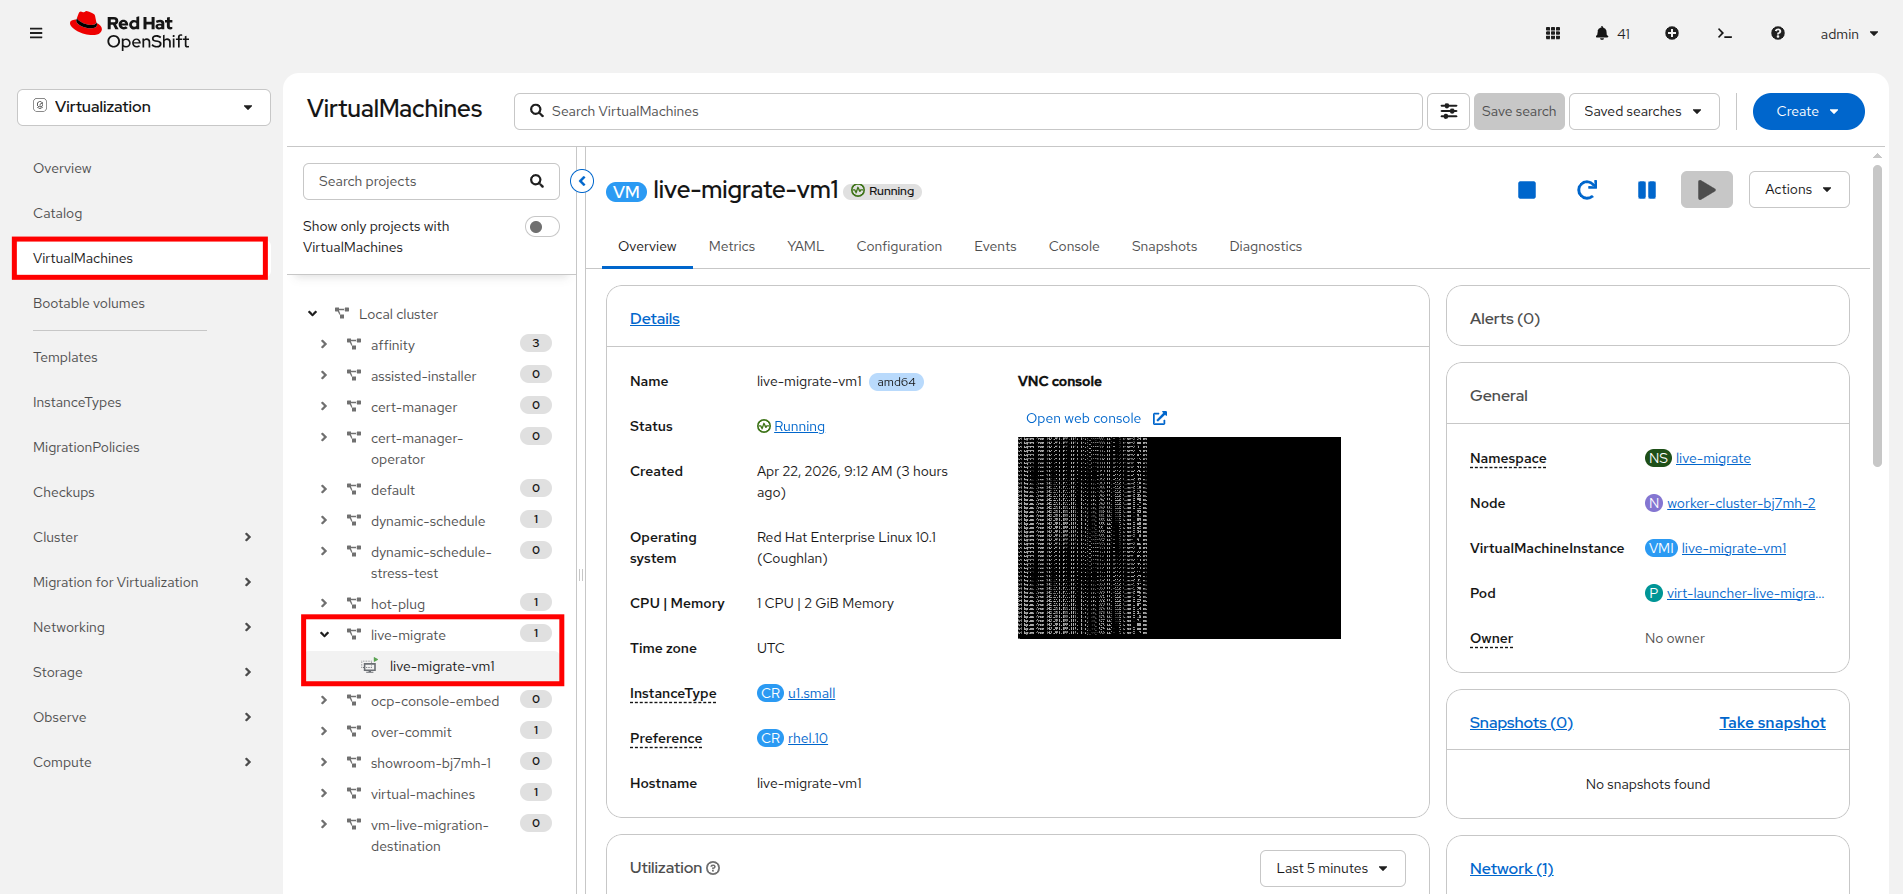 Figure 24. Select live-migrate-vm1
You should still be able to see the pingcommand running in the embedded console. -
Click on the Configuration tab and select Storage. You can see that the name of the Source has changed and the Storage class is now custom-storage-class, which is what you selected for the storage migration.
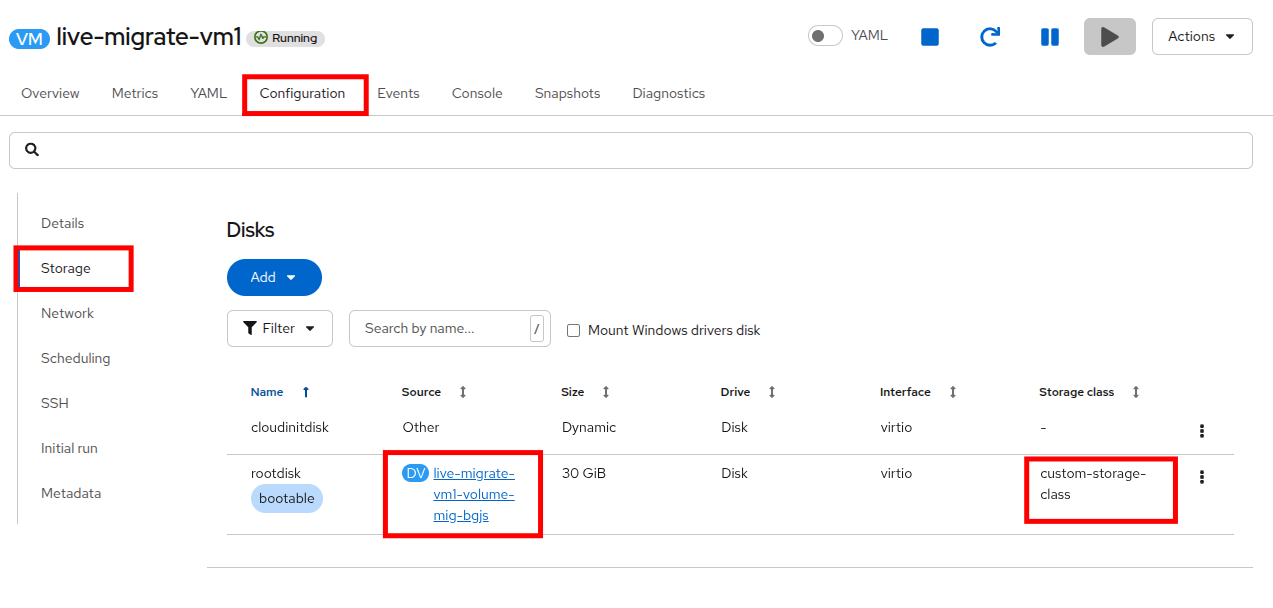 Figure 25. VM has been migrated
 -
Now return to the Console tab, you will see that your ping is still running, stop the command with
Ctrl+cto confirm that it ran continuously throughout the extended live migration process, and that no pings were dropped.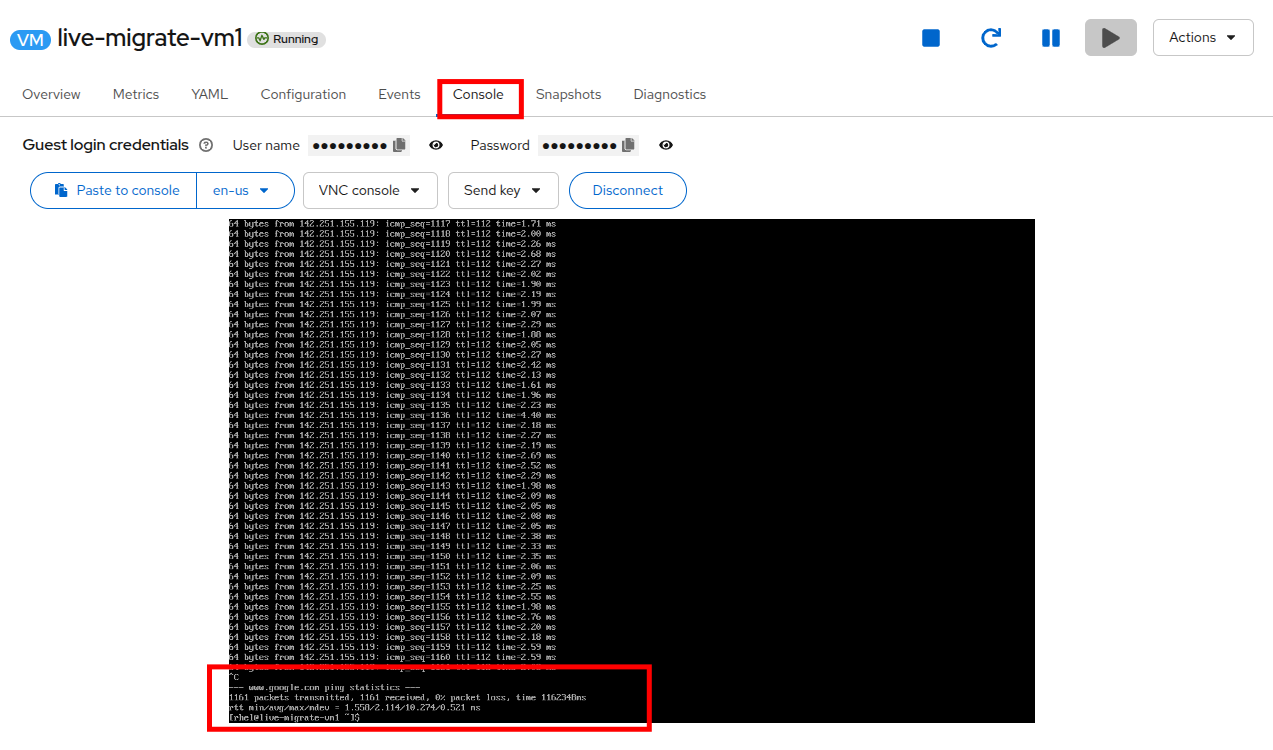 Figure 26. No interruption during storage migration
Congratulations, you have completed this module!
| Prior to moving on to the next section, please shut down the live-migrate-vm1 virtual machine using the Stop button or the Actions menu in order to conserve lab resources. |
Summary
In this module we explored how we are able to migrate virtual machines between nodes in our cluster while they are still running. This live migration feature allows you to let OpenShift automate the selection of the destination node based on free resources, or allows you as the administrator to select the node to where the VM migrates. We also explored the storage live migration feature which migrates a virtual machine’s disk from one storage class to another while the machine continues to operate