Live Migration of Workloads
Migrating workloads between compute nodes and storage types is a crucial feature of any modern hypervisor. OpenShift Virtualization allows the simple and easy process of migrating your virtual machine compute and storage from one place to another.
In this module, you will perform three migration tasks:
Accessing the OpenShift Cluster
{openshift_cluster_console_url}[{openshift_cluster_console_url},window=_blank]
oc login -u {openshift_cluster_admin_username} -p {openshift_cluster_admin_password} --server={openshift_api_server_url}{openshift_api_server_url}[{openshift_api_server_url},window=_blank]
{openshift_cluster_admin_username}{openshift_cluster_admin_password}Compute Migration to a random node
During maintenance or troubleshooting, you might need to migrate a VM to a different node. Live migration is the process of moving a running Virtual Machine Instance (VMI) to a different node without disruption.
In this lab, you will be performing a live migration of Virtual Machine from one compute node to another. To do this, you will access a running VM, determine its current node, and then migrate it to another node.
Requirements
-
The underlying PVC must use ReadWriteMany (RWX) access mode
-
The pod network must not be configured with the bridge binding type.
-
Ports 49152 and 49153 must be available in the VM’s virt-launcher pod; live migration fails if these ports are specified in a masquerade network interface.
-
CPU model must match on the source and destination node - you can not live migrate from Intel to AMD
Instructions
-
Ensure you are logged in to the OpenShift Console as the admin user from your web browser and continue to the next step.
-
From the left side panel, navigate to Virtualization → Virtual Machines. Under All projects, select the live-migrate namespace and click on the Virtual Machine named live-migrate-vm1.
-
The Virtual Machine is currently powered off. Click the blue Play button to Start the Virtual Machine.
 Figure 1. Start the Virtual Machine
 -
The Virtual Machine will schedule, start and move into the Running state as seen below.
 Figure 2. Running Virtual Machine
To see the node the Virtual Machine is currently running on, look at the General box on the right hand side of the VirtualMachine details page for the Node name. In the example, the node is worker-cluster-m2ssq-1.
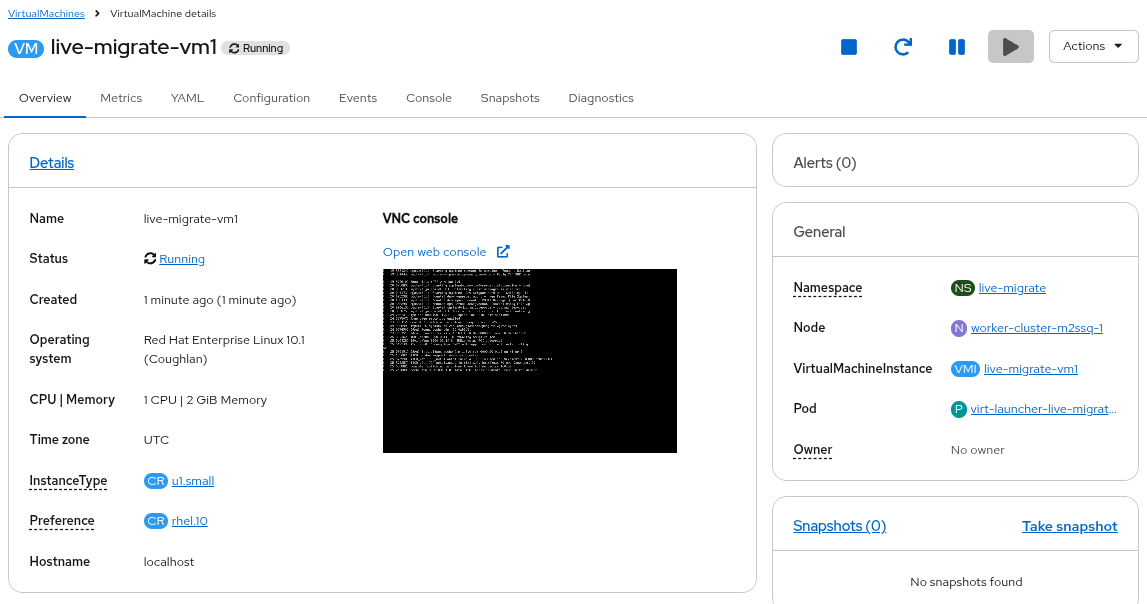 Figure 3. Virtual machine details
 -
To migrate the Virtual Machine to another node, click on the Actions menu, hover over Migration, and then click Compute.
 Figure 4. Initiate migration
 -
Leave the default selection, which is to Automatically migrate to any Node.
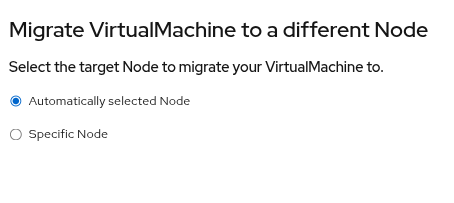 Figure 5. Configure migration
 -
Click Migrate Virtual Machine
-
Wait a few moments and the Virtual Machine status will change from Running to Migrating.
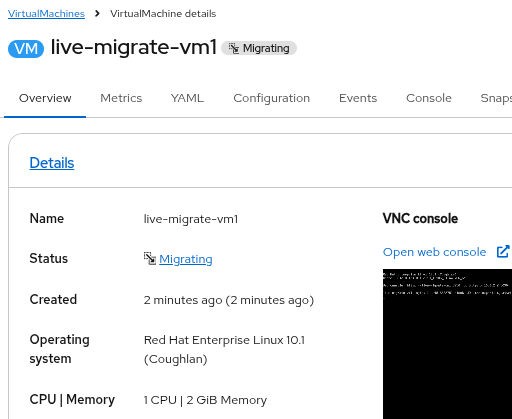 Figure 6. VM is migrating
 -
A few moments after that, the Virtual Machine will return to a Running state.
Looking back at the General box on the right hand side of the VirtualMachine details page, you can see that the node has changed.
 Figure 7. VM is running
 -
The VM has migrated to a new worker node while still running.
Compute Migration to a specific node
During maintenance or troubleshooting, you might need to migrate a Virtual Machine to a specific node in the cluster.
|
The requirements for this type of migration are the same as the previous lesson. |
Instructions
-
Ensure you are logged in to the OpenShift Console as the admin user from your web browser and continue to the next step.
-
From the left side panel, navigate to Virtualization → Virtual Machines.
-
Under All projects, select the live-migrate namespace and click on the Virtual Machine named live-migrate-vm1.
-
The Virtual Machine should already be Running from the last lesson. If it is not, click the blue Play button to Start the Virtual Machine and wait for it to enter the Running state.
Figure 8. Virtual machine details -
To migrate the Virtual Machine to another node, click on the Actions menu, hover over Migration, and then click Compute.
Figure 9. Initiate migration -
You will be presented with the Select the target Node to migrate your VirtualMachine to window.
Figure 10. Configure migration -
Select Specific Node, which will then display the list of available nodes. Select the check the box next to a worker node and click Migrate Virtual Machine
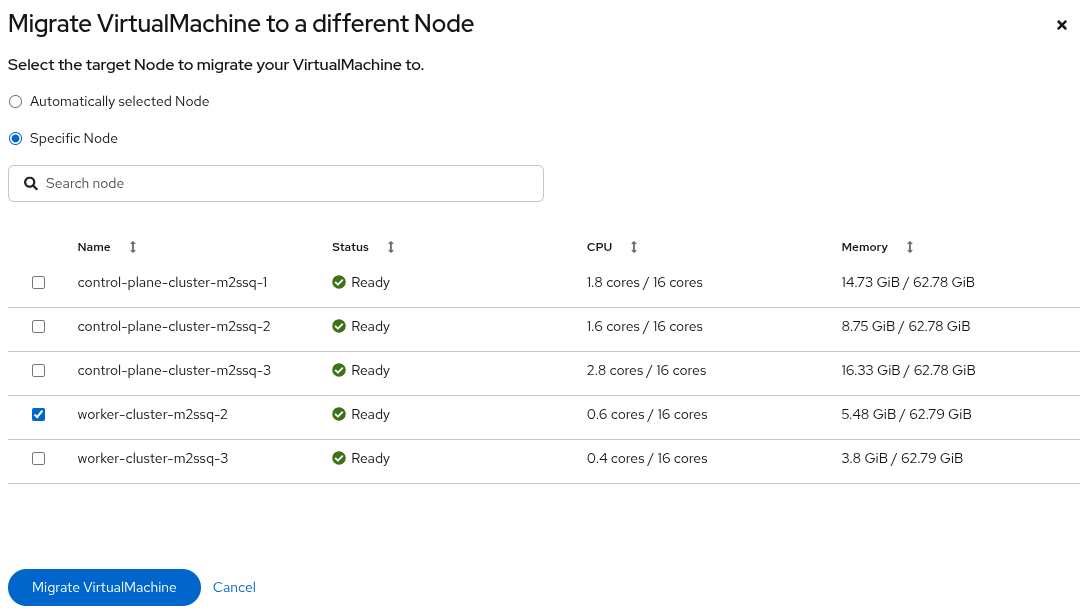 Figure 11. Select worker node
 -
You will see the Virtual Machine status changes from Running to Migrating.
Figure 12. VM is migrating -
A few moments after that, the Virtual Machine status will return to a Running state.
Looking back at the General box on the right hand side of the VirtualMachine details page, you can see that the node has changed, specifically to the one you selected from the list.
Storage Migration
Storage environments often have their own lifecycles and performance profiles, so it is important to be able to move Virtual Machines between storage devices for lifecycle and performance management. OpenShift Virtualization allows the migration of PVCs from one StorageClass to another while the virtual machine is running.
Requirements
-
The Migration Toolkit for Containers (MTC) Operator must be installed for storage class migrations
|
MTC has been deprecated and engineering is working on removing the MTC requirement for storage class migrations. This feature is targeting 4.21 and engineering plans to backport it to 4.20.z. You can follow VM Storage Migration for more information. |
Instructions
-
Ensure you are logged in to the OpenShift Console as the admin user and continue to the next step.
-
From the left side panel, navigate to Virtualization → Virtual Machines.
Under All projects, select the live-migrate namespace and click on the Virtual Machine named live-migrate-vm1.
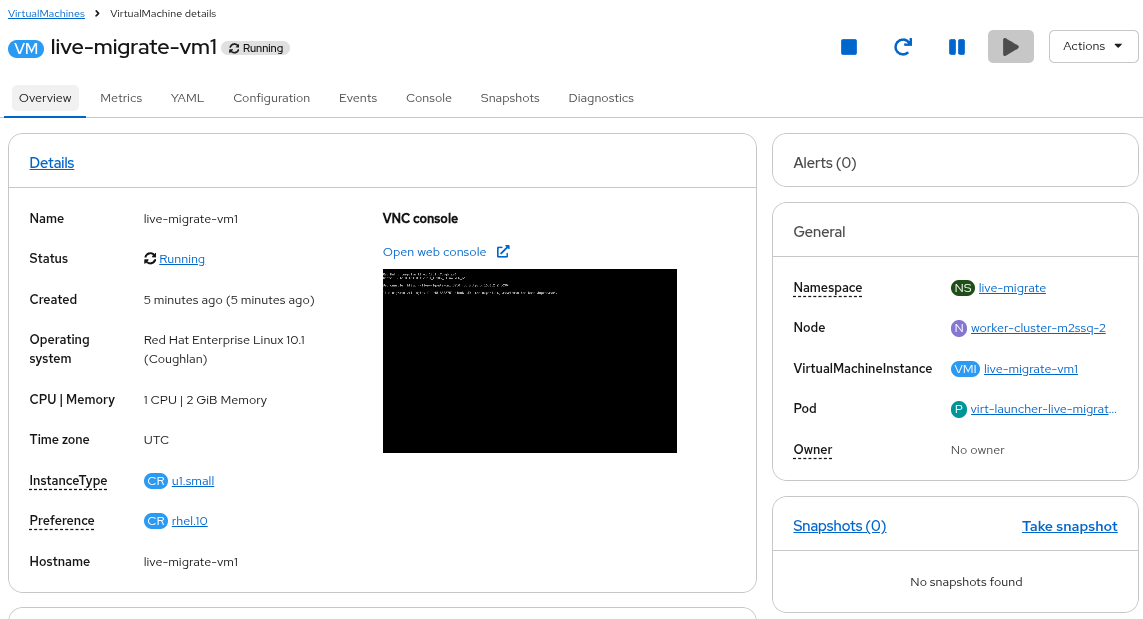 Figure 14. Virtual machine details
 -
Click on the Configuration tab and select Storage. You can see that the Virtual Machine currently has a single 30GB bootable disk that is using the Storage class called ocs-external-storagecluster-ceph-rbd.
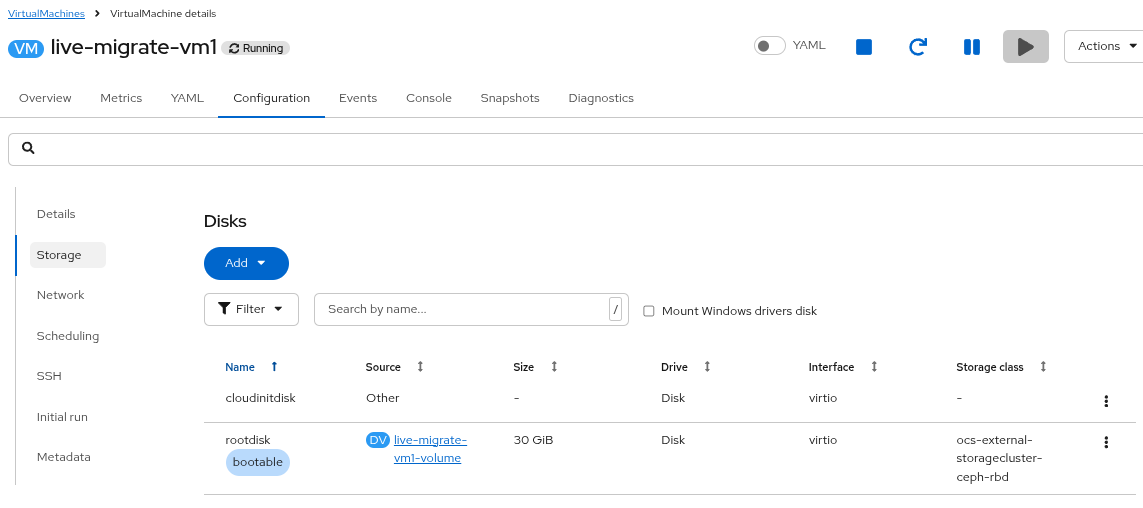 Figure 15. View storage details
 -
Click on the Console tab. If necessary, click the blue Connect button.
Login to the Virtual Machine using Copy to clipboard and Paste to console with the User name and Password credentials from above the console window.
-
Run a command, such as
toporping, that will continue running as we perform the remainder of this exercise.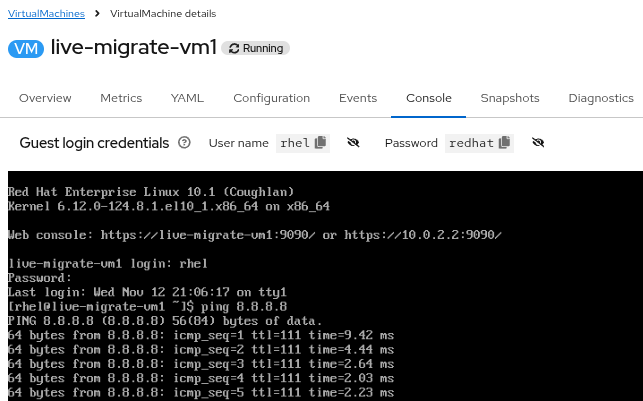 Figure 16. Run command on console
 -
Click on the Actions menu, hover over Migration and click on Storage.
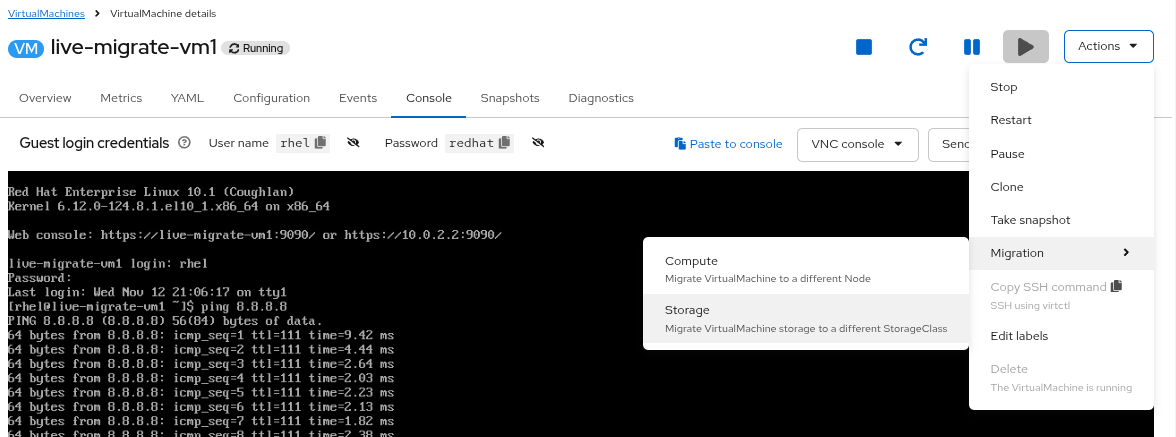 Figure 17. Initiate storage migration
 -
In the Migrate VirtualMachine storage window, review the options, keep the defaults and click Next.
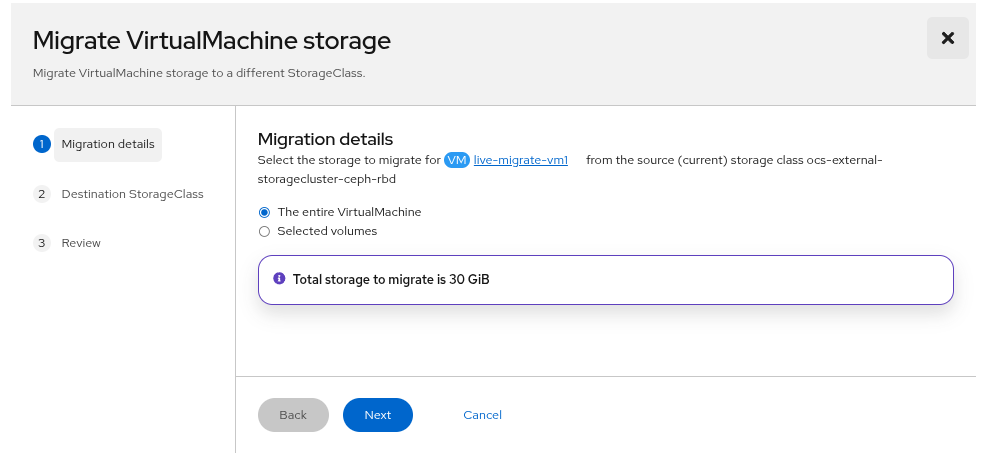 Figure 18. Migration details
 -
For the Destination StorageClass, select the new StorageClass called custom-storage-class and click Next.
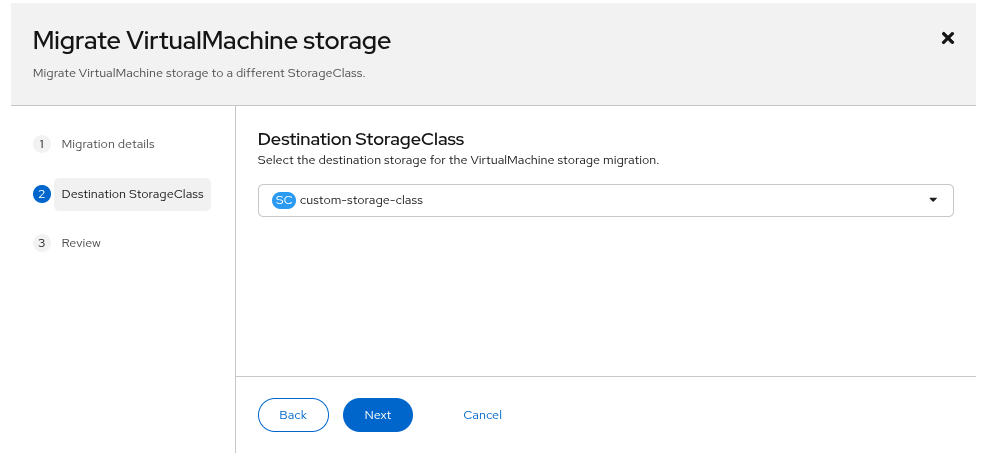 Figure 19. Select destination StorageClass
 -
Review the final storage migration configuration and click Migrate VirtualMachine storage.
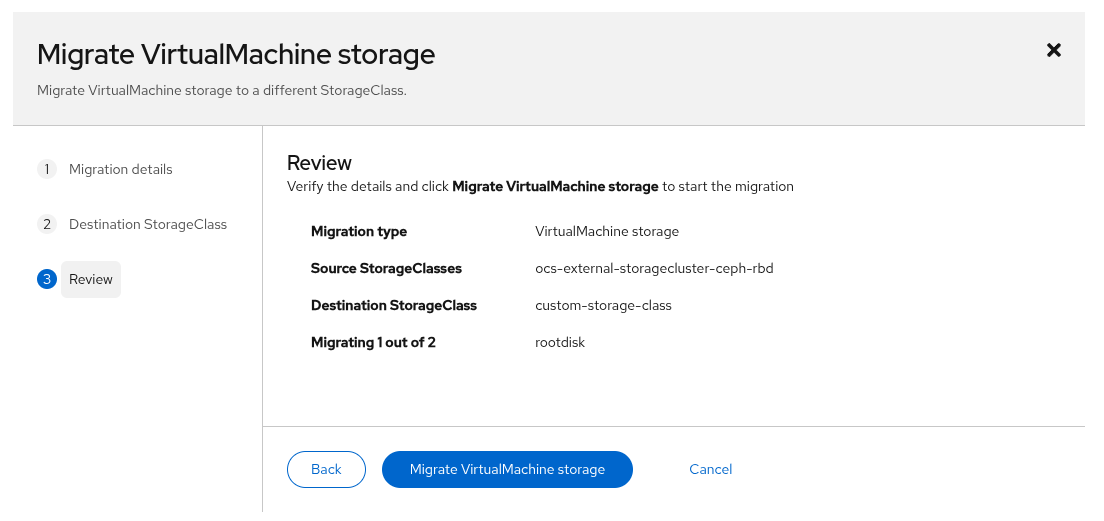 Figure 20. Review migration details
 -
The next window will show you the status of the storage migration. It is safe to close the window by clicking the X in the top corner, or you may click on the link to View storage migrations. Do not click the Stop button.
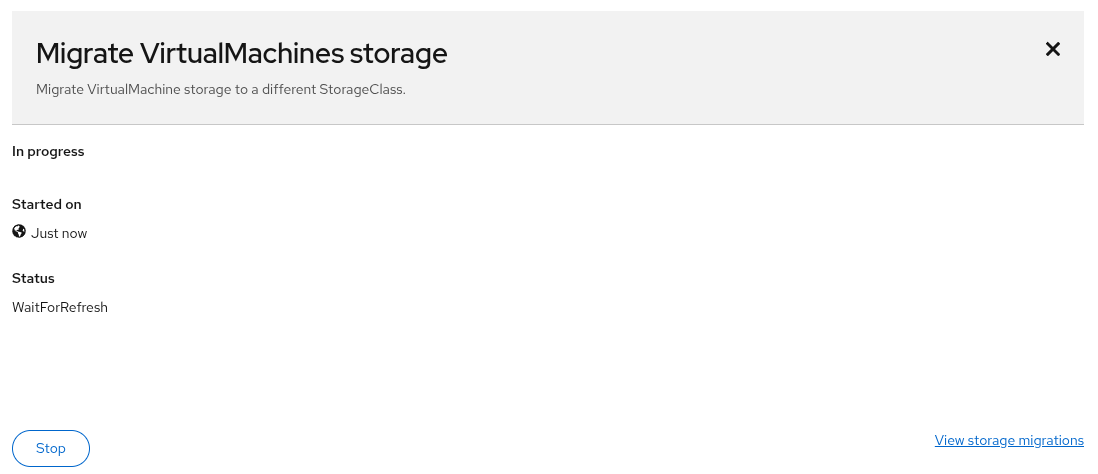 Figure 21. Migration has started
 -
To view the storage migration status, navigate to Migration for Virtualization from the left side panel and click Storage migrations. The migration plan will start in the Pending state, move to Running and then to Completed.
It may take over a minute for the migration to start, and five or more minutes for the migration to complete in the lab environment.
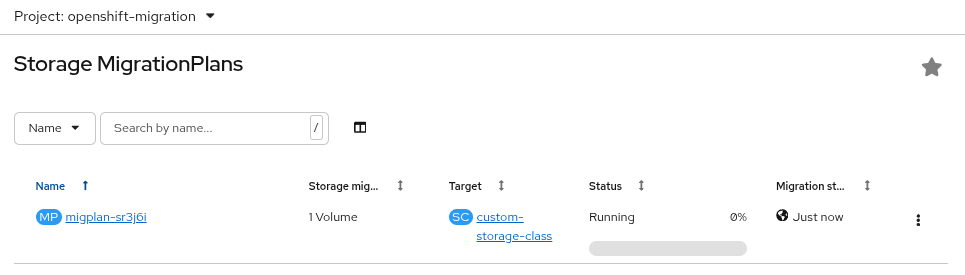 Figure 22. Migration is running
 -
Once the migration is Complete, from the left side panel, navigate back to Virtualization → Virtual Machines.
Under All projects, select the live-migrate namespace and click on the Virtual Machine named live-migrate-vm1.
Click on the Configuration tab and select Storage. You can see that the name of the Source has changed and the Storage class is now custom-storage-class, which is what you selected for the storage migration.
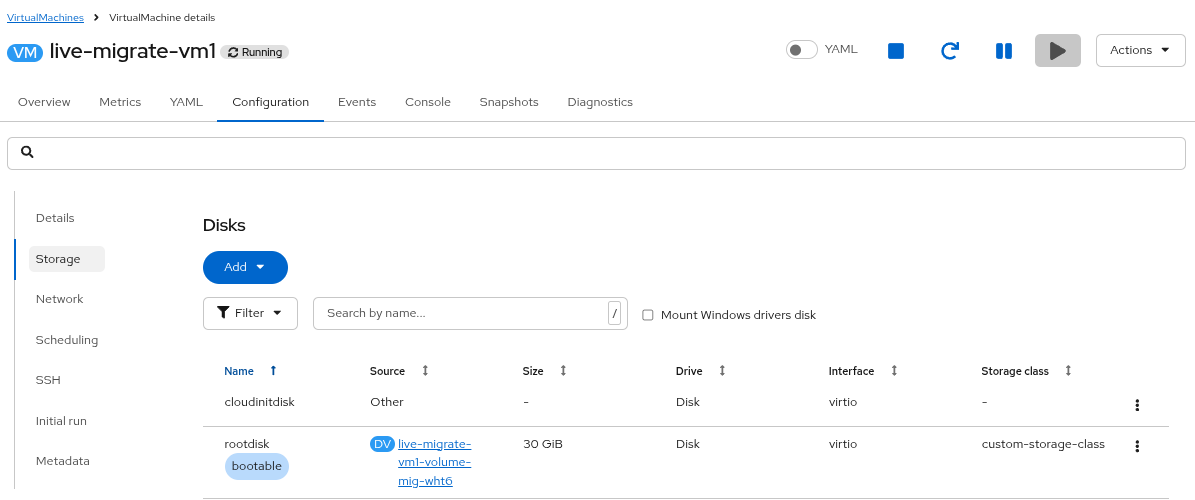 Figure 23. VM has been migrated
 -
Moving back to the Console tab, you will see that your ping is still running and was uninterrupted during the migration.
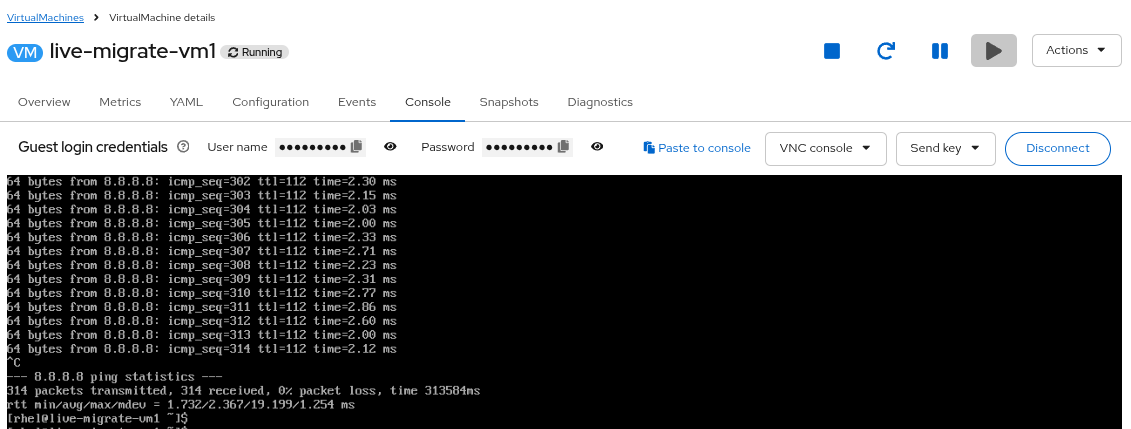 Figure 24. No interruption during storage migration
|
Stop the live-migrate-vm1 VM using virtctl from your Terminal window to ensure you have enough resources for the next labs. VM live-migrate-vm1 was scheduled to stop |