Migrating Existing Virtual Machines
Introduction
This portion of our lab uses the Migration Toolkit for Virtualization (MTV) to import virtual machines from VMware vSphere to OpenShift. The migration toolkit supports two "modes" of import:
-
Cold migration turns off the source virtual machine before starting the migration. This is the default migration type.
-
Warm migration copies data while the source virtual machine continues to run. Once the bulk of data has been migrated, the VM is shutdown and the final data is copied to the destination. The new VM can then be started, resulting in a much shorter period of downtime for the VM-hosted application.
| The migration toolkit has already been deployed to your cluster using the Operator available in OperatorHub. |
Documentation for how to install and configure the Operator can be found here.
If you would like to learn more about how to configure the Migration Toolkit for Virtualization for your own needs, please see the documentation at the following links for:
-
Explore the VMware vSphere environment
-
Review the configuration for the Migration Toolkit for Virtualization (MTV)
-
Create a Migration Plan
-
Migrate VMs into OpenShift Virtualization
-
Explore Advanced Options with Embedded Interactive Demos
Prerequisites for Migrations
The following prerequisites apply to all migrations:
-
ISO images and CD-ROM disks must be unmounted.
-
Each NIC contains either an IPv4 address or an IPv6 address, although a NIC may use both.
-
The VM operating system must be certified and supported for use as a guest operating system for OpenShift Virtualization.
-
VM names must contain only lowercase letters (a-z), numbers (0-9), or hyphens (-), up to a maximum of 253 characters. The first and last characters must be alphanumeric. The name must not contain uppercase letters, spaces, periods (.), or special characters.
-
VM names must not duplicate the name of an existing VM in the OpenShift Virtualization environment.
| The Migration Toolkit for Virtualization will automatically assign a new name to a VM that does not comply with the rules, as doing so allows the migration to proceed without issue. |
Migrating Virtual Machines from VMware
A three-tier application has been deployed on VMware for you to migrate to OpenShift.
The application consists of the following four virtual machines:
-
One HAproxy system that redirects traffic to the web servers.
-
One Linux system running a MariaDB database.
-
Two Microsoft Windows servers with IIS hosting a PHP application connecting to the database.
For this lab, you will be tasked with migrating three of the four virtual machines using cold migration.
| You will not need to migrate the HAproxy (load balancer) VM because OpenShift handles network traffic and load balancing natively for VMs connected to the SDN using a Service. |
Review the VMware environment
To help understand the process of mapping resources, such as datastores and port groups, from vSphere into OpenShift’s equivalents, storage classes and network attachment definitions, let’s begin by reviewing the source environment for the migrations.
-
Navigate to VMware vCenter: vCenter Console
-
Click on Launch vSphere Client
-
Login with the following credentials:
-
User: {vcenter_full_user}
-
Password: {vcenter_password}
-
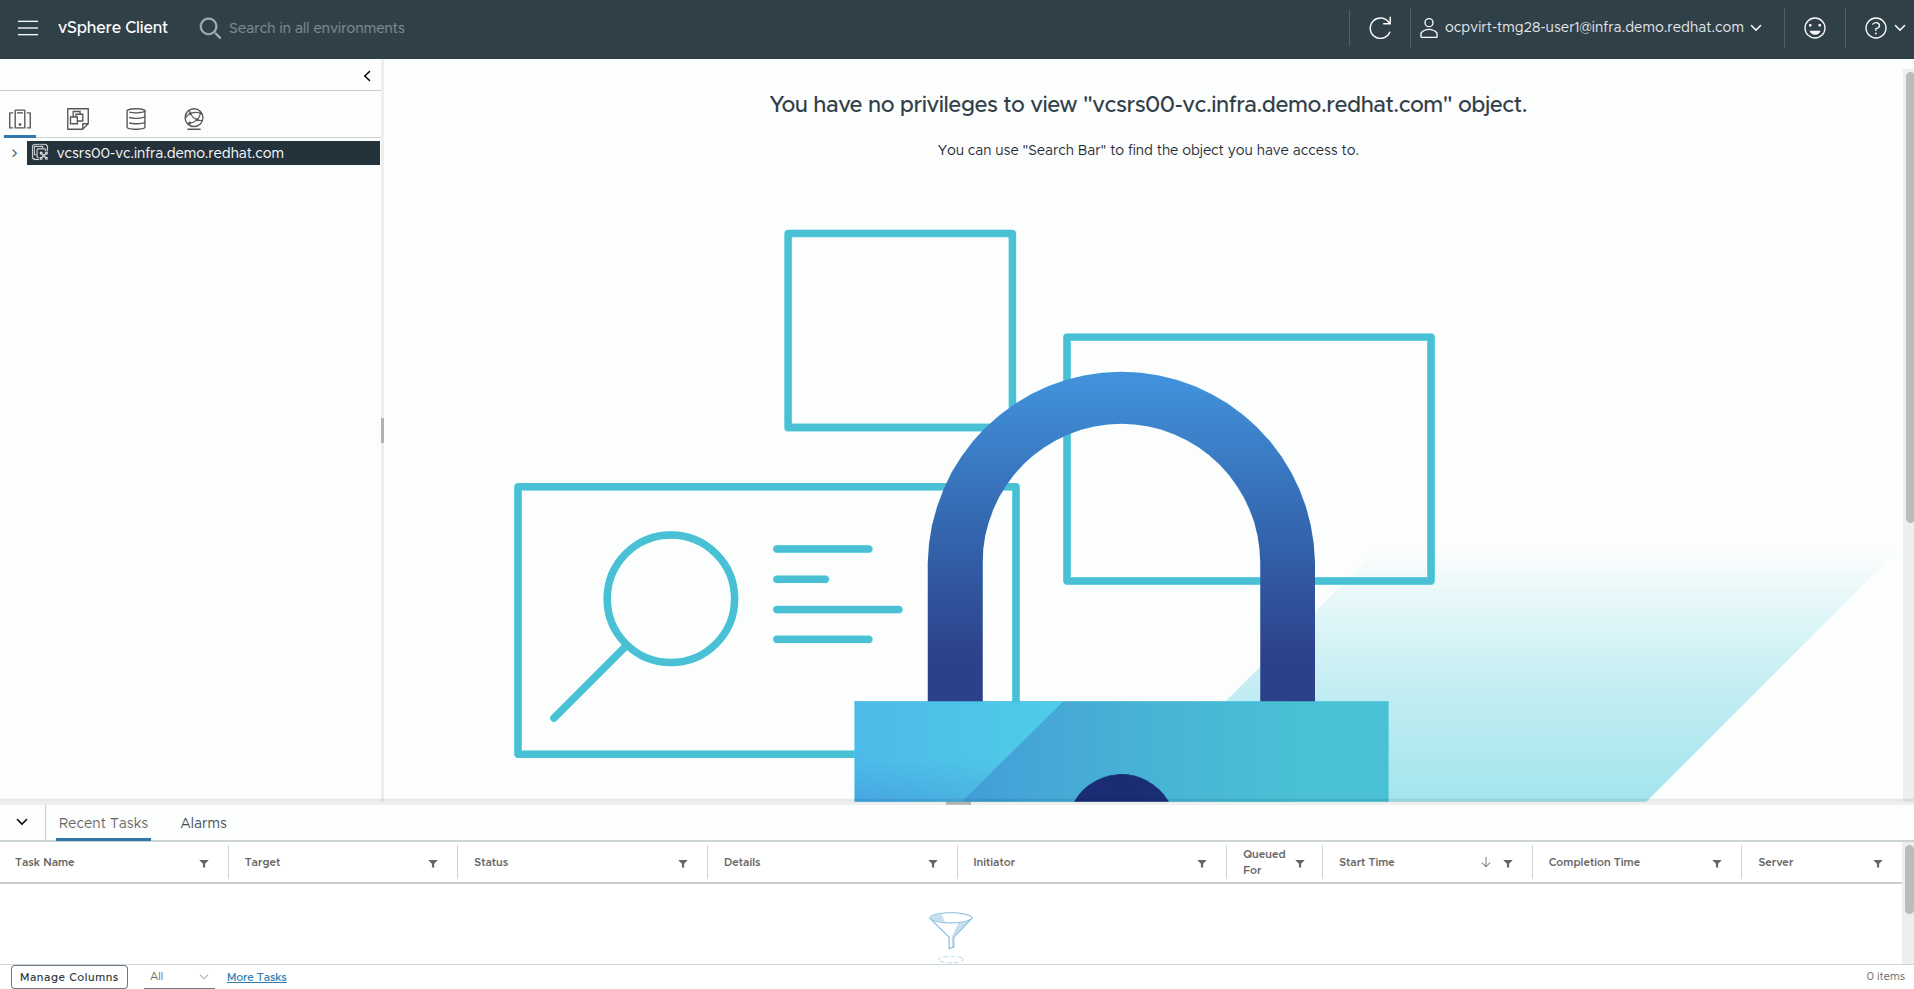
-
By default you’ll land in the Inventory view at the top of the navigation tree with a message that you have no privileges to view this object. This is expected with the current user account.
-
Click the Workloads icon and expand the navigation tree until you see the folder named Roadshow, and the 4 VMs under it.
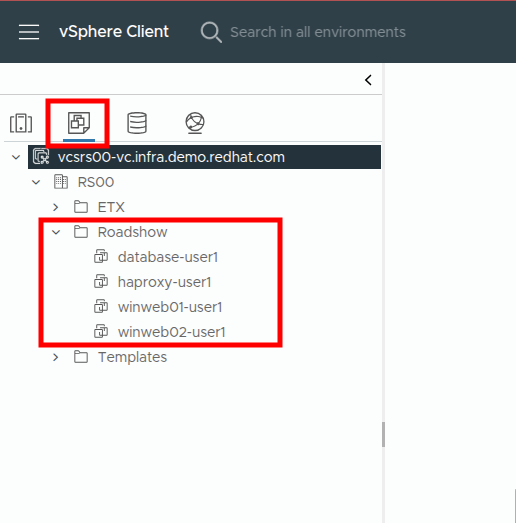
The exact folder list in your lab environment may differ from the images here, but as long as you are able to find the Roadshow folder and your VMs to work with, you may proceed with the lab. -
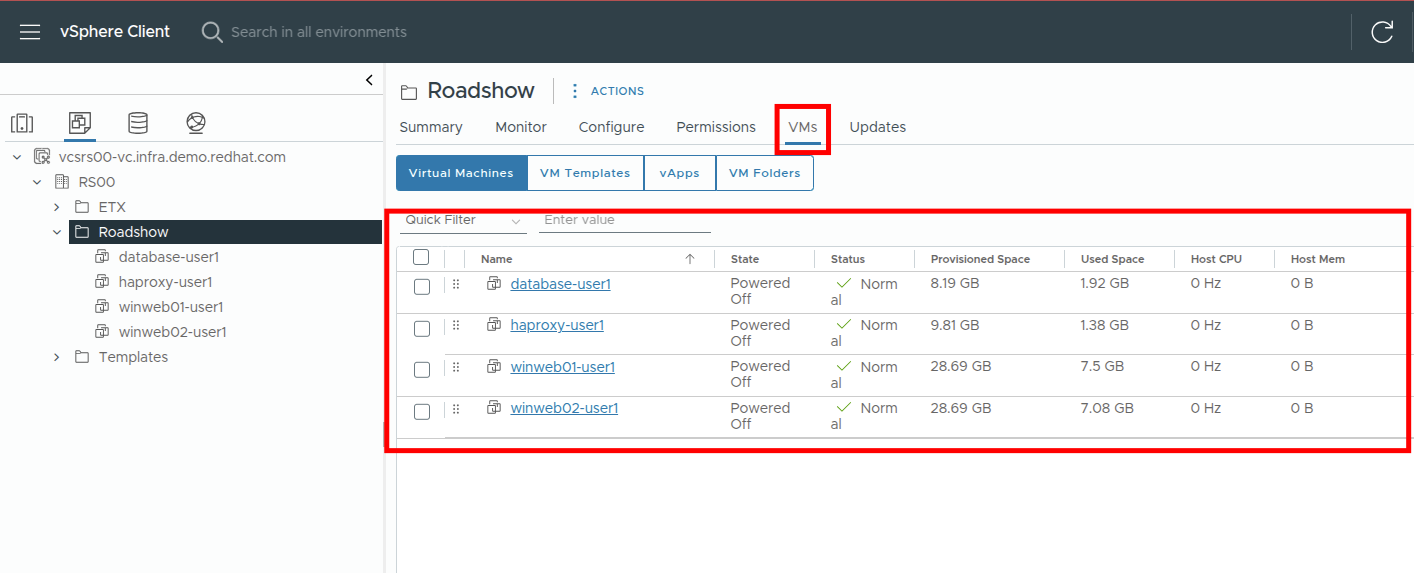
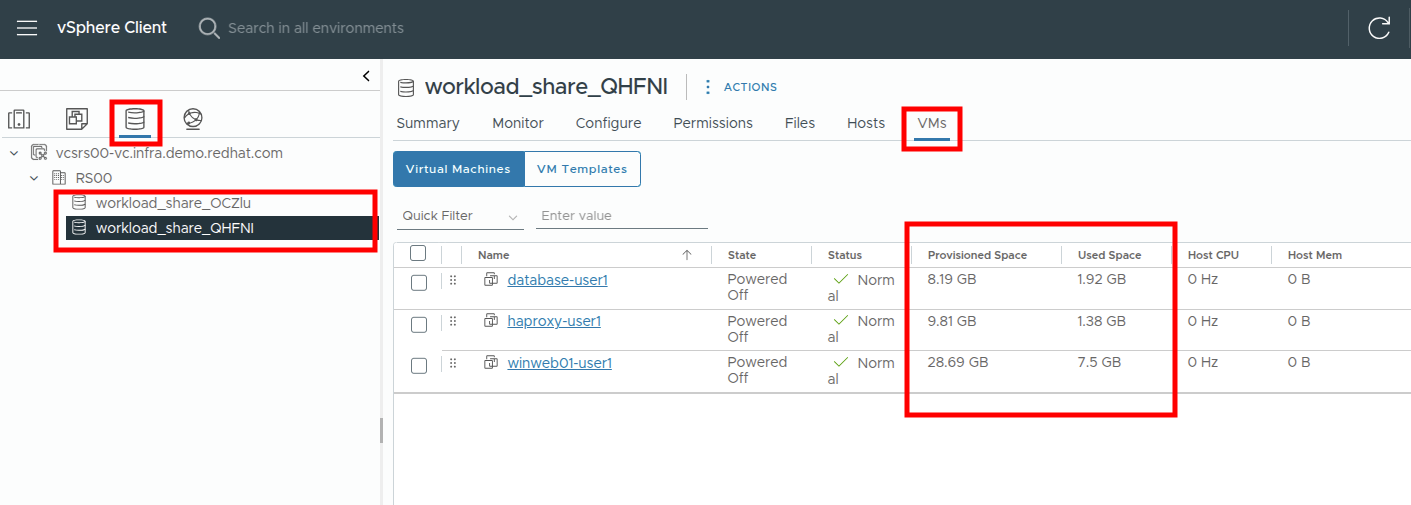
Click on the VMs icon at the top of the screen to see the details of each virtual machine in the folder.
-
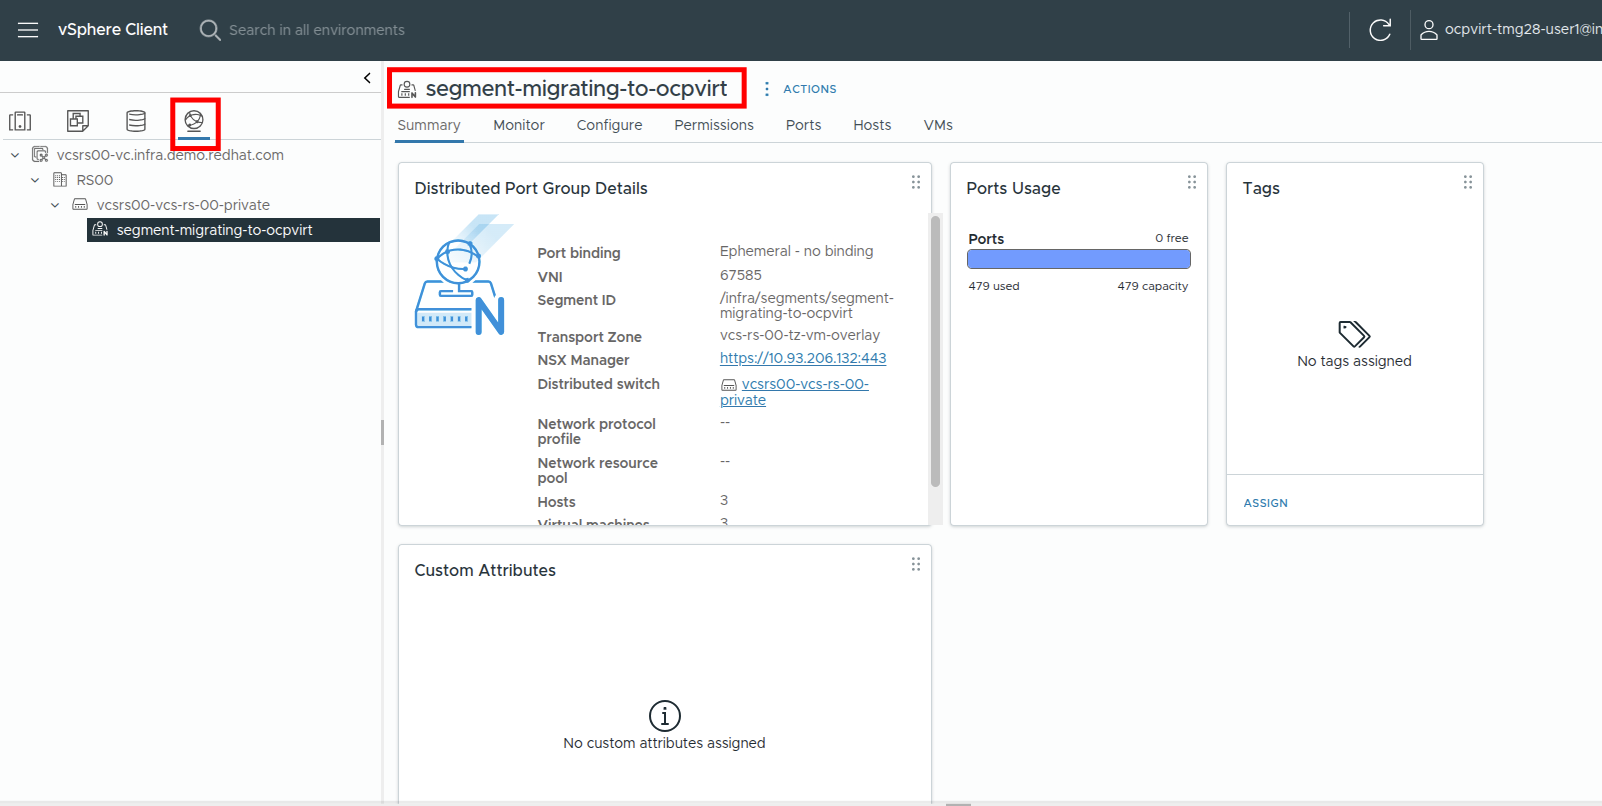
Change to the Networks view, then expand the tree to view the port group used by the virtual machines. Note that the name is segment-migrating-to-ocpvirt.
-
Finally, review the datastores in use by browsing to the Datastores view. Expand the tree to see the datastores that are attached to the RS0x datacenter, and optionally browse to the VMs sub-tab to view the capacity used by each virtual machine.
Review the VMware provider to the migration toolkit
Now that we have completed our review of VMware vSphere and the virtual machines that reside there, you may close the window and return to your OpenShift web console.
| The Migration Toolkit for Virtualization (MTV) is officially a separate tool from OpenShift Virtualization, and cannot be accessed from the Virtualization perspective. |
-
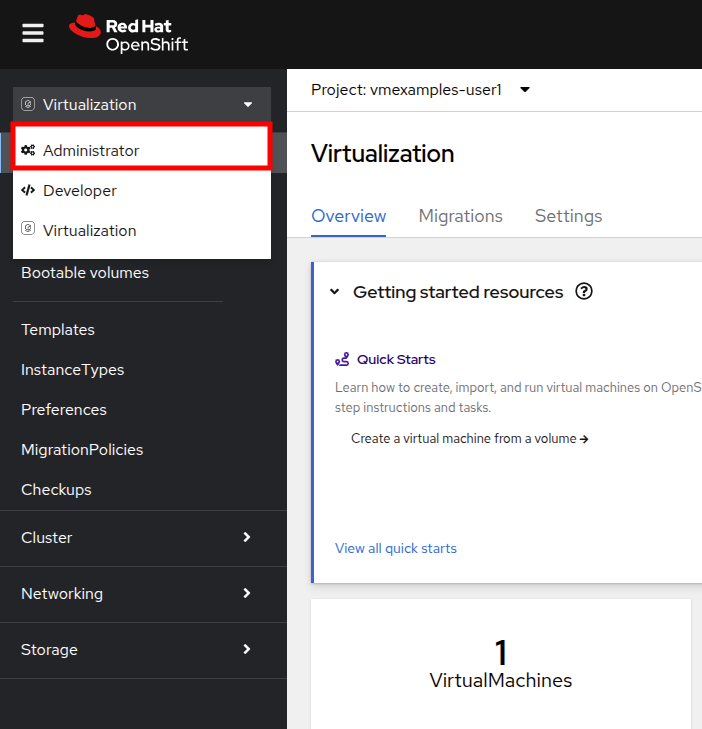
In the left-side menu, click on Virtualization and from the dropdown select Administrator.
-
Navigate in the left menu to Migration → Providers for virtualization
-
Select project mtv-{user} at the top of the page.

| MTV 2.4 and later are project/namespace aware and do not require administrator privileges. You can delegate VM imports to application teams and VM users so that they can self-serve and migrate at their own pace! |
By default, there is a provider called host which represents OpenShift Virtualization as a target platform.
Additionally, this lab has already been configured with an additional provider named vmware which you can see has an endpoint address of the VMware vSphere cluster we were just exploring.
Create a Migration Plan
Now that we have reviewed our environment, and have our providers created, it is time for us to create a Migration Plan. This plan selects which VMs to migrate from VMware vSphere to Red Hat OpenShift Virtualization and specifics about how to execute the migration.
-
Navigate in the left menu to Migration → Plans for virtualization and press Create Plan.

-
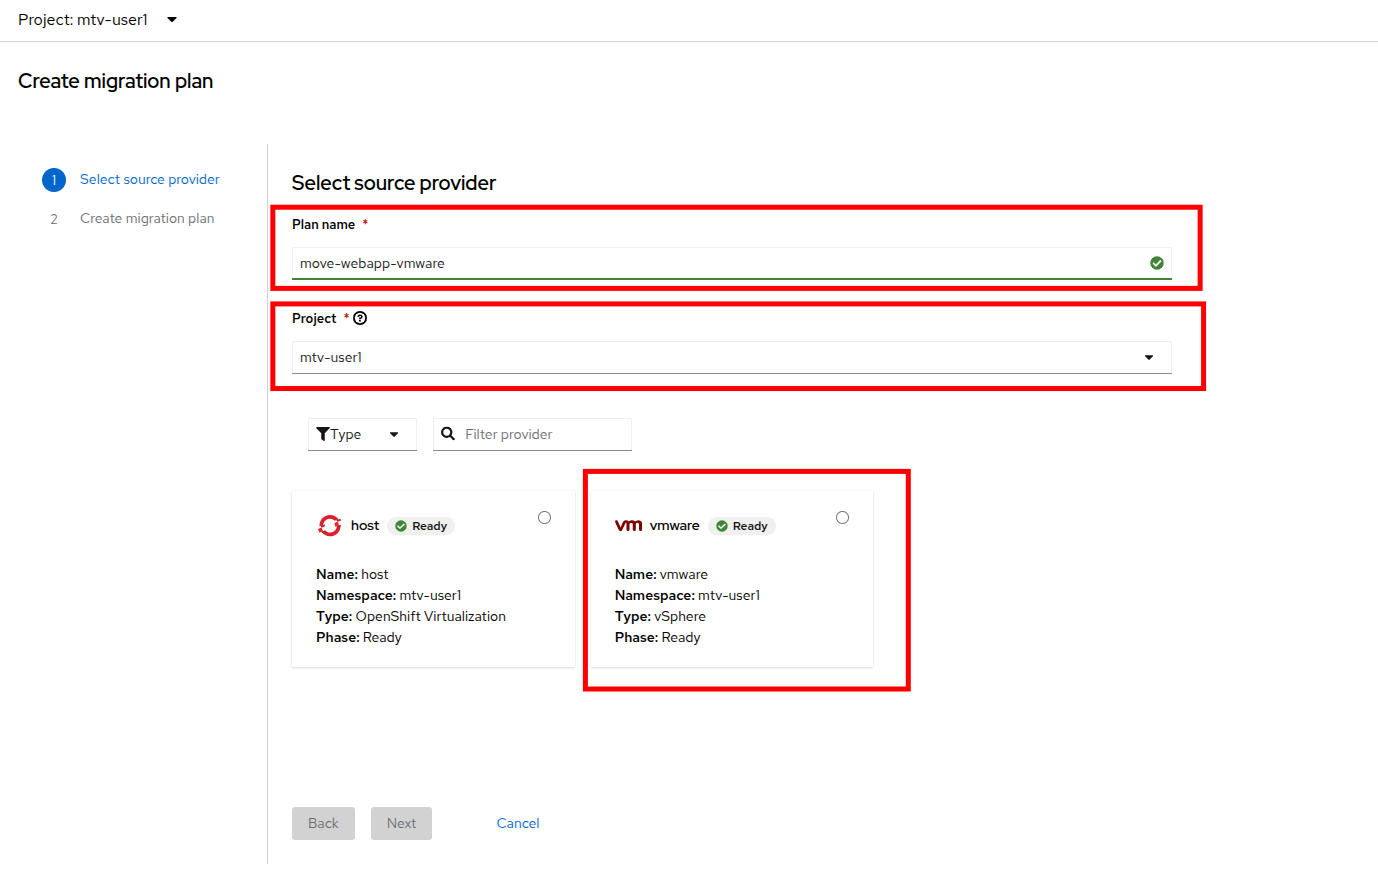
First you will be asked to create a Plan name, fill in the field with the value: move-webapp-vmware. Ensure that the Project selected for the migration is mtv-{user} and select the source provider that you intend to migrate from by clicking on the VMware tile.
-
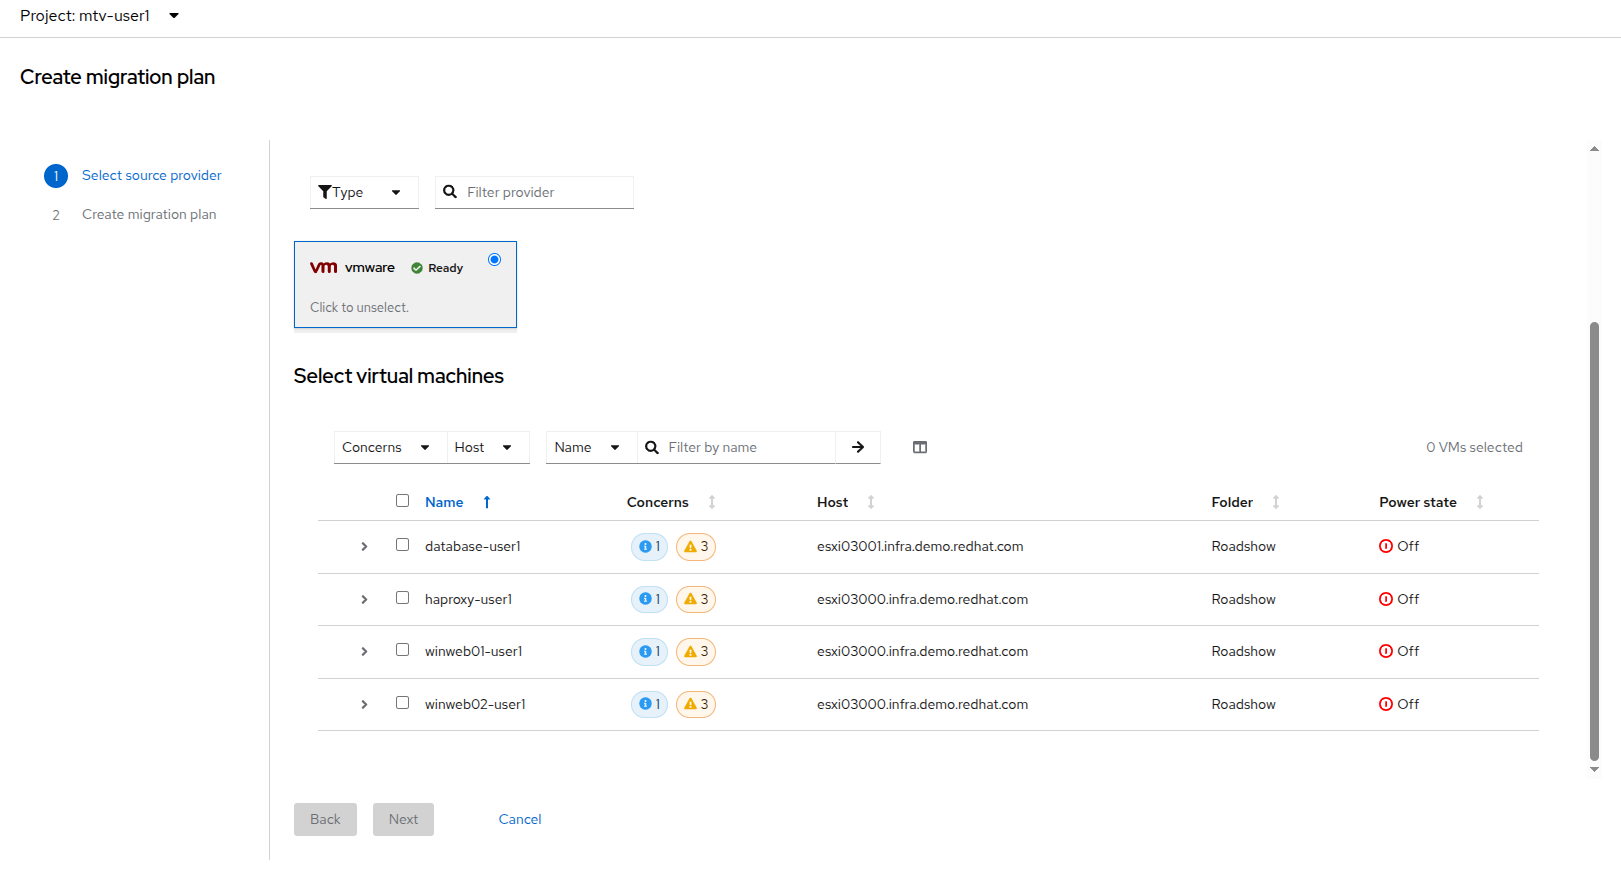
The page will update, you will see the a list of the virtual machines in the environment that your user account {user} has access to.
-
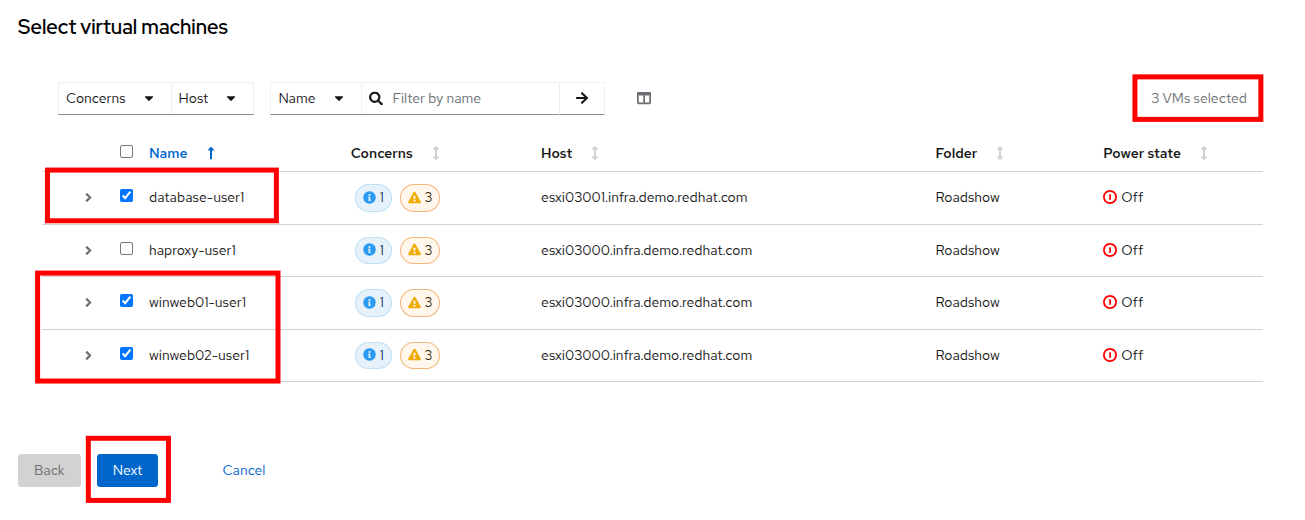
In the Select virtual machines section, click to select the three VMs you would like to move:
-
database-{user}
-
winweb01-{user}
-
winweb02-{user}
-
-
Click Next.
-
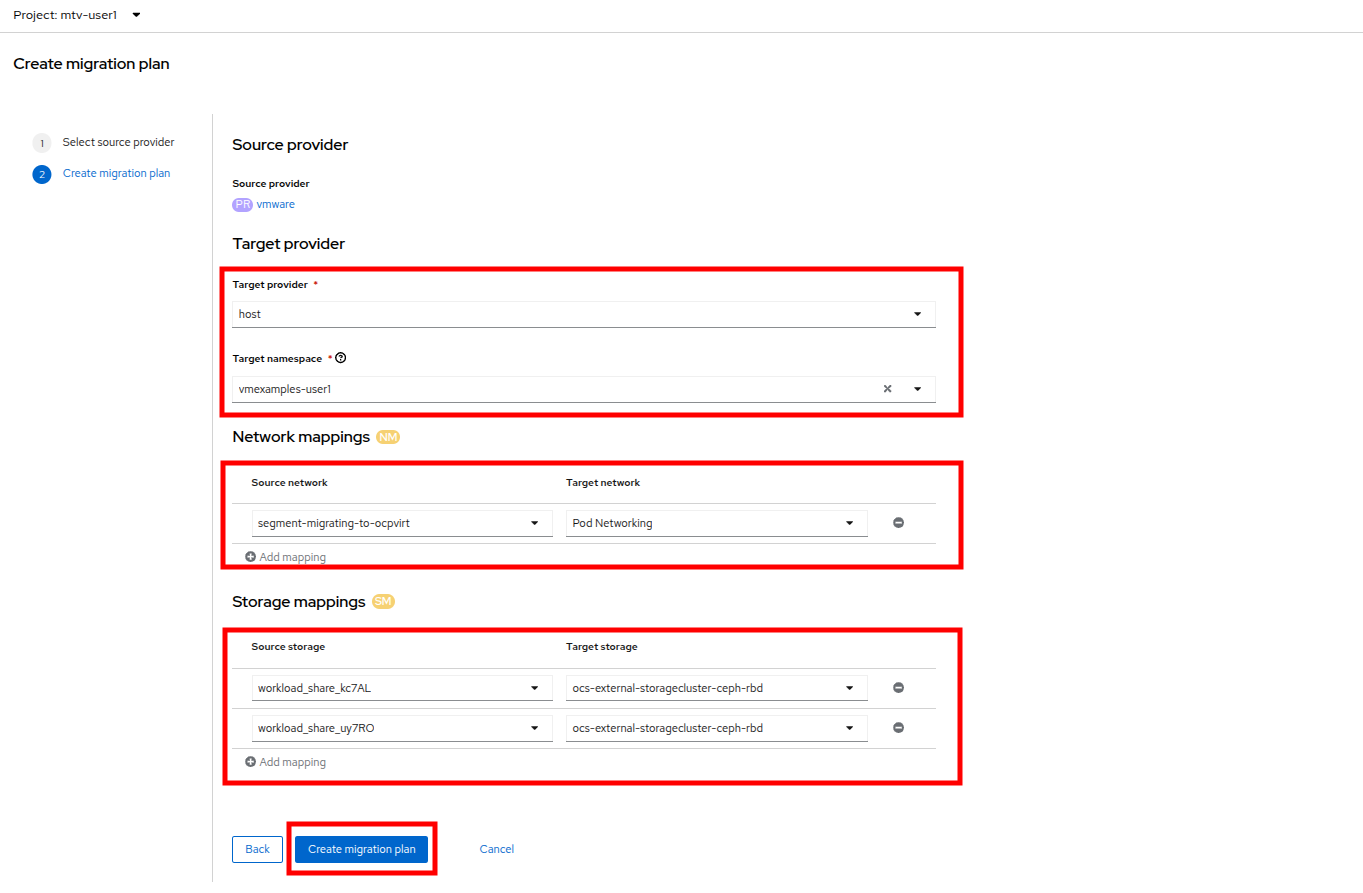
On the next screen you will be tasked with providing details for your migration plan. Several details will already be filled in for you, but you will have to make a few minor modifications to ensure that the VMs land in the correct namespace, and that the networks and storage options map correctly.
Please fill in your migration plan with the following values:
-
Target provider: host
-
Target namespace: vmexamples-{user}
-
Network map: Pod Networking
-
Storage map: ocs-external-storagecluster-ceph-rbd
In some cases both the Network and Storage maps will automatically detect the Networks and Datastores that the discovered virtual machines currently make use of on the source provider. If not, you will need to create those mappings and ensure that they align withe the values above on the OpenShift side.
-
-
Click the Create migration plan button.
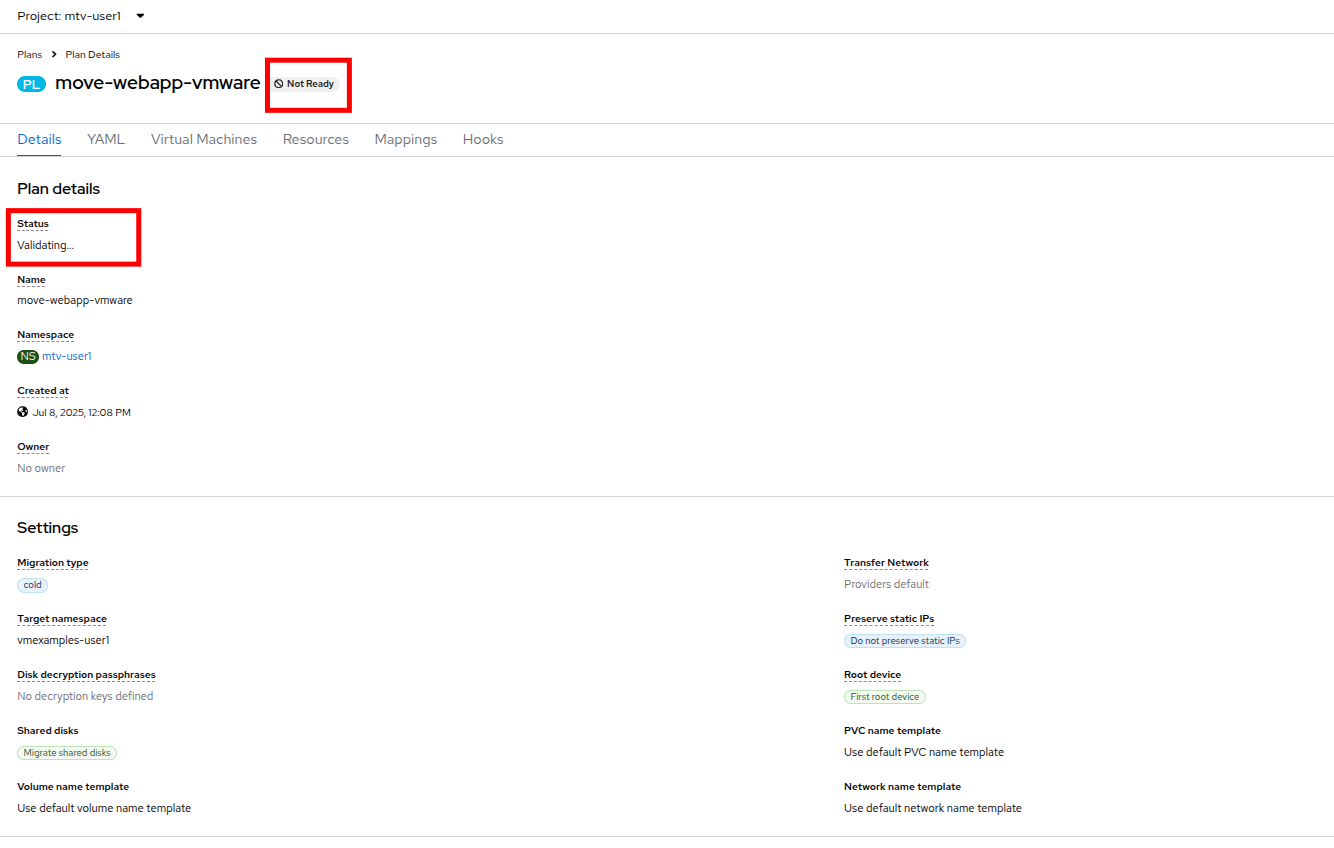
-
You will be taken to a new screen where you will see that the plan for migration is currently being validated, and is in a Not Ready state.
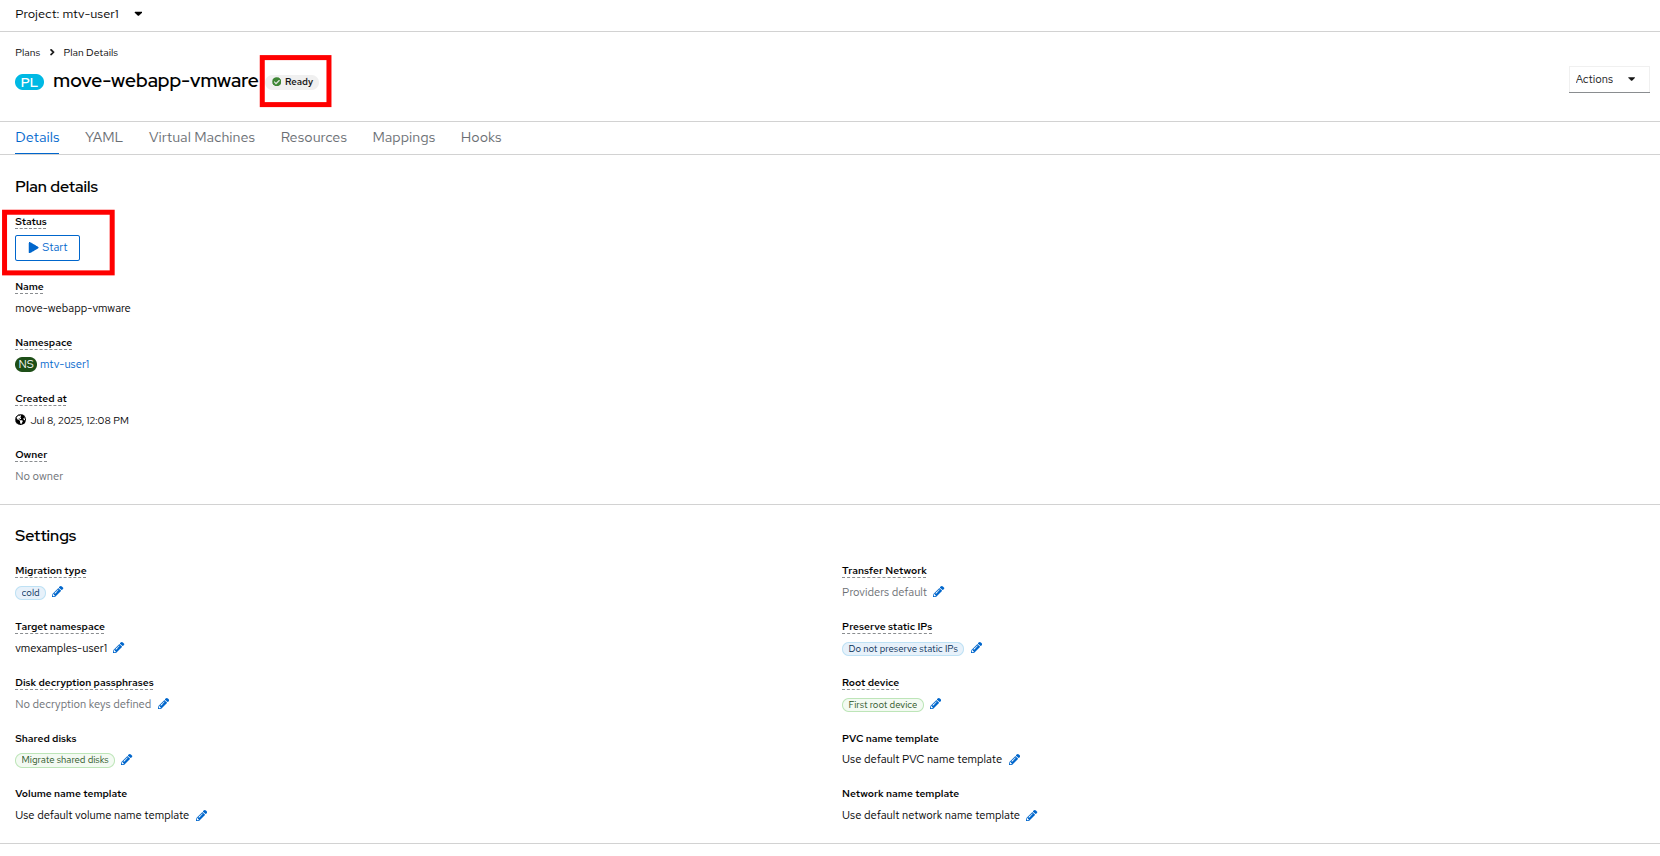
-
After a few moments the plan will become Ready, click on the blue "Start" button to begin the migration process.
-
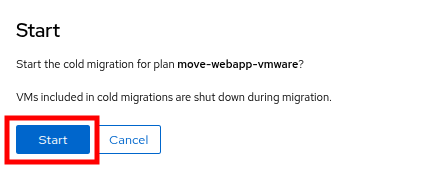
You will be presented with a confirmation box to begin the migration, click on the Start button.
-
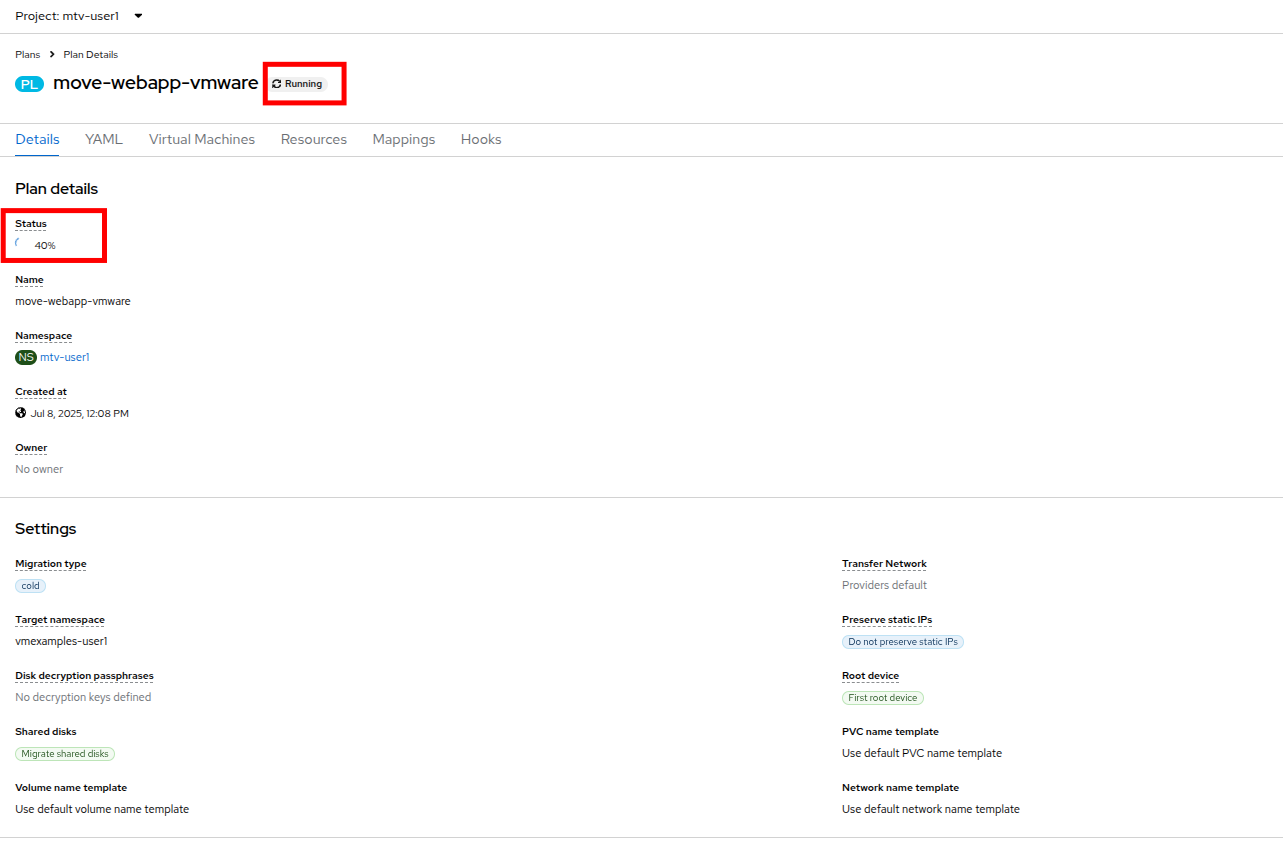
The plan will switch to Running and a spinning wheel will appear under the Status field and update the progress of the migration with a percentage value.
-
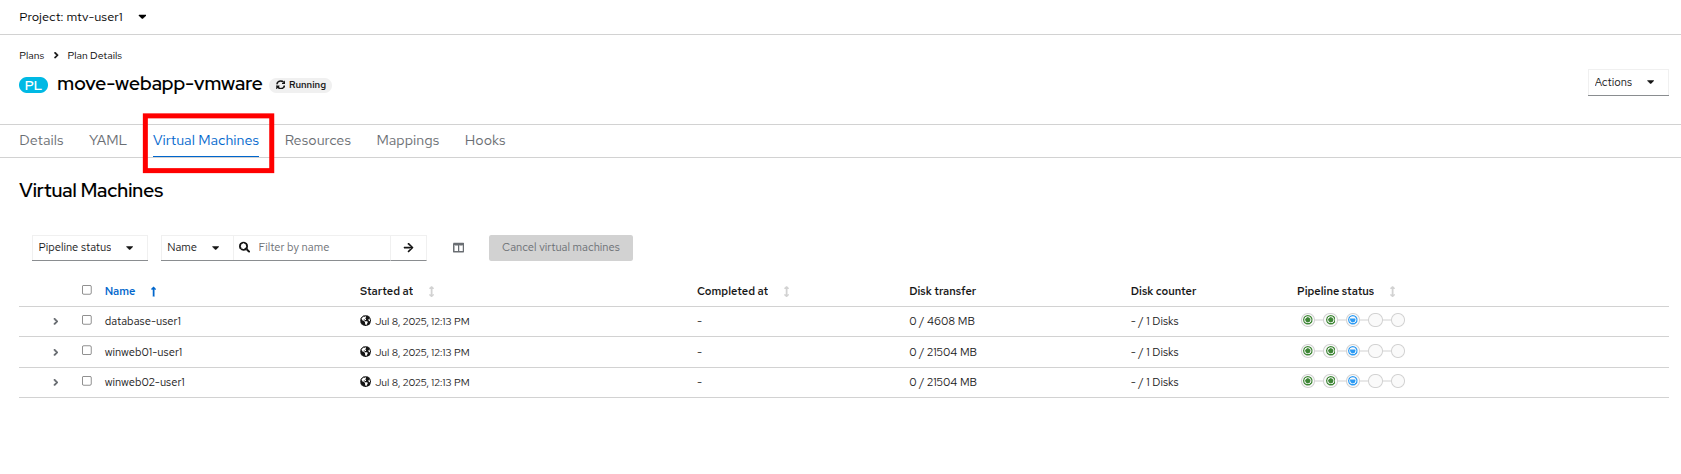
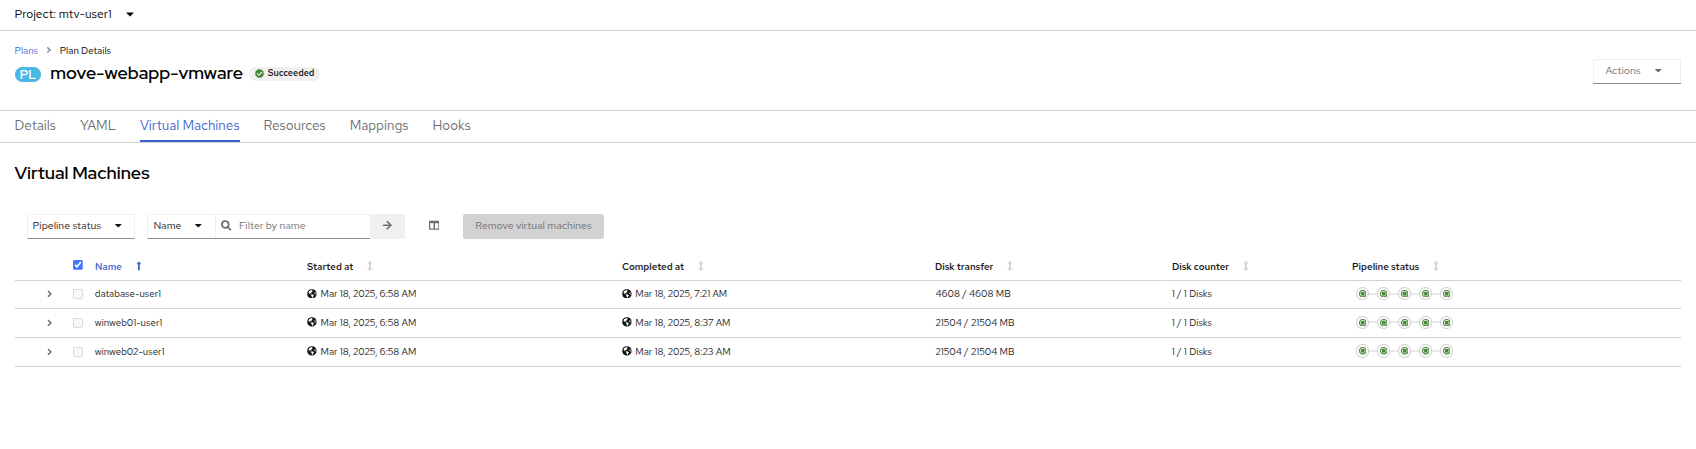
Click on the Virtual Machines tab and you will be presented with a page with more details about the migration plan progress.
-
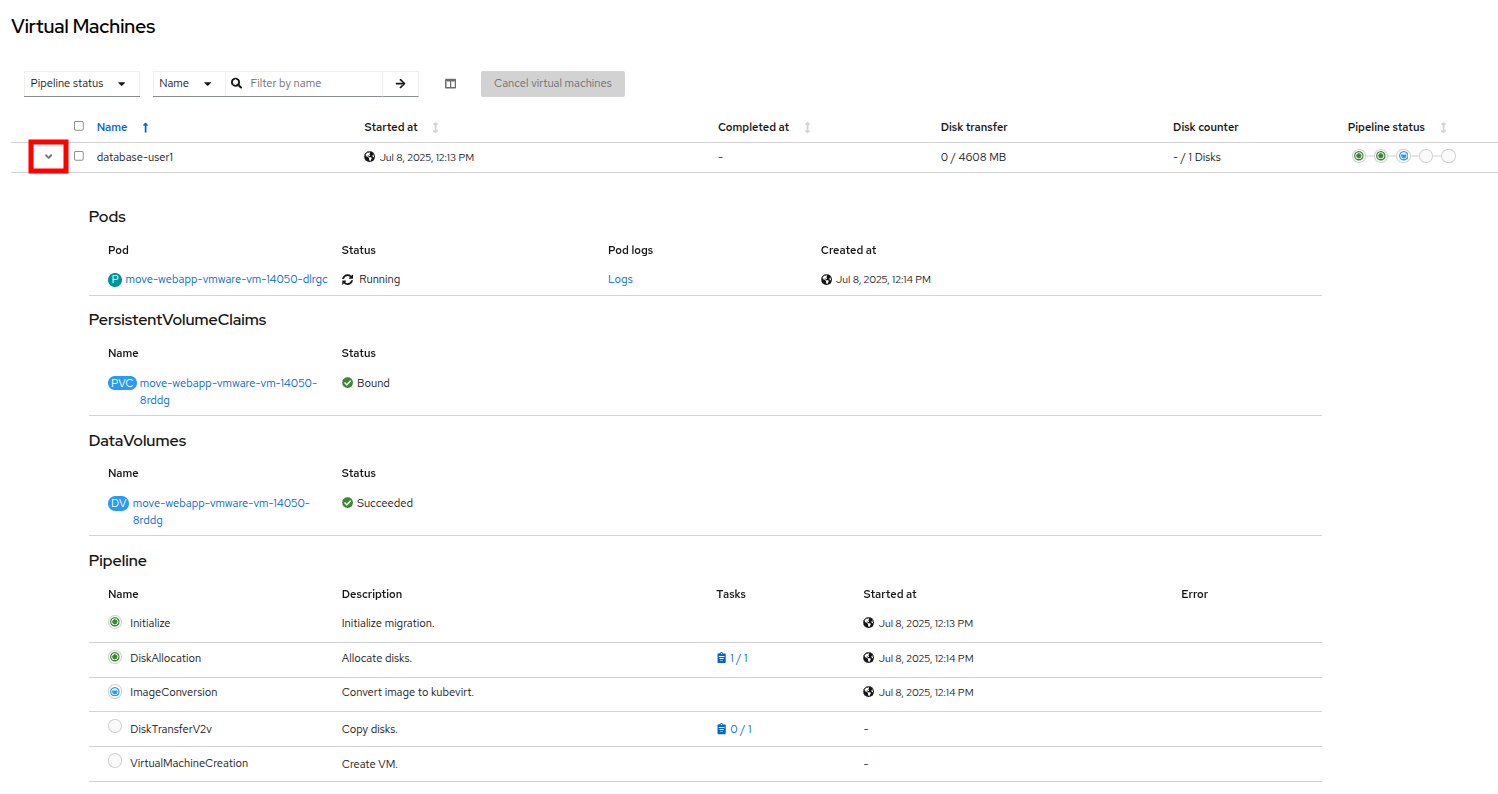
You can click the drop-down arrow next to the name of each VM being migrated to get additional details about the stages of the migration process. Click on the arrow next to database-{user} to expand it’s details.
It is suggested to have a 10gbps network for virtual machine migrations which we do not have in our simulated lab environment. This, combined with having many participants performing the same task in parallel can cause this task to perform much slower than in a real environment. Please be patient with this process as it completes. You may continue with other sections in the roadshow as the migrations complete in the background. We will return to work with these machines in a later module.
The migration of these machines can take quite a bit of time depending on the number of users currently participating in the lab. Please feel free to move along to the next section of interactive videos, or to the next module while awaiting the completion of the migration plan. We will work with these migrated VMs in a later module.
Interactive Demos of Advanced Features
While we are waiting on the cold migration for our lab to complete so that we can work with those virtual machines, we thought we would take this opportunity to introduce some additional advanced migration options that can be performed by the Migration Toolkit for Virtualization. In this section we plan to cover automated reconfiguraiton of virtual machines during the migration process, as well as how to perform a warm migration which reduces downtime during a migration operation.
Please take this time to review the following sections and enjoy the interactive demo videos.
Automated Config Hooks
Automated configuration hooks are a really awesome and powerful feature built into the Migration Toolkit for Virtualization.
Configuration hooks are included as a feature in the Migration Toolkit for Virtualization. They can be set up as either a pre- or post-configuration hook to modify the properties of a virtual machine either before or after the migration process completed. They leverage the power of Ansible automation to performed their desired actions through YAML formatted playbooks, but they do not require a separate subscription for Ansible Automation Platform. Instead, they run by executing inside of a separate ansible-runner pod with runs the playbook provided against the target virtual machines during the migration process.
These automated tasks can be invaluable to ensuring that virtual machines that worked on a source hypervisor, work as expected on OpenShift Virtualization.
You can perform simple tasks like editing files on the guest, or more complex tasks like updating the configuration of hardware devices.
Check out the interactive demo below to see examples of both examples in action.
-
We will discover a virtual machine on a remote ESXi host and configure a cold migration plan.
-
We will use a pre-migration hook to reconfigure the network adapters from VMware native format to VirtIO format for OpenShift Virtualization, and write a text file to timestamp the start of the migration process.
-
We will use a post-migration hook to clean up the network adapter configuration, and write another text file to timestamp the completion of the migration process.
-
We will verify our running virtual machine migrated successfully and that the changes we made persist after startup.
Warm Migration
While the default migration type for the Migration Toolkit for Virtualization is that of a cold migration, requiring the source virtual machine be powered down through the entire migration window, there are many organizations with valuable workloads that cannot sustain a long period of downtime to perform a virtual machine migration. For these types of workloads the Migration Toolkit for Virtualization also supports warm migrations.
The warm migration process is achieved by taking advantage of Changed Block Tracking (CBT) technology on the source hypervisor, which is often used for backup and disaster recovery operations to reduce the amount of data that is transferred over the wire during an operation. Once CBT is enabled on a virtual machine, snapshots are taken of the guest at regular intervals to keep a record of changes on the VM disk. When it’s time to migrate the VM, an initial copy of the guest is transferred while it is still running. This allows for a large amount of machine data to be transferred while the machine is still operational with no down time. When an outage window can be scheduled, the Migration Toolkit for Virtualization triggers a cutover which powers down the guest, and transfers the changed CBT snapshot data, requiring a much more brief downtime for the VM.
-
We will explore the running Windows and Linux virtual machines on our source hypervisor.
-
We will review the configured Migration Toolkit for Virtualization providers.
-
We will create and execute a warm migration plan, which stops at the cutover phase.
-
We will initialize the cutover operation after verifying that the guests are still running.
-
We will explore the environment after our migration plan has completed.
Migration Wrap-up
-
After several minutes we will see that the migration has completed successfully.
-
The selected virtual machines have now been successfully migrated to OpenShift Virtalization.
Summary
In this section we explored the Migration Toolkit for Virtualization, and used it to assist with the migration of existing virtual machines from a VMware vSphere environment to OpenShift Virtualization. We also viewed some interactive videos to that allowed us to demonstrate some advanced features that can be utilized in specific migration scenarios.
In addition to the Migration Toolkit for Virtualization, there are two other migration toolkits currently available. The combination of these can be used to move many types of workloads into and within OpenShift clusters depending on your organization’s needs.
-
Migration Toolkit for Applications - Accelerate large-scale application modernization efforts to containers and Kubernetes.
-
Migration Toolkit for Containers - Migrate stateful application workloads between OpenShift clusters.
For more information about these other migration toolkits, please reach out to your Red Hat account team.