Storage Management
Red Hat OpenShift supports multiple types of storage, both for on-premises and cloud providers. OpenShift Virtualization can use any supported container storage interface (CSI) provisioner in the environment where your workload is running.
Some physical storage system examples include: Dell/EMC, Fujitsu, Hitachi, NetApp, and Pure Storage.
Some software-defined storage examples include: IBM Fusion Data Foundation, OpenShift Data Foundation (ODF), and Portworx.
| This list is not exhaustive, please see the Red Hat EcoSystem Catalog for information on all of the supported storage solutions. |
This workshop segment will explore Persistent Volume Claims (PVCs), which are used to request storage from the provider and store a VM disk. Many storage providers also support snapshots and clones of their devices, be sure to check with your vendor to verify the features supported by the CSI driver and storage device.
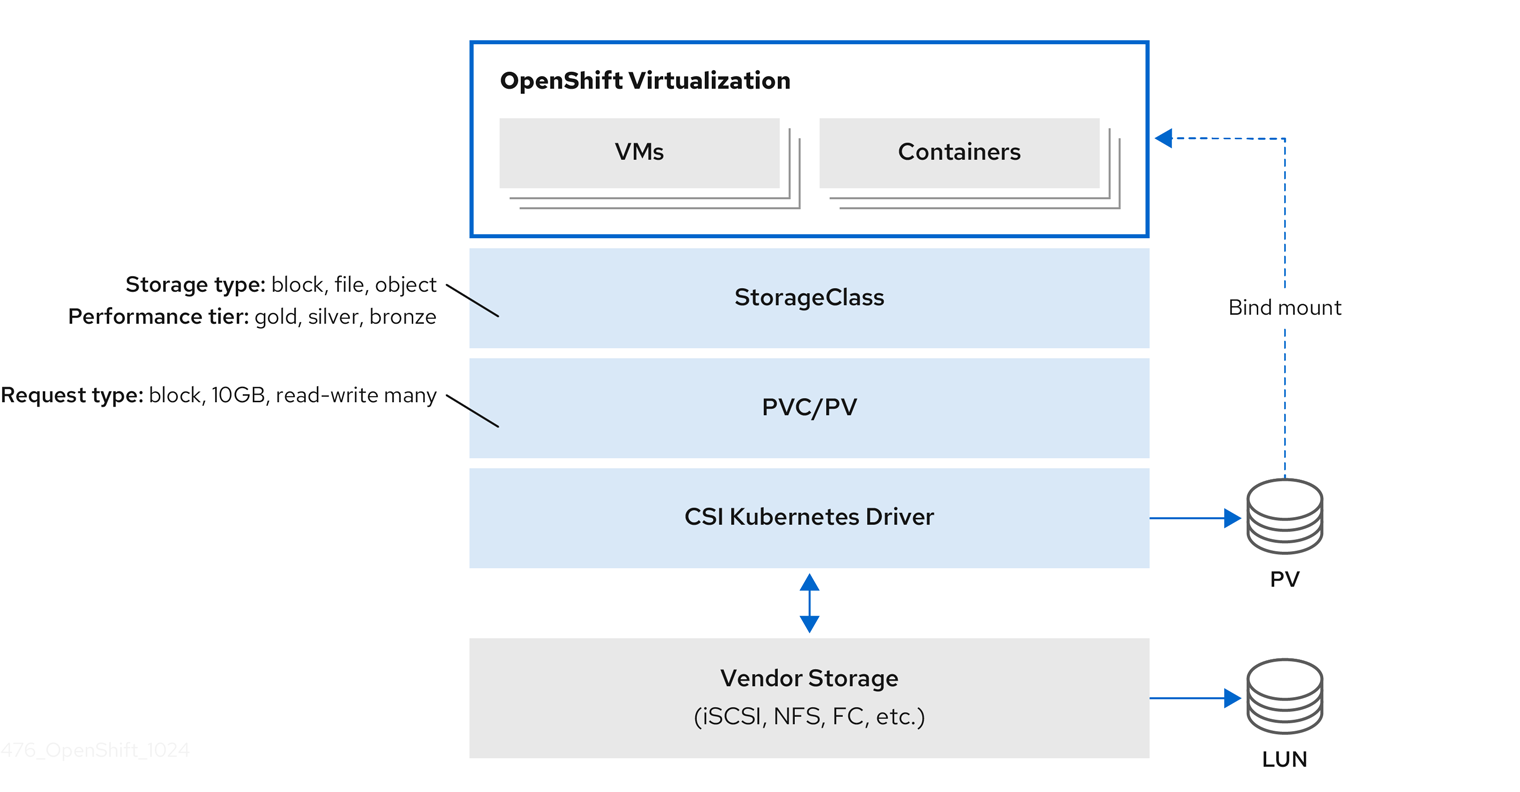
Notably, there are no restrictions on storage protocol (e.g. NFS, iSCSI, FC, etc.) specific to OpenShift Virtualization. The only request is that the RWX access mode is available, as it is required to support live migration of VMs within the cluster. Otherwise, the right choice for storage is that which best meets the needs of your organization’s VMs and Applications.
Please observe the following graphic for a demonstration of the CSI workflow for provisioning storage in Red Hat OpenShift.
Examine the PVC for a VM
In this lab, we are going to take a closer look at the storage behind the virtual machine we just created fedora01.
-
Start by clicking on the left menu for Storage → PersistentVolumeClaims. Make sure you are in the vmexamples-{user} namespace, you should see the fedora01 PVC that was created when you created the fedora01 VM in the previous section.

-
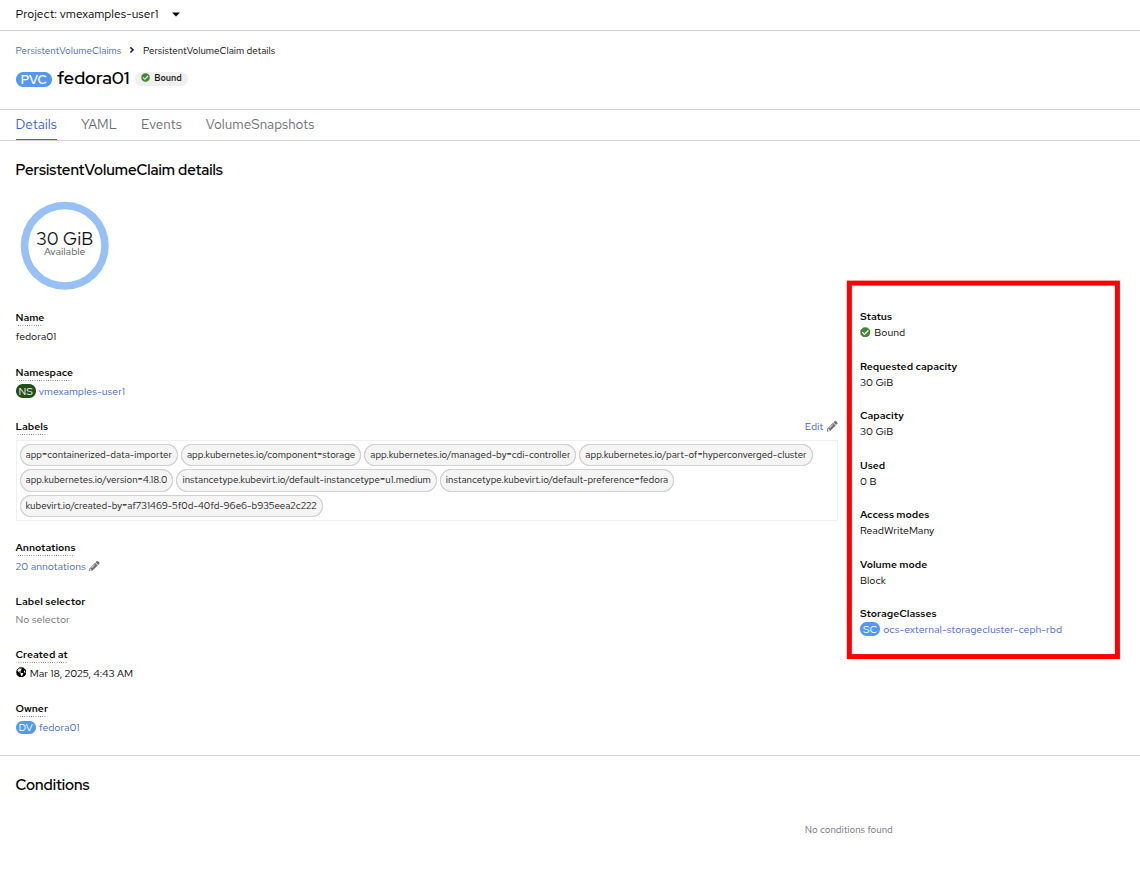
Click on the fedora01 PVC and you will be presented with a screen that shows additional details about the storage volume backing the VM.
-
Notice the following information about the persistent volume claim:
-
The PVC is currently bound successfuly
-
The PVC has a requested capacity and size of 30GiB
-
The Access mode of the PVC is ReadWriteMany (RWX)
-
The Volume mode of the PVC is Block
-
The volume is using the ocs-external-storagecluster-ceph-rbd storage class.
-
Managing Snapshots
OpenShift Virtualization relies on the CSI storage provider’s snapshot capability to create disk snapshots for the virtual machine, which can be taken "online" while the VM is running, or "offline" while the VM is powered off. If the KVM integrations package (qemu-tools) is installed on the VM, you will also have the option of automatically quiescing the guest operating system (quiescing ensures that the snapshot of the disk represents a consistent state of the guest file systems, e.g., buffers are flushed and the journal is consistent).
Since disk snapshots are dependent on the storage implementation, abstracted by the CSI, both the performance impact and capacity used will depend on the storage provider. Work with your storage vendor to determine how the system will manage PVC snapshots and the impact they may or may not have on your expected performance.
| Snapshots, by themselves, do not provide a backup or disaster recovery capability as they are usually stored locally on the same storage system as the original physical volume. To survive a true disaster, the data would still need to be protected in other ways, such as having one or more copies stored in a different location, or mirrored to a storage system at a remote location to overcome the storage system itself failing. |
With the VM snapshots feature, cluster administrators and application developers can:
-
Create a new snapshot
-
List all snapshots attached to a specific VM
-
Revert a VM to a snapshot
-
Delete an existing VM snapshot
Creating and Using Snapshots
-
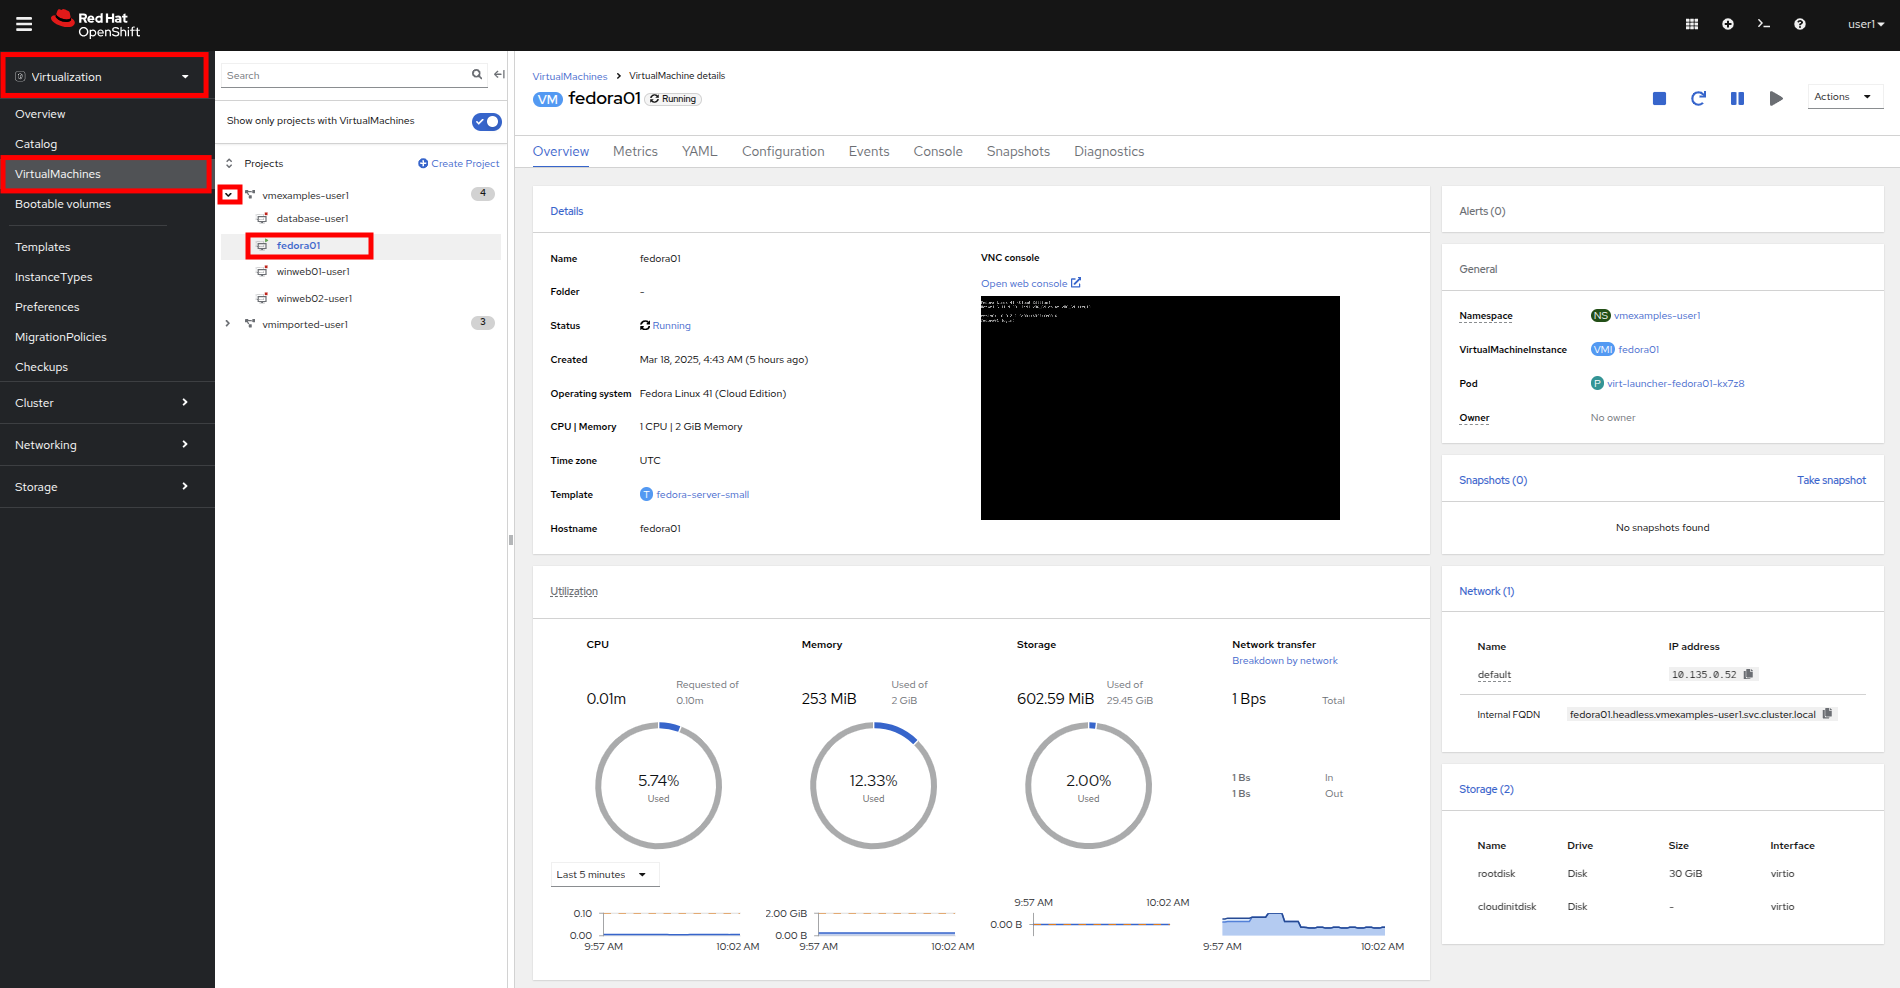
Navigate back to Virtualization perspective dropdown, and then click on VirtualMachines in the left-side menu. Expand the project vmexamples-{user} in the center column and highlight the fedora01 virtual machine.
-
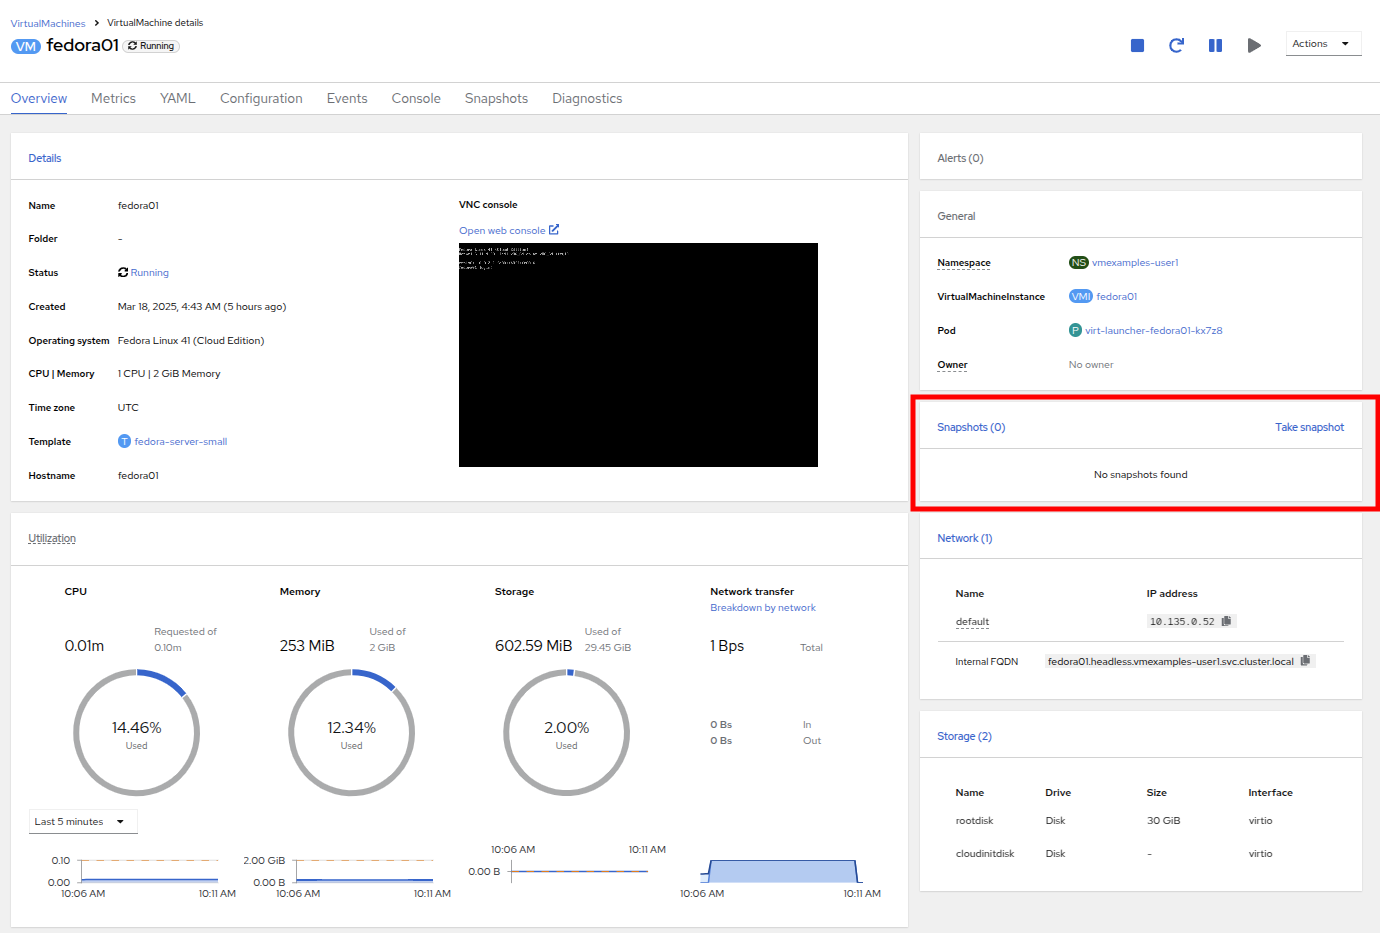
Notice there are currently no snapshots of this VM listed on the overview page.
-
Navigate to the Snapshots tab at the top of the page.
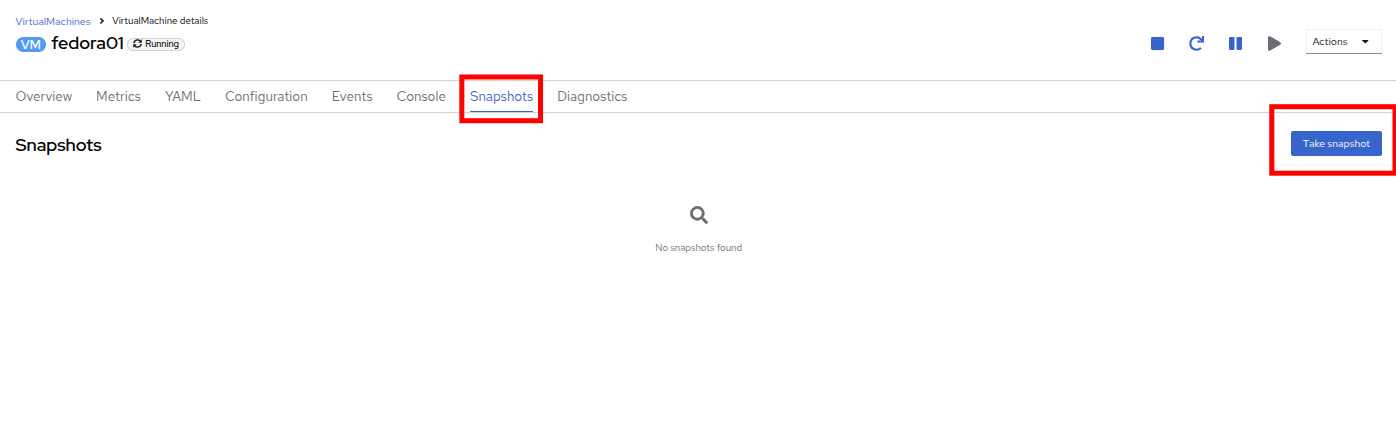
-
Press Take snapshot and a dialog will open.
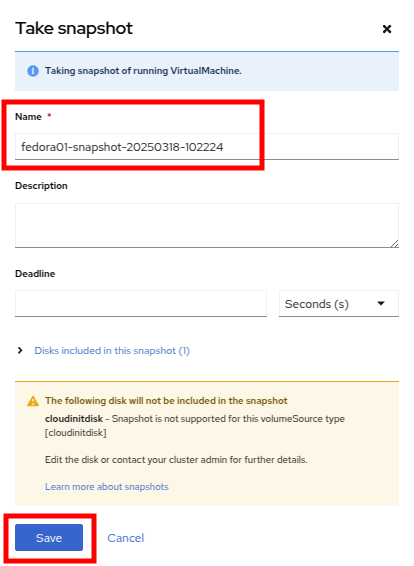
There is a warning about the cloudinitdisk not being included in the snapshot. This is expected and happens because it is an ephemeral disk used for inital boot. -
A name will be auto-generated for the Snapshot. Press Save and wait until the status shows as Operation complete.
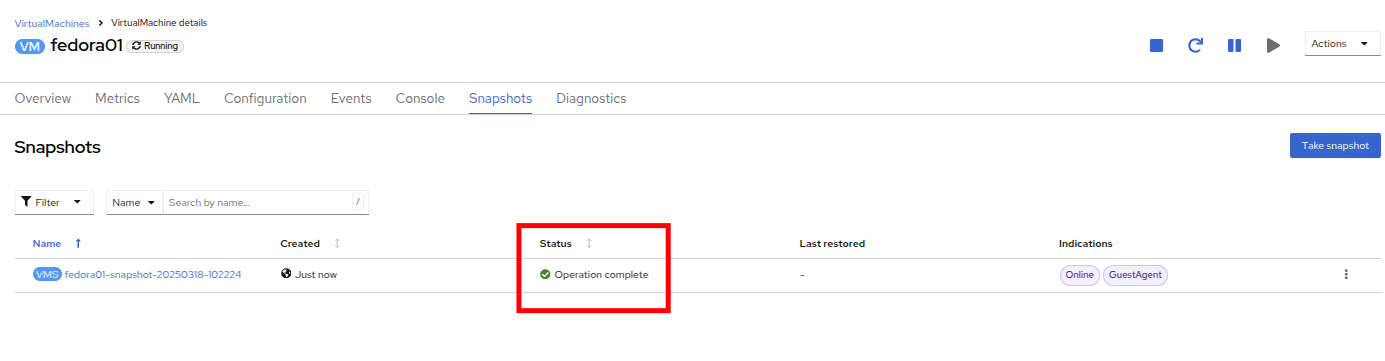
-
Press the three-dot menu, and see that the Restore option is greyed out because the VM is currently running.
-
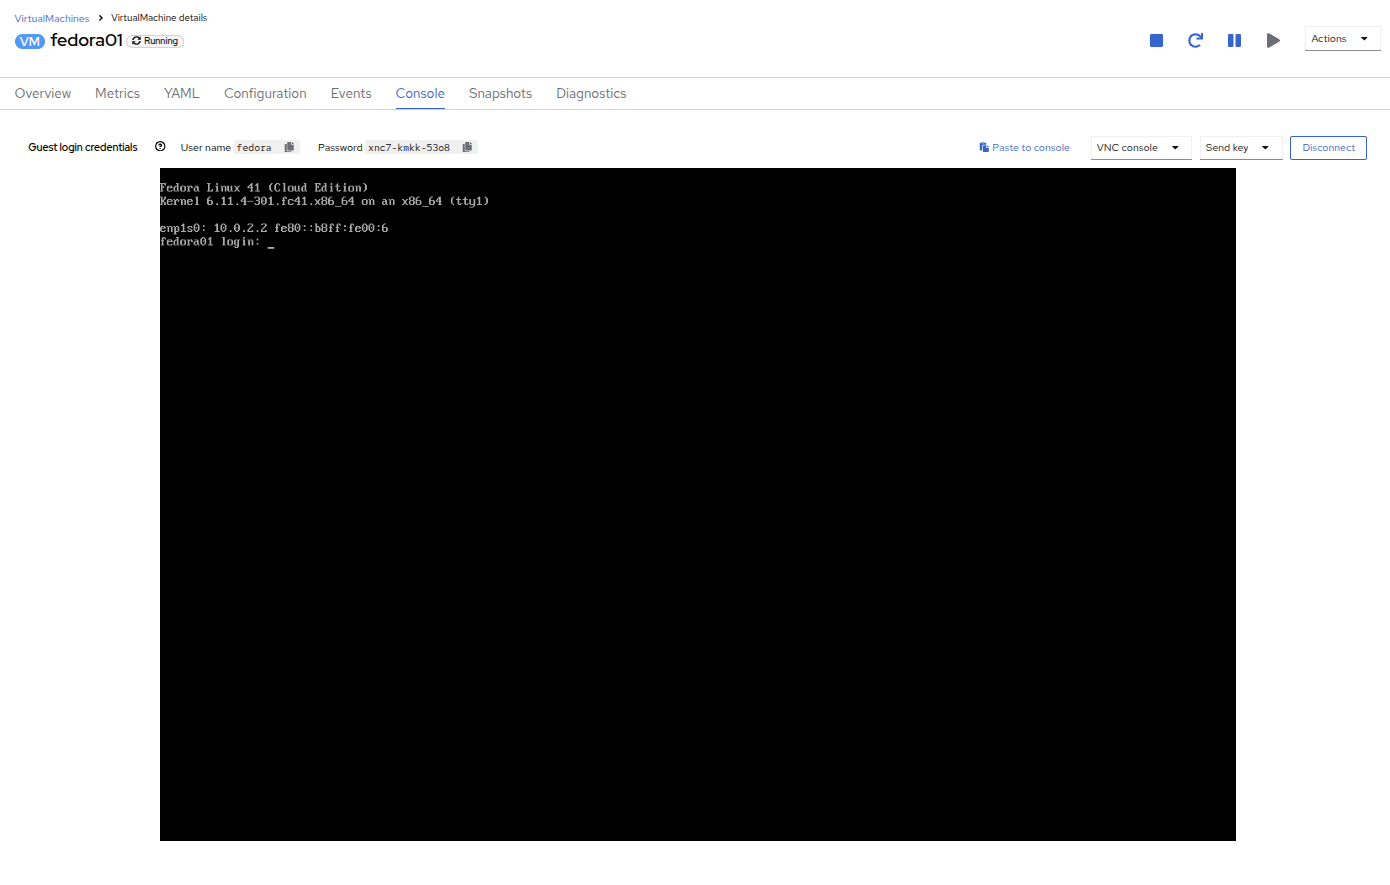
Next, switch to the Console tab. We are going to login and perform a modification that prevents the VM from being able to boot.
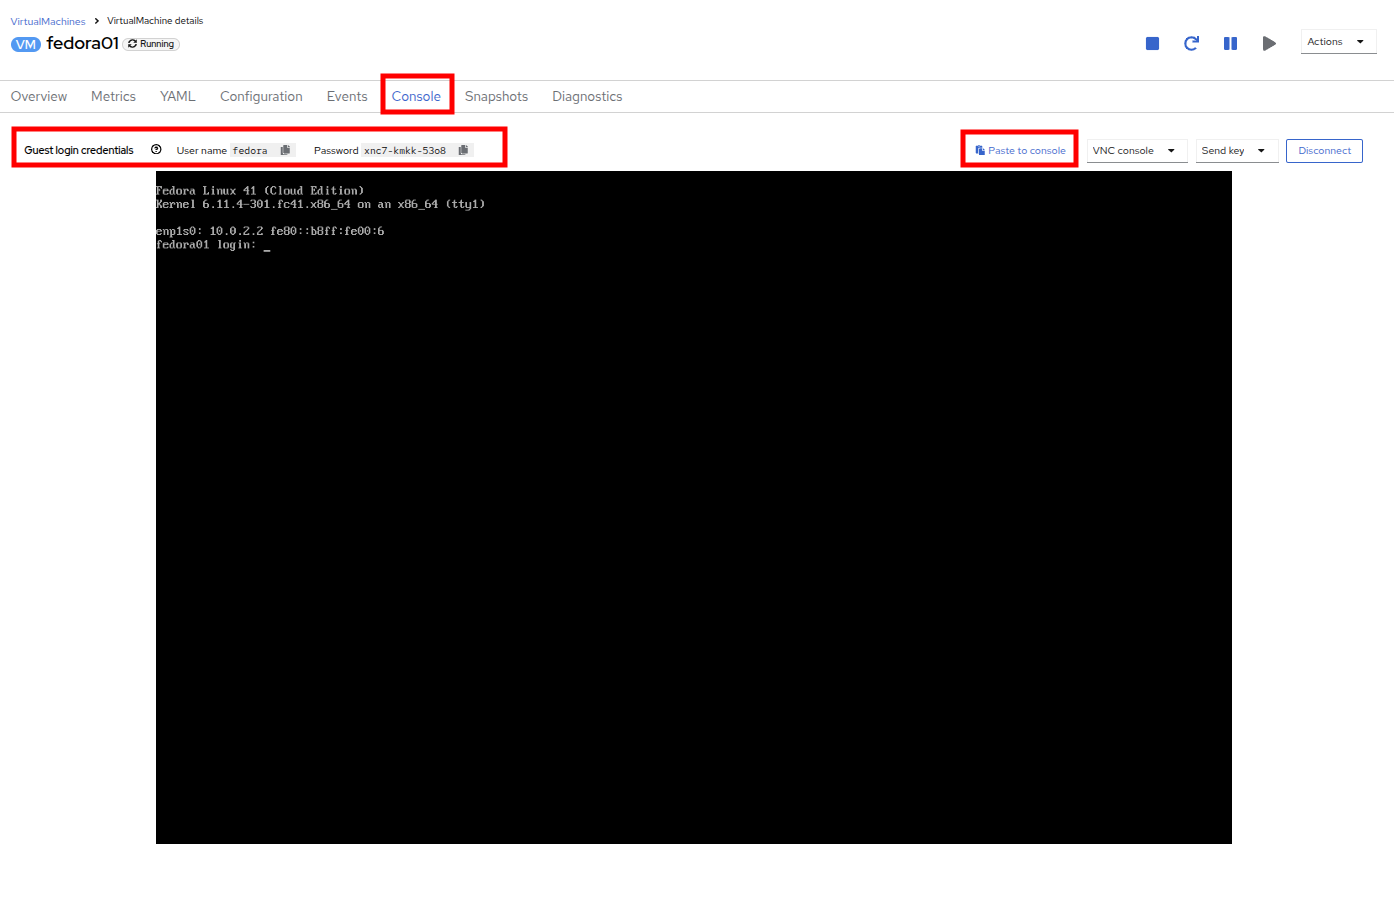
There are copy icons next both the User name and Password and a Paste to console button available all available here, which makes the login process much easier. -
Once you are logged in, execute the following command:
sudo rm -rf /boot/grub2; sudo shutdown -r now -
Once executed, the virtual machine will automatically restart, but it will no longer be able to boot successfully.
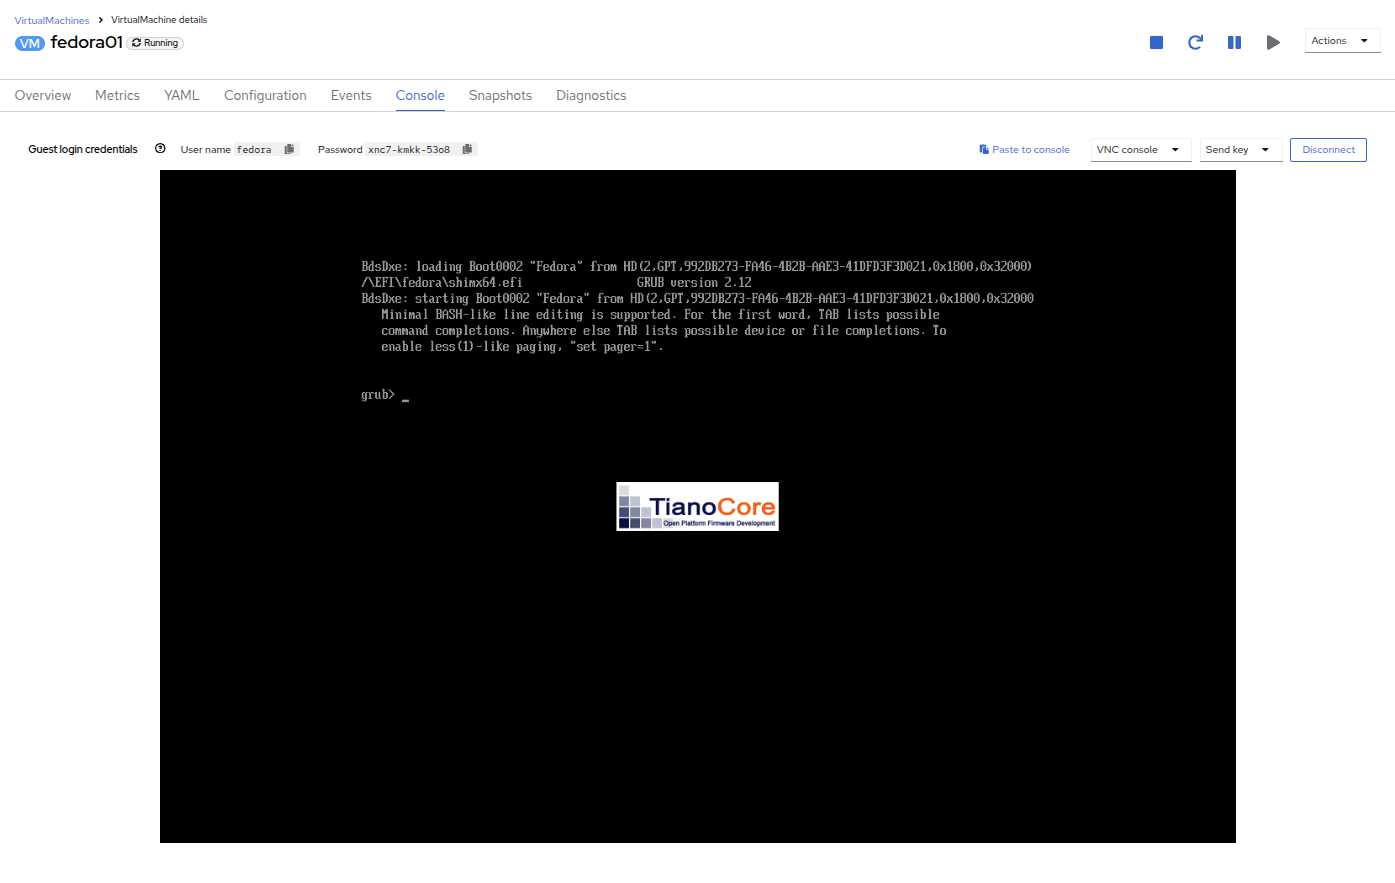
In the previous step, the operating system was shutdown from within the guest. However, OpenShift Virtualization will restart it automatically by default based on policy as the pod hosting the VM is still running. This behavior can be changed globally or on a per-VM basis. -
Using the Actions dropdown menu or the shortcut button in the top right corner, Stop the VM. This process can take a long time since it attempts a graceful shutdown and the machine is in an unstable state. If you click on the Actions dropdown menu again you will have the option to Force stop. Please make use of this option in order to continue with the lab.
-
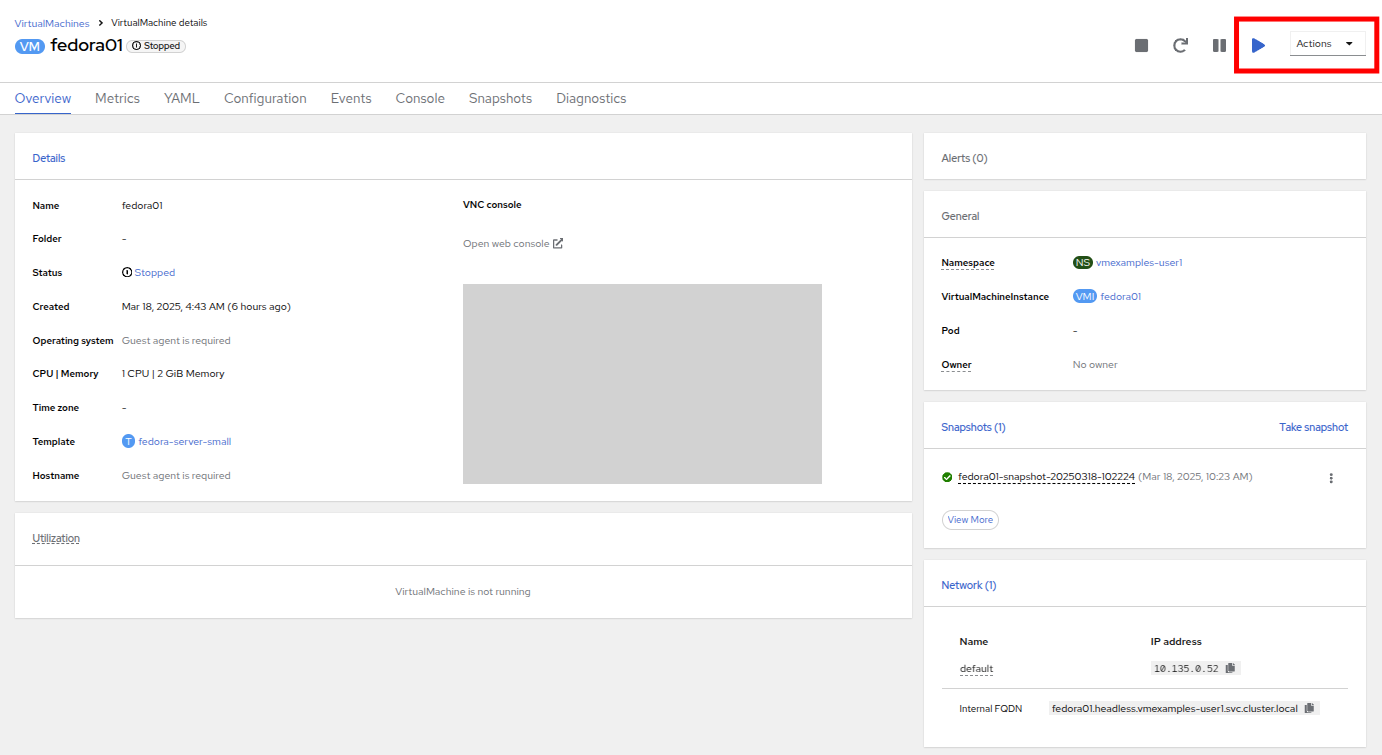
You can click on the Overview tab to confirm that the VM has stopped. You can also see the snapshot we recently took is now listed in the Snapshots tile.
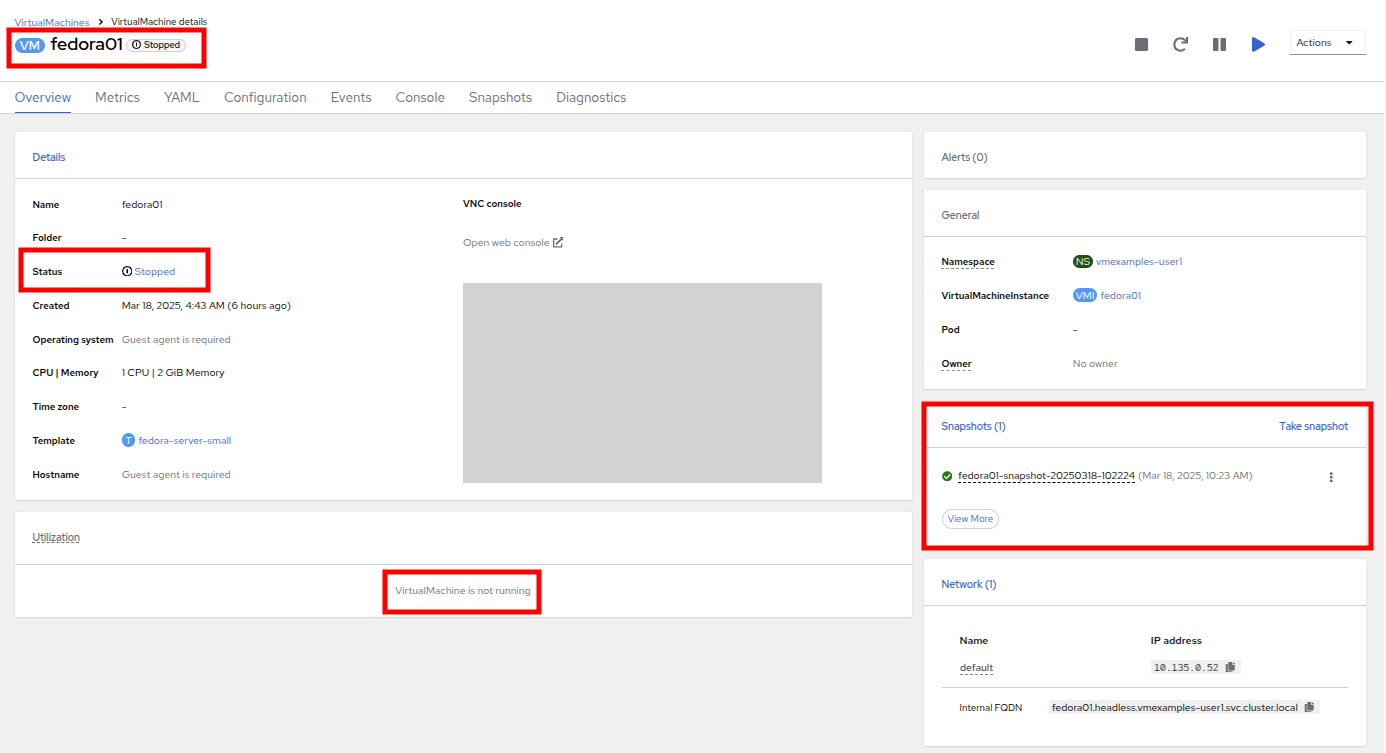
-
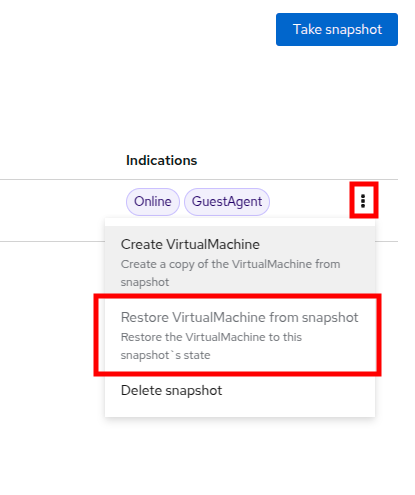
On the Snapshots tile, click the three-dot menu next to our snapshot, and with the VM stopped, you will find Restore is no longer greyed out. Click it.
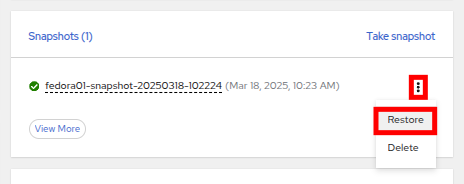
-
In the dialog shown, press Restore.

-
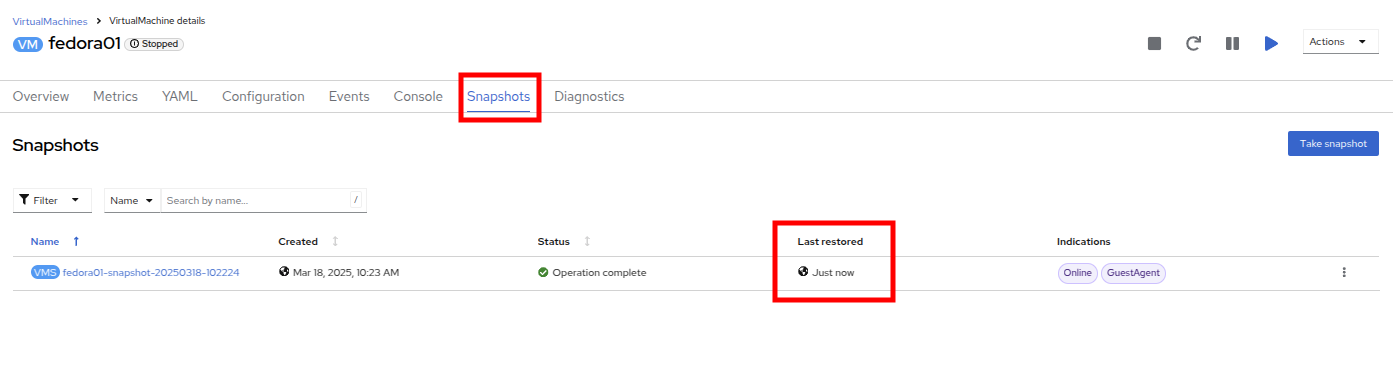
Wait until the VM is restored, the process should be fairly quick. If you click on the Snapshots tab at the top you can see details of the last restore operation.
-
Return to Overview tab, and start the VM.
-
Click on the Console tab to confirm that the VM has now restarted and booted back up to the OS successfully.
Clone a Virtual Machine
Cloning creates a new VM that uses it’s own disk image for storage, but most of the clone’s configuration and stored data is identical to the source VM.
-
Return to the Overview screen, and click the Actions dropdown menu to see the option to clone the VM.
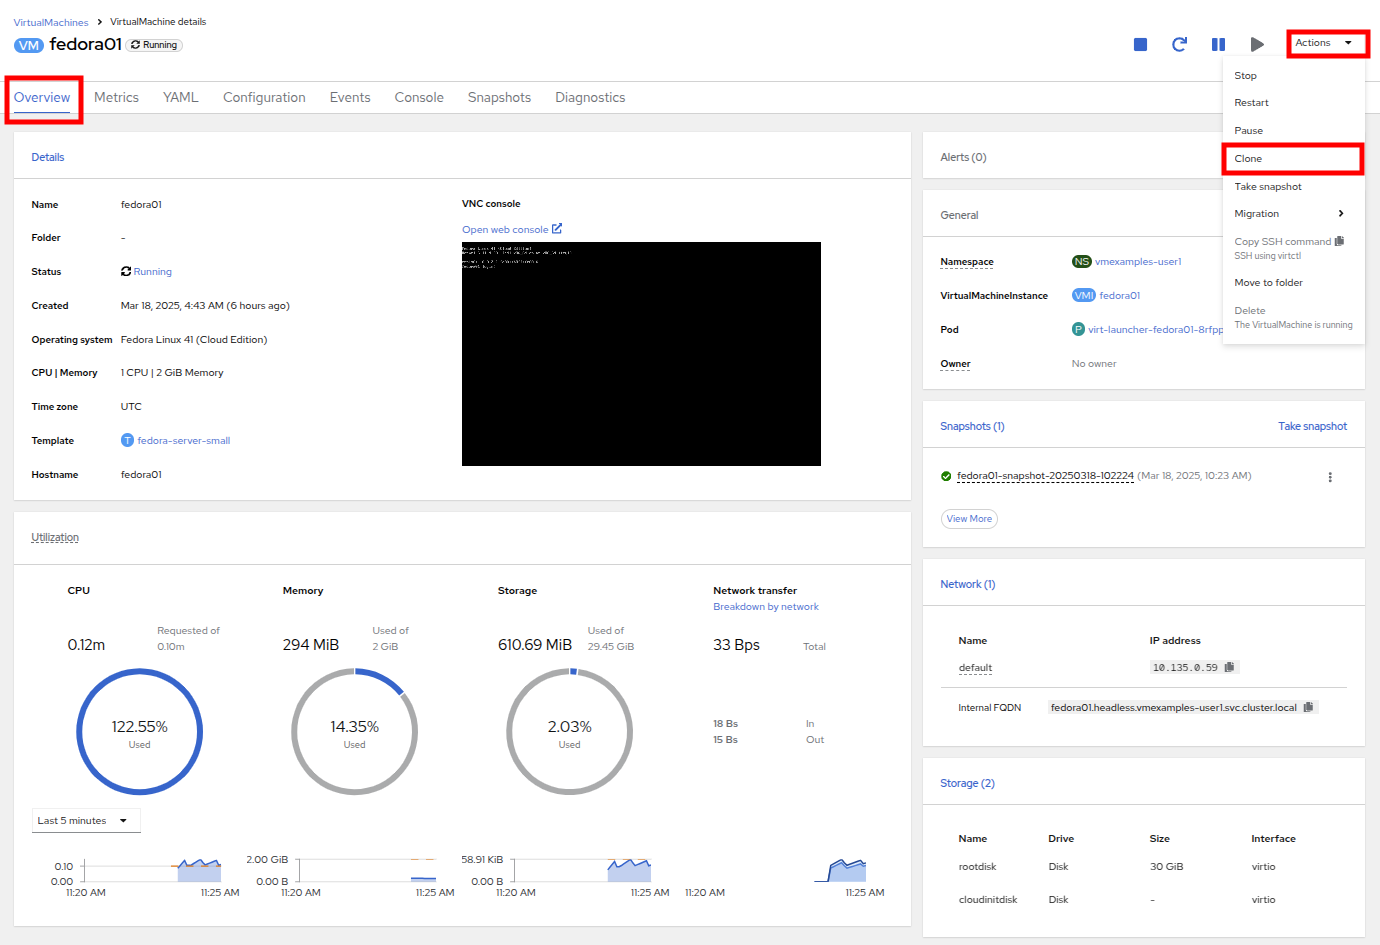
-
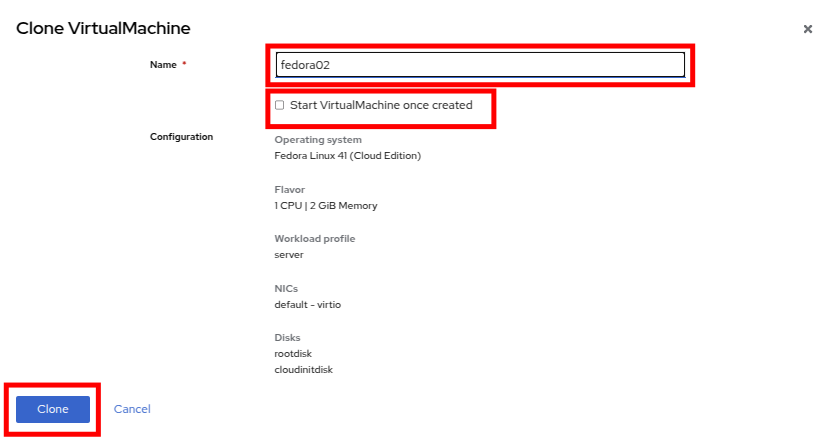
Press Clone from the Actions menu, and a dialog will open. Name the cloned VM fedora02, and ensure that the checkbox to Start VirtualMachine on clone remains unchecked, then click Clone.
-
A new VM is created, the disks are cloned and automatically the portal will redirect you to the new VM, and you can see the Created time as very recently.

The cloned VM will have the same identity as the source VM, which may cause conflicts with applications and other clients interacting with the VM. Use caution when cloning a VM connected to an external network or in the same project. -
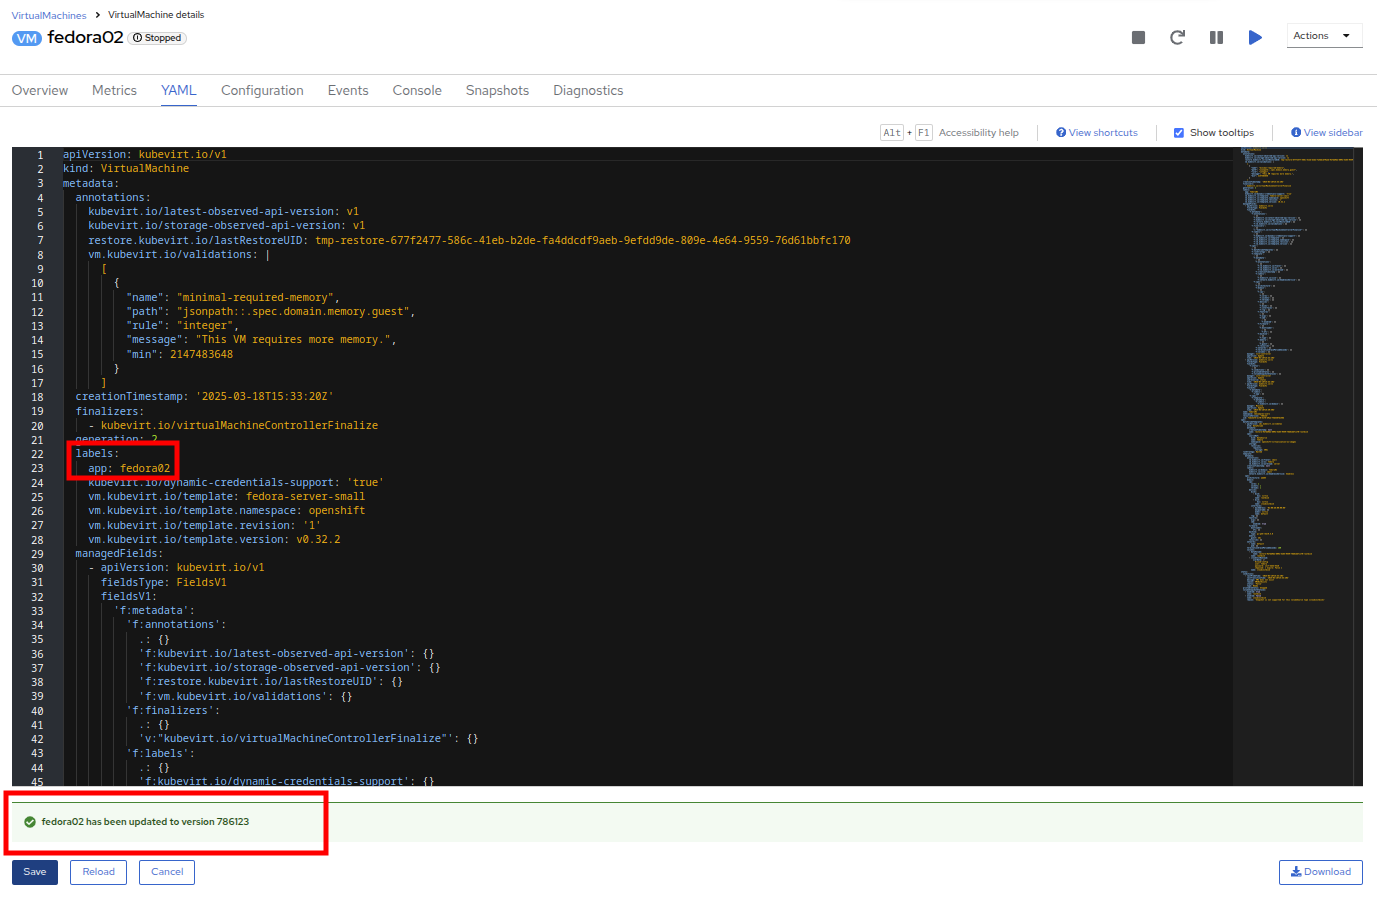
Click on the YAML menu at the top of the screen, you will see that the name of the VM is fedora02, however there are some labels that remain from the fedora01 source VM that will need to be manually updated.

-
Modify the the app and kubevirt.io/domain values in the YAML so that they are set to fedora02 then click the Save button at the bottom, you will prompted that fedora02 has been updated to a new version. Doing this now will allow us to avoid issues working with this VM in later modules.
-
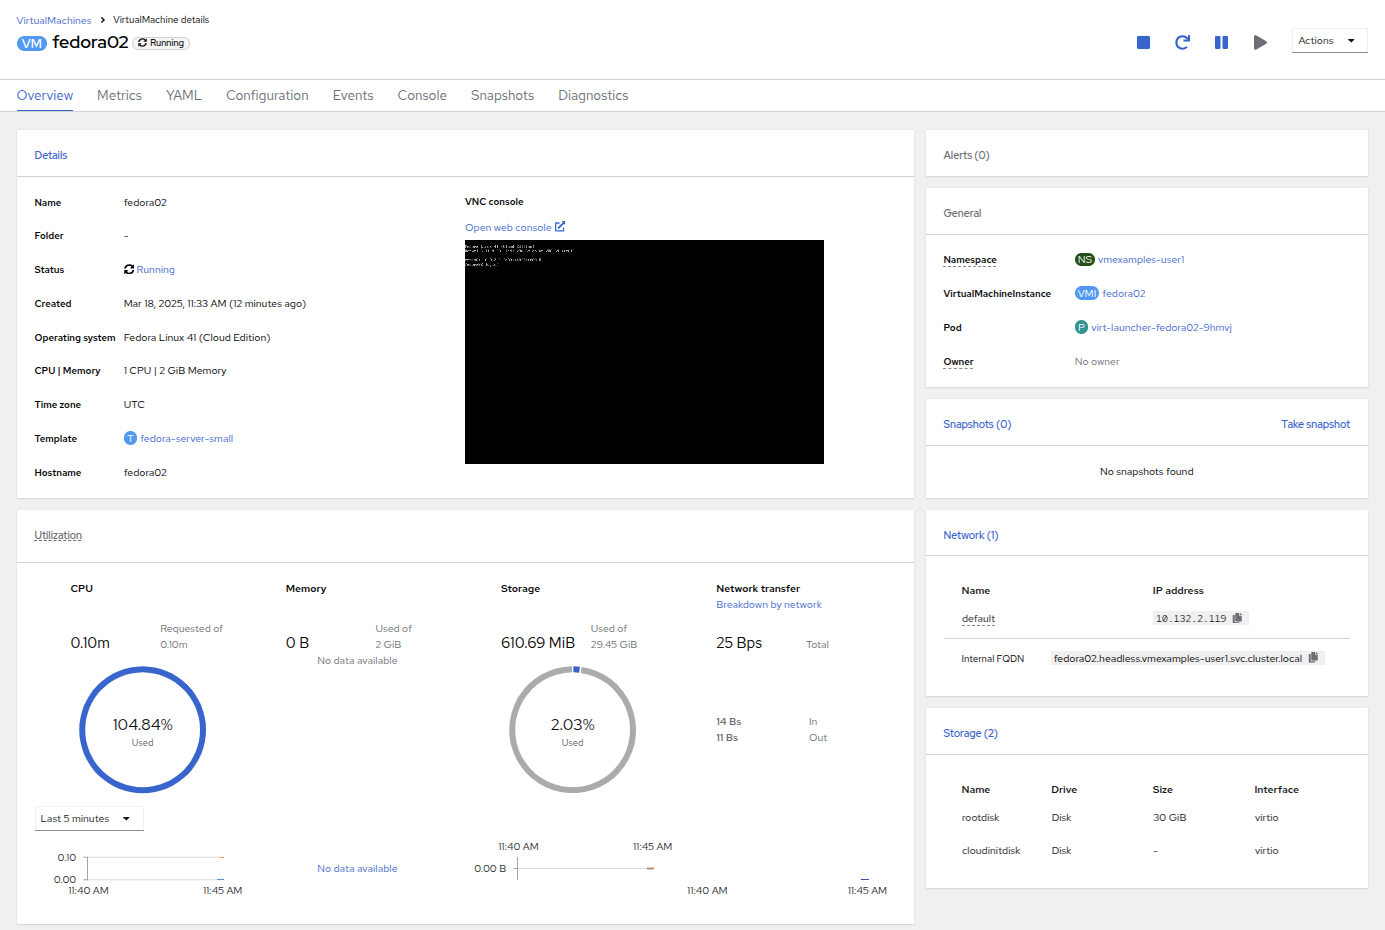
When you have completed the modifications to the virtual machine’s YAML go ahead and start it up so that you have both fedora01 and fedora02 running.
Summary
In this section of our lab we explored the storage options that are available when managing virtual machines. We also performed several VM management functions that are dependant on the storage provisioned for the virtual machine, including taking snapshots of VMs to peform basic restores, and cloning of VMs to be used in other projects or to help streamline future development.