Backup and Recovery for Virtual Machines
Introduction
Data Protection is a major topic of conversation when it comes to any enterprise workload, and there are no shortage of options currently available for backup and recovery of virtual machines with OpenShift Virtualization. Many of these solutions function in the same manner at which they protect pods in OpenShift. They do this by taking a backup of the virtual machine, or a namespace containing multiple virtual machines and store it remotely in an object storage bucket. These backups usually also include the persistent storage volume, alongside the metadata and custom resources that define the virtual machine.
Red Hat Solutions Include:
-
OpenShift APIs for Data Protection (OADP): A Red Hat operator which provides a storage agnostic method to back up and restore OpenShift objects, including virtual machines.
-
OpenShift Data Foundation Metro-DR and OpenShift Data Foundation Regional-DR
Ecosystem Partner Solutions Include:
| This is not intended to be an exhaustive list of partners offering a supported backup and recovery solution. Please check with your storage or data protection vendor(s) to determine the compatibility of their product with OpenShift Virtualization, or check the Red Hat EcoSystem Catalog for additional information. |
In this portion of the lab, we will make use of OADP to perform a virtual machine backup and restore operation.
Review the OADP Operator
-
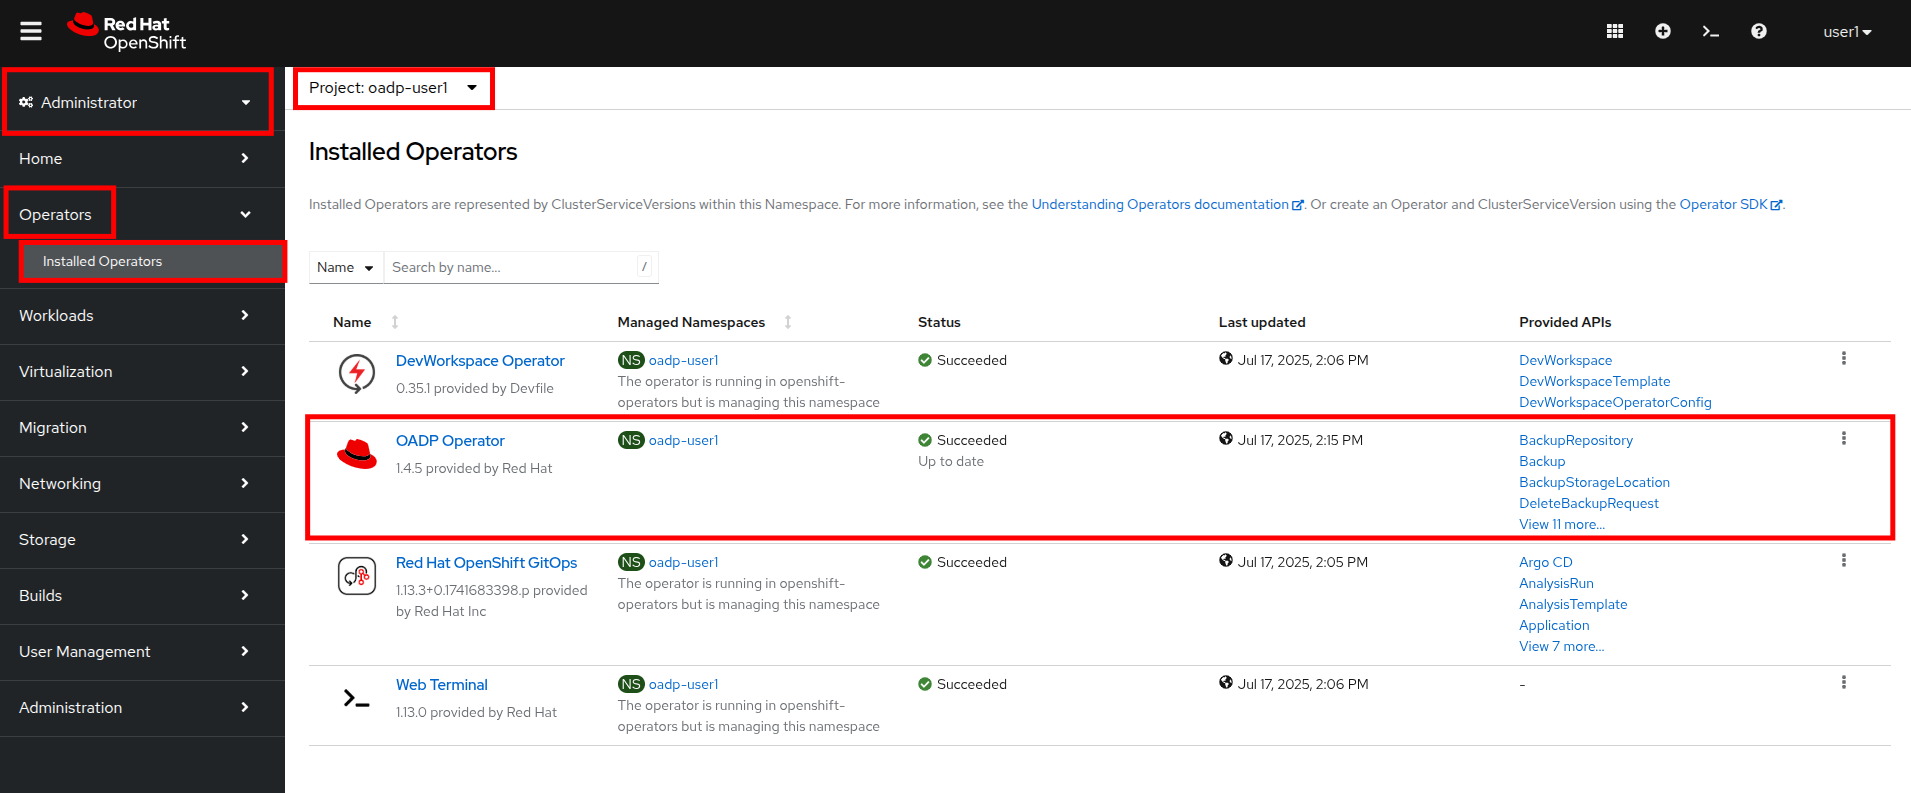
Navigate to the Administrator perspective once again, and in the left menu click on Operators and then Installed Operators. Ensure that the project oadp-{user} is selected.
-
Click on the operator to see it’s details.
-
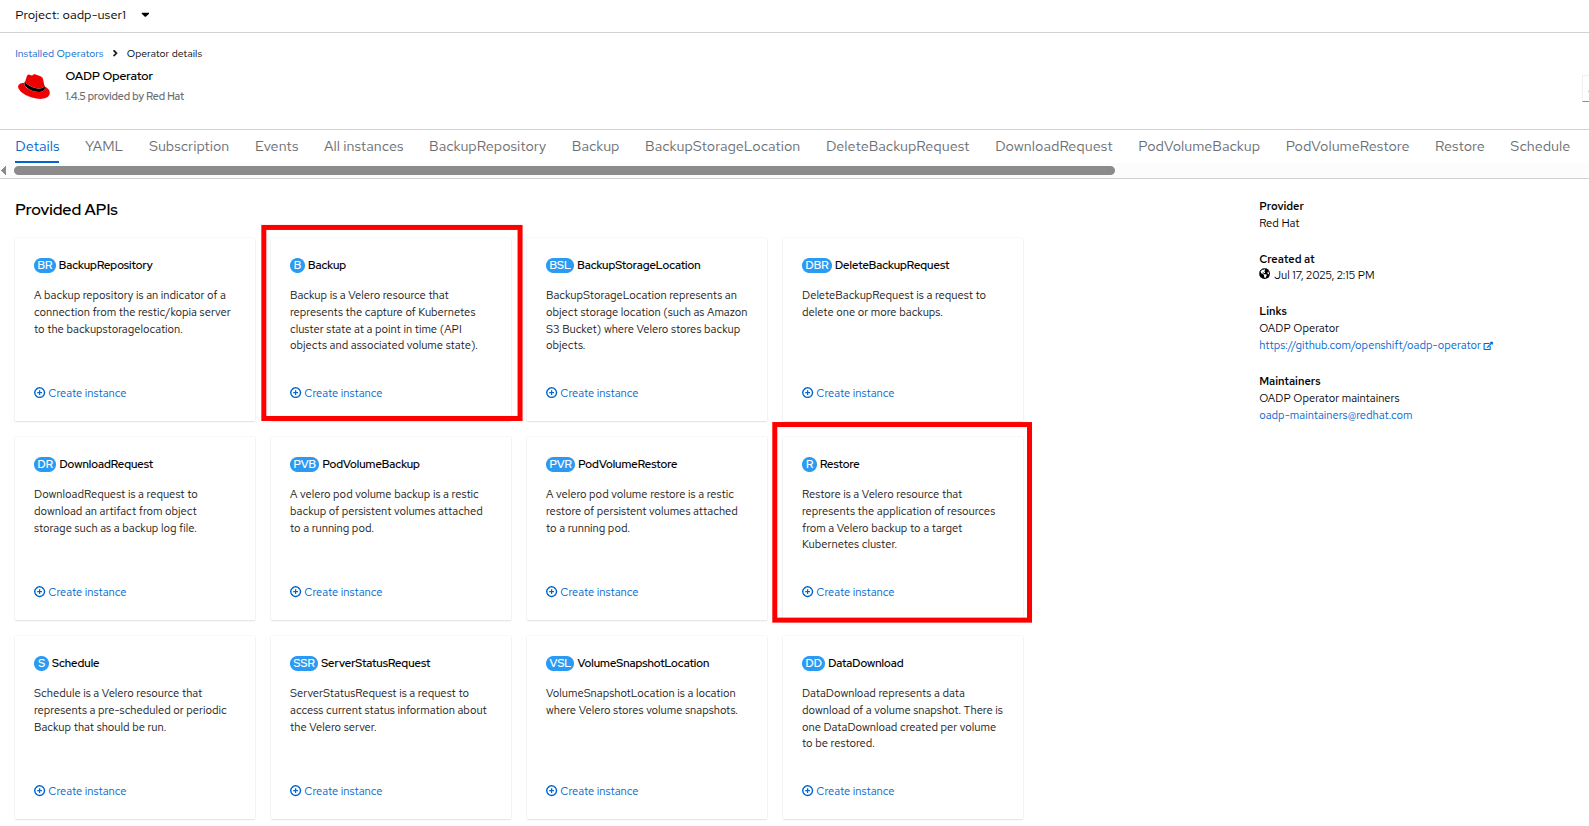
Review the Provided APIs available. In this module, the Backup and Restore functions will be used.
-
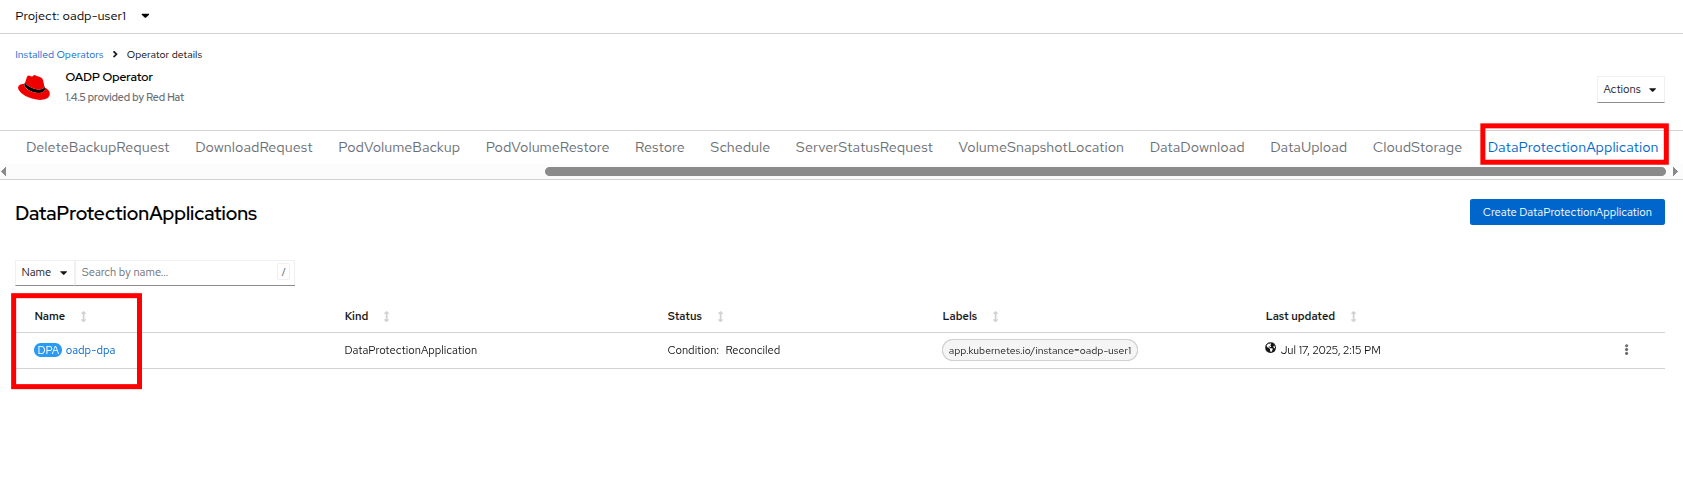
Use the horizontal scrollbar at the top to navigate to the tab DataProtectionApplication. This object represents the configuration of the deployed OADP instance.
-
Click on oadp-dpa to see the details of the DataProtectionApplication and then click on the YAML button at the top to see how it is configured.
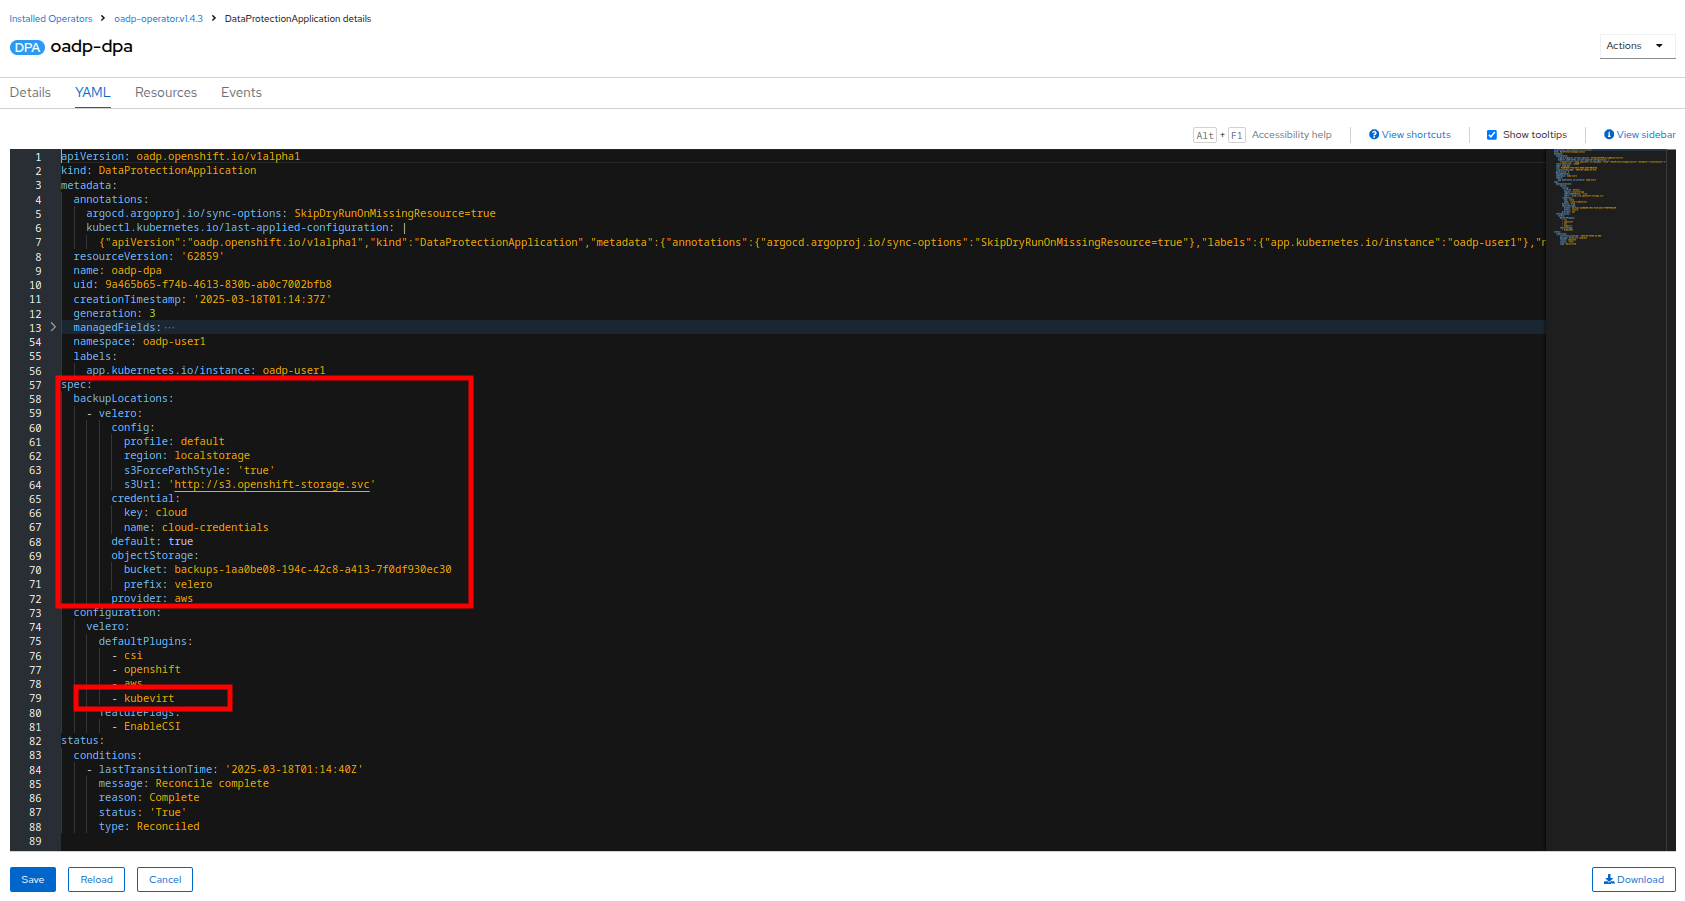
Notice that OADP has been configured by adding the kubevirt plugin and it has been configured to use the internal object storage bucket provided by OpenShift Data Foundations running on your cluster.
For the sake of convenience our lab is setup to perform the backups to a local object bucket, however in a production environment you would want to ensure that backups are directed to an external storage system, or a cloud-based object storage bucket to ensure that workloads are protected against a localized disaster.
Create a Virtual Machine Backup
You now will perform a backup of the VM fedora02 which we created in the previous section. The selection of the objects to be backed up is defined by the labels app and vm.kubevirt.io/name. This includes the VM definition, disks, and additional objects being used by the virtual machine such as config maps and secrets.
| If you did not complete the previous section, and you do not have the fedora02 VM, change the label selectors in the YAML above to match a virtual machine in your inventory. |
-
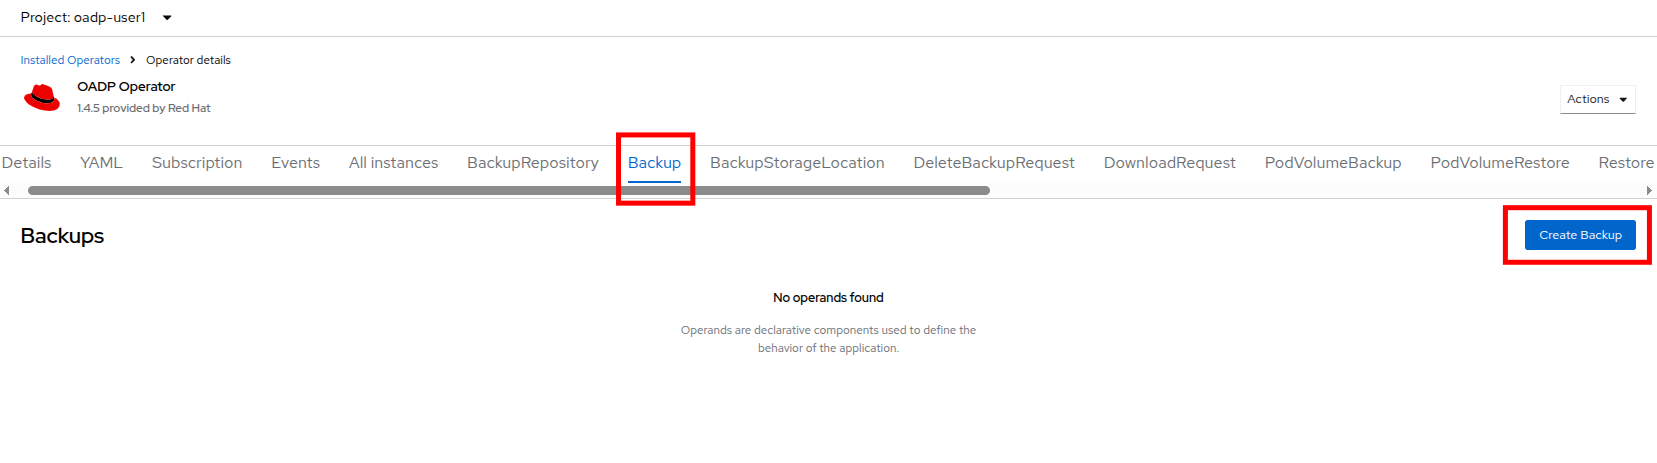
Navigate back to the Operator details and using the horizontal scrollbar, scroll back until you see the Backup tab.
-
Click on the Backup tab and press the Create Backup button.
-
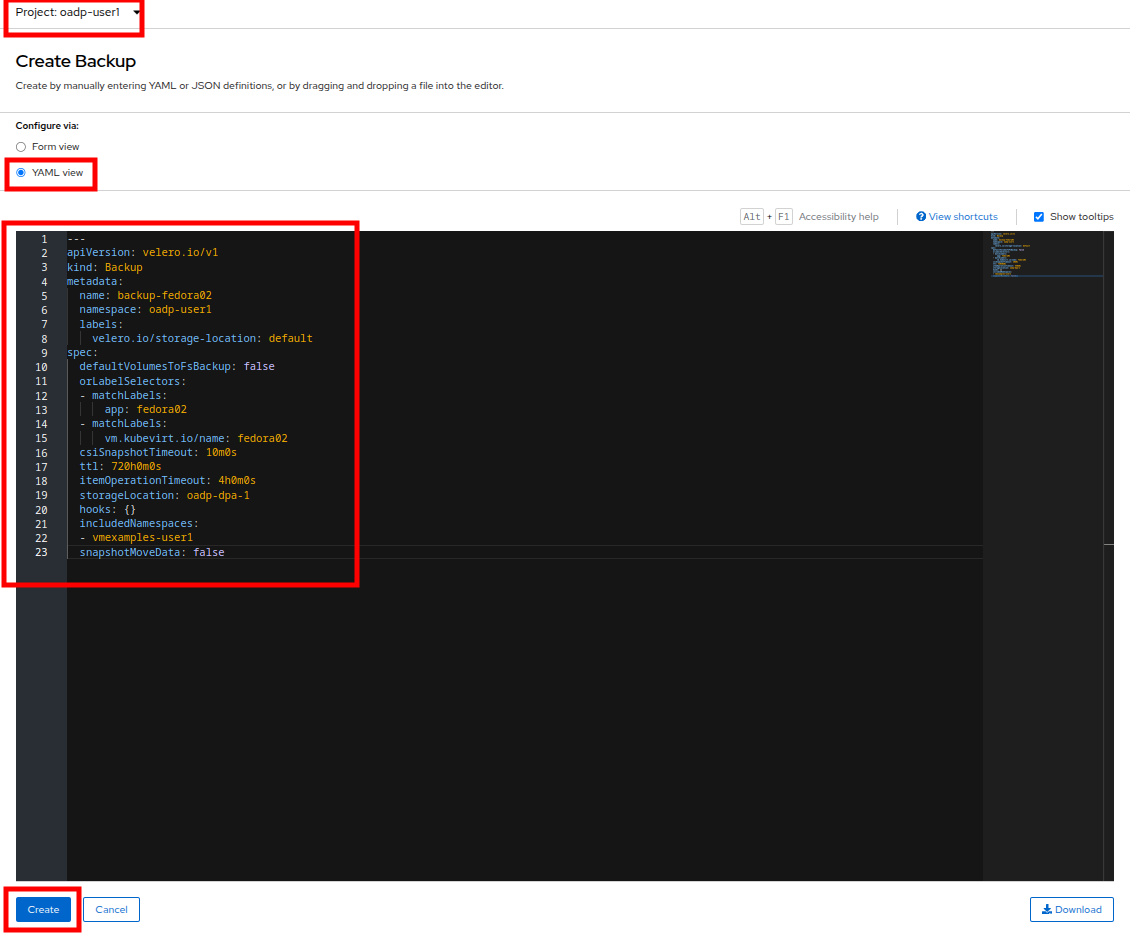
Switch to the YAML view and replace the default content with the following one:
--- apiVersion: velero.io/v1 kind: Backup metadata: name: backup-fedora02 namespace: oadp-{user} labels: velero.io/storage-location: default spec: defaultVolumesToFsBackup: false orLabelSelectors: - matchLabels: app: fedora02 - matchLabels: vm.kubevirt.io/name: fedora02 csiSnapshotTimeout: 10m0s ttl: 720h0m0s itemOperationTimeout: 4h0m0s storageLocation: oadp-dpa-1 hooks: {} includedNamespaces: - vmexamples-{user} snapshotMoveData: false -
Click the Create button at the bottom.
Note that the content of this YAML indicates that any object with the labels app: fedora02 in the namespace vmexamples-{user} will be backed up to the location specified in the DataProtectionApplication configuration.
-
Wait until the Status column changes to Completed. This indicates that the virtual machine has been successfully backed up.

Restore From a Backup
-
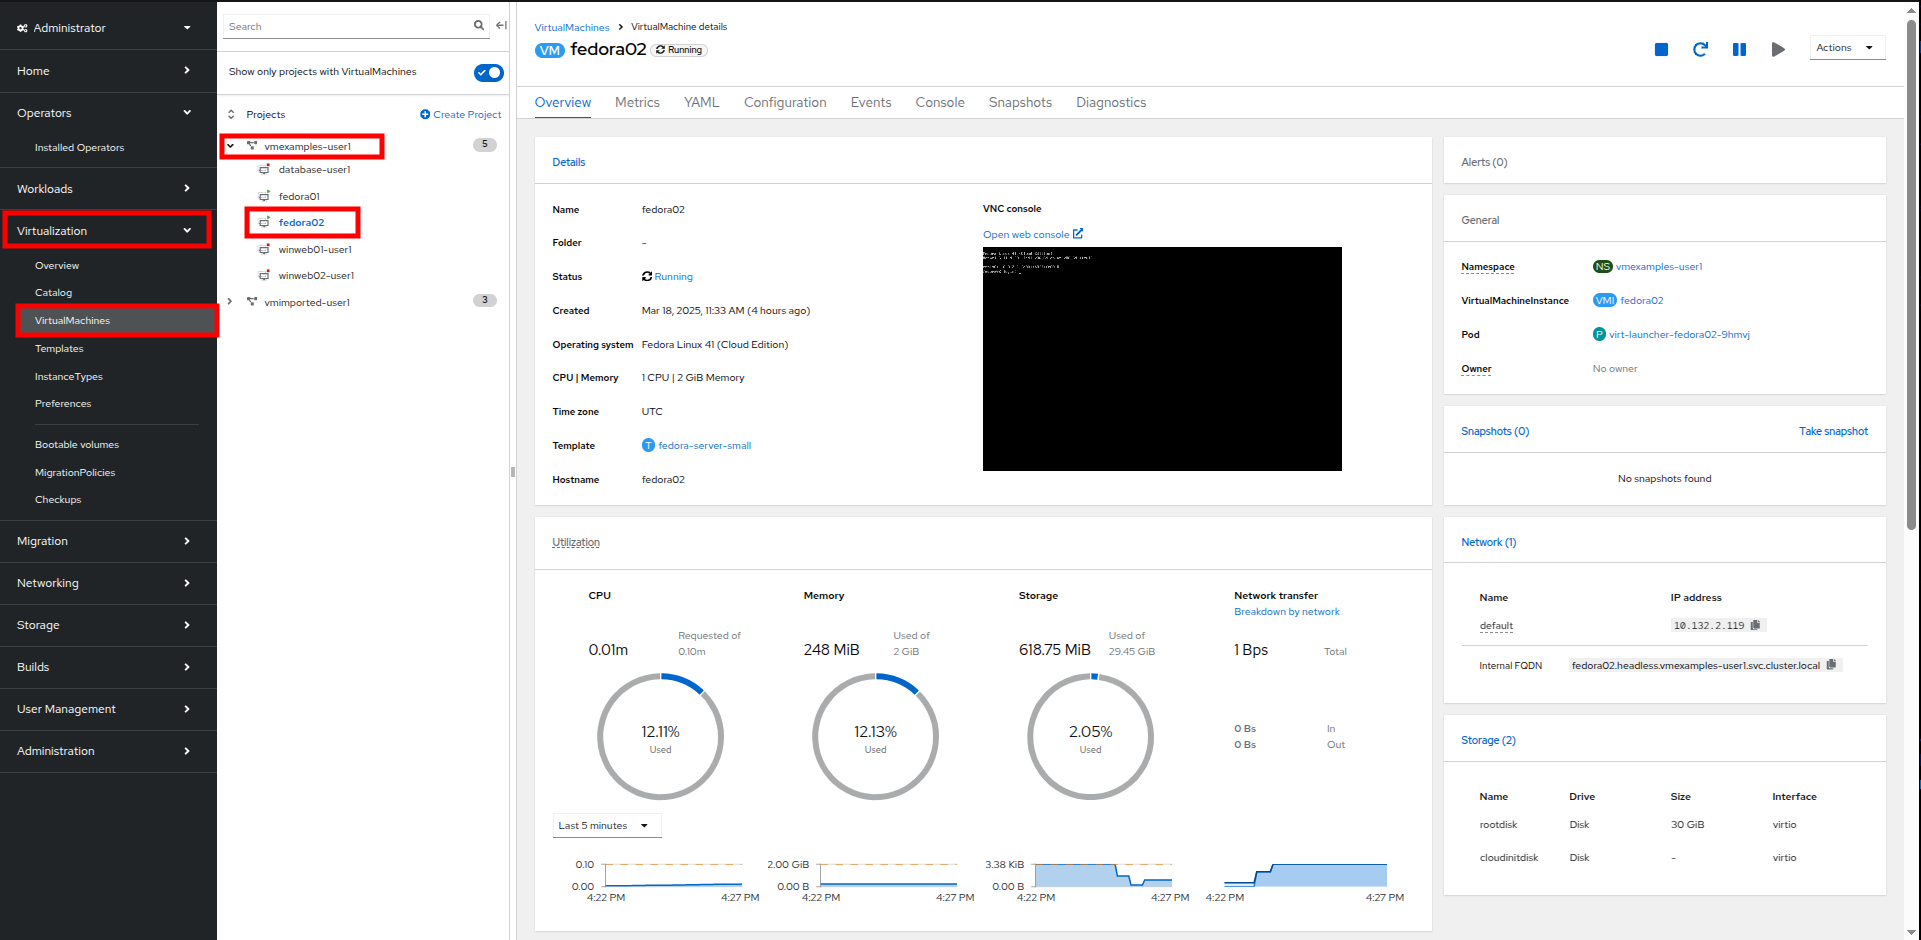
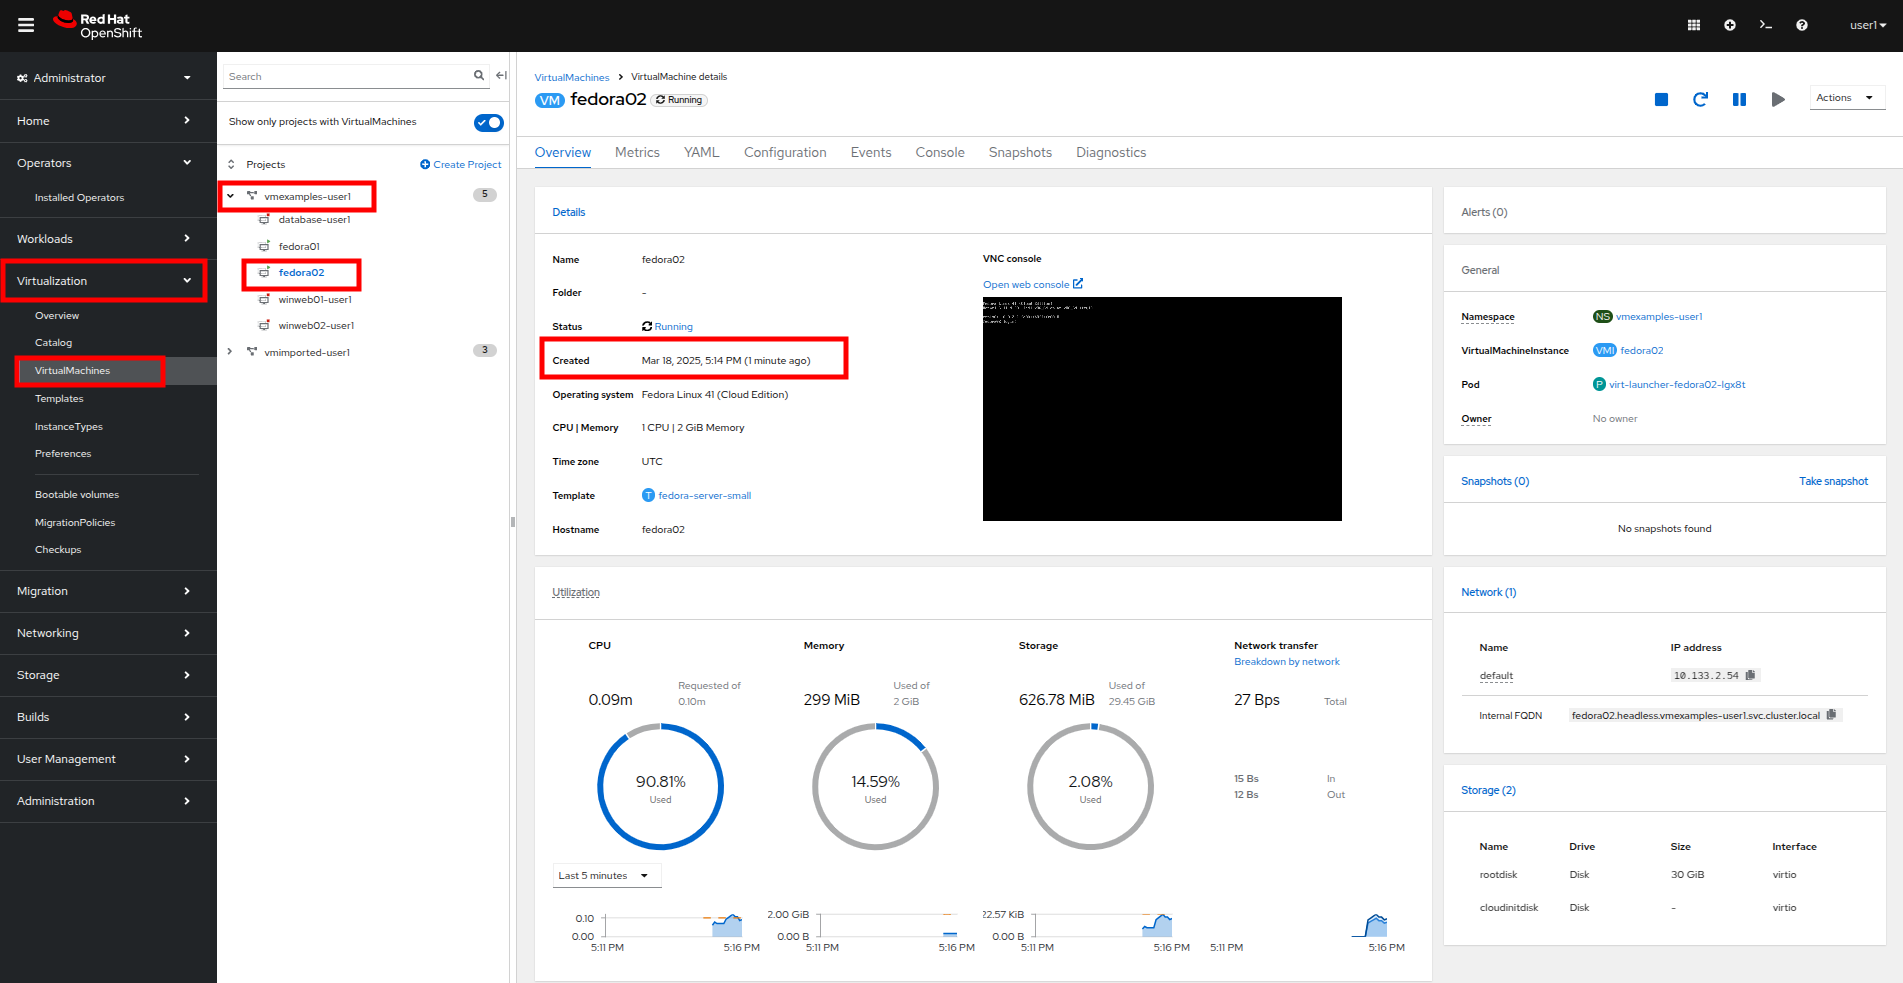
In the left-side menu, click on Virtualization and then VirtualMachines. In the center tree column expand the vmexamples-{user} project and click on the fedora02 VM.
-
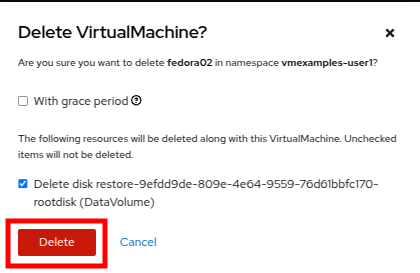
Stop the virtual machine, and then once it is stopped, click on the Actions dropdown and select the option to Delete the VM.
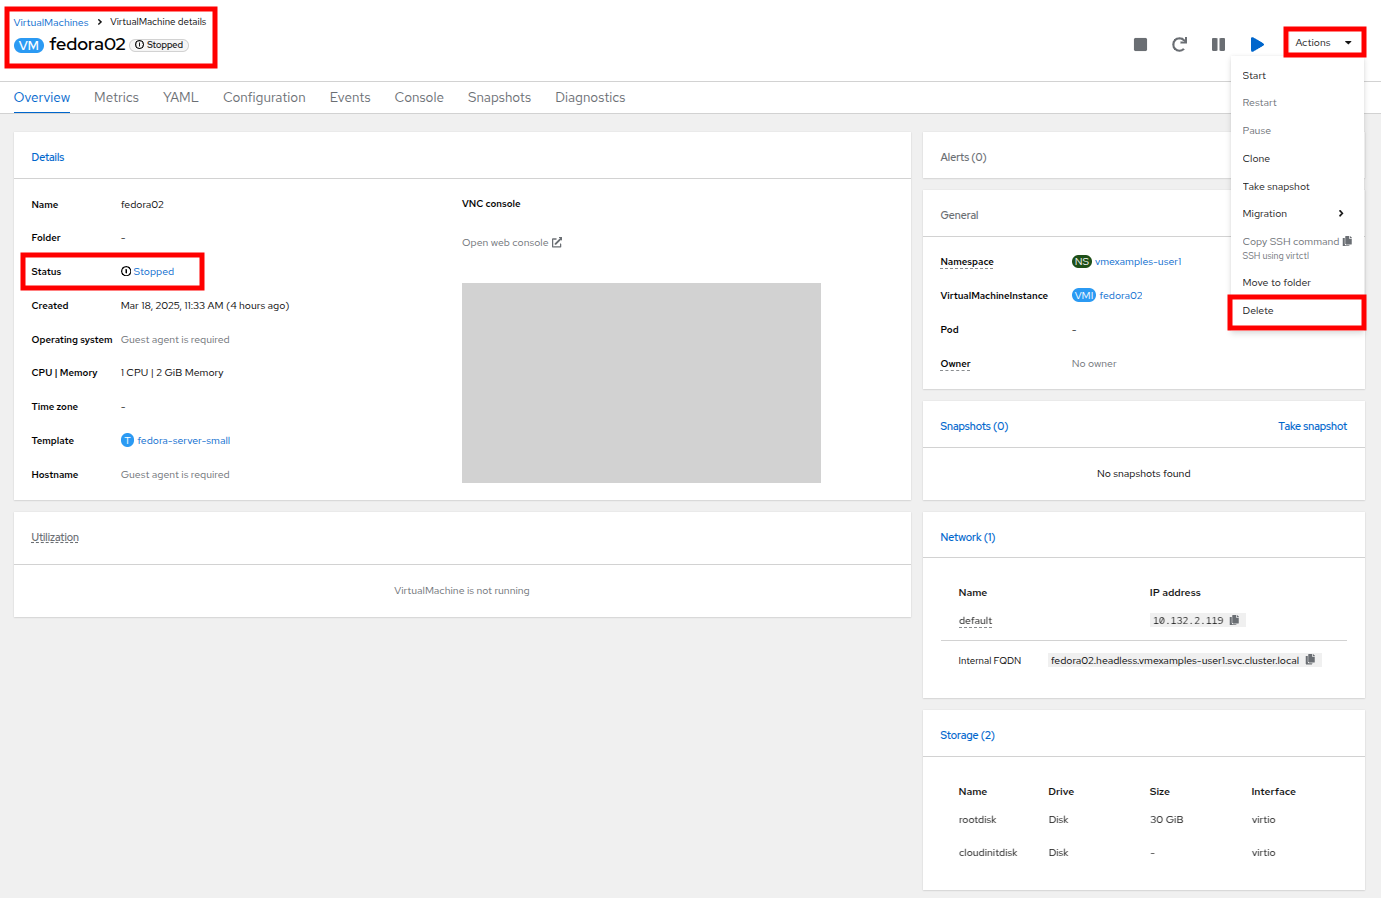
-
When prompted, click the red Delete button to confirm deleting the virtual machine.
-
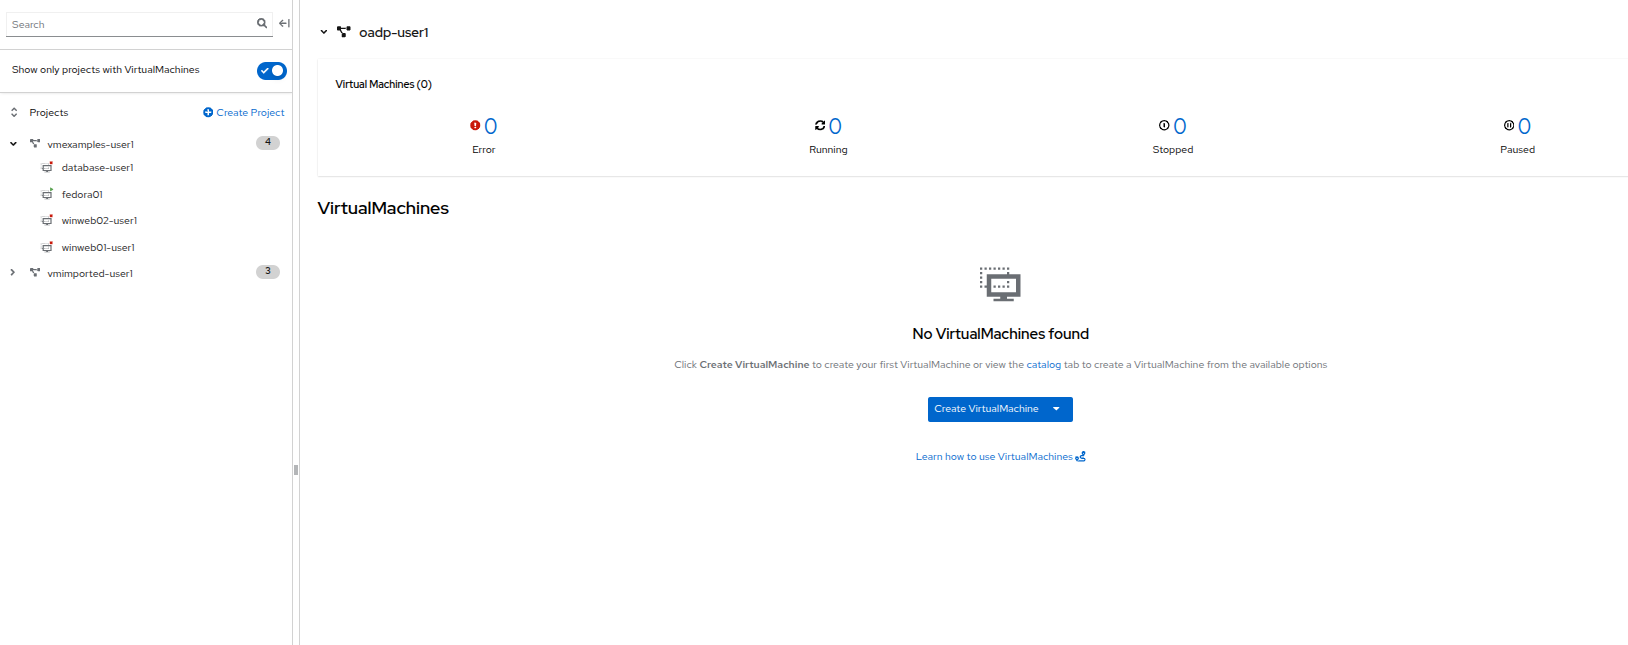
The virtual machine will disappear from your inventory.
-
Click on Operators and then Installed Operators and select the OADP Operator once again. (You may need to switch back to the OADP-{user} project.)
-
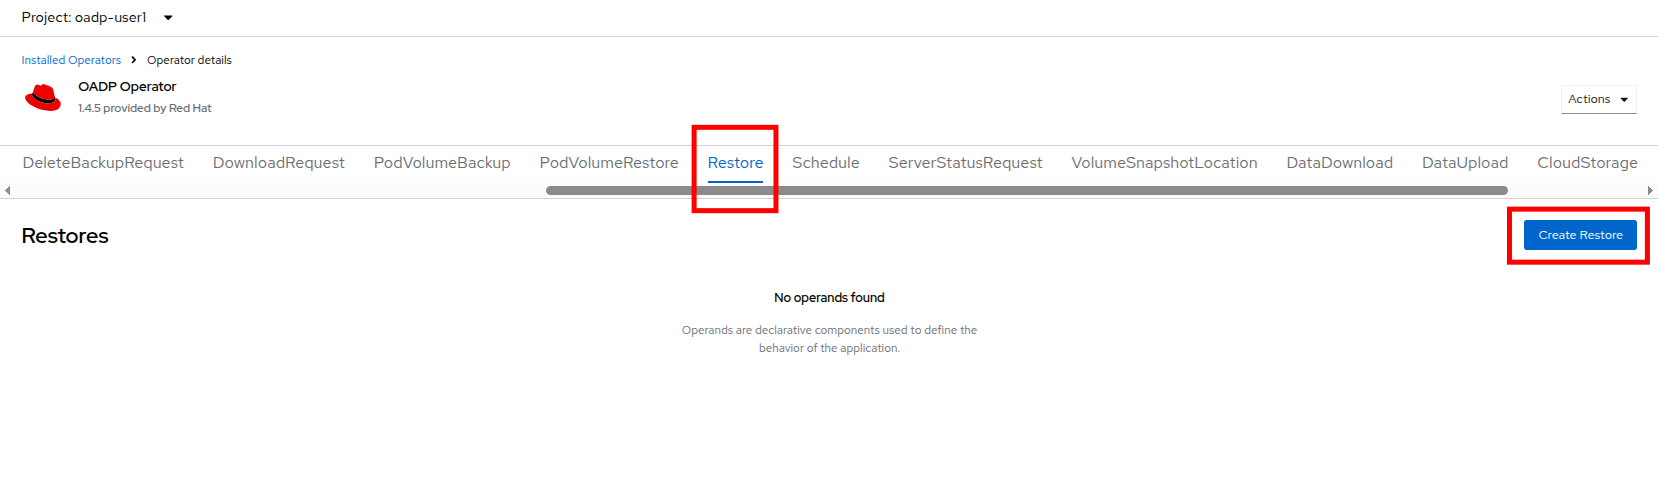
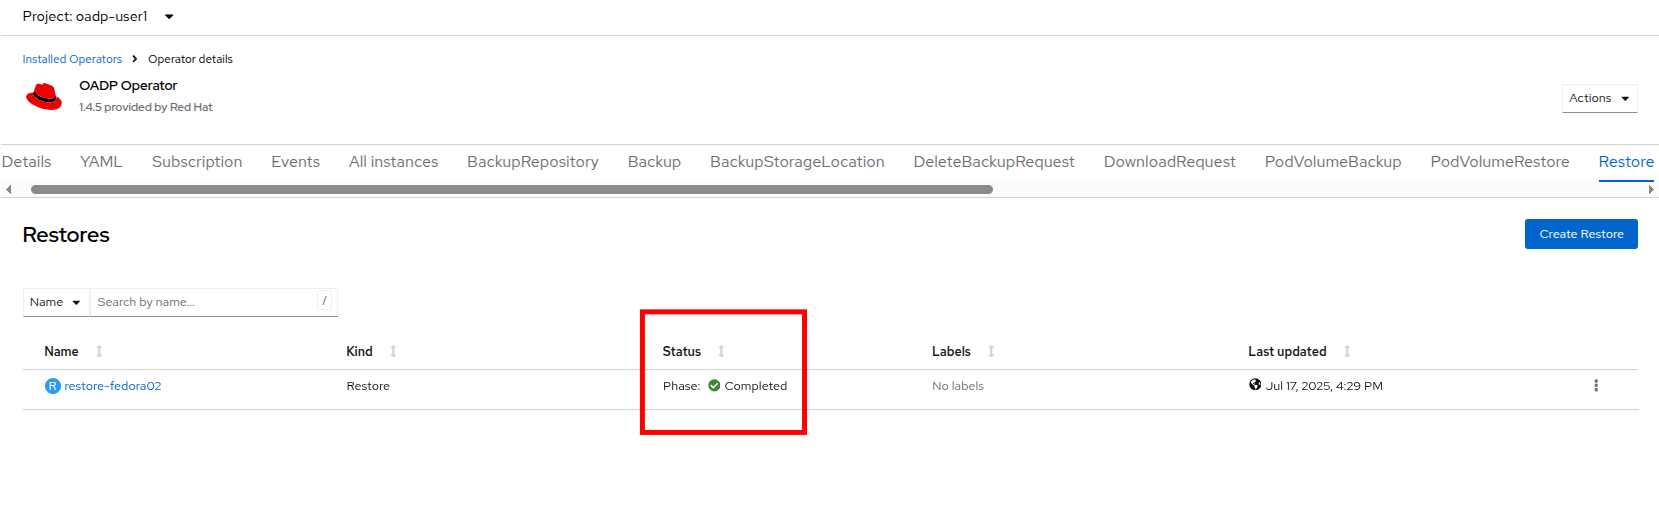
Use the horizontal navigation bar to locate the the Restore tab, click the Restore tab, and then press Create Restore.
-
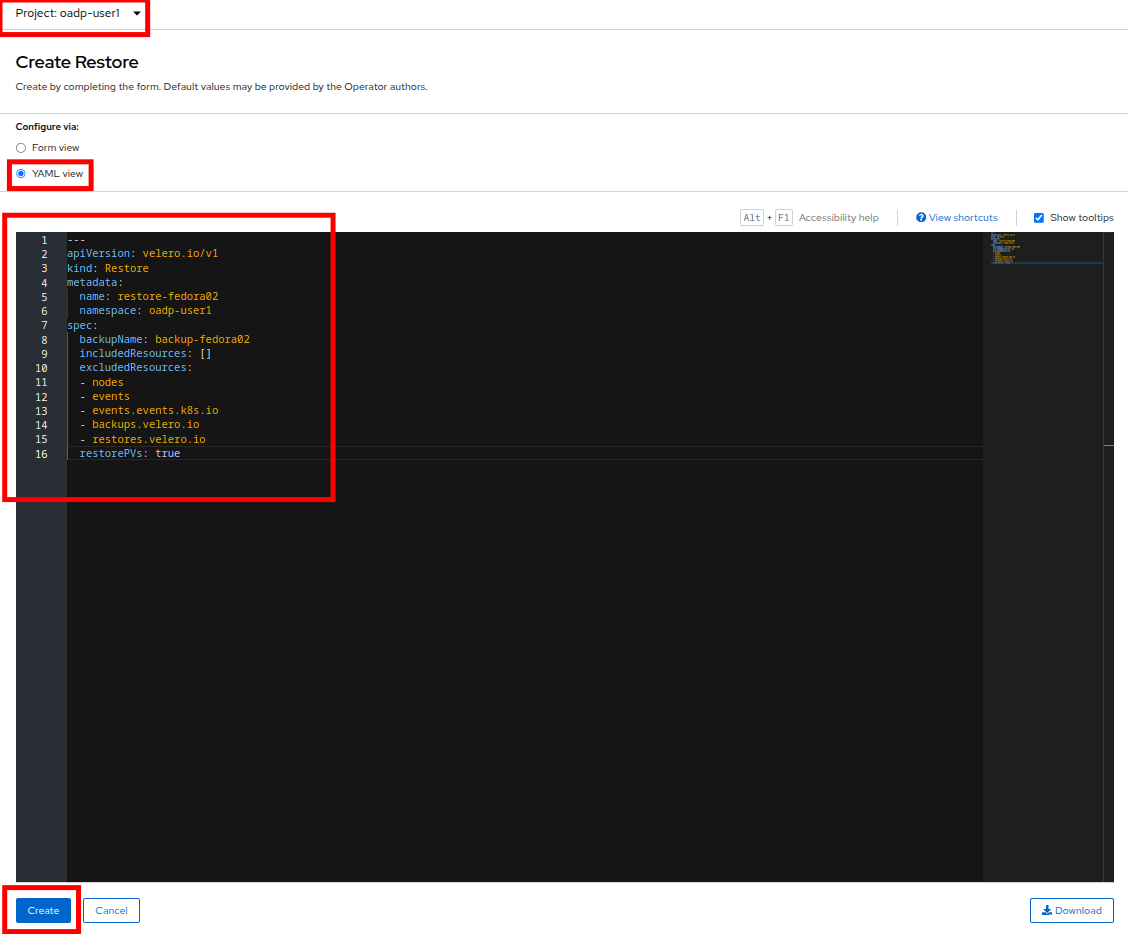
Switch to the YAML view and replace the content with the following one:
--- apiVersion: velero.io/v1 kind: Restore metadata: name: restore-fedora02 namespace: oadp-{user} spec: backupName: backup-fedora02 includedResources: [] excludedResources: - nodes - events - events.events.k8s.io - backups.velero.io - restores.velero.io restorePVs: true -
Press the Create button at the bottom.
-
Wait until you see that the Status column changes to Completed.
-
Navigate back to Virtualization and click Virtual Machines in the left-side menu and confirm that the fedora02 virtual machine was restored (in the vmexamples-{user} project). You can see it’s Created value should be a quite short time ago.
Summary
Protecting virtual machines is a critical aspect of a virtualization platform. OpenShift Virtualization provides multiple methods that enable native protection, for example using OADP, or allowing storage and backup partners to integrate their offerings. If you have questions about how to protect virtual machines, please don’t hesitate to ask the proctors for the workshop or reach out to your vendor to determine their compatibility with OpenShift Virtualization.