Introduction
Amazon Cognito is a fully managed authentication, authorization, and user management service provided by Amazon Web Services (AWS). It simplifies the process of adding user sign-up, sign-in, and access control to your ROSA Cluster. Integrating ROSA cluster with Amazon Cognito simplifies user authentication, provides secure access control, supports federated identity and SSO, and enables centralized user management and audit trails
As part of the previous lab, we created a temporary cluster-admin user using the rosa create admin command.
This uses htpasswd as a local identity provider to allow you to access the cluster.
Most ROSA users will want to connect ROSA to a single-sign-on provider, such as Amazon Cognito.
In this section of the workshop, we’ll configure Amazon Cognito as the cluster identity provider in your ROSA cluster.
Create and Configure a Cognito User Pool
To set up the Amazon Cognito service we need to do a few things:
-
Create a user pool
-
Create a user pool domain
-
Create users in the user pool
-
Create an app client for the user pool
-
Set up the OpenShift OAuth service to use that app client
-
The first step is to create a user pool in the Amazon Cognito service.
aws cognito-idp create-user-pool --pool-name rosa-${GUID} --auto-verified-attributes email \
  --admin-create-user-config '{"AllowAdminCreateUserOnly": true}' | jq .
Sample Output{ "UserPool": { "Id": "us-east-2_Z91VxhckZ", "Name": "rosa-6n4s8", "Policies": { "PasswordPolicy": { [...Lots of output omitted...] -
You will be using the user pool ID to identify this user pool in subsequent commands. Retrieve the user pool ID and set an environment variable in your terminal:
export AWS_USER_POOL_ID=$(aws cognito-idp list-user-pools --max-results 1 | jq -r '.UserPools[0].Id')

echo ${AWS_USER_POOL_ID}
Sample Outputus-east-2_Z91VxhckZ -
Now let’s create a domain for our Cognito user pool (this command does not print a result):
aws cognito-idp create-user-pool-domain \ --domain "rosa-${GUID}" \ --user-pool-id "${AWS_USER_POOL_ID}" -
The next step is to create users in the user pool. You probably want a special user to be designated as cluster admin as well as a few regular users.
First let’s create an admin user for our cluster:
aws cognito-idp admin-create-user \
  --user-pool-id "${AWS_USER_POOL_ID}" \
  --username admin \
  --temporary-password "{ssh_password}-A2@23" \
  --user-attributes Name=name,Value="Cluster Administrator" Name="email",Value="admin@rosaworkshop.com" Name="email_verified",Value="true" \
  --message-action SUPPRESS
Sample Output{ "User": { "Username": "admin", "Attributes": [ { "Name": "sub", "Value": "16326777-00b0-401f-ae11-9550c25986f5" }, { "Name": "email_verified", "Value": "true" }, { "Name": "name", "Value": "Cluster Administrator" }, { "Name": "email", "Value": "admin@rosaworkshop.com" } ], "UserCreateDate": 1682017660.792, "UserLastModifiedDate": 1682017660.792, "Enabled": true, "UserStatus": "FORCE_CHANGE_PASSWORD" } } -
Now create two more users (output not shown below):
aws cognito-idp admin-create-user \ --user-pool-id $AWS_USER_POOL_ID \ --username user1 \ --temporary-password {ssh_password}-A2@23 \ --user-attributes Name=name,Value="User 1" Name="email",Value="user1@rosaworkshop.com" Name="email_verified",Value="true" \ --message-action SUPPRESS aws cognito-idp admin-create-user \ --user-pool-id $AWS_USER_POOL_ID \ --username user2 \ --temporary-password {ssh_password}-A2@23 \ --user-attributes Name=name,Value="User 2" Name="email",Value="user2@rosaworkshop.com" Name="email_verified",Value="true" \ --message-action SUPPRESS -
Lastly we need to determine the OAuth callback URL, which we will use to tell Amazon Cognito where it should send authentication responses. To do so, run the following command:
CLUSTER_DOMAIN=$(rosa describe cluster -c "rosa-${GUID}" -o json | jq -r '. | .domain_prefix + "." + .dns.base_domain')

echo "OAuth callback URL: https://oauth.${CLUSTER_DOMAIN}:443/oauth2callback/Cognito"
Sample OutputOAuth callback URL: https://oauth.rosa-6sc5n.dypb.p1.openshiftapps.com:443/oauth2callback/CognitoTake a note of that URL - you will need it in the next section.
-
Next, let’s create an app client in Amazon Cognito. To do so, run the following command:
aws cognito-idp create-user-pool-client \
  --user-pool-id $AWS_USER_POOL_ID \
  --client-name rosa-${GUID} \
  --generate-secret \
  --supported-identity-providers COGNITO \
  --callback-urls "https://oauth.${CLUSTER_DOMAIN}:443/oauth2callback/Cognito" \
  --allowed-o-auth-scopes "phone" "email" "openid" "profile" \
  --allowed-o-auth-flows code \
  --allowed-o-auth-flows-user-pool-client
Sample Output"UserPoolClient": { "UserPoolId": "us-east-2_Z91VxhckZ", "ClientName": "rosa-6sc5n", "ClientId": "1l3onr3gg232ngprritg50fqao", "ClientSecret": "1tj74t43u8lf9ub45540g1mnio8sscfbr9l9o0s73a2d97s6gvhc", ... -
Save the ClientID and ClientSecret in two environment variables:
export AWS_USER_POOL_CLIENT_ID=$(aws cognito-idp list-user-pool-clients --user-pool-id $AWS_USER_POOL_ID | jq -r '.UserPoolClients[0].ClientId')

export AWS_USER_POOL_CLIENT_SECRET=$(aws cognito-idp describe-user-pool-client --user-pool-id $AWS_USER_POOL_ID --client-id ${AWS_USER_POOL_CLIENT_ID} | jq -r '.UserPoolClient.ClientSecret')

echo -e "Client ID: ${AWS_USER_POOL_CLIENT_ID}\nClient Secret: ${AWS_USER_POOL_CLIENT_SECRET}"
-
Set up OpenShift authentication to use Amazon Cognito
Now that you have your Cognito service fully configured you can configure the OpenShift authentication service to use Amazon Cognito to authenticate users.
-
Set up the identity provider in OpenShift:
rosa create idp \
--cluster rosa-${GUID} \
--type openid \
--name Cognito \
--client-id ${AWS_USER_POOL_CLIENT_ID} \
--client-secret ${AWS_USER_POOL_CLIENT_SECRET} \
--issuer-url https://cognito-idp.$(aws configure get region).amazonaws.com/${AWS_USER_POOL_ID} \
--email-claims email \
--name-claims name \
--username-claims username
Sample OutputI: Configuring IDP for cluster 'rosa-6n4s8' I: Identity Provider 'Cognito' has been created. It may take several minutes for this access to become active. To add cluster administrators, see 'rosa grant user --help'. I: Callback URI: https://oauth-openshift.apps.rosa-6n4s8.1c1c.p1.openshiftapps.com/oauth2callback/Cognito I: To log in to the console, open https://console-openshift-console.apps.rosa-6n4s8.1c1c.p1.openshiftapps.com and click on 'Cognito'. -
Logout from your OpenShift Web Console and browse back to the Console URL (
rosa describe cluster -c rosa-{GUID} -o json | jq -r '.console.url'if you have forgotten it) and you should see a new option to login called Cognito.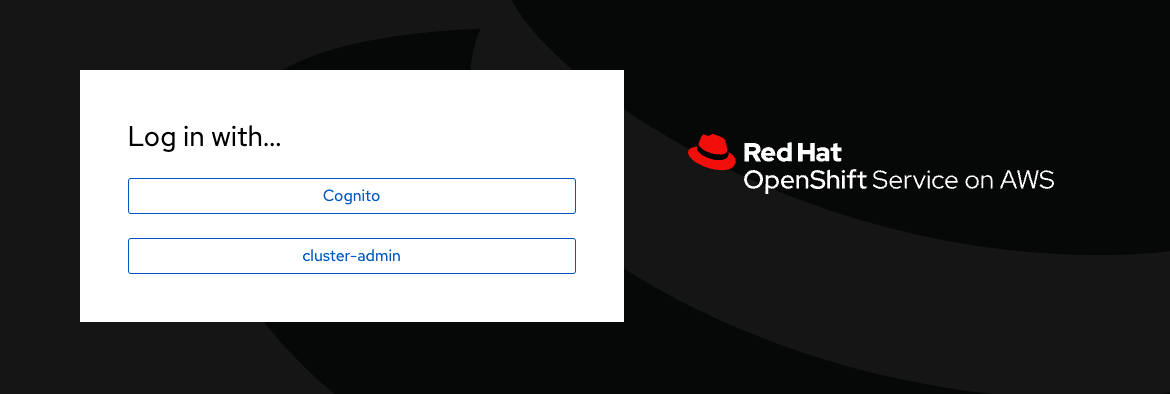
|
If you do not see the Cognito option wait a few seconds and refresh the screen. |
-
Click on Cognito and use the userid
adminwith password{ssh_password}-A2@23. You will be prompted to change your password. Just enter the existing password two more times. -
Let’s give Cluster Admin permissions to your Amazon Cognito admin.
Find out the existing users in OpenShift (note for this to work you must have logged in via the web console before - OpenShift does not create user objects until a user has logged in).
oc get usersSample OutputNAME UID FULL NAME IDENTITIES admin 92cb9ccd-4e94-427a-81ac-3e3cb6b33aae Cluster Administrator Cognito:e28ab3f6-0940-442a-9999-05fe1b6fe9e2 backplane-cluster-admin b154dba0-55f4-4451-9a98-ce3c371b8c19 cluster-admin 301ada8a-3348-465f-8506-31e1c6ae0db1 htpasswd:cluster-adminIn the example above you can see the two admin users that we have created: the
cluster-adminwhich is managed by htpasswd and theadminuser that is managed by Cognito. You will also see thebackplane-cluster-adminthat Red Hat SREs are using. -
Save your admin user password in a variable:
export COGNITO_ADMIN_PASSWORD={ssh_password}-A2@23 -
Save the variable to your
.bashrcecho "export COGNITO_ADMIN_PASSWORD=${COGNITO_ADMIN_PASSWORD}" >>$HOME/.bashrc -
Now you can map your new Cognito
adminuser to thecluster-adminrole by running the following command:oc adm policy add-cluster-role-to-user cluster-admin adminSample Outputclusterrole.rbac.authorization.k8s.io/cluster-admin added: "admin" -
Refresh the OpenShift web console - you should now be able to switch to the Administrator view.
-
Get the login command for your new user:
-
Click on Cluster Administrator (your user) on the top right of the console
-
Click on Copy Login Command
-
Click on Cognito
-
Click Display Token
-
Copy the command under Login with this token to your terminal and log in:
oc login --token=<token> --server=https://api.rosa-s8j4w.g5r0.p1.openshiftapps.com:6443Sample OutputLogged into "https://api.rosa-s8j4w.g5r0.p1.openshiftapps.com:6443" as "e6569c03-ccc2-4428-b15b-1ad251e1bad6" using the token provided. You have access to 101 projects, the list has been suppressed. You can list all projects with 'oc projects' Using project "default".
-
-
The final step is to delete the temporary ROSA admin user:
rosa delete admin -c rosa-${GUID} -ySample OutputI: Admin user 'cluster-admin' has been deleted from cluster 'rosa-s8j4w'Now all of your users are managed in Amazon Cognito.
-
You can delete the
cluster-adminuser object and it’s associated identity:oc delete user cluster-admin oc delete identity cluster-admin:cluster-adminSample Outputuser.user.openshift.io "cluster-admin" deleted identity.user.openshift.io "cluster-admin:cluster-admin" deleted
Congratulations! You’ve successfully configured your Red Hat OpenShift Service on AWS (ROSA) cluster to authenticate with Amazon Cognito.