Creating Your Project and Pipeline Server
As a preliminary step, each of you is going to:
-
🚀 Create a Data Science Project
-
This will help keep your things organized and ready for action!
-
-
🌐 Create a Data Connection
-
We need that for the pipeline server to store its artifacts.
-
-
🛠️ Deploy a Data Science Pipeline Server
-
We will need one, and it’s better to create it from the start.
-
-
💻 Launch a Workbench
-
We will use it to review content and notebooks and to run the lab exercises to optimize the model.
-
-
📥 Clone the Git Repo into Your Workbench
-
This contains all the code from the prototype, ready for you to explore!
-
The instructions below will guide you through these steps. Follow them carefully.
🌟 Create a Project
-
First, in the OpenShift AI Dashboard application, navigate to the Data Science Projects menu on the left:
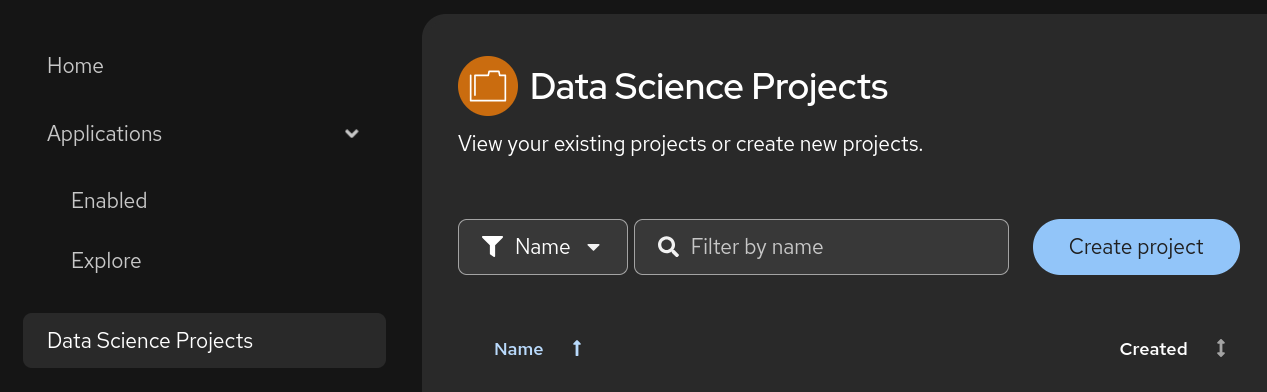 Figure 1. OpenShift AI Dashboard
 -
Create a project with the same name as your user ID
-
You have been assigned a unique user ID:
userX -
You need to now create a project with the exact same name:
userX🚨 Your assigned user is userX. Don’t mess that up or things will break later on!
-
-
Leave the resource name unchanged.
-
Optionally, enter your first and last name in the description of the project.
-
It should look like this:
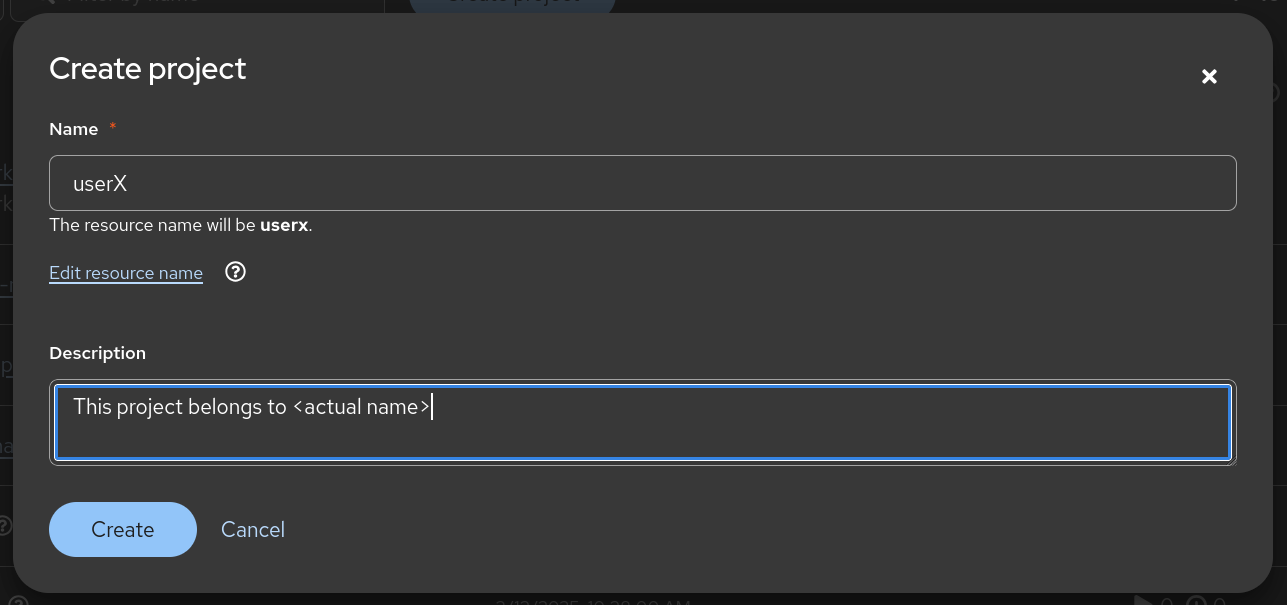 Figure 2. Project
🚫 It should NOT be userXlike in the screenshot. (for you,Xshould be a number instead)
🌈 Create a Data Connection for the Pipeline Server
-
We have deployed an instance of Minio in the cluster to act as a simple Object Storage for our purposes.
-
You will need to create a connection that points to it.
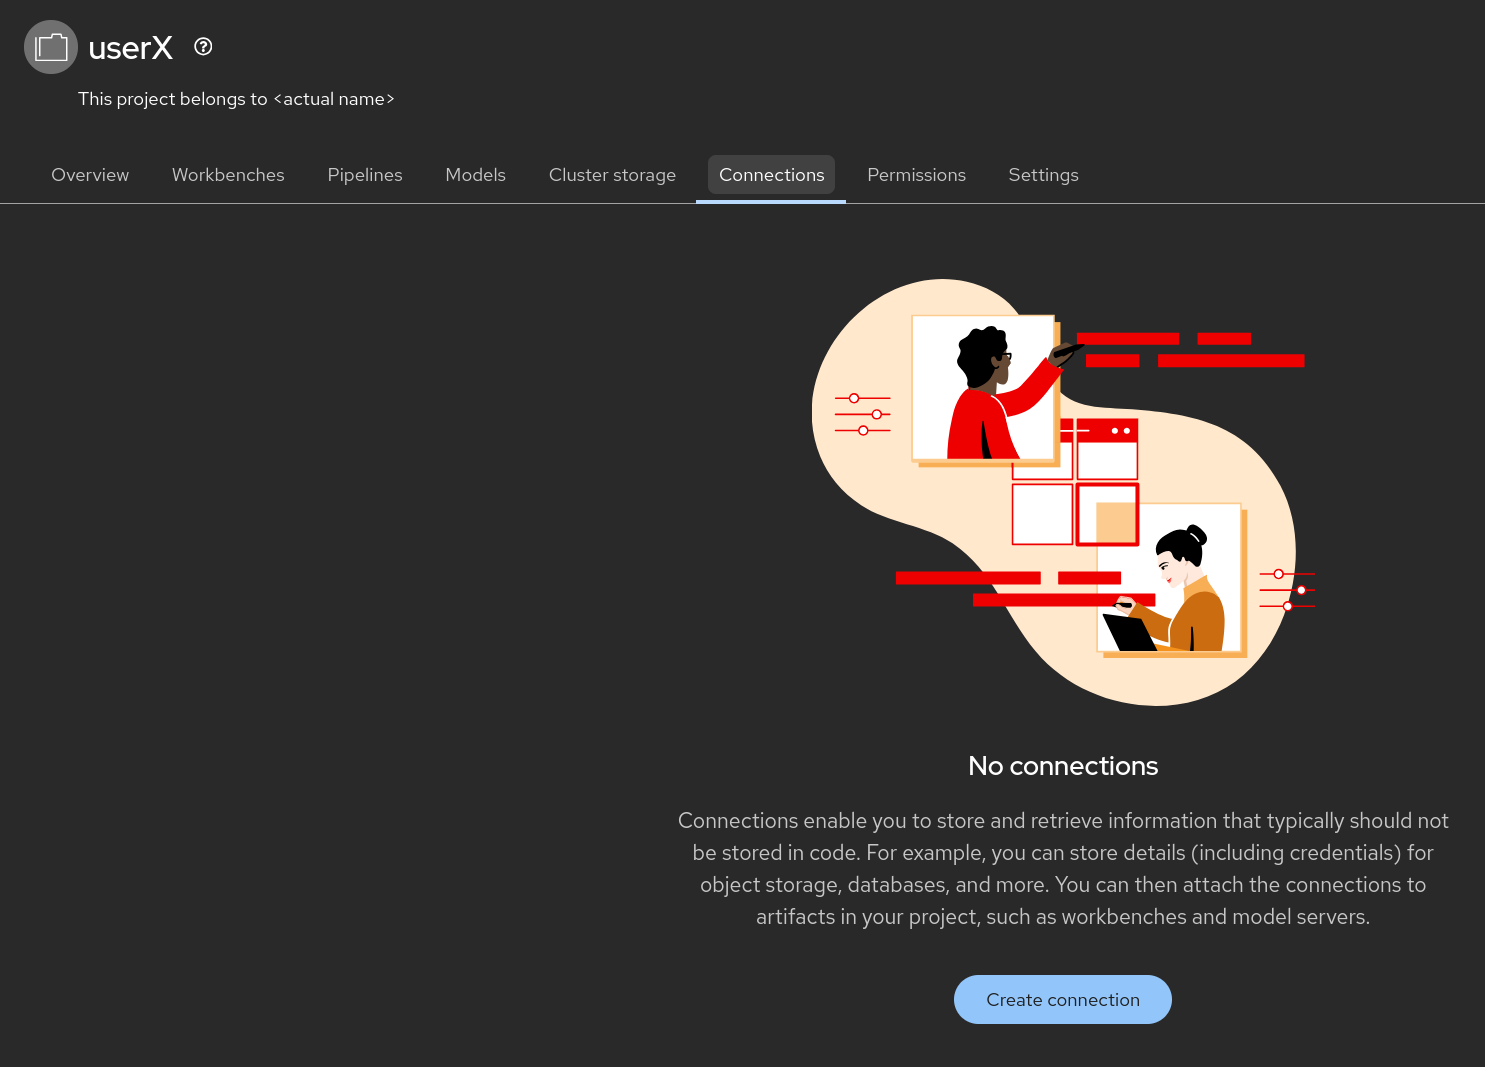 Figure 3. Connection
 -
You need to select the connection type, in this case S3 compatible object storage -v1
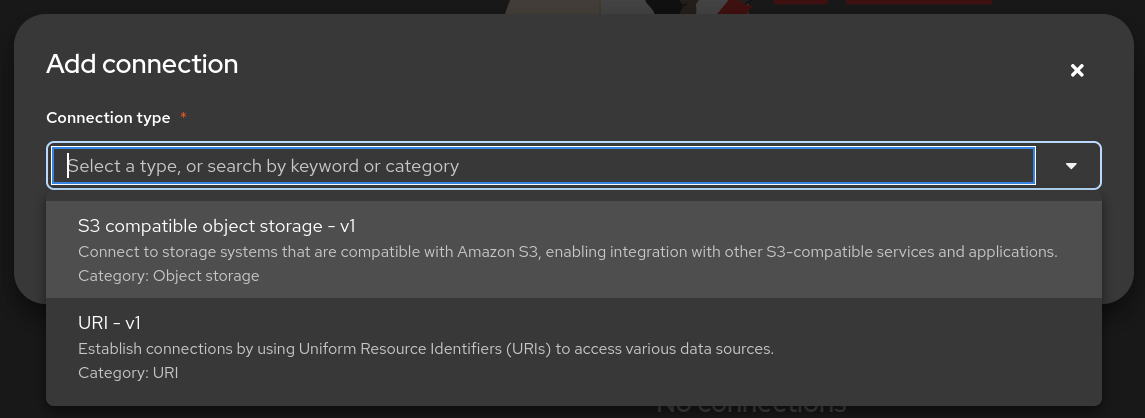 Figure 4. S3 comaptible object storage
 -
Here is the information you need to enter:
-
Name:
Minio - models -
Access Key:
userX -
Secret Key:
openshift -
Endpoint:
http://minio-service.wksp-userX.svc.cluster.local:9000 -
Region:
none -
Bucket:
userX🚨 Once again, the bucket you will use has to match with the user ID you were provided!
-
-
The result should look similar to:
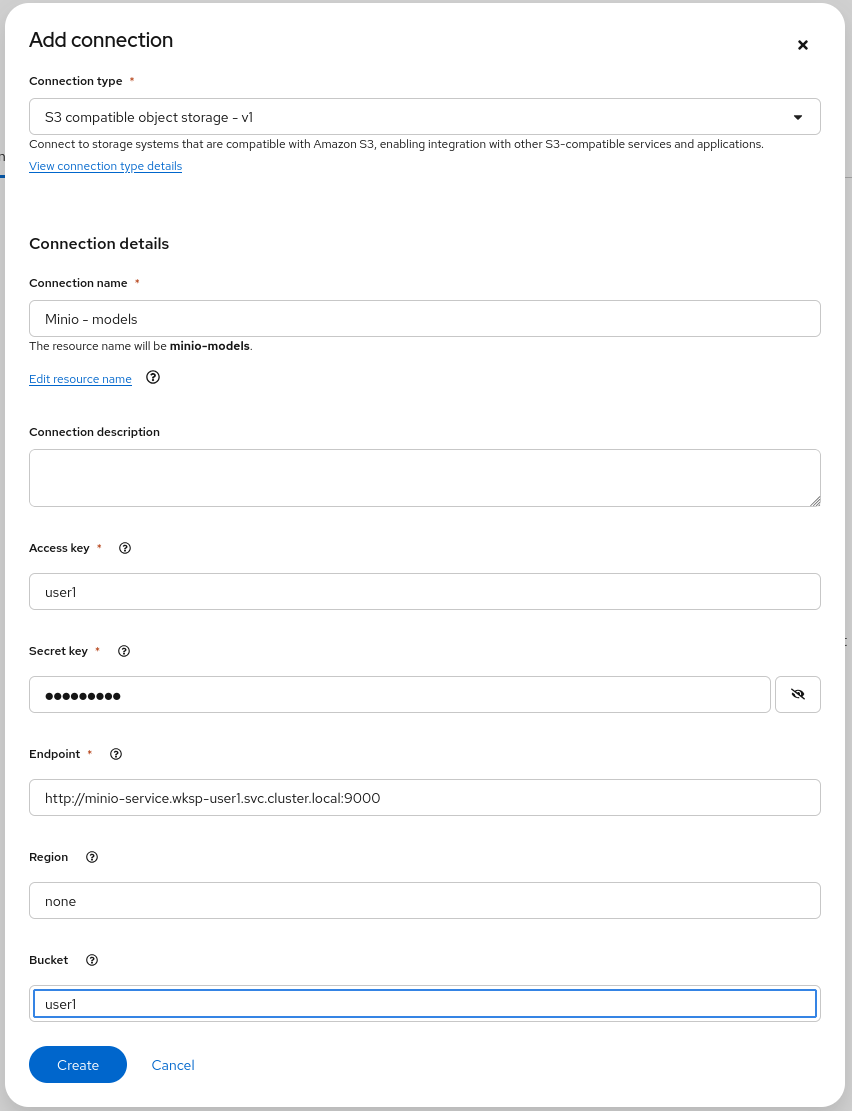 Figure 5. Result
🛠️ Create a Pipeline Server
It is highly recommended to create your pipeline server before creating a workbench. So let’s do that now!
-
In your Data Science Pipeline (project
userX), or in your Data Science Project, Pipelines, click on Configure Pipeline Server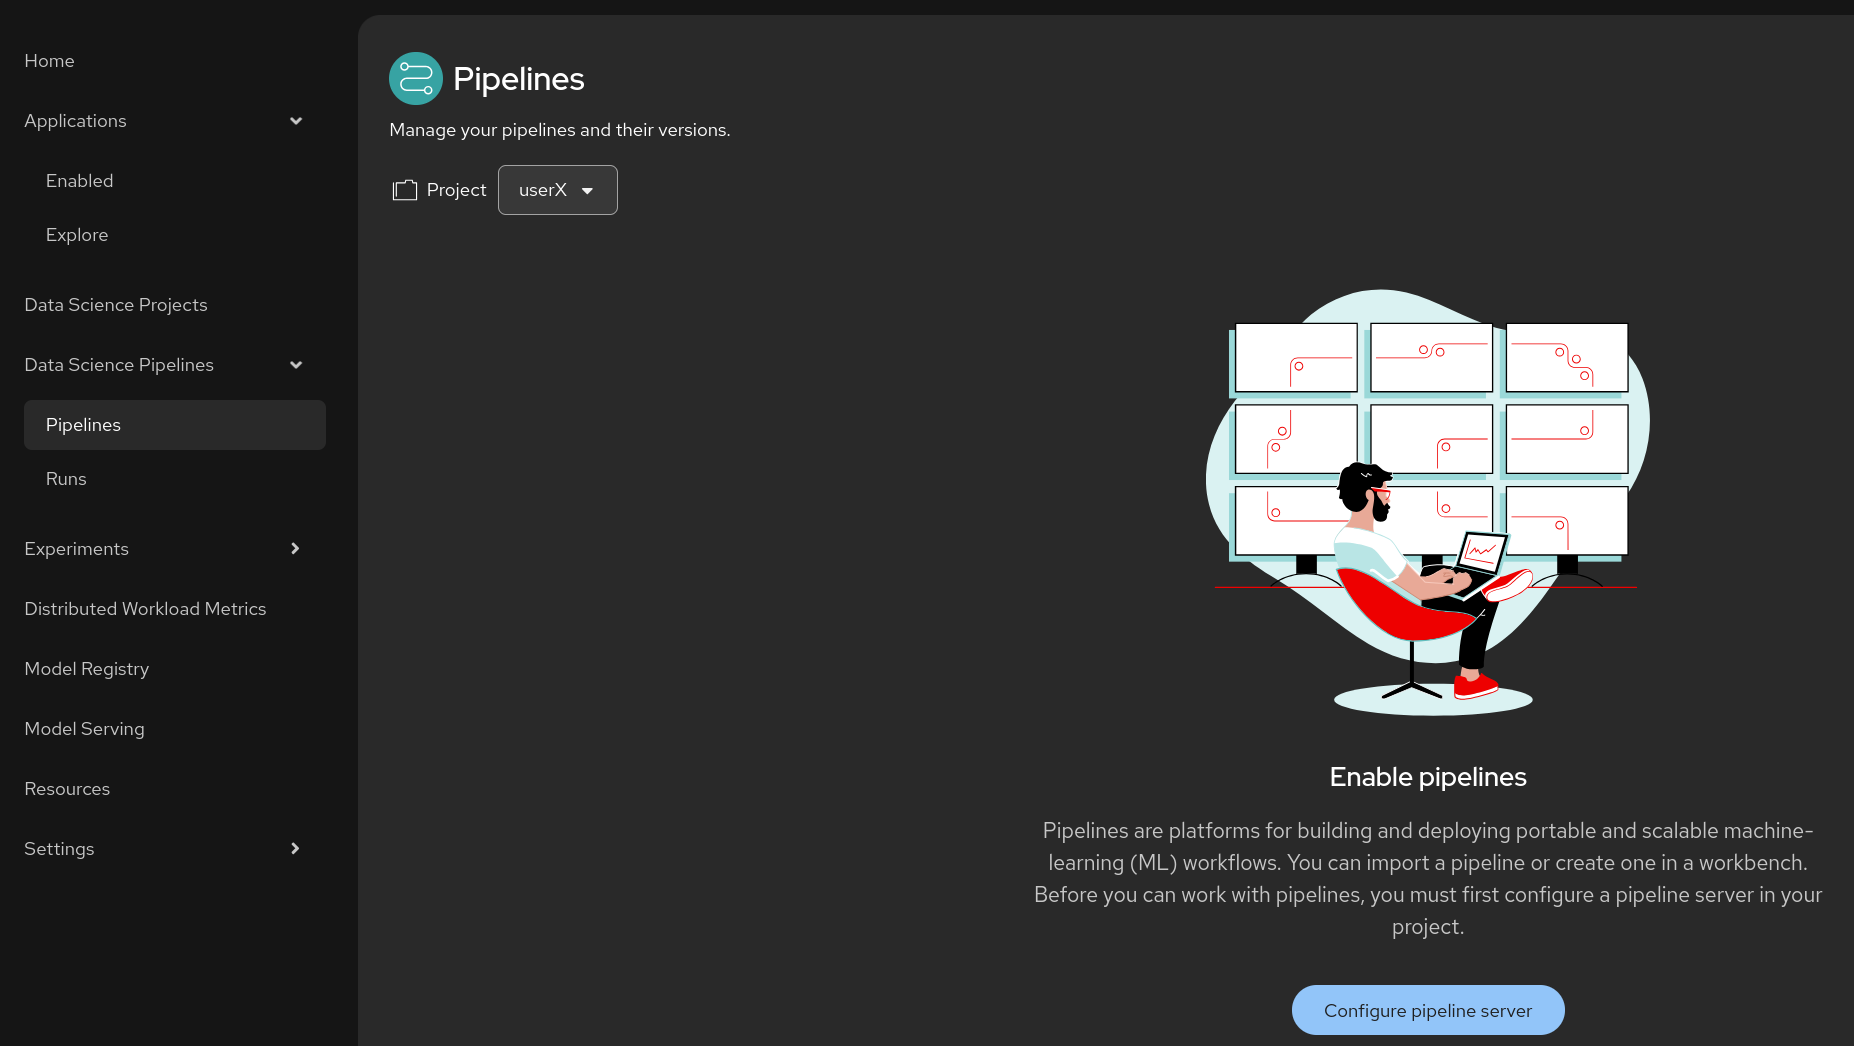 Figure 6. Pipeline Server 1
 -
Use the same information as in the Data Connection created earlier (Minio - models) and click the Configure Pipeline Server button:
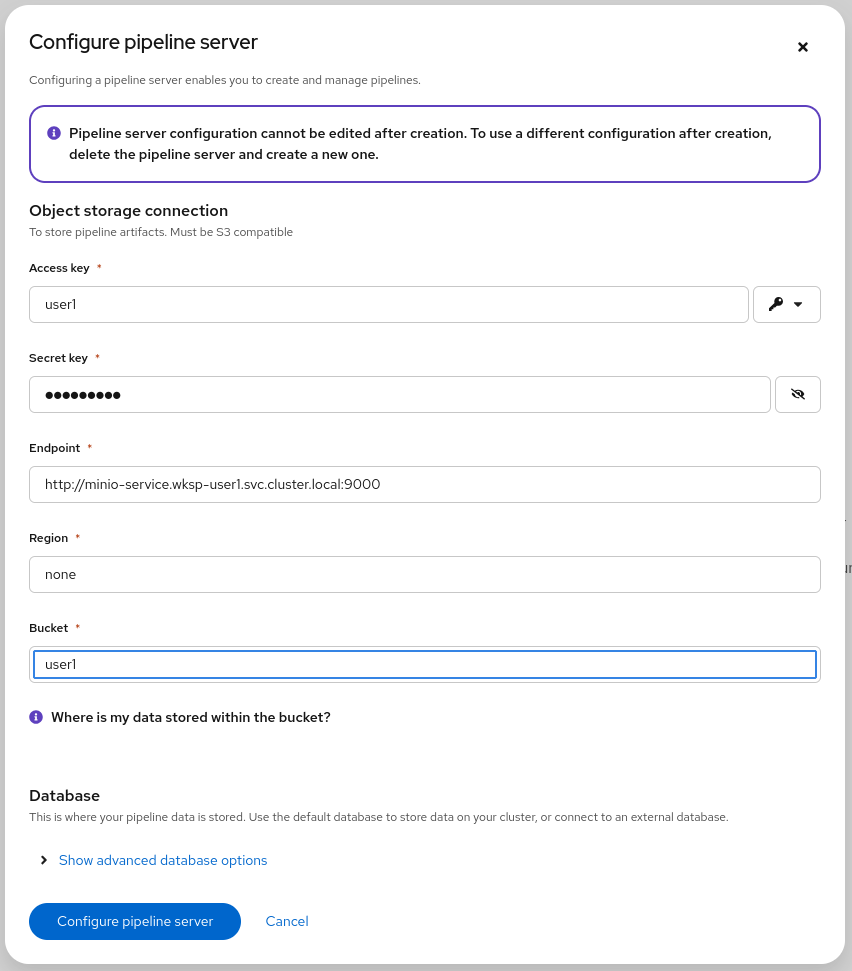 Figure 7. Pipeline Server 2
 -
When your pipeline server is ready, your screen will look like the following:
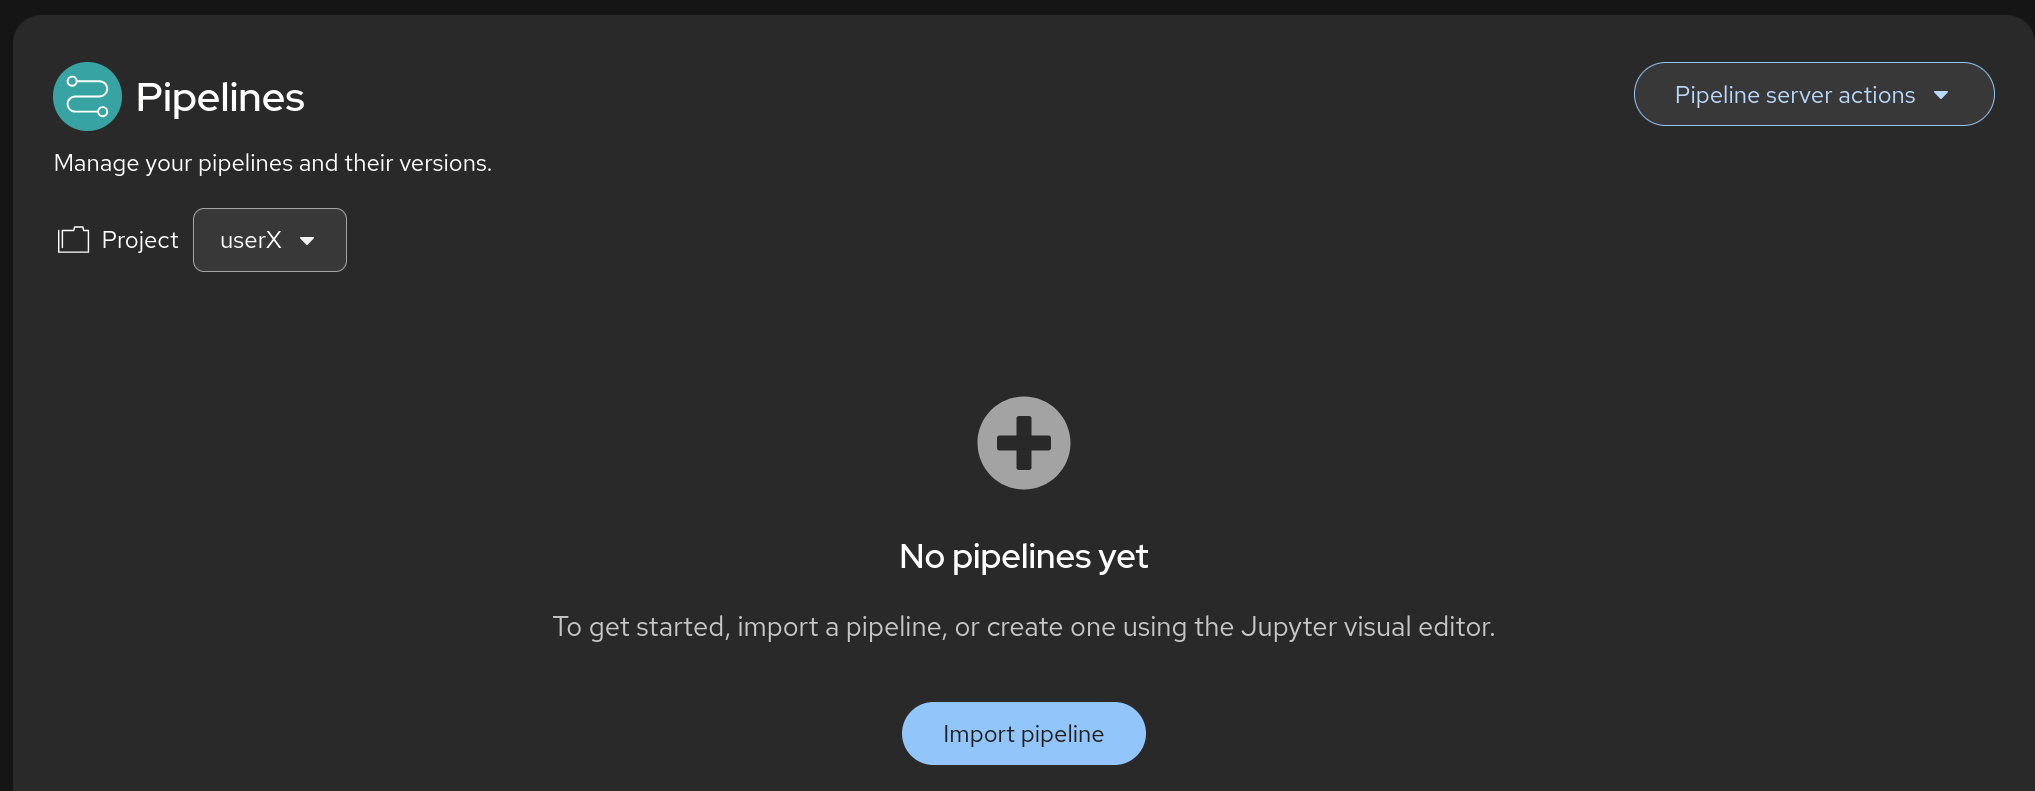 Figure 8. Pipeline Server 3
At this point, your pipeline server is ready and deployed. 🎉
| There is no need for wait for the pipeline server to be ready. You can go now to the next steps and check this out later on, before Section 5 steps. This may take more than a couple of minutes to complete. |