Lab Introduction
About this Lab
Already know the basics of Red Hat Ansible Automation Platform and want more? This lab is ideal for anyone with basic Ansible Automation Platform experience looking to expand their automation skills.
In this hands-on lab, we’ll introduce you to some of the advanced capabilities of Automation Execution so you can benefit even more from using AAP. You will:
-
Configure automation execution resources with Ansible
-
Employ automation execution workflows so teams can collaborate more efficiently.
-
Use surveys and the revamped RBAC system to give your users self-service access.
-
Use dynamic inventories to scale your automation.
-
Get more flexibility with the constructed inventory feature.
-
Secure the automation supply chain with content signing that ensures only approved content runs in automation execution.
-
Get a sneak preview of the new Self-Service Automation Portal RHEL appliance
-
Be introduced to Policy Enforcement in AAP
| Since Ansible Automation Platform (AAP) 2.5, Automation Controller is now accessible through the automation execution interface in the new UI, providing the same capabilities. If you’re familiar with previous versions of AAP, note that from now on, we will refer to automation controller as Automation Execution to align with the latest terminology. |
Lab Infrastructure
Your lab includes a number of servers:
-
A bastion host running VS Code server, Gitea and an OPA (Open Policy Agent) server. You’ll also use the command line there to do some Ansible development.
-
A one-node AAP cluster.
-
Two managed RHEL 9 hosts.
-
A Self-Service Automation Portal (SSAP) RHEL appliance.
|

Working the Lab
Some hints to get you started:
-
Don’t type everything manually, use copy & paste from the browser when appropriate, but take your time to understand what you are actually doing.
-
To edit files or open a terminal window, we provide a couple of methods detailed below.
-
You can click on any screenshot to magnify it in a new window or tab. Once done, simply close the window or tab to come back to the instructions.
-
Copy and especially paste in the virtual terminals offered in your favourite web browser can be finicky using keyboard combinations, but using the context menu summoned by a right mouse-click works well in Firefox and Chrome.
Finding your way in the lab
If you’re reading these lines, you should see a WebUI looking like the following screenshot. We call this user interface "Showroom" so don’t wonder if you see this name here and there.
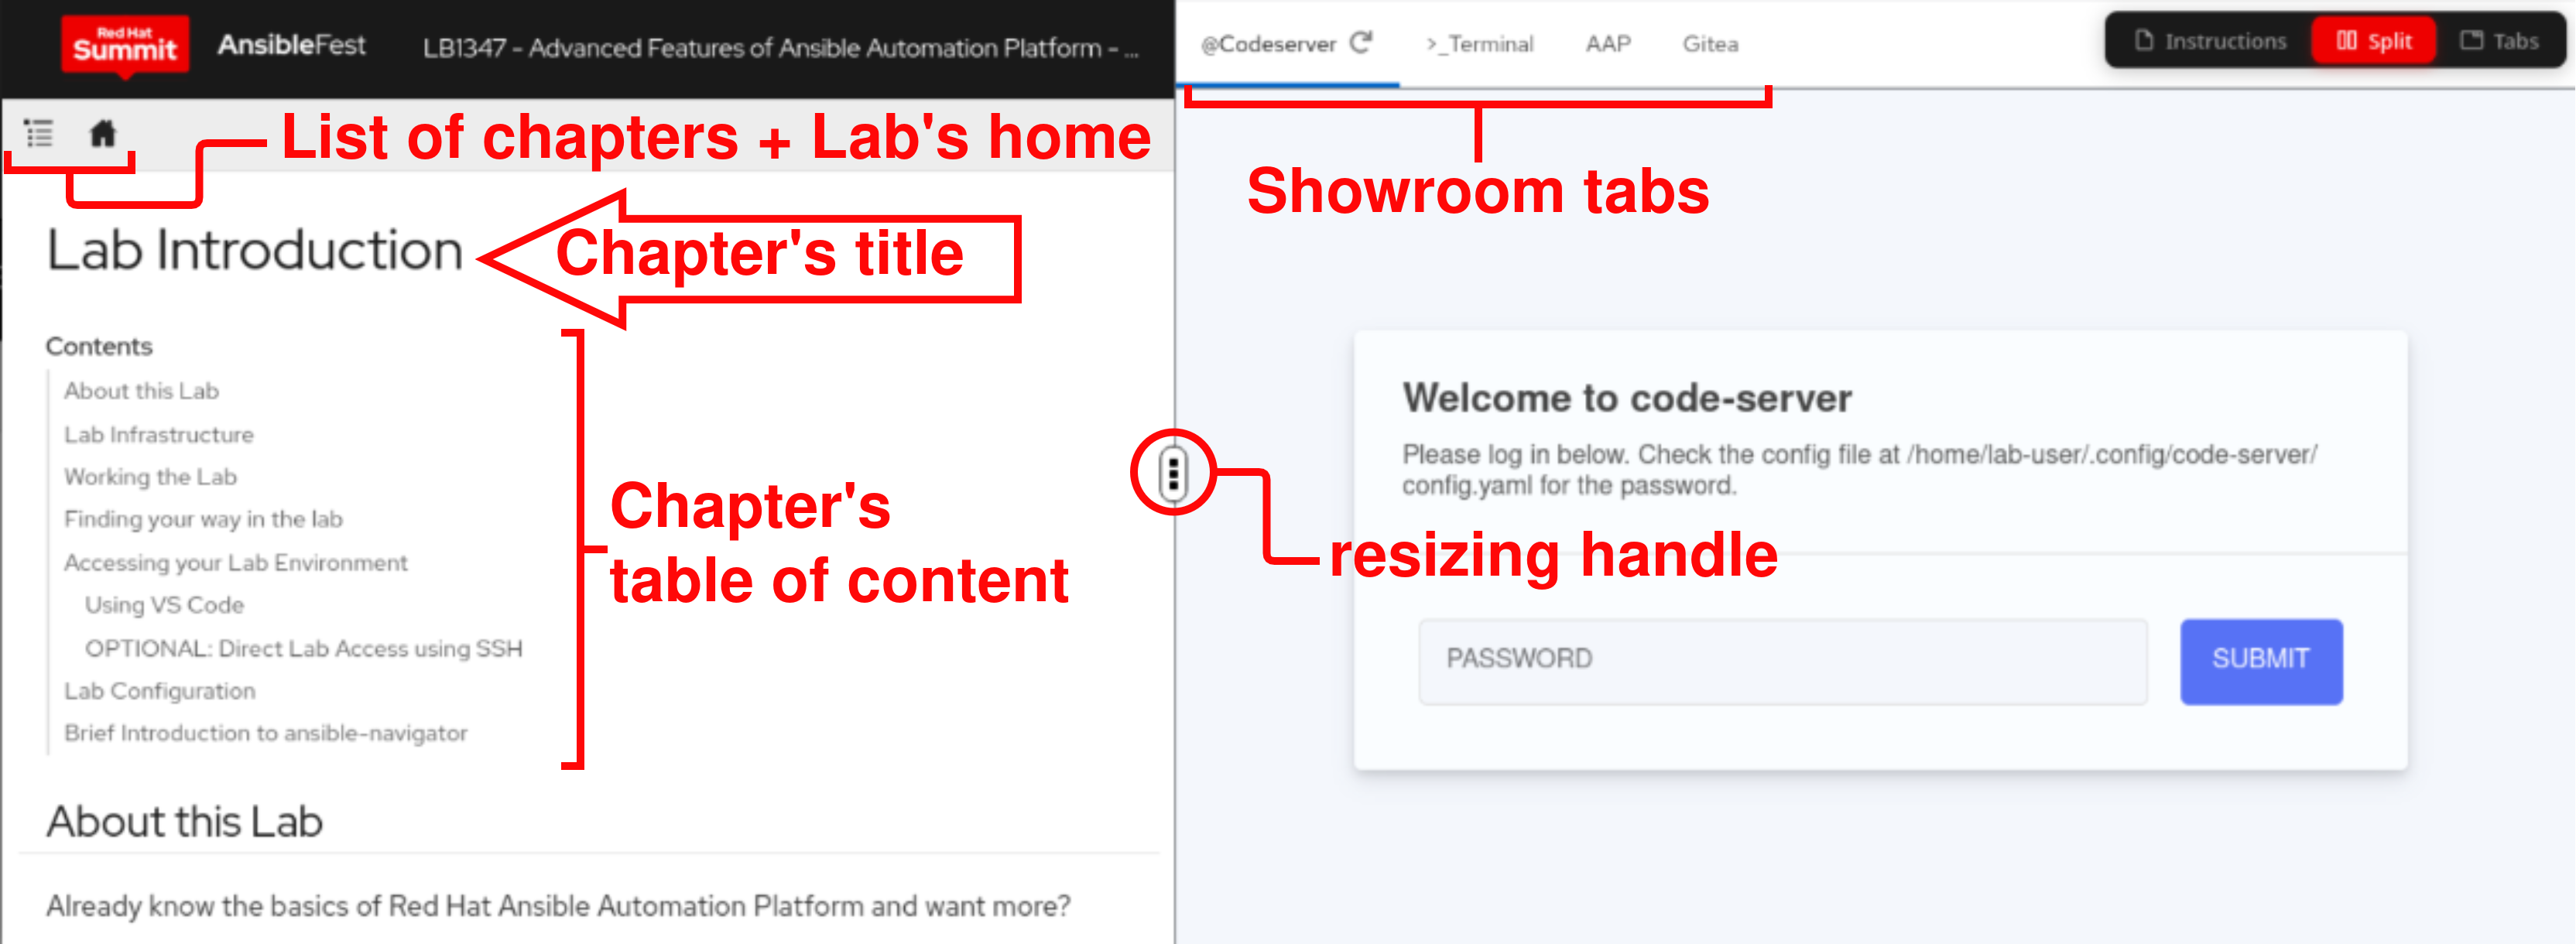
On the right side, there are different tabs providing access to the elements of your lab (for example Codeserver, AAP, Gitea), described in more details in the next chapters. You may use the resizing handle in the middle to give more space to the environment or to the instructions.
| You can also access the environment directly in separate browser tabs using the links provided. For the access details, check the Lab Access section. |
Lab Structure
The lab instructions are divided into chapters, or exercises. The chapters cover a lot of ground and you might not be able to finish all of them in our limited time frame or you already know some of the areas covered. To help you choose between chapters we have divided the content into three levels you’ll find as fold-outs in the table of contents:
-
Base
-
Intermediate
-
Expert
After finishing the Base level (because Configure resources with Ansible is a prerequisite for other chapters) you are free to explore chapters based on interest.
| While forward-skipping chapters has been tested, jumping backwards has not, so your mileage might vary if you do… ;-) |
Accessing your Lab Environment
For some exercises you’ll have to use the Linux command line. Throughout this guide we’ll refer to this as accessing a terminal. And actually you have three options to do so, so take your pick:
Using VS Code Server - when an IDE is your thing
Click here to see the instructions for VS Code Server
Your main point of contact with the lab is VS Code Server, providing a VS Code-experience in your browser. You’ll use VS Code Server to open terminals and to edit files (either in the build-in GUI editor or just using your favorite editor on the command line).
Now, open VS Code Server using VS Code Server, or click the Codeserver tab (which should be already selected).
You should be greeted with a login screen:
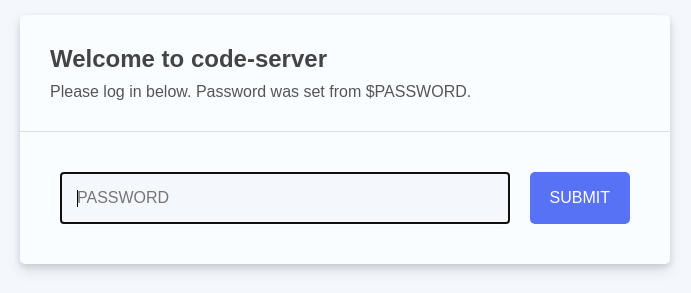
Use the password MYVSCODEPASSWORD to log in to the VS Code Server web UI. Open a new terminal with at the top of the VS Code Server UI (the menu item might be hidden depending on browser width, behind three dots). A new section will appear in the lower half of the screen and you will be greeted with a prompt:
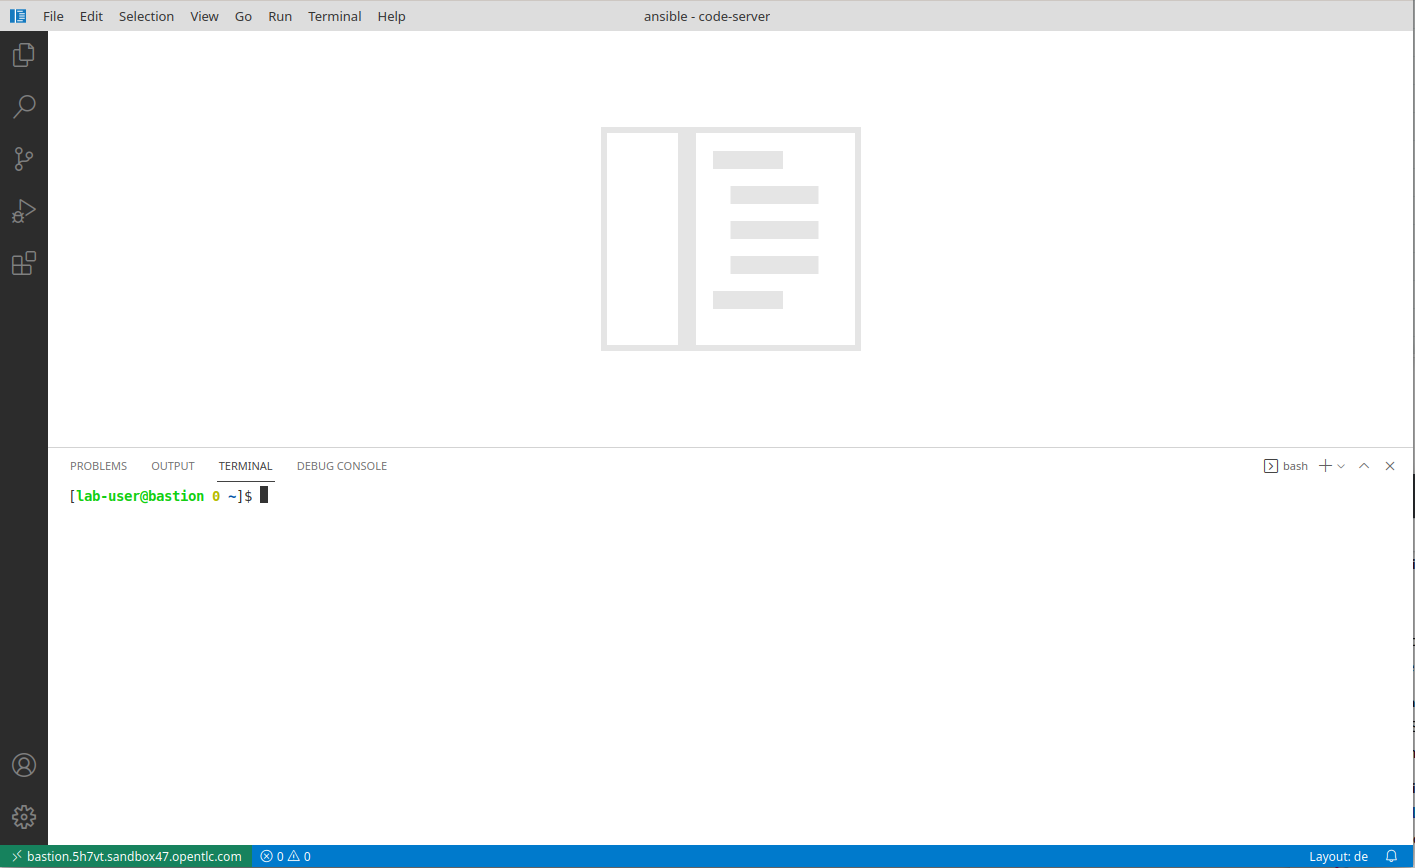
Congrats, you now have a shell terminal on your bastion node you can use it to work on the command line. From here you can run commands or access the other hosts in your lab environment, if the lab instructions tell you to do so.
Using the in-Browser Terminal - for people familiar with Nano or Vi
Click here to see the instructions for the Browser Terminal
There is a Showroom tab named >_Terminal, this will give you a plain terminal on your bastion node where lab-user is already logged in.
Using SSH - if you’re the Linux admin type… ;-)
Click here to see the instructions for SSH
You can of course use SSH directly to access the bastion node when you have an SSH client ready to go and know your way around:
ssh MYSSHUSER@MYSSHHOST -p MYSSHPORTThe password is still the same: MYSSHPASSWORD
The user to access the terminal is MYSSHUSER, but your bastion node is setup to let you become root using sudo without a password.
|
| All access information has been summarized for your convenience under Lab Access, accessible in the navigation menu to the right. |
The "Terminal" tab gives you the same functionality as SSH without the need to login, you’re directly on the bastion host.
Lab Configuration
Most prerequisite tasks have already been executed for you:
-
Ansible software is installed
-
sudohas been configured on the managed hosts to run commands that require root privileges. -
An
.ansible-navigator.ymlconfiguration file has been created. Without it, you would have to add parameters to each execution ofansible-navigator.
Brief Introduction to ansible-navigator
During this lab, you will always use ansible-navigator which supersedes the capabilities of ansible-playbook. Access your preferred terminal and check Ansible Navigator has been installed correctly (if you use copy & paste for the first time, your browser might ask for permission for pasting):
ansible-navigator --versionwhere the result should be something like this (your actual version might differ):
ansible-navigator 25.1.0Now have a look at your Ansible Navigator configuration file. It’s a dot file in your user’s home directory and can be printed to screen with the following command:
cat ~/.ansible-navigator.ymlYou can also open the file in VS Code Server by using the navigation bar on the left labeled "Explorer" or .
Note the following parameters within the execution-environment section:
-
image: where the default execution environment is set, we have set it to your private automation hub -
pull.policy: set to missing, which only downloads the execution environment if it doesn’t already exist locally. -
environment-variables: since execution environments are Linux containers, which don’t have access to your environment variables, we have to compile a list of variables we want to have passed through to the container.
For a full listing of every configurable knob checkout the settings documentation.
| For your convenience, we have pre-configured the authentication credentials for Ansible Automation Platform, so you won’t need to log in manually. However, in real-world scenarios, it’s best to avoid this practice, as storing passwords in a plaintext configuration file can pose security risks. |
Run the ansible-navigator command with the images argument to look at execution environments configured on the control node:
ansible-navigator images
| The output you see might differ from the above output, but you should see at least the one image configured in the file. Beware that the procedure might take one or two minutes to pull and save the image locally. |
This command gives you information about all currently installed Execution Environments or EEs for short. Investigate an EE by pressing the corresponding number. For example pressing 0 with the above example will open the ee-supported-rhel9 execution environment:
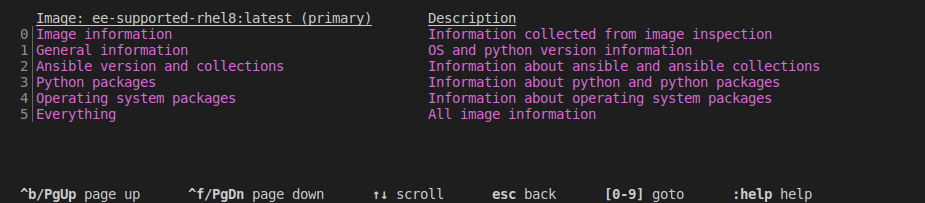
Selecting e.g. 0 for Image information will show information about the execution environment image you are inspecting:
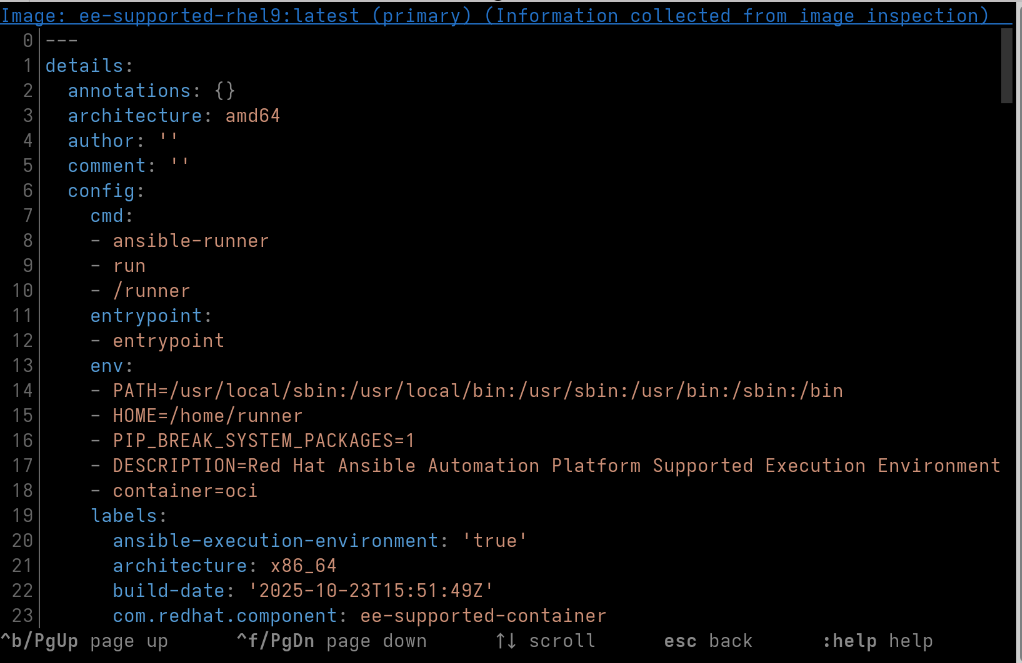
To get back to the previous view in ansible-navigator press Esc, if needed several times.
The last press in the main menu will get you out of Navigator.
Alternatively you can type :q anywhere to exit at once (familiar with Vi?).